Tamiya F-14B (Conversion) 1/48, The Fighting 103.

Started by Harvey R. · 141 · 2 years ago · 1/48, Cold War, F-14, Jolly Roger, Tamiya, tomcat, Top Gun, VF-103
  • Profile Photo
    Harvey R. said 2 years, 12 months ago:

    Tamiya F14B, VF-103 CAG Bird

    Greetings folks, another day another built. After dusting myself off from the recent Spitfire builds, cleaning the desk, and giving myself a days break the itch to build immediately returned. After much internal debate between whether I should build a Corsair or F-14 from the stash, or buy a Hurricane and make that I've decide to finally work on this Tamiya F-14 I've had sitting around for a while. In the time I've had it I've been buying a plethora of aftermarket goodies for it, in the hope of building an F-14B


    Why a F-14B?

    I've mentioned before I have a long term goal of building one of every version of the Corsair, but I also have a mini-goal of building one aircraft from each of the Jolly Roger squadrons. Naturally VF-17 gets a Corsair, but for VF-84 I'd stupid if I wouldn't build a phantastic Phantom as the representation. This leaves VF-103 as either being the F-14B or F/A-18 Hornet. In my humble opinion, the Cat > Bug, so the choice was easy.

    Now, I'm not expert on the Tomcat, but I think it's a great plane. My area of interest is largely WWII aviation but even so I don't think there is a plane that is as cool as the Tomcat and that's probably down to a few famous movies. So for this build don't consider this an in-depth, rivet counter conversion, but I will try my best to get the obvious differences out of the way.

    The Kit

    For this build I chose on the Tamiya F-14A, the reasons are simple.

    1. I'm admittedly a Tamiya fanboy.
    2. The best kits on the market are either an F-14A or D, and the AMK F-14D didn't appeal to me due to the cost, fit issues, and having lots of extra parts I don't care for.
    3. Why would I want to build a swing wing plane, without a swing wing?! That's the major reason I chose this over the AMK static design.

    As for choosing the A over the D, I decided that the A would be best as a lot of Bs were converted/upgraded from As and if they could do it in real life I can probably do it on a kit. Also, if I wanted to I could always just build the F-14A VF-84 Jolly Roger included in the kit.

    The kit itself came out in 2016 and looks to be a typical Tamiya kit, beautiful details and fit, a well-engineered but not overly complicated design, with all the extras you'd want in the form of enough weaponry for various loadouts and two pilots for those like me wishing to add some sense of scale. As with most of my builds this kit will be done wheels up, and as with all tamiya kits since the 80s this will have be modified as the kit doesn't come with a wheels up option. That being said generally Tamiya isn't too hard to work with in this regard.

    This kit will be my first kit that isn't a propeller plane since my 2 ever model after re-entering the hobby, which was a Revell F-105 which I hated and almost made me quit the hobby as I really did bite off more than I could chew. I'm feeling much more confident with this kit, but it's a far cry from the 3-4 sprues I'm normally accustomed to with a Warbird. For those curious, here's all the sprues included. Enough plastic to make a good number of my beloved Tamiya Corsairs I'm sure.


    The Aftermarket

    A conversion can't be done without some sort of aftermarket, for this we have a decent few bits, these are:


    Eduard's F-14D Brassin engine nozzles, they aren't a perfect for the kit being slightly smaller than the F-14As nozzles, but I'm sure I can get them to fit. This is one of the major differences between the A and B as they had different engines.

    An Aries F-14B style chin pod, the second major difference between the versions.

    Some aftermarket decals for the F-14B, not cheap I'm afraid.

    Some brass pitot/AoA tubes, why not?

    And of course, the ever useful Eduard canopy masks.

    And, this time I want try and magnetise some/all of the weaponry. I've never done this before but I'll give it a go.

    Goals and Problems

    Some builds I like to do for fun, often applying as much knowledge as I've learnt as possible which was really what the Spitfires were. In most builds I like to learn or try one new thing. For the F-14B this will be the first time working with any resin beyond the occasional wheel, and hopefully will build up some confidence to work with much more resin intensive projects in the future. I'm also going to be working on a different subject to normal, and a different colour palette to normal. One challenge will be replicating the weathering that can be found on a plane over twice the size of a WWII fighter, with a service life considerably longer than any individual aircraft during the War was expected to survive. I could go basic and just make it a nice shiny CAG bird, but a bit of weathering will make it look far more interesting.

    First Steps


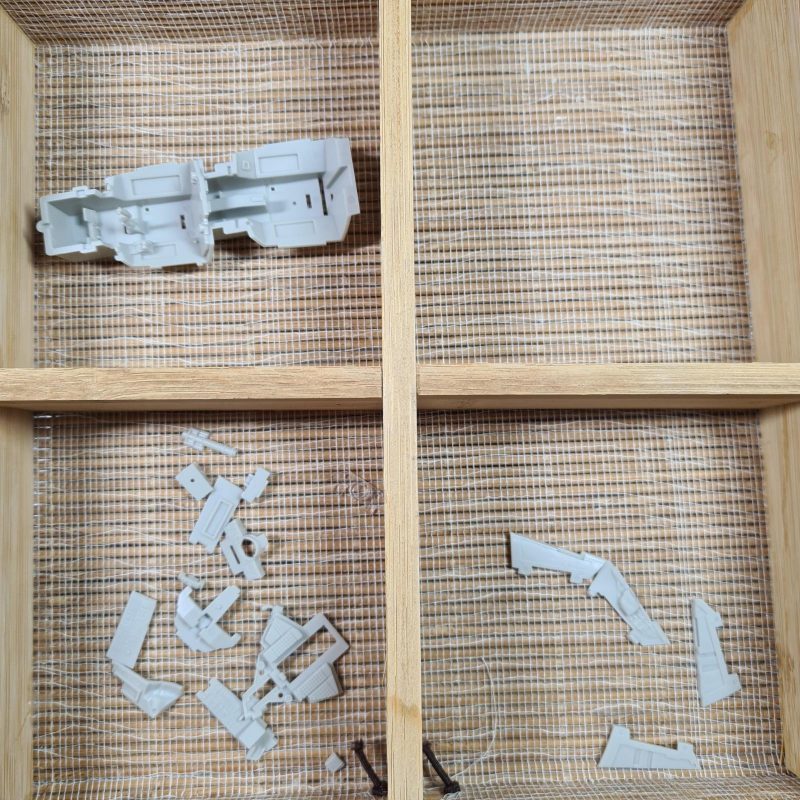
    As with most kits, step 1 of 45 is to begin work the cockpit. A few parts were glued into the 'tub', but a majority of parts were removed from the sprue and recieved an XF-2 base followed by an XF-19 Sky Grey for the interior colour. Typically I can't be bothered to use a fancy and smelly primer for the internals, XF-2 black is what I used to prime with in the past and continue to do so for internal and small parts. With the grey put down, next step will be the good old fashioned hair on a stick, otherwise known as an airless airbrush, or simply a brush to paint on the finer details. The black panels will painted such, followed by each of the many buttons in a white, grey and silver where required. For this model I'll be using the DCS F-14B module for a lot of references, my logic is that the sim has such an amazing replication of a Tomcat and that I'm sure a team of researchers can research more than I can. It also helps see the nooks and crannies of a cockpit that would otherwise be hard to see in a photo.

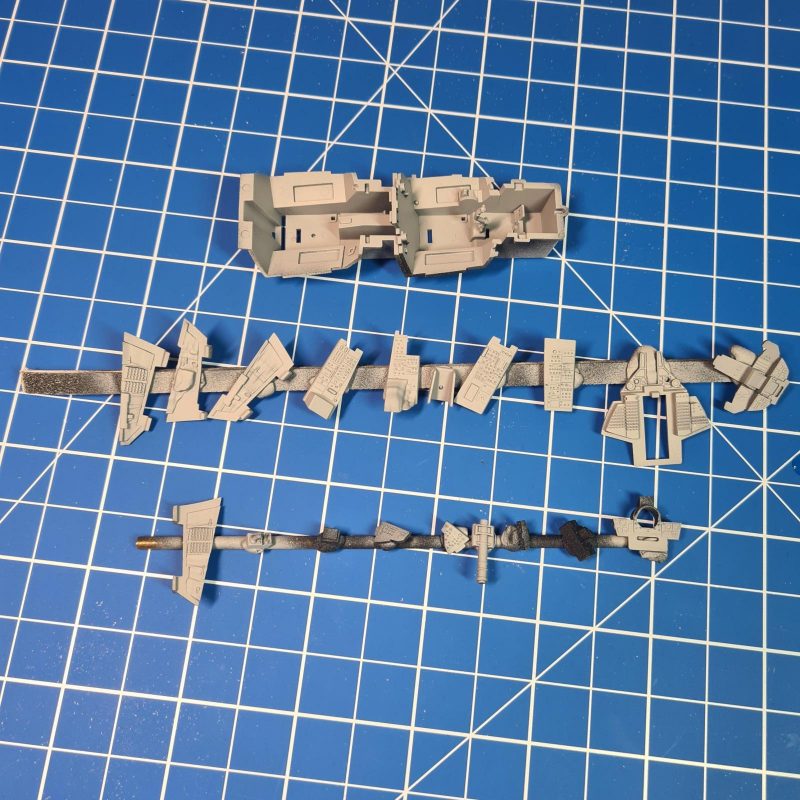
    I also put together some random parts, notably the wing sweep mechanism as I wanted to see how it works. The thing about this build as it seems like several sub assemblies turn into a final kit, the nose, the body, the wings, and the weaponry. Expect some jumping about in the instructions as paint and glue dries on each part.

    Regardless, this is shaping up to be a nice build so far. I already feel a lot more enjoyment building these first steps than expected, as I was so close to choosing another kit. Stay tuned for more updates soon, though I reckon painting the cockpit will take a few nights!

  • Profile Photo
    Andrew H said 2 years, 12 months ago:

    Can't wait to see more of this build! Love the write up so far, very well thought out and descriptive. Also I've got a D model that will be a VF-31 bird, with some eduard bits, and I'm curious to see how you get this together and tackle the paint and weathering.

  • Profile Photo
    John vd Biggelaar said 2 years, 12 months ago:

    Great choice, Harvey @scalerambush
    Those F14's are incredible planes and with this Tamiya kit and aftermarket parts I'm sure you will turn it into a real gem.
    Count me in for this build, looking forward to the steps you will make.

  • Profile Photo
    Spiros Pendedekas said 2 years, 12 months ago:

    What a great entry, @scalerambush!
    Looks to be a super kit and you mounted some great extras!
    I have built the (older) Hasegawa kit and, it looks like your Tamiya is better in many aspects, buildability definitely being one of them!
    Nice first steps!
    Looking forward to it!

  • Profile Photo
    George R Blair Jr said 2 years, 12 months ago:

    This is a great choice, Harvey (@scalerambush). Tamiya kits are good kits overall, and I have heard great things about this kit specifically. I have always liked the F-14A because there are some very colorful markings available for these early versions. Looking forward to the build.

  • Profile Photo
    Harvey R. said 2 years, 11 months ago:

    Thanks all, good to see you around for this one!

    A few little updates.

    The Cockpit


    Normally I stay away from photoetch, I don't particularly have a problem with it and happily use it if I have it (so basically my 4 Eduard kits are the only ones with it), but with how I generally build aircraft of in flight, buttoned up, with a pilot inside they become a bit redundant. Just look at the recently finished Spitfire and how little you can see inside once the pilot was in!

    As such using photoetch completely flew past my mind, but upon painting the pit I've decided to get a photoetch set and am waiting for that. Generally I actually prefer painting cockpits by hand (and using decals for the instruments if possible, if not I'll try and paint them too), it's definitely less accurate but it gives more character and in the end a result I prefer more. That being said I think for all the buttons, switches, and instruments the F-14 (and other modern aircraft) has leans it better for PE than the vintage warbirds I normally do, regardless I may change my mind when I see the PE set as I feel they sometimes look very 'grainy' so I'm not sanding anything off yet.

    So what have I actually got done


    Well I've been working on some sub-assemblies, also been removing the resin from its sprue. Don't be fooled, the F-14 with swing wings may seem impressive but it's probably a 20 minute job if that. In fact, the more I chip away at sub-assemblies the more I think I could finish this kit in a day or two if I was to leave it unpainted. I love Tamiya and their amazing engineering of kits is the main reason why, but even so I was expecting a giant F-14 to take longer to build than their other kits I've build.

    I've also built the front wheel well, the cockpit slots in on top, but I'll be doing this wheels up hence why it's unpainted. The amount of detail in this wheel well is staggering, but then again wheel wells have a bit more going on in them on a jet compared to a Spitfire.

    Now I would want to be chipping away at the ordinance, but I bought so micro-magnets that are so small I've managed to lose them. So whilst I pull out a magnifying glass and look around for them I can't get that job out of the way, yet.

    2 additional images. Click to enlarge.

  • Profile Photo
    John vd Biggelaar said 2 years, 11 months ago:

    Those are real large areas of plastic, Harvey.
    Wondering how the PE set will look like.
    Looking forward to this set as well.

  • Profile Photo
    Spiros Pendedekas said 2 years, 11 months ago:

    Nice progress, Harvey!
    Love how the cockpit is proceeding, looking forward to see the PEs attached!
    Nice to hear that Tamiya engineers did their magic with the easiness of assembly.

  • Profile Photo
    George Williams said 2 years, 11 months ago:

    Off to a flying start with this one, Harvey, the Tomcat is definitey one of my favourite aircraft, and the Tamiya kit has some terrific write-ups. If you have time check out the A-Z guide under F14 here on iModeler, Chuck A. Villanueva's review/build is particularly thorough.

  • Profile Photo
    George R Blair Jr said 2 years, 11 months ago:

    This looks like a great kit, Harvey (@scalerambush). I just finished a video review of Tamiya's F-4B and the parts breakdown looks very similar in a lot of the components. I usually use color photoetch in the cockpit because my hands aren't as steady as they used to be for painting, but it certainly looks like the detail is there to paint a great representation of the cockpits. Looking forward to the rest.

  • Profile Photo
    Harvey R. said 2 years, 11 months ago:

    To Photoetch or Not?

    The photoetch arrived, a day after ordering so I'm quite impressed.

    That being said, I wasn't too happy with the PE itself. Some areas, particularly the hundreds of circuit breakers, seem a lot worse with photoetch. On top of this, whilst the Tamiya set isn't 100% accurate as some dials were simply done with a button instead, the extra 3D provided by the plastic seems to add a lot more to the kit. I also really wasn't a fan of how the PE set handles the RIO's radar station. I know one of the major disadvantages of PE is the lack of actual 3D depth, but having not used a PE set on anything more modern than a Hawker Tempest it took me by surprise by just how flat it is.


    As such, I'm having a real tough time deciding which to use. How do you feel about it? I decided to paint the Tamiya kit's various buttons in white, some of these will be repainted grey/black/red/yellow as required later, after I get some feedback on the PE vs Plastic debate.

    One other issue will be colour matching, making it a bit tricky (but not impossible) to do a mix and match. One nice thing is some circuit breakers by the pilots legs are missing in the kit but are there in very flat PE. In the end I'll give it a think and see what some feedback may provide.

  • Profile Photo
    John vd Biggelaar said 2 years, 11 months ago:

    Although the PE does look very detailed, it indeed lacks the 3D aspect.
    Your handpainted IP does have it and looks great already.
    Can imagen the difficulty to make a decision.
    Personally I would go for your handpainted interior.

  • Profile Photo
    Spiros Pendedekas said 2 years, 11 months ago:

    Hi my friend @scalerambush!

    Yes, PE's 2D nature is kind of a limiting factor, they might look too flat at cases.

    Since you are doing a closed canopy, I would risk to say that the 2D effect will not be that obvious at some aread, like the side consoles that will be viewed from above.

    For me, the real question is if the PE sets are more detailed or accurate than the kit offerings. If they are not, I would use the kit plastic parts. If some PEs are more detailed (or more "correct"), I would judge if they would look flat or not under the closed canopy. If they would not look flat, I would use them. Possible candidates would be the aft areas of the side consoles...:-)

  • Profile Photo
    Erik Gjørup said 2 years, 11 months ago:

    For what it's worth, I think you should go with the originals here. PE is a great way to make some things, but clearly your skills with a paintbrush will do the raised details justice. Maybe the few places where the kit does not provide anything, the PE will be great, as they may be in combination at places like handles and such. Looking forward to tune in again to check up on your decisions here.

  • Profile Photo
    George R Blair Jr said 2 years, 11 months ago:

    I suspect 3D is the way to go here, Harvey (@scalerambush). Your results are better than the photoetch would achieve. I generally use photoetch because my hands aren't steady enough to produce the great results you are getting. The only thing that might be a better option than photoetch would be some of the new 3D decals for the cockpit, it they were available for this plane.