Not to jinx myself but another year has been survived, so as a reward (plus with help from Santa, of course) a new model has landed in my lap. It would be rude to not start it!
This is Tamiya's 1/32 Corsair. 1/32 is an Alien scale to me and I already feel like I want to run back to the familiarity of 1/48, but I'm sure I can manage. Naturally we have a huge amount of detail along with a huge box, but being a Tamiya kit the fit should be perfect. The kit comes with a
lot of sprues so I won't be taking sprue shots, we also get two bits of unpainted PE, a wheels up option (I wish 1/48 had this), two figures included a seated pilot with an oxygen mask (I wish 1/48 had this), as well as some clear pieces for the engine which we will forget about. Rubber wheels too, interesting.
The Subject - KD431
Along with this big chunk of plastic I have a book, 'Corsair KD431: A Time Capsule Fighter'. No prizes for guessing what the model will be of, but yes KD431 will be the end goal. Whilst it does admittedly hurt to take such a big kit and not paint it in the US tri-colour, hell to take the kit and paint it in just Sea Blue is a shame, KD431 offers a lot of opportunity for interesting painting.
-
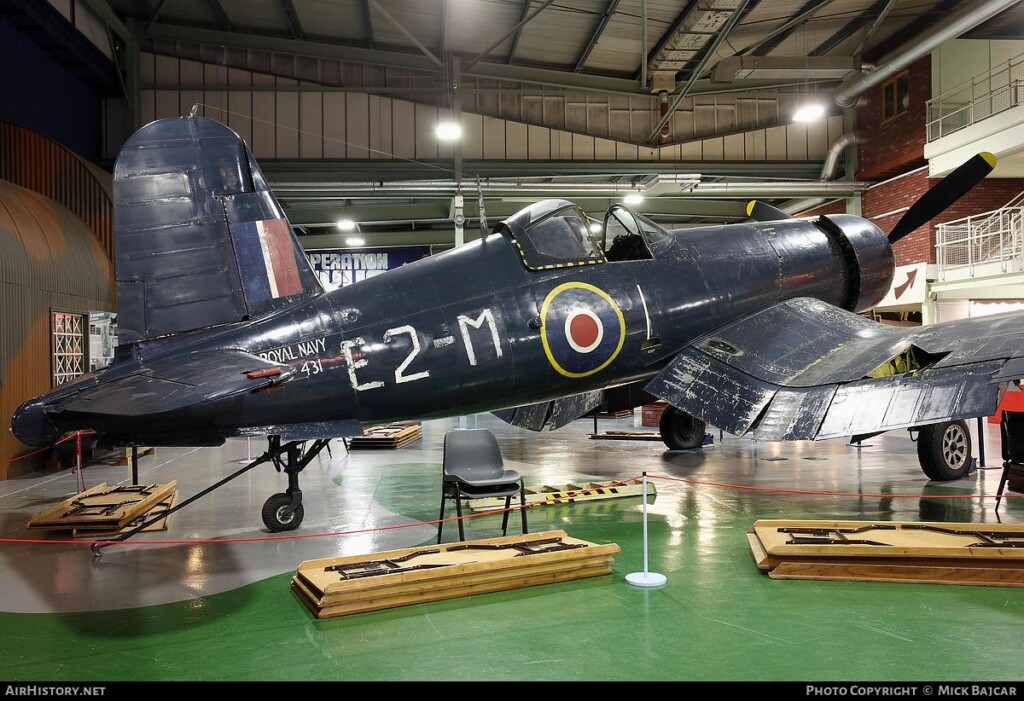
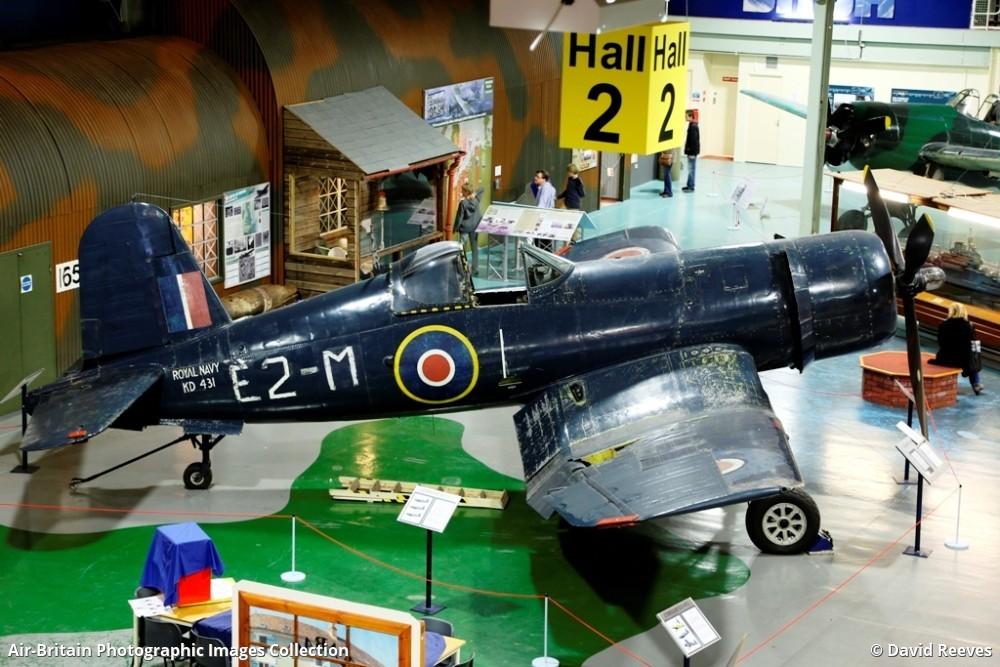
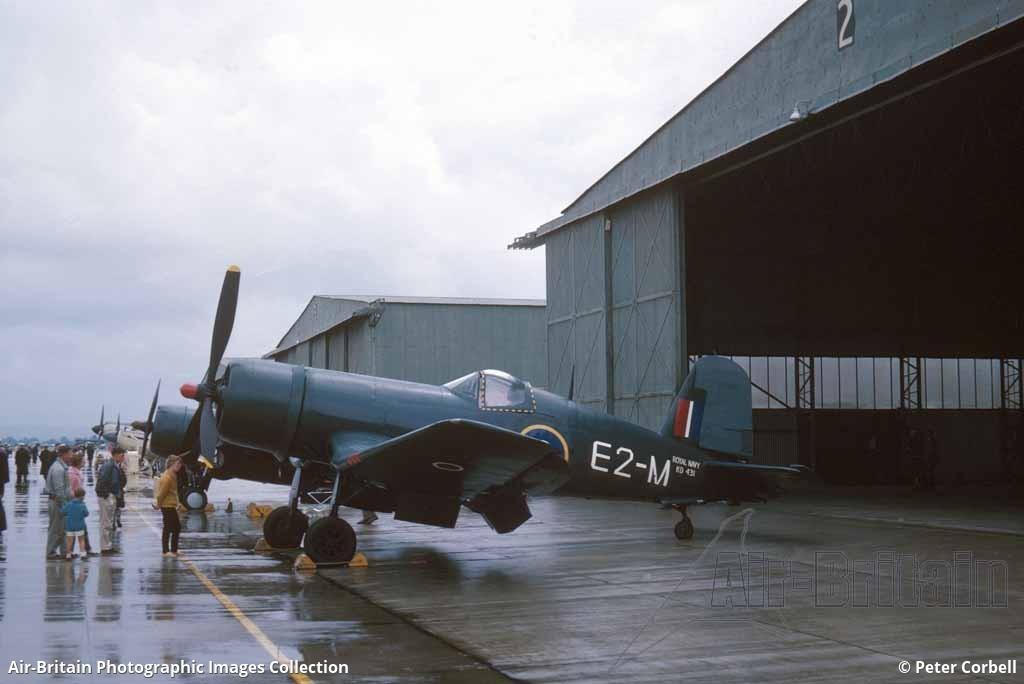
1. KD431 following the restoration to the 1946 paint.
A little bit of history, KD431 is one of two Corsairs in Britain and the only Fleet Air Arm of 2,012 received that survives today. It was completed in August 1944, with its first flight being recorded in logbooks as 22 August. It was then shipped over to Renfrew, Scotland before being attached to 1835 Sqn at Eglinton, Northern Ireland in January 1945. During this year RNAS Eglinton was focused on training up squadrons in preparation for the invasion of Japan, and in July 1945 1835 Sqn was instructed to prepare for deployment to the Far East.
-
In August 1945, just as the squadron was preparing to leave, the war ended of course. KD431 being on dry land was saved from being one the Corsairs pushed overboard to avoid being part of the bill the government would pay for lend-lease. In September the aircraft was transfered to 768 Sqn, being used to practice deck landings until the end of the year. At some point in early 1946 the aircraft was sent to a holding yard in Scotland awaiting scrapping, but was saved when Cranfield College of Aeronautics with its strong links to the FAA and RAF required a modern aircraft with power-folding wings as a study-aid for students, and thus KD431 cheated the chopping block and was used here until 1963.
-
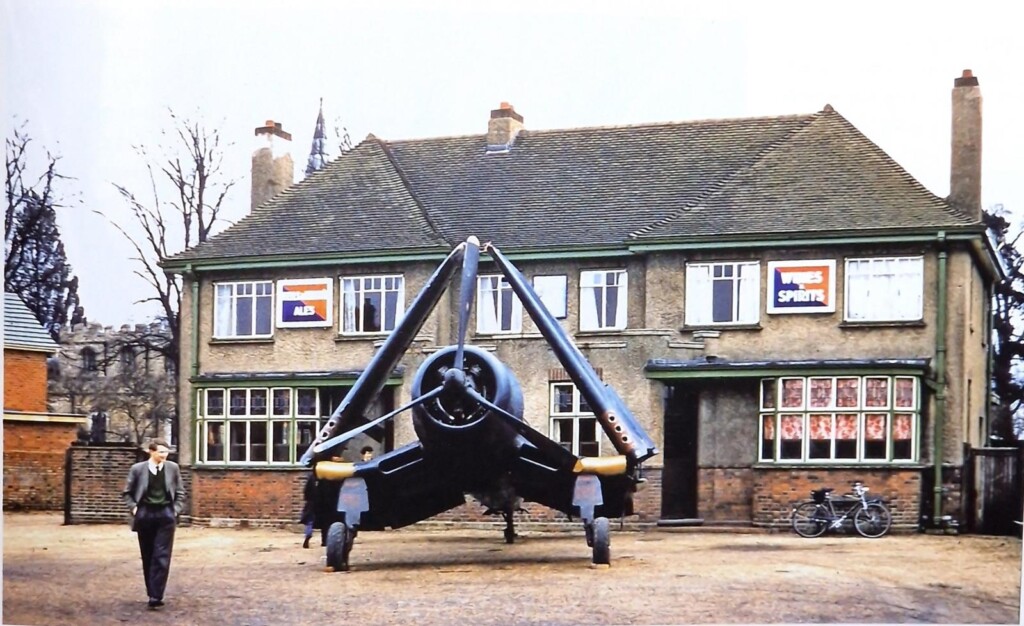
1. Enjoying a pint in the car park of the Pub.
Now here is a story too good to not tell, whilst KD431 was never flown nor was the engine ever run during this time, it did manage to make a short trip when students decided to wheel the aircraft under the cover of night to the local pub as an end-of-term prank. This caused a stur of amusement in the village, and more importantly a certainly unique location for an airplane to visit.
-
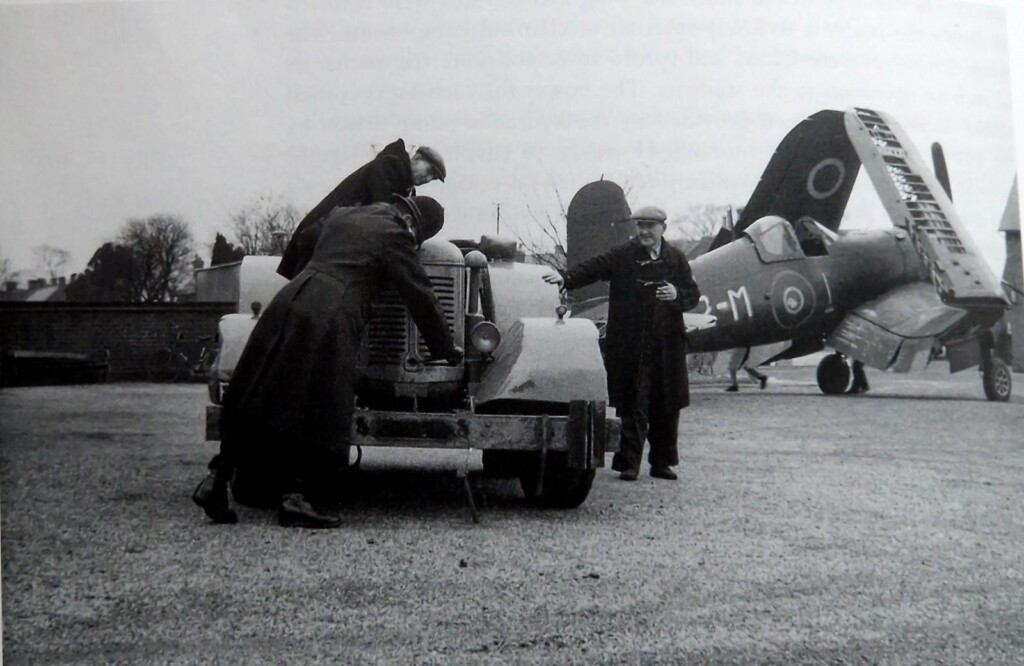
1. Local village Policeman helps out trying to get the Corsair back from its night to the pub, the Tractor clearly wasn't up to the task and kept stalling.
The aircraft was coated in a thick, shiny, not original paint scheme in 1963 and it was set to the Fleet Air Arm Museum, starting in 2000 a restoration project begun that had a different goal to most aircraft restorations. Rather than make it look good, the aircraft had each layer of paint removed to bring it back to how it would have looked on 1946. Scratches and oddities were retained, showing off the history of the aircraft. To me, this looks like an opportunity to do a very weathered and unique model.
-
1. Colourised photo of the 1963 repaint.
Now there was previously a bit of debate on what type this Corsair is, but that's been solved by now. Generally the key identifier for a F4U/FG-1D is the twin pylons on the underbelly, as well as rocket mounts on the wings but those aren't present on British Corsairs. The thing is a lot of changes went on with the Corsair over its lifespan, and whilst the -1D had some larger changes there's clearly some stepping stones.
-
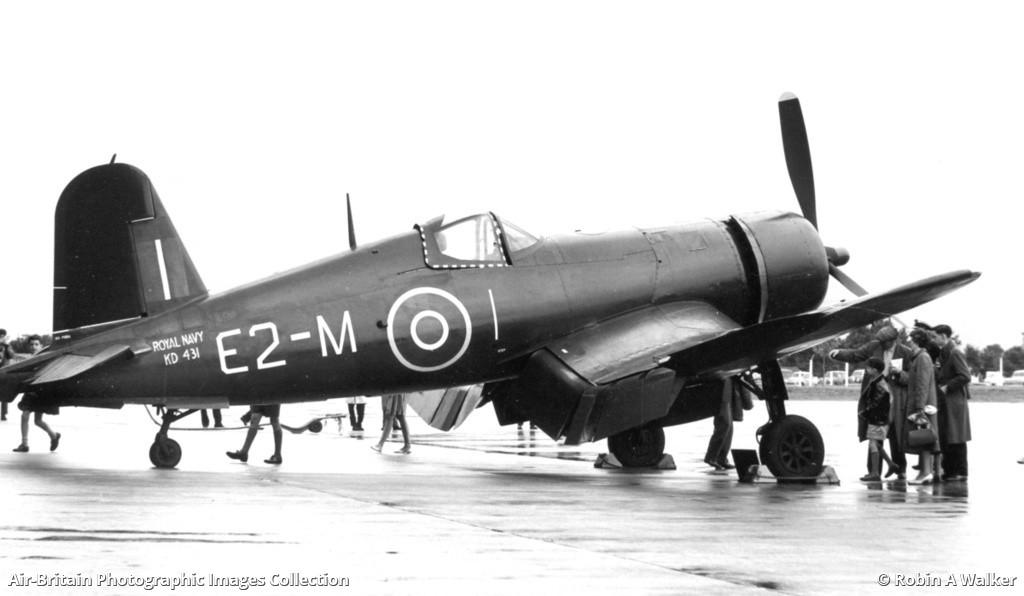
1. KD431 after being repainted in 1963
The overall blue scheme is often incorrectly used to identify the late -D model, but this started being applied in April 1944. September 1944 was when the -1D started to be produced by Goodyear, meaning some -1As were sent in the sea blue. It seems the majority of not all went to the Brits or Kiwis.
KD431 has the R-2800-8W engine. Previously it was thought this was introduced with the -1D, this engine has a water injection system that the earlier Corsair lacks. Was KD431 a lucky one off? Probably not, it can be assumed the very last -1As produced by Goodyear had this engine as Vought was making -1Ds already, but how many is unknown and hasn't seemed to be mentioned at all..
The canopy used is the -1A style of canopy with the bars rather than the 'blown' canopy of the -1D. There was a period of time where -1Ds were made using this canopy to deplete remaining stocks, but the majority did not.
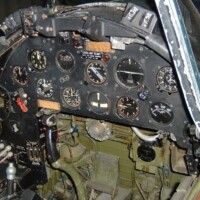
The cockpit itself is a mix-match of -1A and -1D switches, some parts not present on a -1A can be found. Some British stuff is also chucked in too, making things a little strange here.
Finally, KD431 very unhelpfully lacks a manufacturer's plate in the cockpit which would identify it, though one plate is stamped with 'FG-1B'. The -1B isn't an 'official' version, but was used to denote the ones going to Britain to aid with factory logistics. Manufacturer plates in the outer folding wings (assembled and painted elsewhere by Briggs Industries) are stamped with FG-1B and 'BRIT', obviously marking the difference here of the wing being clipped.
So this brings me back to the kit. For KD431 I had to make a choice and I went with the F4U-1A set. The kit comes with parts with an A or D cockpit, but the -1D set only comes with the incorrect 'blown' canopy which would be a big discrepancy if I'm trying to be accurate. However, during the -1A production the landing light was changed from a large lamp under the left wing to a small light in the leading edge and as such the wing is wrong for KD431 being a late production aircraft, but this is certainly the easier fix. It's worth noting that the F4U-1 set comes with some unlisted tiny niche parts to make an F4U-2, despite not including the radome for that version. Maybe this set as some little secret parts hidden on some sprue, who knows?
As a side, the book is very good and goes into excruciating details about the restorations efforts. That being said it does annoy me how many black and white photos are used, original period photos aren't the issue but rather photos taken after 2000 but printed in black and white to save printing cost. I'd rather have paid more to see exactly what the caption is describing.
As I was typing this the postie came, we now have some paint masks. Including some stencil masks by 1ManArmy. KD431 has a lot of stencils that are faded or have been put on twice, so decals wouldn't have worked out amazingly. This set does have stars and numbering for 2 of the 3 included kit schemes, and a different VF-17 scheme rather than the 'Big Hog' included in the box.
Starting the Build
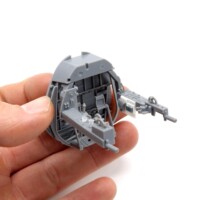
Unsprisingly, the cockpit comes first.
Step 1 and 2 simply starts with the side consoles, with step 3 moving onto attaching parts to the forward bulkhead.
The piece was assembled and painted silver, then interior green. Originally I intended on chipping but then looking closely at photos it can be seen that there isn't much chipping here outside of the pedals, stick, and the foot plates.
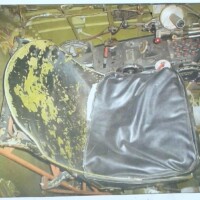
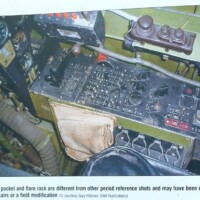
On the right console is a map bag, for whatever reason KD431 has not got this and instead has a flare gun pouch. This is different to normal, the flare gun would be put into a holder pointing down to the floor normally. This may be a modification to all FAA aircraft from the factory, it may be one done to this individual aircraft during or post-war, there just isn't any information about other FAA Corsairs regarding this. This was made using styrene sheets, the pouch was mad by taking the pistol holster for the included figure and removing some details, and some random rods I had will make a budget set of flares.
-
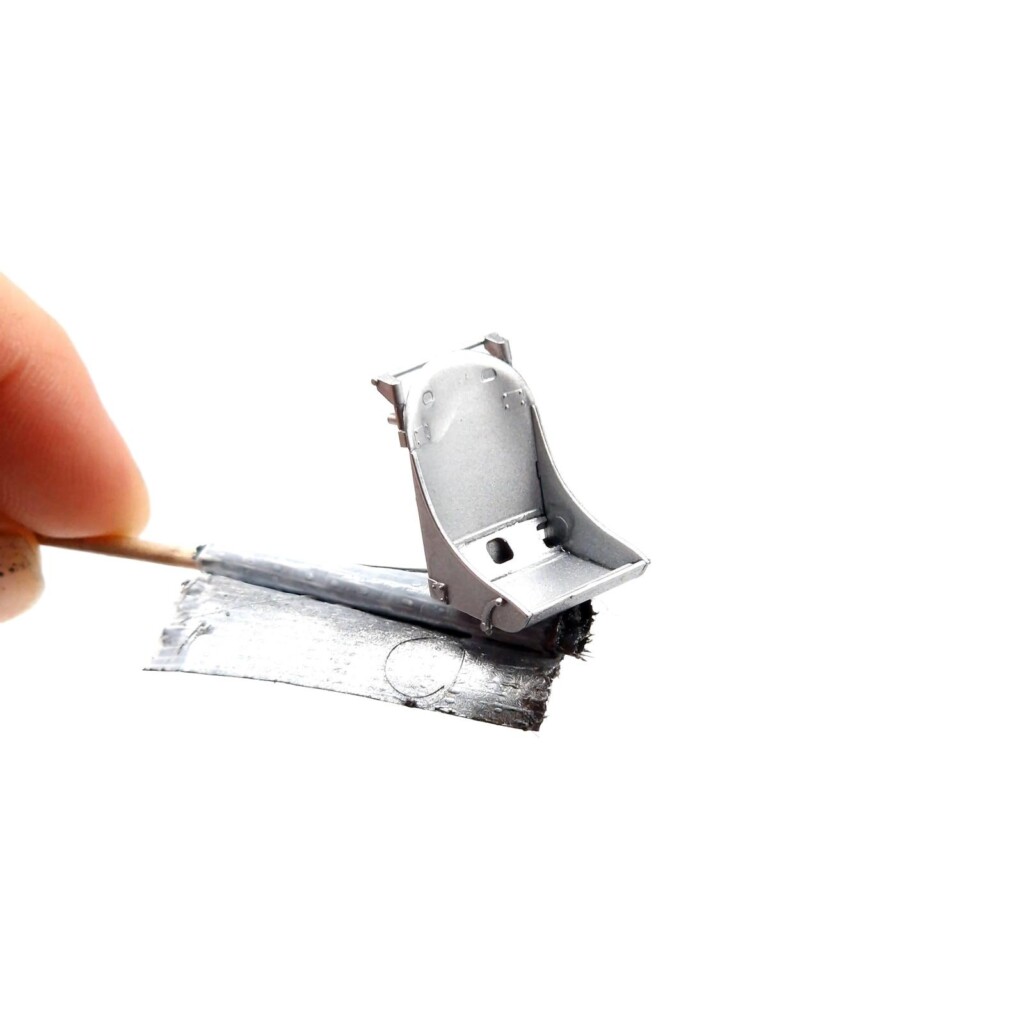
The chair was assembled and went under quite an intense regime. The seat will be one of the more noticeable features in the cockpit so I wanted to get it right. This seat is not original to KD431 and the original may not have been present when the aircraft was at Cranfield. Either way, whilst it has the correct seat for some reason it is in black which is not correct to the original.
First it was sprayed silver, then chipping fluid was brushed on (trying the brush for the first time, no complaints so far). Interior green was then sprayed on and chipped, and finally this was repeated and black was chipped. Quite a bit of work for a chair! PE seatbelts are included with the kit, but the photos don't show this plane having them at the moment so I'll leave them out.
The rear bulkhead is also put together around this time, but needs some more detailing. Seemingly the oxygen bottle is not present on KD431 either, but this would be attached to this part in a normal build. Obviously this may be different now as the photos in the book seem to be from 2006, but hey.
The fuselage has become to have some work, I'll go onto this a bit more when I get to it but it was first sprayed with XF-4 which is a Zinc Chromite colour, and then the interior green was applied. Again, I was intending to chip this but the amount of chipping I'd actually need to do is so minimal I might as well brush paint it. Bits and bobs have been assembled to the cockpit side walls but need painting by brush.
-
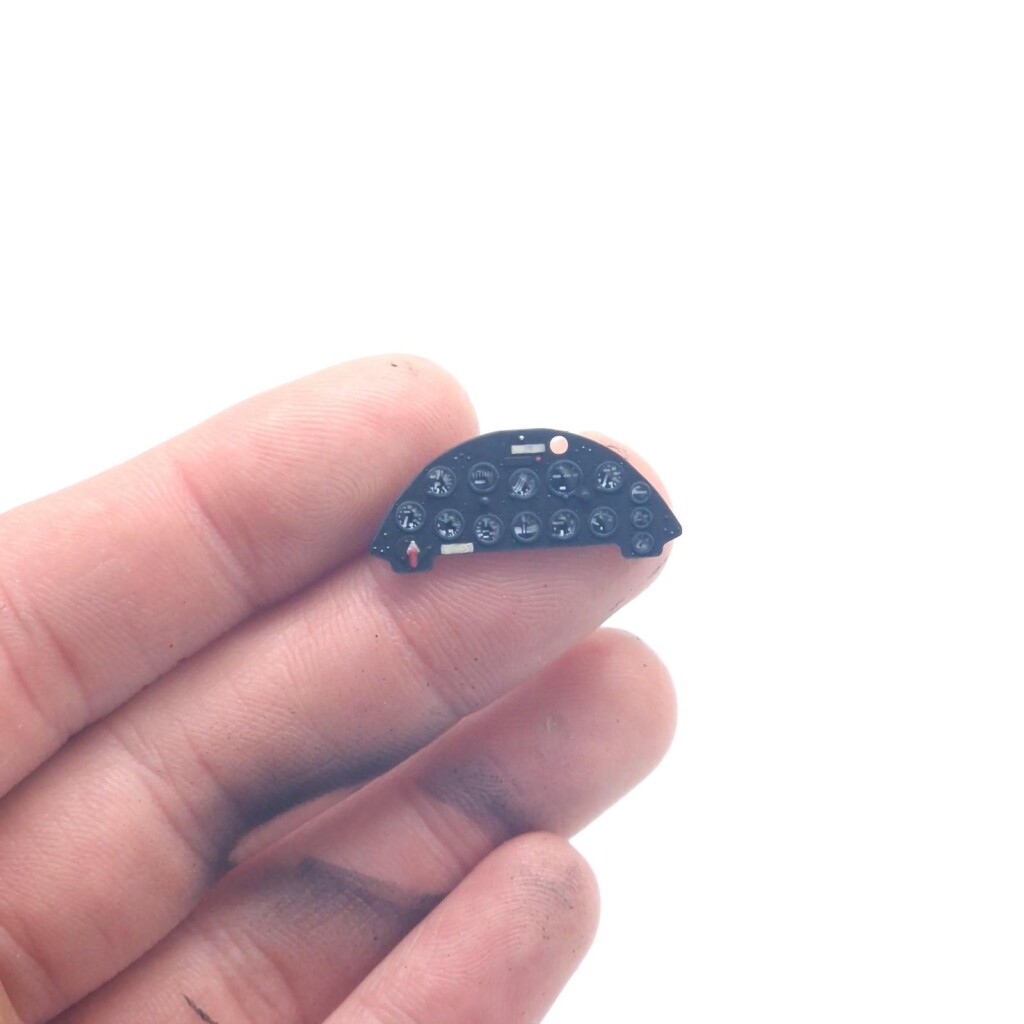
The instrument panel comes in 2 parts, a decal is placed on the rear of the clear piece and then the clear piece goes onto a regular plastic frame. The frame was painted black and dry brushed with a tiny bit of grey and silver for some interest. The consoles also got this treatment, and any buttons were painted the correct colour to KD431 photos in either silver, black or red. A few buttons were chopped off if not present. If I want the bonus points I'll try and make the compass below the instrument panel, possibly an FAA edition, as well as a some of bits here present on the -1D cockpit but not included in the -1A kit.
And that's about that for so far. Hoping to get the cockpit all glued up later. Some decals do need to be placed around too.
6 additional images. Click to enlarge.
-
-
-
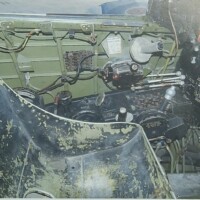
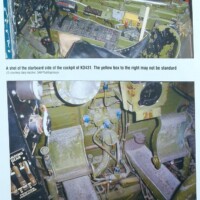
1. Cockpit photos are all of KD431, taken at various times during/since restoration finished in 2005.
-
-
-