Tamiya F4U-1A, 1/32. 'KD431'

Started by Harvey R. · 80 · 1 year ago
  • Profile Photo
    Harvey R. said 1 year, 9 months ago:

    First Steps in Chipping

    As previously mentioned we now have a shiny glossed metallic Corsair, ready for future chipping layers and all that good stuff.


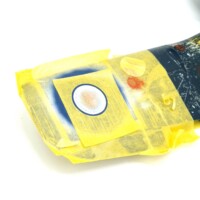
    Since it was a small component that is easy to strip paint off of and restart if it all went wrong, I decided forgo the gloss coat on the metallic cowling panels and get straight to work to see if the chipping would work as intended.

    First the chipping fluid, two coats via brush. Followed by Zinc Chromite. Problem arrised when I put the second layer of chipping fluid over this colour, which unsurprisingly (but was totally overlooked) begun to activate the previous layers when applied with brush. This wasn't a major issue on the flatter surfaces, but on the curved front piece of the cowling it removed a lot of the zinc chromite. A second layer was applied with airbrush after this. Once paint was applied it wasn't noticeable, but a tiny orange peel effect can be noticed up close due to the airbrush use. Not enough to be noticeable and warrent fixing, but enough to remind me why I'm not using the airbrush for the fluid.

    Regardless with that out the way the parts were sprayed a couple of tones of Sea Blue to provide some simple variation, though KD431 doesn't show crazy paint fading or anything just paint removal so this isn't a big deal.

    Chipping was done on the front piece and the cowl flaps, starting with a cocktail stick but this caused too much to come off. I then went for the scalpel which produced more in scale results, and more precisely than a brush would. Scratches clearly seen on KD431 were noted and were replicated with the rear side of the knife.

    Meanwhile a second experiment, just how long can I get away with not chipping those engine access panels? This is due to another hard to see detail being added which is the factory applied nose number, used for identification during delivery and would be removed later on. This can be seen extremely subtle on the real thing, so subtle that you probably didn't notice it looking at other photos.

    It seems only the photos taken with the brightest flash possible have a hope of showing the faint remains of this number. To replicate this I outlined the number with pencil, and then filled in the number using acrylic black wash. The outline is a little more obvious than I'd like due to the graphite (perhaps a black coloured pencil would be better), but in general its very hard to see aside from the light shining on the graphite and if I turn the brightness up. I'm not sure how to do this number any better beyond masking it off and spraying, which doesn't sound very fun making a very 'human' non-stenciled number out of masking tape so as such I'll likely leave it as such and hopefully a clear coat will dull down the graphite. I think I may be nitpicking though.

    And that's the Corsair in its current stage, I plan to start the paintwork on the aircraft itself tomorrow but may sit around and just do some smaller details instead such as the canopy, the cowling number on the other side, gear legs etc.

    Oh, one other thing is the propeller. There were two types used, a 13.4 inch one on the F4U-1/1A, and a 13.1 inch one used later on with the -1D. The later one is a bit fatter towards the base. I believe KD431 has the earlier type, though to be quite honest it's something I have trouble distinguishing without a side-by-side comparison, and it doesn't help that a lot of KD431 photos have them feathered making it at a harder angle to notice.

    Now personally looking at diagrams it seems the Tamiya propeller is a bit too wide or something, it just looks a bit off, but I think it's the right one at least. I may look into aftermarket though for this part.

    E: On observation looking at the photos, the 4 is different to how I've done it as the chalk outline wasn't the same as what is visible now on that nose number, darnit. Luckily it is such thin paint I was able to alter that without issue.

    6 additional images. Click to enlarge.

  • Profile Photo
    Spiros Pendedekas said 1 year, 9 months ago:

    Looking amazing, my friend @scalerambush! The chipping results are superb!

  • Profile Photo
    John vd Biggelaar said 1 year, 9 months ago:

    Very nice work done, Harvey @scalerambush
    To me this identifiation number does look great.
    I agree on the green dot, this is likely the reflection of the ceiling lights.

  • Profile Photo
    Tom Cleaver said 1 year, 9 months ago:

    The project is looking ever-better, @scalerambush. That's some pretty amazing paintwork.

  • Profile Photo
    George R Blair Jr said 1 year, 9 months ago:

    Great job on the remnants of the factory number, Harvey (@scalerambush). I have never seen this number visible on any other plane. Great job replicating it.

  • Profile Photo
    Harvey R. said 1 year, 9 months ago:

    Thank you all! There are some photos I can think off that have that nose number, but they are quite rare. Best example I can think of is this original colour photo of British training in America, with even more sloppy numbers.

    Chipping Away

    Well, a lot has changed.

    Firstly the paintwork was applied the a similar way as on the engine, but with a bit of refinement. Silver with a gloss topcoat then had some key areas painted in zinc chromite, notably the radiators and near where the anti-slip mats are. This then received 2 layers of chipping fluid by brush, followed by an entire coat of zinc chromite, and then the sea blue. This skips over the second stage of chipping fluid which caused some issues on the cowling, and also prevents an orange peel risk as I just can't get it to spray nicely out of the airbrush for some reason.


    With that done it was time for chipping. With the cowling I ended up mostly using the scalpel for more control, and I decided because of this I don't really need to worry about doing the model in section as even if it's dry a knife will chip the paint when a brush can't.

    Starting with the left wing, which clearly is the more photogenic angle of this plane, I started chipping away trying to follow what can be seen in references. I'll try and add a scratch is the same place and direction as on the real thing, if it's the wrong size or in the slightly wrong place that's fine but following the reference as closely as possible helps produce a better result unsurpsingly. One fun part was replicating the circular scratches created by the tabs on the gun-bay doors.

    Since the Sea Blue is so strong I'm happy to mask directly on it, which normally I would not recommend with chipping fluid. This allowed me to make another interesting couple of quirks on this plane. Firstly the circular gas patch, it's not entirely clear when or why this machine in 1945 received a chemical warning patch, but it seems likely it was done in preparation for a career fighting over Japan. There are a few photos of FAA Corsairs in the Pacific which have patches, though the rectangular kind, so it seems at some level the idea of being gassed despite being at Sea was worrisome? Eitherway this circle was slightly too big, but I managed to just chip away the red circle to size which worked out fine.

    I also added some of those stencils masks to the aircraft, they're a bit too big honestly but they're far better than the alternative. KD431 interestingly has a lot of double marked stencils, sometimes these are right on top of each other and sometimes these are in random places. Despite the masks being too big I've placed them near enough where they are on the real thing, painting them in very faded white. I've also added the numbers to the ammo boxes, and painted on the two ammo boxes that are actually olive drab overpainted with sea blue much like the previously done tailplane.

    With that I now slowly move onto the right wing, less photos on this annoyingly but I'll manage. After that it's the fuselage, which won't take too long in comparison..

    1 additional image. Click to enlarge.

  • Profile Photo
    Spiros Pendedekas said 1 year, 9 months ago:

    Absolutely wonderful painting job, my friend @scalerambush!

  • Profile Photo
    John vd Biggelaar said 1 year, 9 months ago:

    Very impressive result, Harvey @scalerambush
    Difficult to tell from the pictures if looking at a real aircraft or your model.

  • Profile Photo
    George R Blair Jr said 1 year, 9 months ago:

    Looks terrific, Harvey @scalerambush. The gas patch is an interesting detail on the plane. I never realized Navy planes ever carried them.

  • Profile Photo
    Harvey R. said 1 year, 9 months ago:

    There's not a great deal of information about the gas patches, there are a couple of photos of other FAA Corsairs carrying them though but it's pretty rare.

    Bit Bri'ish Innit?


    As I was going on with chipping the right wing I fancied a bit of a change of pace, so went ahead and masked off the fuselage markings in the form of the roundel and fin-flash. First spraying the white, followed by yellow, red, blue.

    The roundels from the masking sheet previously shown went on without issue, the fin flashes included are too wide for the Corsair but masking off a rectangle isn't too hard!

    With that done I also masked off the non-slip walkways, these aren't the final look but are more of a guide as to where to chip the model and will be redone at the very end of the model.

    After that was done I went back and finished off the right wing to a level I think is about accurate to what I can see in photos. Next up is to chip that fuselage which will be a fair bit less work, and the underside which unsprisingly will have even less chipping.

    1 additional image. Click to enlarge.

  • Profile Photo
    John vd Biggelaar said 1 year, 9 months ago:

    Great paintwork, Harvey @scalerambush
    Those roundels came out perfectly.

  • Profile Photo
    Spiros Pendedekas said 1 year, 9 months ago:

    Amazing indeed, my friend @scalerambush!

  • Profile Photo
    Louis Gardner said 1 year, 9 months ago:

    Harvey R. (@scalerambush)
    This is looking fantastic. It has to be the best Corsair I have seen to date. I'm glad you are enjoying the book I mentioned on the restoration of KD-431. Your comments about it are spot on. Being a fellow Corsair fan, there's another pair of books I can highly recommend to you that were written by Dana Bell on the "Birdcage" and the raised cabin F4U-1A and F4U-1D.


    These books are a goldmine of information and they go into a lot of details on the differences between the Vought, Goodyear and Brewster versions. There's also some excellent information on the production line changes that were made, and they even go into the Bureau Number as to when these changes or upgrades took effect.

    What I really found interesting is how the author went into the details about how various aircraft components were delivered pre painted, such as landing gear struts and wing panels. These items I mentioned were subcontracted out by various companies like Chrysler for the landing gear, and Briggs for the wings. Depending on when the parts were delivered / installed, they could have been various colors, ranging from Gray to an Aluminum color for the landing gear struts as an example. Then once they were installed, (again depending on the time), they could have been left alone as is, or painted again when the overall airframe was painted. They could have been delivered in White, Glossy Sea Blue or Light Gray, it depended on the color that was used on the bottom center section of the wing. The gear struts could have been the same color as the interior of the main gear wells. To make things even more confusing, later the Navy often painted the gear struts White, once they were placed in service or during major overhauls, to make it easier for the ground crews to detect cracks.

    As far as the numbers on the engine cowl, often these numbers were painted on at the factory, and they gradually wore off in time or they were eventually painted over after delivery. They took the last three digits of the bureau number and applied them to the cowling to make it easier to identify on the factory's flight line.


    Grumman, Vought, Goodyear, Eastern and some others did this regularly. The style / font depended on who was painting that day, because they were supposed to only be temporary.
    The FAA Corsairs in the color picture you posted would have been JT-199 and possibly JT-235 (or 225), as it's hard to tell what the center number is exactly.

    As far as the propeller on KD-431, as you mentioned there were two different sizes installed. On the earlier Corsairs, they used a prop blade that was more thin at the base, and I think you are spot on with your observation. The later prop was a wider blade, and these were often called the "combat prop". I think the wider combat prop was also slightly shorter in overall diameter, with the thinner blades being longer. The wider blade offered better performance.

    One last thing about the ammunition cans that were installed in the wings: The top surface of the ammo cans actually made up the top or outer wing skin exterior surface. These boxes were interchangeable, and could be installed in position for a different MG on the later Corsairs. On the early (mostly "birdcage") Corsairs the ammo cans were placement specific, and this is why they were also usually numbered on top. This is also why on occasion you can see a wing insignia that has a small box section that is Blue instead of the usual White color, if it was a US aircraft, and a newer version of the Corsair.

    I am completely blown away by the work you are doing here on your Corsair, and I can't wait to see the next installment.

  • Profile Photo
    Harvey R. said 1 year, 9 months ago:

    Thank you very much! I've been meaning to pick up those books actually, the Corsair: A Comprehensive Guide is one I do have that I recommend if you don't have already. That '277' is an interesting one too as its one of the prototype F4U-1Cs, the rare time it isn't in overall sea blue.

    Those gun boxes are interesting, I remember first learning about it with the below photo which would make an interesting diorama if anyone is interested in battle-damaged aircraft.

    Speaking of the undercarriage, KD431 has them in all blue. I didn't snap a photo but these are all painted up on my end, just needing a tad of weathering and then I'll snap a pic.

    Roundels, Flaps and Fabric

    Firstly our Corsair has chipping done to the flaps. Very beaten up, clearly lots of foot traffic here despite it not being the proper way of entering the aircraft due to the lack of the F4U-4 style of foot hole in the right inboard flap.


    Fabric was then painted on the aircraft in a lighter shade, whilst it's not too noticeable on the original fabric pieces it's something that is worth doing. I feel it went a bit too far on the left wing, but I can tone this back a bit with weathering. The right side was done purposely brighter, this is due to the right wing fabric being removed during KD431s time as a student training aid to allow easy visuals of the interior of the wing. Fabric was put here when the aircraft was given to Yeovilton museum, and replaced and repainted during the early 2000s restoration as its not original anyways. I do plan on adding the holes to the left wing that the aircraft currently has.

    Fabric on the flaps was tried but masking tape caused a big rip of the chipping fluid, I guess the paint wasn't as thick here as I had done on the wing so these are yet to be done.

    Roundels were then added, a few issues here with white still being visible. This is largely due to me not wanting to put too much paint on the fabric surfaces to make them appear a bit brighter, this can all be fixed up. I also made my own mask to expand the white section, the book doesn't list the size but it seems to be around double that of the type C roundel mask set I have. As a side I found these quite difficult to work with this time when I had no issues with the fuselage masks, maybe due to it being bigger. Kubuki tape is nice but it doesn't hold its shape as well as vinyl masks do, so repositioning it a few time leads to some issues.

    I've also gone ahead and properly glued on the elevators and engine, I've also glued down the engine panels. Whilst it doesn't sit poorly with the panels not glued, as the instructions intend, there was enough of a gap to warrant them being glued. I'm not hugely proud of that engine under those panels anyways as I didn't fill in gaps and such on the cylinders that wouldn't be visible from the front.

    E: Oh yeah, fuselage chipping was done. This wasn't a major affair compared to the wings. More chips were added to the engine access panels too, it looks a bit much but it seems to be that way based on one photo from above in the KD431 book. Makes sense, those panels would have been chucked around a fair bit.

    Speaking of chipping that reminds me of an event I struck to the back of my brain, you may notice the left wing walkway is a bit red.

    Needless to say an incident involving a 1/32 Corsair flipping into a bottle of tamiya red paint occurred, a few swear words later and the majority of damage was washed off before the paint dried. The rest was fixed with a light coat of sea blue but the chipping, now a light blue instead of silver, needed to be redone. Thankfully its not noticeable now and I was able to fix it, and that walkway will get redone later anyways as I mentioned before.

    As a further side the flaps haven't got walkways added as there's a handy rivet line right where it needs to go, meaning I already have a reference for the chipping.

    1 additional image. Click to enlarge.

  • Profile Photo
    Spiros Pendedekas said 1 year, 9 months ago:

    What more to say than it looks absolutely stunning, my friend @scalerambush! Magnificent!