Tamiya RNZAF F4U-1D Corsair, 1/48

Started by Chuck A. Villanueva · 75 · 2 years ago
  • Profile Photo
    Erik Gjørup said 3 years ago:

    Is it OK if I just lean back and enjoy the pictures for a while? Great update!

  • Profile Photo
    Chuck A. Villanueva said 2 years, 12 months ago:

    John, George. the Sky decals performed very well, no fuss. Nice session took a couple of hours to lay them all down. Helps that there is nothing at all in stencils.
    Thanks Eric, would you like some tea while you peruse the images?

  • Profile Photo
    Chuck A. Villanueva said 2 years, 12 months ago:

    With the flat coat applied topside, the undersurfaces remain Gloss White. Now to start on the landing gear.


    Very simple and easy to build each strut assembly. All parts in Gloss white. Strut. retraction actuator and forward gear door.

    All assembled and ready to attach into the wheel bay.

    Starting on the RH side, the main gear is installed into the bay. Which has been given a wash to pop the details within the forward and rear main bay. Also the masking has been removed from the lower observing window.

    The tires are painted Tamiya Tire/Rubber Black. The back side mask removed to reveal the white wheel.

    The front of the wheels are Gloss White as well.

    next is the tail wheel. Tamiya give a couple of options extended or lowered, checking some image of RNZAF F4U-1D Corsairs had the extended tail wheel assemblies.

    Tail wheel strut

    The wheel is attached to the rear strut/hook assembly.

    The tail wheel retraction arm is installed and then painted white, tail wheel tire is Testors Rubber.

    Next is to install into the tail wheel bay.

    Next was to remove the masks off the windscreen, pop the canopy off and removed the masking as well.

    Next is to attach the wheels main gear doors.

    Finally the exhaust stacks are installed, and using smoke to apply the exhaust stream.

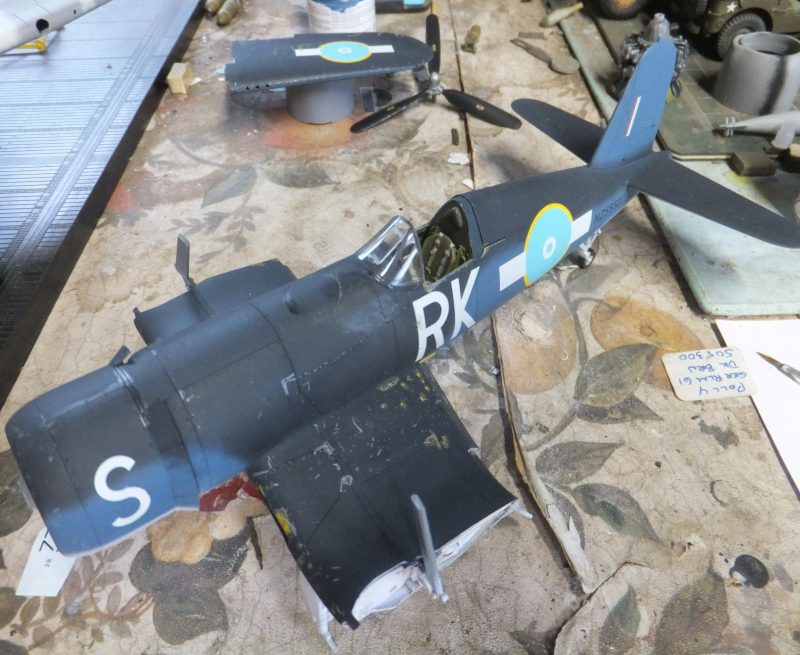
    next up attach the wings and some final details.

    more to follow.

  • Profile Photo
    John vd Biggelaar said 2 years, 12 months ago:

    Awesome progress, Chuck @uscusn
    Was surprised you removed the masks at this stage.
    Will you do remasking when applying the final coat?

  • Profile Photo
    Chuck A. Villanueva said 2 years, 12 months ago:

    Thanks John, I have already applied the flat coat over the top surfaces. So now i can remove the masks.

  • Profile Photo
    Spiros Pendedekas said 2 years, 12 months ago:

    This is proceeding so nicely, my friend @uscusn!
    Love its looks!

  • Profile Photo
    George R Blair Jr said 2 years, 12 months ago:

    Looks great, Chuck (@uscusn). It is really nice to see a Corsair in something other than the standard Navy scheme. Looking forward to seeing the wings folded.

  • Profile Photo
    Chuck A. Villanueva said 2 years, 11 months ago:

    Thanks Spiros, 2nd Tam Corsair makes it another enjoyable build.
    Thanks George, well same paint scheme just another service using a remarkable plane in their markings.

  • Profile Photo
    Erik Gjørup said 2 years, 11 months ago:

    Your kite is beginning to look really busy Chuck! (Thanks for the tea - brought a few bicuits)

  • Profile Photo
    Chuck A. Villanueva said 2 years, 11 months ago:

    Yes Eric and soon to be ready to take flight. I'll take one of those please.

    The final step is to insert the wings into folding mechanism. But first some minor details to tend to.

    First to not to forget to paint the lamps on top of each wing.

    Next a bit more wear and tear in the high wear areas of the upper inner wing panels, cockpit and fuselage.

    Forward and rearward antenna's attached.

    Next the LH wing panel is installed.

    Then the RH side wing panel is carefully attached in place.

    Once these are set, just some detail painting of the ID lamps under the RH wing panel.

    Finally a wash in the wing fold area, and finished. The final bit is to attach the canopy opened and push in the prop into place. And thats a wrap.

  • Profile Photo
    Spiros Pendedekas said 2 years, 11 months ago:

    Looking magnificent, my friend @uscusn!
    Almost done!

  • Profile Photo
    John vd Biggelaar said 2 years, 11 months ago:

    Awesome progress, Chuck. @uscusn
    The applied wash in the fold areas looks very nice.
    How did you paint the signal lights, they look pretty realistic.

  • Profile Photo
    Jordyn Collier said 2 years, 11 months ago:

    What an absolutely beautiful rendition of a Corsair. Well done, and excited to see it competed!

  • Profile Photo
    Erik Gjørup said 2 years, 11 months ago:

    Cool. Now you need a shelf with vertical space available to display it when the hood and prop are in. I like the chosen markings - a bit different from what I recall to have seen.

  • Profile Photo
    George R Blair Jr said 2 years, 11 months ago:

    I really like the folded wings on your Corsair, Chuck (@uscusn). You don't usually see folded wings, so it is really cool to see the wings up.