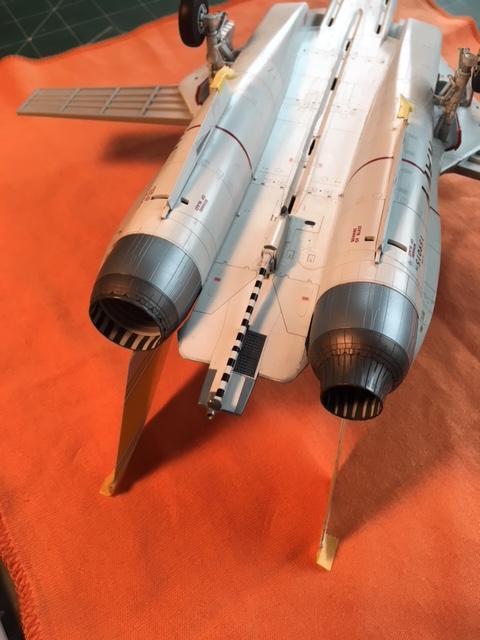
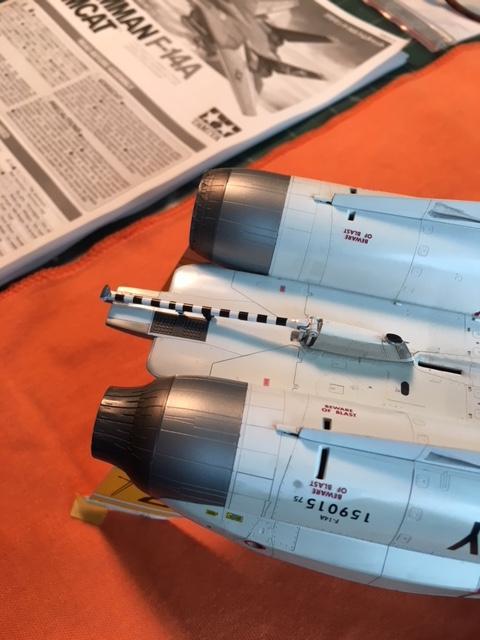
Well, we've been busy on 203 here at Casa Del Mongoose, when work has permitted. Since we tuned in last, i finalized painting and installation of the afterburner cans.
First off, i got the New Ware Models F-14 exterior masking set. One of the nifty things it gives you are masks to paint the inside of the convergent/divergent afterburner iris. This device is a departure from the more conventional A/B setups we're used to seeing. It uses undulating segments that slide forward and back, rather than inward at the back end as we're used to seeing. As a result, the inside is made up of an array of sliding metal and ceramic and metal pieces surrounded by a "Crunch Ring" that keeps everything round. as a result, the inside of these things sorta look like a circus tent, when clean...
The masks New Ware give you fit rather well, though with the unique concave/convex shape the contracted configuration masks are harder to apply on the inside, than the masks for the dilated iris are.
I was a bit dubious as to the colours of the A/B exteriors that tamiya calls for. It seems they start out fairly bright, but as the planes got older and more cycles got on the engines, the metallic areas got darker. Since my plane was fairly new, i took paint swatches from all of my metalizer paints, and then compared them to the mixes that Tamiya recommended using their acrylics. I started off by wet sanding the outsides of the irises with 1500 grit sandpaper so the metalizer would have a bit more surface area to bond to. Then i laid down a primer coat of MM Metalizer non buffing steel. Over that, i laid down a coat of non buffing burnt iron, and on top of that a coat of buffing burnt metal...which of course i buffed out.
Next, i applied the New Ware masks to the exterior- and boy did they fit good! A tremendous time saver; money well spent. Once these were laid in place, i painted the exposed areas with MM buffing Titanium (more buffing). The painted parts were glued onto the tubes, and then the assemblies were glued into the back of the rear fuselage.
Once that was done, i installed the arresting hook. One big mistake i made was i installed the fairing for the hook on the belly before painting. This was a unwelcome aggravation and really complicated things when it came to painting and decalling the belly. Not only that, i had to shorten an actuator rod and i had to really push the hook into place. The hook itself i painted white, then masked and sprayed the black stripes. To be honest, i didn't trust the Tamiya decal to wrap around and conform to the tight curvature of the hook and the ribs molded onto it.
-

-

The landing gear was finally installed for good. The fit is excellent. I'd say the toughest part of the whole landing gear installation is painting those annoying red edges along the landing gear doors. Once the gear was installed, i sanded flat spots on the tyres by carefully dragging a piece of wet 320 grit out from under the tires. It takes a while, but it gives you a lot of control. The landing gear struts are very robust once glued into place.
It doesn't show in the photos, but after the gear was mounted, i drilled holes in the tyre flat spots to take .015 diameter brass rods that serve as locators for the model on the base. The rod locations were marked on the base once the final position was determined, holes were drilled in the base, and the rods glued into the base with white glue.
While that operation was playing out, my name plate came back from the engraving shop, and i mounted it to the base with 4 brass screws provided.
Lastly, i built up 2 AIM-7 Sparrow Missiles. Be very very careful to read the instructions and use the parts called for in the instructions. if you don't, you will run into issues when the decals go on. There are about 16 decals on each of my Sparrows (it varies by modeler). Once painted, the missiles press fit into the sockets on the shoulder pylons without glue.
The pylons themselves are just friction fit in place for now; i still need to build up and paint the 2 AIM-9s for the model, and i wanna keep my options open.
After that: Ejection Seats, Blade Antennae, then done.
Stay tuned for the thrilling conclusion.
-d-