Zoukei-Mura J7W1 Shinden 1/32
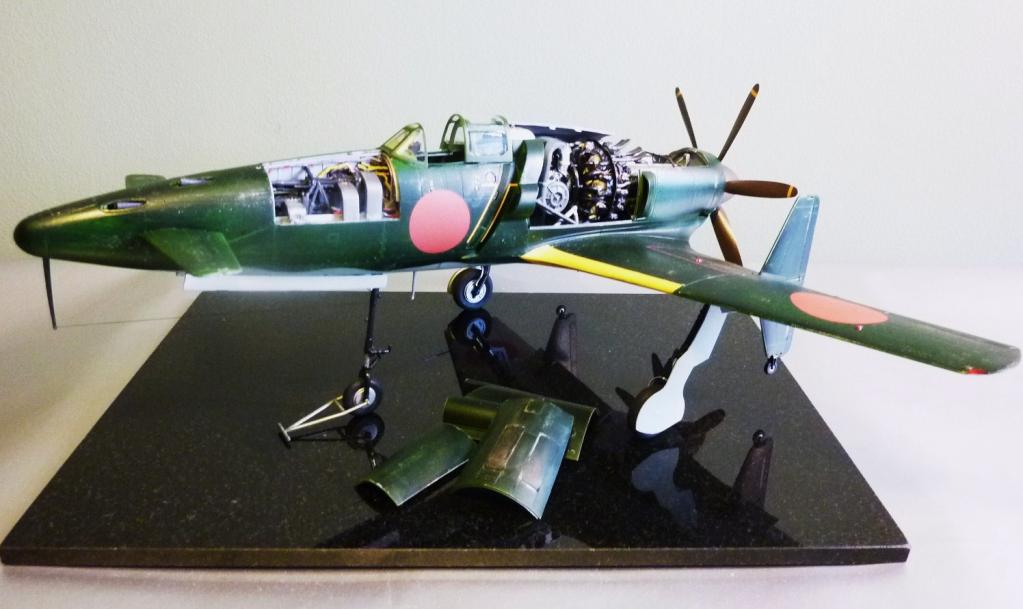
Here is ZM's Shinden.
It's a complex kit. Much of it builds without issues, while other areas require more focus. It builds like a cross between a Tamiya and Trumpeter kit. The complex shapes of the rear fuselage panels in particular are challenging, although they will come right with perserverance.
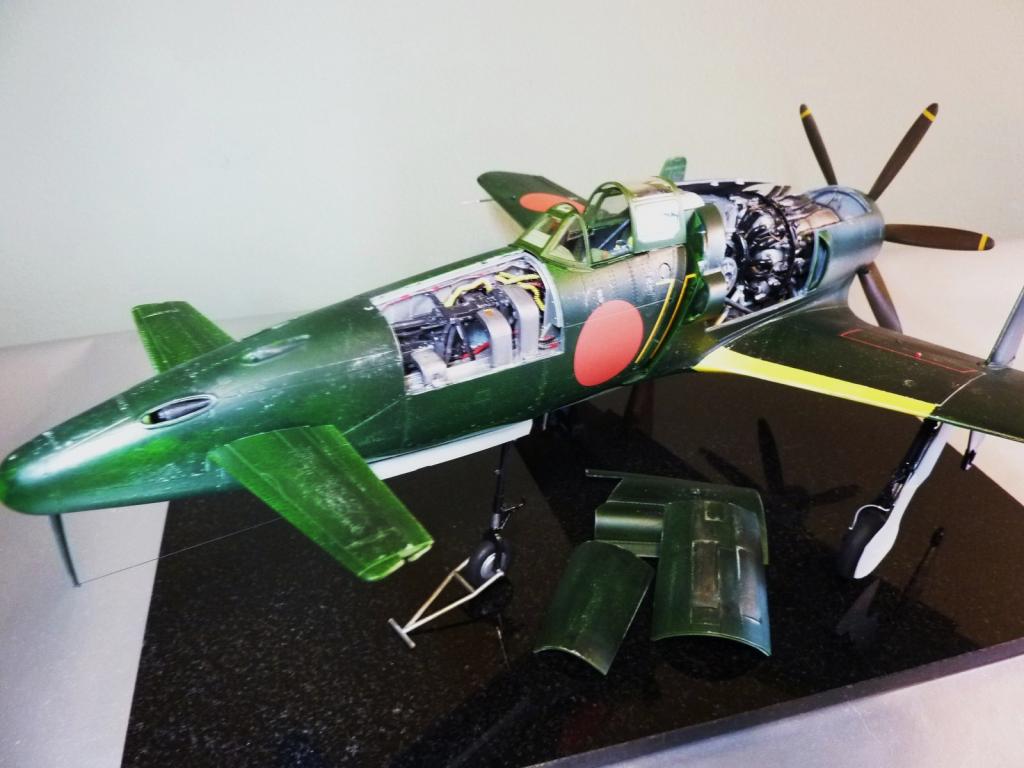
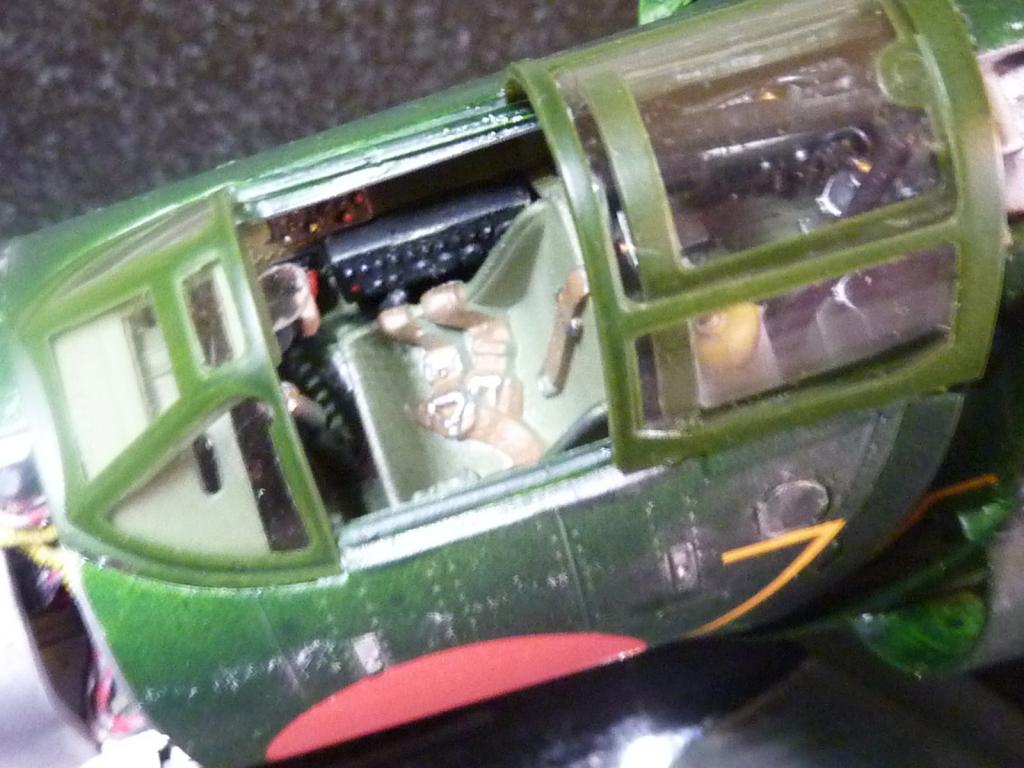
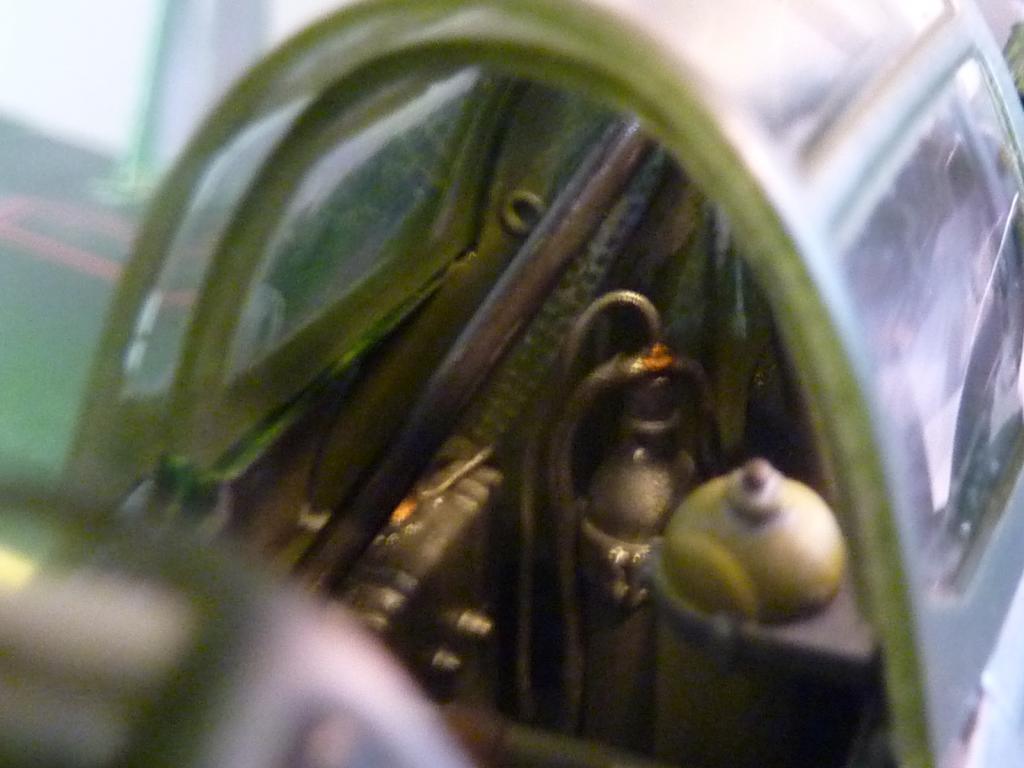
I've added wiring detail to the engine, gun bay, and rear cockpit. The decals are thin, but didn't respond well to decal solutions (I tried three separate products), but eventully settled ok. The narrow edges on the back of the vertical stabilisers I hand painted with its red strip, for example, as there was no chance the decals would adhere.
The engine is a work of art. I think with wiring there must be nearly 100 pieces, and it can definately be considered a model in its own right.
A beautiful design, an interesting and challenging build.


Nice, you built a masterpiece!
Rob,
You did a marvelous job on this model. Your attention to details like the wiring is great. A great looking model of a strange looking airplane. I really like what you have done with this.
You're lucky you didn't try to close anything up, since nothing fits when you do.
Very nice work on all that detail!
Very nice job on the Shinden!
Like Tom Cleaver said; nothing fits when you close it up. I've build this kit too. It was a everything but a nice kit to build! For instance I cut down one of the parts in the gunbay to give the panels a snug fit. I have cut the panels of the cowling ( top part, "spine") because it was to long! The engine didn't fit in the brackets, and when it did I'm sure the panels would not fit. The windshield doesn't fit right and leaves a gap with the panels of the gunbay if the part where the gunsight is not tilted enough. Mine can be found somewhere here on Imodeler and the build here ( in Dutch) http://plakkers-inc.nl/viewtopic.php?f=8&t=2165
Hi Ulrich,
I've had a look at your build log, and I certainly recognise some of the fit issues, but not all. With my build the problems were almost exclusively with the rear panels, and even then not all of them. A great deal of test-fitting, fettling, and still more test-fitting paid off for the most part. I agree, though, that it took a while to get to the level of finish one would wish to achieve.
The engine fit nicely (if snugly) into its bay, and the elongated panels that are the first to be installed to close-up the engine bay were also ok after some work. The wing roots were fine, and the starboard gun bay panel I chose to install simply dropped into place along its recess.
To be honest, I didn't leave off the three panels depicted here because of fit issues (I've had worse), but because I liked al the detail that could be achieved in both engine and gunbays, and wanted them on display.
I still have a little weathering to do on the hinomarus, and when I applied a little heat to the radio 'wire', it over-tensioned and made the main antenna curve back, so will take a few minutes do that over again.
Still, for me, a couple of weeks' work and a reasonable result.
Happy Modelling!
Rob, I'm sure you're more than pleased with the finished model after all your hard and patient work. I think you're right to leave off the panels so as to display the internal detail, it looks very impressive.
Cheers George. Obviously a subject that divides opinion somewhat.
Excellent look with the panels open. That alone adds hours to the build, but it pays off with the quality of display. Interesting topic too. VERY nice!
That's quite nice Rob! I've come close to ordering the 1/48 version. Does anyone have any input regarding those?
Gary, the adverts for the 1/48 appear to promote all the same build features as the 1/32, so expect the integrated internal framing, nice engine and cockpit. Can't comment about price though, as I got the 1/32 kit direct from ZM stand at the nationals last year for £60, which was considerably less than advertised retail value.
One thing to note - the instructions are in the form of a very nice A4 book, but in Japanese with only the occasional English word. Paint colours are Vallejo but you'll have to go by the paint number reference as the colour names are in Japanese. I used White Ensign 'all around IJN grey' for the undersides, and Vallejo Model Air Olive Green with a drop of Burnt Umber added, for the topsides.
Inspiring build of one of my favorite planes.
Rob, here's my Shinden, taken down a different "road" shall we say...
Hi Gary. A cool rendition, and kudos for resolving the build issues with such imagination. I have in fact seen the ZM 1/32 version with the jet conversion in natural metal finish, 'in flight' on a support base, and it too had a futuristic look. Cheers for sharing!