That last headline is a hard act to follow…
Reading that obituary gave me even greater respect for those heroic men who flew these in wartime.
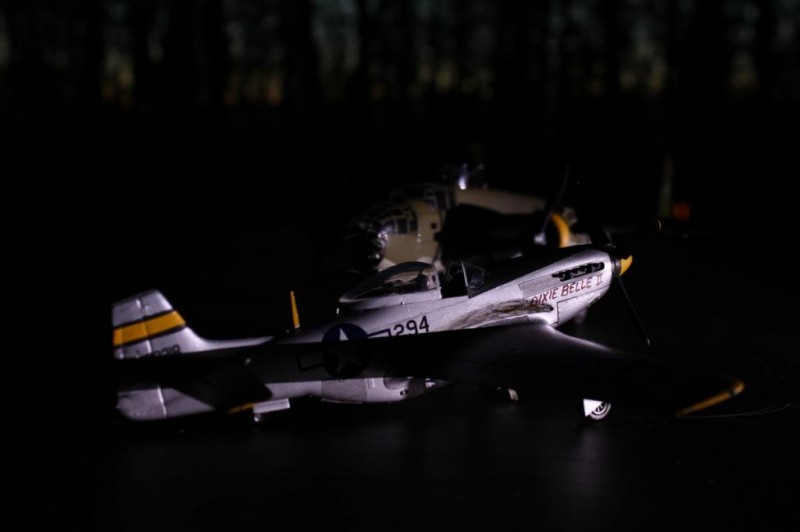
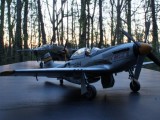
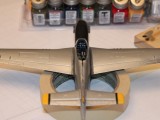
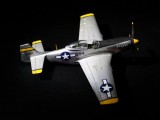
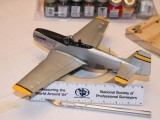
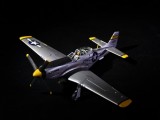
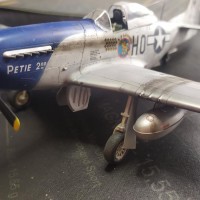
Here is my second model plane in 40 years, a P-51D built from the 1/48 Revell 'Big Beautiful Doll' kit #85-5241. I included to in progress shots too, one trying to show the cockpit, which came out well for me and my little paint brush.
Rather than try to model the complex paint and decal schemed European versions in this kit, I wanted to try to make a replica of a P-51D seen in two old faded photos my dad took on Iwo Jima in 1945. Doing some internet research and using info found on this website too, I arrived at this scheme. The name, "Dixie Belle II" is something I made up and painted by hand. The fuselage numbers were pieced together from left over decals from my B-25 model. I also noticed in the photos there is a a small hole on each side of the plane a little above and in front of the wing. Is it the exhaust? I thought they were the pipes sticking out - anyway those two holes made a lot of stains, on the P-51's I saw in the photos anyway, so I put some holes in and added stains.
Things I am learning doing this include:
- its a great stress reliever
- "Natural metal finish" seems to be a big and deep subject - I barley dipped my toe in it but wanted it to look better than just my plain silver Testors spray paint. So I took a little Model Masters thinned black paint and went over some panels.
- weathering is an art and easy to over do. It is hard to know when enough is enough!
- A big thing to remember for anyone starting or restarting in modelling is this: The single most important tool in your kit is PATIENCE!
On to my next project...I went to the hobby shop on my lunch break today and bought the Revell Pro-Modeller 1:48 scale SB2C-4 Helldiver kit. Oh My...I got in my truck and had to peek in the box...so that's what 'photo-etched parts are! I may be asking questions on this forum as i get into this, I may have bit off more than I can chew with this 'beast'!
Thanks for letting me post and also I'd like to say compliments to all those who post here. Time does not allow me to comment on every post, but they are all great. Really!
Actually, your P-51 is a re-boxing of the Monogram kit. Though a very old molding, it is still one of the best 1/48 P-51Ds out there. Of course, you cannot beat the price. Your P-51 came out very nice. I can see that time has not diminished your skills as a scale modeler and I look forward to seeing your future builds.
The pipes sticking out are the exhausts, those little holes are the oil vent, which, according to my references, should number only one and should be located on the starboard side. An Irishman is not always right, but he is always sure, so it may be possible that I am wrong.
Well...oops! I'm sure you are right Seamus. - I'll tell anybody that notices that it's a bullet hole, no wonder she leaks so bad...
Nice job Ralph,photo-etch is nothing to be scared of.
N.
Well we'll see - some of those pieces are incredibly small.
Right-o Neil! Not to mention photo-etch is the only way to really capture the intricacies of the dive brakes on the Helldiver (or Dauntless for that matter).
Ralph, the sunset photo with the planes looks great! You should get in touch with Bob Mack on this site. He just finished the same Helldiver a few posts back. He could clue you in on and pitfalls or traps in the kit and maybe give some guidance on the photo etch. I plan on doing so as well because I think I'll be starting mine after the D-Day build.
Thanks - I wanted to try photos at night - shadows cover flaws nicely you know. I am a good example. The best pictures of me are taken in pitch darkness, with no flash!
Like it Ralph. Nice scheme too. You don't often see Pacific P-51's modeled.
Thank you George, this gave me a good reason to leave out a lot of stuff!
Looks good to me.
Well done Ralph.
I appreciate the nice remark!
Love the photographs, Ralph.
Thank you - just trying to create a different look -
Nice work, Ralph. It is like riding a bicycle, isn't it? 🙂
One thing (not a criticism) you have made the most common P-51 mistake: the canopy does not slide up into space, it slides along the top of the fuselage. It doesn't look right if you don't know what's what, but it's an easy fix.
I'd say you're ready to move on up to the Tamiya kit.
If you look at the photo of the real P-51 in my post about Jimmy Goodson, you'll see exactly what I meant about the canopy.
Thanks and I knew that, but had a hard time getting the canopy on at all. It's skewed diagonally which you would notice if I too a straight on photo.
that looks great...half the photo-etch you throw away ...cut that heavy stuff [flaps] out with good scissors...the hair clip style [friskars] not the fabric type..wipe down with white vinegar [that etches it]...and etching primer is best but expensive...attach it with tiny dots [pin heads ] of super glue...and stay out of the perforations...bend the end of a tooth pick apply a little spit and touch it to the small parts to pick up
Thank you sir! That is exactly the kind of practical, learnt-by-doing type of advice that makes this (imodeler) such a great resource.
I have been using a toothpick on small parts, wrap a bit if marking tape on it and stick it to the patt to help hold and place them - but these photoetched parts in this kit, some of them, are soo small, like seat belt buckles - gee I ever knew individual parts that small could be manufactured - , 'pick and spit' tip will be just the ticket I think.