Trumpeter 1/16 SU-100, or “How to determine your workbench is level for only 200 dollars”
Originally, this was to be a large, substantial article about the large and substantial 1/16 scale SU-100 assault gun from Trumpeter. Fate intervened and decided instead to teach me the value of having a one-hundred-and-ten-percent level work bench that is firmly attached to the wall and floor. I had just sprayed on what I thought to be the final coat of flat to seal the entire tank and turned my back for all of twenty-three seconds, when the properly sprung suspension system combined with a heretofore unknown slight angle to the workbench. It rolled off the bench gun-first and hit the ground with a noise that can only be described as similar to the one produced when two hundred dollar bills are dipped in liquid nitrogen and are then whacked with a sledgehammer in front of your face.
I had already written the bulk of the article, and I don't really feel like chucking this wall of text into the trash with the shattered remnants of three months of hard work, so here it is.
On with the show.
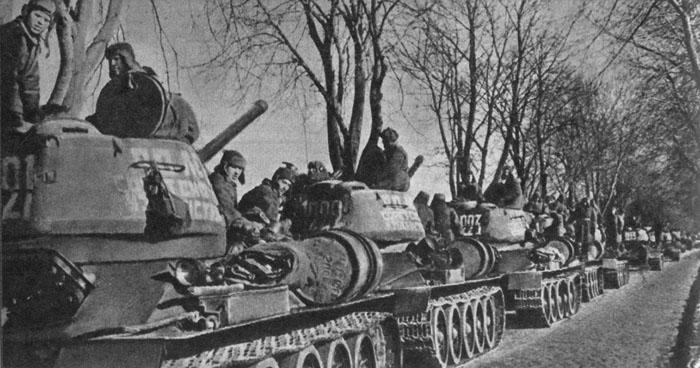
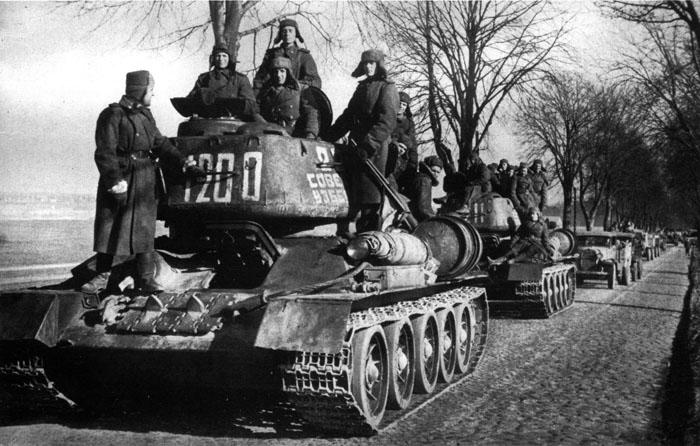
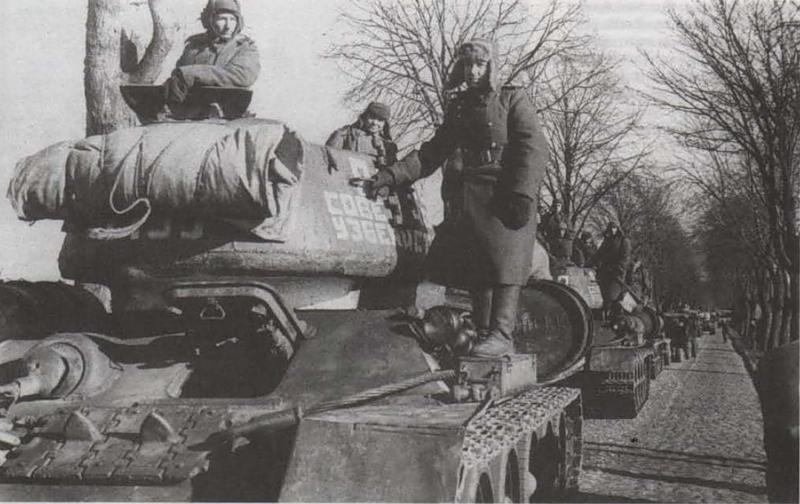
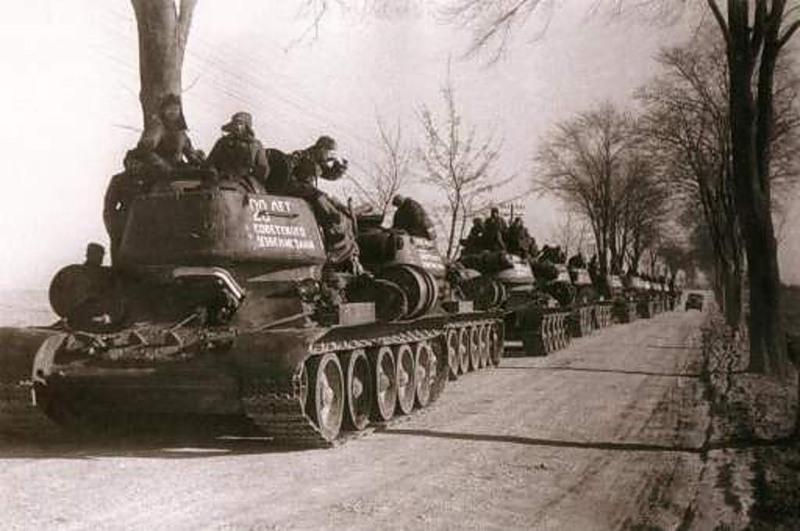
Trumpeter 1/16 SU-100 "20 Years of Soviet Uzbekistan" column, 3rd Guards Tank Army, 2nd Belarus Front, March 1945.
The SU-100 was created as a modification of the SU-85 self-propelled gun, which itself was a casemate-style self-propelled gun built on the chassis of the T-34 medium tank. You'll note that I'm refraining from referring to these vehicles as "tank destroyers." Soviet doctrine differed from American, British and German tank destroyer philosophies. Instead of supplementing infantry attacks, thwarting armored incursions or spearheading assaults, Soviet doctrine treated the SU-100 as self-propelled artillery operating in the direct fire mode.
The SU prefix-- Samokhodnaya Ustanovka-- literally means "Self Propelled Carriage" and was applied to vehicles as diverse as heavy self-propelled mortars, traditional self-propelled artillery and tank destroyers. The SU-85 and SU-100 were typically deployed on heights behind armored thrusts, with the intent of providing supporting fire. As such, machine guns were not mounted in the hull like the German Jagdpanther. Infantry threats were countered by other infantry, like tank-riders. (tankodesantniki) During the Soviet push through Berlin, the deep-penetrating 100mm gun was used to puncture nazi fortifications, despite not being intended for infantry support work.
So, in the process of researching this vehicle, I tracked down the film mentioned in the Wikipedia article: "Na vojne kak na vojne." It's available on some Russian-language Youtube-type sites in Russian and without subtitles, but the film is invaluable reference material as it follows the crew of an SU-100, with extensive shots of the exterior and interior. The film also depicts crew behavior and certain quirks of the vehicle, like the crew sleeping underneath the vehicle during their off hours, the fact that the crew hatches leak when it rains, or the plug and chain used to cover the sight port on the left side of the gun shield. The film is obtainable, but you've got to work very hard to get it.
Like a growing number of people, I've also been bitten by the World of Tanks bug, and the SU-100 is one of the Soviet tank destroyers you can play. Despite the numerous historical inaccuracies allowed by the game (German paper panzers? Sure! World War One camouflage on a M130A1? Why not!) it still engenders a respect for the suite of machines represented in the game. I know, some folks like to grouse about how modeling companies are "pandering" to the World of Tanks crowd, but these people are nattering nabobs of negativism and they, like, really bring me down, man. Each tank has its own distinct play style. You soon get a taste for the limitations of the vehicles when you are repeatedly penetrated, flanked, tracked, set on fire and blown up by other players. So, yes, the 100mm gun can certainly sting other tanks, but unless you're firmly behind a line of heavy tanks, your game is going to be short and painful. Once I learned how to play it, I found that the SU-100 was a supremely efficient tank killer, quick and able to exploit holes in the line and tear the lightly-armored artillery to shreds. So, naturally when I saw this beast on sale, I decided I could live with eating ramen for a few weeks and I took the plunge again. A couple of years ago, I got bitten by the crazy bug and built the 1/16th T-34/85 from Trumpeter. As is obvious, I've been bitten again. Big is an understatement. At this scale, you are not building a mere model, but you are constructing a tank. The entire tank, from the brake straps to the latches on the crew hatches is included. It's the real thing, hit with a shrink ray. Soviet factories were able to churn out 1,175 of these s*****s in 1945, which boils down to around 98 a month. Take my word for it-- don't act like a Shock Worker! Go slow and enjoy every aspect of the build.
Aside from the staggering number of parts, construction is relatively easy. There just aren't that many tiny parts and subassemblies that need to be fabricated between the beats of your heart with a microscope, because it's 1/16th scale. There are, however, a lot of repetitious steps and seam cleanup. The instructions are generally spot-on, and if you follow them there won't be any surprises. I deviated from the instructions to assist in painting (a part left off here and there for placement later) as well as to not glue the rear deck, front superstructure and gun assembly in place. This is to facilitate their easy removal for inspection. The unfortunate side effect of this is that to have the rear deck removable, you can't fill this awful gap with putty. It's not that big of a deal if you're going to have the deck removable because the fit back there is tight enough to begin with, but if you're going to affix it in place, that should be a prime concern. Then again, if you're going to affix the rear deck in place, you might as well skip out on detailing anything in the engine compartment, because you won't see it.
CONSTRUCTION
You begin by assembling the suspension system. This is comprised of a shaft assembly that sits inside a spring. Once this is assembled, paint it black. I don't care what Trumpeter says, paint these bits black, because they're going to be sprayed green later on, and you want to make sure they have proper color depth to them. There is a slight problem with the foremost suspension arms: if you install them the way trumpeter wants you to install them, the sit too "low" and smack right into the exterior bump-stops. This is caused by the arms having their square locating plugs molded wrong. The fix is easy but slightly nerve wracking: take a pair of toothless pliers and firmly-- but not so firm as you crush the locating plug-- grip the locating plug. Then gently (and I mean GENTLY) turn the arm itself 45 degrees. The locating plug should now be rotated 45 degrees from where it was. Torsional stress applied to styrene will cause structural fatigue, so to remedy this, take tenax or pro-weld and brush it on to your relocated locating plug. That should melt all of the cracks into a solid mass. Now you can mount the arm into the front suspension point-- and yes, it will hang pretty low, but it'll have the right amount of play to it. I performed this procedure three months ago, and the arms haven't cracked under the strain yet, so I'm going to assume that this is a good fix.
The engine compartment was assembled and detailed without much drama. Instead of mounting the engine supports to the engine, I mounted them to the hull first. Again, Trumpeter's paint information is bizarre-- the photos I have of the engine compartment show it painted in a medium gray, so I grabbed some Tamiya neutral gray spray paint and used that. The fuel tanks are not to be painted gray, they are painted a dull red; the dull red primer is ubiquitous in interior spaces where the crew isn't doing any fighting, so things like the backside of engine hatches are painted this red color. At this point, you can decide whether or not you want to add wiring to the engine, because that's the only detailing you're going to see if you cement the rear deck to the hull and leave the hatch unglued. Since I'm making it so the rear hull can be pulled off, I didn't add it. Also because I used the last bit of my wire supply to wire my hi-fi together, but I digress...
The fighting compartment also suffers from Trumpeter's goofy painting directions: everything I've seen and read suggests that the floor was painted the same medium / neutral gray color, as were a lot of the fixtures and equipment. Hence, more tamiya neutral gray. Yes, the forward ammunition rack is a lot of thin, fiddly plastic and photo-etch, but it's quite sturdy when complete. If you try to fit the High Explosive rounds (the ones with the flat tips) into the rack, the holes at the end are a little too small. If you want to fit them there, widen the holes a bit. Or don't fit them at all, because once you glue the ammunition rack doors to the back of the rack, you can't see them. Don't fit the diver's seat until the very end of the bottom hull assembly to make it easier to weather the fighting compartment and to properly position the ammunition rack. The knobs of the levers inside the fighting compartment are black. The gas bottles in the front of the fighting compartment are black with brass necks and silver knobs. The lines leading from the gas bottles are light sky blue (if you chose to place them, I did not). The engine instruments are gray with with black dials.
Once you're done with the bottom hull assembly, you can go nuts with the weathering-- I keep going back to my trusted sludge mixture of finely ground pastels suspended in water. Once this mess dries, it looks quite convincing to dried mud and other sorts of sludge. White paint picks up dirt especially well, so in order to full coat every surface with that interesting mixture of crud, I used a wide, soft-bristle brush to slather all of the surfaces with a diluted mixture of black and gray pastels suspended in water, with two drops of black acrylic paint in the mix as well. This was done to break up the surface tension and prevent any "beading" of the water on the surfaces. I then took a paint-mixing syringe and squirted more of this slime over all of the surfaces until the lower hull was like a tub full of dingy bathwater. I sloshed this around to coat all of the surfaces, then started adding my dirt and dust pastels to the mixture. Eventually, everything is coated in a thin film of all manner of sludge. The now clean and semi-damp wide bristle brush was used to push some of this mess away from areas where they would be worn clean by the crew. The same process was repeated for the top superstructure, but with less emphasis on dust and dirt. Smoke rises, after all, and the areas around the ventilation fans should receive an appropriate amount of "smokey" weathering.
Something you will note from "Na Vojne Kak Na Vojne" is that the interior of the SU-100 is not watertight. Rain leaks in through the vents, through the access doors and through the pistol ports. Weather all of these appropriately.
After you're done with the superstructure, you can turn your attention to the gun assembly. This assembles without much wailing and gnashing of teeth-- if you want to keep the gun moveable, don't follow the directions and don't cement everything into place. Keep in mind, since the gun is indeed a perfect replica of the real thing, the gears all do interlock perfectly-- which, if they're glued into place, means the gears won't move and the gun will stay put. Shave some teeth off one of the gears if you're possessed to do so. And if you get tired of the droopy-dog look of the gun always pointing downwards because you've shaved off too much of the teeth, you can always cement it into a locked position (cough). There is a canvas sheath that runs over the control arm-- this should be painted a brown khaki color, not the same green color as the gun. The muzzle of the gun is a separate part, with "rifling" added to the inside, however this bears little resemblance to reality-- the rifling is too "soft," for example-- the lands on rifling should be razor sharp. Even sixty-year-old Mosin Nagant rifles have sharper lands than this. That's easily fixed with an xacto blade. There's something else amiss, which can't be easily fixed: the muzzle is off center. You can't just sand the outside down so that it'll match the circumference of the inner hole, because the outer circumference is "true" to the rest of the barrel. Frustrating, but I simply pressed the entire barrel into the gun assembly, so if I ever get the urge, I can easily swap it out with a turned metal barrel. Not that anyone would notice it unless it was pointed it out, I wager.
The D-10 100mm gun fitted to the SU-100 was taken directly from exisiting towed anti-tank gun stocks, and as such the portion of the gun inside the hull was not repainted in white to match the rest of the interior. It and the backside of mantlet are painted in the same color.
The gun and shield are simply affixed to the hull with a series of bolts. Small steel fillets were sandwiched between the glacis plate and the mantlet and tack-welded in place to further secure the joint. The entire gun assembly will sit quite securely in place without any glue, so you can pull the entire gun off if you want. The mantlet as presented by Trumpeter is... ok, but cast metal is much, much rougher than what Trumpeter gives you. Furthermore, there are prominent torch marks from cutting on the side of the mantlet, so attack these areas with the back of an xacto blade to score them up. While you've got that xacto blade, start shaving the mantlet down around the compound curve areas to better replicate areas where workers ground these places down after casting. Rub the whole mantlet down with some rough sandpaper and gently score the face of the gun port with the xacto blade to represent the machining marks. Please also note that there is a plug attached to a chain, secured to the front lifting eyelet on the mantlet. This plug is inserted into the gunsight port (which should also be chamfered down with your blade) when the gun is not in use.
The gunsight assembly is gloss black with a flat black rubber eyepeice. The periscopes are all brown with black padding around the handles.
You can spend hours cleaning and prettying up the ammunition, but know that it'll probably be crammed behind and below other rounds and equipment, and if you glue the top of the vehicle to the hull, you'll never see any of this detail ever again. I selected four rounds-- Armor Peircing, Ballistic Capped AP, High Explosive and one sacrificial round I planned to make a blank case out of. These are rounds that I spent a fair amount of time on, cleaning them up and enhancing detail on them-- exemplars, if you will.
The exterior of the vehicle is next, and again, there's not much to report here. You can leave the front mudflaps on or off if you wish. If you mount them, please note their "solid" appearance and the addition of... a hinge! A hinge, for a solid peice? This isn't right. This is another easy fix with a pencil and the back of an xacto blade-- just draw a line from the joint where the hinge is down to the base of the flap. Then score it out. Do the same with the joint, and you've got a mudflap. You can continue on, like I did, and remove the front portion of the mudflap entirely, just remember to remove half of the hinge too.
Those ports secured by two bolts on the outer sides of the top engine deck are covers for dipsticks. Weather those areas appropriately.
Wooden crates are sometimes carried on the engine deck, but never into battle. There should be a lot of dirt and grime on the rear deck, because that is where the majority of tank riders were stationed.
Now, since we're working on the outside of the vehicle, a few words about...
WELDING
The welding process used in the production of Soviet armor was a process called Submerged Arc Welding, which is an automatic welding process, leaving much of the actual welding to machines. Yevgeniy Oskarovich Paton was responsible for developing this process in the Soviet Union. You may be more familiar with soldering than welding, and the process is more-or-less similar-- two metal pieces are joined together by the use of a heated filler metal and a substance called flux that aids in the joining. In simple electric arc (stick) welding, a flux-coated rod of filler metal has a positive current run through it, while the piece being welded is attached to the ground. German shops in World War II utilized this method; while visually attractive, this process is time consuming. The Submerged Arc Welding process instead involves simply laying down the filler metal, covering the filler with flux and then applying current to the filler. This process allows large pieces to be quickly and securely joined, at the cost of some truly sloppy-looking welds. These welds aren't being produced for aesthetic value, but for their strength. My welding instructor called them "gorilla welds"; ugly but strong. With all of this in mind, I decided to uglify the welds in the kit with bondo.
Ok, back to steel again. Unless the element is being cast as one part, tanks were assembled from pieces made from rolled homogenous armor. It is, like it sounds, a piece of rolled steel that is cut to shape and then fitted together like a giant model kit. However, the way this is depicted in model kits is typically a smooth, flat surface. Unless they are subjected to machining after cutting, the rough cuts are left in place. In some cases, these cuts are indeed quite rough-- oxyfuel cutting, for example, can produce extremely rough edges. I used tattoo gun needles to score the exposed edges of of the steel plates to impart a rougher texture.
When steel comes fresh from the rolling plant, it's covered in a layer of crud called mill scale. This is essentially a scab over the surface of the steel plate, and is typically removed from the plate before further processing. Pickling the steel by submerging it in an acid bath removes the scale and imparts a dull gray finish with a subtle metallic sheen. The closest way I've found to duplicate this on plastic is with Testors "Gunmetal" metalizer. This paint is not as fragile as other metalizers and even on smooth, shiny surfaces, it doesn't buff out like other metalizers. A wash with reddish brown watercolors can impart a subtle rusty finish. Dullcoat does not harm this finish, so one coat of that is used as a sealer.
Like I said, not a lot of drama for the exterior assembly.
MARKINGS
Aside from a few notable examples, like vehicles marked for fighting in Berlin or vehicles completely whitewashed, you can have your SU-100 in any color as long as it's olive green. The amount of wear and tear that these vehicles received, even if they were mostly confined to rear areas, resulted in the paints weathering heavily. This vehicle represents one attached to the "20 Years of Soviet Uzbekistan" tank column, which itself was attached to the 3rd Guards Tank Army, operating on the second Belorussian front in March of 1945. Maj. Gen. I. A. Vovchenko writes in his memoirs (as well as google translate can assist, that is):
"... In the Smolensk forest our unit received new tanks. On the turret each of them was the inscription "20 Years of Uzbekistan" and the coat of arms of the Uzbek SSR. I came to the place where the tankers took the new vehicles, and saw a commander of the health of the battalion Major Ayrametova. Mayor hands groped letters and arms, I understood his excitement. After this big tank column was built with money collected by workers of Uzbekistan. The arrival of the machines quickly learned all division, and soon ran here two Uzbek tankman ... "
I used a wide variety of green and olive green paints through my airbrush, keeping the darker shades to the undersides and shadowed areas, while the lighter shades were applied to top surfaces and highlights. I really don't remember the exact sequence of paints; I truly used this as a stash-clearing exercise to use up all of my remaining paints.
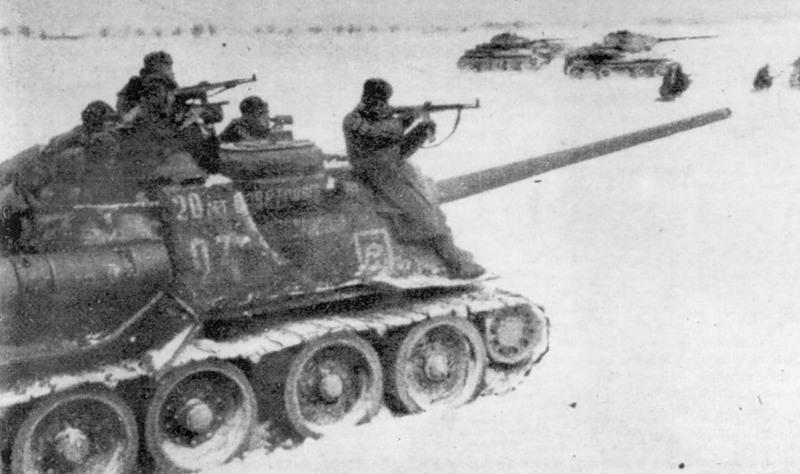
A word of warning: the decals are typical Trumpeter. People who have built Trumpeter's models are well aware of the gibberish Trumpeter includes on the decal sheet- "TYRE POESSORE MICHWAY 290 kPq CROSS COUNTRY" comes to mind. It's a lot worse in this case, because the main, big decal that's plastered on the side of the superstructure is "20 лст Соввтского Узбеккстана" which translates to "20 LST Sovvetskogo Uzbekkstana." It means nothing. It should be "20 лет Советского Узбекистана," meaning "20 Years Of Soviet Uzbekistan." I can sort of guess the reason for the screw-up: these were hand-painted slogans and the only two images of this vehicle I could find are one grainy photo and one color profile, where the writing isn't very distinct. Still, it's distinct enough to see that there IS writing on the right side, which is omitted in the instructions but included on the decal sheet. Go figure. Not that it matters anyway, because it's printed wrong in both instances. No big deal-- this IS a 1/16th scale model and this is a PERFECT time to practice your brushwork with some 5/0 brushes. So that's what I did-- you can experiment with oils or pastel-based whitewash (it's actual whitewash, to be perfectly honest-- finely ground pigment suspended in liquid? Whitewash.) but I felt the titanium white oil paint better replicated the brush strokes of the real inscriptions. I gently traced out the letters on the hull with an HB artist's pencil, then painted them in with my 5/0 brush. Slowly, I must stress-- relax, you've got a lot of working time before the paint fully dries. I didn't make the letters as vivid as possible due to my photographic reference showing me a suitably tattered finish. All's well, once the paint fully dries, it fades a bit. I left the model to sit for a week. Normally oil paint takes forever to dry, but if it's applied thinly enough, it's durable enough to handle gently after a week. I began the extremely dirty process of weathering the vehicle once I determined the pigments and dusts I planned to use wouldn't stick to the oil paint. I gave all of the edges a generous rub-down with graphite from a 6B pencil, blending the highlights in with my fingertips-- probably not the best thing for my health, but it looks cool! I gave extra graphite rubbing to my uglified welds-- those always weather faster and brighter than their surrounding metal. The entire model was generously slopped-over with more hand-ground chalk pastels to replicate how dust and grime work their ways into every nook and cranny.
The only photo of this vehicle show it in heavy snow; the sad fact of making "snow" for AFVs is that's incredibly messy-- at least the way I do it. I really don't want to have all manner of white, flakey crud pervading my workspace for the forseeable future, so I'm taking a little artistic license. Since I do have a number of photographs of vehicles from this particular tank column operating in snow-free conditions-- and I have no information suggesting that this vehicle was destroyed-- I'm omitting the adding of "snow." Consider that it's operating at some time during mid-to-late March, 1945 in Belarus. I did, however, apply some whitewash in thin coats in areas where it seems logical that some of this winter camouflage would have remained.
The tracks were snapped together, with an extra three pairs of links per run than what the instructions want you to have. These weren't live track links with return rollers, they were simple cast steel that sagged on top of the road wheels, so the "tight" way the instructions want you to assemble them is unrealistic. The tracks were sprayed with Testors gunmetal, then soaked in the aforementioned sludge wash, then sprayed with dullcoat. They were then mounted on the tank. After which, I engaged in the dignified and classy behavior of running the tank back and forth on the floor and over books to "test" the workable suspension and tracks-- making the "brrmmm brrmmm kapow blammo" sound effects is an essential step and no AFV model can be considered complete without it. It's the law. (ok, I fitted the tracks and drove the tank around before I weathered it, but I still would have done it afterwards, had it survived...)
Now back to World of Tanks. If only there was a 1/16th scale IS-2...
(Actually, I did go play a few matches of WoT right after this atrocity happened, and I got killed in every single match. Today just ain't my day.)
Side profile of the vehicle in question.
"Tank column "20 Years of Soviet Uzbekistan" on the march. Front tank is likely to have a room - in 1221, the second - in 1222, the third, apparently - 1223 2nd Belorussian Front, the 3rd Guards. mk. March 1, 1945 (RGAKFD)"
"Tank column "20 Years of Soviet Uzbekistan" on the march. On the tower large white numbers 1200 2nd Belorussian Front, the 3rd Guards. mk. March 1, 1945 (RGAKFD)"
T 34-85 tank column "20 Years of Soviet Uzbekistan" on the march. 2nd Belorussian Front, the 3rd Guards. mk. March 1, 1945 (RGAKFD)
T 34-85 tank column "20 Years of Soviet Uzbekistan" on the march. 2nd Belorussian Front, the 3rd Guards. mk. March 1, 1945 (RGAKFD)
[SU-100] from a tank column "20 Years of Soviet Uzbekistan" in battle. You can just read the words "20 years ... ..." and then two words illegible. In the background we see two T 34-85
And then THE HORROR!
REFERENCES
http://tankfront.ru/ussr/colums/20_let_sovetskogo_uzbekistana.html
http://tankfront.ru/ussr/tk/gvtk03.html
http://en.wikipedia.org/wiki/Submerged_arc_welding
http://tfilm.tv/7971-na-voyne-kak-na-voyne.html
http://tankarchives.blogspot.com/2013/03/on-german-welding.html
http://www.armchairgeneral.com/rkkaww2/galleries/SP_guns/SU_100_int.htm
http://www.cgsc.edu/CARL/nafziger/945RAAE.pdf
http://www.tanks-encyclopedia.com/ww2/soviet/soviet_SU-100.php

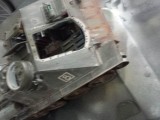
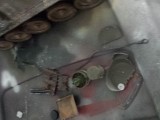
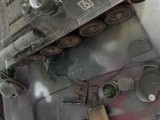
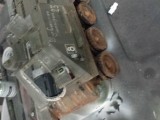
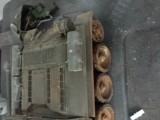
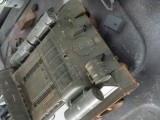
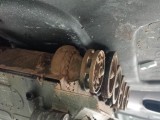
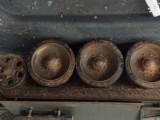
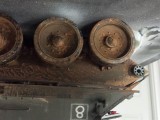
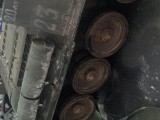
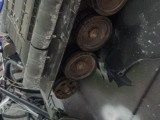
Not much to say but Ouch ! that had to hurt ,is the tank beyond repair ?
N.
I can only echo what Neil said, Ouch.
That suspension was so live it rolled off the bench? Just how much of a slope was there? Holy Cow. At any rate, I'm sure if you built that monster, you can fix it. Actually, you must, because after such an entertaining write-up, we deserve to see this creation, I think. After all, it's 1/16 scale, those are some big pieces, right?
If it's any consolation, I kid you not, last night I had a half hour and decided to put a coat of paint on my WIP $60.00 resin Ki-60 Japanese fighter. Ran out of paint, went to put it down on the bench, but something somewhere decided to let it fall out of my hand and crash-land on the cement floor. I feel your pain (somewhat).
Isn't it always the way accidents happen when we have a little bit of free time?
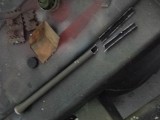
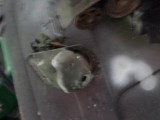
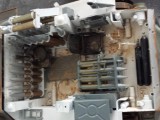
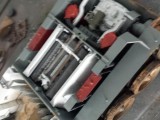
You might not be able to see it because of the poor quality cellphone photos, but when the gun barrel impacted the floor, it split apart and shattered. The impact drove what was left of the barrel back into the mantlet where the force tore off the mounting lugs for the shield. During this maneuver, the weight shifted to the left side (driver's side) of the tank, causing the tank to topple and crush the left-front fender, ripping off the left front idler. The front superstructure became loose at this point, and its mobility caused the interior fittings of the fighting compartment to come loose. The tank finally came to a rest on its back and damaged the rear smoke canisters. Well, I say "damaged"-- they're off in the Phantom Zone for all I know. That's as near as I can figure, anyway.
A fair amount of the interior parts are either damaged or missing, and I don't think that I could restore it to anything that would bear close inspection. Or even a passing glance, really, because gigantic models like this really grab you by the lapels and force you to give them a close look. We talk of models that are "three footers"--- well, when they're this big the distance at which such flaws would be overlooked is so great that you might as well not display the model at all.
Oh well, a poignant reminder that while it might look like steel, it ain't.
Instead of models for the next couple of months, I think I'm going to invest in my workspace. If nothing else, when I'm done I'll have work benches that are FLAT!
Wes, it's repetitive but ouch, on so many different levels.
Could you take the remnants and turn it into a diorama of a knocked out SU-100? To much really beautiful work to not do something with it.
I certainly hope you can rescue this magnificent undertaking and make something of it. Seems a shame to just toss it. You had the talent(s) to bring it this far, surely you can repair what damage was sustained and show us the fruits of your labors. At least relegate it to the shelf of doom until you can bring yourself to have a second look...I know we'd like one. Good luck, sir.
Like the others have said, I can't really believe you're going to bin it.
that is a sad accident...i'm a retired ironworker and have never heard of submerged arc welding...close principal to cad welding but with an electric melt instead of chemical...put it in a battle diorama...of course it would have to be big as a tennis court to be in scale