Special Hobby 1/32 Tempest V (Hi-Tech)
When Sydney Camm first designed what became the Typhoon in the late 1930s, not that much was known about high speed flight and heavy weaponry, with the result that the Typhoon's wing turned out to be too thick. The result was that Camm began working on the P.1012, known as the Typhoon II, which would feature a thinner wing. In March 1940, it was decided to adopt a NACA “laminar flow” airfoil with a maximum thickness-to-chord ratio of 14.5% at the root, 10% at the tip. The wingspan was originally greater than that of the Typhoon but was clipped to 41 feet, two feet shorter than the Typhoon, with an elliptical wing shape to provide room for 200 r.p.g. for each of the four 20mm cannon the airplane would carry. The new design was finalized by October 1941; the Air Ministry issued specification F.10/41, been written to fit the aircraft. In February 1942 the name became officially Tempest.
The first Tempest prototype flew on September 2, 1942. Initially, it was not as maneuverable as expected, but when the ailerons were modified with spring-loaded trim tabs, maneuverability was outstanding. In tests with Allied and captured enemy types, it outperformed the Mustang and Spitfire below 20,000 feet and only the Fw-190a could out-roll it. Below 22,000 feet, it was the fastest Allied fighter of the war, capable of 376 mph at 1,000 feet, with a top speed of 435 mph at 20,000 feet. Engine problems led to cancellation of other versions and finally, on June 21 1943 the first Tempest V, powered by the 2,235 h.p. Sabre IIA series engine, took flight. The first 100 “Series I” aircraft had long-barreled 20mm cannon that extended beyond the leading edge of the wing; all subsequent “Series II” aircraft used short-barreled weapons that did not. The Ejxxx and subsequent Series II aircraft used the Sabre IIB engine providing 2,400 h.p. Interestingly, during the war the Tempest never used the gyroscopic gunsight used by the Spitfire and Mustang.
The Tempest entered service in April 1944 with 3 and 486 Squadrons with 56 Squadron attached in May as 150 Wing, led by Wing commander Roland Beamont, who had taken the first Typhoon unit into combat and had been involved over the previous year in testing and development of the Tempest as Hawkers.
The Tempest first saw combat on July 8, 1944 over Normandy, where Beamont opened the score with two of the three Bf-109s shot down that day. Soon after, the Germans launched V-1 “buzz bomb” attacks against London and Southern England, and the Tempest as the fastest low-medium altitude fighter was held back to defend against this weapon. The Tempests were responsible for 636 of 1,846 V-1s destroyed by the AF by the time the V-1 launch sites were overrun in September. Beamont himself shot down 32 of the pilotless bombs.
3, 274, 80, 56 and 486 (RNZAF) Squadrons moved to the Continent on September 21, 1944, replacing the Mustang III squadrons in 122 Wing. Soon based at Volkel in Holland, the Tempests were used for “armed reconnaissance,” - low level attack, strafing trains and other transport - as well as air superiority, taking on the Luftwaffe frontline fighter units. In February 1945, 222 and 33 Squadrons of 135 Wing converted to the Tempest and were joined by 274 Squadron.
On 2 October 1944. Beamont scored his ninth and final victory of the war when he shot down a Fw 190 near Nijmegen. Attacking a heavily defended troop-train near Bocholt on 12 October during his 492nd operational mission, Beamont was shot down and captured. Confined first at Stalag-III at Sagan in Lower Silesia, then to Stalag III-A at Luckenwalde, Brandenburg, he remained a POW until the end of the war in Europe.
The Tempests went on to become the best British low-medium altitude air superiority fighter of the war over the remaining months of combat, though losses were heavy. 52 German fighters were shot down during December 1944, with 89 trains destroyed, for the loss of 20 Tempests. Following the Operation Bodenplatte of 1 January 1945, 122 Wing bore the brunt of low to medium altitude fighter operations for the 2TAF Tactical Air Force, with Spitfire XIVs of 125 and 126 Wings often providing medium to high altitude cover for the Tempests. The Wing lost 47 pilots in January, 1945.
Throughout the period from January to March, 1945, Tempests flew “rat scrambles,” particularly over the Me-262 and Ar-234 base at Rheine-Hopsten, to catch jets that were most vulnerable during take-off and landing. Luftwaffe pilot Hubert Lange said, "The Messerschmitt Me-262's most dangerous opponent was the British Hawker Tempest — extremely fast at low altitudes, highly-maneuverable and heavily-armed." After seven Tempests were lost to flak at Rheine-Hopsten in a single week, the "Rat Scramble" was discontinued.
In air-to-air combat, the Tempest units shot down 239 German aircraft between November 1944 and the end of the war, achieving an estimated air combat success ratio of 7:1 while accomplishing a 6:1 ratio against single seat enemy fighters.
Kits of the Tempest V have been thin on the ground. Matchbox and Heller produced 1/72 kits back in the early 1970s, with the Matchbox kit convertible to a Tempest II, while AMT released a 1/48 Tempest in around 1976 that needed a lot of work to become a good model. In 1998, Eduard released a 1/48 Tempest V, which also had a lot of mistakes but was the best kit of this airplane available. Pacific Coast Models' 1/32 kit was the first time the Tempest has been done in this scale.
Special Hobby announced at about the same time the PCM kit came out that they were going the Tempest in both the Mk.V and later Mk.II versions. The kit is composed of 120 injection-molded plastic parts, with 16 resin parts in the “hi-tech” version (kit 32053 is the same kit without the resin) and 16 photo-etch parts that provide cockpit detail and seat belts. The kit benefits from beautifully-petite surface detailing and very detailed cockpit and gear wells. Decals are provided for five alternatives.
Despite the great detail, this is a limited-run kit and a modeler needs to keep that in mind in order to have a good result. Despite the real advance in part quality and overall detail, which is very impressive, this is still a limited-run kit and must be treated as such. That means test-fitting three times before gluing once. Tolerances on the kit are close, and this means you must be certain you have gotten rid of all sprue nubs when cutting parts off the sprue trees. It is absolutely essential that the mating surfaces on the fuselage and the wing sub-assemblies are perfectly smooth in order to get these two major sub-assemblies together correctly.
I also found it was a good idea to attach the separate nose parts to their respective fuselage parts prior to further assembly, to insure getting the mating surfaces for the wing-to-fuselage area perfectly aligned and smooth. I also suggest sanding down the mating surface of each upper wing just a bit, because the overall fit is very tight and a small bit of “wiggle room” is very helpful in getting the sub-assemblies to come together.
Once the fuselage parts were glued together, I proceeded to assemble the wing. This is mostly involved in assembling the detail in the wheel wells. Once that was done, assembly of the wing sub-assembly was not difficult, but you do need to take care in aligning the inner leading edge parts that fill in the areas where the radiator intakes are on the Tempest II. The more care you take in doing this, the less you are likely to need any seam filler, with the concomitant loss of surface detail when you sand the area down smooth.
I then proceeded to the cockpit. The resin seat is a real improvement over the plastic seat, but the plastic seat can be made to look good with a little effort, if you have the (cheaper) kit without the “hi-tech” parts. The painting instructions are very good and should be followed. I ended up using a set of Eduard seat belts, which look better (to me) than the photoetch parts in the kit, though it is not that much effort to make them look good if you plan to stick to what's in the kit. The radiator area makes up into a detailed assembly. Again, the painting instructions should be followed.
Once I had the fuselage together and fully set up, it was time to bring the two sub-assemblies together. There was some industrial-strength pushing and shoving to get the wing into position with the fuselage, but once things clicked into position there was no need for any filler. In fact, I only used a small bit of filler along the fuselage centerline in the entire process.
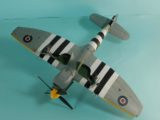
I had decided to do the famous Tempest V Series I flown by Wing Commander Roland Beamont at the outset of the Tempest's combat career.
First I applied flat black along all panel lines, and painted the area of the D-Day stripes black. I then masked the black stripes and painted the white areas. While many D-day markings were roughly applied, Hawkers painted Beamont's airplane for him at the factory, so these should be neat as a pin. I then painted the sky fuselage band and masked it. I used Tamiya RAF Ocean Grey, Dark Green and Sea Grey Medium, for the camo, applied freehand with my airbrush.
Special Hobby decals are nice and accurate, but they are very thin, and if not handled carefully will fold up like a cheap suit at the first opportunity when you slide them off the backing sheet. I strongly suggest that you give these decals a coat of Micro-Scale Liquid Decal Film. This gives them sufficient thickness that you get away from losing them to folding, while remaining thin enough that they will settle into the nice surface detail under a few applications of Solvaset. The kit provides full stenciling as well as national insignia and personal markings for each option.
I gave the model a coat of Micro Flat clear coat, which dries with a slight sheen, which is right for the finish applied to RAF aircraft. I then attached the landing gear, the prop, and the canopy.
If you like the Tempest, the Special Hobby kit is for you. They would have a real winner if they scaled this beautiful kit down to 1/48. This is the best Tempest kit in any scale. Take your time with assembly and you will have a winner.
Thanks to Salvador Sanchez for the review kit.
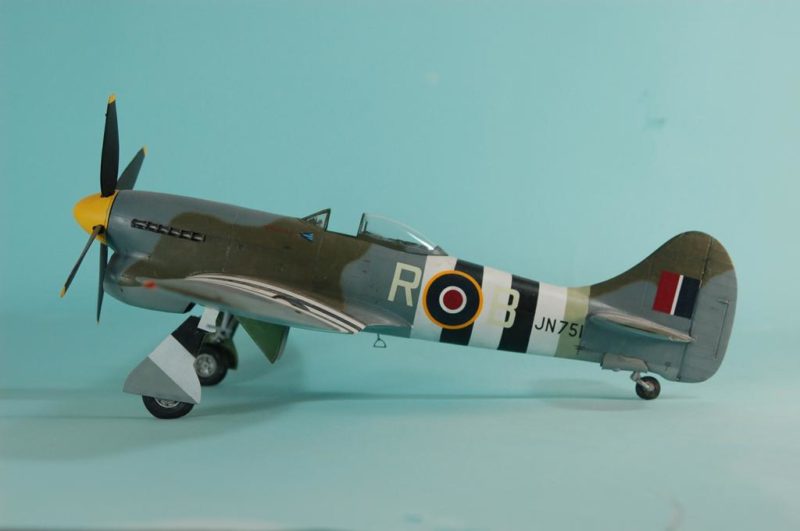
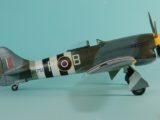
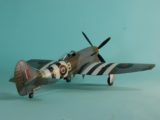
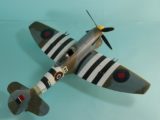
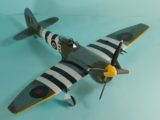
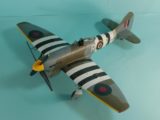
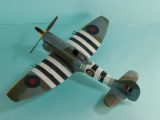
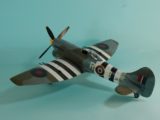
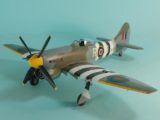


Nicely finished, Tom...I was wonderin' where you'd gotten to. Couple questions: Didn't this "hi-tech" kit come with any under wing stores? And just how big IS this kit - i.e. wingspan?
It does come with underwing stores, but Beamont's airplane was never photographed carrying any.
This one is another home run ! You knocked it out of the park !
Great article too. Well written.
Tom, lovely Tempest! I like it better clean, anyhow. Been a fan ever since I read Clostermans The Big Show.
My favourite scheme, of a very sexy aeroplane. Just hope they do it in 1/48. Great job as always.
Very decent build Tom, the Tempest always looks fine and somewhat aggressive. This build captures these traits so well.
Fantastic result, must be a giant in your shelf!
It is indeed no small model.
Cracking build of my favorite aircraft and an interesting article too. Nice one Tom.
Somethings improve with age...another lovely Brit kit done right.
Two thumbs up.
Another nice and clean build Tom. Love the Tempest and Typhoon - very few aircraft seem as imposing sitting on the ground.
Very nice build Tom & a most informative read as well. Thanks for posting.
What a great looking aircraft!