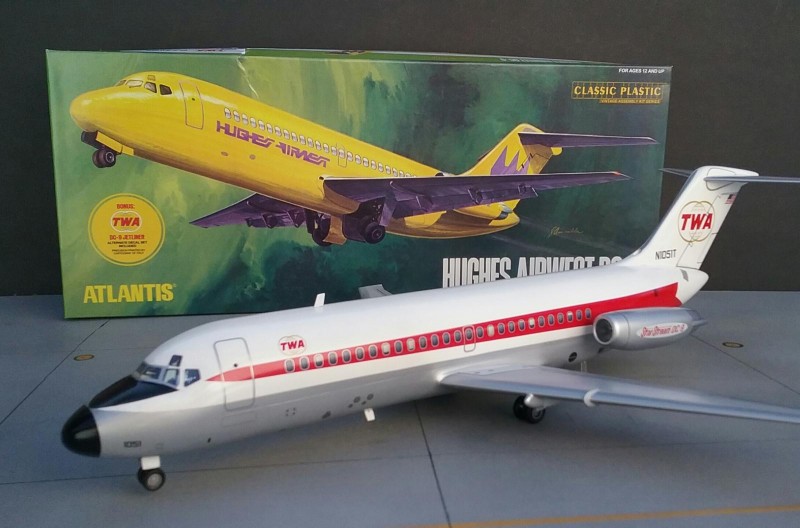
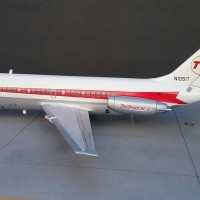
Atlantis (ex-Aurora) "Classic Plastic" TWA DC-9, 72nd scale
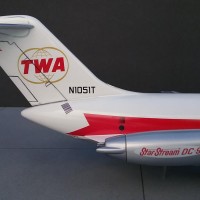
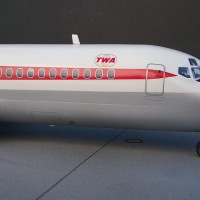
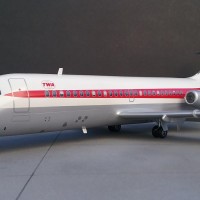
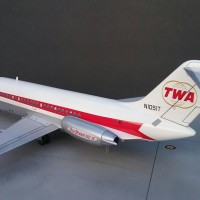
This is one that I just completed; it's the Atlantis Models DC-9-15 (or thereabouts). This kit appears to be a re-issue of an ancient kit, which I believe was originally Aurora. In any event, the kit is very basic, and consists of parts with very little detail. Perhaps the best part of this kit is that there are no windows, just decals to represent windows. I rarely do airliners, but when I do, I always have to fill the windows, which I later replace with decals. Filling airliner windows is always a chore, so I was pleased that this kit didn't have any.
The kit comes with liveries for Hughes Air West, and TWA. While the kit decals appear nice, they have little detail other than than markings for the airline. I located a set of TWA decals from Vintage Flyer, and these decals are magnificent to see and use. The Vintage Flyer sheet contains all the livery markings, plus doors, windows, and vents. .
Wow! Yoiu turned a pile of something I would scrape off my shoe into something really nice!b WELL DONE!
Thank you, Tom...I appreciate it. Those old molds are still putting out the plastic parts, just like some of old-timers. Thanks again.
Looks really good, Marvin...so just how long (tip to tail) IS a 72nd DC-9...?
Craig. Thank you. This kit is one of the few airliners that comes in 1/72nd scale, so it is a bit of an odd-ball. The model is approx. 17.5" in length, with a wingspan of about 14.5" (These are approx measurements, done with a stell tape measure).
Well...as Andy Robinson said to Clint Walker (Dirty Harry) at the cross in Griffith Park, " my...that's a big one.." 🙂
Superb finish.
Thank you, Julian, I appreciate it.
Nice work, Marvin. I bought one of those last month and was disappointed at the lack of cocpit windscreen decals. The Vintage Flyers are the way to go. Nice job!
Not much in the box, but just enough to get by with. I realized the same thing about the lack of windscreen decals, so Vintage Flyer it was. The Vintage Flyer decals for the DC-9 are superbly printed, but not without their pitfalls. The first thing is that the decals come in one solid sheet, so each decal has to be individually cut out. The second thing is that the Vintage Flyer decals are so thing that they tend to roll over onto themselves, if you are not careful. This said, the Vintage Flyer decals go down beautifully, and because they are so thin, the carrier film edges almost disappear. Under a coat of gloss clear, the edges vitually disappear. Good job Vintage Flyer. While plugging Vintage Flyer, a trip to their website shows a nice variey of airliner decals in various scales. Hmmmm!..I might have to do smore airliners now.
Considering this is a "Classic" kit... a real smart paint job and some contemporary decals make for a smart tight build.
Two thumbs Marvin.
Old and new together compliment each other sometimes. Thanks for the compliments, Stephen.
A handsome airplane! Really liked the model.
Thank you, Dmitry, I appreciate it.
Nothing like a quality built classic airliner model!
Classic it is; sounds better than oldie. Some kits never seem to die...call them "classic" and they probably never will. Thanks for the compliments, Sebastijan.
Marvin, this turned out really nice, I have to add that those window decals look really good. Great looking paint finish, of coarse I wouldn't expect anything less coming off your work bench, Nicely done !
Thank you, Terry. This was one of those "quickie" builds that I just had to do. I had to add some scratch stuff, like the underwing "vortilons", wings fences, and wing extensions, but otherwise the plastic was prettty much OOB. Thanks again, Terry.
What a magnificent build. It looks really super. The decals do give the model that allmost 1:1 appearance, and in total it's just fantastic. Great job!
Thank you, Ferry...I really appreciate it.
Very nice, clean finish on this. I wouldn't have suspected you could make this old kit look so good! Well done.
Greg: I got lucky with this one; it's simple, so am I, plus Vintage Flyer decals are awesome! Thanks again.
Beautiful job!
Thank you, Robert...I appreciate it.
🙂 ... Greetings ... 🙂 :
Very outstanding and eye catching model. That one is a classic, I remember building this one in my younger years for my cousin.
Bings back memories, good ones at that ... thanks Marvin.
Good choice for the TWA livery, historical too.
Thank you, sir!
Good looking model Marvin, I like the reflection of the fan inside the engine, well done.
Thank you Allan. Good catch on the fan blades, where it is, indeed, a reflection. I used 1/2" aluminum tubing to get that effect. The tubing was fared into the nacelle with superglue, and left natural metal; only the forward edge received a little paint. The engine fans are from the kit. Thanks again.