How-to article on applying WW1 "Fokker" Streaky Camouflage, or “Fokker Streaking” 101
This article is part of a series:
A lot of us have a few World War 1 Fokker planes in our stash. Some of us have been thinking about just how to replicate the often seen Fokker finish...
Here's how I did it... and it's not all that hard once you break it down. The nice thing with this method is that you can simply wipe away any mistakes with the green. Or you can completely wipe down a panel and start all over if you so decide.
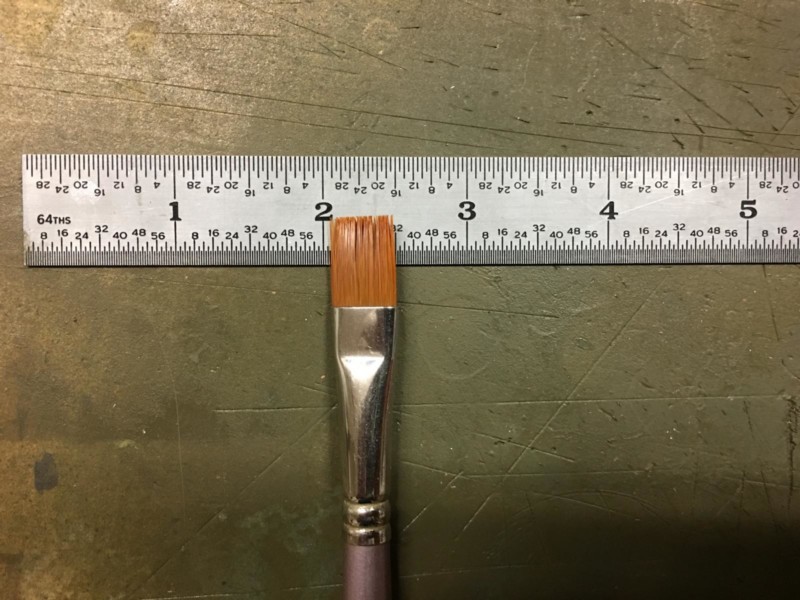
Before you start any project, it's best to do your homework, and gather the needed supplies and specialty tools if so required for the task at hand... but this is so easy, and only a 1/2 inch wide (12MM) paint brush is needed... which some of us have on hand right now.
I make no warranties, either expressed or implied. OK enough legal mumbo jumbo and lets get on with the project...
To begin with, here's a list of things I used.
Safety glasses for eye protection.
A respirator to protect my lungs.
rubber gloves to keep my fat little fingers cleaner, and to keep my skin from absorbing some nasty chemicals that my liver and kidneys would later have to filter out of my blood.
These items listed below worked very well for me. But if you want to experiment by using different brands of materials, that's entirely up to you.
An artists flat paint brush. I chose one that measured approximately 1/2 inch (12 MM) wide.
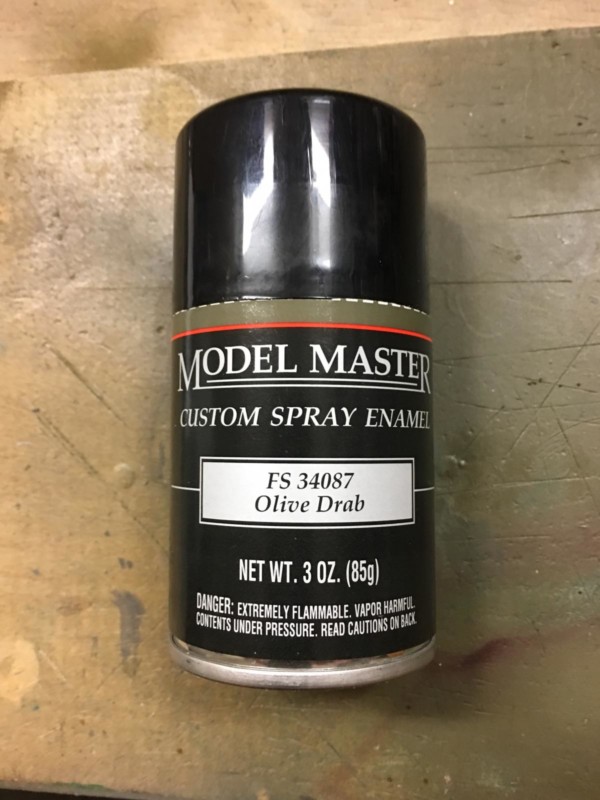
Model Master spray enamel right from the old rattle can... I used FS 34087 "Olive Drab" which is a standard US Army WW2 color. Nothing fancy here...
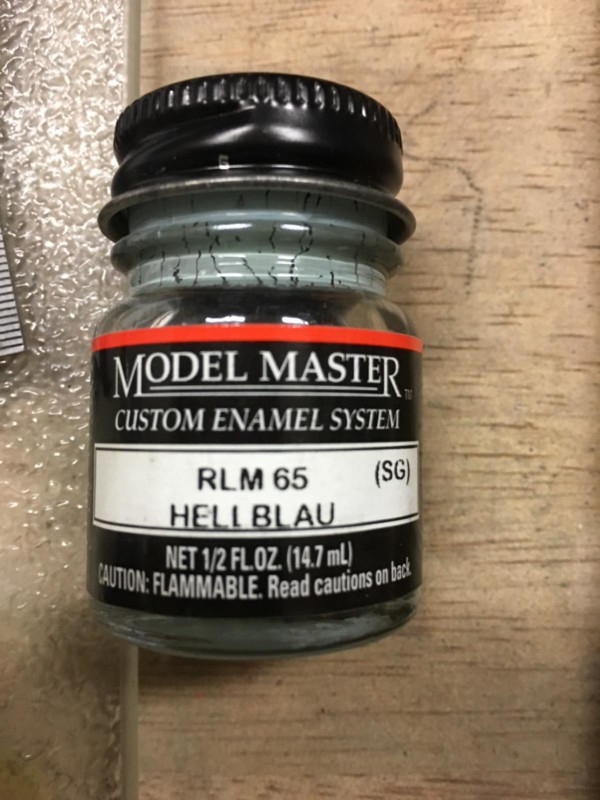
I also used Model Master enamel for the base coat which was light blue. For this color I chose RLM 65 "Hellblau" which was a standard WW2 German Luftwaffe color. I air brushed the color on my build.
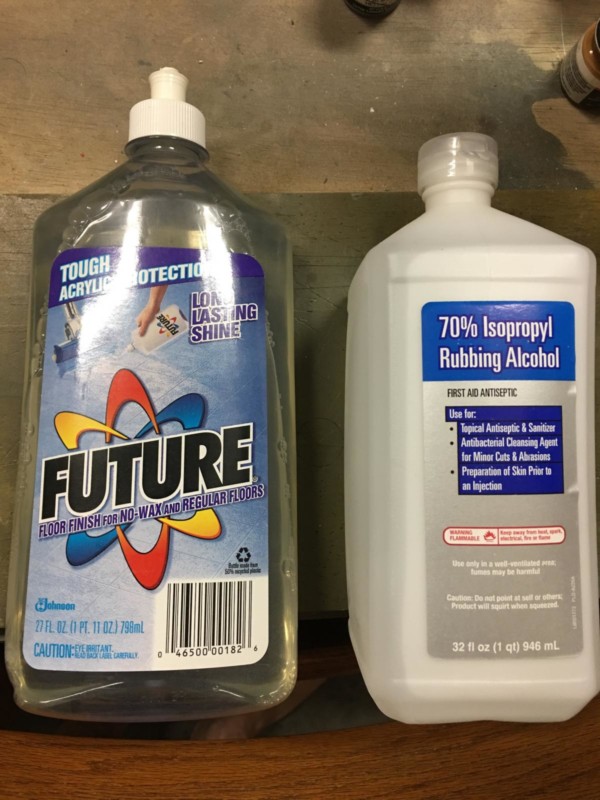
I used a 50 / 50 mix of "Future" floor acrylic wax, mixed in even proportions with standard medical rubbing alcohol. This mixture was also air brushed. More on that later...
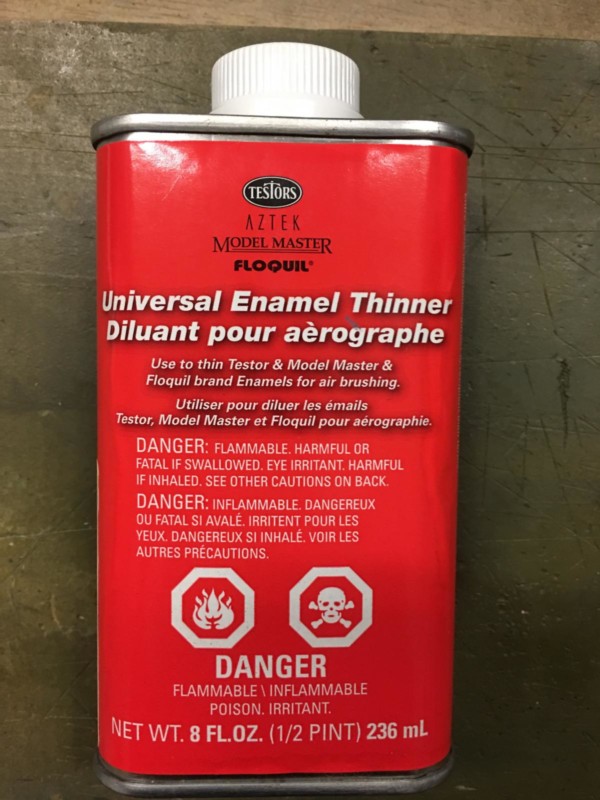
The last ingredient for this magical evolution was plain old "Universal enamel paint thinner". Here again I used Model Master since this is what the local Hobby Town store in Sanford FL carries.
The very first thing you need to do is locate various pictures of the subject you are building so you can see what angles the streaks were applied at. The wings, fuselage and tail surfaces were all painted individually before the actual planes were assembled.
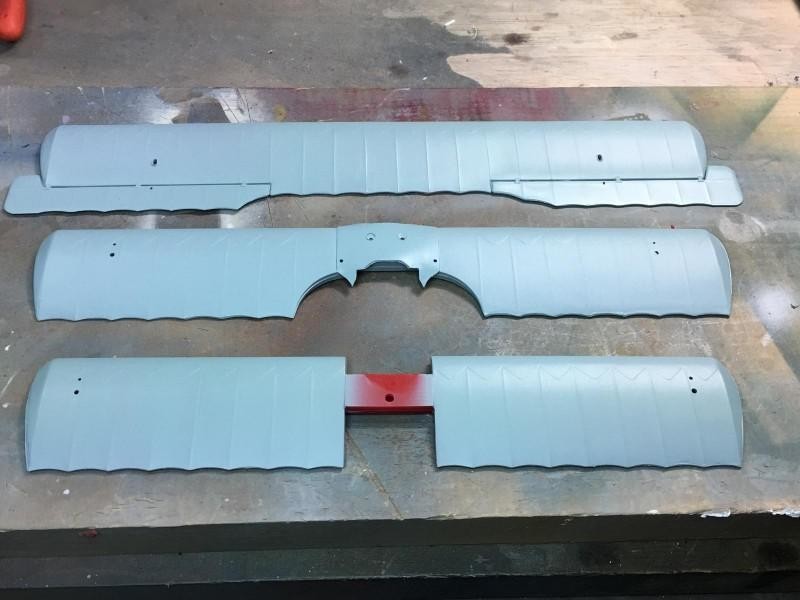
Next fill in all blemished areas, sink marks, etc. on your model, just as you would on any typical build. Once you are satisfied with the results, spray the entire airframe using RLM 65 "Hellblau". It should look like this once completed:
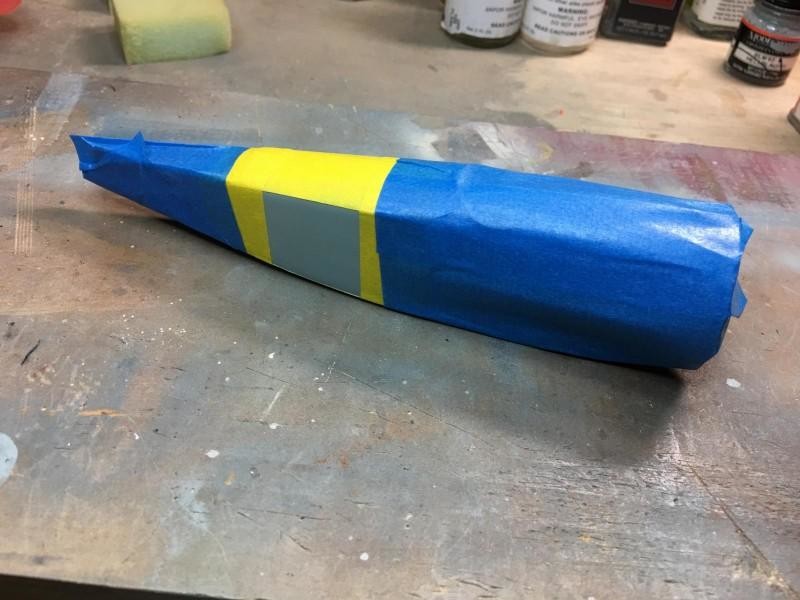
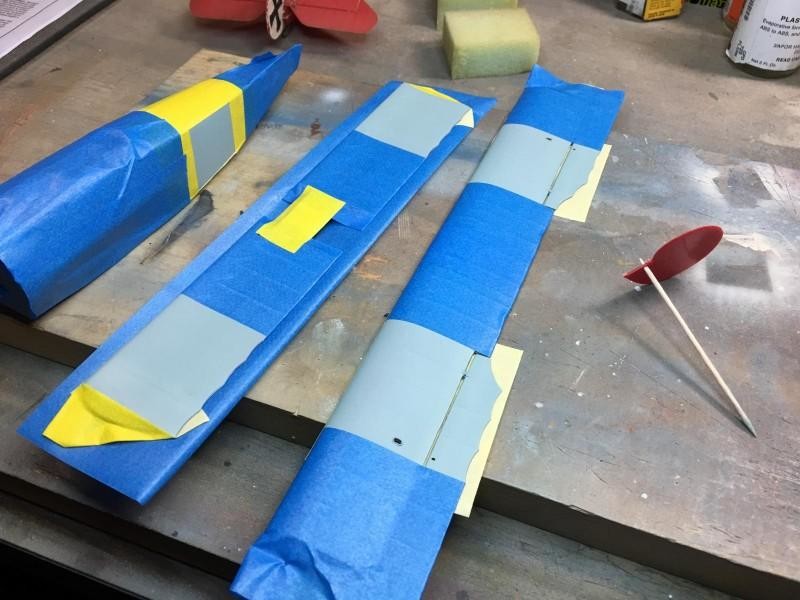
Let this dry, preferably overnight. Following ample drying time, mask off the areas that were painted as a white back ground under the "Maltese" or German "Iron Cross" markings at this point. If you plan on using strictly the kit supplied decals using decals for the back ground only, you can skip this step. But I have found it makes the white back ground more prominent and to me it looks better. Once this is done it should look something like this:
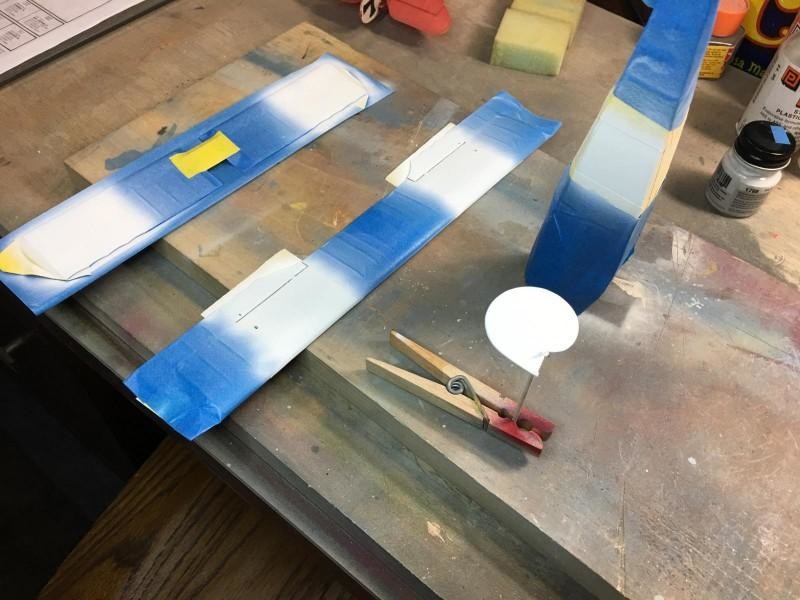
Spray on the white back ground...
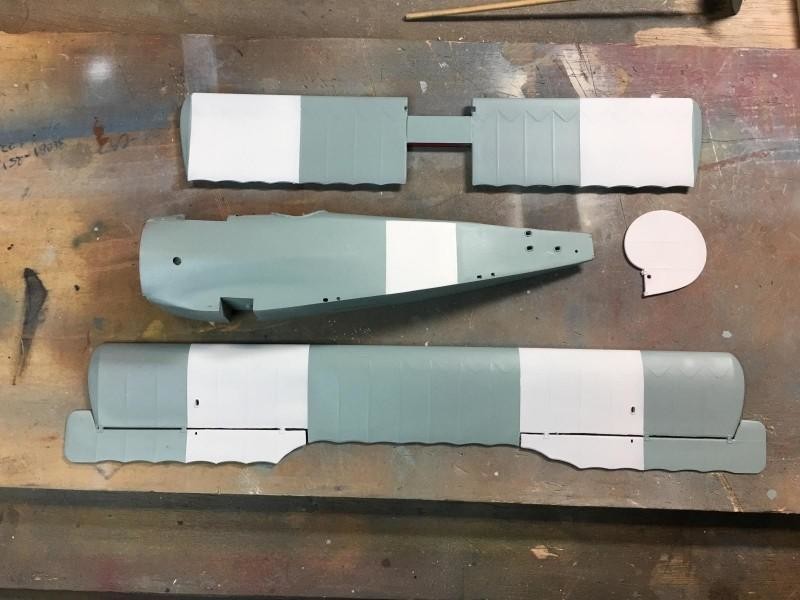
Once the white has dried, remove the masking. This is how it should look now:
This next step is VERY IMPORTANT !
Mix the Future Floor acrylic in a 50 / 50 percent ratio (half and half) with the rubbing alcohol. Spray several coats on the entire airframe and let it dry, again preferably overnight... This acrylic mixture will act as a buffer later between the light blue and the OD green. It is needed to keep the thinner from attacking the light blue. More on that later.
Now you will have to again mask off the underside areas of the plane that were normally light blue on the real plane, and the just painted white back grounds for the German Crosses.
Wait until the painted on Future mixture has dried sufficiently, or you may ... no scratch that, you WILL end up with a mess on your hands... don't ask me how I remember this step... just trust me.
Remember the Olive Drab spray paint in a can ?
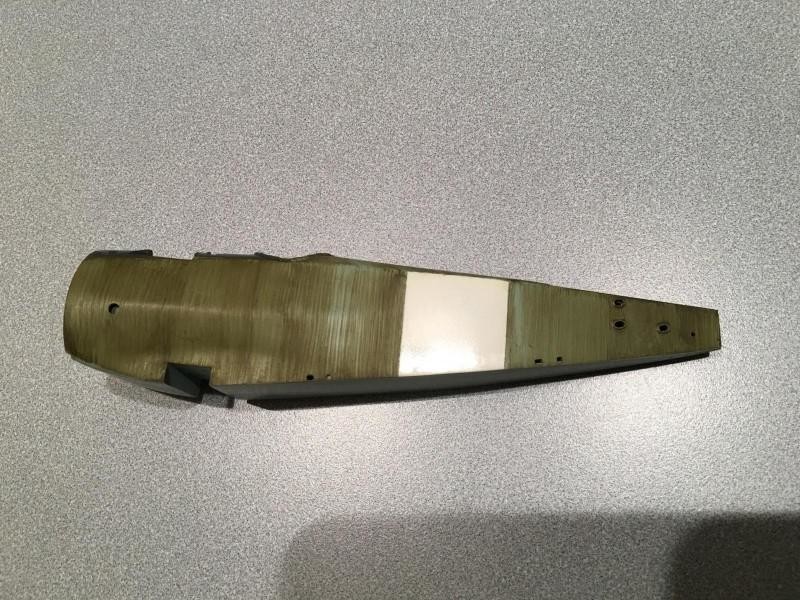
Now is when you need it... Give the upper areas a light coat of O.D. Green. Nothing fancy here. Complete coverage is not needed, and a light dusting of spray paint actually works best...
The following step is very easy... Remove the masking.
Now take your flat artists brush and dip it in the paint thinner. Wipe off most of the excess thinner. Now with the thinner moistened brush, simply drag the brush along the surface of the Olive Drab paint, making sure the brush strokes are in the proper angle that was used on the real plane.
If the sides of the fuselage normally used vertical brush strokes, so should you. Simply follow the pattern used by Fokker.
Don't worry too much about the light blue under the OD Green. The Future mix is there to keep it intact and act as a buffer between the light blue and the green...
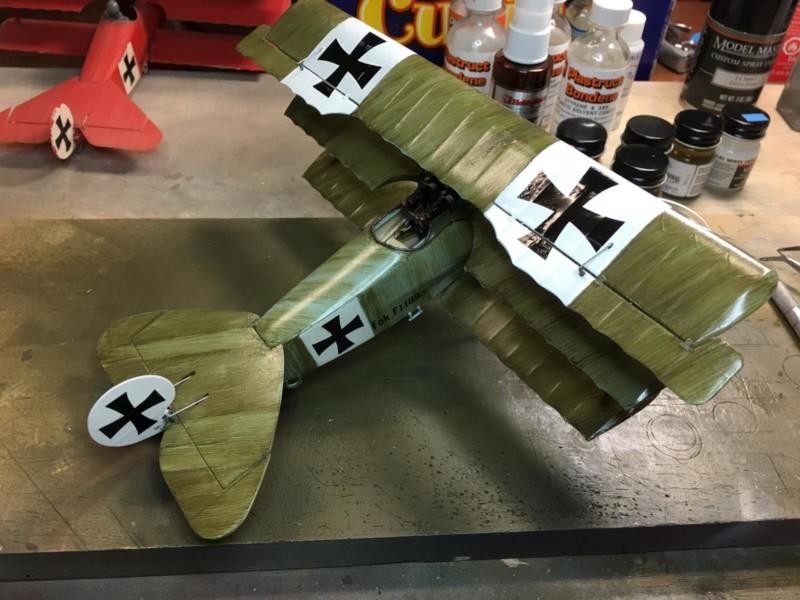
The wings normally used a 10 degree pattern brush stroke. Here's how I did mine, (and my angles are off a little).
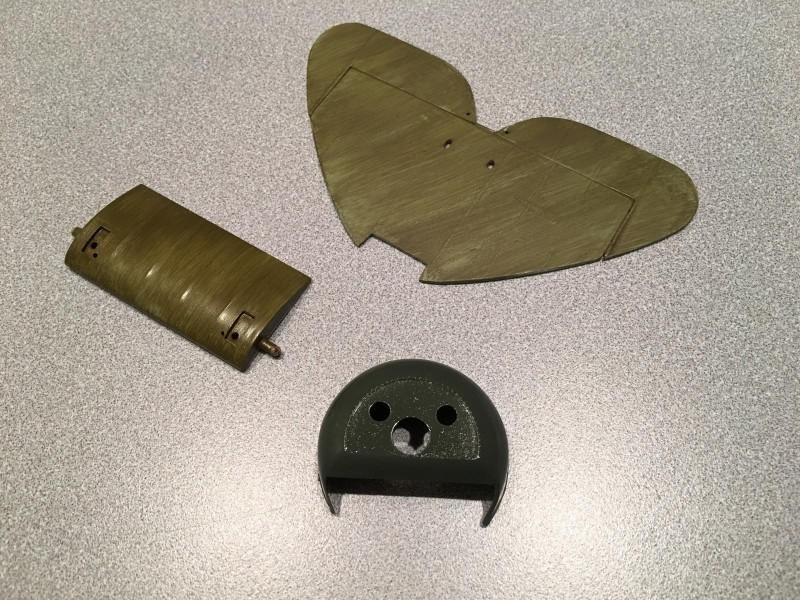
The tail surfaces and sub wings were also painted separately, so you should do the same.
You can lighten the effects of the streaking by adding more thinner and wiping off the excess paint from the brush in between brush strokes.
If you want to make the area look darker, (like I did here), simply add some more Olive Drab paint onto the artists flat brush and brush it on, again following the brush angles for the part you are painting. You can use the paint from the spray can (after you spray a small amount into a jar) or bottled paint of the same color.
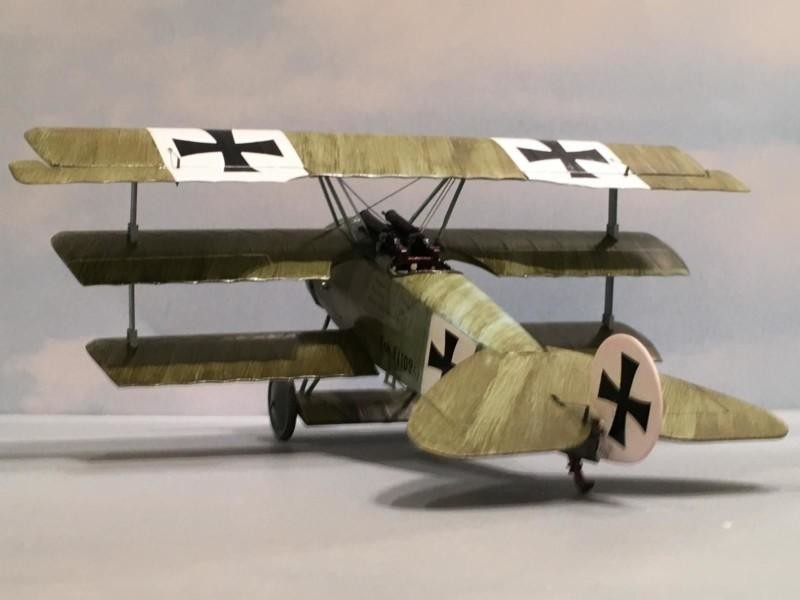
On my Voss F-103 pre-production machine, the areas just behind the cowling / the forward portion of the fuselage appear darker in most original era photographs. So here I simply added more OD green color and made it darker. This could have possibly been due to castor oil staining from the rotary engine though... check your references and paint accordingly.
Remember when I said you can lighten the streaks ? Here's how I did mine... If you look close at the sides of the fuselage just ahead and behind the white Iron Cross back ground, you will see the streaks are much lighter. I simply used thinner on the paint brush in these areas a few more times.
The beauty of this method is that since you have a protective barrier of "Future" acrylic mix in between the two colors of paint, (light blue and Olive Drab), you can add and subtract to olive drab color to your liking and not have to worry too much about damaging the light blue undersurface.
Once you get the parts looking the way you want them to, assemble the model parts.
I found out that just through normal handling during assembly, that some of the top coat Olive Drab came off.
Don't worry about it... as it's an easy fix.
Simply go back again with your trusty artist brush and paint thinner and add or subtract paint to your own tastes. Once you do one area (or two) you will really be surprised at just how easy this is... It's not brain surgery.
If it makes you feel better, try it out on a piece of scrap plastic first until you feel comfortable...
Once you get the plane EXACTLY how you want it to look, give the entire plane another spray coat or two of the 50/50 Future acrylic mixture. This will "seal the deal" and lock down you now great looking, super fantastic, wonderful Fokker streaks.
Now you can add decals to suit your particular build and spray a final coat of the 50 / 50 Future mix to seal the decals down.
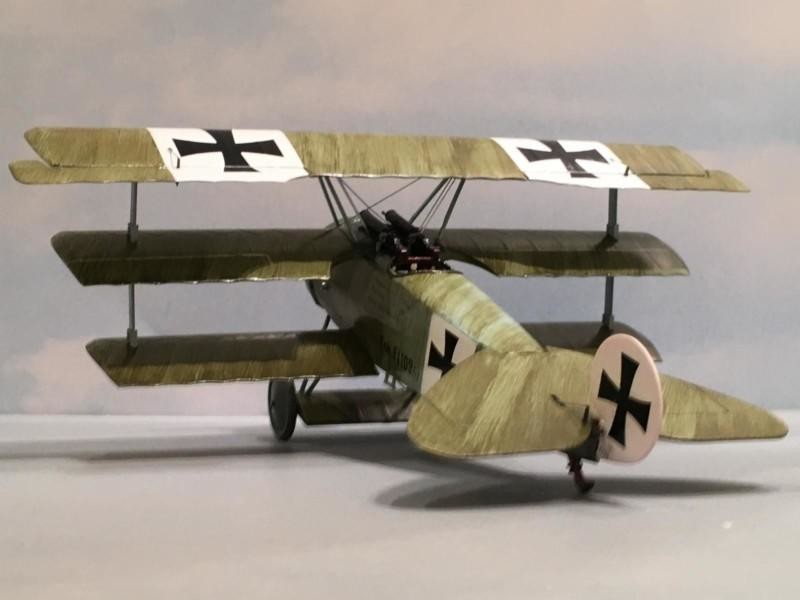
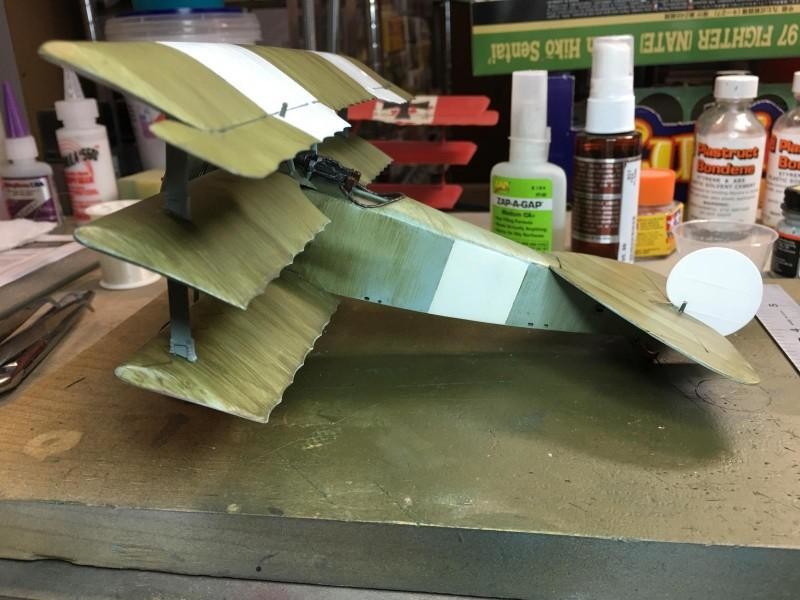
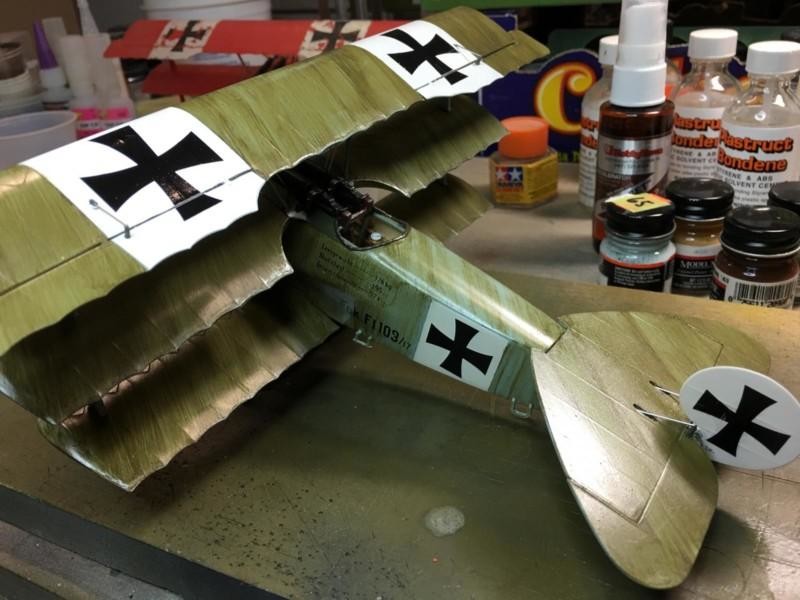
Your plane should now look something like this (but only if it's a Fokker DR-1 type 


Here are the end results...
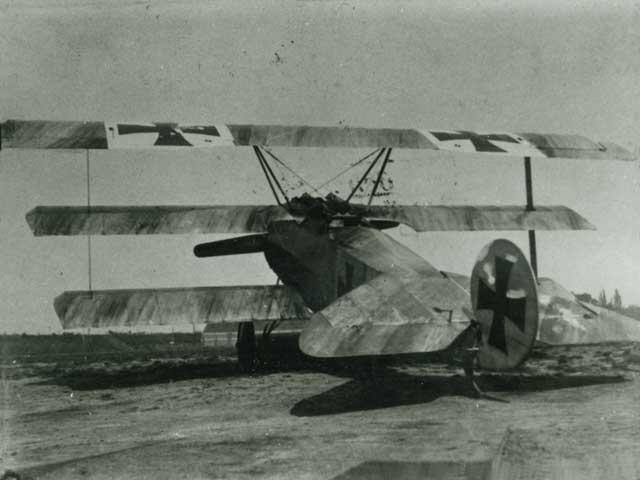
The original reference photo:
My Fokker build... Yes I need to build a photography light box...
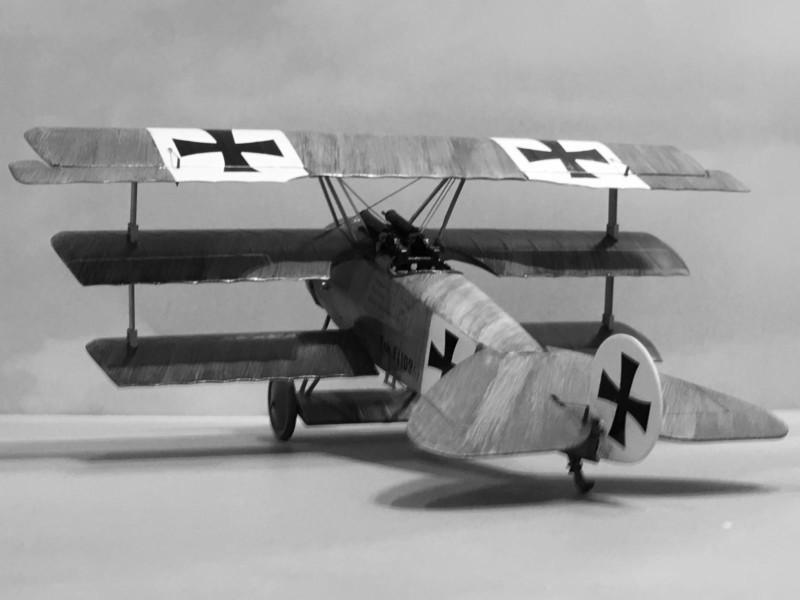
as seen in gray scale
I hope you like how it turned out for you. With a little practice, you too can be a Fokker streaker in no time flat...
UPDATE:
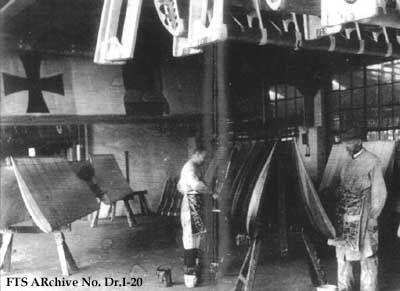
Here's an original photograph that actually shows how this process was done at the Fokker Factory... If you look close, it appears that the lower wing cross was left with a natural linen back ground and was not painted. This was something I never realized before until I read something that was written last night by Aviation Historian and well known WW1 researcher, the late Dan San Abbot...
Here's what Dan San Abbot had to say about this picture:
"The dark olive dope was thinned to a wash and applied with 80 to 100mm wide brushes in one continuous stroke. It was applied in one coat over the clear doped linen fabric. The dark streaks are where the brush had a full load, and each succeeding brush stoke the covering of the thinned dope got lighter.
After the camouflage finish was applied, using matt black dope, the crosses were painted on the clear doped linen fabric on the upper wing top surface, the lower wing under surface, both sides of the fuselage and the rudder. After the crosses had dried, the cross fields were painted with flat white oil based paint on the top wing , fuselage and rudder crosses. The lower wing crosses were left as is, clear doped.
One coat of sky blue dope was applied to the under surface of the wings , axle wing, fuselage, and tail plane. The sky blue dope overlapped to the bottom side of the fuselage 20mm and to the top surface of the tail plane, forming a border 20mm wide.
After all the painting had dried, the fabric surfaces were given one waterproofing coat of copal varnish which had a yellowish cast, this causes a yellow shift, changing the sky blue to a turquoise.
This is all supported with Fabric Samples from Ltn. Stapenhorst's Fok. DR.I 144/17 held in the Imperial War Museum. These are substantiated facts, not my opinion".
Blue skies Dan...
Lastly, here's a link to another website where Achim Engels, a gentleman who lives in Germany and has built numerous full size flying replica Fokker aircraft. Here Mr. Engels describes the colors used. It's well worth taking a look if you are serious about authenticity... Mr Engels has dedicated his life to the authenticity of his builds and even goes as far as to replicate the smallest details in his full sized builds using original Fokker factory technical drawings.
http://www.theaerodrome.com/forum/showthread.php?t=1230
Here's another link that goes directly to Mr. Engels website. Here I learned a ton about how these Fokker machines were constructed.
As usual, comments are encouraged.

Nicely presented, Louis...informative, comprehensive and easy to follow - thanks for the tutorial.
Your welcome Craig !
Thank you. Nice of you to take the time to educate us. I really appreciate it.
You're welcome George. I hope to see some more streaky Fokker's soon...
They call him MR. streaky! Nice name for a saloon, Streaky Fokkers. Look nice on a model railroad layout.
Brilliantly presented and thanks for the tutorial!
Thanks Dave. I'm glad you liked it my friend.
Interesting and useful material. Fokker in factory streaky paint scheme is a one to build for me.
Please post photos of it here. I'd like to see it.
Thank you for sharing this technique with us!
You are welcome.
Nice job Louis, always nice to review some informative techniques that improves one's skills.
Thanks Tom for the kind words.
Louis - That's a great guide to producing an effective Fokker "streaky" camo finish. I hadn't realised you used enamels which still have unhappy teenage memories of overlong drying times and messy fingers. You've obviously mastered the art.
A word of caution for anyone planning on building a Tripe that's not F 102/17 or Voss' 103/17. Both the colour and streak density on these machines seem to differ from the later production models, whilst generally following the principles Louis identifies. The appearance of these a/c are readily available in numerous contemporary b&w pics, so there are many reference points. For other Tripes, this is sometimes more difficult, so it's advisable to do as much research as possible if you're a detail hound like myself and Louis. Each a/c left the Fokker factory with the streaks hand painted, so each had its own pattern and density of the streaks, even though the methodology of their application may have been uniform. My own impression from pics and profiles in Paul Leaman's book is that many of the production run examples had a top colour that was more khaki/green than olive/green as with the 2 F types and the 2 earlier models had more of the undercoat pale blue showing through. The 56 Squadron reports of Voss' final action on 23 Sept 1917 describe F 103/17 as appearing "silver-blue", which perhaps highlights some of this difference. Additionally, the weather-resistant dope applied as the final coat at the factory introduced a dull brown effect on whatever colours were used.
Thanks for adding this additional information Paul. In order to help those in their quest for achieving the Fokker Streak finish, I have updated this article and added a few links at the end that I found useful when I built F-103.
Paul is "spot on" with his comments in all of his postings about these machines. The information he provided me during my "F-103 Voss" build was of great help. Thanks again Paul.
Here's a few paragraphs that I found online that describe the actual brush painting process Fokker used that Paul described in his last posting above.
This excerpt was quoted from respected researcher (and WW1 Aviation Historian) Dan San Abbott (who's unfortunately now deceased):
"The dark olive dope was thinned to a wash and applied with 80 to 100mm wide brushes in one continuous stroke. It was applied in one coat over the clear doped linen fabric. The dark streaks are where the brush had a full load, and each succeeding brush stoke the covering of the thinned dope got lighter.
After the camouflage finish was applied, using matt black dope, the crosses were painted on the clear doped linen fabric on the upper wing top surface, the lower wing under surface, both sides of the fuselage and the rudder. After the crosses had dried, the cross fields were painted with flat white oil based paint on the top wing , fuselage and rudder crosses. The lower wing crosses were left as is, clear doped.
One coat coat of sky blue dope was applied to the under suface of the wings , axle wing, fuselage, and tailplane. The sky blue dope overlapped to the bottom side of the fuselage 20mm and to the top surface of the tailplane, forming a border 20mm wide.
After all the painting had dried, the fabric surfaces were given one waterproofing coat of copal varnish which had a yellowish cast, this causes a yellow shift, changing the sky blue to a turquoise.
This is all supported with Fabric Samples from Ltn. Stapenhorst's Fok. DR.I 144/17 held in the Imperial War Museum. These are substantiated facts, not my opinion".
I hope this is of some use.
I give full credit for this information here as it was not my original posting.
http://www.modelflying.co.uk/forums/postings.asp?th=85540
In the hope of helping other model builders, whether flying scale models or plastic static display as mainly found here, I started this article.
I have also added a photograph showing the actual "Factory" process of streaking the paint on a wing of a plane that was yet to be assembled. This photo credit is given to the author who wrote the posting in the web link I just mentioned, as it was not mine.
Thanks Paul for the assistance.
One thing I learned from this was how the lower wing crosses did not apparently have a white background. Here's proof again that one should check the photographs very closely. But in most cases there are only one or two photos available, so a best educated guess is often what we do.
Thanks again Paul...
Louis - Dan Abbot's quote is very interesting to me for 2 reasons. The possible absence of the white background panel to the lower wing undersurfaces is difficult to see from most b&w pics 'cos generally the undersurface is in shadow. On some of the earlier models though it appears that there may be a white background in some pics I have seen, so as you say, you pays your money and takes your choice.
The second item is the suggestion that the olive streaks are applied to the fuselage and upper surfaces on top of clear doped linen. This may well be the reason why there's a difference between the appearance of 102 & 103 and subsequent models. With the dope giving the linen probably a slightly brown/buff tinge, the streaking would undoubtedly have looked different from the 2 early models, probably made even more brownish by the sealant coat to delay the effects of fuel and general weathering. Dan seems to have based his deductions on the fabric samples of 144/17 at the IWM, a much later model than 102/103, being delivered to Jasta 11 on 12/12/17 and shot down on 13/1/18. I might see if I can have a look at these samples. Very illuminating.
Paul
The Olive paint was applied over clear doped linen on the Dr.I, but the F.1 prototypes were painted like this.
Wow that really would be fantastic if you had access to these original parts for comparison. If by chance you have access to a color standards book of sorts... maybe you could get a comparison ?
I'm sure the colors would not be the same due to the age and associated color shift that goes with it.
I was amazed when I stumbled across this little bit of information about the lower wing crosses having a natural linen back ground.
I tend to agree with Tom about the first 3 prototypes being initially painted with light blue overall. It would make sense that Fokker didn't paint the production machines in this manner. First would have been the time / effort and cost thing. Second would have been a little reduction in the total overall flying weight of the machine, and trying to wring every last ounce of performance from it. So it would have been a win / win for Fokker not to paint the light blue before the Olive Green.
This also would explain how it affected the overall appearance, and how F-102 / 103 would have had a different looking shade of green because the first underlying color (or the lack of an undercoat).
Please keep me posted with what you find out at the IWM. Thanks again.
If you spray Model Master Sealer (for their metallic paints) over the light blue, you can use the rubbing alcohol to thin the OD with the same result and no exposure to the paint thinner. Other than that, you've got it down right, except that the elevators should be painted separately because they're usually straight up and down (not a criticism).
I'll have to give that a try Tom. Excellent idea. I have tried to shy away from Testor's Gloss Coat and Dull Coat simply because they can turn yellowish over time. But the Model Masters Sealer entered my mind. Good point, and thanks for the advice.
Taking your advice on how the elevators were painted separately, I went to the "Wingnut Wings" website and looked around at their archive photos. I was able to find two very distinct pictures that show they elevators could very well have been painted in place together, IE., at the same time and same angle as the horizontal stabilizers were. The complete elevator assembly part of the plane was painted separately, as a complete unit, as were the individual wings and fuselage of the plane, exactly as I stated in my article above.
These pictures are from the Wingnut Wings website and they are accredited with all honors for presenting them.
In none of the pictures I have found, can I see where the elevators were painted as you mentioned. Now am I saying that "ALL" elevators assemblies were painted like this ? No, absolutely not ! So the wise person would end this by saying "check your references" and leave it at that...
You can also clearly see what I'm talking about in the original B&W photo of Voss' F-1 too. They also appear to be angled exactly as I have done with my model.
So It does NOT appear to be painted as you stated... (not a criticism).
Masterful. I learn something every time I read you, Lou.
That's a great compliment my friend. I have accomplished my mission then. Thanks !
Louis, fascinating article. You answered several questions I've had for years. Or, you can do it the easy way, and paint it red. Richtofen! Yeah, man!
Thanks Bernard ! I appreciate the compliments .
Louis, many years ago I tried to streak an Aurora DR-I. It didn't work. I "overblended", if you catch my drift. Where's that red paint? There was NOTHING like your article.It is a great time to be a modeler, believe me. David hit it perfectly. Thank you! Power to your elbows!
Fantastic tutorial. When, next year, wingnut wings release the fokker dr I will use it.
Thanks
Way late to the party, but what does "spray on" the Future mix mean? Is that with an airbrush or a spray bottle? I'm worried about the wax messing with my airbrush.