More Z-M insanity.
This article is part of a series:
So this Zoukei-Mura Ho 229 is taking on a life of its own. It's been consuming me, I can't stop thinking about it and It's driving me insane. Much more to go.
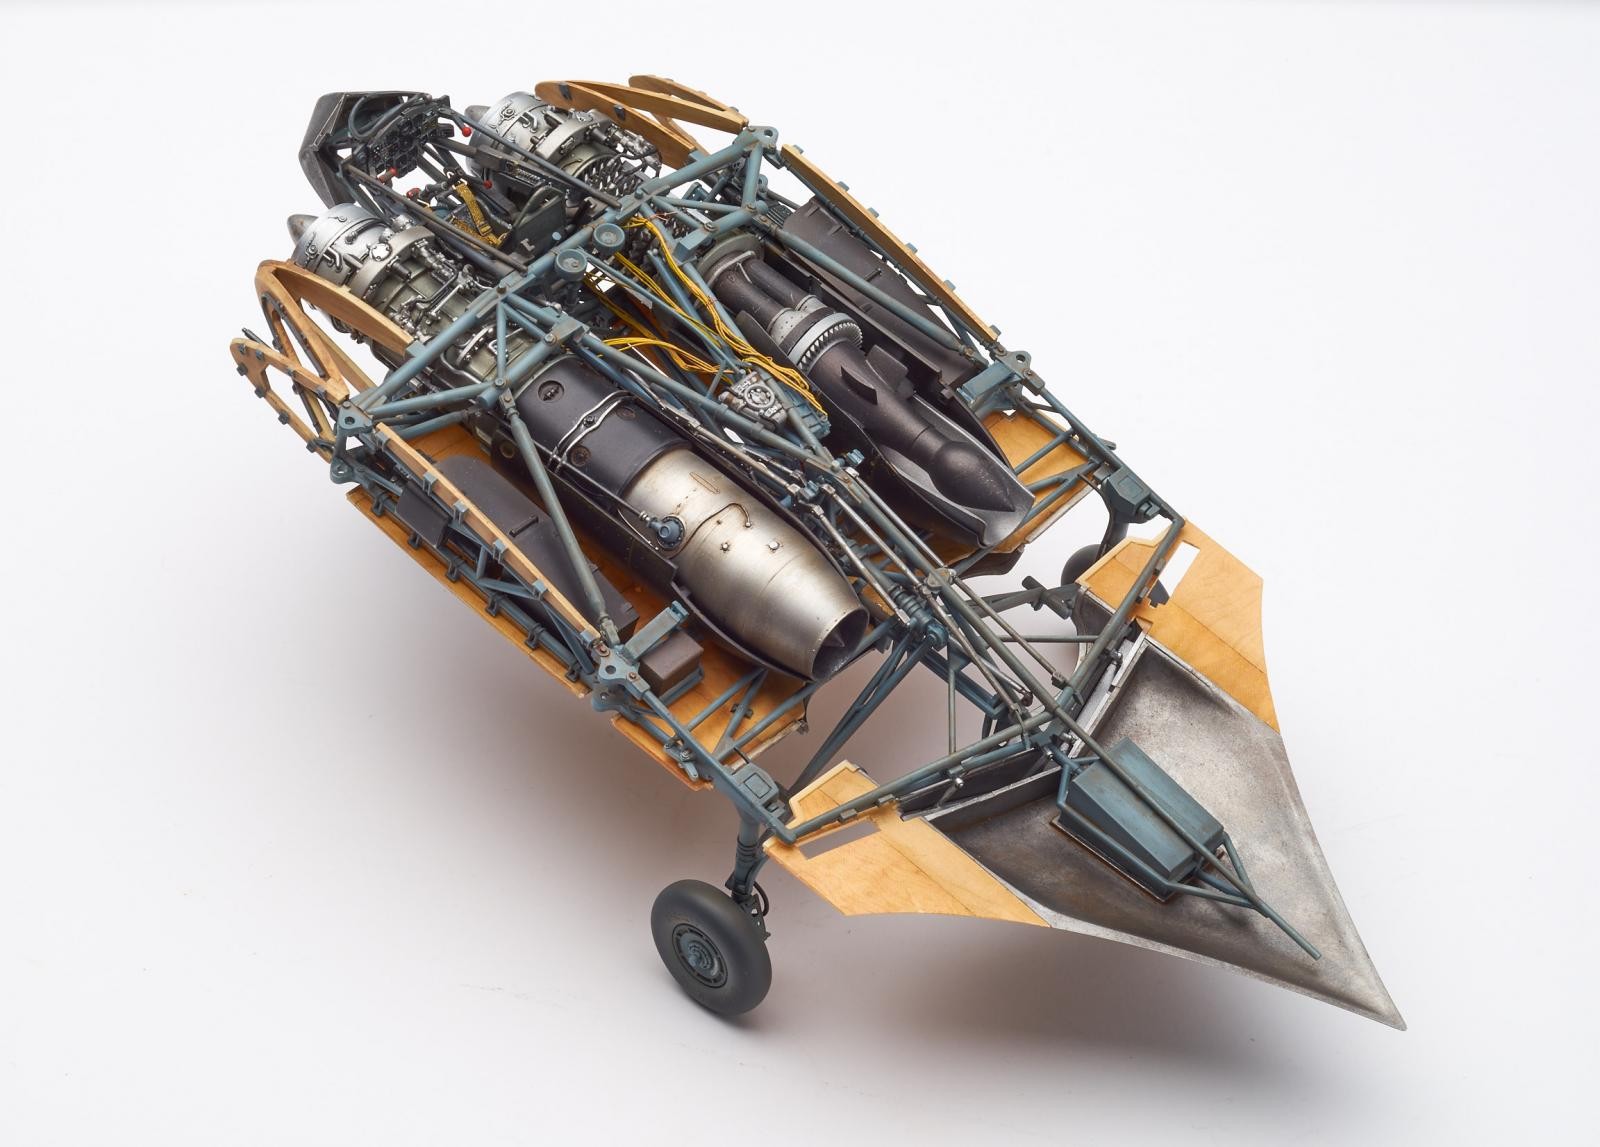
So this Zoukei-Mura Ho 229 is taking on a life of its own. It's been consuming me, I can't stop thinking about it and It's driving me insane. Much more to go.


You must be logged in to post a comment.


Well, it looks fantastic! Your detail work on what is obviously a splendidly detailed kit looks stellar.
George, rest assured: No insane person can deliver such modeling quality 🙂 Very nice work!
Beautiful work. You do have to be "nuts" to go for that level of effort.
Hi George. There are great builds of this kit and I thought I saw a couple that seemed as good as it can get. This one, however, opens new horizons.
Btw, there's going to be functionality on iModeler soon that allows to connect several articles to one "project", hence I encourage you to present intermediate results as articles.
Hi Johannes. Thank you. I apologize for not using the WIP forum. The connection feature sounds great and it will be very useful.
I've a strong feeling we'll be seeing this one again next month - if you get my drift. 🙂
George,
I see your conundrum with wanting to keep things open and transparent for all to see. But, the trade off is to loose the shape of the wing and the design. Sort of like building a model that engineers would appreciate vs what a pilot would want. A plane model that inspires one to want to fly it. The logical choice is to build another model all buttoned up and then display them side by side. Of course that is if money is not a question.
Hey Stephen. That is precisely what I am going to do. I ordered another one that will be closed up and painted.
I simply love it. AND I would very much like to learn something about your natural wood technique - is it brush-painted?
Thanks. The wood that appears on the inside of the wing and the ribs of the body are airbrushed first with Mr Color "Sail". I used oils for the wood grain effect. I'd never used that technique before so I had to practice a bit first. I placed little tiny dots of burnt umber oil then streaked it with a stiff wide brush lightly soaked in paint thinner and dragged the paint around until I achieved the result I wanted. For the outside, I used Uschi van der Rosten wood grain decals. They work really well, but take a considerable time to apply. "Uschi" recommends making a pattern with masking tape and transferring it to the decal. I instead cut the decal to a slightly larger size and placed it on the usual way. I then trimmed it along panel lines using and ultra sharp radial keratotomy knife. This is a diamond bladed knife used for cutting corneas. I initially used a a fresh #11 scalpel, but this sometimes tore the decal. I remembered that I had a an RK knife and used it with somewhat better results.
4 attached images. Click to enlarge.
Many thanks for this tutorial, very informative and just what I needed!
Thanks for the tutorial!
George, I am watching this develop on your blog also - what a build. And what a demonstration for us. No more words just admiration and thanks.
Hi Paul- Thanks so much for the kind words and for visiting my blog.
Simply amazing!