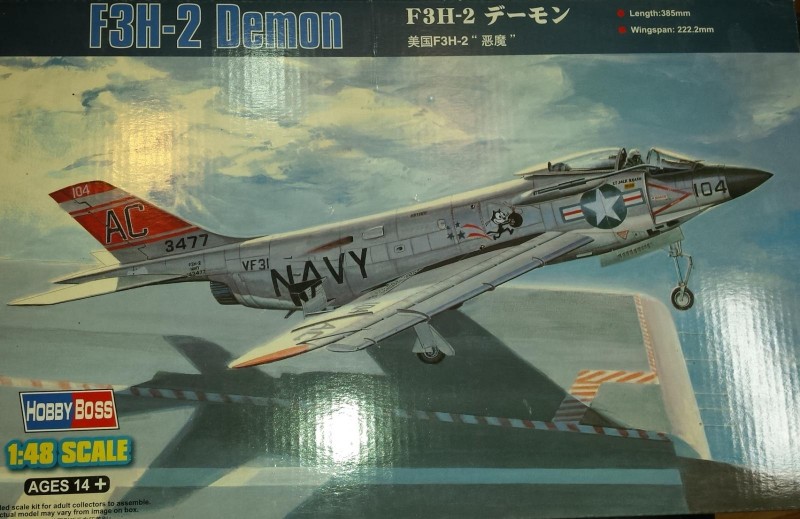
The Making of A Demon: WIP Hobby Boss 1/48 F3H-2 Demon
This particular model has certain sentimental value to me because it is the last model purchased by my mother prior to her passing. For years now, really since I have been married with kids, I no longer get any fun Christmas gifts. Now my Christmas gifts are either for just the kids, or, they are joint presents for both my wife and I. This joint gift always caters towards the wife like some type of household appliance or decoration. There was one big exception and that was my mother. She would still get something just for me and whatever I wanted within reason. I would just point it out and even into her late eighties I would always get exactly what I asked for. For the most part it was always some new model I wanted. Well prior to her passing about 4 years ago I showed her this 1/48 Hobby Boss Demon on my computer and she ordered it for me. The next year she was gone. Its taken me all this time to get started on it b/c I wanted to be motivated and to do it right, and I think I just could not get myself to do it for emotional reasons. So this is my build experience up to this point.
This article will take you from the box opening about a week ago, up until today, in which I finished the basic painting of the assembled fuselage. As I did quite often several years ago when I had more extra money I purchased a resin cockpit set to enhance the base details. Upon opening the box and examining the contents and the included details I thought twice about using all the extra resin parts. This is because I did not want to deal with any additional fit issues, and sanding of resin parts, coupled with the included details were impressive out of the box. Basically I determined that the resin parts would not really enhance the cockpit details therefore not worth the extra effort. The one exception was the bang seat. I did feel that usage of the resin ejection seat was necessary to improve the look and did not require any kit modification.
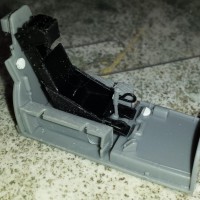
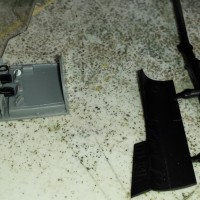
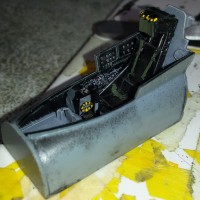
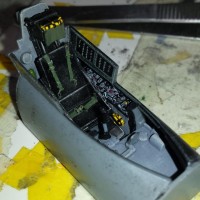
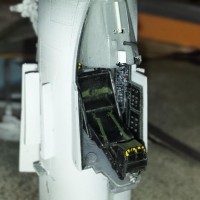
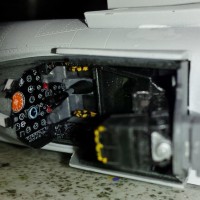
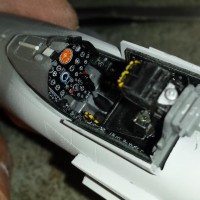
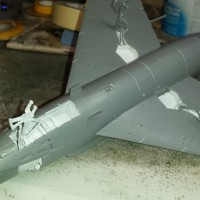
The Cockpit Tub: The pictures will show assembly of the kit's cockpit tub. It is actually designed out of the box in a similar manner to the resin after-market parts. The kit parts included the cockpit tub side-walls, in addition to really nice raised details on the side counsels and IP face. These parts were actually separate parts to be added after the painting of the cockpit floor, and base sides. Most pictures of non restored Demons showed the upper cockpit walls were flat black, and the bottom walls and floor were typical grey. I used the included kit cockpit decals to decorate the counsels and IP face. Despite the significant raised detail I was able to get the decals to conform and adhere to this raised detail by using lots of hot wet pressure and solvent solutions to soften. I felt this would look better then my efforts to hand paint all the detail. The resin ejection seat was painted flat black and dry brushed with silver, grey, and gun-metal. I did add a few bits of plastic to busy up the rear cockpit bulkhead, floor, and sides. I then dry fitted all the pieces of the of the cockpit tub assembly and they fitted so perfectly that I decided to glue them in place with Tamiya thin liquid cement at that point. I then dry fit the whole cockpit tub assembly with IP attached to the front fuselage sides. There are very good positive attachment points that insure perfect cockpit alignment with the front fuselage side wall. This to fit perfectly leaving no gaps when closing the front fuselage sides around the tub. One unique aspect of this model is that the cockpit tub is sandwiched only between a separate front fuselage insert, not the whole one piece larger fuselage halves as in more conventional models (see pictures). Once this forward piece is assembled it fits into the the larger fuselage rear halves. Again there are excellent positive alignment points which hold the section securely. The outside of the forward assembly section will make up the inner wall of the main engine intakes once fully assembled. Therefore you will want to paint the outside of this forward section white at this early stage b/c will not be able to get to it latter in the construction (see picture). You also need to attach the multiple intake guide vanes to this forward cockpit assembly. After the vanes are attached and glue still not dry I test fit this whole unit into the rear large halves to insure the vanes fit well and are properly aligned with the outer intake walls. This is an important step and assures a nice tight fit latter in the assembly.
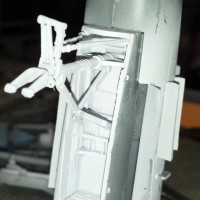
Front Wheel Well: This assembled into a nice square rectangular box which sits under the cockpit tub, and slides just forward of the tub bottom. I did not need to assemble and attach the front landing gear at this time, and most would wait until after final assembly, but I decided to for the following reasons. The gear appeared complicated and had many pieces and would be easier to assemble at this time. It would be stronger assembling before painting and this model will be heavy. The gear will be the same white color as the aircraft bottom insignia white not needing a mask, and it would help me paint by holding the aircraft off the ground when I turn it over to paint top side, if I also assemble the main gear early. The final reason is it helps you to place the wheel well assembly into the assembled front fuselage tube section. Other reviews indicate that the front well does not seat properly once installed and sandwiched between the front halves. It has gaps between the well walls and the fuselage bottom. Having the gear securely attached allows you to have a handle to pull downward on the whole assembly following its insertion into the front fuselage halves. This downward force seats it properly eliminating all gaps. The directions are not clear on how this assembly fits into the nose section so I proceeded with lots of dry-test fitting and caution before commiting to glue. It paid off b/c the whole assembly went together perfectly when the time came to assemble the whole fuselage and insert the front section with wheel wells.
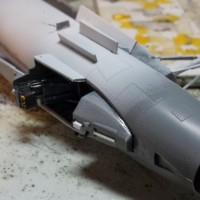
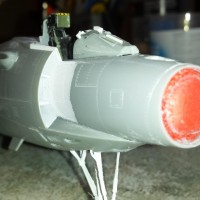
Nose Weight: Yes you need it. I did not have any lead weights so I jammed modeling clay embedded with steel BBs into every available cranny within the front cockpit assembly. You will see the red clay in the attached pictures coming out of the nose.
Taking into account the above assembly sequences and pre-cautionary steps taken the assembly was proceeding without errors, or problems, and the fits were perfect. It started to come together more quickly once the above sequences were completed.
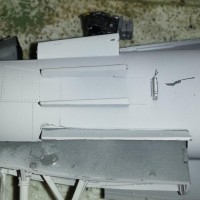
Fuselage Assembly: Several components must be assembled prior to closing the fuselage and sandwiched between the two large rear fuselage halves. You would think that some of these items will interfere with the closing and would produce alignment issues but the kit is engineered so well in this respect that no alignment problems existed when test fitting the halves with the internal structures and assemblies. The most crucial component is the forward fuselage tube containing the cockpit and forward wheel well. As mentioned earlier this fit perfectly. The 2 fuselage halves closed perfectly sandwiching the forward fuselage assembly and all other attached sub components without issue. Because of all the careful pre-assembly steps this whole assembly was seamless once closed up and required no filling, other then minor sanding of the seam part-line. This was an area I was worried about because several build reviews indicated that the halves would not close perfectly b/c pieces being to wide interfered with the closing. I did not find this at all.
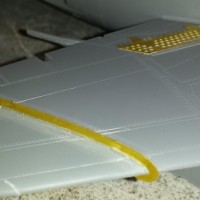
Wings/Control Surfaces: These assemblies where all straight forward and conventional in assembly. The wings and control surfaces all fitted together perfectly. The wing control surfaces were actually so tight that I need to scrape the vertical sides to fit into the wing slots. All control surfaces are separate pieces and split in halves. The halves came together flawlessly. The most difficult part of the main wing assembly was installing the Photo-Etch wing fences along the leading edge and wing surface. To ease this assembly and increase surface area to glue these very thin PE pieces I notched the leading edge and wing surface with a scribing tool. The fences then fit securely into these scribed notches with thin CA glue. Notching the leading edge exactly as needed was difficult to accomplish as the notch must wrap around the leading edge circumference from top to bottom wing. Use caution. There are small recessed lines exactly were the fences need to be. This helps greatly with scribing. The primary wing flaps, although separate, cannot be inserted into the lowered position without parts being modified. I therefore kept them in the neutral position. Once the wings were assembled they attached to the fuselage perfectly with minimal effort and again no filler was needed.
Main Gear and arresting gear: The main wheel wells were sandwiched between the main wing halves with no issue and perfect fit. I again assembled the main gear at this time although many will opt to assemble these later in the build after painting the aircraft. These include many pieces and are really nicely detailed. They are a bit fiddly though and offered moderate challenge due to the high part count, poor direction, and nature of the assembly with minimal mating surfaces on some of the parts. I did leave off the majority of the gear doors to aid in painting at a later time. The main gear structure are very strong and nicely reinforced once assembled and glue is dried. I also decided to build up and attach the very detailed arresting gear assembly. This assembly was also fiddly for the same reasons as the main gear but once assembled is a very strong structure.
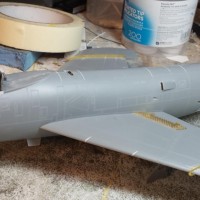
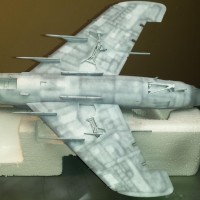
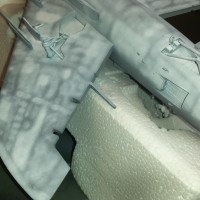
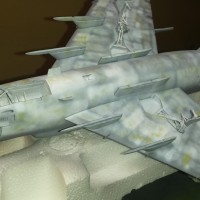
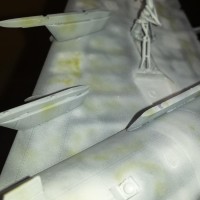
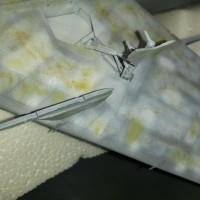
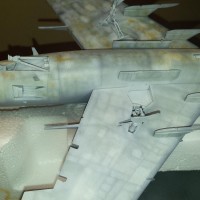
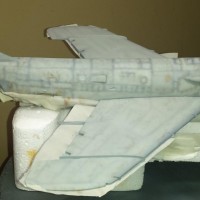
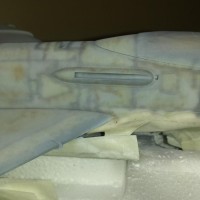
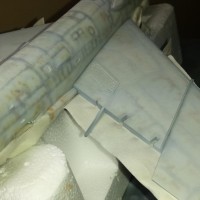
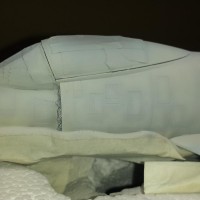
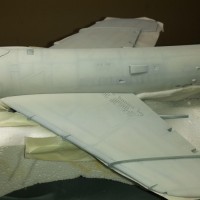
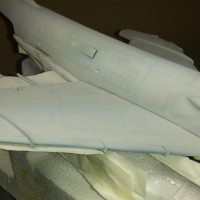
Primary Painting: I would be ready to prime all the assembled parts after masking off the canopy, main intakes, and exhaust opening. I only temporarily tacked the canopy in place with light acrylic glue in order to ease masking the open cockpit. I had to remove the ejection seat b/c the seat top prevented the canopy from closing tightly. I will need to sand the seat bottom a bit prior to final assembly. The Front windscreen was masked at this point and attached. The front of the windscreen did not seat perfectly on the forward fuselage deck. Upon investigation it was the cockpit front cowling that was a bit to wide for some reason. If I attached the cockpit cowling 1-2 mm more rearward the windscreen may have fit better. I narrowed the offending piece with some minor sanding to remedy the windscreen fit issue. Problem resolved. BTW I forgot to mention that prior to all this I added some more detail to the cockpit cowling with plastic pieces and rubber tubing to busy it up mimicking many reference photos. I also attached the PE and Glass gun sight included in the resin cockpit set prior to seating the windscreen. It was time to prime. I used "Stynylrez Easy App Surface Primer" in medium grey on the whole aircraft. This was the perfect color for priming based on my pre-shading techniques. I sometimes black base with either a black or dark panzer grey primer but b/c the aircraft would be white/light grey this shade of grey was dark enough to serve my purposes. I then painted the underside of the aircraft and all control surfaces insignia white. I start with a very thinned mixture of this paint and apply it in a light varied cloudy pattern only painting between the panel lines. Doing this eliminates the need to separately pre-shade all the panel lines with another dark color. To enhance the look of the final paint and eliminate an unnatural monochromatic white/grey appearance I do a lot more preshading between the panel lines before I blend it all in. I do this with several warm colors in the same family, all thinned very well, and applied in a very light, random, cloudy pattern. Although the colors may be very different from each other I keep the contrast between each color about the same. This allows for the colors to be blended with a final coat without one sticking out in an unnatural manner making it more difficult to blend without eliminating the more subtle colors. I do keep the contrast of the panel line shade stronger b/c I do want this to remain more then the subtle pre-shady cloudy patterns. There are many ways to achieve this overall effect but this is the way I do it and have gotten better at it with lots of practice and trials on kits. I then masked off the demarcation line between the insignia white bottom and the Light Gull Grey upper surfaces with Blu-Tac putty to allow for a soft separation of the colors often found on these types of cold-war high visibility Navy paint jobs. I had significant problems applying the grey paint for the following reason. These days I only use what I feel are the best, modern, acrylic paints such as Vallejo Model Air, AK, and Tamiya brands. I did not have any FS36440 (Light Gull Grey) in these newer brands. I am also completely broke at this time without even an extra $5 bucks to purchase some more paint. I have a special account for model making and I am not allowed to access other accounts. This account is in the negative...LOL! To my surprise I found an unused bottle of MM ACRYL #4763 Flat Gull Grey in my stash. Perfect match! I also had an unused bottle of MM ACRYL Thinner made perfectly for this paint. I had not used this older brand acrylic since my early trials with this type acrylic paint many years ago. My experiences were so bad that I stayed with enamels until the new generation of acrylics became available. I had also purchased a much better, more expensive GREX airbrush with a larger .50mm needle perfect for fast drying acrylics since then. So with all my current experience with airbrushing, and better airbrush I gave the MM ACRYL paint a go. Well, no matter what trick, and mixture I used, this stuff just SUCKED! No other way to say it. I tried everything, thinning it out, adding flow-enhancers, and a large needle and this stuff would not spray w/o clogging badly every 30 secs or less. Sometimes I could not even clean the needle w/o pulling it out of the airbrush. It would only spray at the highest air-pressures and needle wide open but that set up did not allow me to use my usual fine spray band techniques. So my paint job was not perfect and varied from my usual outcome. It took me hours to apply this base paint in a fine, cloudy, tight pattern, between the panel lines. My final, well thinned, wide pattern, blending coat with this paint was easier b/c I could use the needle more open without the need for finer patterns, but even then it was tough. I usually use a paint:thinner ratio of about 2:8 making the paint almost translucent for perfect blending coat w/o completely covering all the pre-shading. I was finally complete with this stage. Now onto detail painting, and, extensive weathering.
Stay tuned for my next posting which hopefully includes the final product.
Paul, first, I'm sorry for your loss. It is very clear just how much you miss your mother and that wonderful way she recognised you as her boy despite all that growing up nonsense.
I wish you'd taken longer over sharing the build thread, for my own selfish reasons. I enjoy your builds and learn a lot, so it'd be nice to spread them out a little, I'm not much of a 'binge watcher'. People like me and Jeff (sorry, buddy, but you know it's true) have a limited attention and need our education in bite sizes.
I especially liked the way you explained the layering of your paintwork and included ratios of mixtures and the techniques. As well as sharing your mistakes...
Anyway, thanks for sharing this (on lots of levels). Fantastic work.
Thanx David, Great feedback and thoughts. I get so caught up in the build and then before you know it I have all this to say instead of in little bites. Sorry for that. I think it would be better if I reported sooner so I could be more detailed and concise regarding steps of build.
Paul, this one is probably the most interesting of your work I’ve read so far (mind you that I only got hooked here a few months ago, so yes, I might have a lot to catch up from way back).
The Demon is a very appealing jet, just the fact that it’s from HobbyBoss alone makes it more interesting.
Thank you for explaining your techniques, it’s the best part of any WIP to me, much more than the actual outcome. I always found new perspectives and ways to improve from reading other fellow modelers experiences. I’ll be surely following it
Hey Pedro, thanx for comments and glad you enjoyed. This really is a well designed model with very good, above average fits so really worth sharing.
Looking forward to seeing this all done, my friend...don't see that many of 'em.
Craig, I am looking forward to it being done also...LOL!
Very nice, all need more Demons. I have one finished from Grand Phoenix , 1/48 too. But i worked little different with colors.
Why dont u post it for all of us to see. Maybe give me some more ideas before finishing this one.
Hi Paul. The Demon is one of those US Navy aircraft that has often been neglected as it was over-shadowed by more "glamorous" fighters but it spawned the F-4 Phantom, needless to say! I love the shape of the Demon and also have this one in the stash with all the resin, PE, and aftermarket decal goodies to make an awesome Demon. I can't wait to see your Demon when finished. Judging by what you have done thus far she is going to be a winner!
Morne, get it on the work bench asap...its a great model. Fit will be perfect if you do lots of dry-fitting and think ahead of the instructions. You will be very pleased. As I said I had some extra goodies but based on the included details I decided to make it an easy build and skip the goodies except for seat and harness. I did not mention this but the after-burner section is really really nice as is, and the dive breaks are really nicely done and have lots of detail. Best I have seen on a basic kit w/o extra stuff. Details in wheel wells are good and I like the arresting gear assembly. I really wanted to drop the flaps but needs some research and modification to do so, kit not set up for that. I want to see your progress when u do it. Thanx for feedback!
Great work so far Paul - and great details in the write up! I know where you're coming from in the emotional connection to the build. Every time I start up a build of one of the jets that dad flew, I am excited and melancholy at the same time. I just snagged another F-4C and decals to match his Cam Ranh Bay ride, but keep putting it off for other projects...
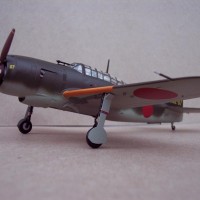
I built a 1/72 Demon a few years back - as a precursor to my favorite jet (the Phantom II) I had to. Unfortunately, Emhar is the only kit around in my scale. I didn't look for PE stuff, as I usually don't like working with it, but I did scratchbuild the airbrakes out of plasticard. It was also one of my first attempts at post shading the panel lines, and with the very deep/wide engraved detail on the Emhar kit, it ended up looking a bit heavy-handed! Anyway - still a Demon! I look forward to seeing yours finished up. Here's one pic of mine...
1 attached image. Click to enlarge.
Thanx for the feedback and the picture. Nice little jet...good job!
Paul that Demon is going to look outstanding when completed. Nice write up but like David I feel less is more. Look forward to seeing her done.
Very nicely presented, Paul.