Review: Airfix 1/48 Hawker Hunter F. Mk. 6
OK, it arrived a week ago today, and as soon as I opened the box, I saw that once again I could resist everything but temptation. It really was a "weekender," completed Monday afternoon.
HISTORY:
Hawker Aircraft came late to jet aircraft, and even later to swept wings. Where the company had achieved a 30 year run of success with all previous designs, it seemed to lose its footing with the Hunter. The fighter's immediate predecessor was the straight wing Sea Hawk, a design that was five years behind its US contemporary - the Grumman Panther - when it finally entered service with the Royal Navy in 1953.
Interestingly enough, while the Hunter would go on to become the most successful of all Britain's post-war military jets, it was not considered a success at the outset. The early development of the Hunter was plagued with so many problems it seemed likely it would be replaced by the Supermarine Swift until that airplane revealed even more serious design faults. Overcoming the gun firing problems that were causing major problems in engine operation was like dealing with the Hydra: solve one and two more would take its place. Eventually, a complex gun gas exhaust was installed to insure the gas dissipated below the intakes.
As a design, the Hunter suffered from a too-extended gestation, which failed to take into account very important discoveries about jet aircraft that could have led to early modification of the design. The most important of these was the failure to utilize US research on the all-flying tail that enabled the Sabre to slip past the “sound barrier.” Additionally, like the MiG-15, the horizontal stabilizer was placed high on the vertical fin, the exact wrong position aerodynamically for transonic flight; like the MiG-15, the Hunter would remain resolutely subsonic. Failure of the flaps to operate as effective air brakes led to extended tests to discover the proper location for the ventral dive brake that was eventually fitted. Aileron pitch-up stall was only cured by the addition of a sawtooth leading edge to the wing. What would turn out to be the biggest fault - one shared with all other British post-war fighter designs - was the extreme lack of range, since the original design called for a point-defense interceptor; Hunters eventually carried as many as four underwing tanks and almost always flew with two.
Eventually, the Hunter emerged from all this development (which included several test flights with extensive criticism from Chuck Yeager during 1952-53) with handling qualities that became the standard against which other military aircraft would be judged. The airframe was so strong that no Hunter was ever lost to midair structural failure. The firepower of four 30mm cannon was so heavy that any target that got in a Hunter's sights could be shredded with a two-second burst. 1,972 Hunters were built, of which 400 were later re-manufactured for service with second and even third air forces, and it served with no less than 21 different world air forces, a record only bettered by the MiG-17, which was built in substantially greater numbers, making the Hunter's achievement even more remarkable.
During the Hunter's early life, marks alternated between use of the Rolls-Royce Avon and Sapphire engines as powerplants. Production finally centered on the Avon-powered Hunter with the F.6, which came into operational service beginning in 1955. While the F.6 would be remanufactured into the FGA.9 for further RAF service, as late as 1984 Hunter F.6s were in use to replace the temporarily-grounded Buccaneers for pilot proficiency. With the first prototype having flown July 20, 1951, the Hunter is one of the longest-serving jets in any air force, with the last of its type retired from the Royal Air Force only in 1996. The Lebanese Air Force flew them sporadically on combat missions, retiring their last one in 2014. Several have been flown as "MiG simulators" for dissimlar combat training by the contractor who provides "aggressor forces" for Top Gun.
THE KIT
To my mind, the Hawker Hunter is aesthetically one of the best-looking jets ever designed, with its flowing lines. The Hunter appeared in the US as a plastic kit some 60 years ago, with a release by Lindberg that could, with a lot of putty, sanding, and a fair bit of scratchbuilding talent, be turned into a fair approximation of the airplane. Airfix first released a 1/72 Hunter F.6 in the early 60s. The next 1/48 kit would not appear until the mid 1980s, when John Adams of Aeroclub released an F.6, FGA.9 and T.7 as vacuformed kits. These remained the best 1/48 Hunters when Academy released their 1/48 Hunter in 1998 - with a cockpit done in 1/72! Fortunately, Aeroclub released a 1/48 correction set, since the rest of the model was essentially correct.
These kits are all nice bits of history, with the release of the Airfix 1/48 Hunter. As with the rest of “new Airfix,” the kit is designed for ease of construction, coupled with a high degree of accuracy. It is nowhere near as fiddly to get right as the Academy Hunter.
The cockpit canopy is beautifully shiny and clear; it comes in both closed and open options. With a black cockpit, the closed option doesn't lose much detail-wise while not marring the beautiful lines of the original. The cockpit is indeed 1/48, and supplies sufficient detail considering it's black. If a modeler chooses to open the canopy, it might be necessary to get hold of a resin MB Mk.2 seat.
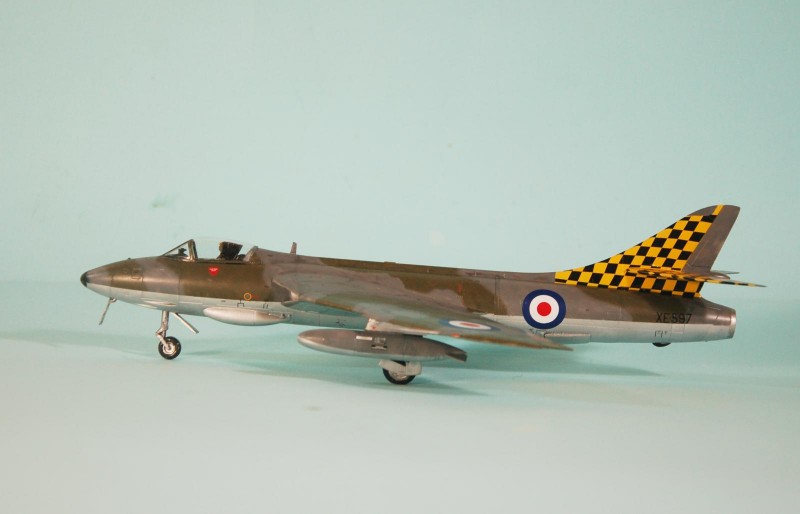
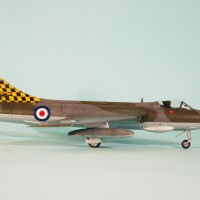
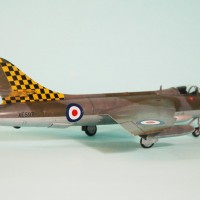
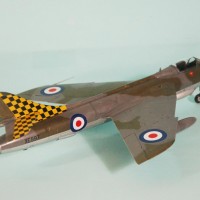
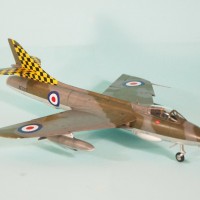
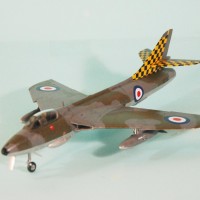
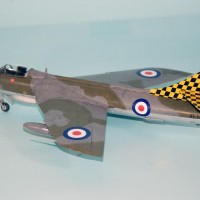
Decals provide the CO's airplane of 63 Squadron as seen for the Battle of Britain 1958 celebration, with black-and-yellow checkers over the vertical fin and horizontal stabilizer, a Hunter assigned to RAF Valley in 1968, and a well-photographed Hunter of the Royal Netherlands Air Force in 1964. Fortunately, Aeromaster released several interesting Hunter decal sheets, and these can still be found at reasonable prices on EvilBay.
CONSTRUCTION
As is usual with “new Airfix,” if one follows the excellent instructions, there will be few difficulties encountered, and an excellent result is assured. That said, my kit had some slight warping of the main airframe parts. This was easily rectified with care in assembly. As with all modern CAD designed kits, parts fit is precise and you are well-advised to be certain you clean off all sprue nibs after you cut a part off the sprues. I chose to use the parts for the ejection seat that included molded-on seatbelts, since I planned to use the closed-canopy option. I added fish weights in the space beneath the cockpit floor behind the nose wheel assembly.
I glued the rear fuselage parts to the forward parts before further assembly, so I could work the joint from both sides and insure good fit that wouldn't need any filler later. I particularly like the way Airfix designed the intake trunking, so that it fits in each fuselage half separately and aligns easily. When I glued the fuselage halves together, I realized there was slight warping in the main forward parts. I ran glue along the centerline seam an inch at a time and then rubber-banded that section, being very careful as I went along to align the halves along the seam, with the result that I only needed a light scraping with the trusty old #11 blade to get rid of the seams. The shell casing “Sabrinas” were then attached; these fit much better than did the Academy kit.
The wing assembly requires that the one-piece upper half be attached to the fuselage first. Again, I found slight warping. I discovered that if I started the assembly by gluing the leading edge of the intake trunking to the intake lip of the wing and was sure to get that firm and smooth, followed by squeezing the wing to the fuselage to get the wing-to-fuselage gap at the forward edge nice and tight, and did this on both sides before proceeding, that the rest of the attachment was easy and resulted in no need of filler. This is much superior to the Academy kit, where it is advisable to attach the wings to the fuselage half before assembling the fuselage, to work the wing/fuselage seam into position.
Once the upper wing part is attached, the gear wells are assembled and then the lower wing is attached. Here, I found that if I made sure to get tight fit on the fuselage/wing joint, that the rest of the assembly “clicked” into place. Be sure before assembly to open the mounting holes for the drop tank pylons if you are going to use them. The flaps and ailerons are separate. This is one case where the flaps will fit equally well up or down. The ailerons can be displaced a few degrees up or down if one chooses. I then attached the horizontal stabilizers and mounted the dive brake in the closed position.
If you choose to use the closed canopy option, be particularly careful when you run glue around the edge. You need to also apply the camouflage colors to the immediate rear of the cockpit on the spine. The rear of the Hunter canopy does not have a frame and it overlaps the spine, so you will see the colors beneath it. The fit is very tight, and it is easy to get a little glue up in the rear of the canopy through capillary action (which I managed to do, but fortunately it's not horridly visible). The fit is tight enough you will need to rubber-band the canopy to get it to sit down completely without any gaps.
COLORS & MARKINGS
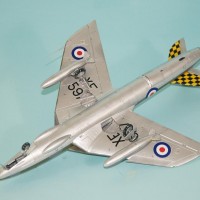
I first painted the tail yellow and masked that off, then applied Tamiya Gloss Black to the lower surfaces and then painted them with Vallejo White Aluminum. When that was dry, I gave it a coat of clear Satin and the result looked very close to RAF High Speed Silver. I then masked off the lower surfaces and painted the upper camouflage with Tamiya XF-54 Dark Sea Grey and XF-81 RAF Dark Green. When it was cured, I applied Clear Gloss and then unmasked the lower surfaces.
The kit decals went on without problem under a coat of Micro-Sol. I did have to touch up the black checkers on the tail to insure coverage across the leading edges of the vertical fin and the stabilizers. Airfix provides every stencil, and they're all small. I probably spend 75% of the time of decaling on these, but the end result is worth it.
For final bits, I attached the landing gear and drop tanks and unmasked the canopy. Kudos here to Airfix for the design of the main gear. It's impossible to get the alignment wrong, and the joint is very strong. And the gear is not fully-extended, as on the Academy kit.
CONCLUSIONS
This is the 1/48 Hawker Hunter everyone's wanted. You can turn your Academy kits into door stops. Another winner from Airfix. The FGA.9 is an obvious next release, since every part other than the extended drop tanks and “cut out” flaps are in the kit now; there's also a “straight leading edge” F.4 in the works for later this year, and you can see inside the wing just how this will be done (hint: a little cutting and sanding). This is a kit that anyone with some experience with plastic kits can undertake with confidence. Take care in assembly and you won't use filler anywhere. Highly recommended! I will definitely be doing others.
I'm with you - always though the Hunter had a classic elegance. Nicely done as usual, and love that scheme with the checkerboard art.
Good work, TC... I like it.
Tom, thank you very much for this elaborate review and presentation!
Waiting for long for a modern 1/48 kit of the Hunter (and I always felt something was wrong with the shape of Academy´s, maybe canopy too short?), so yes, just ordered one now, on the spot.
There are different producers for resin Martin-Baker seats (variant Mk.2H or 3H). I think the True Details seat resemble the original seat most. The Quickboost one has sharp details but is missing the parachute which was often (or always) fitted into the seat. The PJ production one shows very soft details.
Xtradecals have already released new decals sheets for the Airfix Hunter.
Nice! Informative narrative as well.
Superb! Very nicely done and written story is top notch.
Congrats
real pretty...that didn't take you long
The great "Carnac the Magnificent" once said" I see in your feature" another Hawker Hunter . Wally Fisk had a Hunter in his collection at Polar Aviation. He bought it from the Singapore Air force. It was the two seat trainer version. With a sharks mouth painted on. Does the Airfix kit look like it could be molded with a new fuselage to represent the trainer version?
Great read and mod as always.
Thanks for the background & build review. Your Hunter looks superb & I feel a heavy dose of temptation coming on.