One salty modeller!
This article is part of a series:

My last post concerned my first oil and enamel washes as i am wanting to have a crack at different techniques and effects, this one concerns chipping, something that i think looks great but have been too scared to attempt. Well, time to get on that horse and give it a shot.
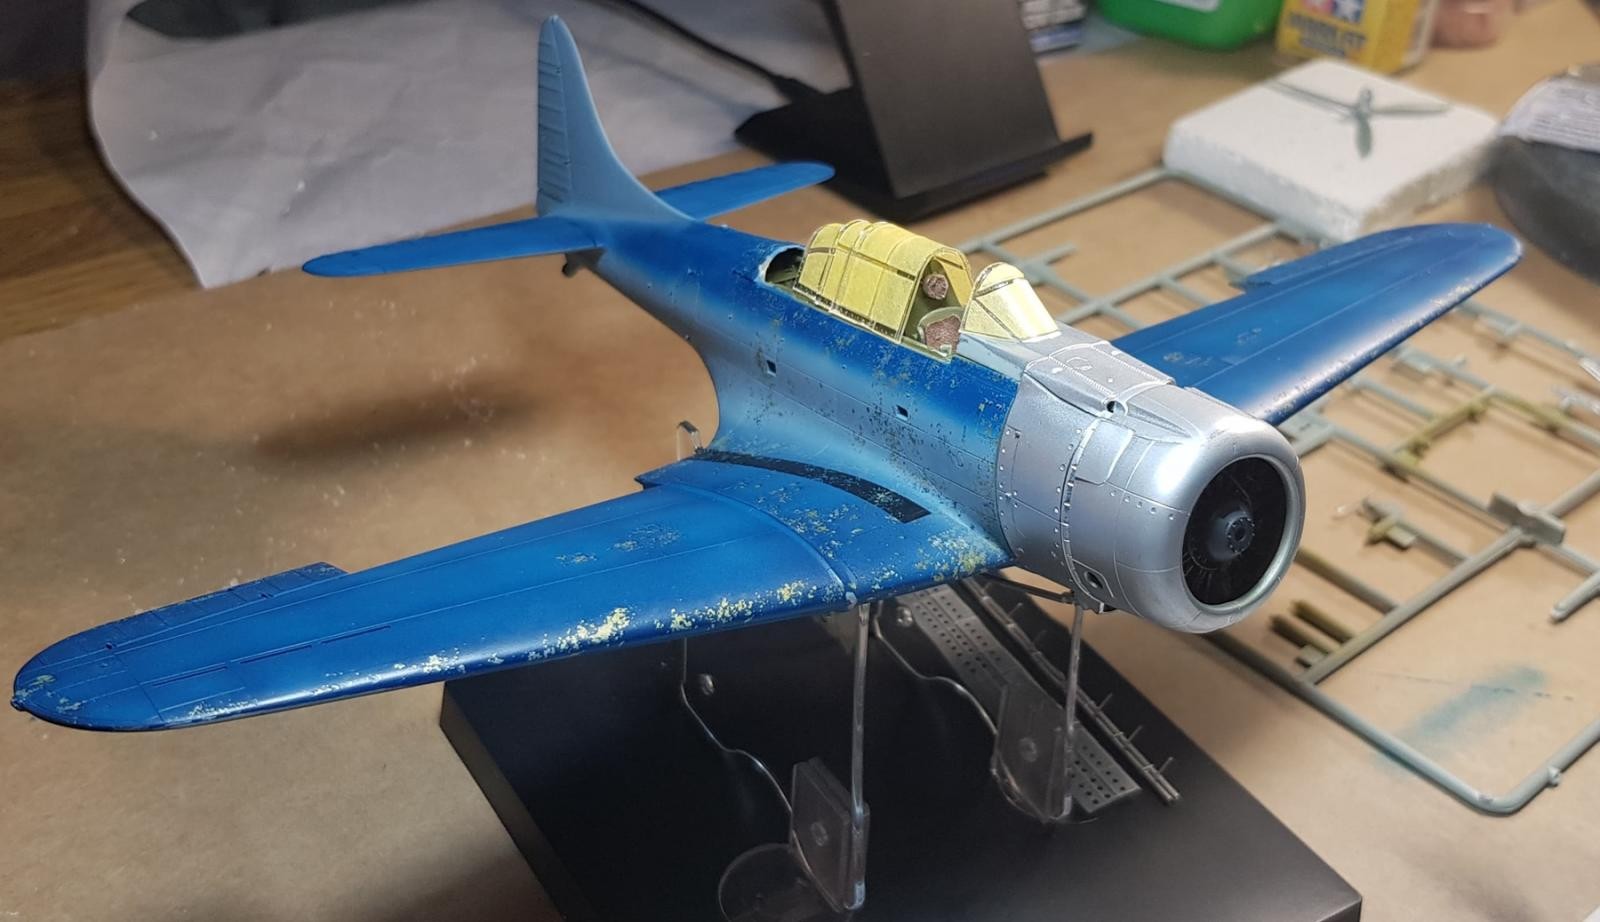
The victim is Academys 1/48 Dauntless, it should have really been a Japanese plane in retrospect but this kit was cheap..plus, it's a Dauntless, and i have a soft spot for the old girl. I'll just insert here that i must have got the Friday afternoon moulding of this kit as the fuselage was warped, the wings didn't align, and the cowls were shocking and had to be sectioned and then braced with sprue to come true and align with the gun mount and fuselage. It ended up being a trimming, putty and sanding monster of a kit. So, moving on from that joy, I had looked at the different chipping techniques since my jump into models mid last year and had decided that the salt one looked pretty cool, plus i had salt in the cupboard so could save money on product!
The method-
Step 0. Piece together terrible kit to resemble an aircraft
Step 1. Aluminium base.
Step 2. Wet.
Step 3. Apply crushed rock salt to wet area.
Step 4. Let dry.
Step 5. Apply paint over salt.
Step 6. Let dry
Step 7. Remove salt with brush
Step 8. Sit back and enjoy the fruits of ones labour
Easy!...right? Had to be. So i did some salt tests on my leftover Warspite base and figured out a few things, salt placement was going to be a challenge, generic table salt didn't work so it had to be rock salt, psi had to fairly low initially so all of the salt didn't blow away, paint had to be thin to go with the low psi. Two tests and i felt i had enough of a handle on it that when i was ready to tackle the model i would be good to go.
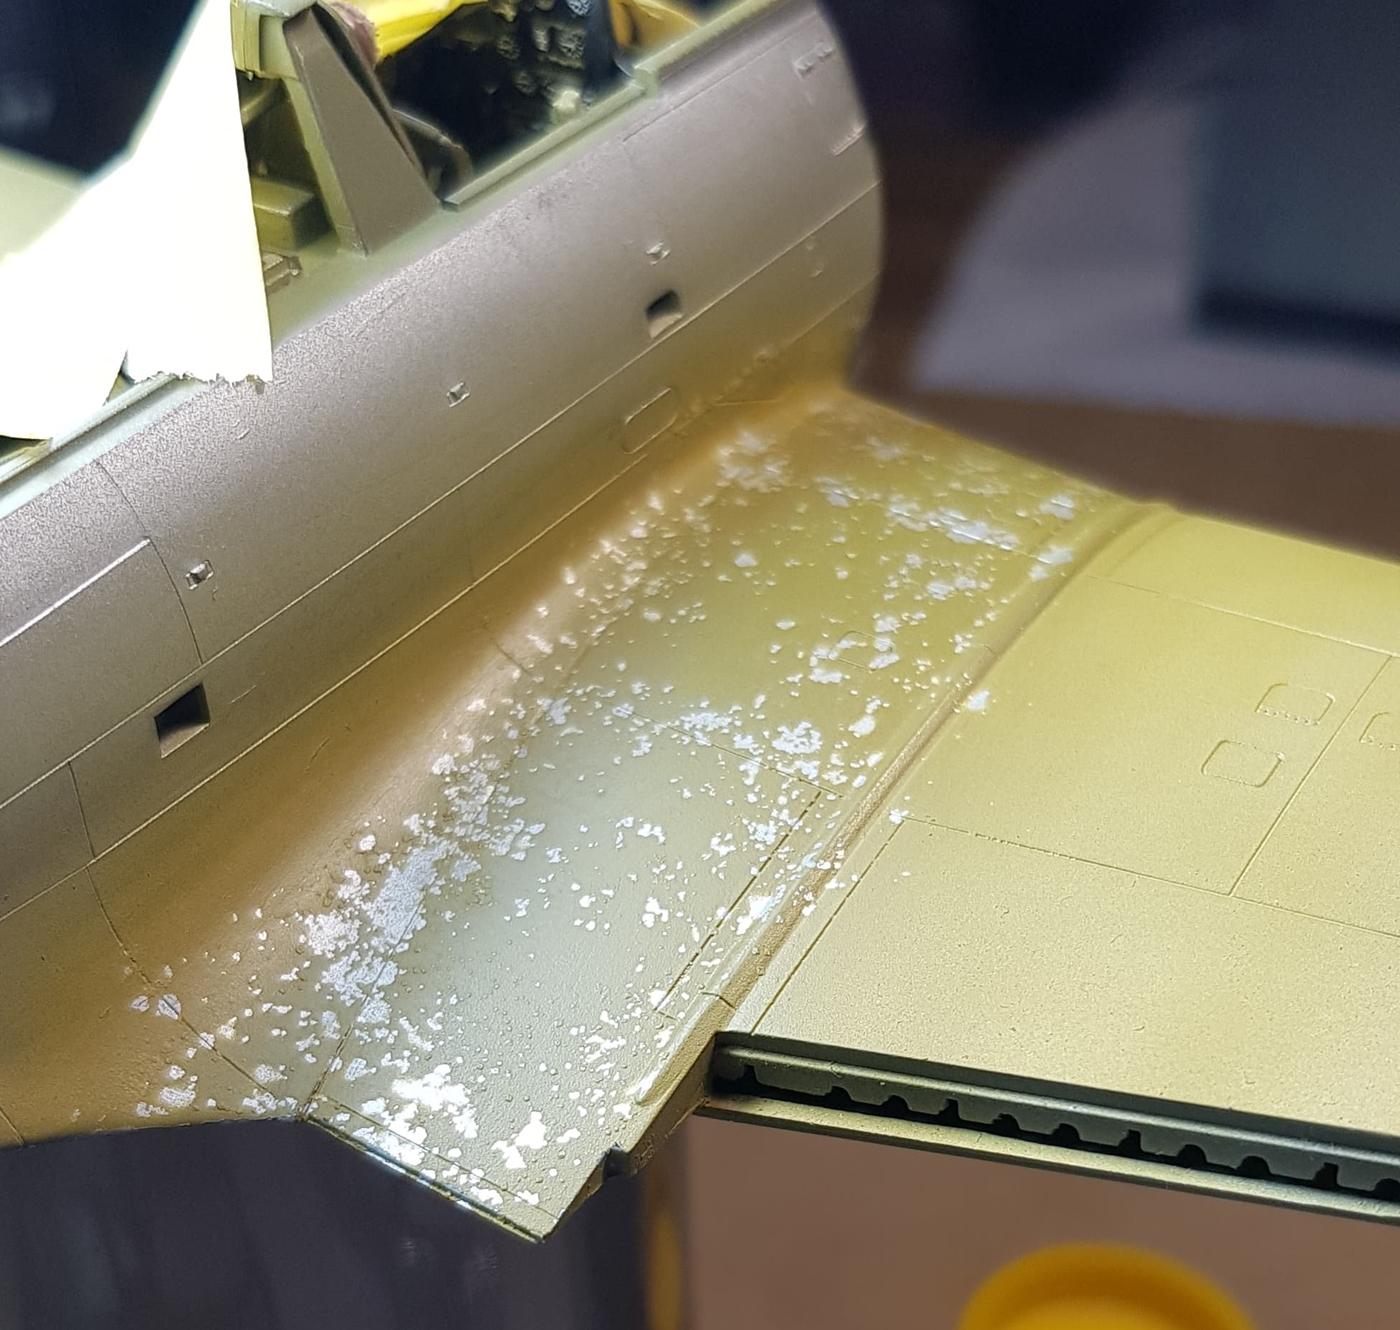
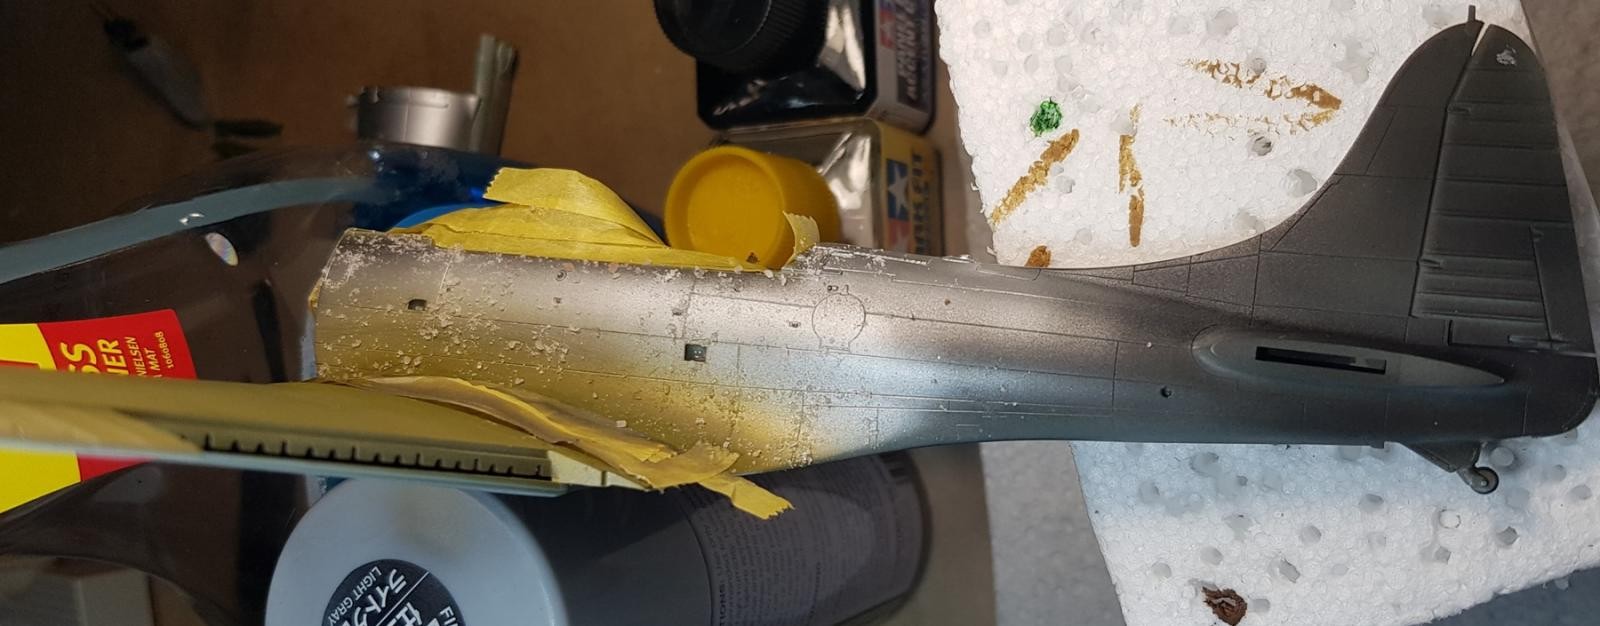
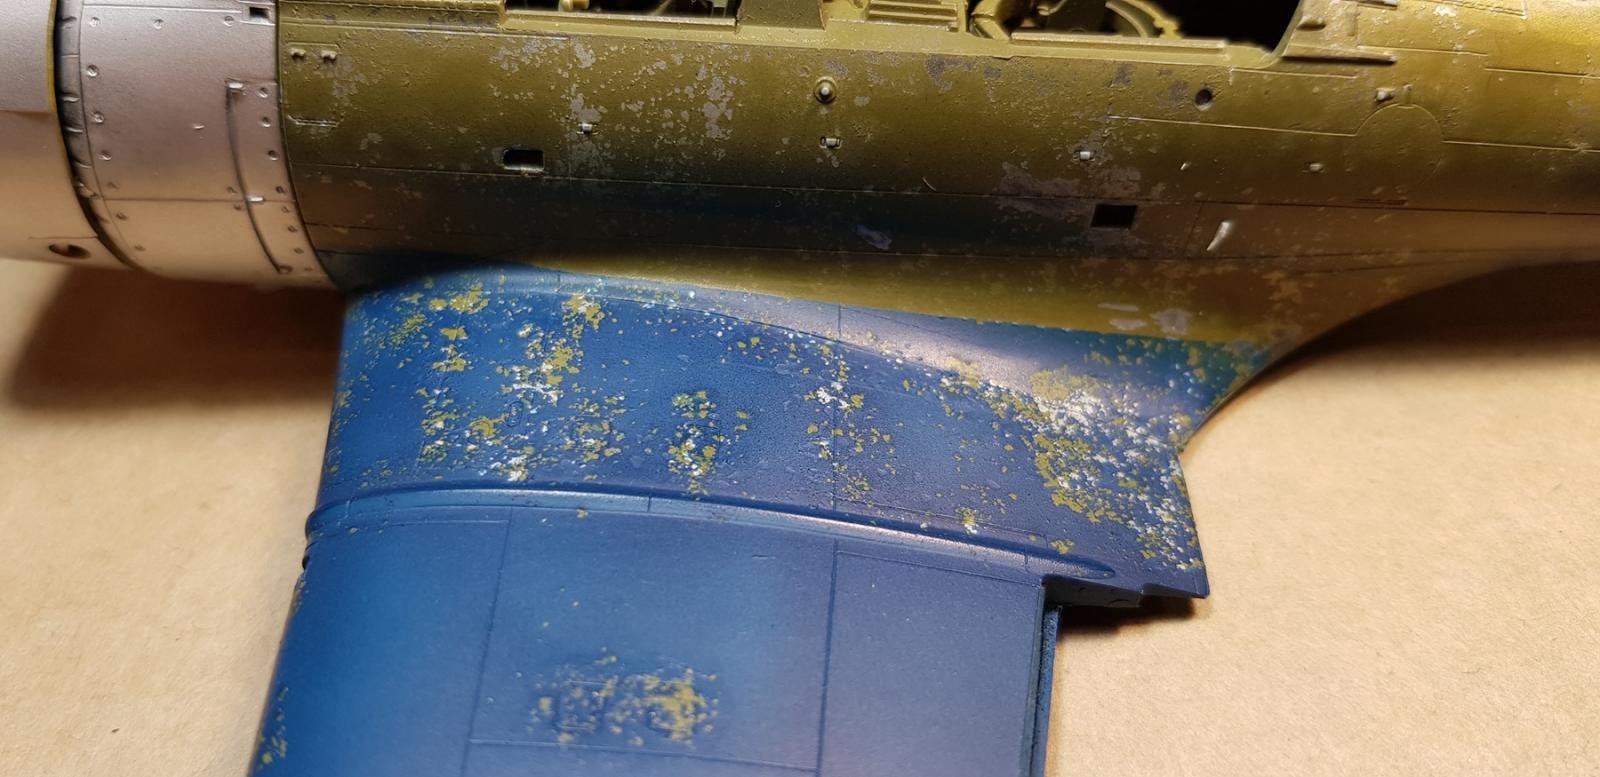
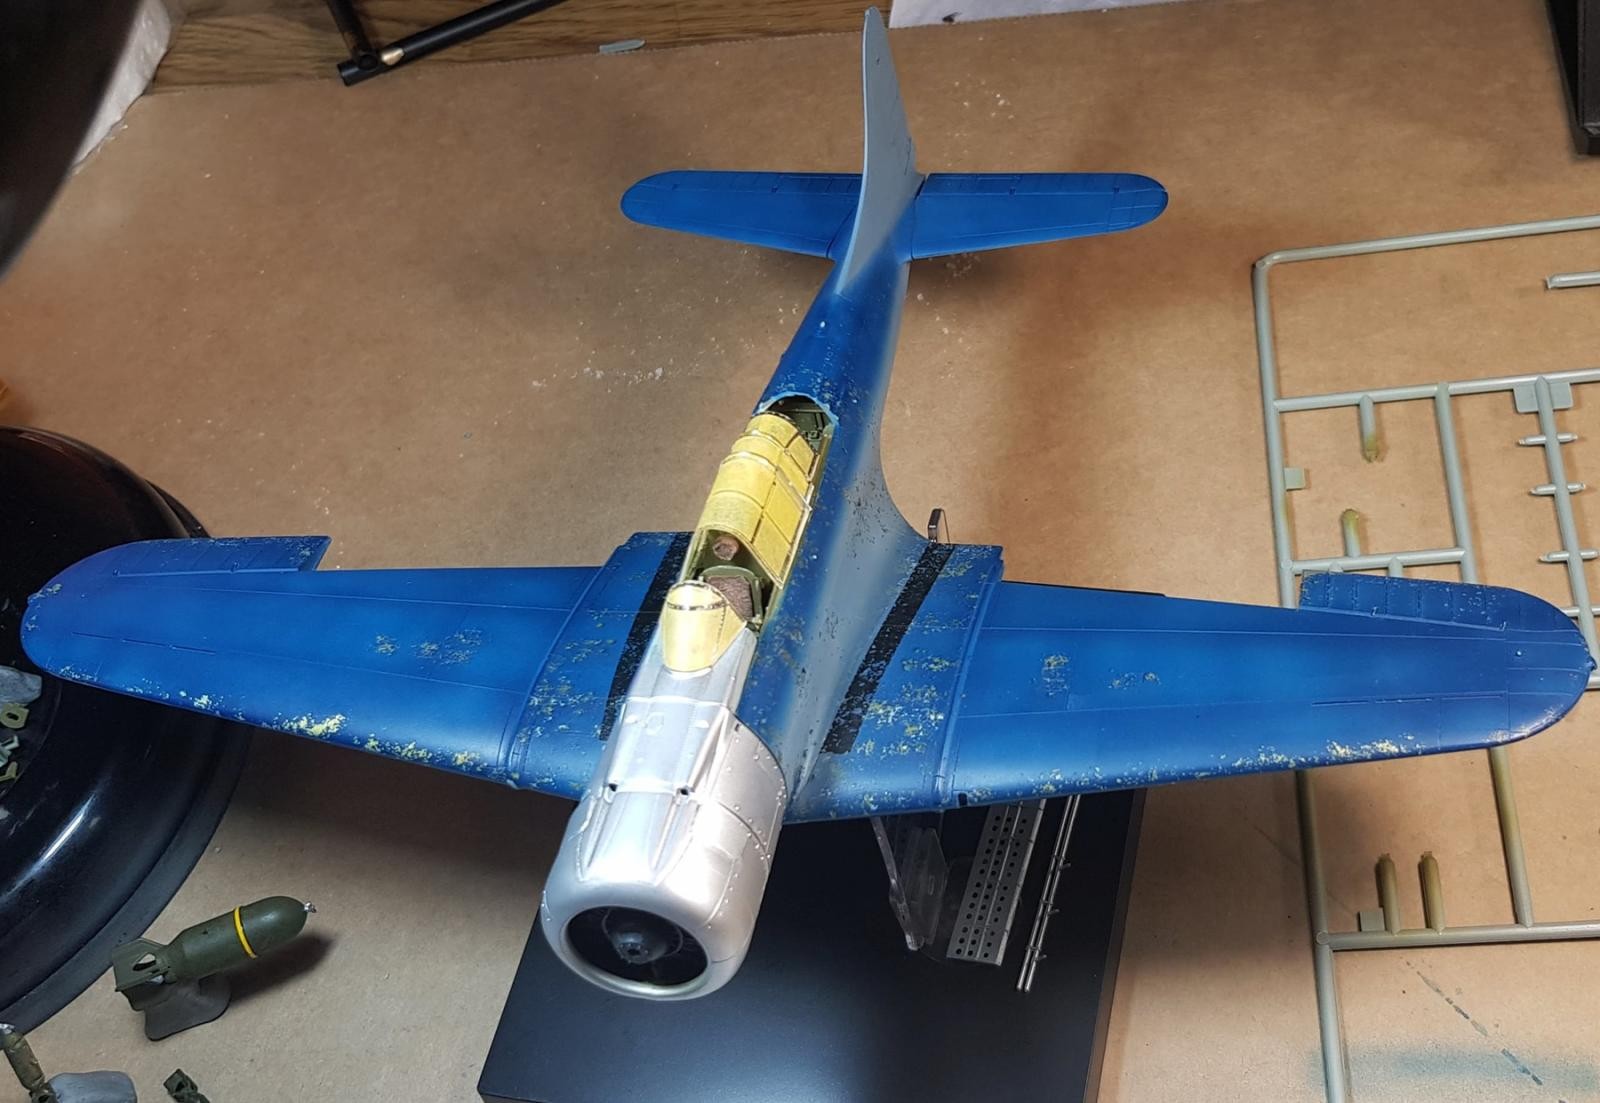
So i got her to the stage of 'salt ready'. The wings and fuselage area were sprayed with a black base then aluminium which was rubbed down with a cloth to smooth it out. The areas i would be doing were the inboard upper wings, fuselage area around the cockpit and engine cowl sections. At this stage i wanted it to be 'realisticy sort of'.. but i wasn't going to beat myself up over a less than stellar job and knew i would certainly over do it, it just seems to be in my nature with these sorts of things.
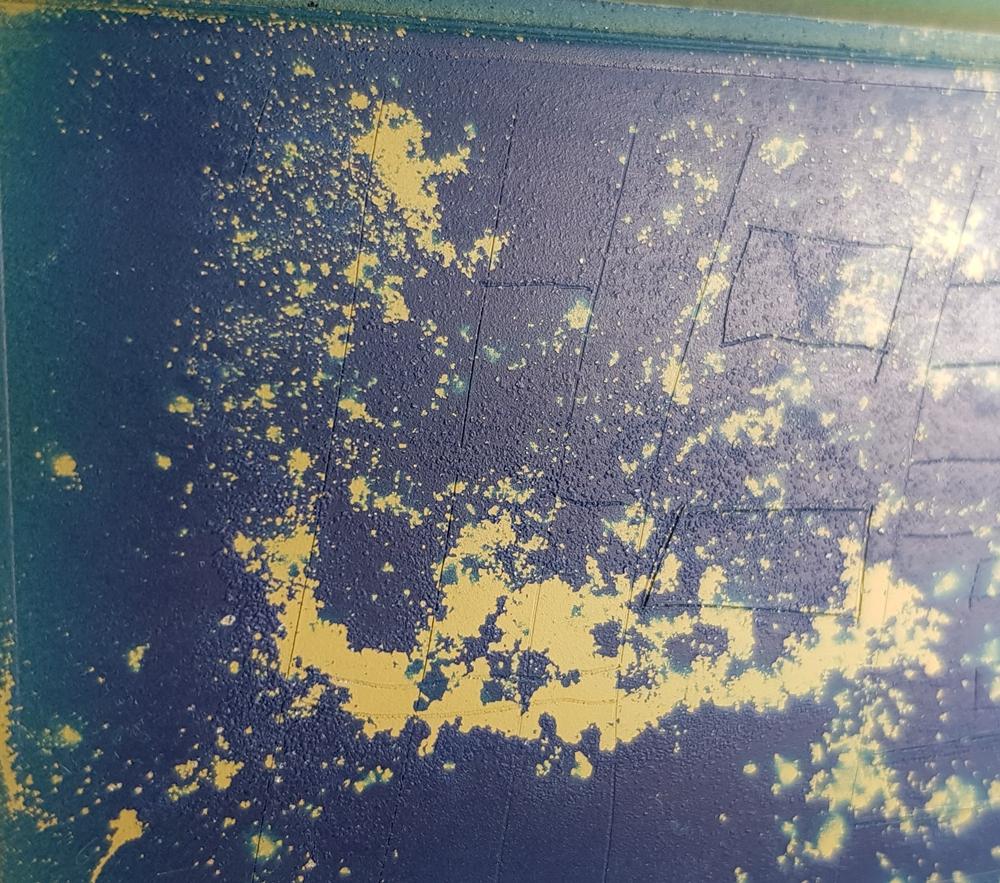
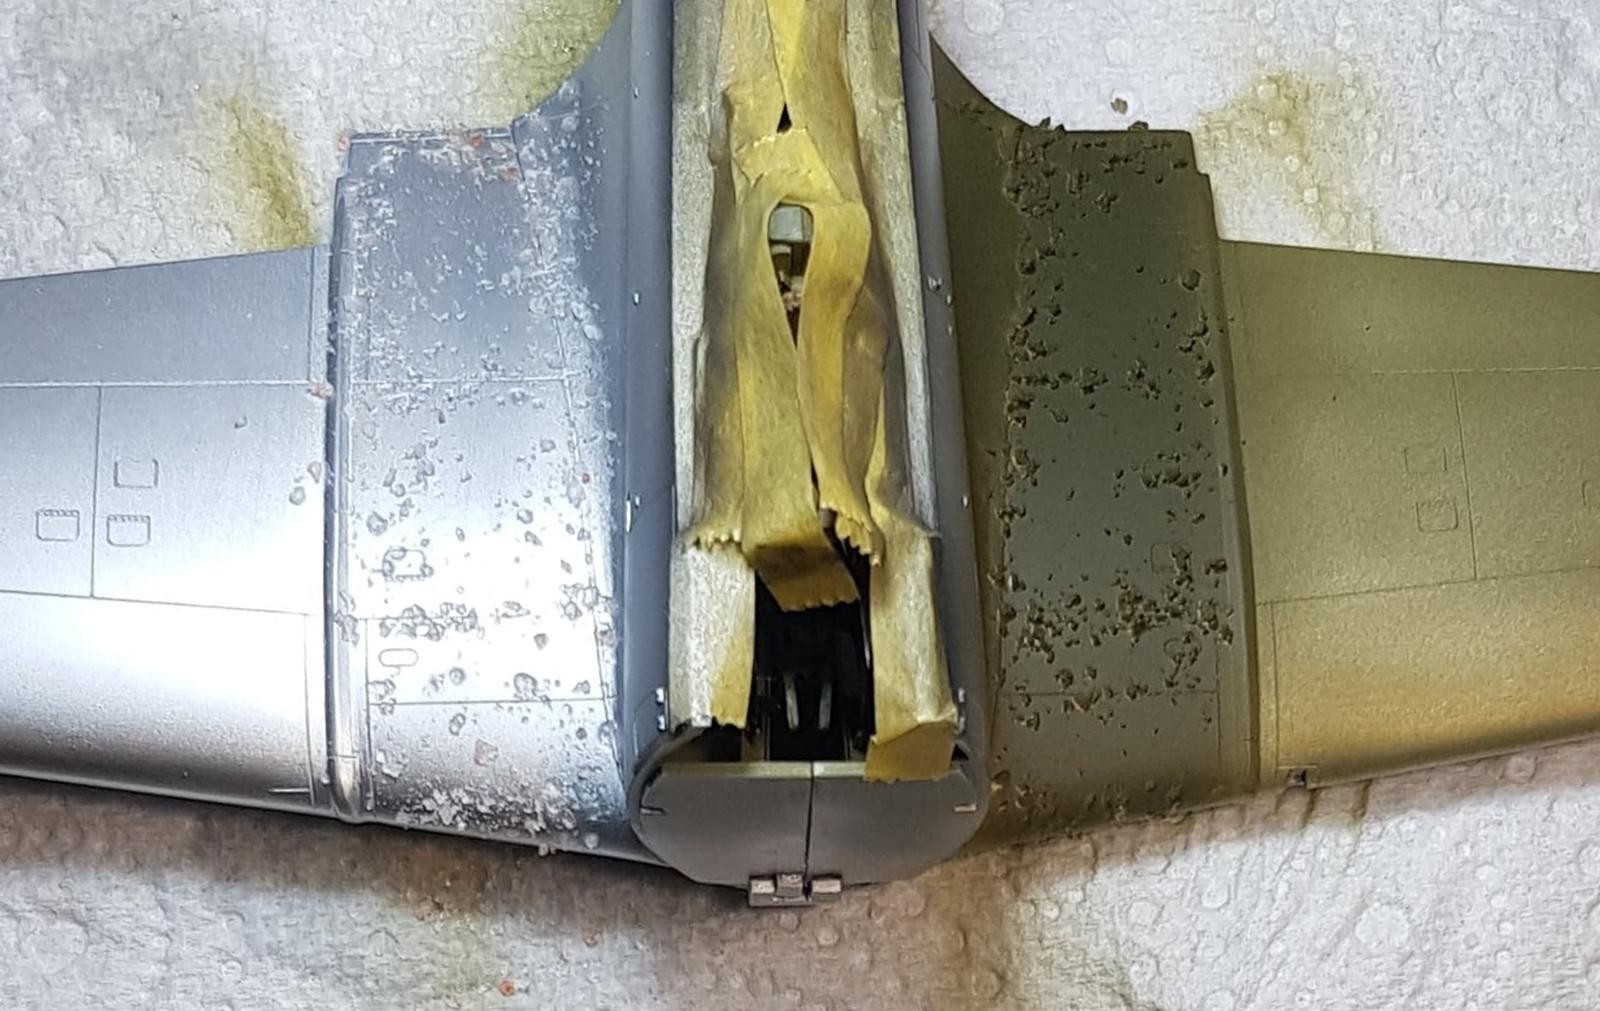
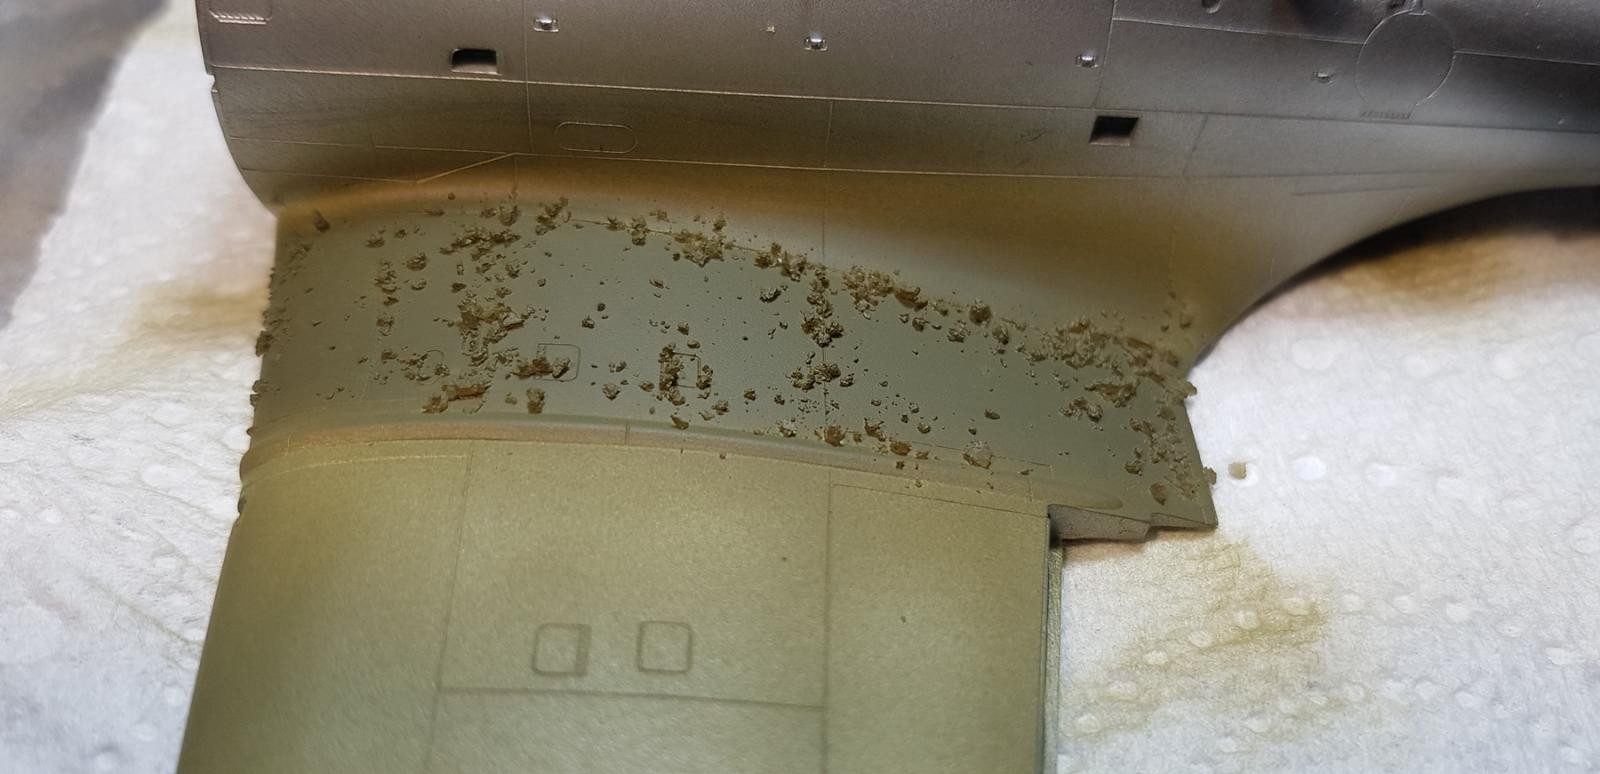
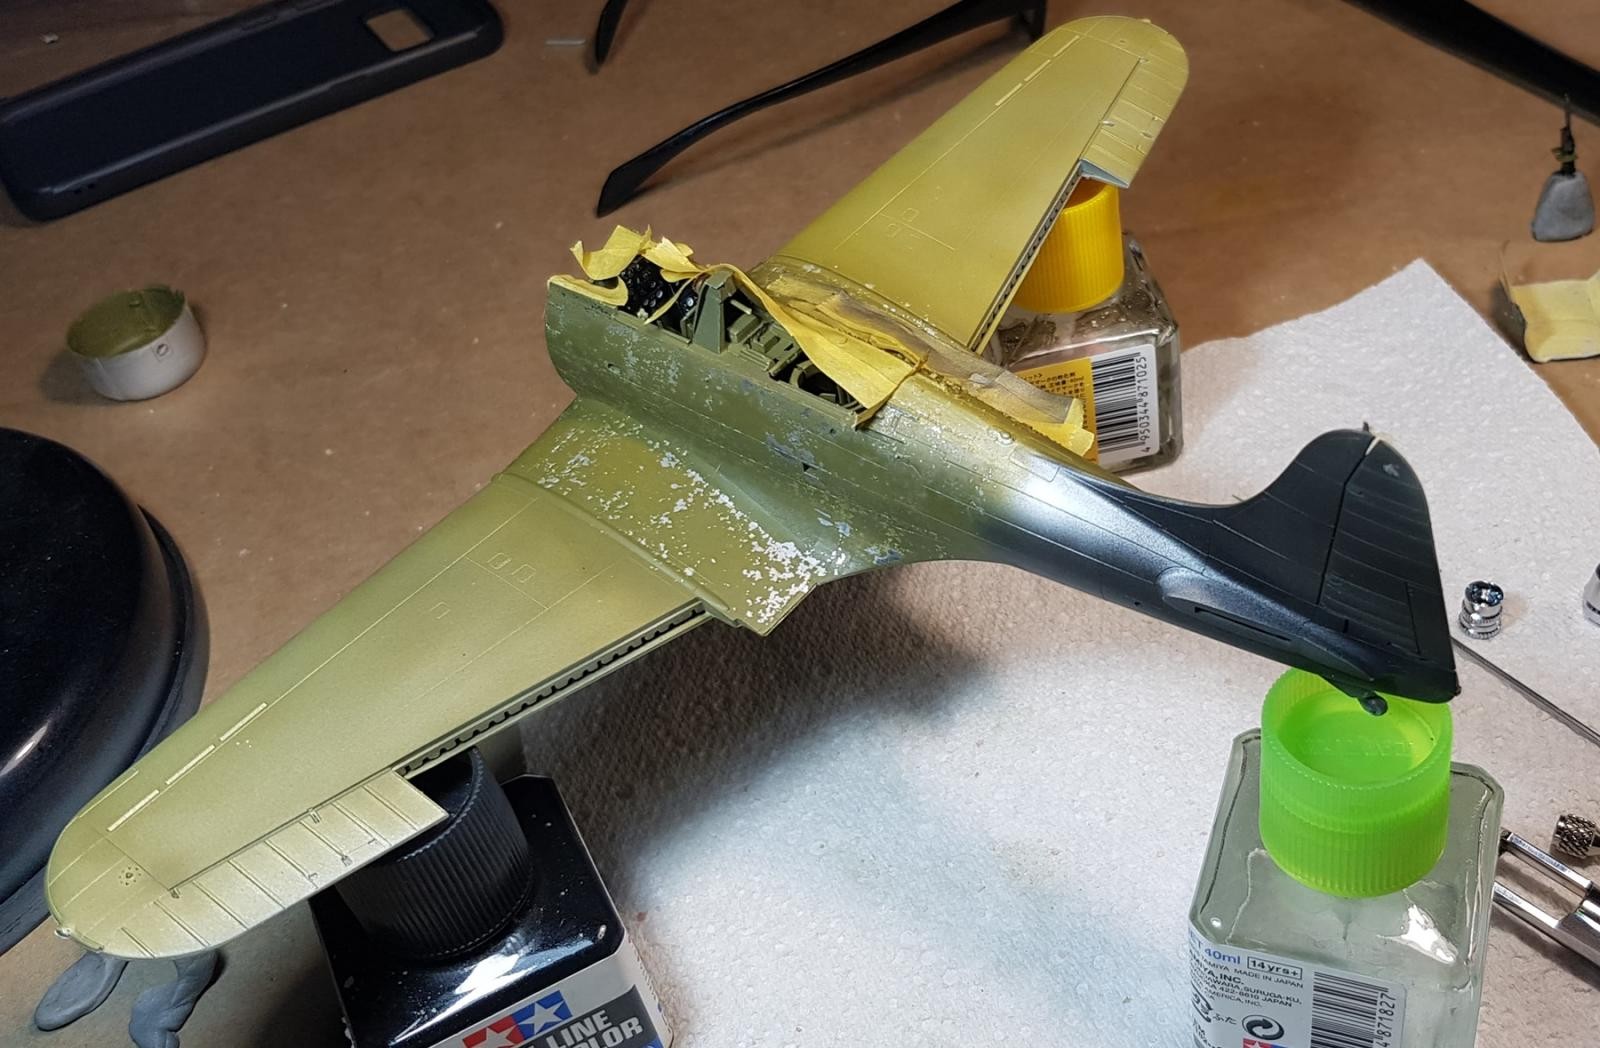
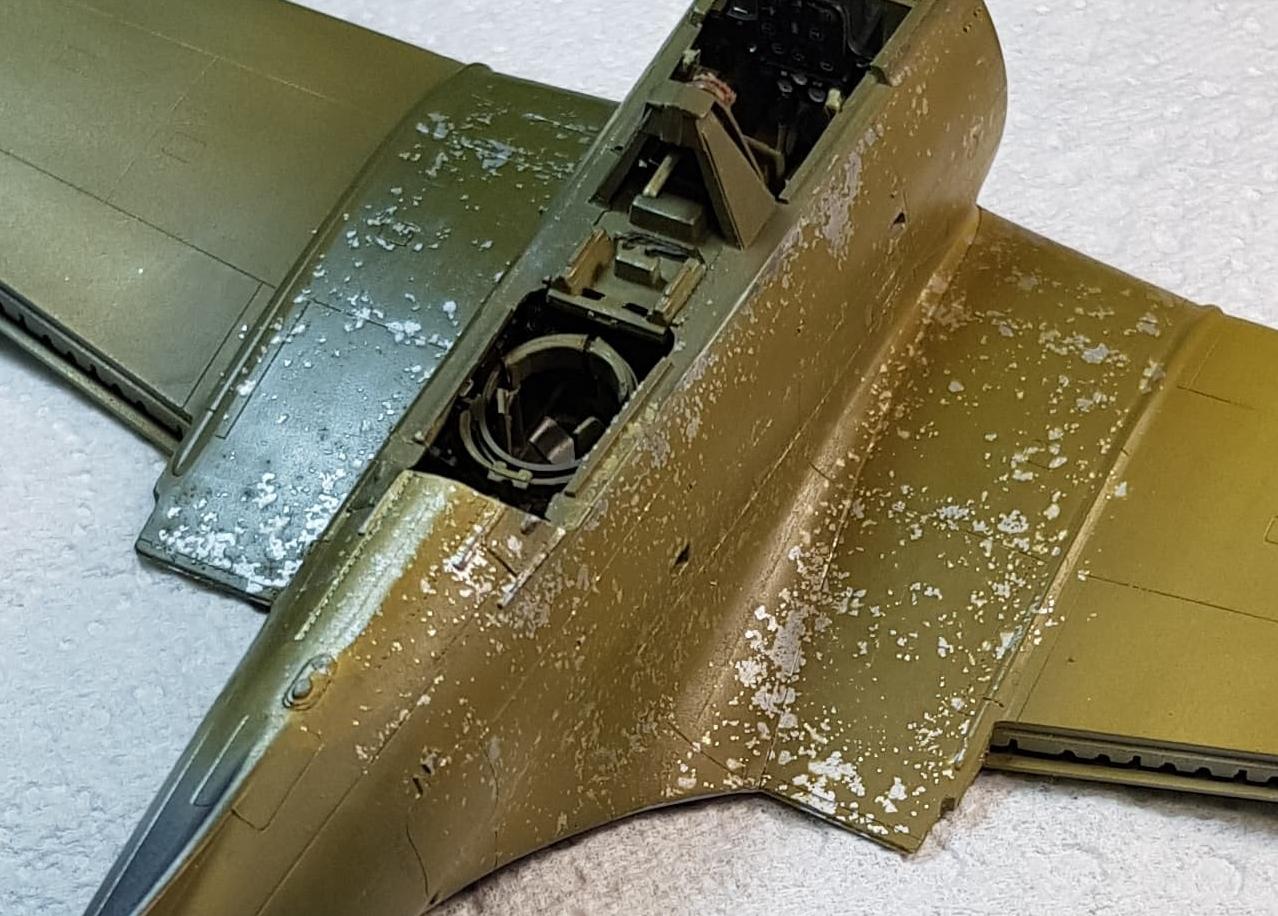
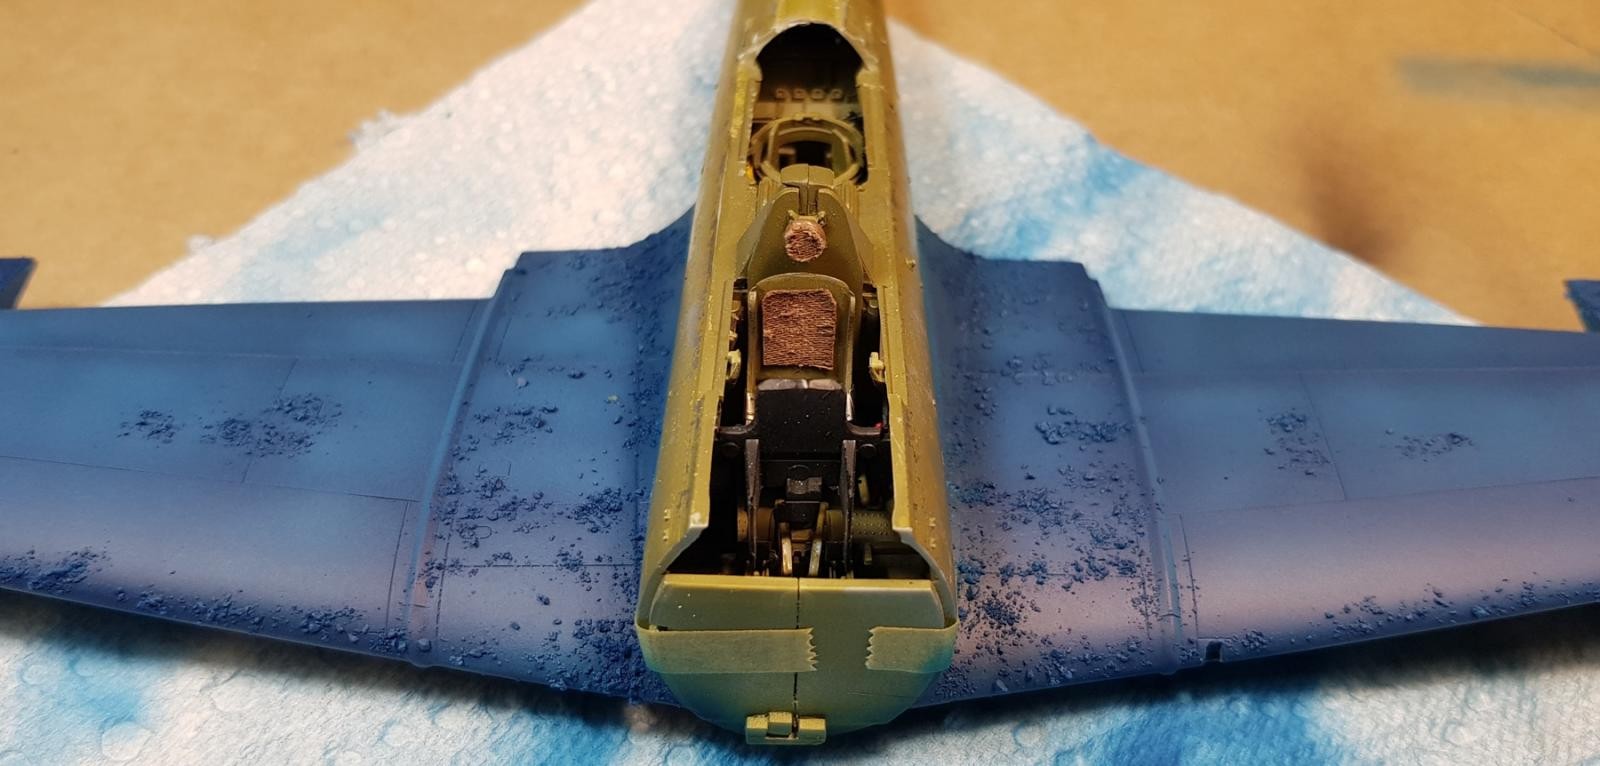
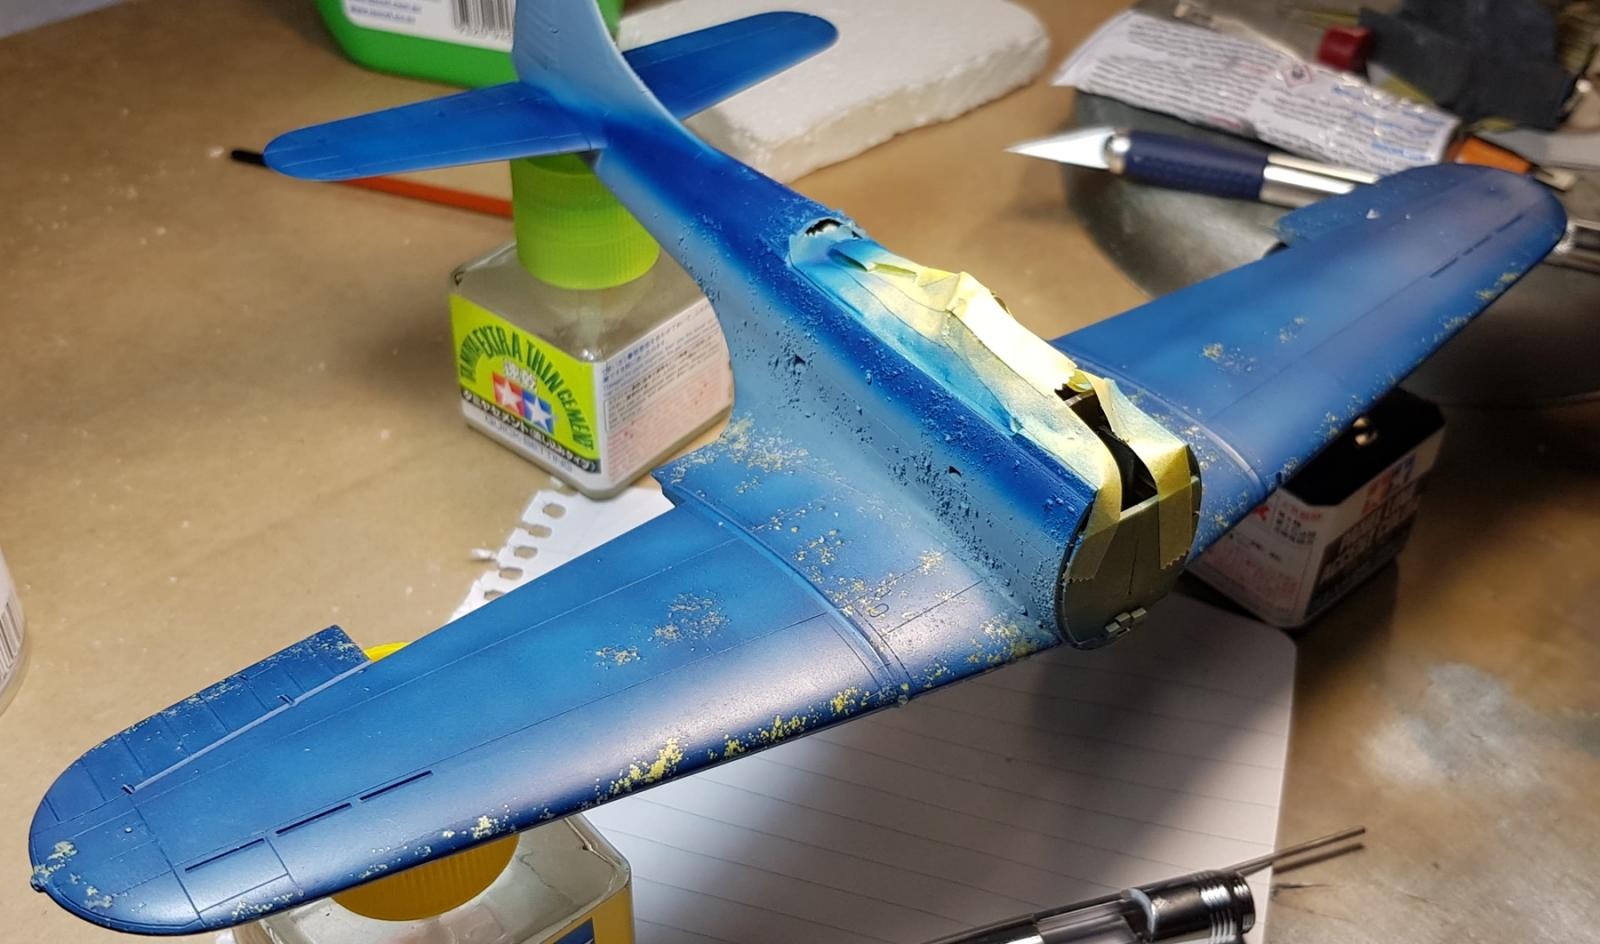
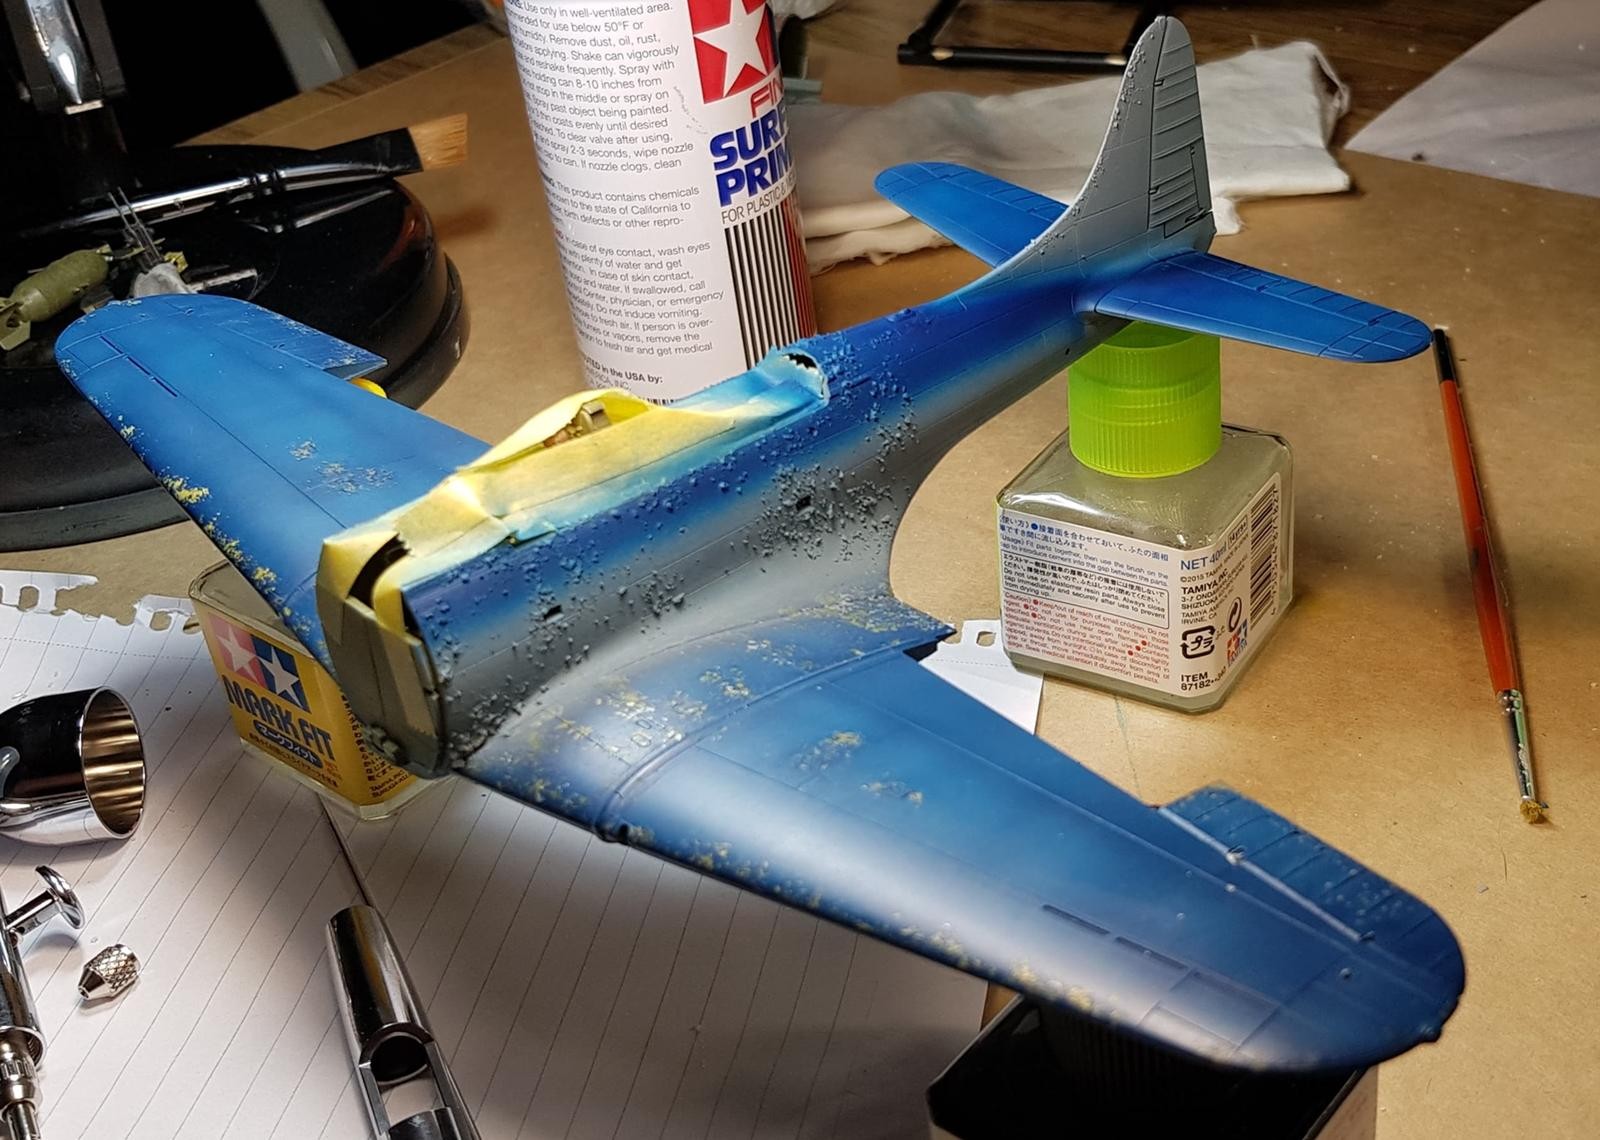
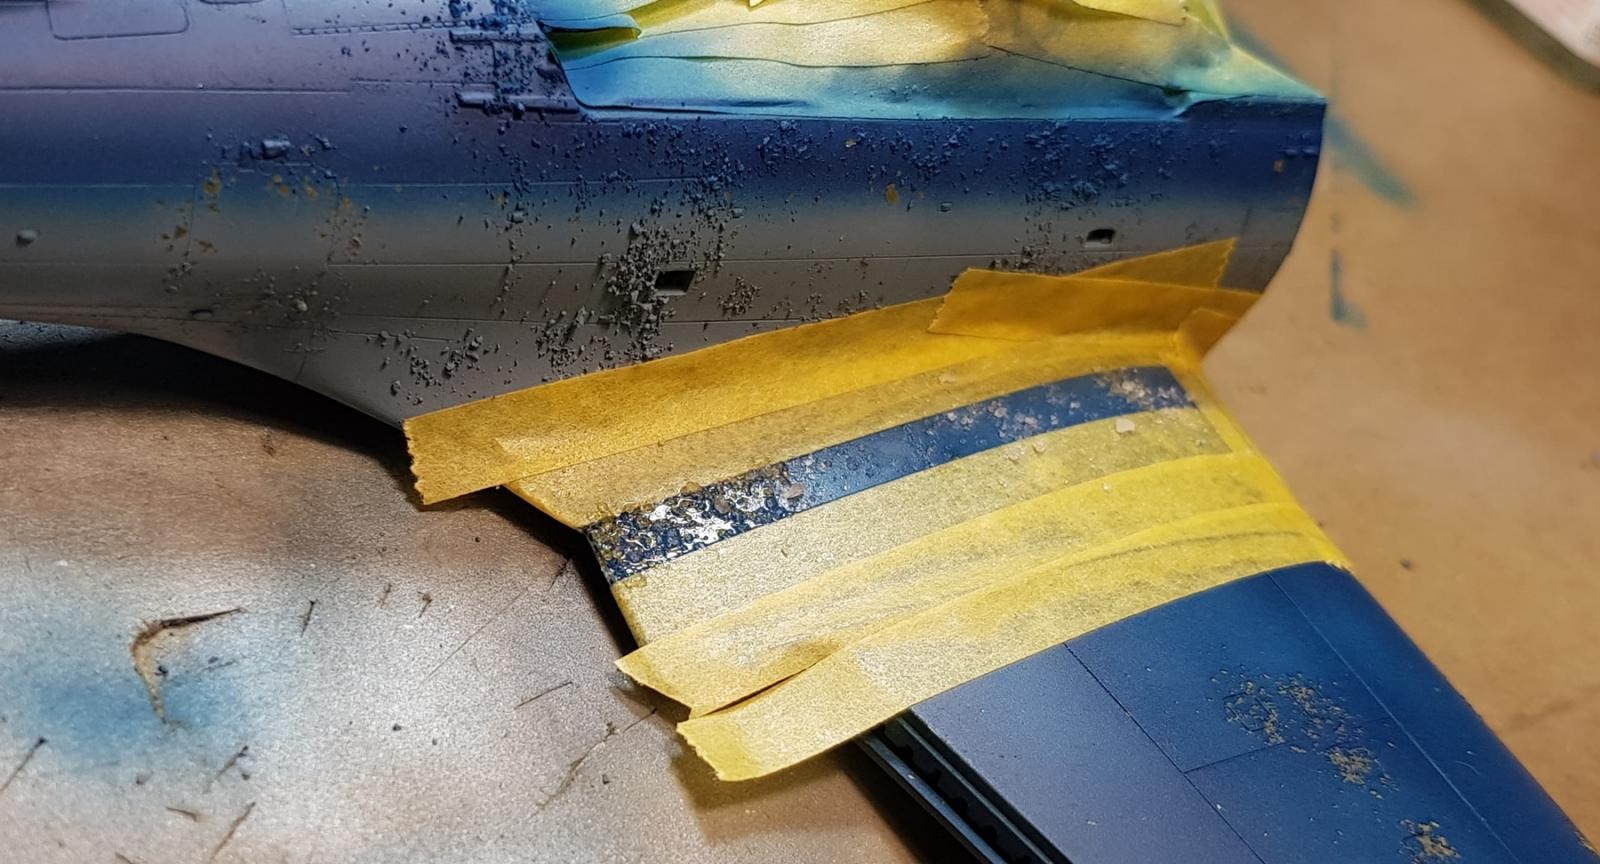
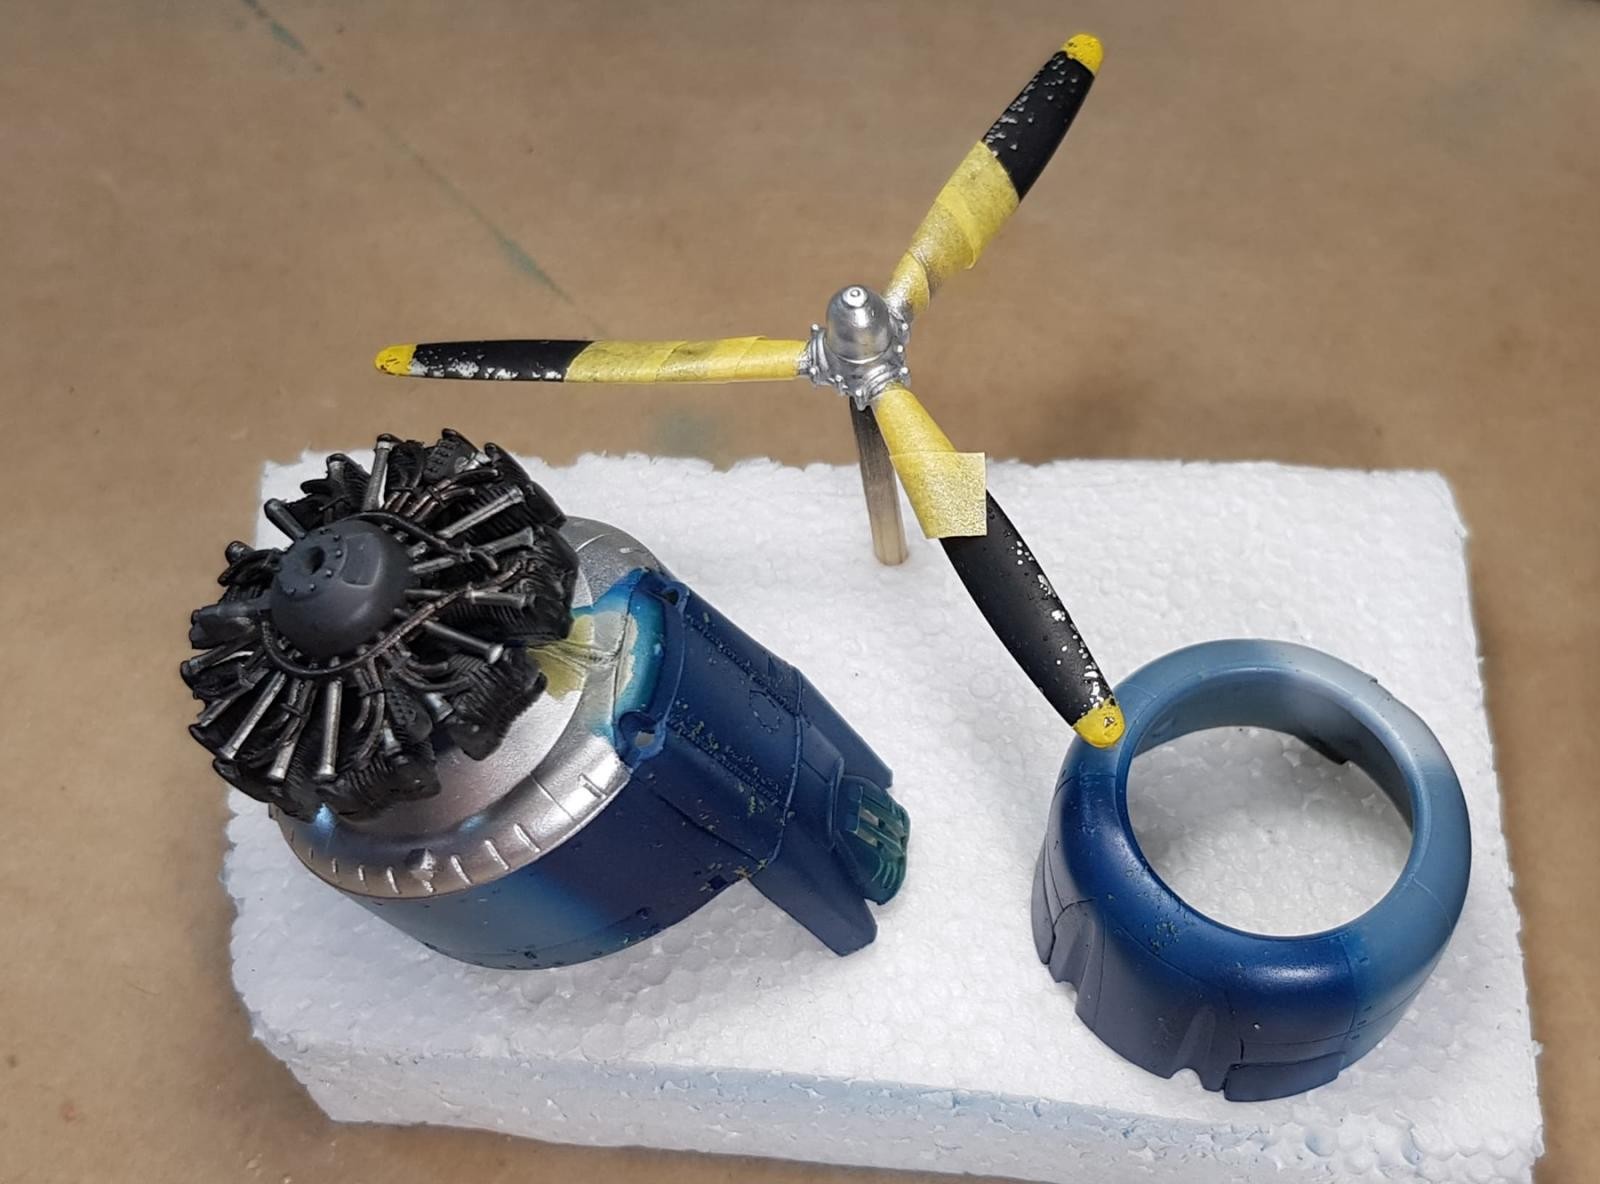
A mix of yellow and black was mixed to make the green undercoat that would go over the aluminium, the inboard of the wings was wet with a brush and water and i layed my salt (excessively as it turned out). She sat under my lamps for about 30 minutes and then i sprayed on the colour. After spraying it was back to the lamps, let if dry for a few hours then remove the salt with a stiff cut down brush. This process was repeated with the model tilted so i could do the fuselage sides, the whole lot was rubbed down with a damp cloth to remove any salt remaining and then the whole process was repeated again from the start with the top coat blue which included lightening the mix to fade the paint out as it looked far to fresh and clean. Salting and spraying the side coat intermediate blue and one last salt deployment for the anti slip stripes on the wings. Phew.
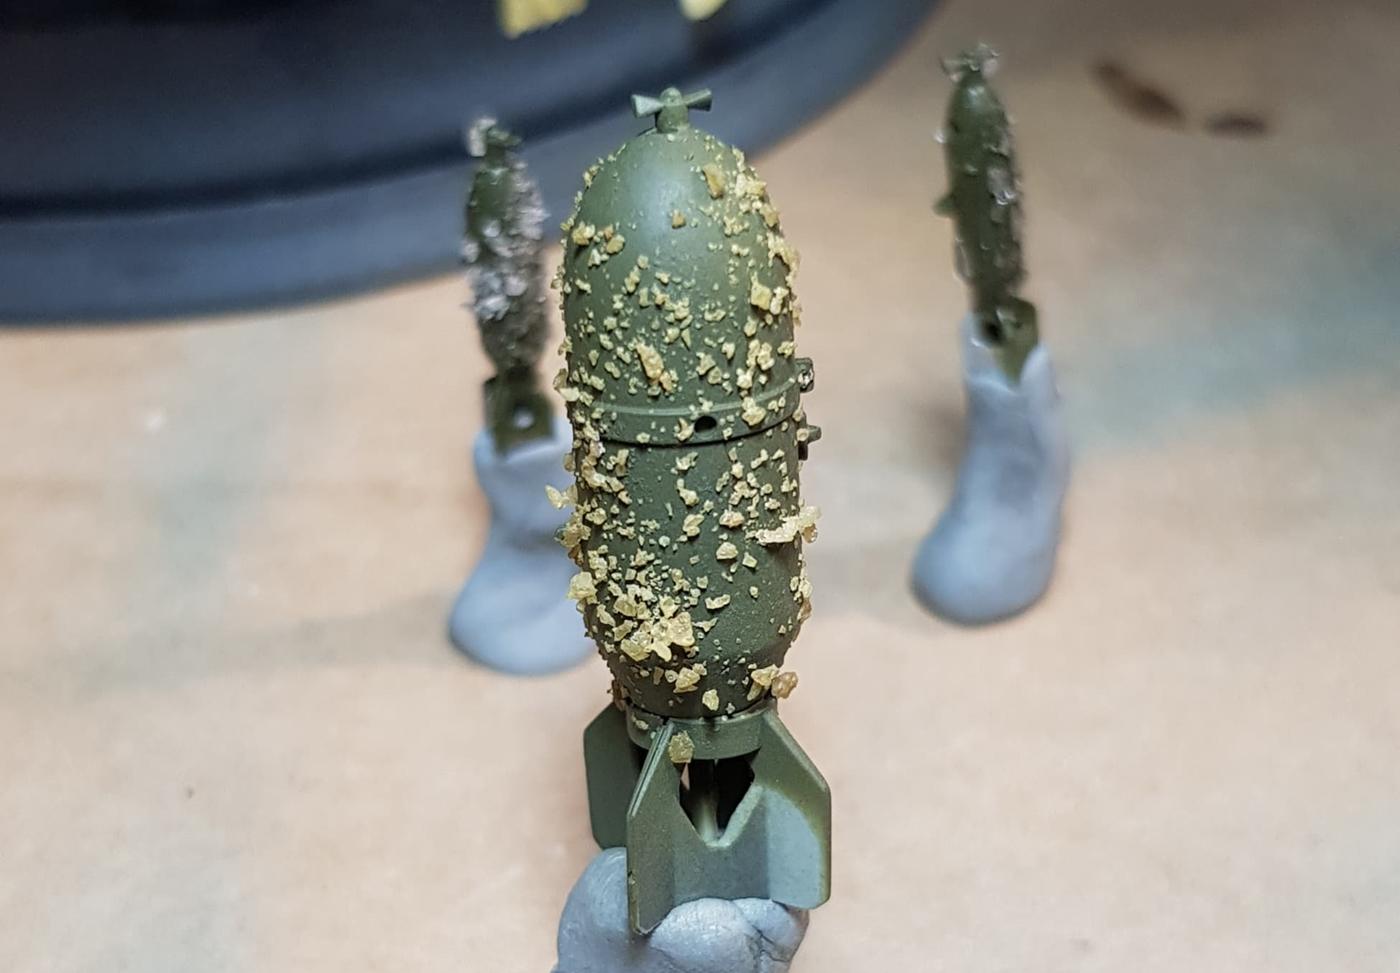
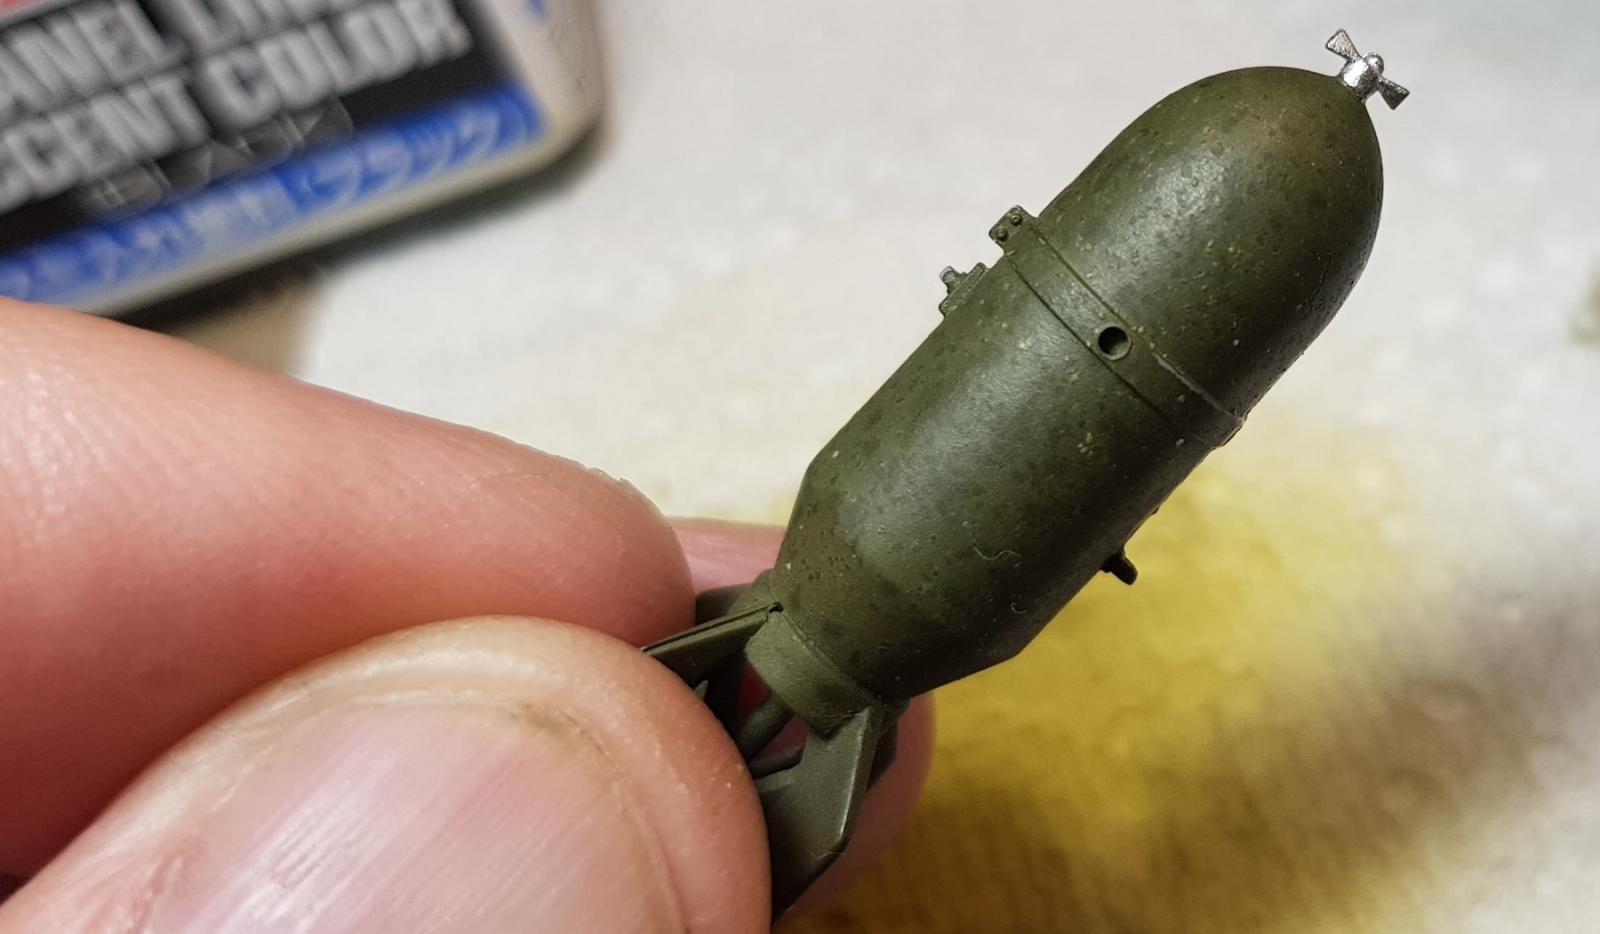
The whole process took a couple of days owing to drying times and just general patience in taking it all nice and slowly with a low psi (8-10) thinned spray initially to seal the salt. The cowls were done separately as was the prop and even the ordnance got assalted.
It is definitely an overkill salt job and i did miss the mark with the leading wing edges as i was dropping the salt from above and the fuselage looks more like an 88 spewed splinters everywhere than actual crew wear marks. Despite that, i really like how it has moved along and have enjoyed delving into this technique, it's made for a really fun build so far and i think once decalled and oil washed she should turn out to be an interesting addition to the cabinet.


Looks like you have things well in hand...looking forward to the end result.
Same here! Cheers Craig.
WOW...seeing is believing and I'm liking what I'm seeing! Not sure I have the patience for this since my normal modelling time is limited to the weekends. Curious, what drove you to pick this method over another?
I tried the hairspray method on a 190 earlier in the year but it didn't pan out so well and i had to respray the wings. Chipping fluid was my next option which i'll try in the future at some stage. The salt seemed the most interesting and hands on option and something i had wanted to try ever since watching a yt vid on different chipping methods last year.
Turned out very nice. I haven't tried it myself as I am concentrating on the hairspray method
I did try that on a model earlier in the year but ended up having to sand and repaint the area as my end result was a bit of a mess. I need to revisit the effect in the future though.
Good work on the salt chipping.
As long as you are working on a project to increase your skill, I'll pass along some information about "weathering" a prop. Generally, a propeller doesn't "chip" other than on the leading edge, where it is smacking against "foreign objects" churned up by the passage of propwash over the ground on takeoff/landing. In the South Pacific, where your Dauntless was operating, most of the strips were made of crushed coral, which really turned up a lot of gravelly dust and did a lot of wear on wing and stabilizer leading edges. On props, it "sand blasted" the tip, up to a maximum of about the outer 1/3 of the blade. If you look at photos of VF-17 Jolly Rogers F4Us, you can see this clearly, which is where I first noticed it. Also, the "sand blasting" is greater on the rear face of the prop than the front, due to the laws of aerodynamics. (A prop is an "airfoil" and there's a greater concentration of air on the lower, flatter side of an airfoil, which through the laws of osmosis is trying to get to the top and even things out, which creates lift - turn the airfoil 90 degrees and the "lift" becomes "thrust," but the dynamics are the same). Anyway, you're doing really well on chipping, so knowing this is the last bit you really need, other than practice, to become an expert. Good luck!
Cheers Tom. My prop looks like someone dragged it across said coral strip before fitting it to the aircraft! I do really like the effect you can get and this build has taught me a lot about the method that i can hopefully apply better and in the future.
Maybe a sand blown TBM from Flight 19 in a desert would be more suitable 😀
Very nice illustration of this salt weathering technique, thanks for posting!
Thanks Michel, it's been a fun build so far.
Nice little ad hoc tutorial.
Cheers David, i haven't figured out how to do a post in text/picture/text format yet which would have made it slightly more tutorial like.
Jimmy @hetstaine, have a look at this: https://imodeler.com/help/arranging-the-images-within-text/
Thanks for that! Couldn't be easier.
🙂 … Greetings … 🙂 :
You caught my attention as soon as I saw the Headline picture Jimmy.
I read on and just loved your " EXPERIMENT " way of thinking and attacking the situation at hand.
And as seen, the results look great.
Looking forward to this project.
Cheers! I figured you have to give all mediums a go and find out what works for oneself 🙂
Looking forward to seeing her done and dusted, Jimmy - great insight into this technique. Have to say I'm really impressed with the bomb, too! Might well give that a go next time up as an intro. Cheers for sharing!
No worries Paul, it's a fun method!
Great job, Jimmy! I have had similar experience with Academy: they are either great or they are not so great. So I think your "Friday on the assembly line" idea may have some merit. I have tried hairspray with variable results, but I have had more consistent results with chipping fluid. Great job with the salt, which is something I have wanted to try but have been unwilling to use on a model. After seeing your results I think I will finally give it a try.
Cheers
I've only done three Academy kits so far and two of them now have below average compared to other brands i have built. Their Warspite was a nice kit though.
Give the salt a shot, it's definitely something i will be toning down and using again:)
very nice - thanks for the first-hand tutorial. I've got a couple of projects lined up for some chipping, and wasn't sure which technique to use yet.
Cheers Greg, i'm sure with your skill you'll get the hang of it very quickly 🙂