1/35 Amusing Hobbies Object 279
INTRODUCTION
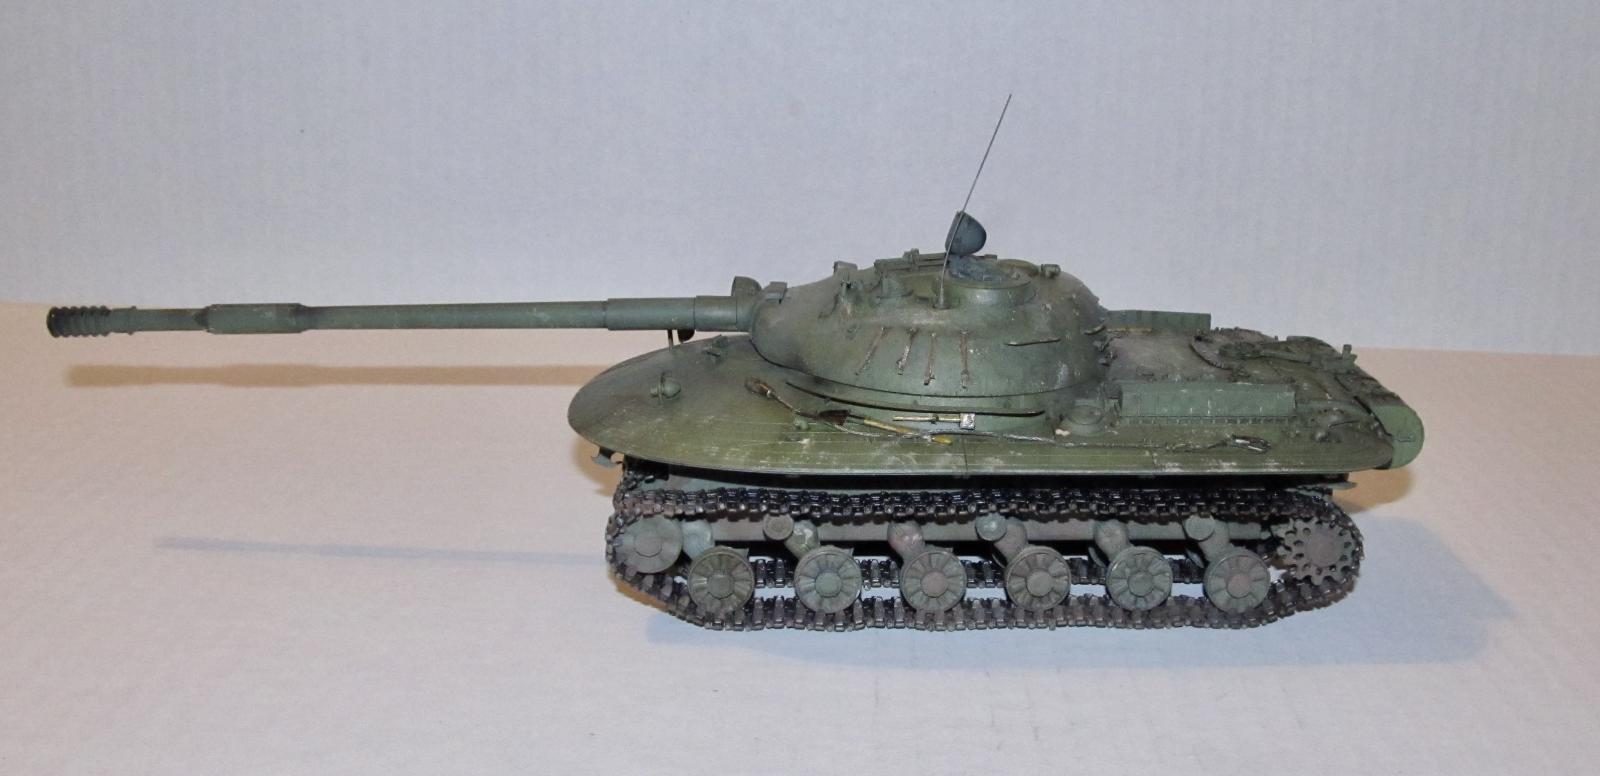
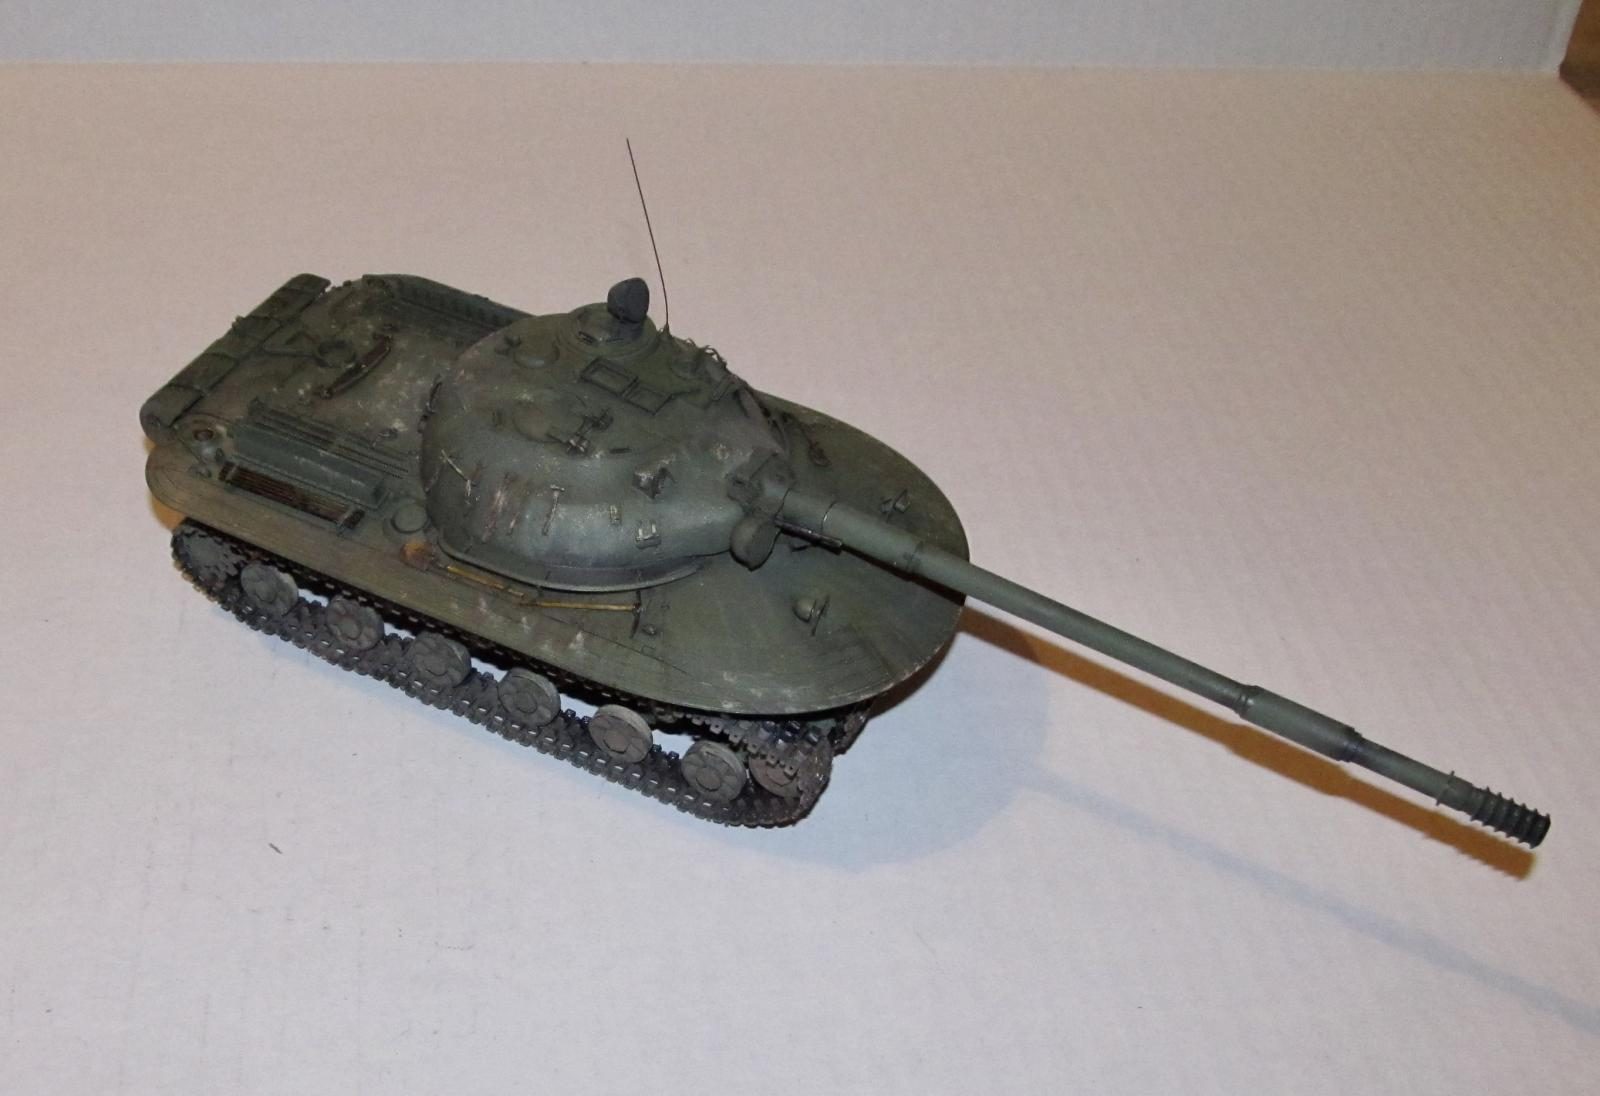
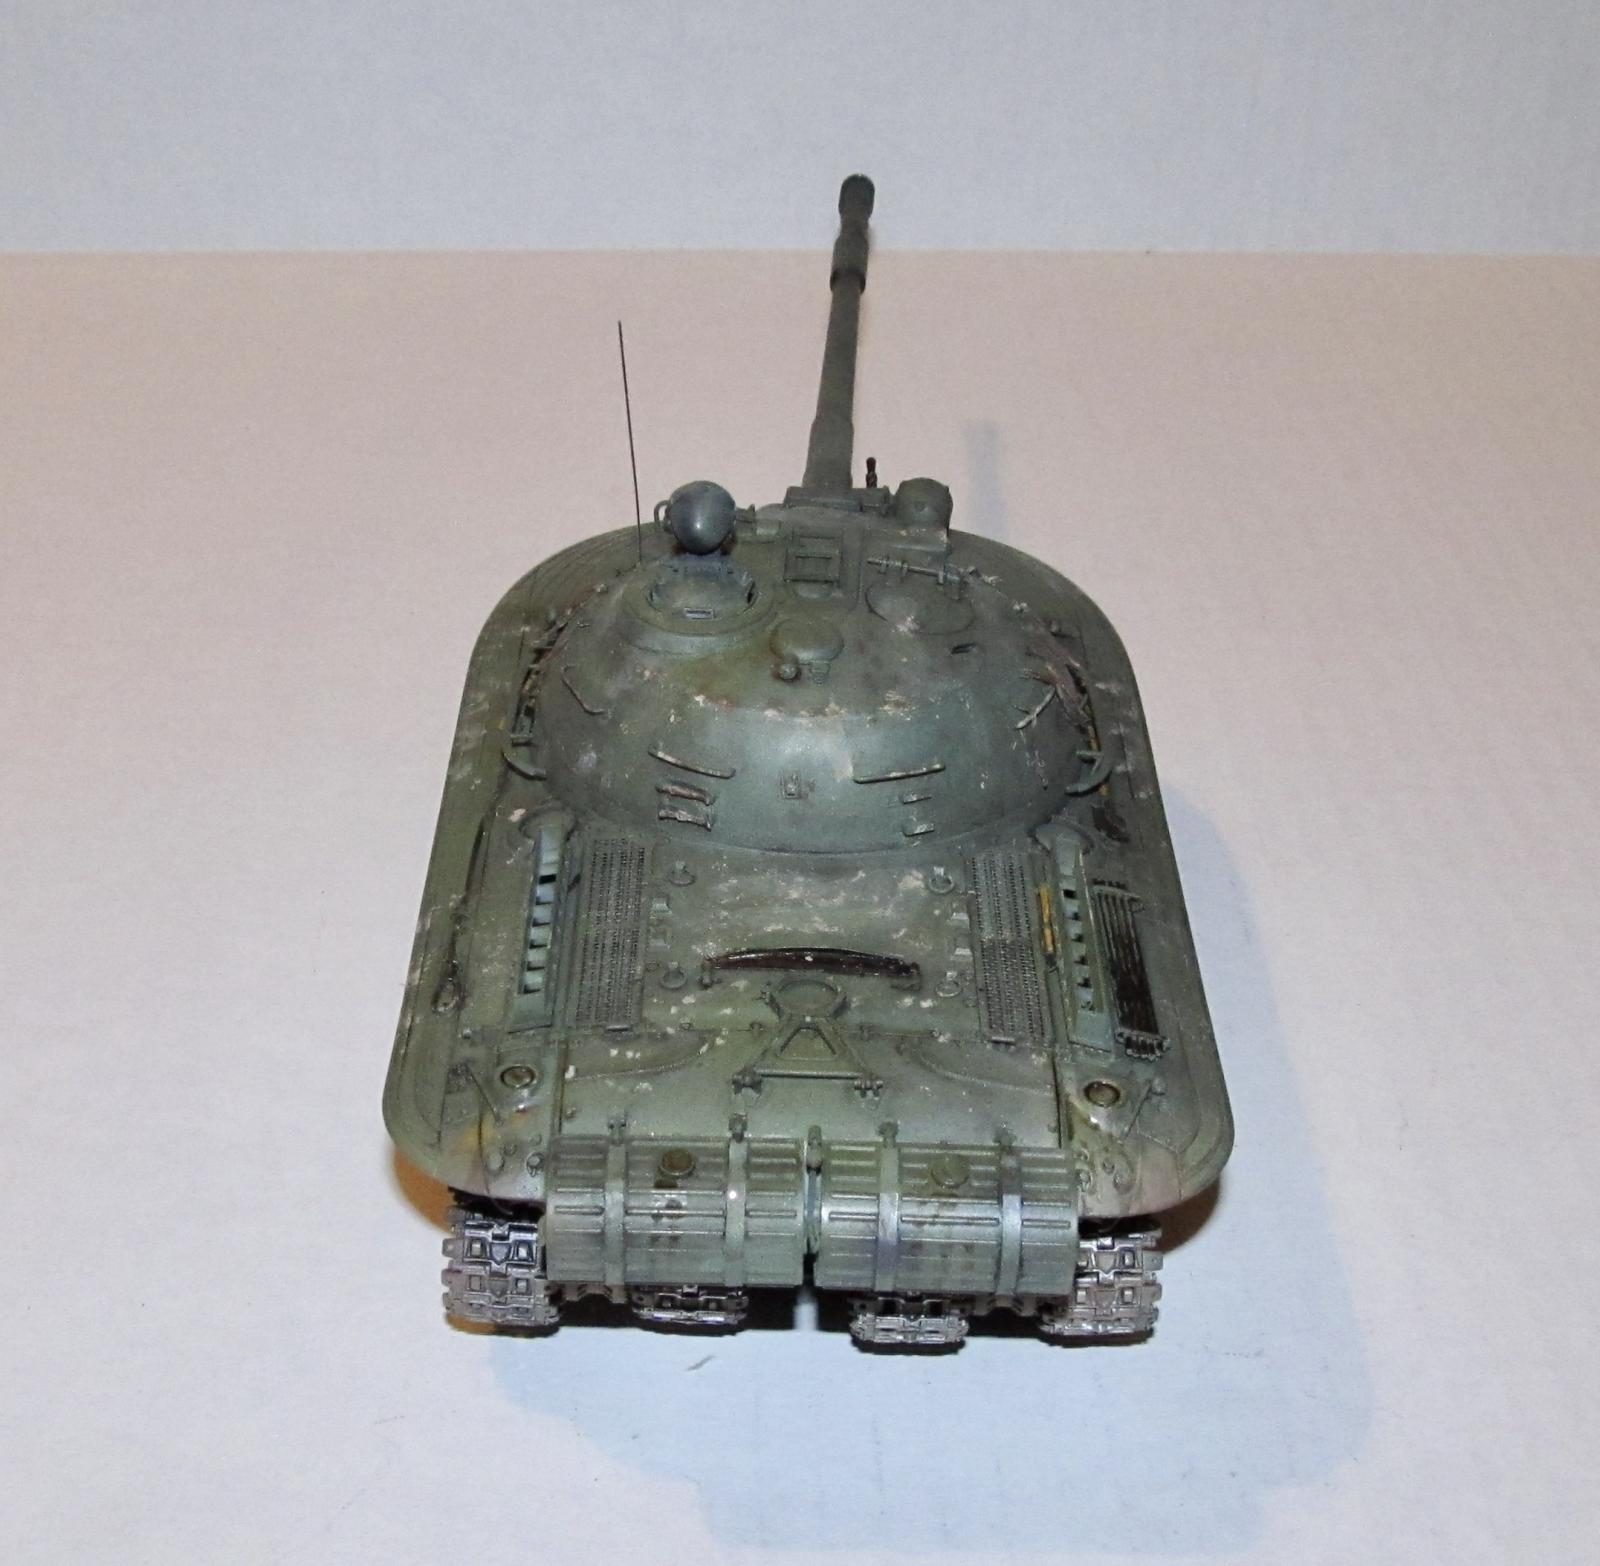
Object 279 Kontin was born out of the Soviet desire for a heavy tank that could indirectly withstand a nuclear blast and fight in a radioactive wasteland as well as cross terrain considered inaccessible for conventional armor and act as a heavy breakthrough tank. These tanks were supposed to be used only by the Supreme Command Reserve (used for breakthroughs and for last ditch defense.) Designed in the mid 50s at the Kirov plant and two prototypes were delivered in 1959.
It weighed 60 metric tons which was almost double the weight of the then latest Soviet main battle tank, the T-62 which weighed in at 37 metric tons. For comparison's sake, the current M1A2 model with depleted uranium armor weighs in at around 65 metric tons.
From Wiki
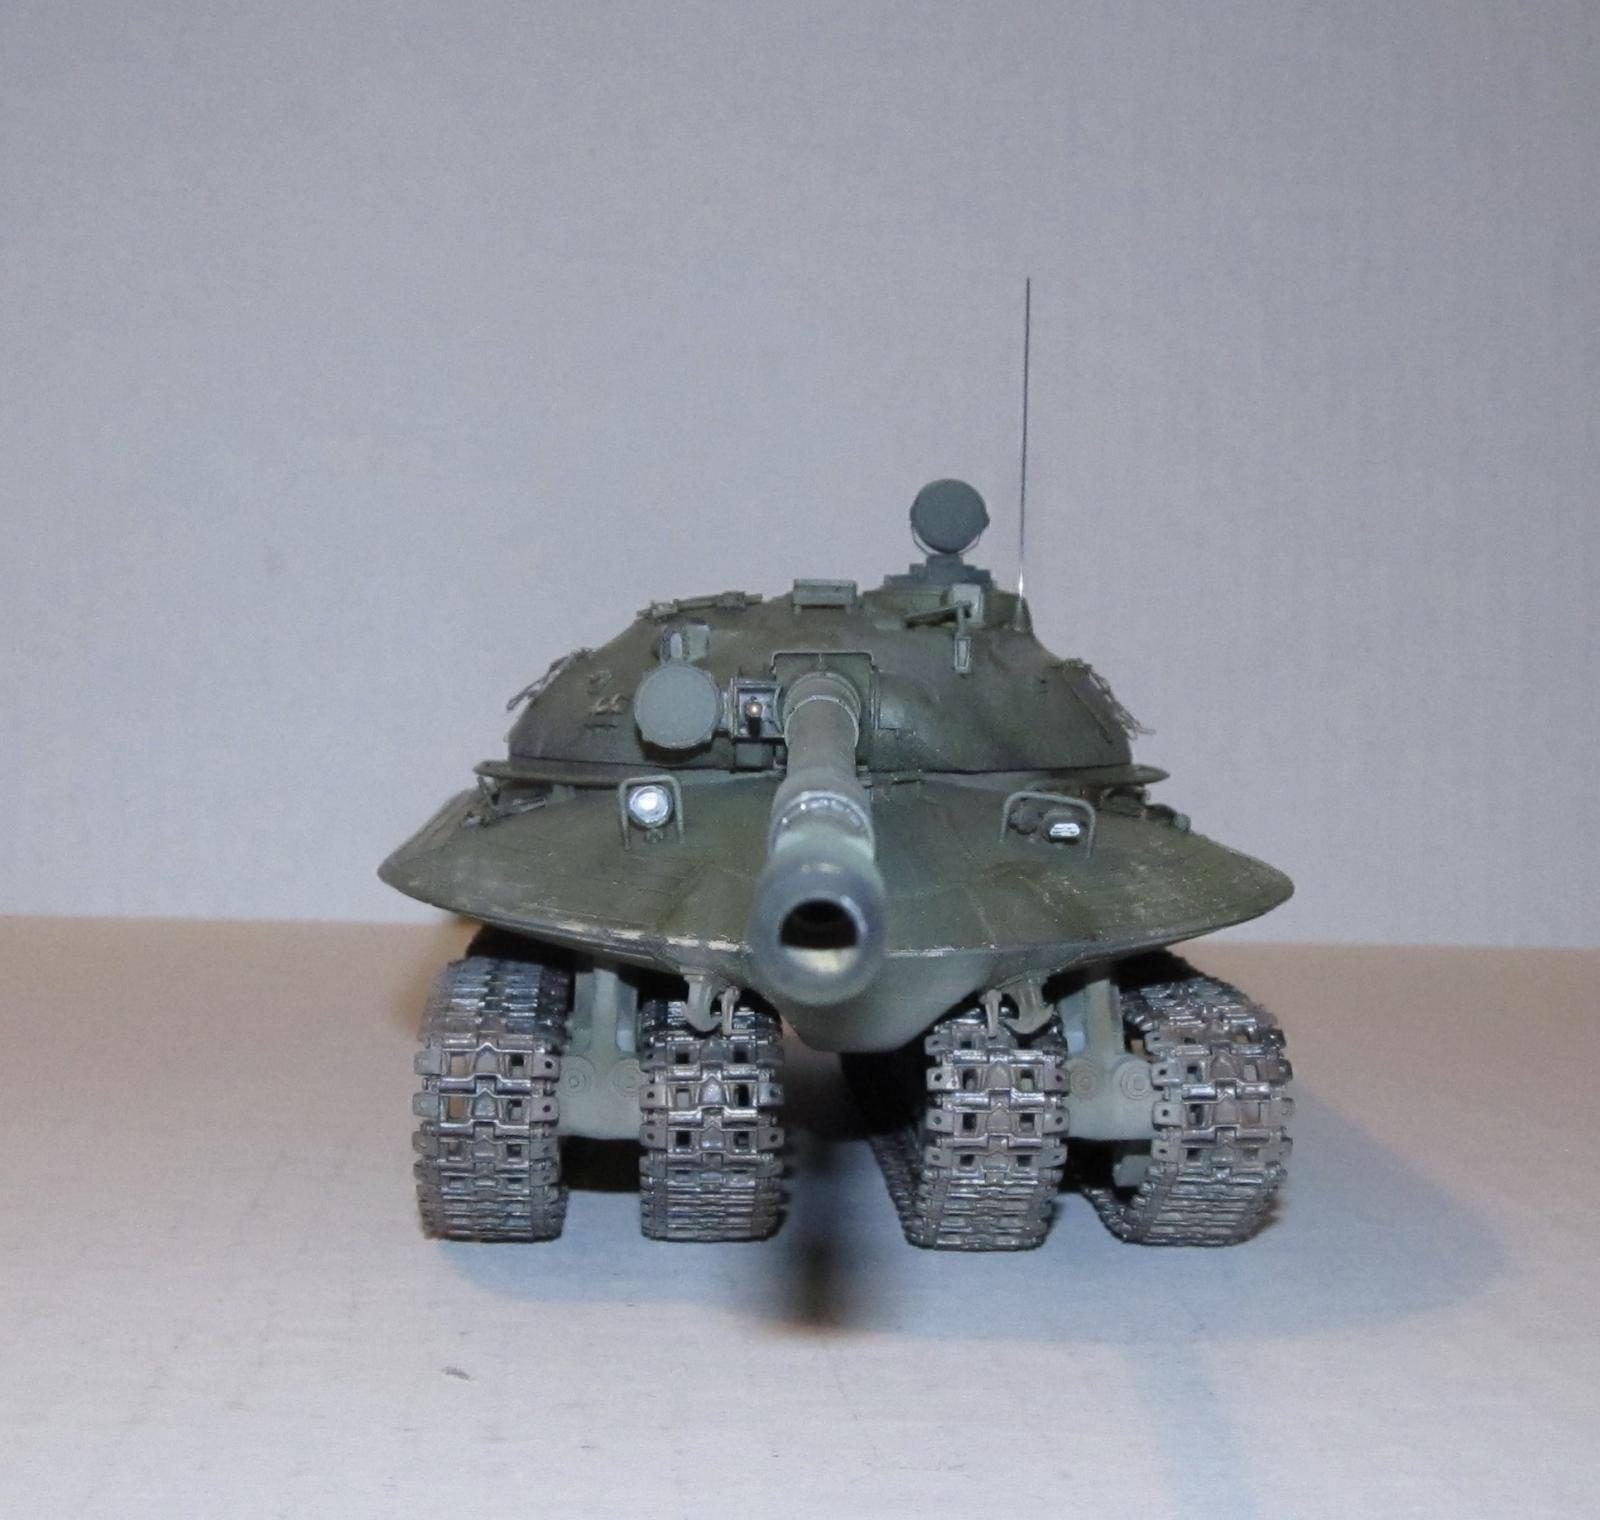
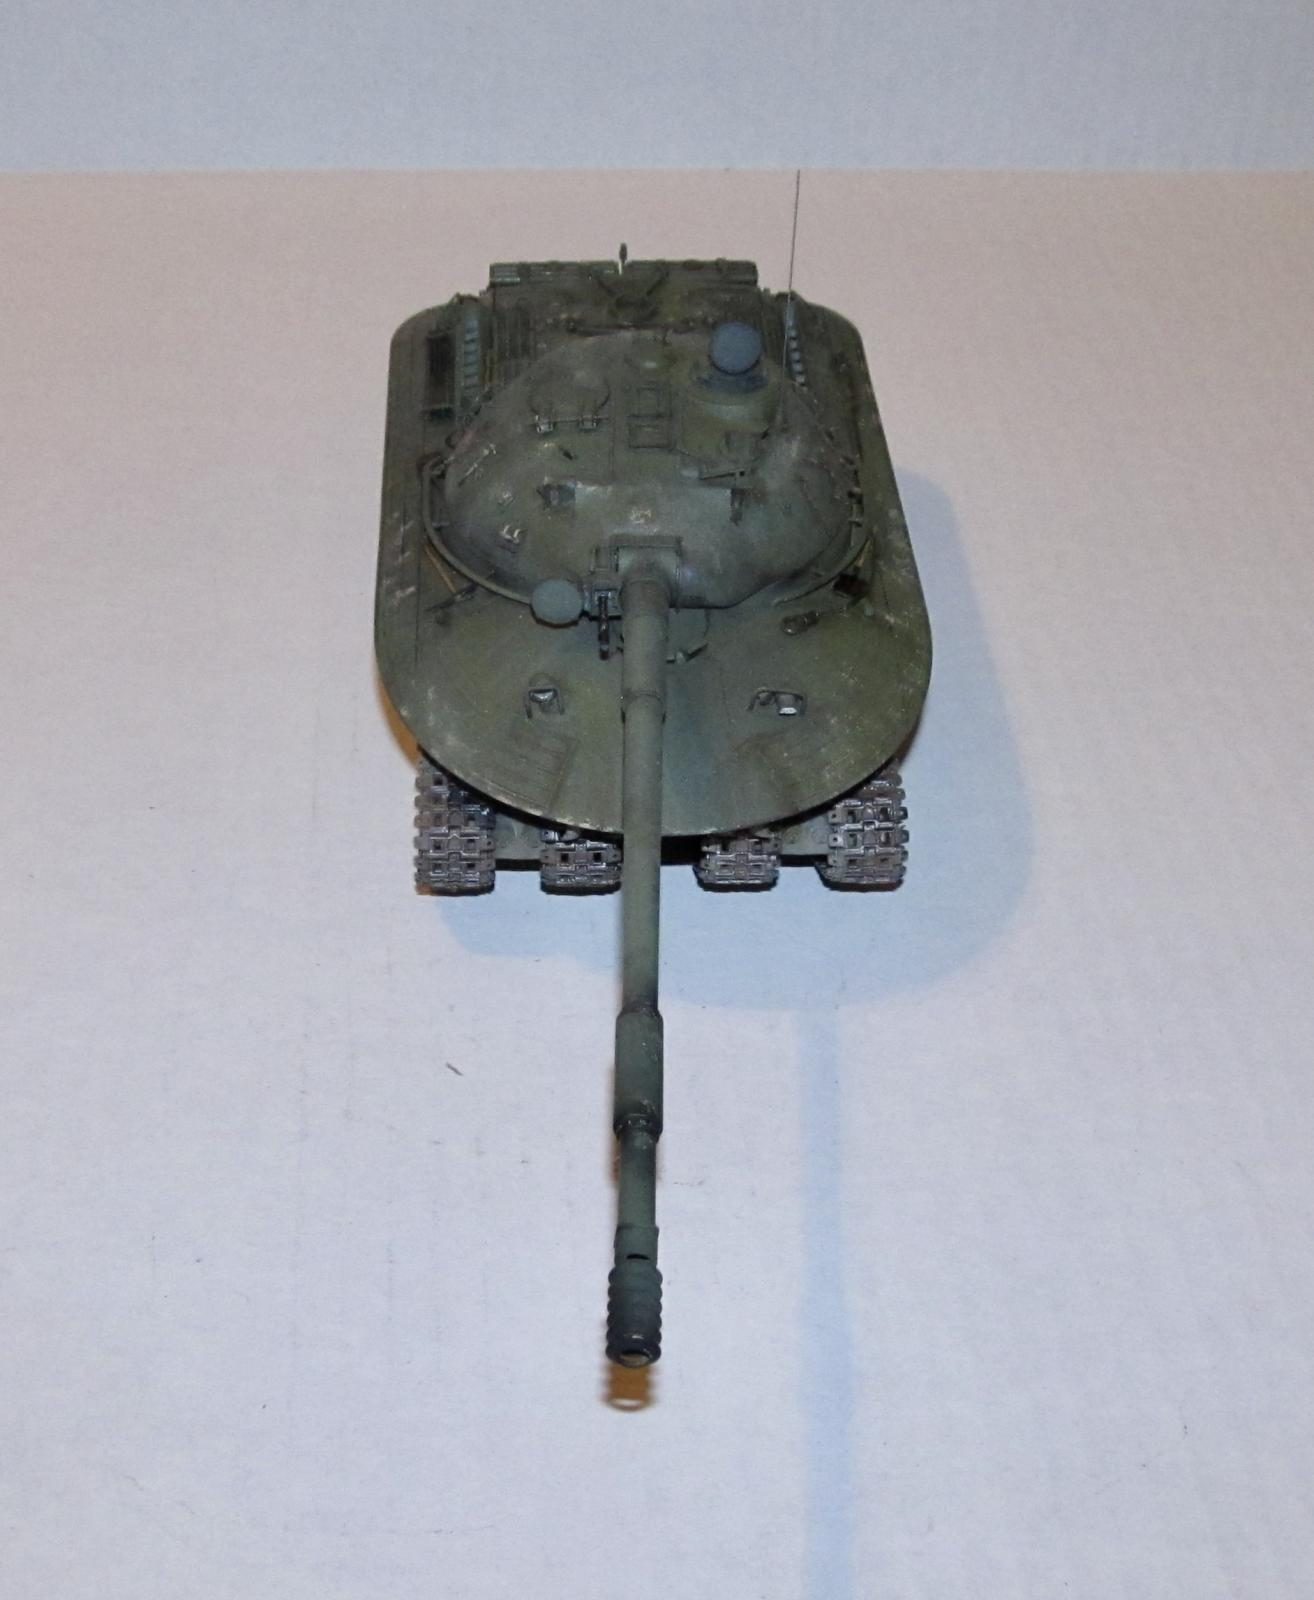
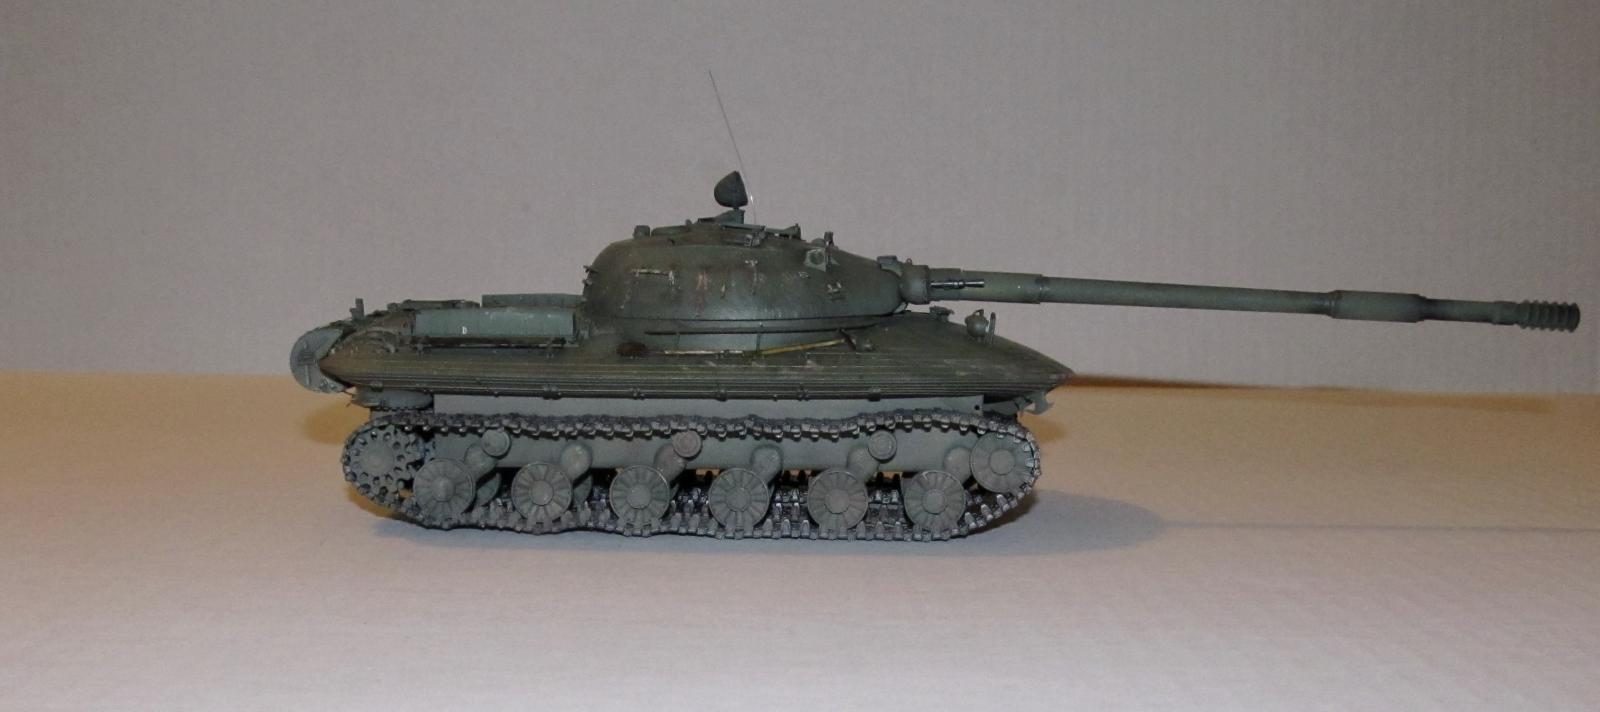
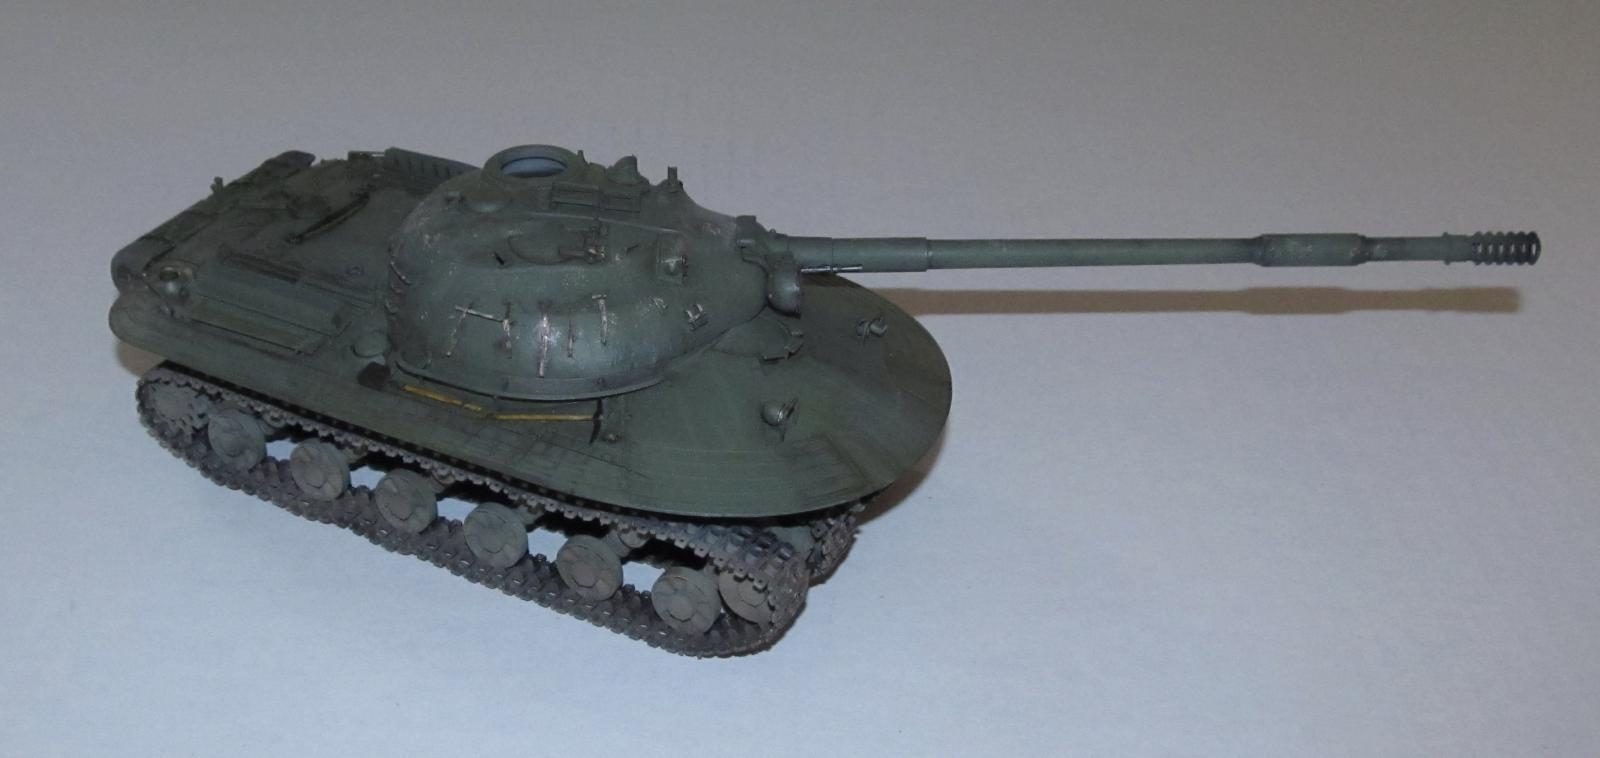
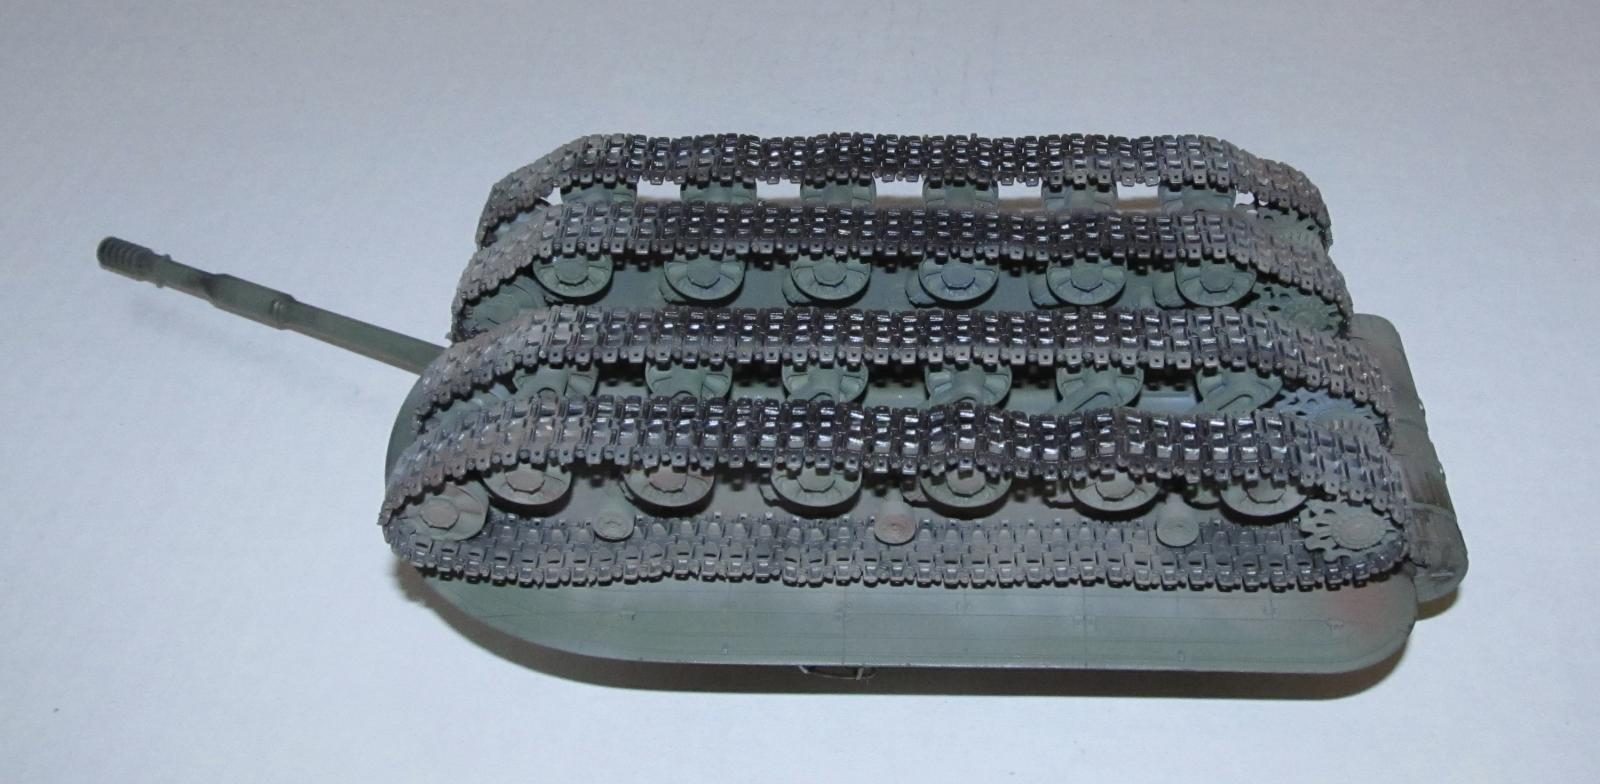
This unique tank boasted increased cross-country capability. It featured four-track running gear mounted on two longitudinal, rectangular hollow beams, which were also used as fuel tanks. The tank suspension was hydro-pneumatic with complex hydrotransformer and three-speed planetary gearbox. The track adjuster was worm-type. The specific ground pressure of this heavy vehicle did not exceed 0.6 kg/cm2. The track chain, running practically along the whole track length provided for increased cross-country capabilities on swampy terrain, soft soils and area full of cut trees, Czech hedgehogs, antitank obstacles and the like.
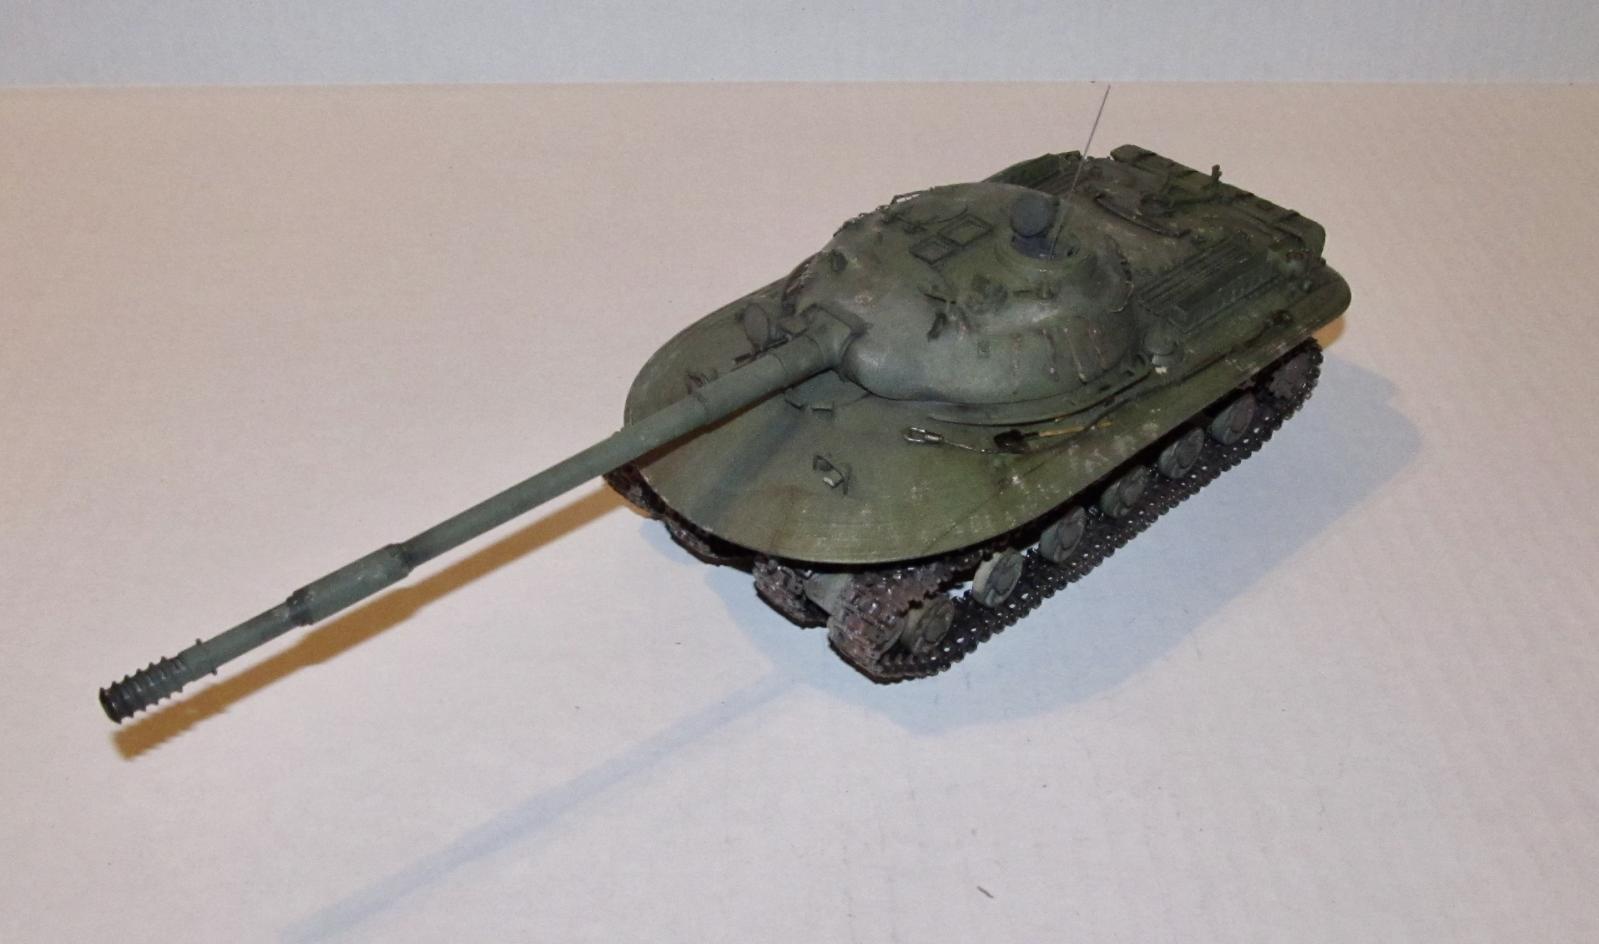
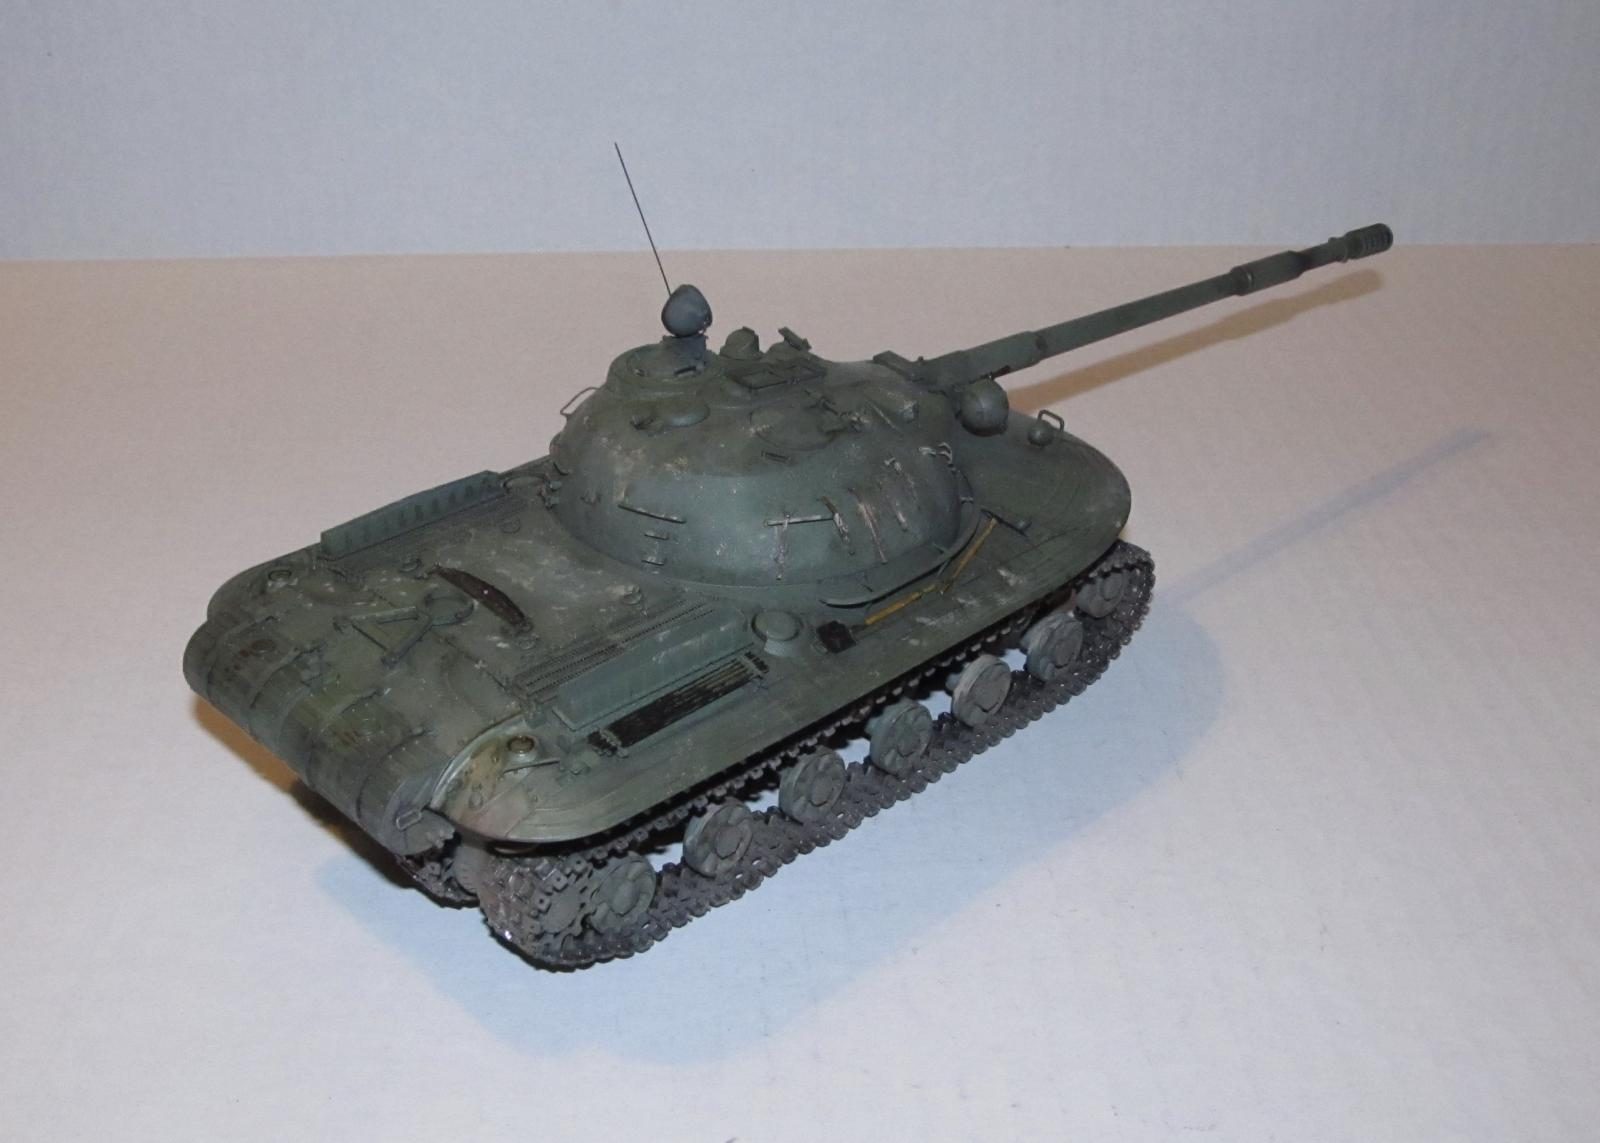
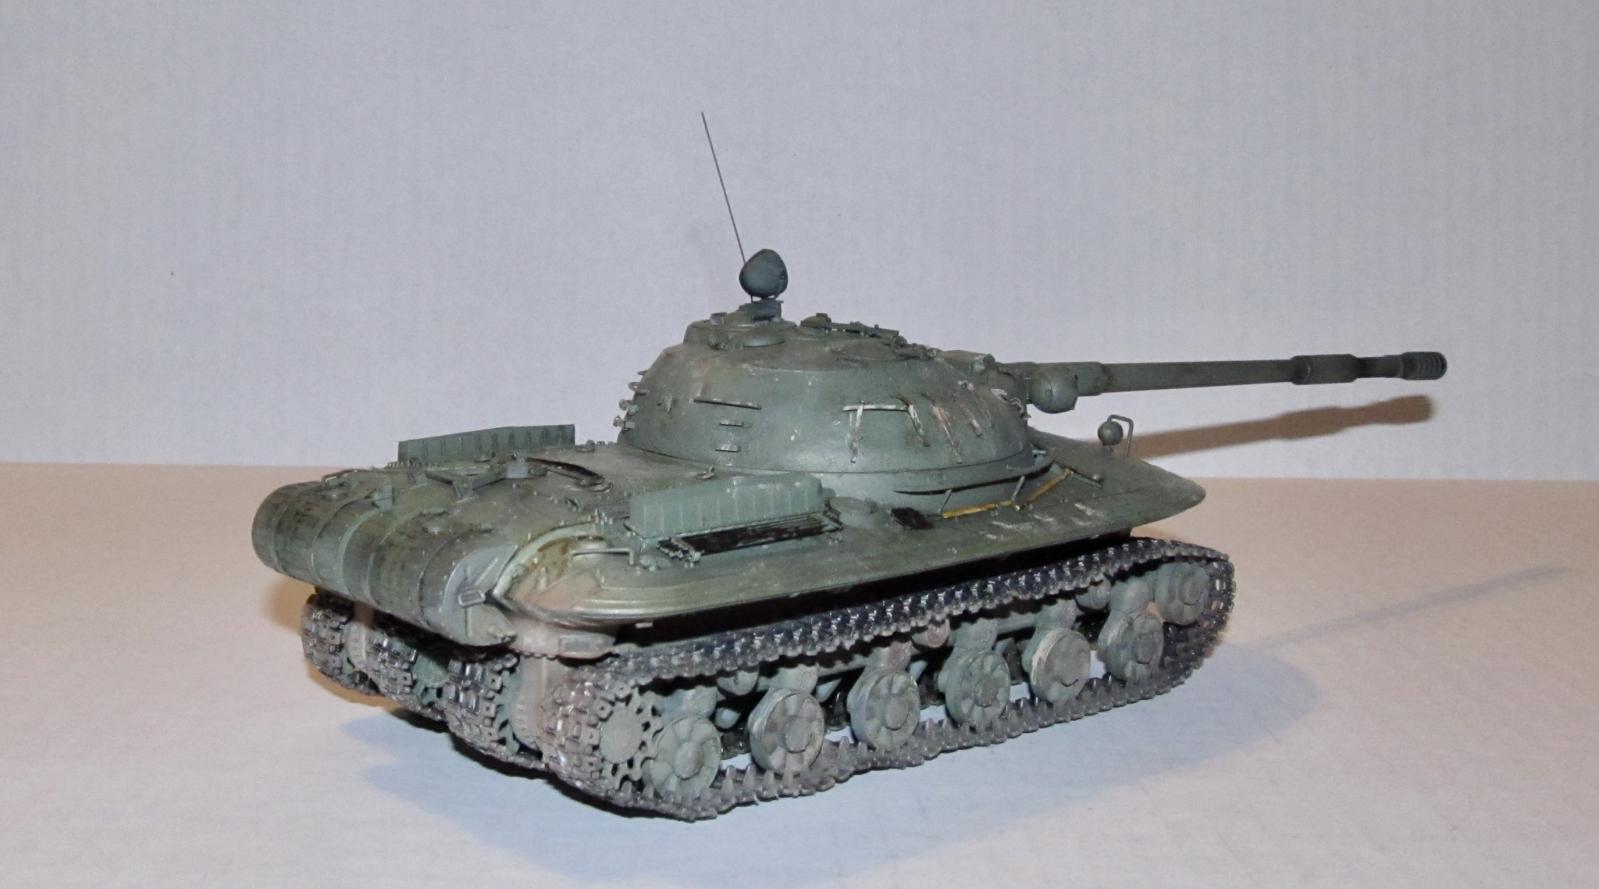
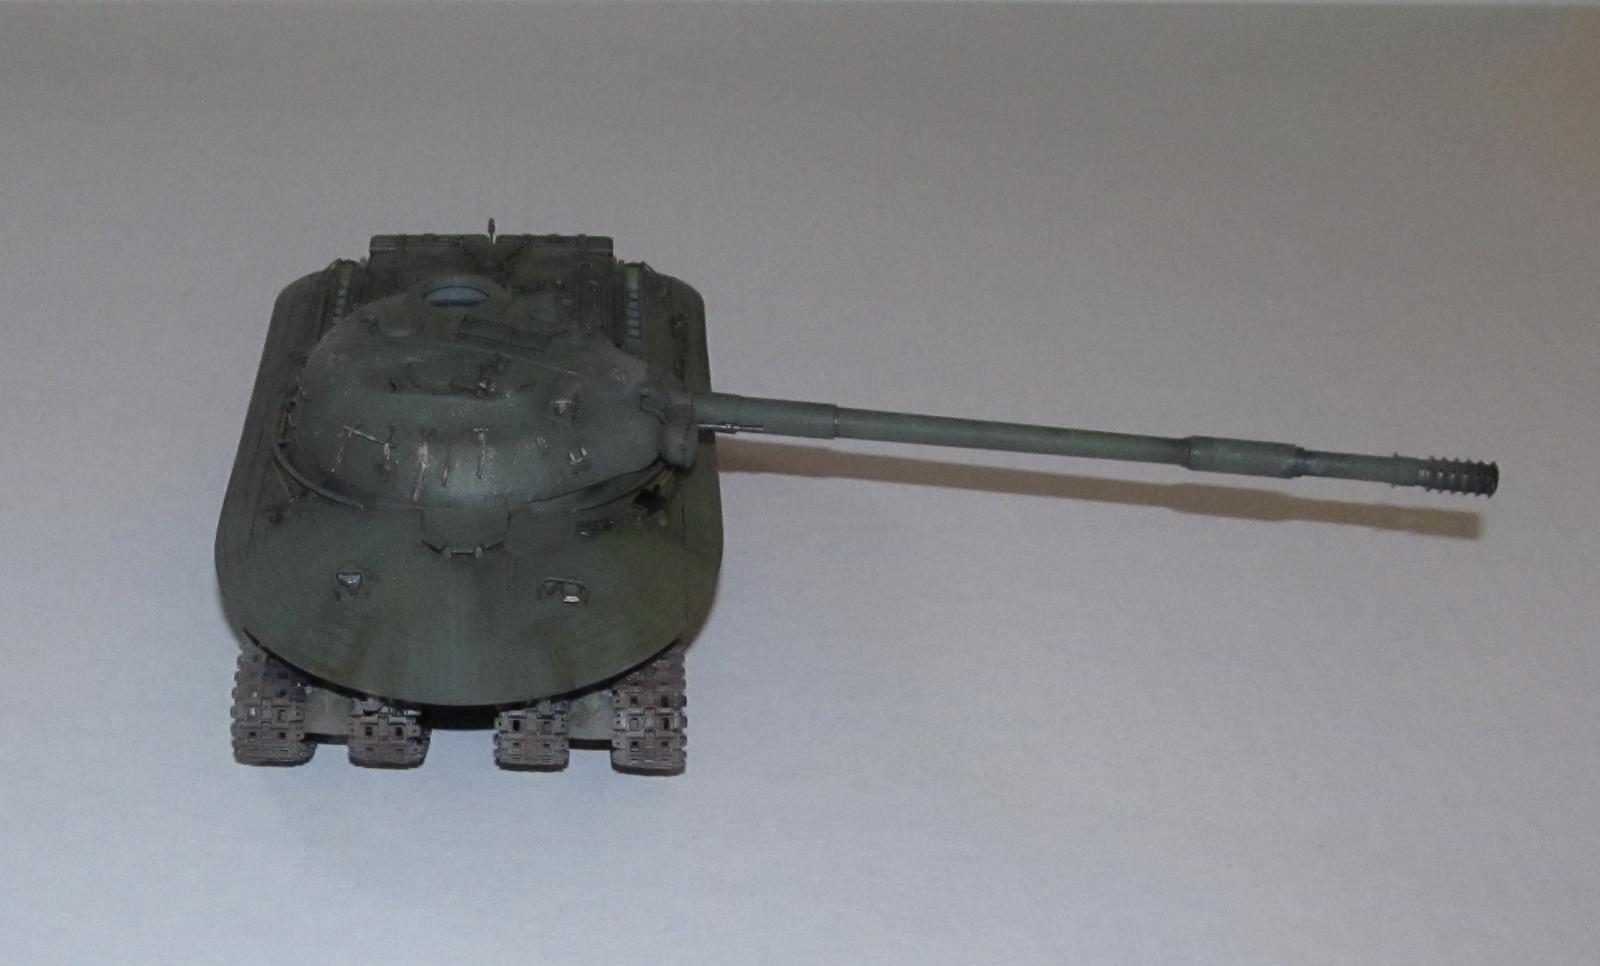
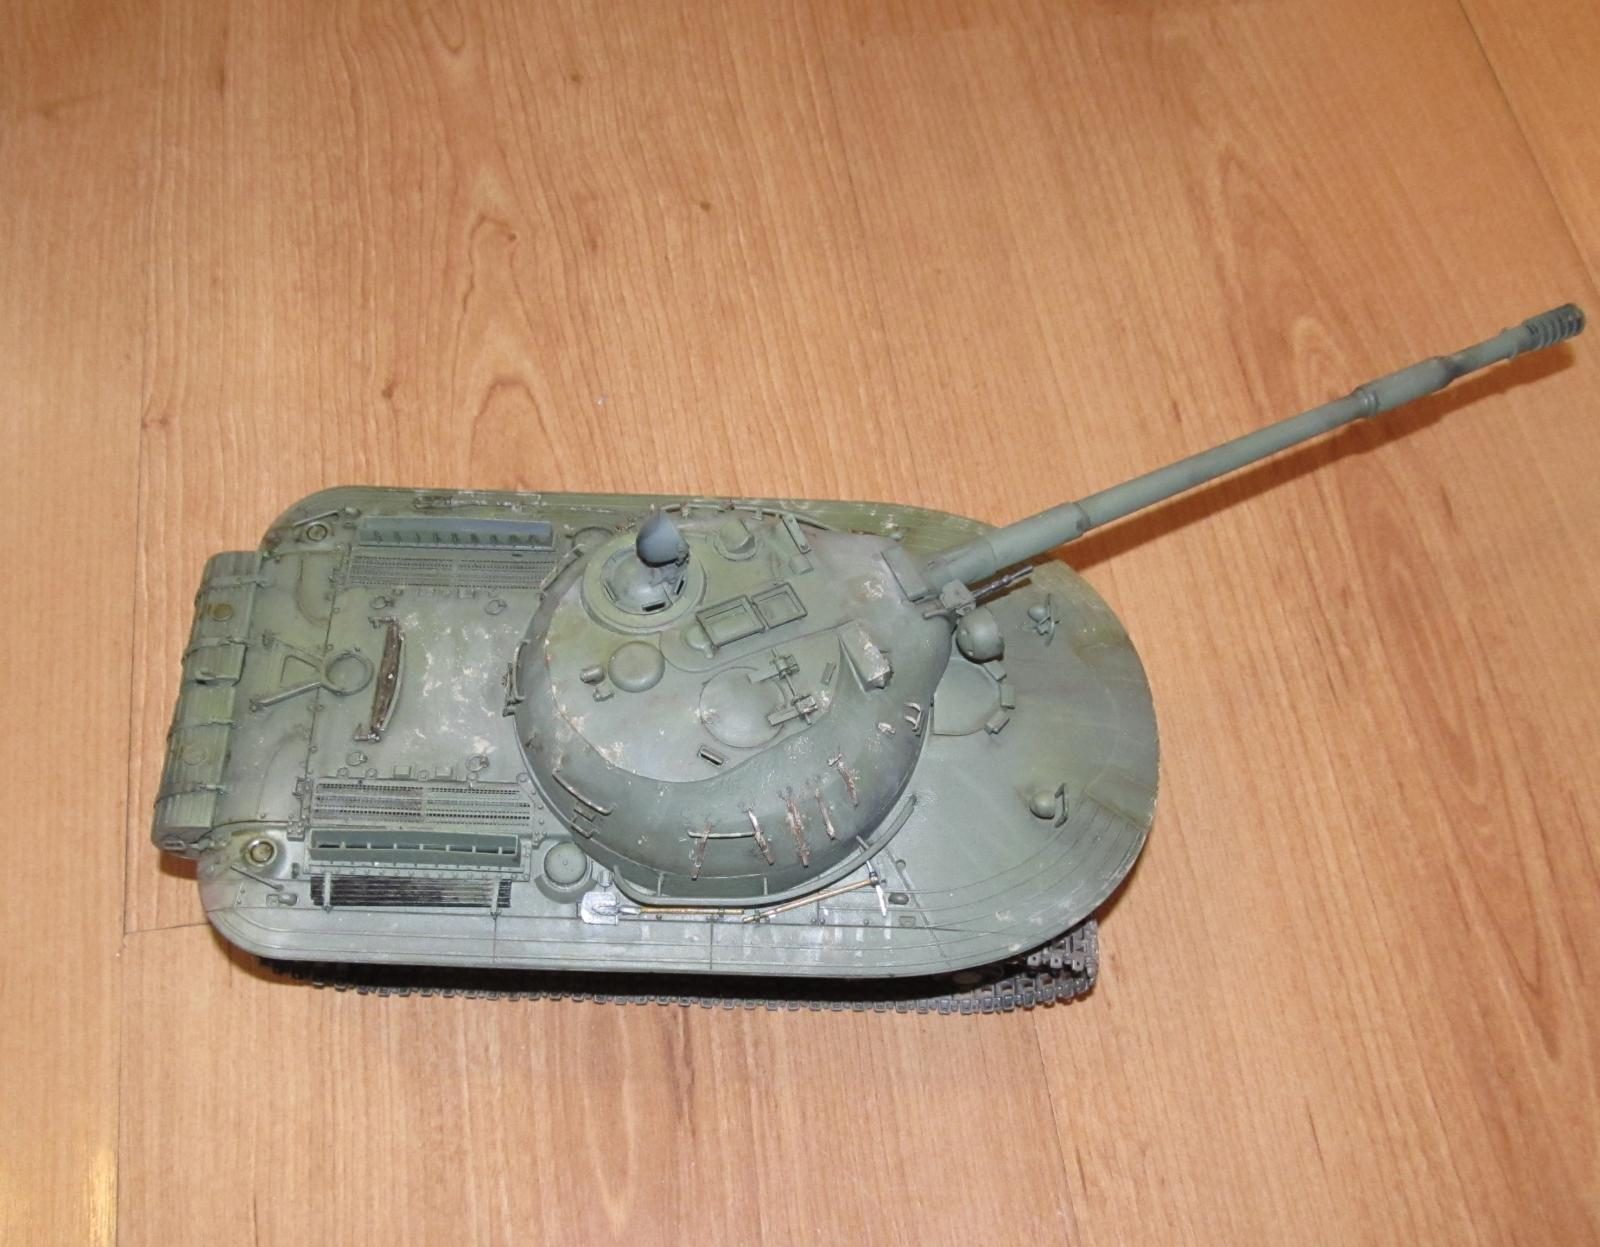
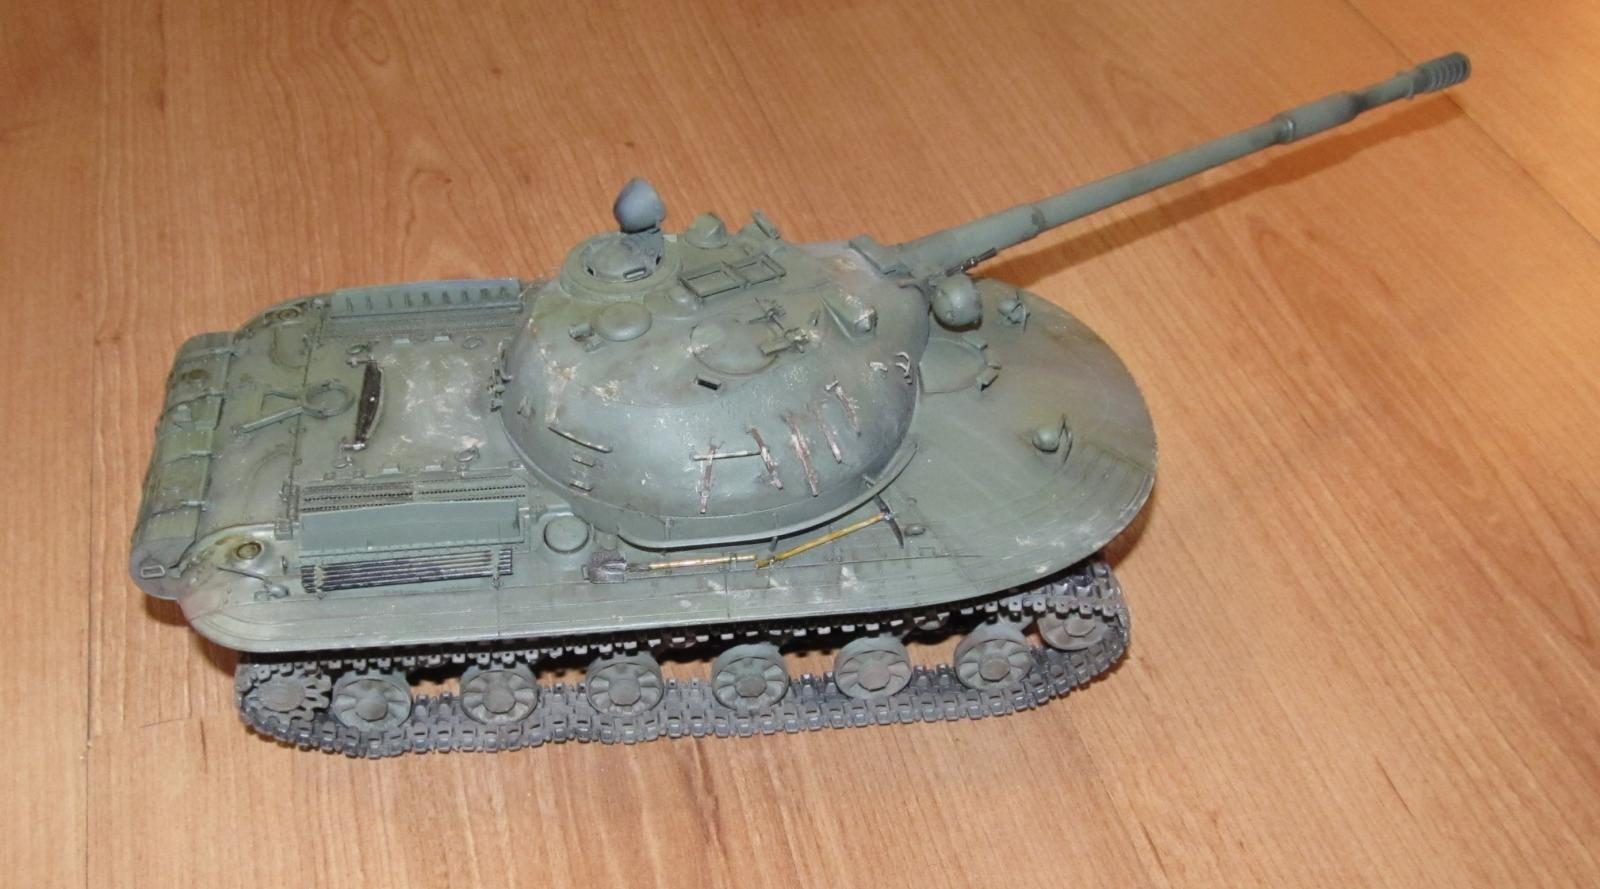
The tank hull, with a maximum armour thickness of 269 mm, was covered by a thin, elliptical shield protecting it against APDS and shaped charge ammunition, and preventing it from overturning by the shockwave in case of a nuclear explosion. It comprised large cast irregular shape structures of variable thickness and slope. The all-cast front part of the hull was rounded in shape with thin armour panels against HEAT projectiles, which ran around the edges of the front and sides of the hull. The sides of the hull were also cast and had similar protective armour panels.
The all-cast turret, with a maximum armor thickness of 319 mm, was rounded and had anti-HEAT protective panels. The turret ring was also heavily protected. The tank was equipped with a chemical, biological, radiological, and nuclear (CBRN) protection.
The tank was armed with the 130 mm M-65 rifled gun. The secondary armament was a 14.5 x 114 mm KPVT coaxial machine gun with 800 rounds. The weapons were stabilized in two planes by a "Groza" stabilizer. Object 279 carried 24 rounds of ammunition, with charge and the shell to be loaded separately.
The gun was provided with a semi-automatic loading system with a rate of fire of 5-7 rounds/min. Firing control system comprised optical rangefinder, auto-guidance system and L2 night-sight with an active infrared searchlight.
End of Wiki snippet
The tank was cancelled because of Nikita Khrushchev who preferred lighter, faster and easier to produce tanks such as the T-62 and the IT-1 missile armed tank which (like its Western counterparts) proved to be a dud. Also playing a factor in the cancellation was the realization that the complexity of the tank with its quad track design would be a headache to maintain, its low maneuverability and the fact that it was too heavy to be used on most Soviet bridges.
THE KIT
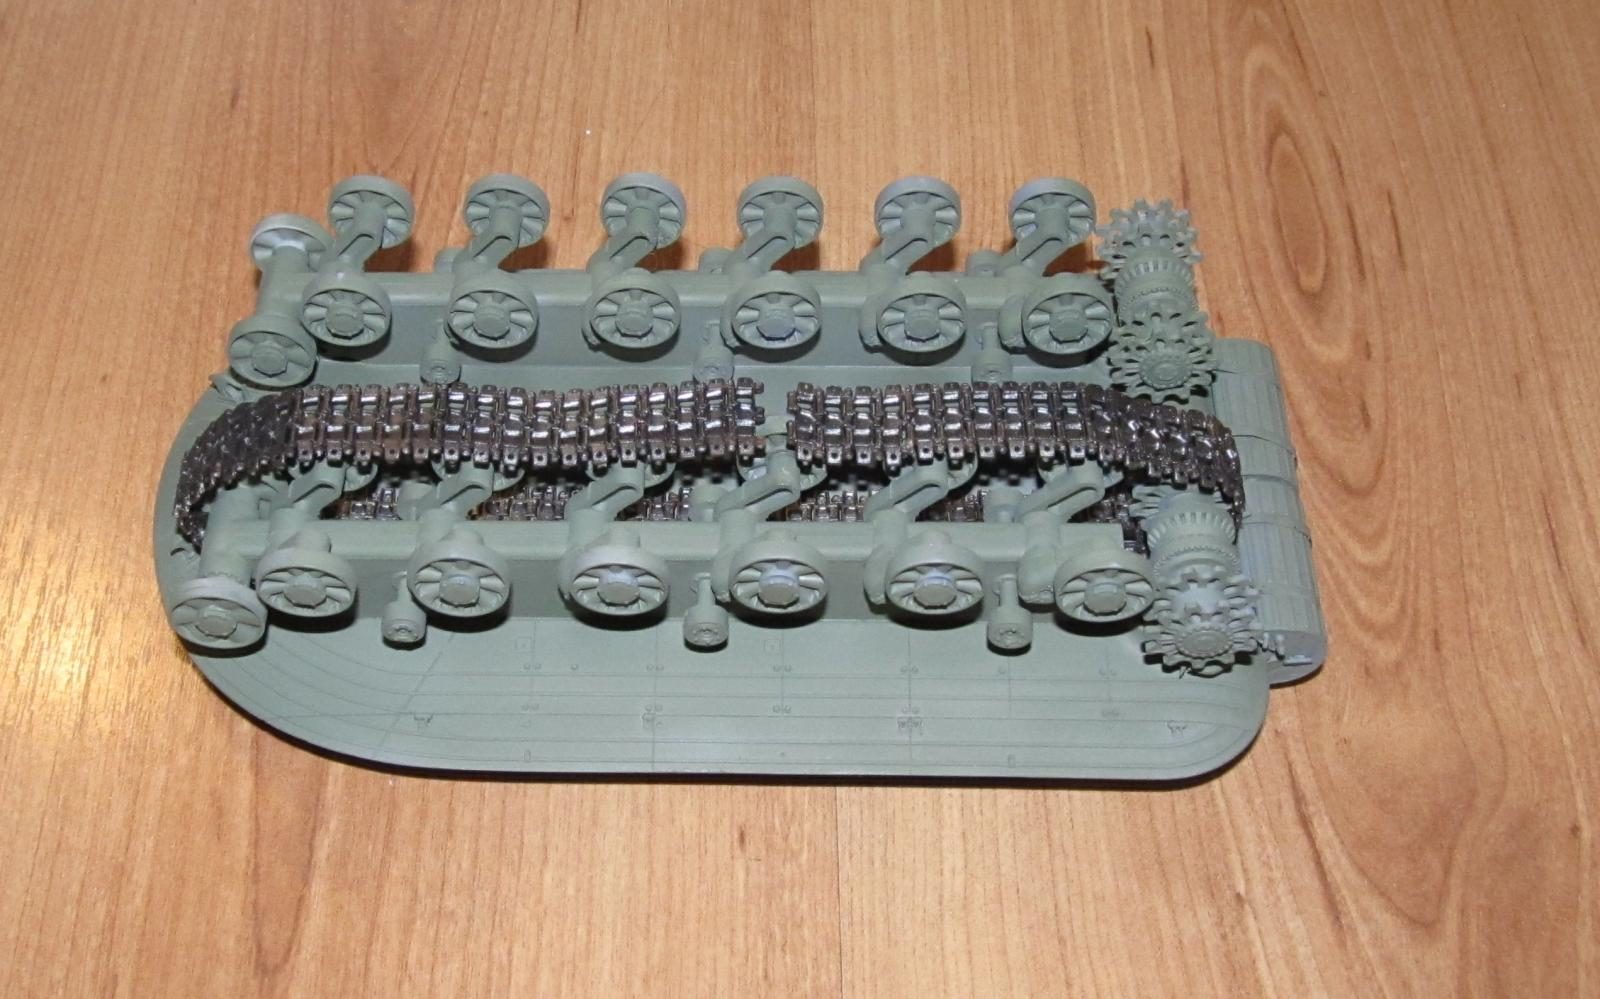
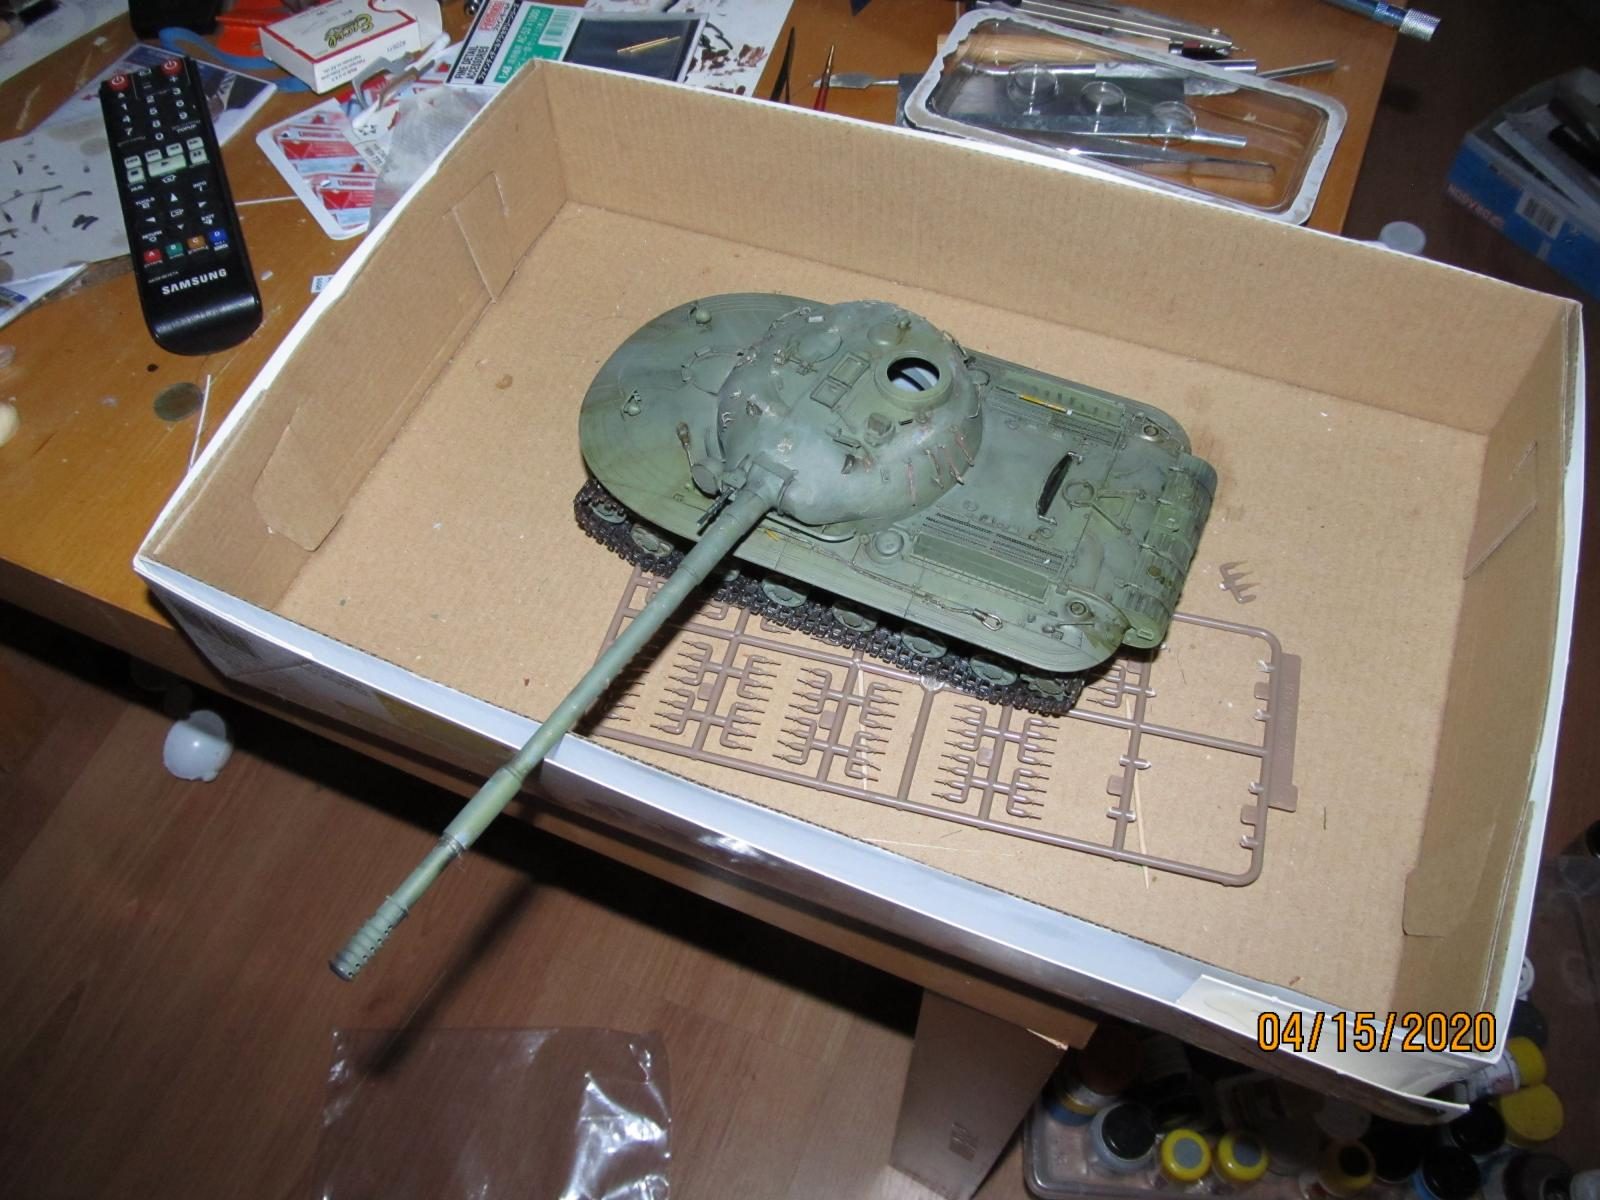
It consists of 1567(!) parts including PE. Before you freak out (I did till I figured it out), many of those parts are for the tracks and there are quite a few considering there are four of them—the tracks come in one small bag and the linkage pins are attached on their own sprue. The parts are well detailed and there is an injection mark on each link so one could be really busy sanding them off. On the bright side, it comes with a jig to help assemble the tracks.
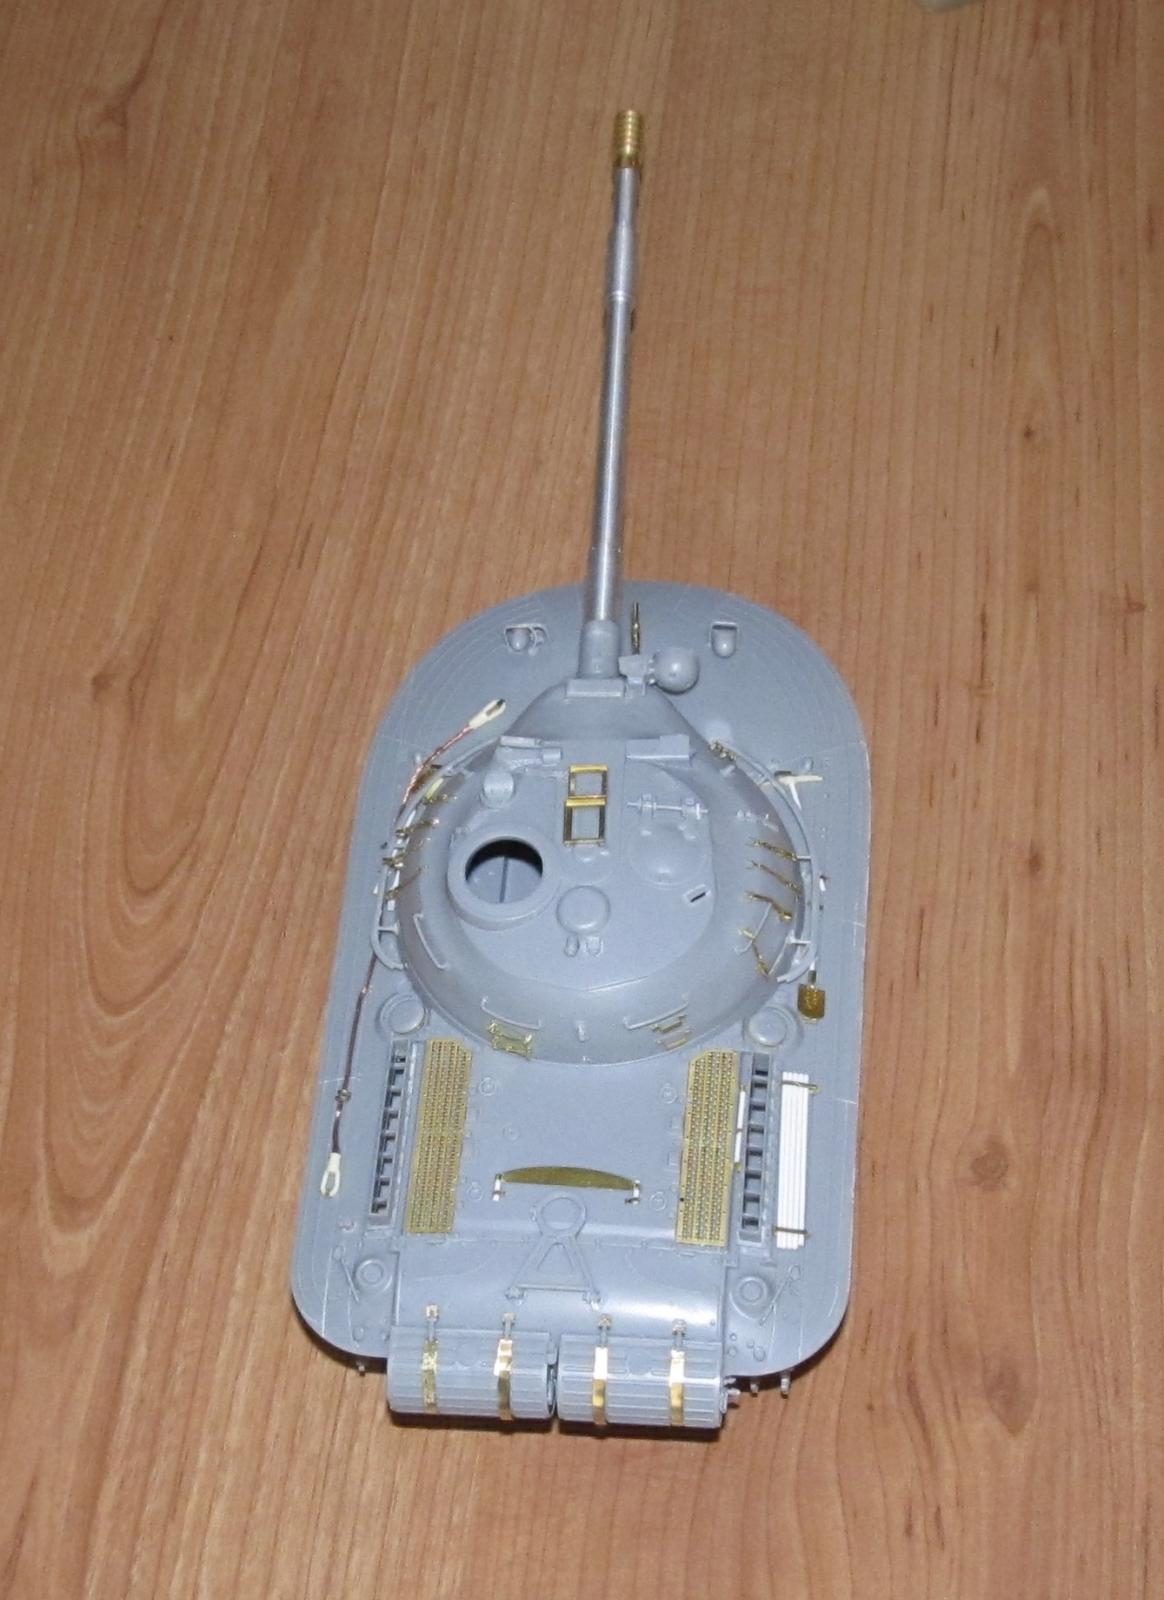
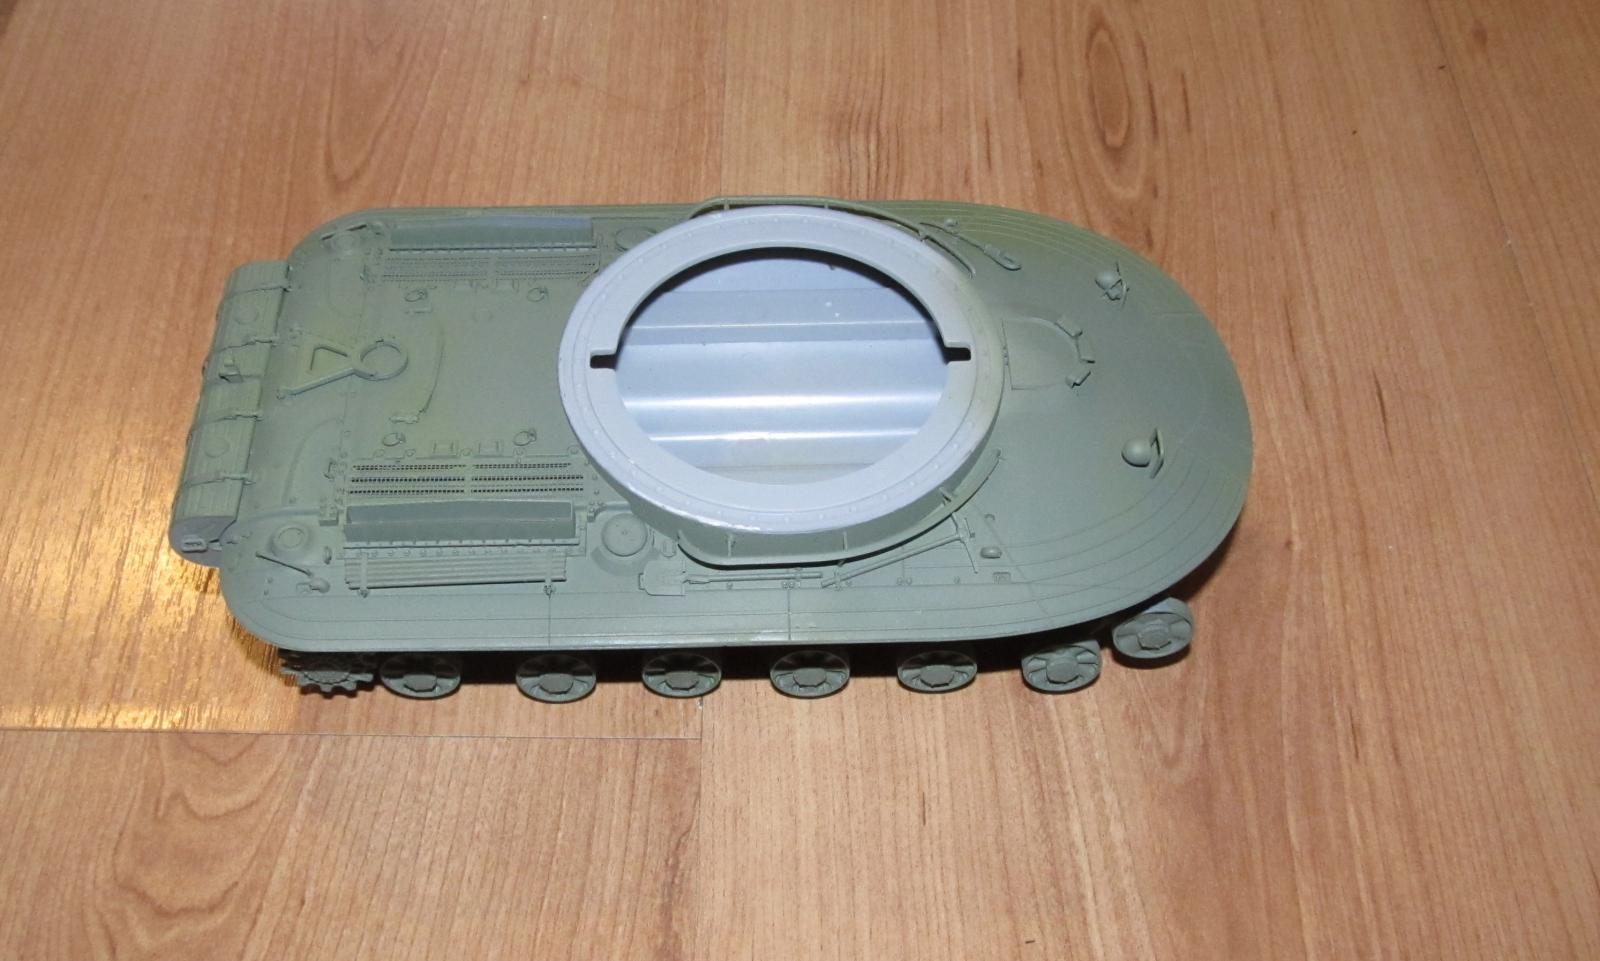
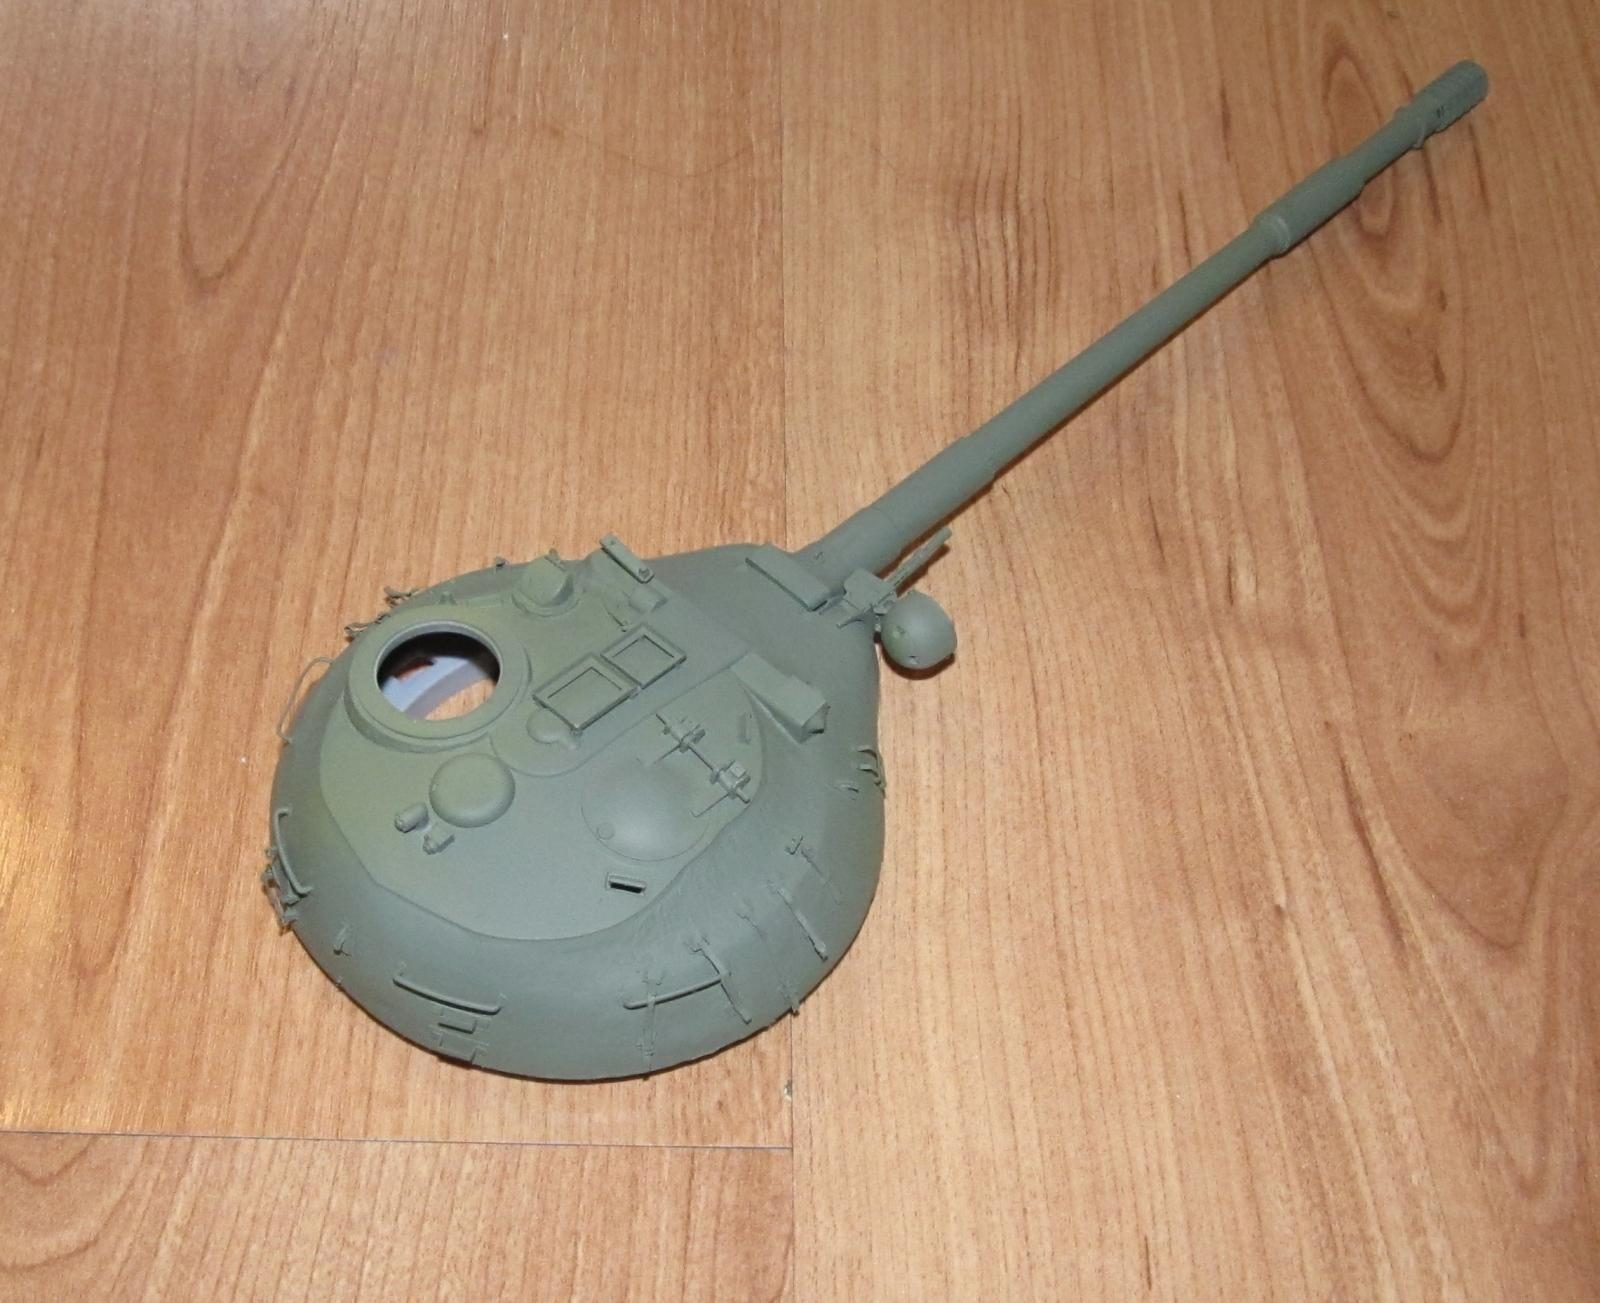
The main hull consists of two clamshell like pieces (top and bottom.) The main turret hull is a one piece part with simulated casting marks that make the surface rough. One of the surprises is that the 130mm gun barrel is one hollow piece and so is the muzzle break (thanks to slide molds) which makes things easier to build (all that time you save not having to fill/sand the gun barrel can be used to make tracks.)
There are two sprues for the running gear, four sprues for the road wheels, one sprue for the turret hull, one sprue for the weapons and various protrusions, one giant sprue for the hull, one sprue of clear plastic, five sprues for the linkage pins, and one bag of track links. Also included are two sheets of PE for the engine grills and various small parts and one copper wire for the tow cable(?) No interior is supplied which is fine with me as I don't usually build armor interiors.
CONSTRUCTION
I began by working on the tracks. Unlike my experience with Meng Tracks where the pins are loose, I have found that these Amusing Hobby Tracks are almost too tight. I had to use a 0.7mm drill bit to drill out the holes in each track link to ensure that the pins actually go into the link. It took a couple of weeks to build four sets of tracks 80 links in length. Once in a while the pins would come loose and I would be forced to either replace the ones that fell out or glue them in place.
The underside track drive wheel sections fit is too good especially the rear drive sprockets. I had to work those onto the main hull because the fit was so tight. The rest of the undercarriage was glued together with a combination of CA glue (visible seams) and Tamiya extra thin (hidden seams).
There were still some gaps that needed to be filled where the track drive sections go. I used Vallejo putty to fill in any gaps between the hull and the track drive sections.
Amusing's design philosophy seems to be borrowed from Dragon's “Why make one part when six or more will do?” The main gun travel lock is usually a one piece item on many armor kits, but Amusing decided to make it around seven mostly tiny pieces which took me about 40 minutes to clean, assemble and glue which is why adding the tiny parts took a while as this kit went back and forth off the shelf of doom.
The main hull is made up of two clamshell pieces (top and bottom) and was quickly/easily glued together with CA glue and the seams carefully sanded smooth.
It seems my building philosophy for this kit was similar “Why use the simple plastic parts when you can use eye killing time consuming tiny sized pieces of photo-etch and other aftermarket goodies?” This became apparent when I started building the turret. The plastic slide mold gun that I gushed about
was quickly replaced with a Aber 130mm aluminum barrel with all the attachments including the muzzle brake. I also replaced the clunky plastic 14.5mm machine gun with a much better detailed five part metal one from the same Aber set that proved to be quite fiddly to assemble and mount to the model.
Adding the metal 130mm barrel was not that difficult as I had to drill out the gun mantle hole to accommodate the new metal gun barrel. I glued the metal barrel in place using CA glue once the hole was large enough. The rest of the metal barrel pieces were added to the barrel and glued in place using CA Glue.
The rest of the plastic turret parts were glued in place. I started adding small PE assemblies to the tank turret and that is when I ran into trouble. It turns out that working on small PE assemblies requires a lot of patience and will power which I did not have much of at the time. Object 279 comes with a lot of details including rear fuel tanks that come with PE strapping and PE hand straps on the turret for dragging infantry around. A few weeks later I summoned the effort to finish all the PE assemblies and various armor tools including tow cable (the plastic kit does not include any tools.) It turns out that I only used about ⅓ of the Voyager PE set because the parts were redundant, too complex or too tiny for me to use.
I closed up all but one of the hatches and added a searchlight made from the blunt end of an extra fuel tank to the only unglued hatch. Now I was finally ready for painting.
COLORS AND MARKINGS Part 1
Painting
The model was first primed using Grey Stynylrez primer. Once the primer was dry I sprayed on a thick coat of Mission Models MODERN Russian Olive Drab 2. Next I lightened random areas on the top of the model using more Russian Olive Drab 2 and a mix of Mission Models Modern Russian Armor Green which I think is too light.
The four sets of tracks were sprayed with Black Stynylrez primer and then painted with Vallejo Metal Color Magnesium.
Various strapping, small tools and the machine gun barrel were painted using a brush (red brown, wood effects, steel with rust and gunmetal.)
FINAL CONSTRUCTION
I added the four tracks to each drive. Adding the two interior tracks was a touch more difficult than I thought as I had to thread the track via the top of the bogies and then line them up with the drive sprocket. If they didn't then the track was too short. It took a good hour to get both these tracks on aligned with the drive sprocket. The outer tracks were easy to add.
I drilled out the antenna mount using a 70 thou drill bit and used CA glue to secure a 10cm length of steel wire into the hole.
The remaining hatch was glued on and I was ready for weathering.
COLORS AND MARKINGS Part 2
Weathering and Final Coat
I usually overdo my AFV model weathering to the point where it looks like a muddy junked AFV and/or so lazily that I miss obvious spots. This is why I started spraying very light and heavily thinned coats of Tamiya buff, dark earth and NATO brown (75% thinner to 25% paint) around the tracks and underside of the tank. The idea was to show a tank that has been used and not a participant in a mud bogging contest. I took my time instead of ignoring the interior of the tracks and various wheels which is to say, I sprayed everywhere with a heavy focus on the rear of the tank. I tried to keep the coats thin and random so that there would be variations in the mud. One thing I tried to do was concentrate on the area around the tracks and fade the mud as I got higher up the tank (a pattern which I noticed on my own car.)
Next I used three different types of washes. The first wash was using Tamiya enamel based washes (brown and black) to highlight various details. After the excess was wiped clean, I then added a watercolor wash (mix of burnt umber and black) to dirty various surfaces and create streaking. I used damp Q-tips to create streaks and patterns. Finally I used three different Vallejo acrylic washes for oil stains and even more streaking and stains similar to the use of filters. It took a few hours to do which is way more time than I usually take to weather anything as I just slap on the wash and wipe it down in about 30 minutes to an hour.
However, I wasn't finished as I used ripped apart sponges dipped in Tamiya Buff or Dark Earth with most of the paint wiped off to simulate mud tracked by tank crew and/or infantry mounting or dismounting from the tank. While the paint was drying, I would create streaks using a damp Q-tip (also to remove any mud that I thought was too much.)
I thought about simulating chipping, but I didn't do much as some hand holds were chipped with rust colored paint using a fine tipped brush but I was losing patience and stopped.
A day later, I went over the tank again to find any sections I missed and paint them. I missed a few areas around the underside and redid the mud as it didn't look “realistic” enough for me.
The tracks were weathered again using Vallejo Acrylic rust wash. Next I dry brushed the edges of the visible portion of the tracks (more on the outer tracks) using chrome paint to show the constant “wear” caused by soil/rocks. I added on more final sloppy wash on the tracks using Tamiya enamel brown wash solution.
When everything was dry I sprayed on Tamiya flat coat to seal everything in.
CONCLUSION
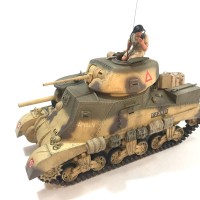
I knew that with four sets of tracks to make and using a complicated PE set that it was going to be a slow slog of a build. I just didn't think it would take this long. This kit would be much easier to build without the PE and metal barrel set I used as Amusing Hobbies did a fine job creating a model based on the only surviving examples at the Kubinka Tank Museum, but forget to add certain details that are used on operational tanks such as tools. Definitely recommended for Russian Armor enthusiasts who have some skills with PE.
I think this is one of my best painting and weathering efforts as I'm guilty of not taking the effort or time to weather a tank well. I am happy I finally completed my Object 279 tank. It definitely belongs on my collection of oddball AFV models.


Looks very nice.
Very unusual, great job!