1/48 Bristol Beaufighter Mk VIF – Malta 1942
My first attempt at an article or work in progress on this site, please bear with me! Recently purchased (more like invested) in a Harder-Steenbeck Infinity airbrush and decided to try this out on a new kit build; this Tamiya classic became my first victim! This is OOB, no frills; the only thing additional is the paint mask by Eduard.
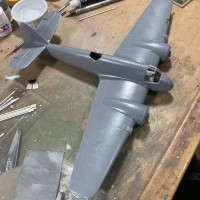
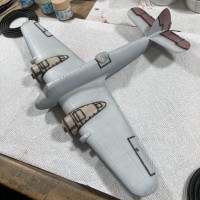
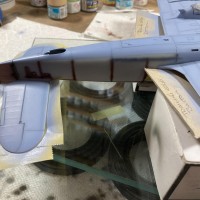
Cockpit is relatively basic, but fit is firm, tight, and the detail is sufficient for OOB. Tamiya provides decals for the crew station intruments, which I struggled to get on as they basically fell apart on me during application. Once the cockpit was finished the rest of the kit went together rather rapidly due to really good, crisp sprues, virtually no flash, and good engineering design of the moulds. I take my time with such things, so while it took me several weeks to do, in reality probably a few hours' time in total; airframe assembly to the final shape in Picture 2 probably took about two hours.
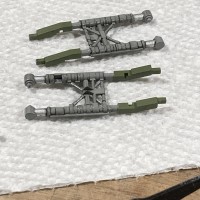
The rockets, wheels, engines, landing gear, props, antennas and wheel well doors I did separately as they'll go on later towards the end.
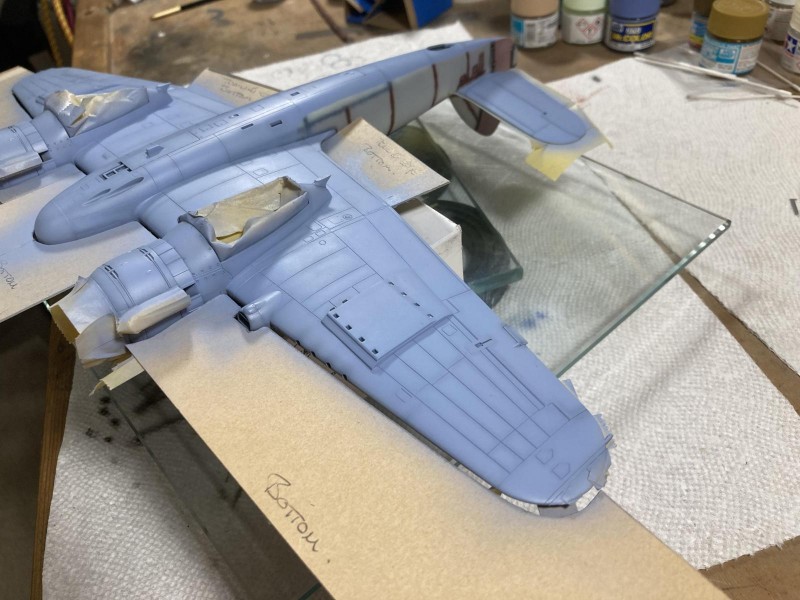
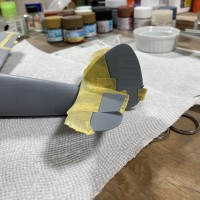
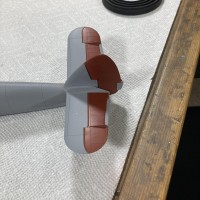
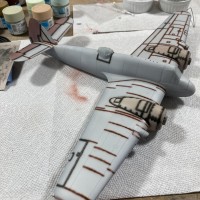
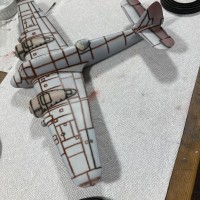
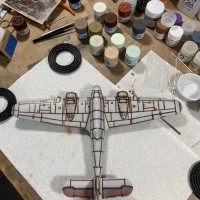
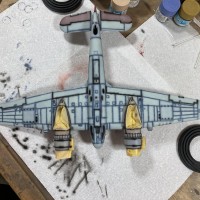
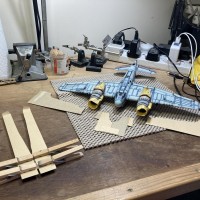
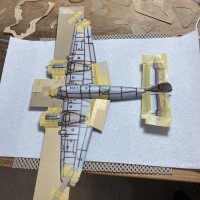
Once assembled, I primered the airframe and touched up with putty and reprimered again, then began the undershading or filtering for the final camouflage coats. First on was a deep red-brown on fabric-covered control surfaces (or what I assumed were anyway), and then a dusting of Pale Brown - I put a heavier application of pale brown on the engine strutures in the wings to offer a subtle difference for engine fluid stain, metal, etc. then added a filter of camouflage gray across the top of the wings and fuselage to simulate sun fading in the mediterranean climate before tracing the panel lines. This is pretty tedious as I tend to hit EVERY panel line! Here is where I acquainted myself with my new toy - an Infinity CR+ with a 0.2mm needle... Flat black thinned out at about a 1:2 or 1:2.5 ratio (very thin for me) and I used the trigger stop feature and was truly impressed with the results. hinged panels and really grimy areas will get this, but I'm going to chase the rest of the panels elsewhere with a combination of browns. More to come, hopefully today...
I've finished undershading all the panel lines on the topside of the airframe today in a cocoa brown that I think will complement the middlestone/dark earth camouflage to come later. About 65% done, next step will be to flip the Beaufighter over and put a filter on the underside (I'm thinking of Oxide Green frankly) before I undershade the panel lines a medium grey ahead of the final coat of Azure Blue.
Its been a few days since I was out here on this article, I haven't forgot - just been very busy both with work and the Beaufighter (when I've had the headspace for it anyway)... so I'll carry on and pick up where I left off:
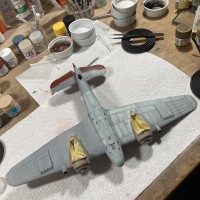
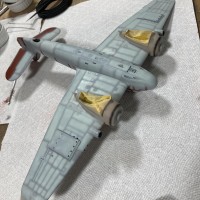
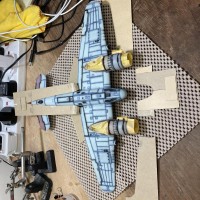
6 Sep 21: [Pic11] I started shading in the individual panel lines on the underside of the Beaufighter, I feel I got a real good effect going with the GS Oxide Green, taking care to keep a little distance from the panel lines themselves.
11 Sep 21: [Pic13] I put a GS intermediate blue around all the panels - really struggled to keep a consistent flow through my H&S, then discovered a recent trip to my local hobby shop that GS Aqueous really shouldn't be mixed with Mr Color thinner! Food for thought next time, even though it seemed to work just fine with GS Cocoa Brown, GS Oxide Green and GS Flat Black... needless to say I think the oxide green accent was a waste of time; I should've just shot the whole thing GS oxide green then did the panel lines afterwards.
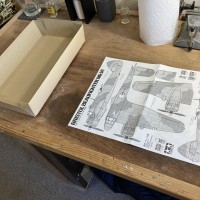
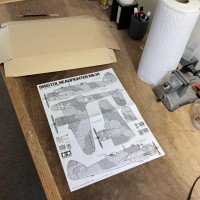
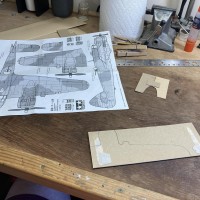
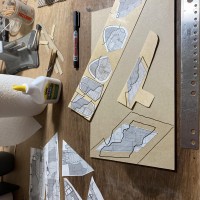
12 Sep 21: [Pic14] Next comes the camouflage. One of the truly great things I love about this kit from the moment I opened the box was the giant, to-scale planform of the Beaufighter's camouflage patterns! Yay! Harking back to my days as a penniless youth, I wanted a soft edge on my paint, and I had a handy supply of cardstock ?...
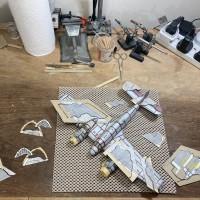
17 Sep 21: [Pic18] I spent the next several days marrying up the various pieces of the camouflage areas in order to get the correct shape around the bends and corners... These all needed to be done before I put the first coat of paint down over the undershading.
20 Sep 21: [Pic21] I taped up my beaufighter, deciding it was best to start from the belly up. As a reward for their sage advice at my local hobby shop, I decided to invest in a few of the AK Interactive paints - live very dangerously and try my hand at them while putting on a finish coat with them. I bout the Azure Blue, Dark Earth, and Middlestone. Along with a supply of AK thinner to accompany. I couldn't find anywhere a set mix ratio of thinner to paint for the AK line, and all the commentary I was reading on it was as diverse and contradictory as it was confusing, so I chose to go with what I knew: Dave Whalen once said if you can get paint bubbles to 'roll' across the surface you've got a good mix - so that's what I did. I always tend to go a little too thin than too thick, so with the Azure Blue it was more like a 1:2.5 mix of paint to thinner. I got the dancing paint bubbles, so tested it out on a scrap piece of cardboard with my H&S and then off to work.
The jury is still out for me on the AK Interactive range of paints after my first experience. I'm a little worried I won't have enough 'room' shading-wise or coat-wise to be able to pull out the dark panels from underneath both a coat of Middlestone AND a coat of Dark Earth on top of that, knowing what I know now, but hey, that's part of the fun, isn't it?

Great start on both, the build and the article, Thomas @luftfanatic
Welcome to this great community.
Looking forward to the next steps.
Any build that puts such effort and detail before painting the camouflage colors is bound to be interesting to say the least. I’ve been H&S airbrushes for years and never turned back when it comes to fine spraying. The Infinity is the Porsche of airbrushes 😉
Thanks for the kind words John, and Pedro. The panel lining all told today has taken me about 3 hours, so far. I've got the belly to do now and that I'll do later - need to take a break!
I'm a very recent acolyte to undershading (this is my second attempt) - inspired by a recent article on the topic from somebody elsewhere who was doing an F-105 Thud. As for the airbrush, well, I've been a devoted Badger fan for over 25 years - I cut my teeth on the 200 and 150, and the past 15 years my go-to's have been the 100LG and 100GXF - but for fine detailing Pedro is definitely right: this is the Porsche of airbrushes; I'm totally sold on this one.
This is good work. Keep at it.
I don't want to sound like the Site Police, but this post is an excellent candidate for the Work in Progress Group or the Desert War Group (Malta being part of that campaign). You can expect to get both support for what you're doing and things learned by others about what to avoid/do different than the instructions to get a great result.
Thanks, Tom.
This is a great entry, Thomas! The Tamiya kit is definitely a great kit, I have the same to build, as well.
You've done a great job so far, looking forward to your progress.
Welcome aboard!
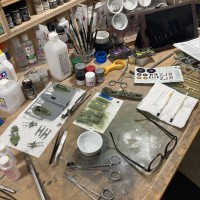
Excellent beginnings, Thomas @luftfanatic. While new to posting on this site, you are obviously very experienced and skilled as a modeler. Your well-worn and well-stocked workbench is ample evidence in itself. Glad you decided to jump in. I just wanted to second what Tom said about the Desert Air War and Work in Progress GBs. The set-up for GBs allows you to do on-going threads that keep bouncing back into public view so people can always see you have done new work. You can see this daily in the indicator box "Worth checking in Groups" on the Headline page. Newly posted stuff in any GB thread is also flagged at the top of the Groups page. It will be a great benefit to you and to anyone else who wishes to follow your skilled work. When you post in the Headines page, it is a once-only thing that is normally used to show the conclusion to a project. If you add to the same posting later, it will be less likely to be seen, because it will keep receding into the past in headlines. At the same time it is obviously impractical for you to post a whole new article with each step of progress in Headlines. I really like the ingenious and considerate way that the administrators of iModeler have set up its features so we can mostly manage this all ourselves and support each other, particularly in Groups.. As for the Desert Air War Group Build, which I administrate, you are very welcome to join in. I am actually going to add a bit to the description of the GB to clarify how pivotal Malta was to the unfolding of the Desert Campaign, since British bases there were essential to blocking Rommel's supplies across the Mediterranean by convoy. Anyway, I am sure you already know this, just to clarify what is included in the GB. Looking forward to more of your airbrush artistry and the impressive capabilities of your new tool. Happy modeling.
Thanks Colin, is there a way I can 'move' this article/thread somehow across to the Desert Air War GB? Or is this something the Admins have to do...?
Hi Thomas @luftfanatic. Glad you decided to join the DAW GB. The admins might be able to move the article over and do so if asked. However, it would probably be faster and easier to just rebuild the article in the Group Build. I would suggest the following:
That's the way I would do it, anyway. iModeler users who have been on the site longer than I have might have a better way so all comments/suggestions are welcome.