Sturmtiger inside-out
For me, a kit can't have enough parts, polystyrene and photo etch. Hence AFV kits with full interior, many parts, elaborate instructions and often accompanied by plenty of PE - we've seen coming onto the market the last few years - are right up my alley.
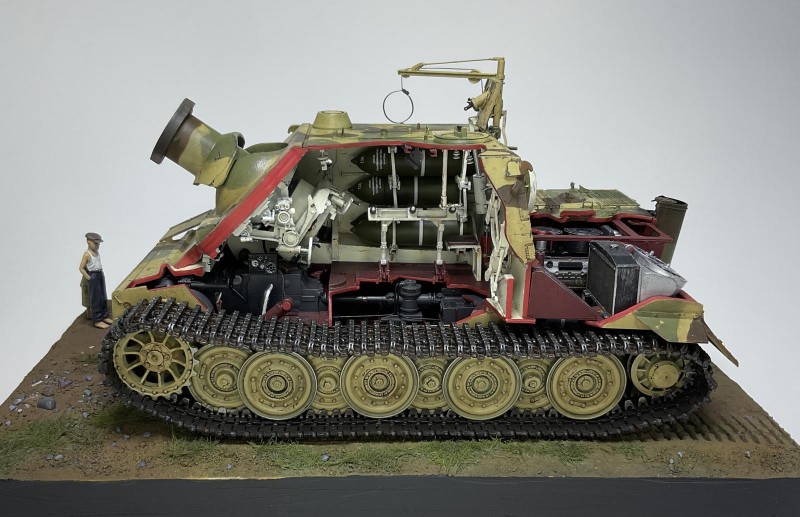
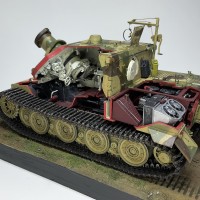
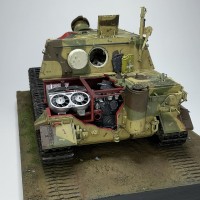
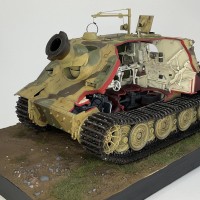
Also, cut-away of machines or vehicles have always fascinated me. Giving a peek-view of the guts of the machinery but keeping the overall ‘machine' in tact. That brought me to the idea of combining the two into a cut-away model. The boxy Sturmtiger was a perfect candidate for this project. I was already forming an idea for putting this beastly and ugly tank on a simple base, it was time to dig up my Dremel tool.
The kit is the 1:35 RFM-5012 Sturmtiger based on the Tiger I chassis. Actually, the box contains a lot of Tiger I parts which are not used in this build. Apart from trimming down some locator pins and the regular cleaning up, the kit came together nicely. As usual with interior kits, the build is very detailed with numerous tiny parts that will never see daylight after closing it up.
Since the cut-aways require a lot of dry fitting with adjoining areas, it was impossible to follow the steps in the instructions. It is important to tick off the used parts in the instructions to prevent loosing track.
It was surprising (annoying) that for a detailed kit like this, significant details around the engine like cooling water piping and fan drive shafts were missing. I mean, gears were included in the overhead cranes' gearbox, but piping in the engine compartment missing! So that had to be scratch-built. Also surprisingly, some parts like the batteries under the floor of the fighting compartment and additional front armour, were not called out for in the instructions but included on the sprues. So checking the box content for additional details is worthwhile. Several details like wiring of the radio, various hydraulic hoses in the fighting compartment, fuel lines and piping around the engine were scratch-built. Unfortunately, in my enthusiasm I forgot to make pictures of the completed engine which looked pretty awesome with all the hoses and wiring.
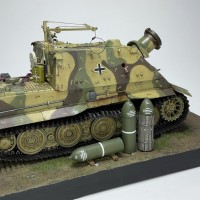
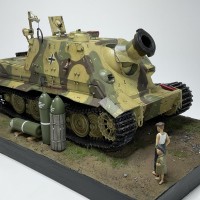
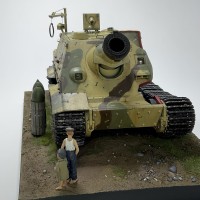
I am happy with the final result. The weathering is a little heavier than planned for, but I felt I had to ‘camouflage' some of the mishaps I created during the painting of the ambush camouflage (which is not based on an actual vehicle).
During my research, I found a picture of the projectiles in their ‘transport casing', I had to build one of these (that's the one standing next to the tank). The figures came from a Miniart ‘Villagers' set I had in my stash.
I learned a lot during this project and enjoyed it very much, it gives another dimension to just following the instructions. There are not many references or examples of cut-away builds online, so it is some trial and error. But it is a nice opportunity to show-off your preciously and time consuming built interior kit. Apparently there is interest for these models as Ryefield came out with a pre-cut cut-away (yep…) model a while back (RFM-5019). One advise on cutting up your own: make sure you get a model with representative armour thickness, the glacis plate of a Sturmtiger is 15 cm (!) = 4.3 mm; a 1.5 mm glacis plate would have looked a bit weird.
Regards, Joost
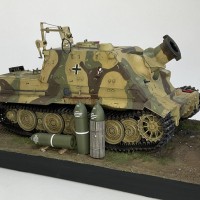
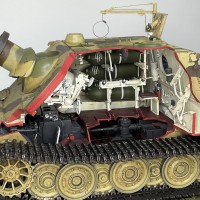
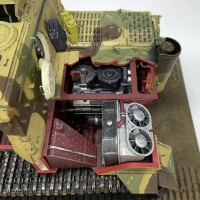
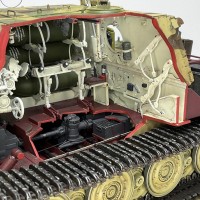

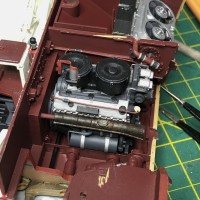
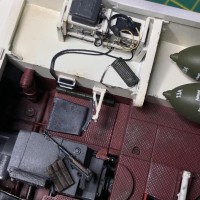


What a monstrosity! Must have been an absolute pig to drive. Love all of what you have done but especially the grenade rack is nice to behold.
Always wondered abut the strange look of the half moon shape at the muzzle...any idea what that is?
Hi Stellan, that would be the counterweight to compensate for the weight rearward of the pivoting point.
What a wonderful idea to build such a model, Joost!
Your building (including scratch building), painting and weathering skills are truly unique. The finished model will be a head turner, a definite eye catcher wherever it appears.
Congratulations and welcome aboard!
Those complicated models are all yours! You can do justice to them for sure. Great work.
Amazing work you put in to your build and it looks great! The scratch building steps this up quite a bit and your knowledge in this vehicle comes through in this build. I used to drive and be a loader on a M48A5 over 40 years ago. Even though your build is not the same tank, the way your made it brings me back to those days.
Excellent work, Joost. I love seeing stuff like this but don’t have the patience myself. Liked!
Amazing build Joost and a conversation piece of how far it got in WW2 designing tanks and artillery. Was this a mortar or howitzer ? I guess the ranging makes the former a more likely candidate. Great work.
What an amazing entry, Joost @joostverbeek
This is a true eye catcher and unique build.
Welcome to this great community and hope to see much more of your builds.
Joost, this is the best cut away build I have seen. Amazing work and very inspiring...
Wow, this is really cool.
Meticulously well done! And what a beast of a tank
looks wise! Do you have any more cutaways?
Welcome aboard, Joost. Tremendous amount of work with a stunning result...NICE!