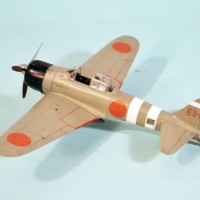
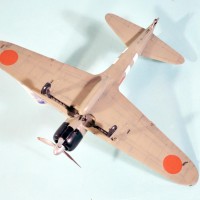
Eduard 1/48 A6M2b Model 21 Zero (Mitsubishi-built)
The Airplane:
At the time of its appearance in combat over China in September 1940, the Mitsubishi A6M2 "Zero" was arguably the most advanced single-seat single-engine fighter in the world. That it was designed to fly from aircraft carriers made it even more amazing. Its heavy armament of two 20mm canon and two 7.72mm machine guns was only equaled by the Messerschmitt Bf-109E. There was not a contemporary fighter in the world it could not fly rings around in combat. Even more remarkable was its range, which was at least four times as great as any of its contemporaries. At the outset of the Pacific War its opponents credited the Imperial Japanese Navy with more aircraft carriers than they had, since it was inconceivable that a fighter could fly from Formosa to the Philippines and have time for 45 minutes of combat before having to break off and return - which the Zero accomplished regularly.
The Zero paid for this spectacular performance with a very light structure that foreswore both defensive armor and self-sealing fuel tanks, since its engine was no more powerful than any of its contemporaries, being a Sakae-11 of 1,000 horsepower. It lost its outstanding maneuverability above 250 m.p.h., being seriously degraded by stiff ailerons. At over 300 m.p.h. its maneuverability advantage was largely negated. Almost any Allied fighter, by the fact of the additional weight of armor and self-sealing fuel tanks, could dive away from a fight with a Zero if need be since the fighter had a relatively low never-exceed speed. With such a light structure, one good burst from the American armament of six .50 caliber machine guns would explode a Zero with one burst if the pilot could hold the Zero in his sights long enough.
During the first year of the Pacific War, the myth of the Zero was considerably enhanced by the fact that it was flown by pilots who were among the best in the world - the pre-war trained fighter pilots of the Imperial Japanese Navy - who not only averaged some 800 flying hours as compared with a third of that or less for most of their opponents, but could also count significant time and experience in actual combat over China during the Sino-Japanese conflict that had raged since 1937.
Unfortunately for the Japanese, the A6M2b Model 21 - the first Zero to see combat in significant numbers - was also the best of the series. Successive changes did not improve performance significantly as compared with the increased performance of the new Allied types that entered combat beginning in late 1942 with the arrival of the P-38 Lightning in New Guinea. Coupled with new tactics that played to the strengths of the Allied fighters and against the weaknesses of the Zero that were discovered when an A6M2 that crashed in the Aleutians was repaired and flight tested, and the fact that the Japanese were unable to replace their pilot losses after Midway and Guadalcanal with similarly- trained personnel, the day of the Zero was basically over by the conclusion of the Guadalcanal campaign.
Tetsuzō Iwamoto:
Born in 1916, Tetsuzō Iwamoto enlisted in the Imperial Navy in 1934 and completed pilot training in December 1936. He first entered combat over China in early 1938 and by the time he returned to Japan in 1940 he had 14 credited victories. Assigned to the fighter squadron aboard the aircraft carrier Zuikaku in 1941, he flew with that unit from the Pearl Harbor attack on December 1941 to May 1942, including both the Indian Ocean raid in April and the Battle of the Coral Sea in May.
Assigned to Rabaul in the fall of 1943, Iwamoto became the leading Japanese ace during the three month battle by the time he and the other surviving pilots were withdrawn in February 1944. Following assignments at Truk and the Philippines, he was commissioned an Ensign in October 1944. His final combats were over Japan in 1945. Credited with 87 official victories by the IJNAF, either Iwamoto or Hiroyoshi Nishizawa was Japan's Ace of Aces. His diary was discovered after his death in 1955, in which he listed 202 Allied aircraft shot down.
The Kit:
Eduard surprised the world in late November 2021 when they announced the coming release of this “Tora! Tora! Tora!” dual combo kit of the Mitsubishi A6M2b Zero 21; the project was kept secret due to a planned release by Italeri of a new-tool Zero 21.
The kit follows Tamiya's 1/48 Zero 21, released in 1973, and Hasegawa's A6M2b, released in 1993. The only thing this kit shares with these previous releases is the designation as an A6M2 and similar dimensions.
This kit is Eduard's most advanced yet in terms of quality of surface detail; the rivet effect is closer to “scale” than any other 1/48 single-engine fighter featuring such detail. I can say from having been around the Planes of Fame A6M5 for the past 40 years that the surface detail of this kit is the closest to the real thing I have ever seen in a model.
This is the only Zero kit that gets the shape of the cowling right, with its subtle curve on the sides. The cockpit is so well-detailed that a resin cockpit is only needed by those modelers who don't believe a non-resin cockpit can ever be completely right. The seat comes with the holes in it, unlike any other 1/48 kit of this airplane. The cockpit is close to being as detailed as the cockpit of the 1/32 Tamiya kit. The Profipack kit includes photoetched instrument panel faces and seatbelts.
Decals are provided for ten A6M2s flown by all the squadrons of the six carriers that took part in the Pearl Harbor raid.
Construction:
The design of this kit is good enough that if you make absolutely certain to clean off all sprue nubs on mating surfaces, and then read and heed the instructions, it will be difficult to get a bad result.
I mixed a green for the cockpit interior to match the color Eduard used on the photoetch instrument panel. The result was a color exactly like the color of the Planes of Fame A6M5 cockpit; Ed Maloney once told me that when they restored the airplane 45 years ago, all the paint was original, and they copied the colors of everything. Since that A6M5a is a Mitsubishi-built airplane, I think we can declare that Eduard “got it right” for this kit, which makes up as a Mitsubishi-built A6M2.
Some people have complained that the photo-etch part on the left side with the chain is a problem since the chain is supposed to fit over the interior structure, which is assembled later according to the instructions. If this is a problem, it's one you need a penlight to see once the cockpit is assembled. Once again, those who want to make an ant pile into Mount Everest are free to do so, and the rest of us are free to leave them to it.
The rest of the cockpit goes together without problems. I compared the injection-molded kit seat with the Brassin resin seat that I received for the review, and I really can't see a serious difference once the model is assembled. This kit really doesn't need the expensive aftermarket resin stuff; save your money on all that and get a second kit. Or buy it and use it; I subscribe to the Al Superczynski Rule. However, all the various bottles that fit into the rear of the cockpit behind the seat are invisible once the model is assembled, so if you - like me - subscribe to “If you can't see it, I didn't do it,” you can save time there.
I only needed to scrape down the centerline seam of the fuselage once assembled to get rid of the seam. I used my pounce wheel to rescribe the rivet lines that cross that seam.
The only potentially-tricky aspect of the entire construction process is the attachment of the main gear. It fits a bit loose, which can easily lead to misalignment. I ended up attaching the gear with CA glue. Be sure that the gear legs angle in when viewed from ahead, so that the wheels are vertical. The leg should angle forward so that when you look down at the wing from above, the axle of the main gear is just visible ahead of the wing's leading edge, and you have it right.
Painting:
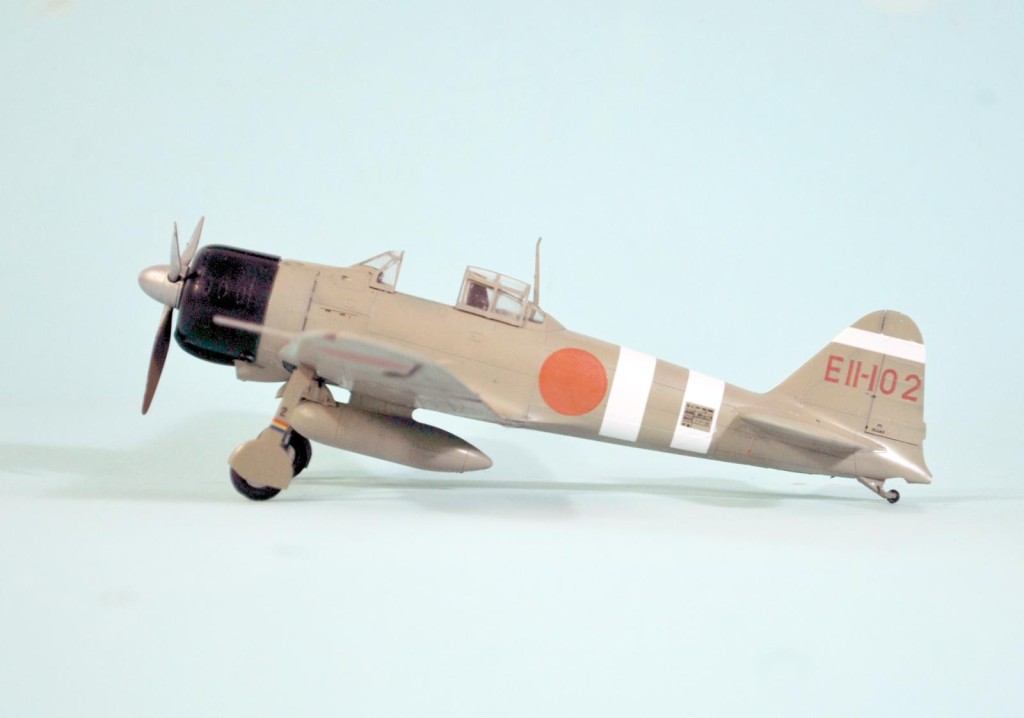
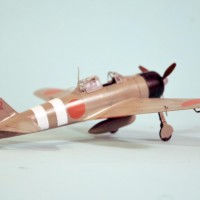
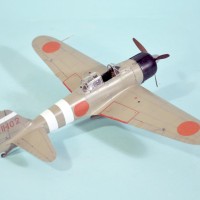
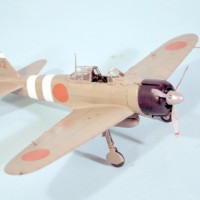
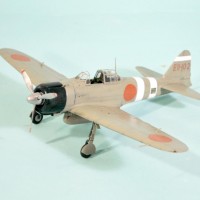
One can get the particular shade of “Mitsubishi Zero green-grey” from Mission Models Paints, or you can mix Tamiya XF-76 “IJN Grey 2" with XF-51 “Khaki Drab” in a ratio of three parts XF-76 to two parts XF-51 and get the exact shade in the Eduard instruction booklet. Interestingly, once I painted the model this color, I found that if I held it in front of an “earth tone” backdrop, the “tan” was more prominent, and when it is in front of a blue background, as with the photos accompanying this review, the color seems more like “Sky.” That makes a very good camouflage color for an air superiority fighter and explains why Marion Carl said Zeros were hard to see in combat.
I painted the prop and spinner with Vallejo “Dull Aluminum.”
Decals:
Shortly after the kit became available, a rumor over at The Other Place stated that the decals are “unusable” because the red decals are done with “dot matrix” printing that was visible when the decal was applied to the kit, and also that the edges of all the decals are “ragged.” I looked and looked at these decals, and didn't see that. I even put on my 2x magnification Optivisor and used Uncle Sugar's surgically-restored 20/20 Mark 1 eyeballs to study the decal sheet and couldn't see these problems. I'm not going to declare all sheets are fine, because we all know some decal sheets get mis-printed, but the one I have with this kit is fine.
The color of the hinomarus is the “tomato red” that is one of the three shades found in Japanese insignia. The apparent “dot matrix effect” may come from the fact the hinomarus are “faded,” and have uneven color across them. Once on the model, I found no problems with them. Also, it was alleged that Eduard got the wrong font for the ID letters and numbers on the vertical fin. When I asked about that, Vladimir Sulc provided me the two photos included with this review of Zero vertical fins that Eduard used in creating the decals. The font looks accurate to me; it may be that everyone else “saw what they expected to see” (a very common event) and thus got it wrong (also a very common event). I also note that with the decal film left on, the decals are so thin they settle so well that even the extremely fine rivet detail on the surface comes through once it has set up. As thin as they are, they are completely opaque.
Final Finish and Assembly:
The Pearl Harbor Zeros were all practically factory-fresh, and spotless. IJNAF aircraft from this period used gloss paint. I gave the model an overall coat of clear satin varnish, and left it otherwise clean, to represent the airplane as it appeared in December 1941.
I removed the masks from the canopy and installed the sliding section in the open position, then attached the landing gear as noted above, using CA glue.
Overall Assessment:
I have yet to run across a “perfect kit,” but this Zero from Eduard is 99.9999% of the way there, only getting an 8 of 10 for the loose fit of the landing gear legs. The surface detail is outstanding. Unfortunately, since there aren't a bazillion different camouflage and markings possibilities, as there are with the Spitfires, Bf-109s, Fw-190s and P-51Ds, modelers will likely only have a couple of these in their collection. But they'll be standouts. Highly recommended to anyone who enjoys working with high-quality material for a high-quality result. This is Eduard's best yet.


Another superb build and a great write-up, Tom!
Very impressive job, Tom. These haven't made it to Aus yet, but I think I'm convinced now - probably the second box with the Sakai plane - although there are one or two slightly different camo scheme's in there, too.
Beautiful as always, Tom @tcinla
Thanks for sharing the background information and the article on MM.
After finishing my Hasegawa Zero recently, I'm definitely into trying out this one as well.
Tom, a very high quality build, I like it a lot! And as always very interesting about the history, plane and pilot.
Thank you.
Nice job, Tom. Inspiration to dig into this kit.
Sold! Your build and review have made me want to get one of these, Tom. Another one slips through the stash reduction embargo…….
Well done Tom, an excellent review of Eduards newest release.
That looks superb. People were bashing the "meatball" decals because they weren't supposed to look faded, but the contrast between the colors here is amazing. I've also read that the cowling has so many parts that they even give you a jig to assemble it. Well, be that as it may, that IS one nice looking Zero. Liked!
Great review and build, I never take much notice of what “armchair modellers” have to say, better to read the comments from someone who has actually built the kit.
That's a purty Zeke Tom!
Nice build Tom, @tcinla. I have heard how wonderful this kit is and your right up gives a really nice and complete description of what this kit is all about. I am not really into Japanese aircraft but the idea of building a really really nice kit does sound fun. Again nice build and thanks for sharing good infromation about the kit.
Great model, and interesting story! I like read your articles!
Looks really good Tom. @tcinla You just have convinced me to pick one of these up.
Beautiful job!
I agree about the landing gear, and I agree that this is maybe the nicest kit ever produced. Certainly, it is the best Eduard kit ever produced. Positively sublime. I'll have mine finished this weekend.
Awesome looking kit and equally awesome build, Tom.
I'll be using that paint mixture in the future for sure
great article and build Tom. I just finished up the cockpit on mine, and completely agree with everything you have said. Love the details in this 'pit! I'm not there yet, so I do want to ask about the decals. You said they snuggle right in, even with the carrier film on. Did you just leave the film on, or did you attempt to remove it? I'm very curious about these "new" Eduard decals, but am not yet to a point where I can experiment for myself.
Tom, @tcinla
This Eduard Zero is the nicest kit they have released yet. I look forward to them releasing other versions, and when they do, chances are I will have to get a few more kits. I thoroughly enjoyed reading this article. Well done ! I'll be sure to check the "like" box before I leave.
One quick question: How do you feel about the way the cowling is assembled, using the jig that's included in the box ? I it easy to get glue in places you shouldn't ?
Thanks in advance.
@lgardner - if you use the little cowling jig, and don't slather on glue, it works. It's actually pretty nifty, and with all the curves in that cowling you didn't know it has from building Hasegawa kits, I don't know another way to cast it than in parts. It's all very subtle, but once assembled, those curves all all there,
Thanks Tom @tcinla
for the updates on how to go about building the cowling. This was my main concern about building this kit. Now I am much more confident with building these two Zeros. I'll also pay close attention to the landing gear installation.
@feroc - I haven't experienced all the "problems" with the Eduard decals the "experts" are claiming (other than they made some of the early ones too thin and not opaque, which made using yellow in the decals difficult, but that was learning printing), any way, I haven't done this "lift" business, since I'm not willing to risk the paint and decal job at that point.I use Solvaset, the decals melt into the surface, and I see no need to change horses.
A great result Tom. Looks like another Eduard Kit to put on the shopping list. It's turned out beautifully. Thanks also for the background & hints. Much appreciated.
Nice build Tom. When I get the courage to start my 1/32 Tamiya, these are the markings I'm doing.