Supermarine Spitfire Mk. VIII "HAVA GO JO"
This article is part of a series:
This is my last build for 2021. It was built for a club competition with a photo evidence deadline of 23:59 on 31 December and was completed with 5 hours 34 minutes to go. The reason for this deadline was the various Melbourne Covid-19 lockdowns that prevented us from meeting, so judging has been delayed until February of this year.
I choose this aircraft to celebrate the RAAF Centenary. The RAAF, the second oldest air force after the RAF, was formed in 31st of March, 1921.
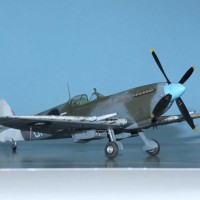
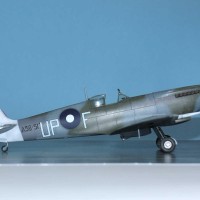
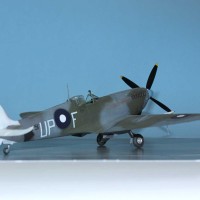
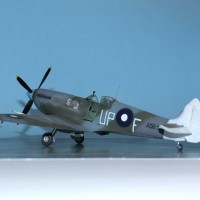
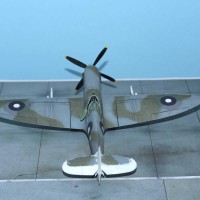
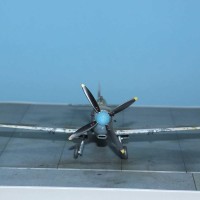
This model represents the mount of F/O Norman Turnbull of No. 79 Sqn, flying out of Morotai, April 1945.
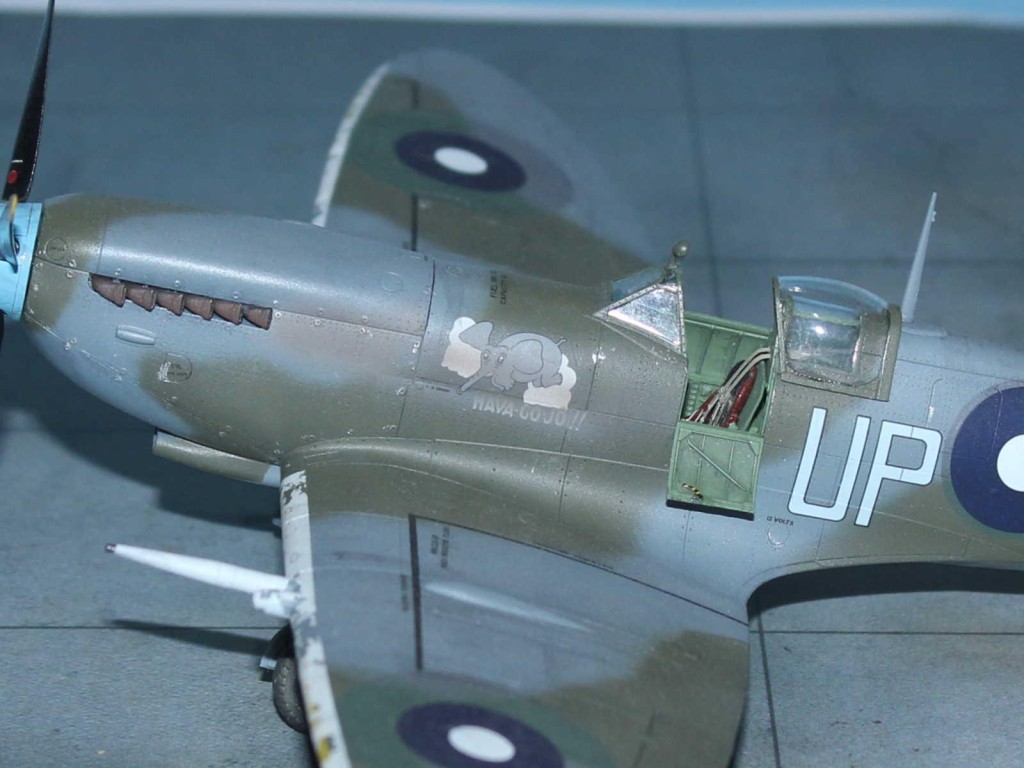
Norman was known as "Jo" to his squadron mates and was perhaps a little more stocky than others, so, as a joke his ground crew painted a flying elephant with the encouragement to "Hava Go Jo!".
After learning to fly in Australia as part of the Empire Training Scheme, Norman completed his training on Spitfire IIs in the UK. He briefly served with No. 552 Sqn and then No. 131 Sqn which, in 1943, converted to Mk Vbs to fly cover for the Royal Navy off Scapa Flow. He was briefly attached to the Fleet Air Arm (FAA) as part of trials to see if squadron-level pilots could fly Seafires from Royal Navy aircraft carriers for the coming invasion of Italy. He successfully completed two take-offs and landings from HMS Argus.
In the June of 1943 No. 131 Sqn. moves to Exeter to undertake Rodeos, Rhubarbs and Ramrods over France and Holland. During this time Norm shot up several trains and claimed a Fw 190 probable. Norm briefly flew the Spitfire Mk IX before his tour ended in November.
Norm returned to Australia where he spent some time instructing on Wirraway trainers at Mildura, Victoria, and then test flying repaired Spitfires at Port Moresby, New Guinea. He was posted to No. 79 Sqn., in June 1944.
No. 79 Sqn. RAAF was established in 1943 with the Spitfire Mk V. The squadron was intended to operate as high cover escort for RAAF Kittyhawks operating over New Guinea and was given priority for the limited number of Spitfires then available to the RAAF. It commenced operations from Goodenough Island in June 1943. By this time the war had passed on and active flying consisted of convoy patrols and the odd intercept of US bombers that had forgotten to turn on their IFF.
In November 1944 the squadron moved to Darwin to re-equip with the Spitfire Mk. VIII and became operational on the type in March 1945, flying from Morotai in the Netherlands East Indies.
By this stage the war had shifted to the Philippines campaign, from which the Australians were excluded by General MacArthur. The RAAF was consigned to mopping up operations in the bypassed areas to the rear of the US advance. For this role, Australian developed bomb racks were fitted to the Spitfires, thereby improving their air-to-ground effectiveness. However, the RAAF Spitfires had few opportunities to engage Japanese aircraft and 79 Sqn did not achieve any aerial victories using this marque.
I bought this kit soon after it's released in 2015 but it took a club 'Gunna Build' competition in 2021 for me to get around to building it. Actually, I started building both kits in the 'Dual Combo' boxing plus a Special Hobby Spitfire Mk. Vc as entries in the competition. Late in the year the rules were amended to allow only one entry per club member and this build is mine.
The quality and fit of the kit is excellent and presented few problems and the instructions clear and detailed.
Some of the photo etch provided for the cockpit and elsewhere is a little fiddly but worked OK. The kit provides the Australian designed bomb racks in photo etch and these are fragile and awkward to install. I'd have preferred these, and some other parts, to have been provided in plastic as super-gluing metal parts can be messy.
The only fit issue for the plastic on this build was the rear fuselage joins, top and bottom, requiring considerable filling and sanding. This was an issue with both of the kits, so I don't think it was user error.
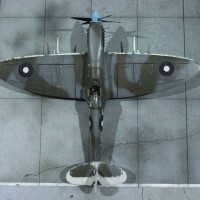
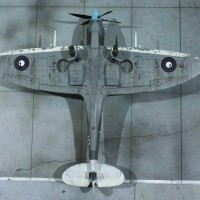
The aircraft was delivered to Australia painted in the standard RAF scheme of Ocean Grey and Dark Green over Medium Sea Grey, with regulation yellow wing leading edges, Sky fuselage band, full RAF insignia and RAF serial number. Once assembled in Australia, the RAF markings were painted over with RAAF equivalent colours and RAAF insignia, serial number and theatre markings applied
The first painting step was to pre-shade the panel lines with black followed by the areas on the top wing and fuselage where the RAF national markings were with RAAF Dark Sea Grey and Foliage Green following the RAF camouflage pattern. These areas were then covered using the masks that Eduard kindly provides to give the end effect of the RAF markings having been over-painted with RAAF colours.
As there is no way of checking otherwise. I marked the green/grey boundaries on the masks so that, when I painted the RAF camouflage, the demarcations would line up. This worked well except for the starboard wing where part of the boundaries is misaligned.
Next, I painted the RAF camouflage scheme as per the kit instructions. Interestingly, this aircraft was painted at a site that carried the upper surface colours under the nose with the exception of immediately under the carburettor intake and an oval immediately in front of the carburettor. While Eduard provide a comprehensive set of masks for this kit, they don't include one for this oval, so I had to make my own.
I also unmasked and painted the yellow wing leading edge because these would show through the chipped RAAF white wing leading edges.
The rear of the fuselage was then painted RAAF Dark Sea Grey to cover what would have been the Sky fuselage band and RAF serial number. This section covered the original RAF Ocean Grey segment as indicated on the instructions.
The theatre markings on this aircraft were a white wing leading edge and white empennage and photos show these to be quite worn. The white on the wings was severely chipped, with the RAF yellow leading edges being visible, and I replicated this by using the "salt method".
This is the first time I have tried this. It involved masking the white area off and wetting the surface with water and applying grains of salt and allowing it to dry in the sun. This leaves random "masks" of salt in place. I then sprayed the white coat and, once dry, washed and brushed the salt away to leave a patchy, worn appearing leading edge.
The empennage was worn differently to the wings. Photos in the reference book show the white on the horizontal tails to be nearly completely worn away while the elevators remain white. The vertical fin, on the other hand is gently worn on the leading edge only. The reference book suggests that this wear is due to the ground crew sitting on the tail, and no doubt hanging on to the vertical fin, when the engine is run up - a common occurrence.
For this, I decided to mask and paint the red portion of the RAF fin flash so that it would show through the wear. I then applied a great deal of salt to the horizontal tails and sprayed the white but was careful to go lightly on the fin leading edge.
The panel centres of the RAF upper surface colours where then carefully gone over with Dark Green with a little yellow and Ocean Grey with a little white to simulate sun fading.
After a gloss coat I decaled the aircraft. The main marking decals are printed by Cartograph of Italy and performed flawlessly, conforming over the bumps on the wing without issue. However, the stencils are printed by Eduard and nearly all of them silvered.
Then I added some black (camouflaged areas) and brown (white tail) washes to dirty things up a bit. Looking at photos, the propeller looks clean and there are not many scratches and dings so I restricted these to engine panel fasteners and the wing gun hatches.
I used the kit decals except for the elephant nose art because I had the BarracudaCals decals that I had purchased years ago, and I thought the lighter grey elephant looked better than the kit decal. However, I over did it when applying the exhaust stains and, in trying to fix it, I destroyed the decal. So, I had to strip the remains of the decal (although I kept the grey "HAVA GO JO" portion), masked the area to respray the camouflage and used the kit decal (minus the "HAVA GO JO") anyway. I carefully resprayed the exhaust staining.
I then applied a clear matt coat.
The final step was to remove the cockpit and under wing and fuselage formation light masks and paint the latter clear red, green and a mixed orange. I didn't forget the wingtip formation lights which were first painted chrome silver and then clear red/green.
After the model was completed, I used a technique given to me by a fellow club member to reduce the silvering of the Eduard decals. The silvered areas of the decals are pierced with the point of a sharp blade and then a small amount of liquid glue is applied. This seeps under the decal due to capillary action and glues the decal to the surface of the kit. This is the second time I've tried this technique and care needs to be taken not to apply too much glue.
I bought the BarracudaCals decals long before the Eduard kit became available with the intent of building this particular aircraft using the ICM kit. The Eduard kit is far superior to the ICM kit and makes into a great rendition of this aircraft.

Nice one Michael. You've put in a lot of work for an excellent result (and the background info too!)
G'day Tony (@tony-prince),
Thanks for the comment.
I should have credited Peter Malone's book, that comes with the kit, for the background info.
A wonderful model and an equally wonderful write up, Michael!
A great way to finish yet another modeling year!
Thanks, mate (@fiveten).
Excellent result on this RAAF Spitfire, Michael @michaelt
You closed 2021 with one of your finest builds.
Thanks for sharing the background of this aircraft and Norman Turnbull
Thanks, mate (@johnb).
The white tail and the leading edge chipping are especially well done, Michael. Best of luck when they judge her - she's a stunner!
G'day Paul (@yellow10),
Thanks for the comments.
Looking again at the photos of the aircraft, I realised that the white should be worn on the spine as well, and perhaps a bit more on the fin.
I'm happy with the wing leading edges, though, and may try it again on the second one (which is almost ready for painting).
Thanks, again.
Good looking Spit Michael, likewise I enjoyed reading the background information about the pilot and your building experience.
G'day Tom (@tom-bebout),
Thanks for looking and reading.
Great model! I love mark VIII RAAF! Shouldn't the propeller spinner be Sky "S" - more pale green blue?
G'day Lis (@lis),
I agree, the Mk VIII is the best looking Spitfire and I'm biased towards the RAAF.
The spinner was a pale blue - either RAAF Sky Blue, the same as the codes, or Pennant Light Blue.
Eduard suggests H323 which is more like the latter. I was in a hurry so went with that.
Thanks for looking.
I use C314 as Sky Blue. Mr Color specified it as FS35622 Sky Blue. I think it have good shade.
Nice work on this @michaelt. You can't go wrong with the Eduard Spits. The difficulty with the rear fuselage join may be due to not quite "getting it right" in placing the cockpit tub. In my experience, every "fail" with one of these kits is modeler-induced (usually un-noticed) to either clean off all sprue nubs or get exact placement of parts, which creates a "snowball downhill" effect in assembly (ask me how I learned all this).
That camo scheme was the one developed at Aboukir for the Mk. VIII - you see the same nose camo on Desert-camouflaged Mk. VIIIs. It is indicative that these Spitfire VIIIs were originally sent to the Med, where they were painted at Aboukir in desert camo, then repainted in standard camo for going on to Australia. Other Mk. VIIIs were sent directly from Egypt in desert camo (see: CRC Mk.VIII) and modified in Australia. The same thing had happened with the Mk. Vc's. This is also why the camo scheme on top is an "approximation" of the A scheme - a "tell" that an airplane was repainted at Aboukir is the "approximation" scheme.
G'day Tom (@tcinla),
According to Peter Malone's (a former work colleague) book that comes with the kit, aircraft in the MT serial range were camouflaged in the Day Fighter Scheme at the factory. According to ADF Serials ( http://www.adf-serials.com.au/), A58-517 was originally MT594. Also, according to Peter, this aircraft was assembled and painted at Chattis Hill going by the nose camouflage scheme.
As for the fit issue, it happened to booth kits (the second is almost ready for painting), and seemed to be more of an issue with the mating surfaces, rather than fit.
I have a pair of Mk Is and Mk Vs to build, so I'll see how they go (one day).
As always, thanks for your comments and advice.
@michaelt - Thanks for the extra information. Interesting how the "Chattis Hill scheme" became known as "the Aboukir scheme" when they continued it.
Also, problems with mating surfaces in Eduard kits are always failure of the modeler to completely clean them. I got hit with that enough times that now, when I cut off those sprue attachments that go onto the mating surface, I sand it down. It's way easy to think I got it and find out later I didn't, since these kits are designed with no tolerance for not getting the surfaces absolutely, completely smooth. The very slightest bit of it remaining on the surface is a killer downstream.
Great looking Spitfire!
Thanks for looking (@greenterrorz).