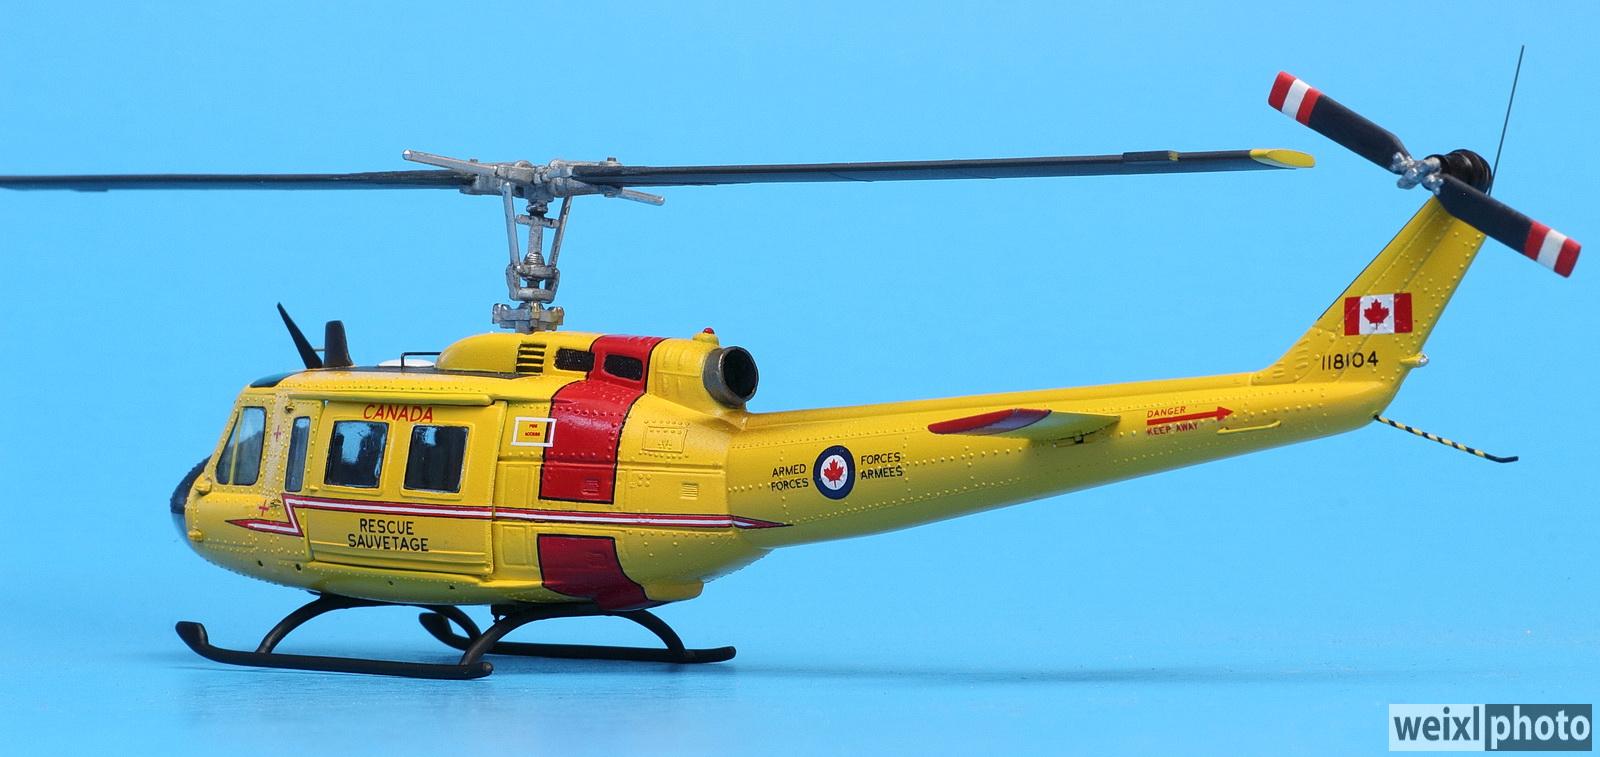
1/72 Hasegawa CAF CH-118 Iroquois By Don Weixl

I started this 70's era kit around 1979 when I was still in college. I got around to painting the interior and then it got put away. I found the barely started kit hiding behind some kits in April of 2021 over 40 years later. I was inspired to finish the kit with the purchase of the Belcher Bits BD3 Canadian Helicopter decal sheet. I chose the 1980 bright yellow Base Rescue Flight #104 scheme, complete with lightening bolts, from CFB Chatham, New Brunswick (my birthplace in 1959 where my Dad was an F-86 Sabre instructor).
The model was built pretty much out of the box, with a few refinements. The kit has a simplified main rotor assembly, oversize rivets and less than perfect windows. It is a simple little kit. I was up to the challenge of making it into a presentable tiny helicopter, my first in 1/72 scale.
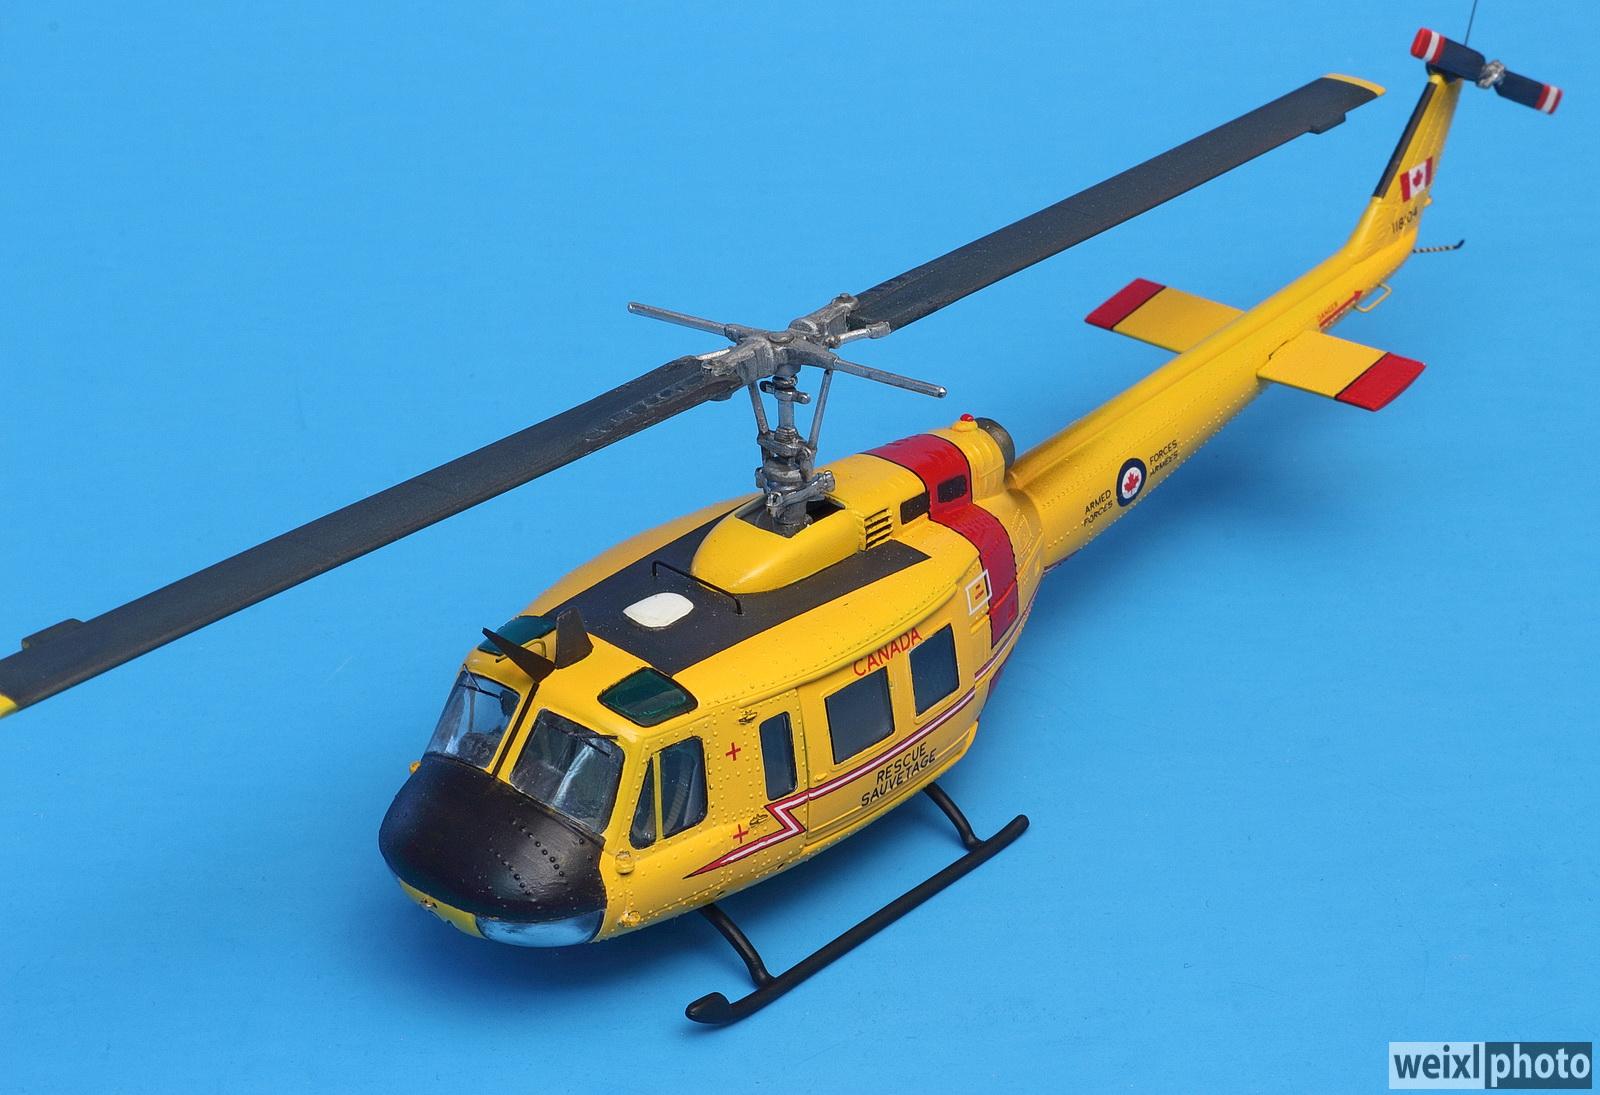
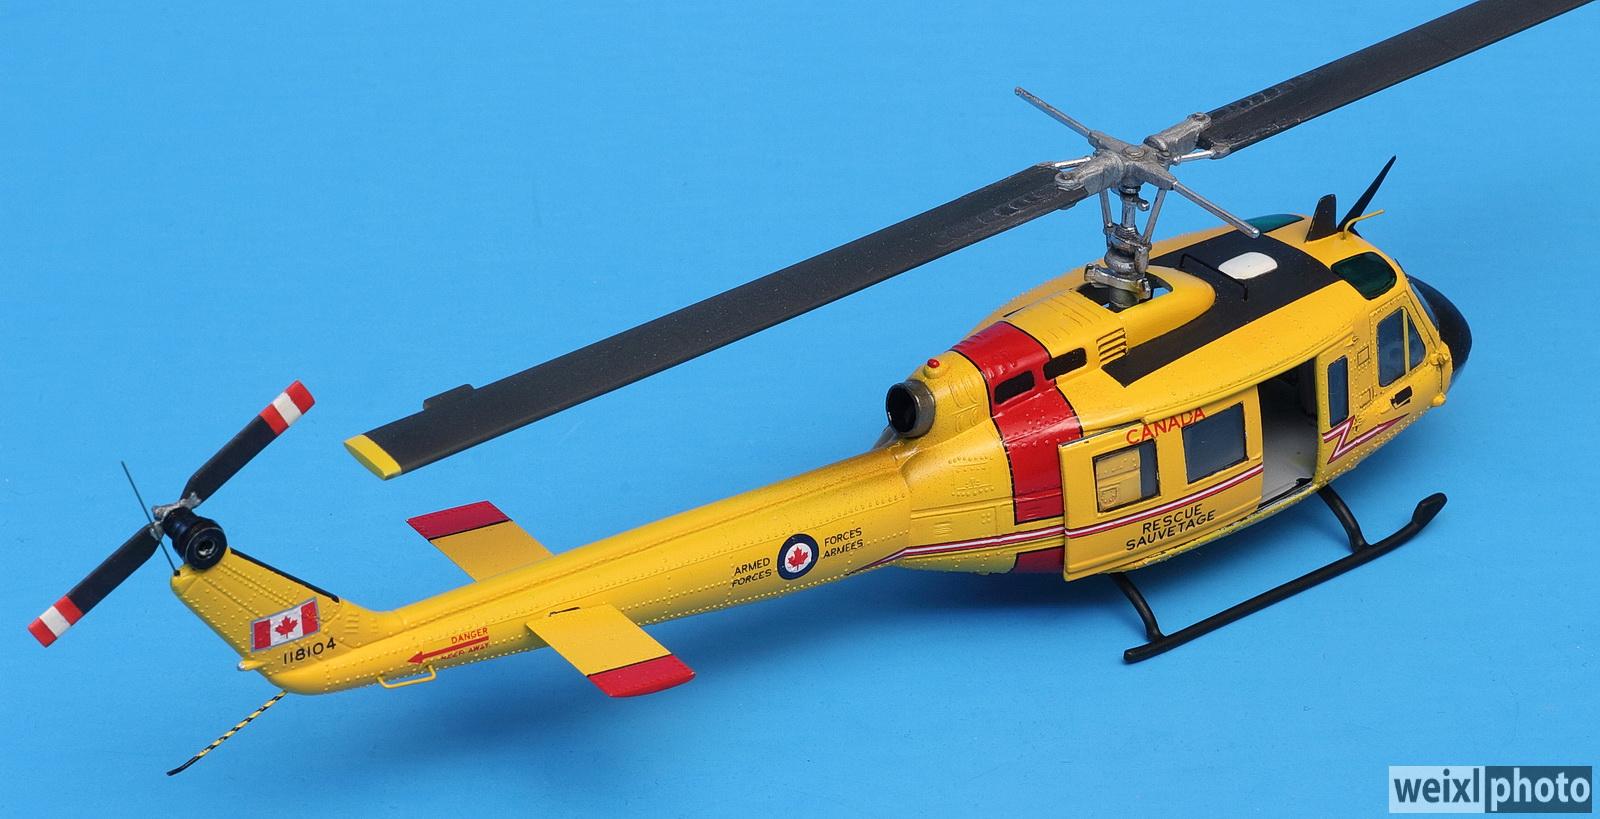
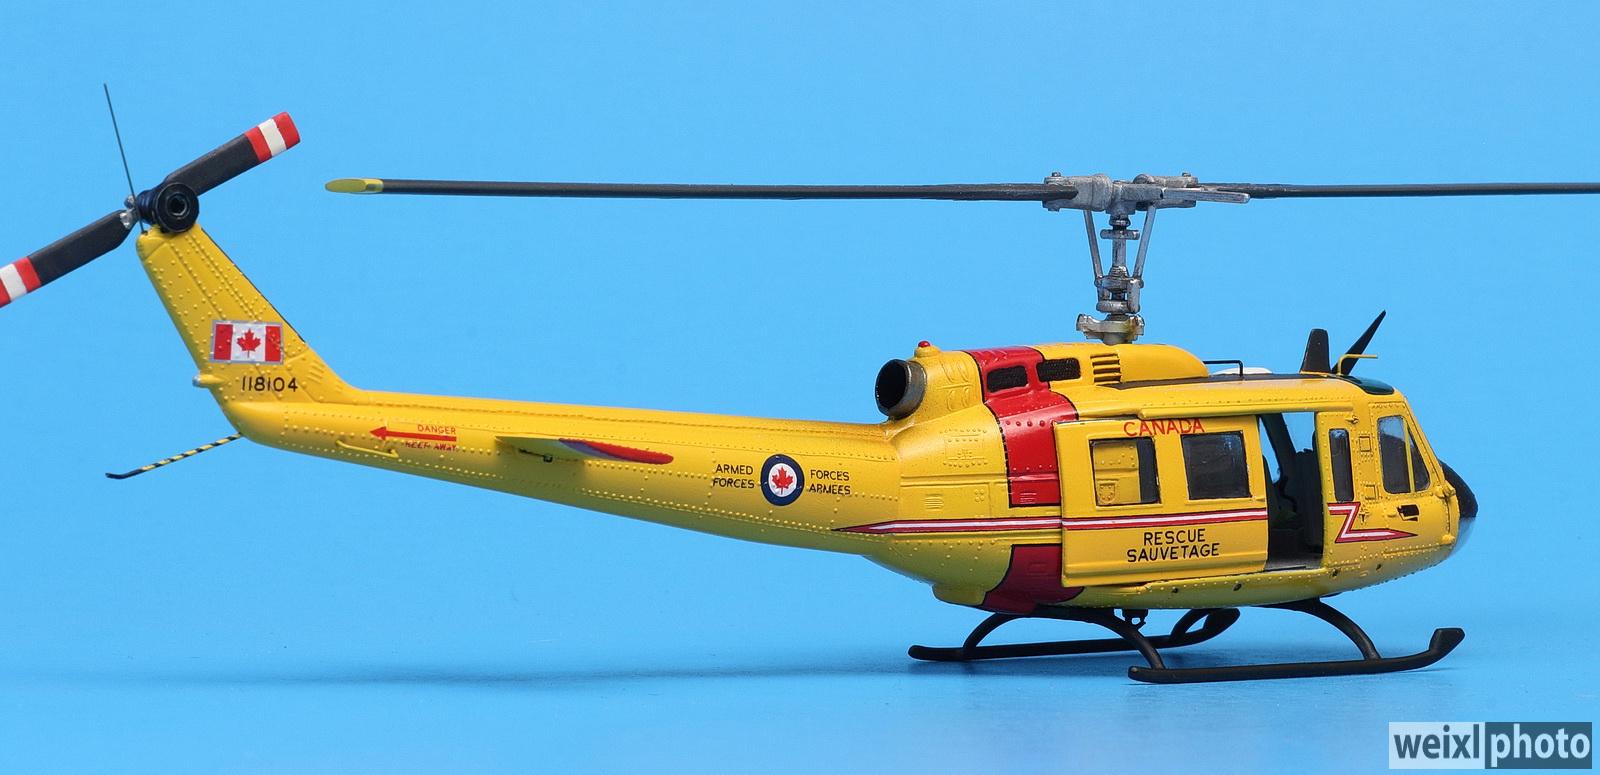
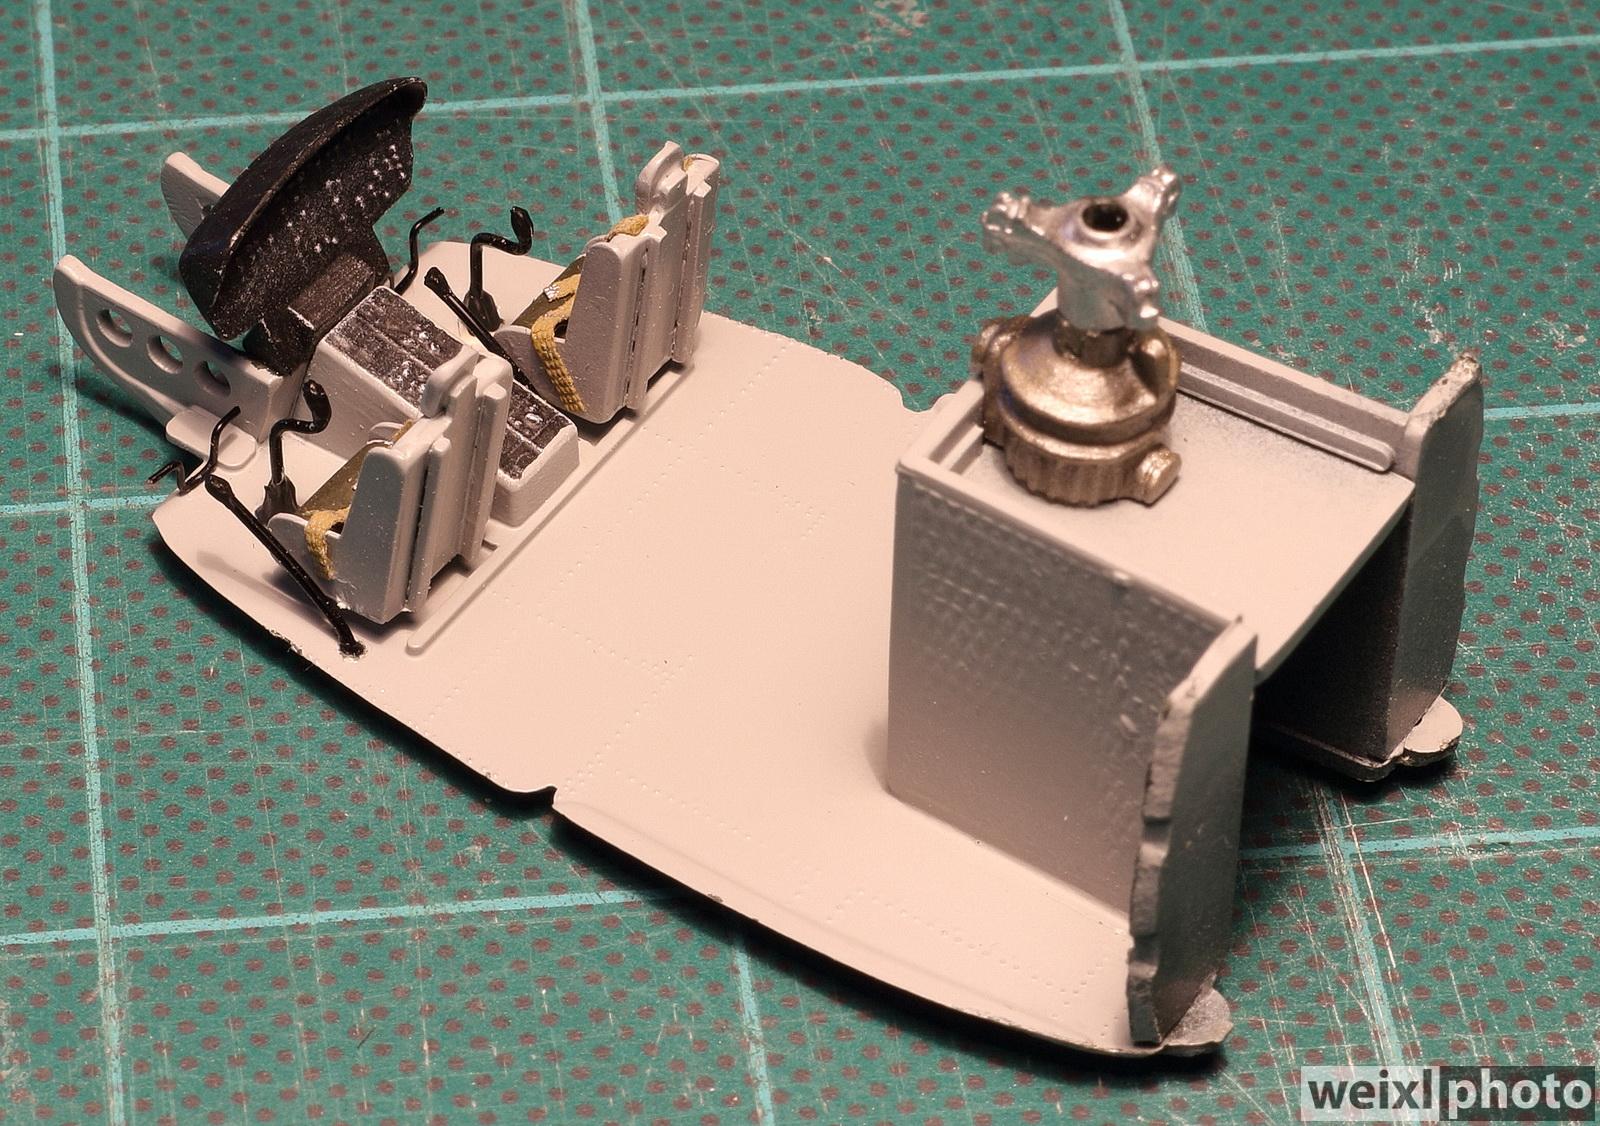
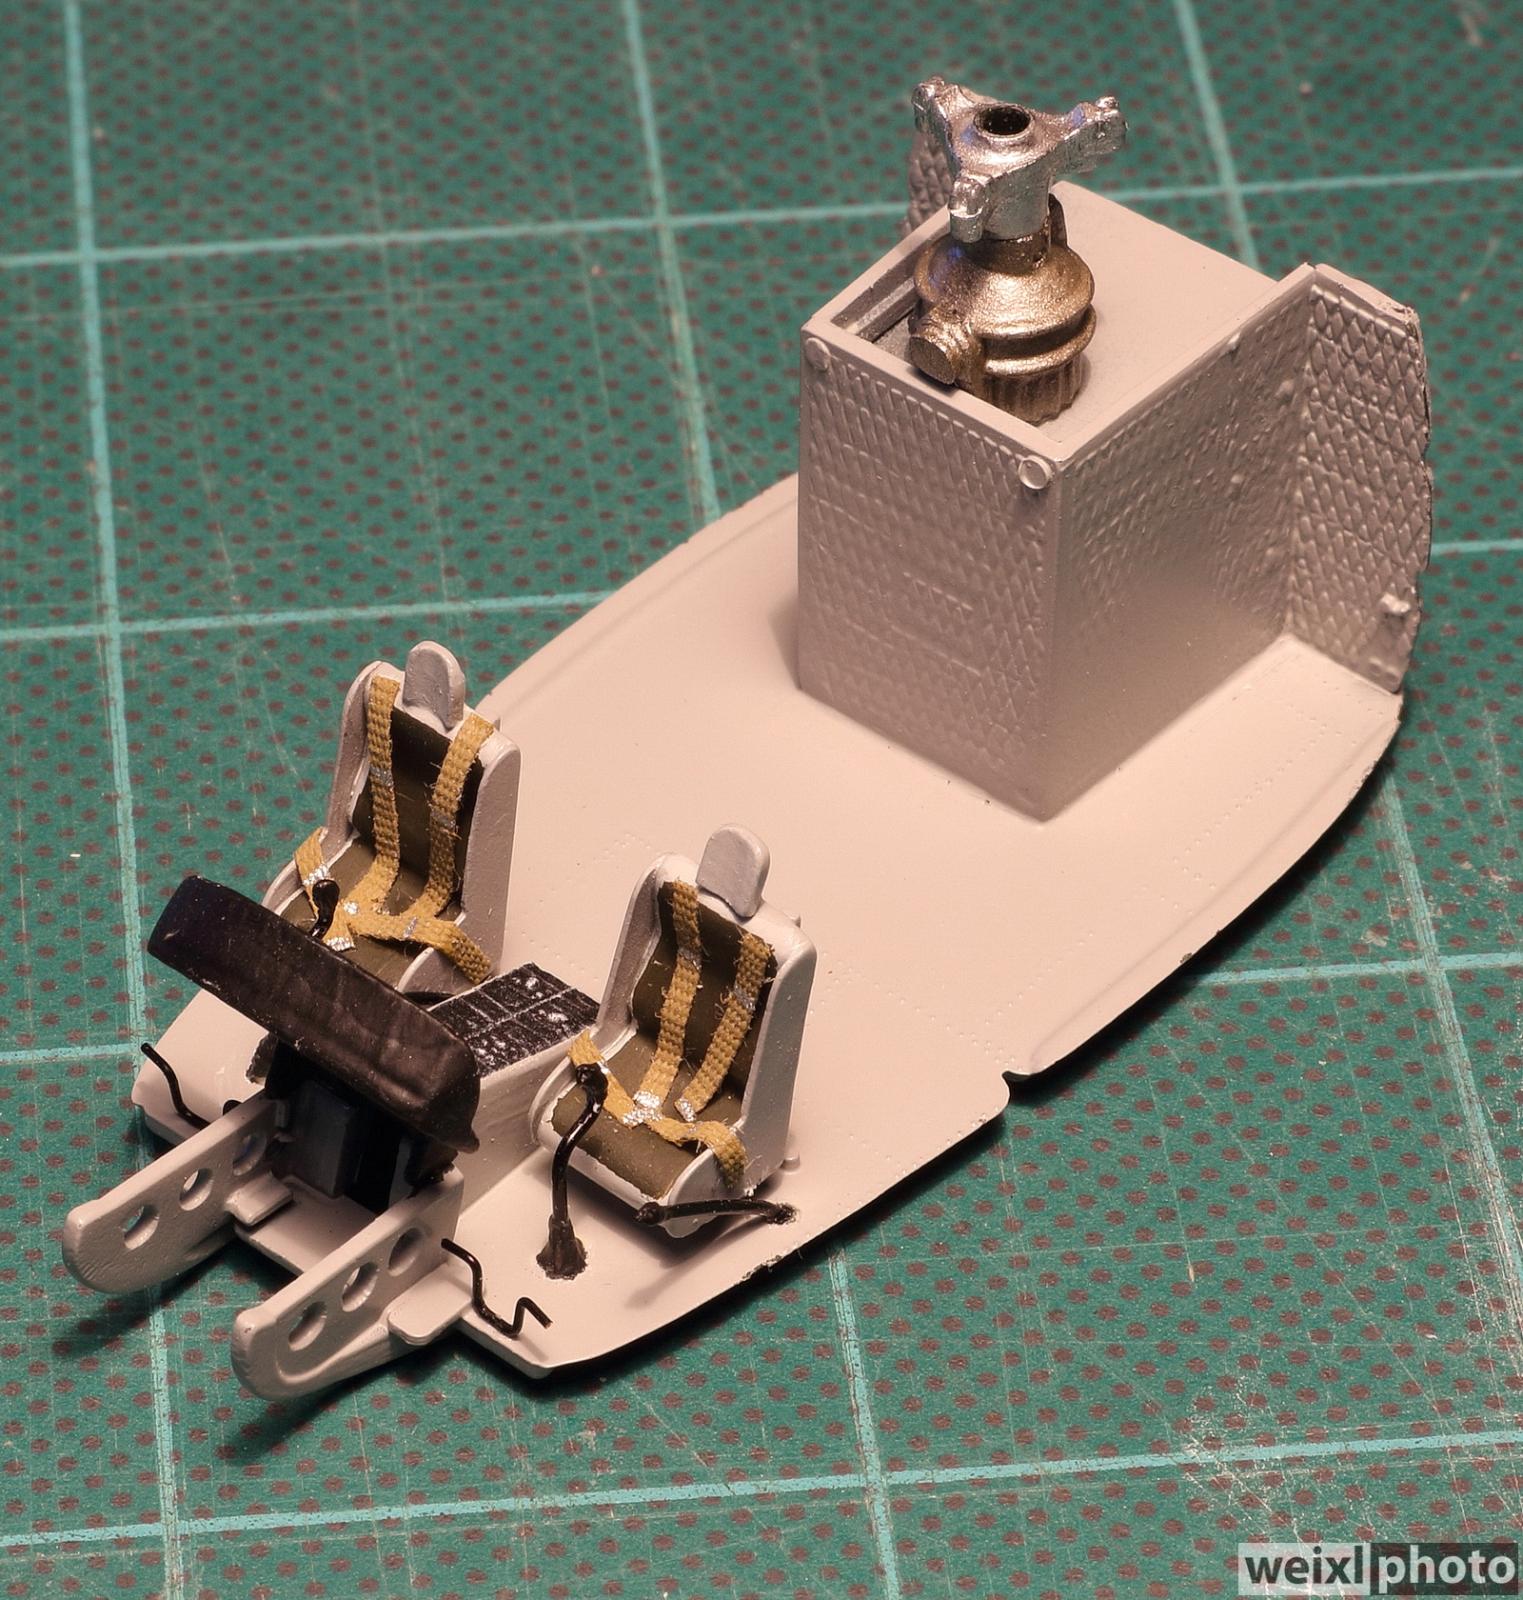
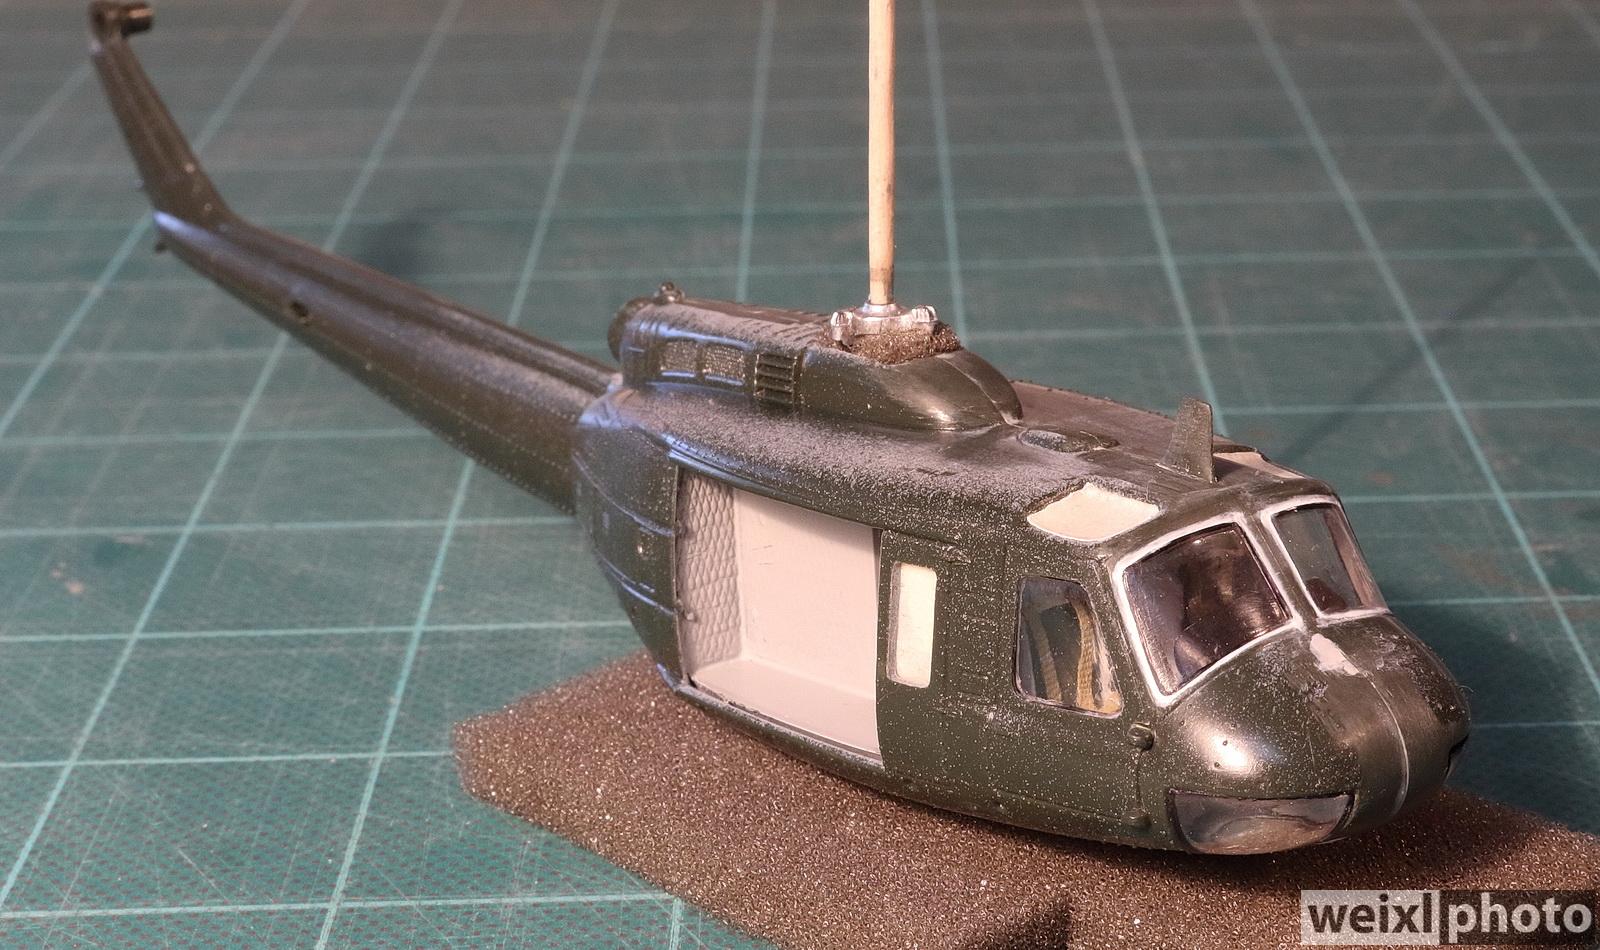
Once I had finished assembling and painting the interior with a few upgrades such as tape seatbelts on improved seats and collectives made from stretched sprue, I buttoned up the fuselage halves. The front window had fit issues (gaps) that were mostly fixed by using Vallejo acrylic putty. After window masking, the dark green plastic was airbrushed with Tamiya white primer sprayed through my Iawata airbrush. Tamiya X-8 gloss yellow with a drop of Tamiya X-7 gloss red was airbrushed over the model. I had slight orange peel in the yellow finish. Polishing out the paint was not an option due to the rivets etc. so I decided to live with it. Next time I will use Tamiya's paint retarder to try and get that perfect smooth finish. Masking for the red stripe on the rear of the fuselage was tricky due to the compound curves of that area. I airbrushed the red stripe using Tamiya X-7. The Tamiya acrylic paint stayed soft for longer than usual. Masking tape left a mark when removed from the model. Where I held the model with cotton gloves also left marks on the model.
I hand brushed 3 thin coats of Polyscale grimy black on the roof no slip areas. The black anti glare nose area of the helicopter was hand painted using Tamiya flat black. After drying, I buffed the flat black paint with a soft cloth to even out the sheen of the paint. The main rotor blades were airbrushed with Polyscale grimy black. The skids were airbrushed with Tamiya semi gloss black. The rotor assembly was hand brushed with Metalcote silver.
The Belcher decals went down well using Microscale Microsol and Microset decal setting solutions. The decals were clear coated with a thin coat of Future applied with a small brush.
I used brass wire to make to make grab handles above the cabin and at the tail of the boom. Piano wire was used to make the tail skid and a pitot tube. The antenna at the tail of the helicopter was made from stretched sprue. Windshield wipers and a cable cutter were made from thin styrene sheet.
I airbrushed Tamiya clear green on the inside of the cabin's top windows. Tamiya smoke was airbrushed around the jet exhaust outlet. These helicopters were maintained in very nice condition and had very little weathering otherwise.
The trickiest part of this build was installing the less than perfect cabin side windows. I started by polishing the windows and then dipping them in Future. Once dry I used a Sharpie marker around the edge of the windows. Thinned Pacer canopy glue was used to glue the windows into the cabin using a small brush. I used dental wax on the end of a toothpick to carefully line up the window in the opening and then wick thinned glue into the joints.
I enjoyed building this small model. It isn't a contest winner but presents well in my display case due to its bright paint scheme. Who doesn't like lightning bolts?

An outstanding result, Don! Really nice that this so long ago started kit finally crossed the finish line, let alone in such great looks!
Thanks for all build details.
Well done!
Thanks Spiros! I have almost caught up building all of my unfinished kits. It is a good feeling. Now the big decision of what to build next: Aircraft, car, complicated, simple etc...?
Excellent build, Don @donweixl
Great you finished it in the end, amazing to see this result in 1/72, making it even more difficult.
Thanks John. You are right, it is a tiny model. I have an even smaller 1/72 Bell Jet Ranger in my stash...I better get at it before my eyes get any worse!
Turned out very well, Don, and I really enjoyed your build details. I sometimes get that problem with Tamiya acrylics staying soft as well. I’m sure I would like lightning bolts if I only knew what they were, please excuse my ignorance.
Thanks George. Regarding lightning bolts, I am referring to the to the red and white stripes on the side of the helicopter, which many Canadian military aircraft have had over the years. They are purely decoration, in a usually all business world of aviation.
Glad you completed it. loooks great in the Canadian livery!