Providing a Road Map for 1/700 Essex Class Modernization – 1/700 USS Hornet (CV/CVS-12) Double Build

On a recent visit to the USS Hornet in Alameda, California, I was struck by how little the ship's hangar deck exterior had changed since World War II. Unlike the other museum ships, Hornet still has most of her roller doors in place. I had been thinking about another angled deck conversion using one of the more modern kits to represent one of the more numerous SCB-27A ships, which saw extended service in an antisubmarine and space recovery role in the late 1960s, and decided the Hornet would be a good model. Not only is her condition in 1969 well-documented, but she remains in existence and open, and I was able to photograph her extensively.
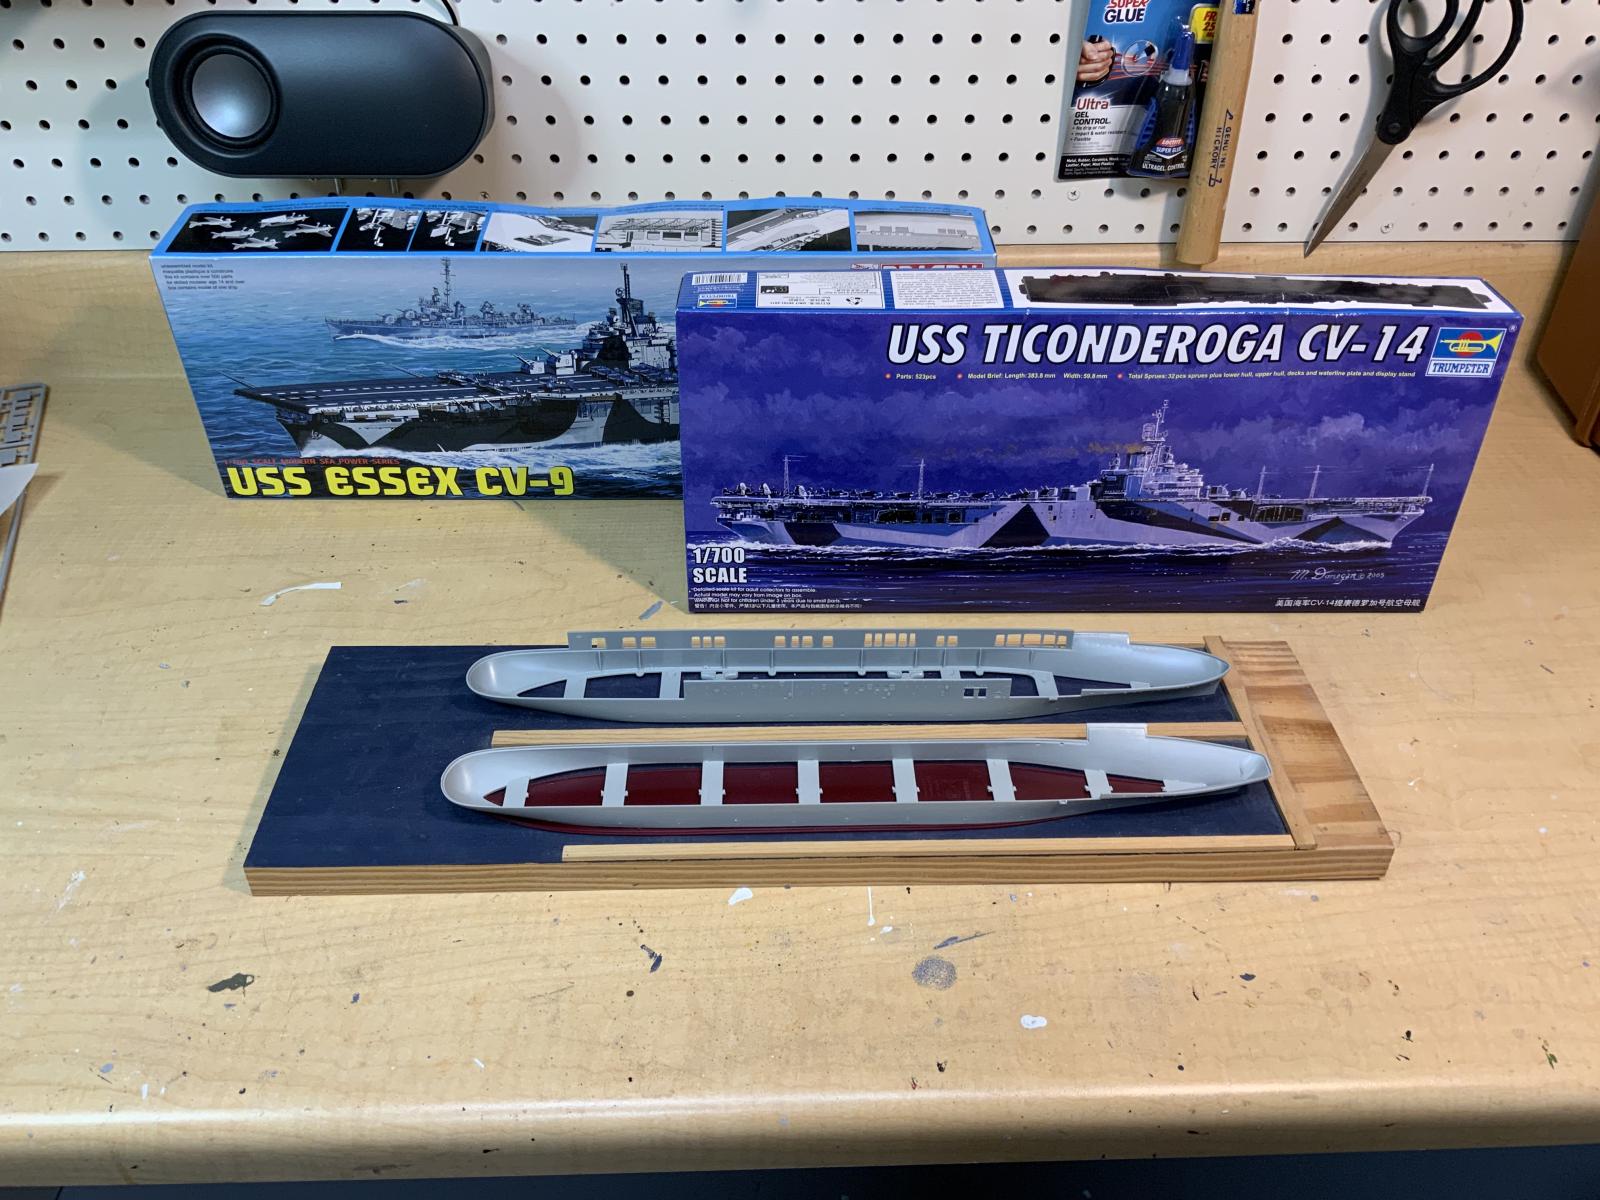
Since any kit would be extensively revised to represent her in her final condition, I chose a less-expensive Trumpeter kit, which also has the benefit of having separate hangar sides. While this is a decided negative when modeling the ship during World War II since it leave noticeable seams, it is not a problem where the hull is going to be widened up to that level anyway.
Combined with that, I was intrigued by the idea of modeling Hornet as she appeared after a year of active service in 1945, heavily weathered and one of the last dazzle-camouflaged ships. I was unable to locate one of Dragon's Hornet kits, but the Essex (CV-9) is actually a better starting point since it only has one flight deck catapult, as well as the other indicia of an early-war Essex, which is what Hornet remained until damaged in a typhoon in the spring of 1945.
Comparing the Kits
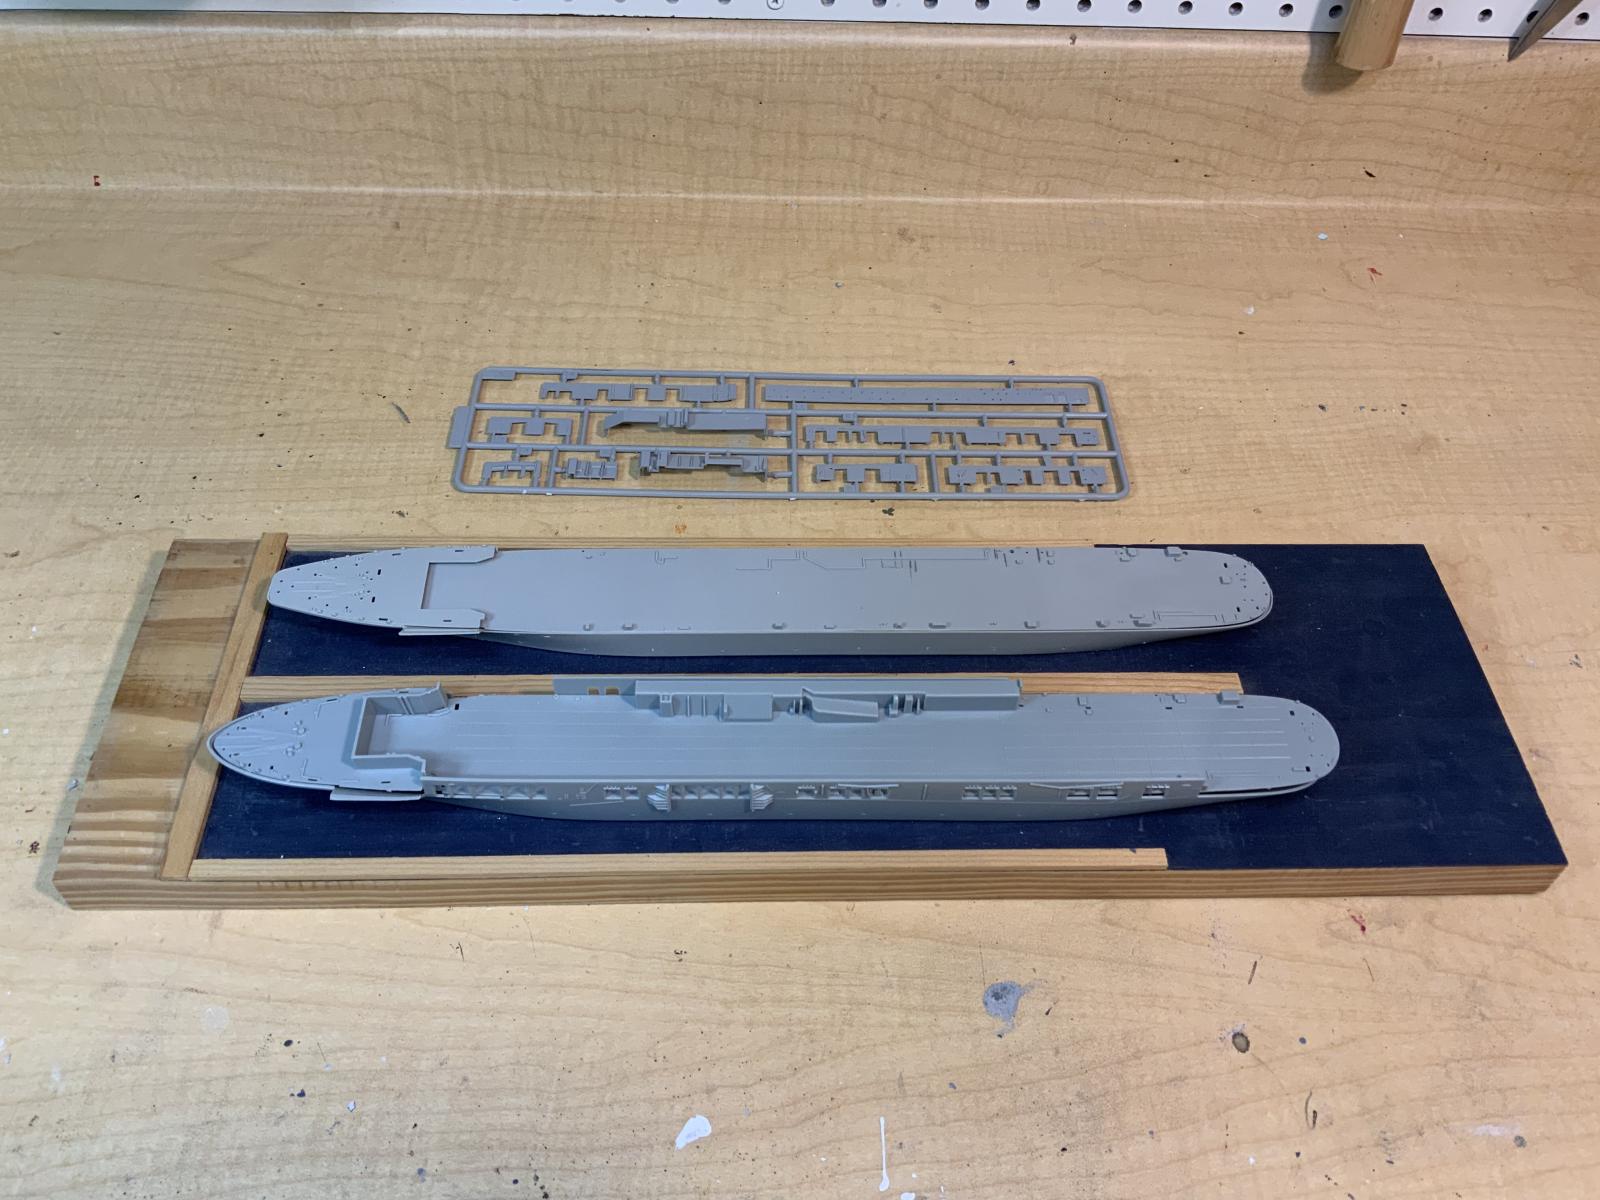
As noted above, the hangar walls are the biggest difference in the two kits (aside from the fact that the Trumpeter is underscale and the Dragon overscale). As the above photo shows, the Dragon kit contains a forward elevator shaft, and all of the port and most of the starboard side hangar deck walls are modeled into the hull. Again, for the World War II appearance this is a definite benefit. But for an extensively modernized postwar Essex, the Trumpeter approach with separate pieces works better.
New tool
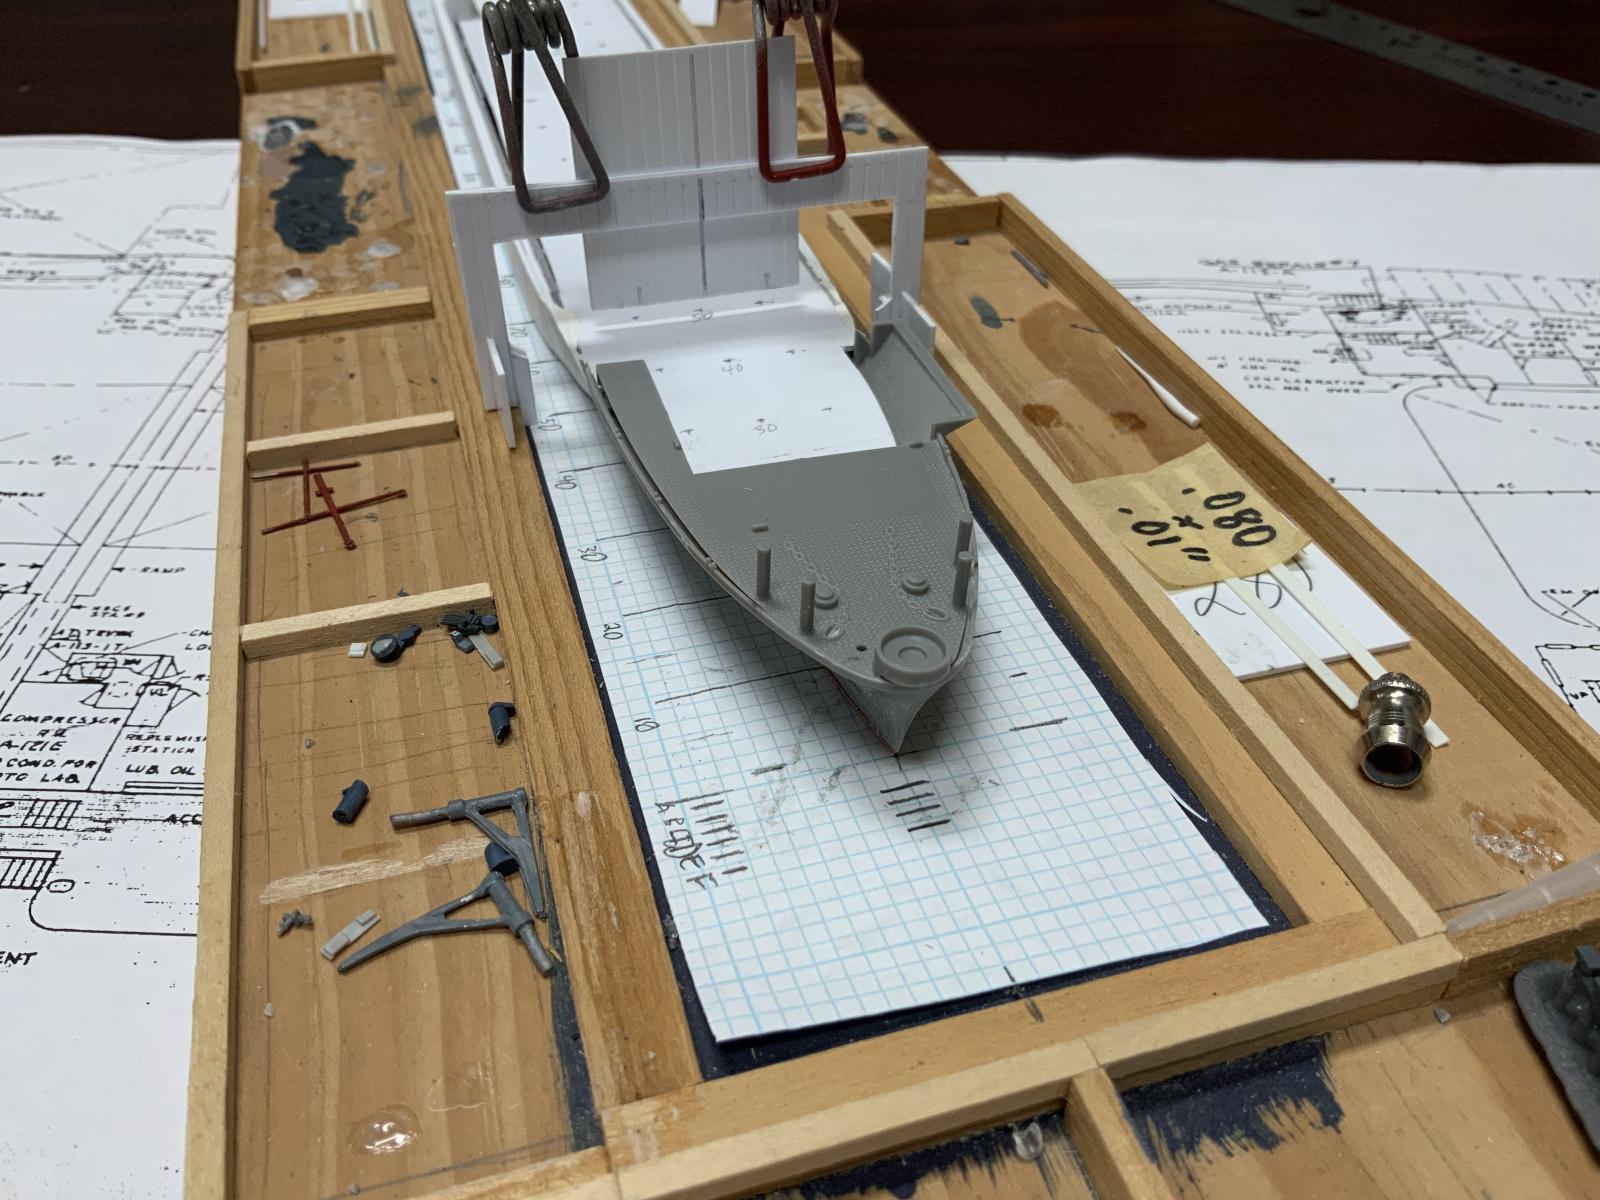
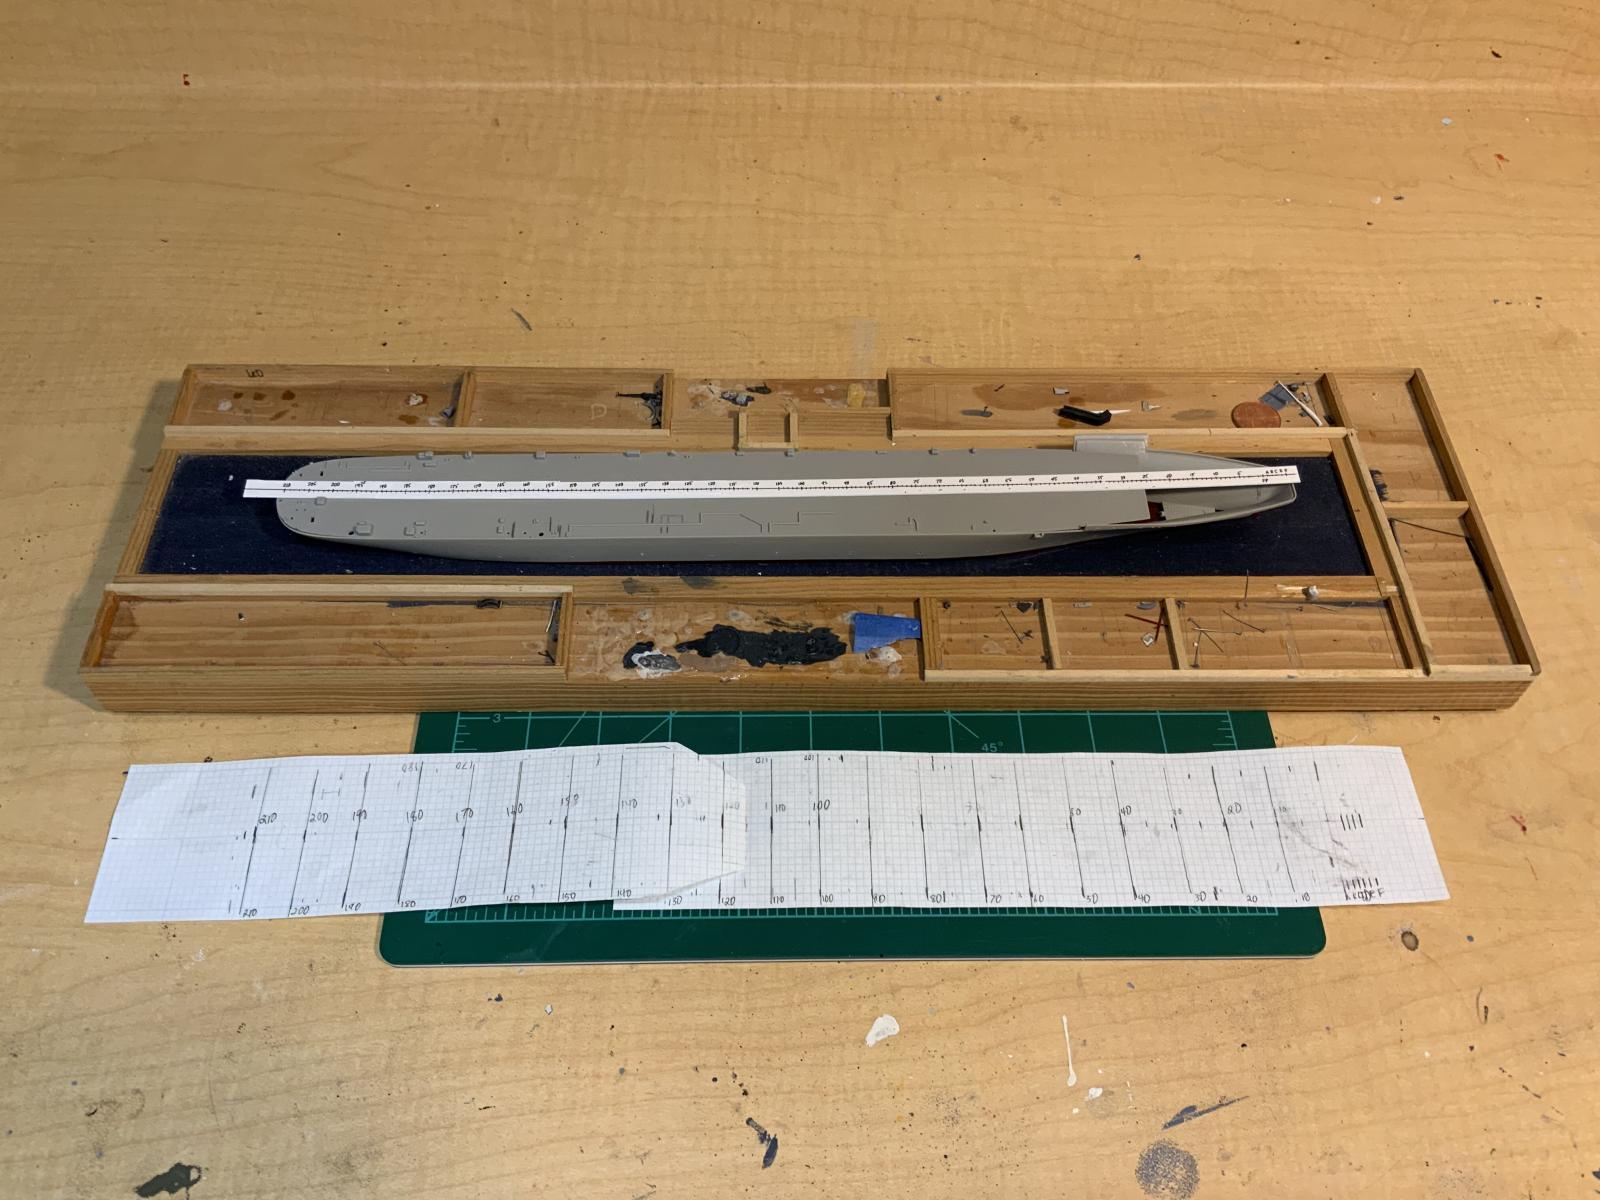
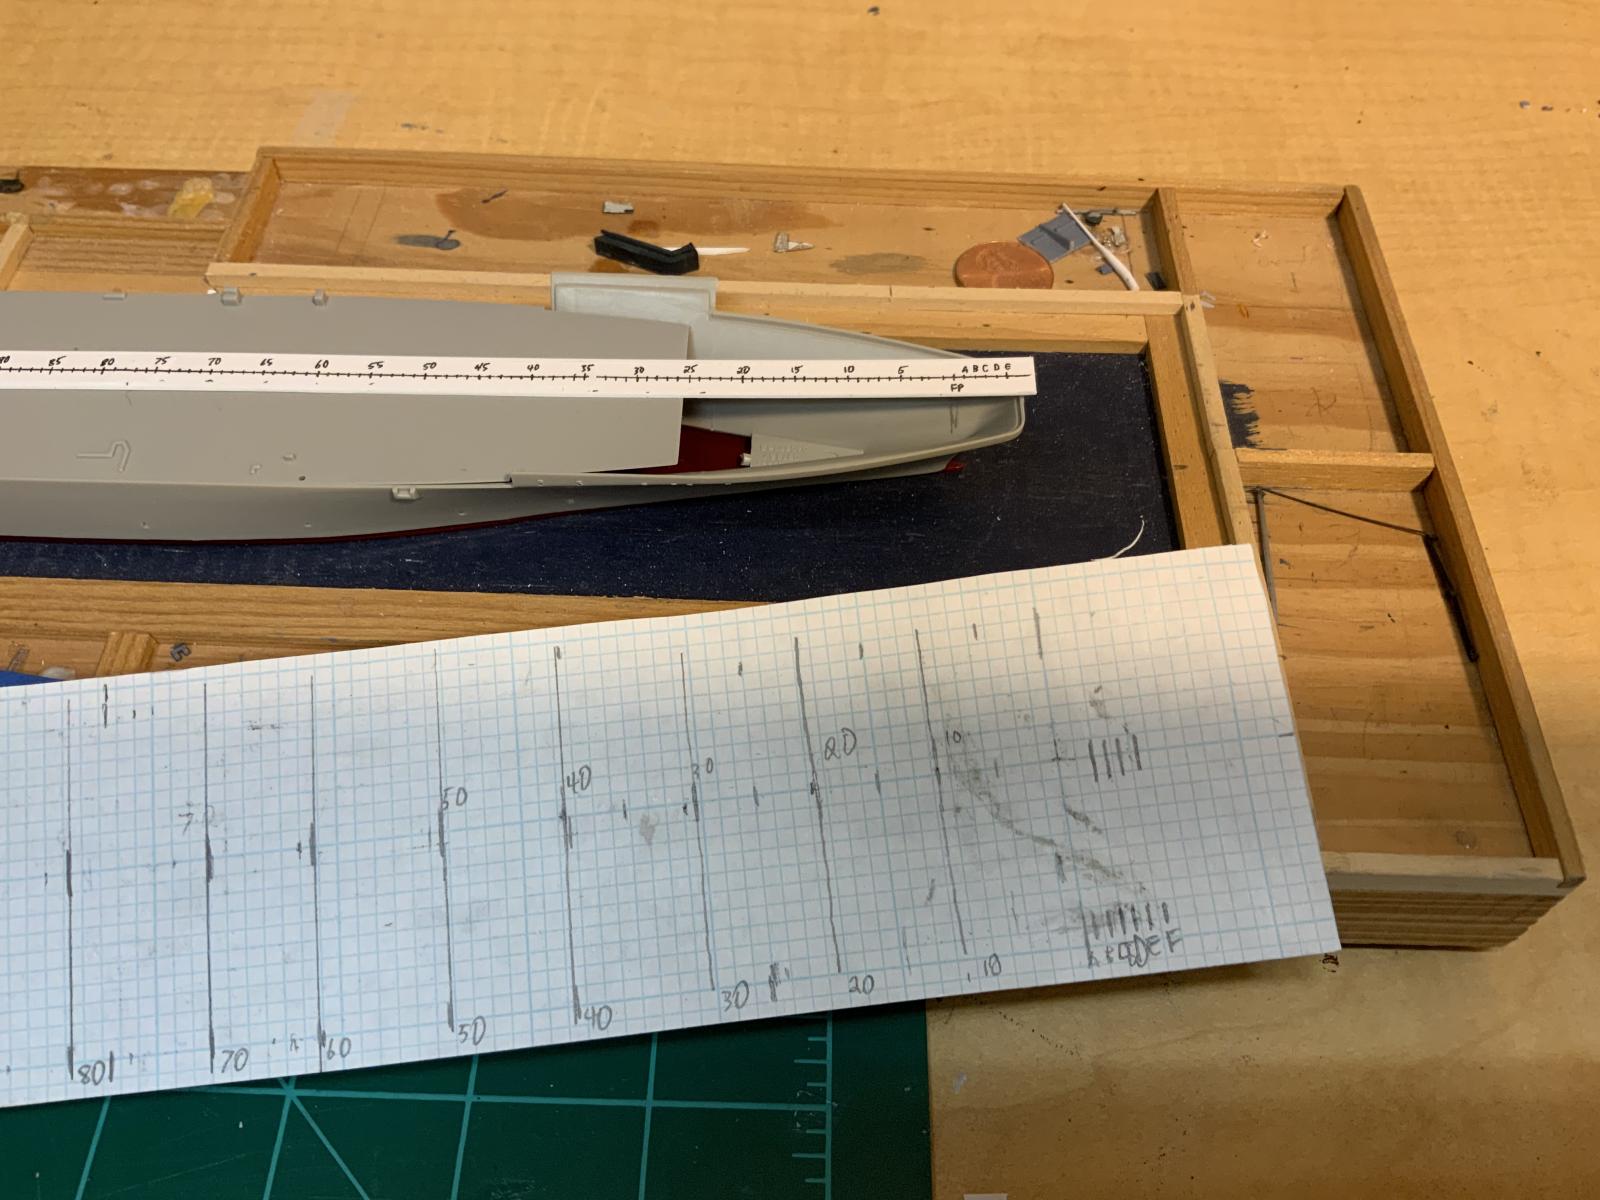
On the CV-31 build, since all that was left of the Hasegawa kit was the outer shell of the lower hull, I needed a tool to accurately transfer locations from the 1/192 Floating Drydock plans of CVA-31. I marked the frame locations on a sheet of graph paper under the ship and created a jig to mark locations both longitudinally and transversely.
With the Trumpeter kit providing a hangar deck and walls, the need for locating structures would be less - especially transversely, but I also wanted something more accurate and flexible.
I'll be posting updates on the build in the WIP Naval Ships & Boats group.


I'm not saying this as a complaint or to be the Posting Police, Michael, but a WIP of this kind of detail will really work if you post it in the appropriate Group, where you can keep all your coming posts together, rather than having them show up scatter-shot here in the headlines. That'll make it a lot easier for people like me who find this interesting to keep track of your progress.
Another option is to link the articles using the beta options at the bottom of the article creation/editing page. I personally think that as long as the content is thorough and well presented and substantial (presents research etc), it can have a place in the article pages. It's when people post a picture or two of a half completed model with only a "just started" sentence that I cringe.
Thanks very much - I appreciate it and will look into that. Wasn’t sure whether this was correct or not.
Tom, thanks for the direction. I wasn’t familiar with Groups or WIP and that is more what I was looking for.
Great work Michael, looking forward to the next installment. Have you seen that Trumpeter is releasing an angled deck Essex? I don't recall which version or scale, but at least it may be a good starting point for future Essex builds, despite the fact that you look to be having fun with scratch building these excellent mods. Keep up the great work.
I have - it is the Intrepid, which will be good for Hancock and Ticonderoga as well. But these ships are so individual that I really do enjoy the individual research and creation.
I have noticed this upcoming release. I am assuming it will be a downscaled version of their 1/350 Intrepid. So this prompts the question: how accurate is the currently available 1/350 Intrepid? Has anyone in this forum had any experience wth it?
Your conversion build are always amazing! Why hasen't a model company done a late, angle deck Essex?
As I was lucky enough to travel to SF for an extended weekend in mid December, Hornet was immidaetly put on "to visit" list and I didn't regret one little bit, so I will follow your build with great interest! And what a great brewery is there half way towards the ferry port 😀
Great job so far and excellent writeup, Michael!
Nice way to do it like this, Michael @mcsmith1964
Looking forward to this build.
Hi Michael,
I had considered a conversion to an angle deck at some point- but life got in the way- I will follow this closely- thanks for sharing- your article is looking impressive already! By the way, how do you insert images in between sections of text?- I have no idea how to do that, I want to be able to do it for my articles.
Dan from Bermuda.
I had the same problem and someone tipped me off - after you've uploaded the pics, when you want to insert one, there is a code to type -
--- pic1 not found ---
- and it'll insert the numbered pic there.THANKS!
If you're interested, look at my post on my CV/CVA-31 double build. The 1968 CVA-31 was largely scratchbuilt - just used the lower hull and flight deck and a couple of other odds and ends from the Hasegawa kit. It is "immensely" easier to convert a kit with a hangar deck like a Trumpeter - after two days I've already finished widening the hull and the surgery to the existing hangar walls which sit on top of the hangar is pretty minor (detailing will be added later).
Even if you did a SCB-27C ship - many of which did away with the wartime rolling doors, as you'll see on CVA-31 - switching out existing hangar sections for plastic sheet would be a piece of cake with a pair of digital calipers to measure what's being replaced - the kit retains all the landmarks you need.
Basically a Trumpeter kit, a Model Monkey island and a little knife and sheet plastic work will get you 60% of the way there. Just have to put down a new flight deck (I always add a new .020 thick flight deck anyway so I can control the detailing), add sponsons, and enclose the bow, which is just sheet plastic and some putty. Rest is detailing you'd do to accurize any carrier model.
But I wouldn't do a subject if I couldn't get a booklet of general plans - fortunately The Floating Drydock had both CVS-9 and CVS-31 - and Hornet is very close to CVS-9. And there's a partial set of CVS-12 plans on the Internet, and I can cross-check CVS-9 against that.
But I could finish the hangar on CVS-12 tonight if I wanted. Although that was actually part of the reason I chose Hornet. It seems to have retained more of the rolling doors than other ships did, so I can almost complete the hangar from kit parts. The biggest change was cutting the opening for the deck edge elevator, and it was ridiculously easy. I didn't spend ten minutes Saturday - the first day - locating the frames (132 and 148) and cutting out that part of the hangar wall (It's the piece on the cutting board). There will be more detailing outboard of the hangar walls on the starboard side, but that can be added later.
1 attached image. Click to enlarge.