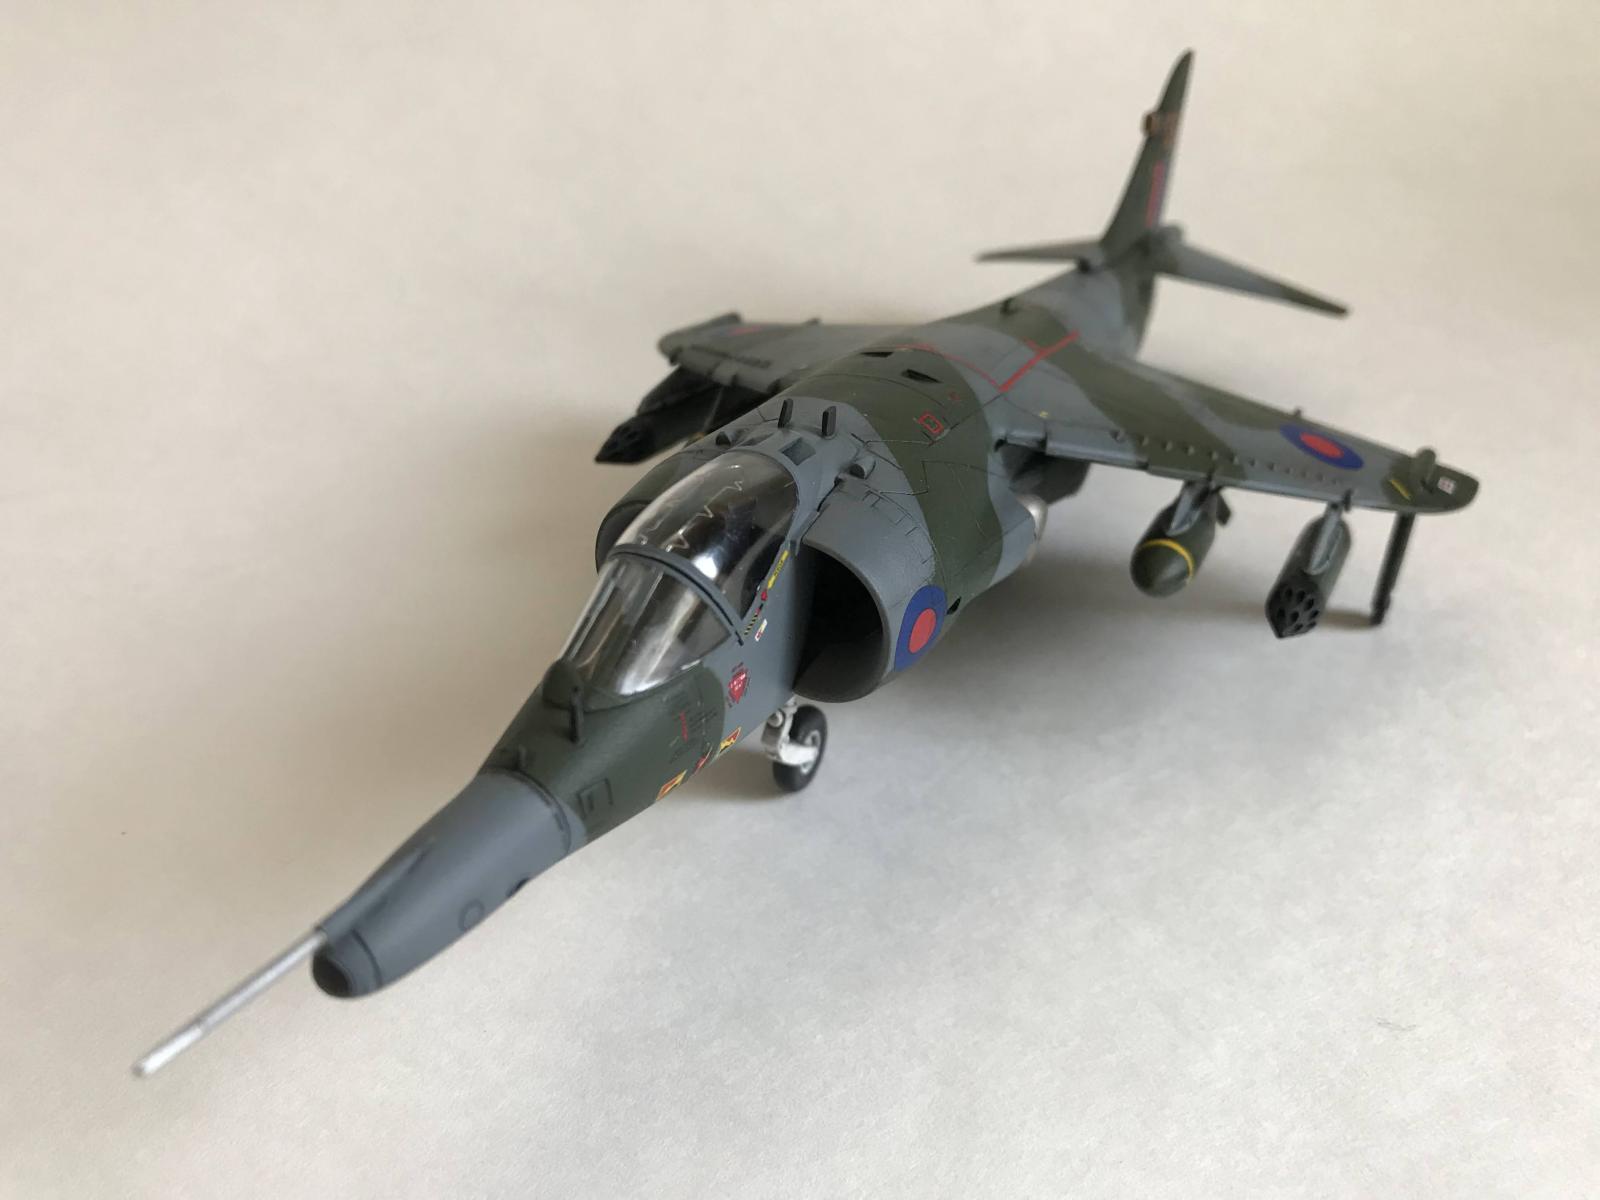
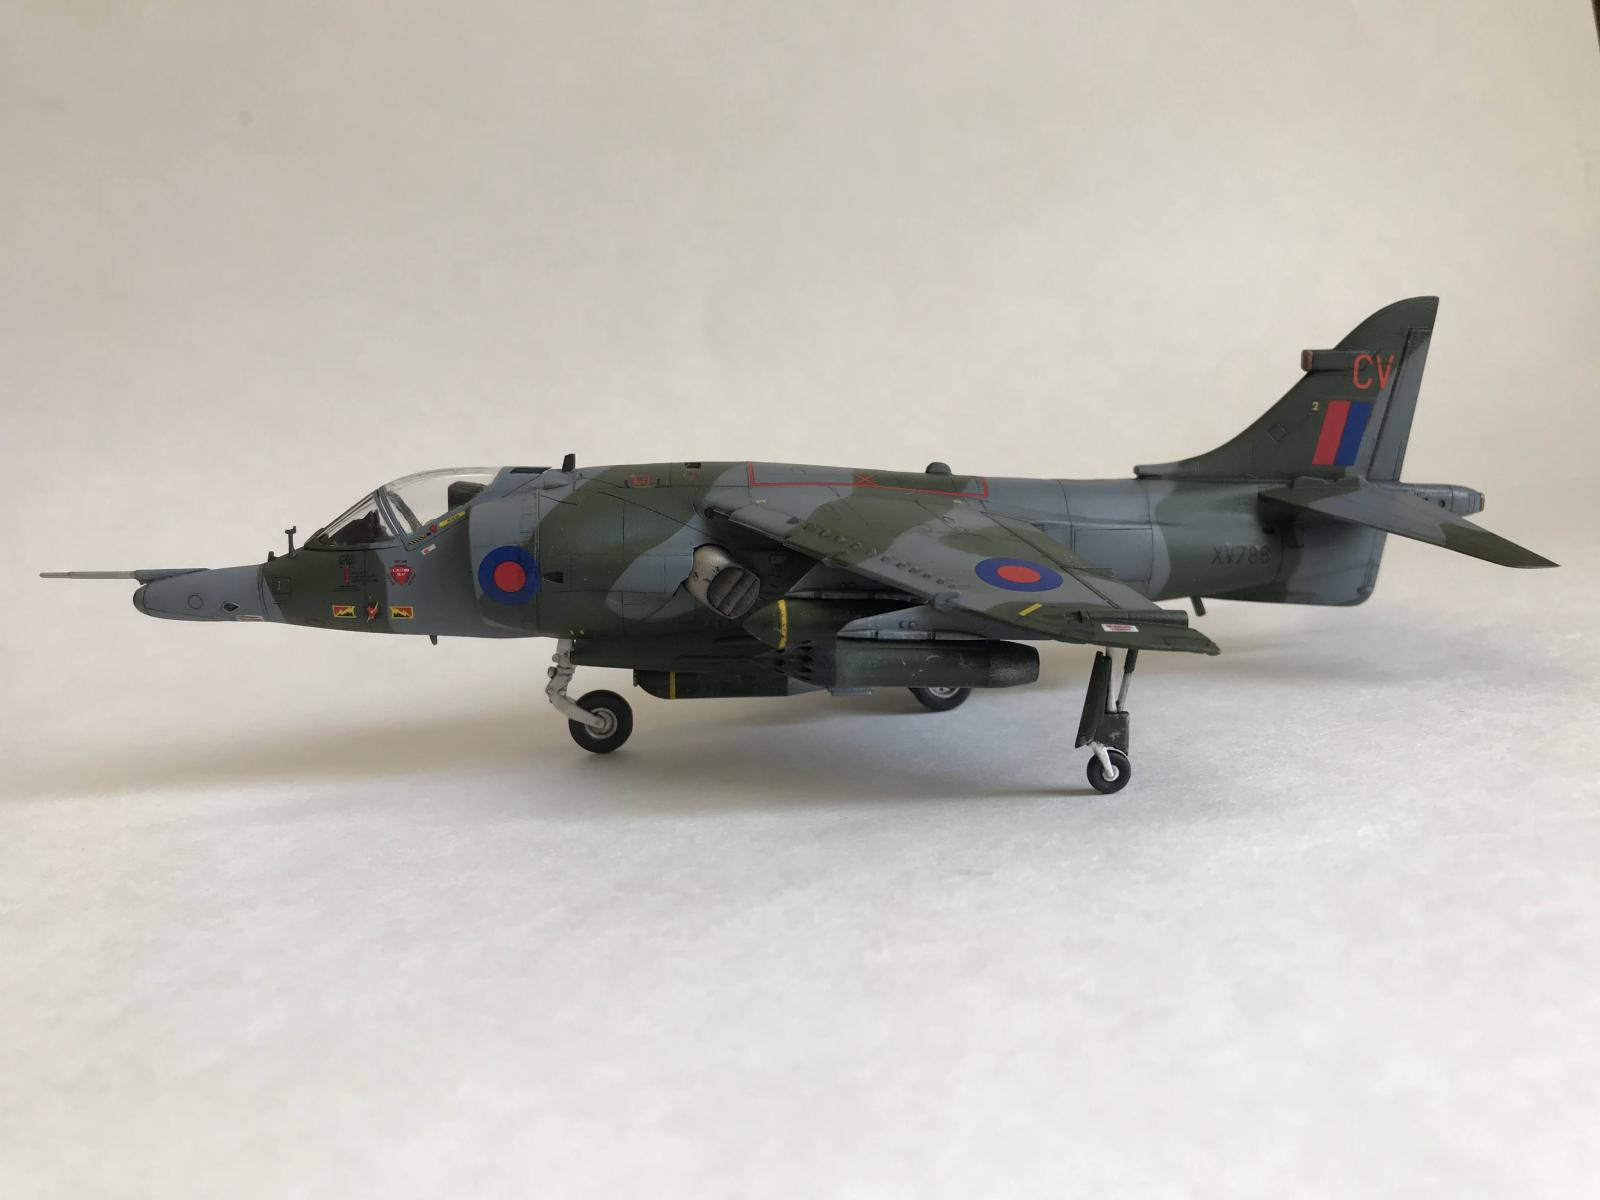
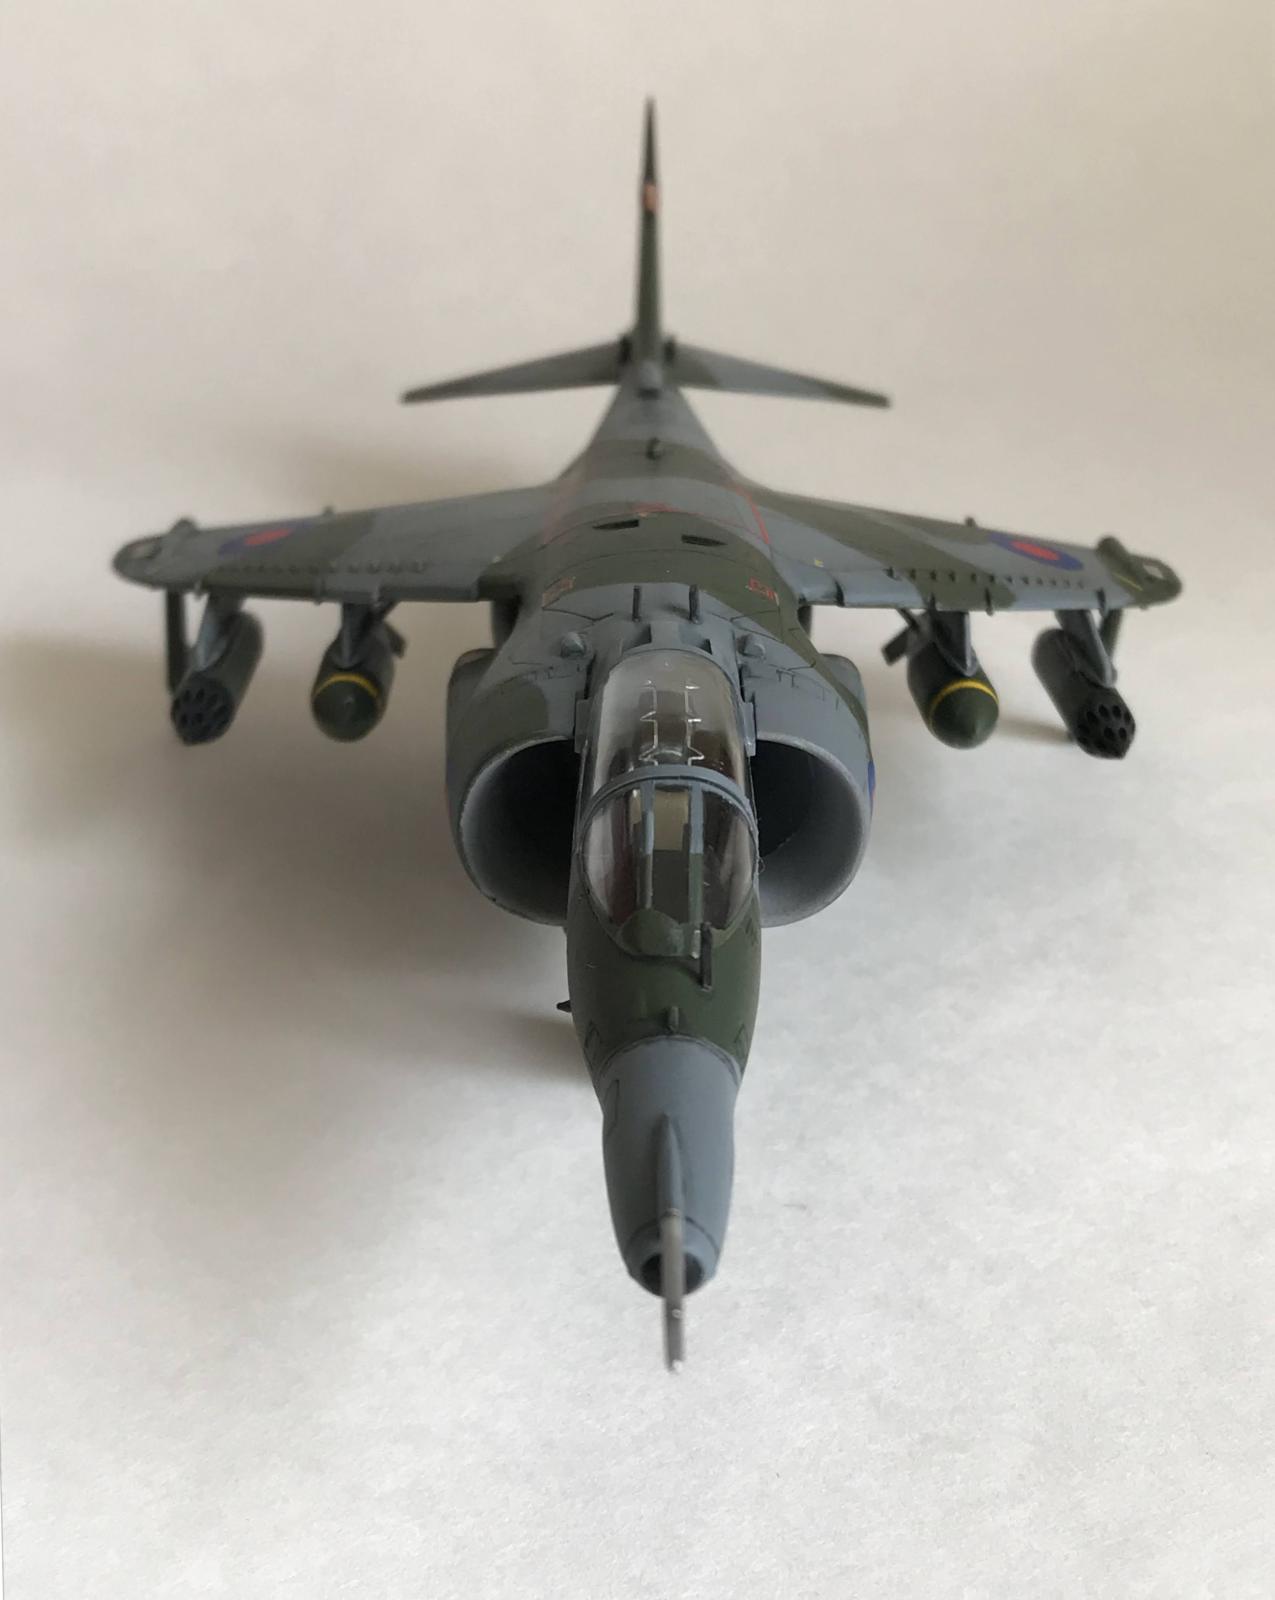
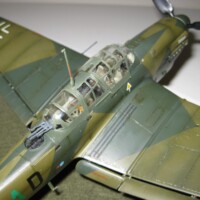
Hasegawa 1/72 Harrier Gr Mk. 3
Here is my obligatory Falklands Harrier! It seems everyone who's into modern military aircraft eventually gets around to building one of these. I'm glad to join their ranks! Since joining this site after my last build, I've been humbled by all the talented people here and the vast collective knowledge they share. This is my third aircraft since my rebirth as a grown-up modeler, and so I'm still making lots of mistakes a learning a lot with each build. Tips and tricks I'm trying out here are likely old news for many of you, but hopefully other beginners who come across this post will find some of it useful.
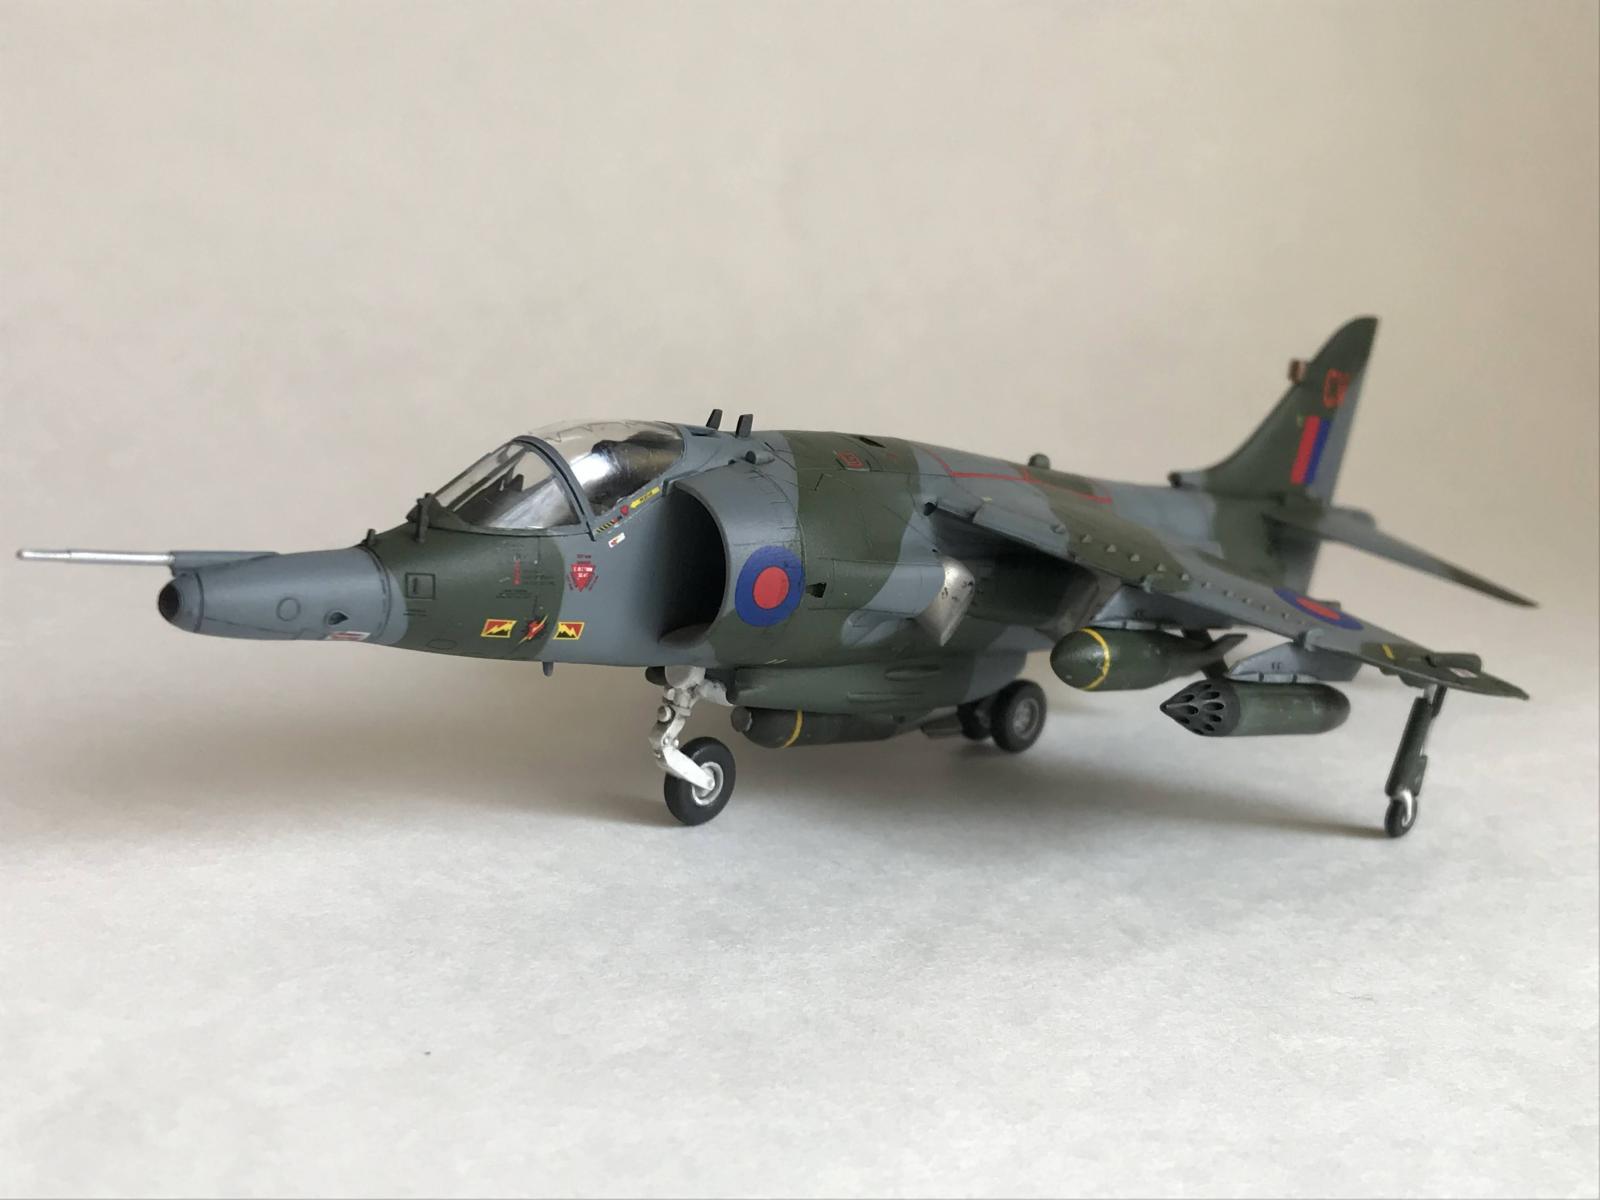
The Hasegawa kit is made of gray styrene with 74 parts. Weapons options include two rocket launchers, two 1000 lb bombs, a BL755 cluster bomb, and 2 ADEN 30 mm canons. Decals are for the RAF No. 4 Squadron or No. 3 Squadron. There are no glaring inaccuracies or omissions, though the landing gear flaps are fused with the landing gear and so would need to be carefully separated for a wheels-up configuration. Also, the auxiliary air intake doors are closed. One slightly annoying artificiality is that the engine nozzle vents aren't open or even indented, and so must be painted black to simulate darkness. Pieces generally fit well together, though I needed some putty here and there to make some joints flush. Panel lines are engraved with good detail.
Overall, my process was as follows:
- Prime (Stynelrez at 25 psi)
- Base coats (Tamiya acrylics thinned ~50% with Tamiya X-20A at 20 psi, Alclad metallizers at 15 psi)
- Some weathering with oils (Mig Oilbrushers)
- Gloss Coat (Alclad Aqua Gloss at 20 psi)
- Panel line pin wash and weathering (Tamiya Panel Line Accent)
- Gloss Coat (as above)
- Decals
- Gloss Coat (as above)
- Panel line pin wash and weathering over decals (as above)
- Dull Coat (Alclad Klear Kote Flat at 20 psi)
New techniques and focus areas I want to talk a little about in this post are 1) the use of paper templates for airbrushing camouflage, 2) oils for weathering, 3) doing away with seams and re-scribing the inevitably erased panel lines, 4) making the engine nozzles look realistic, 5) simulating chipping paint and ordnance weathering, 6) and using only a softener solution (vs. setter) on decals.
Airbrushing Camouflage
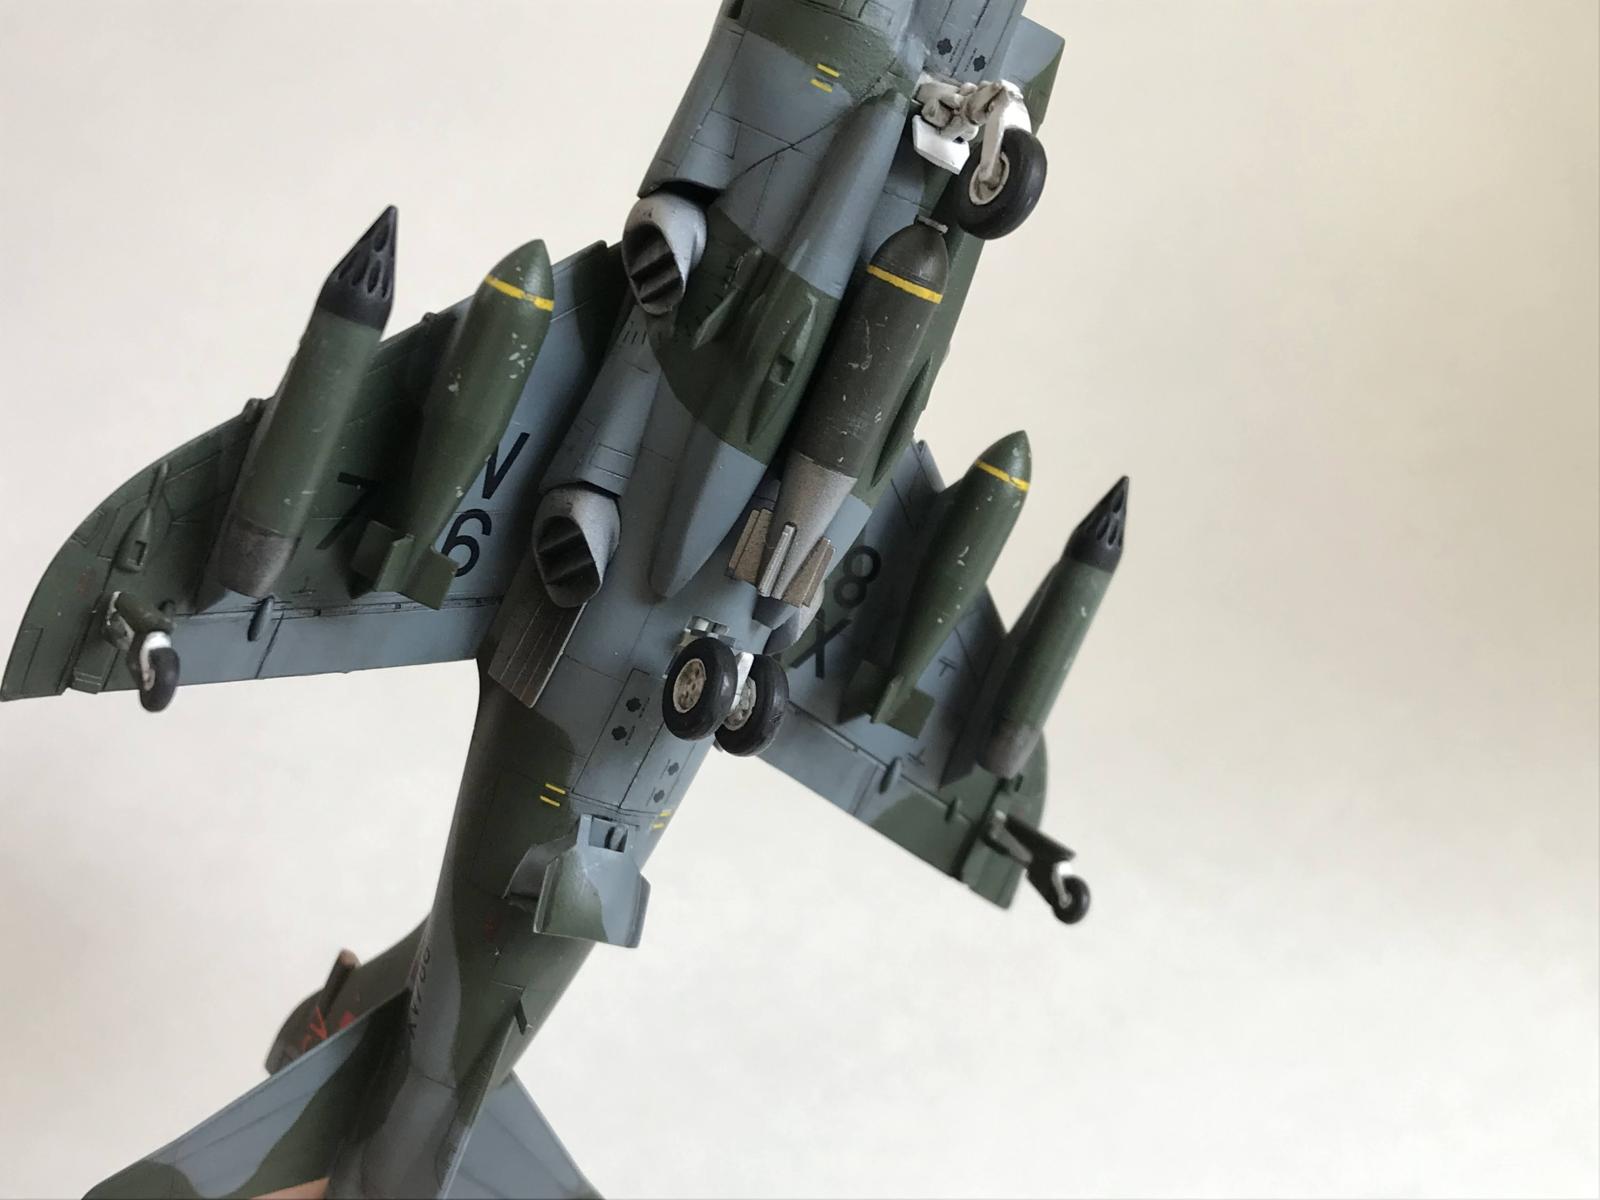
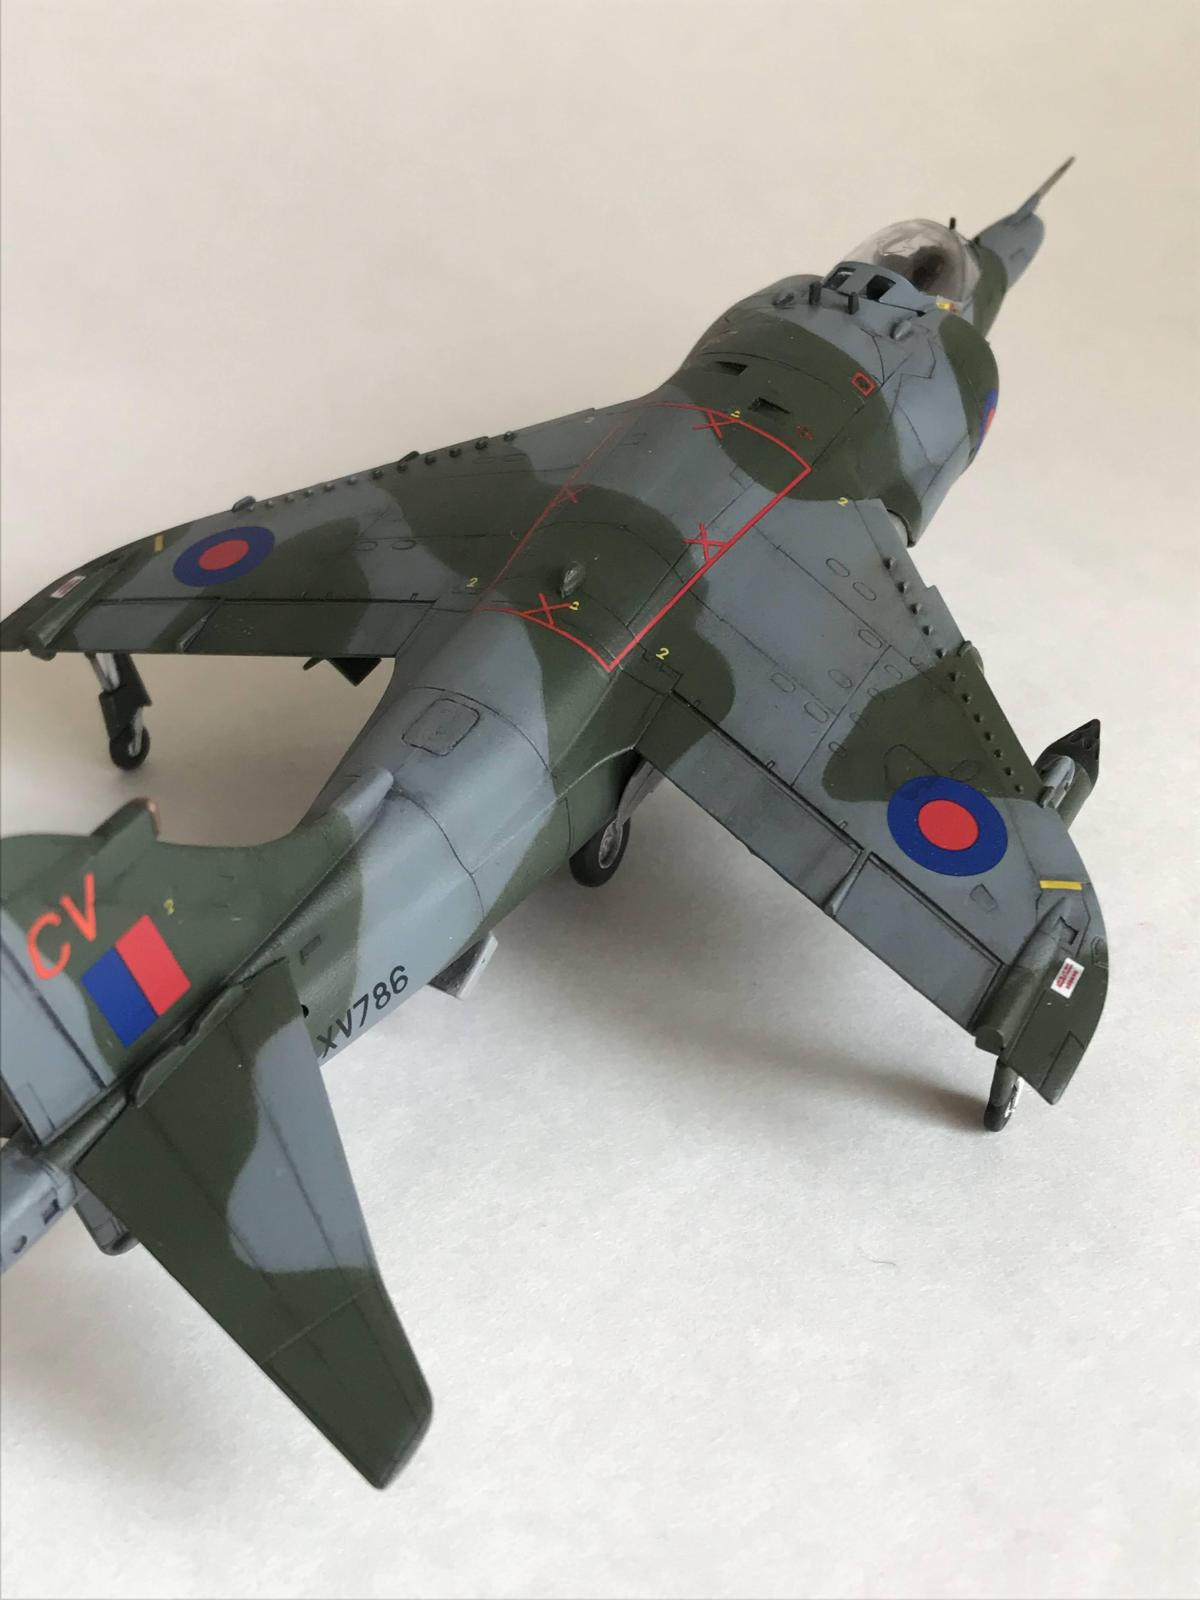
My only experience with airbrushing camouflage prior to this was on my 1/72-scale A-10, which made use of two similar shades of green and I could sort of get away with just free-handing it. The Harrier, meanwhile, has the distinctive gray/green color scheme with relatively sharp transitions. I first applied the dark green (Tamiya Nato Green) in roughly the desired shape, and then cut out masks using regular copy paper and taped them over these green spots:
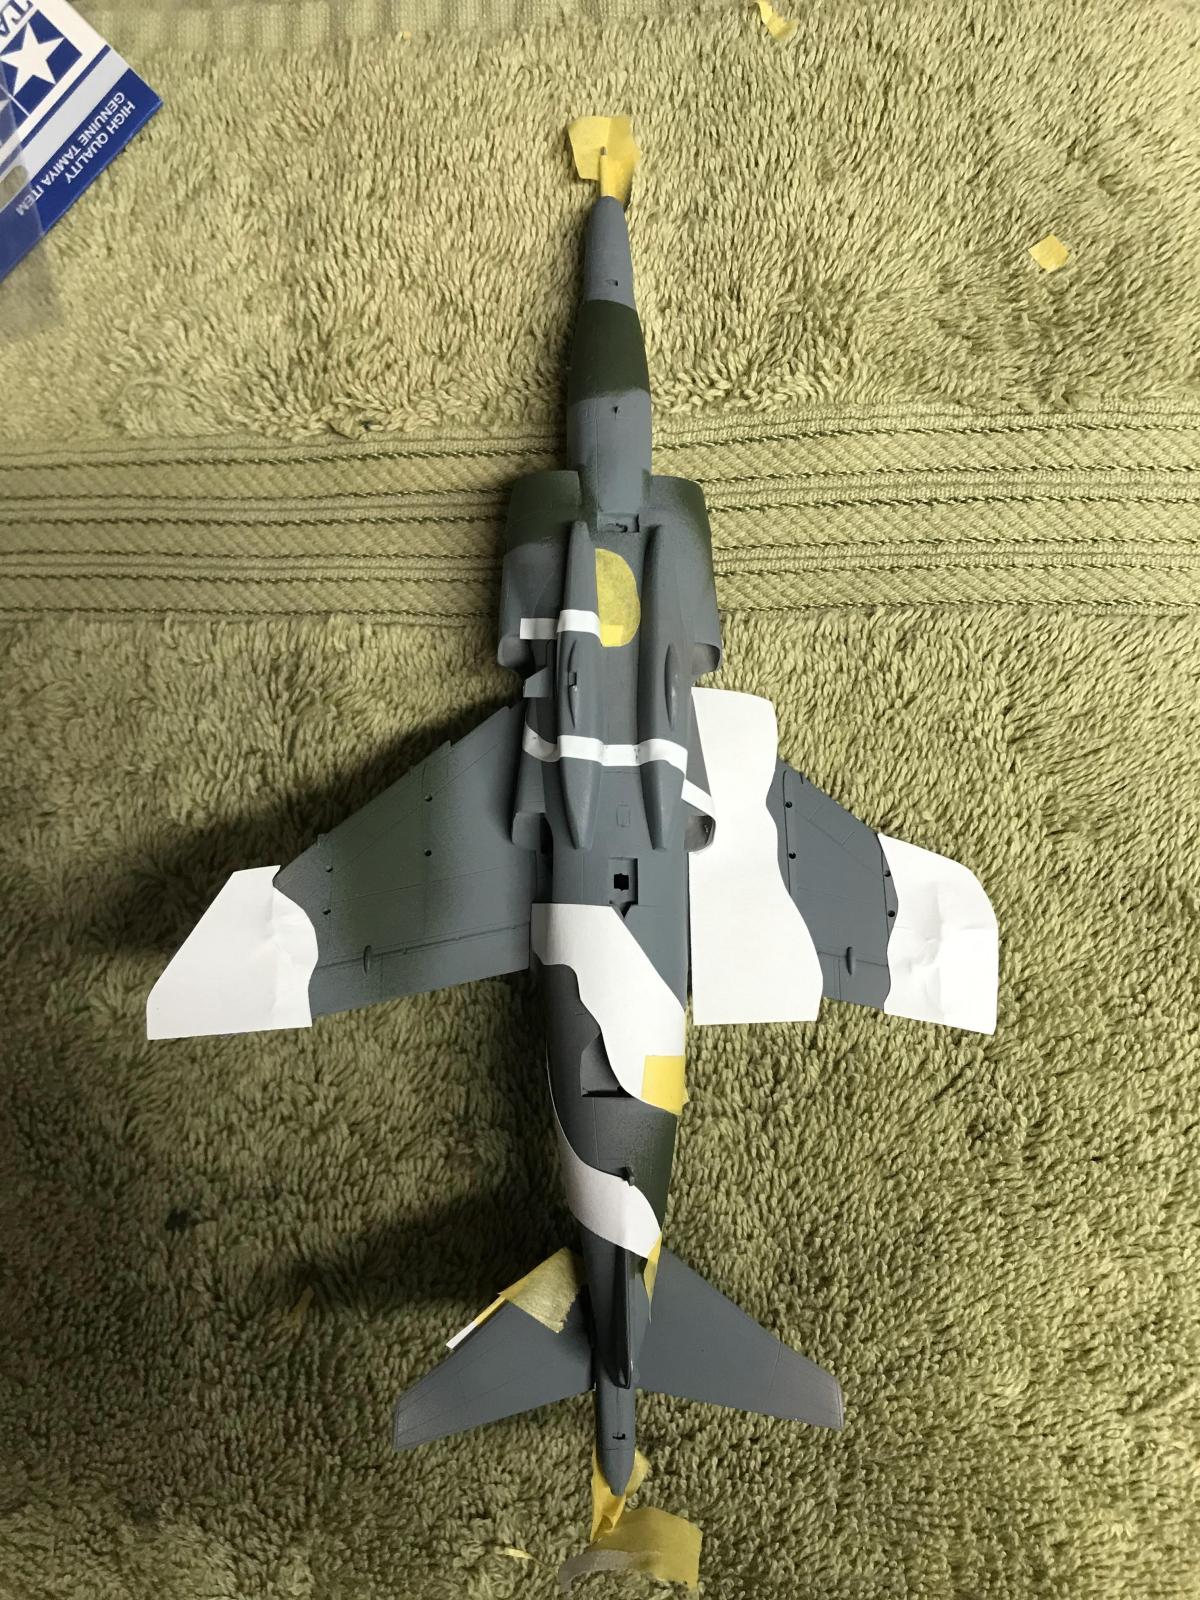
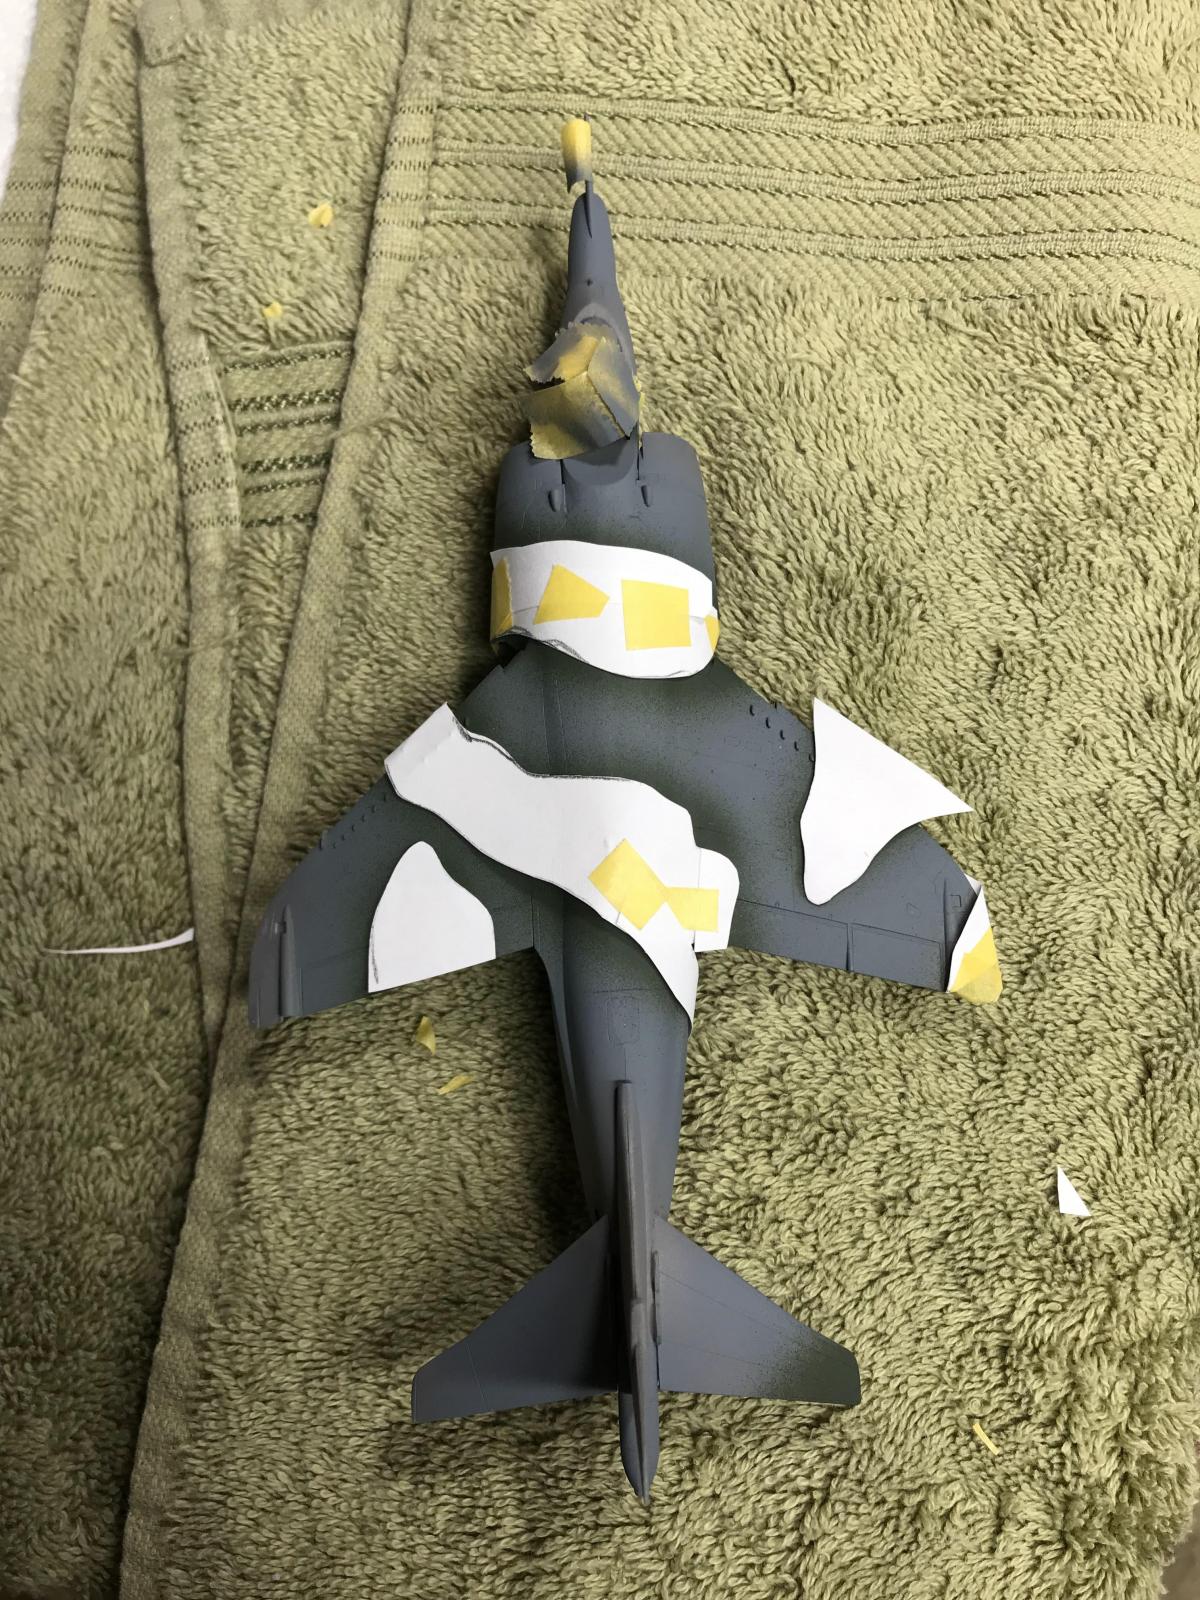
These masks do not sit flush against the surface, and so the separating lines won't be perfectly sharp (as they would be with masking tape, for example). This is slightly tedious and has obvious limitations when the surface is highly irregular, as with the ADEN pods under the fuselage in top photo above. For these regions, I used Tamiya's “Masking Tape for Curves” which is like a lightweight electrical tape that bends fairly easily. I then applied the gray tone (Tamiya Light Gray, which as you can see is not very light and is a little blueish, as desired):
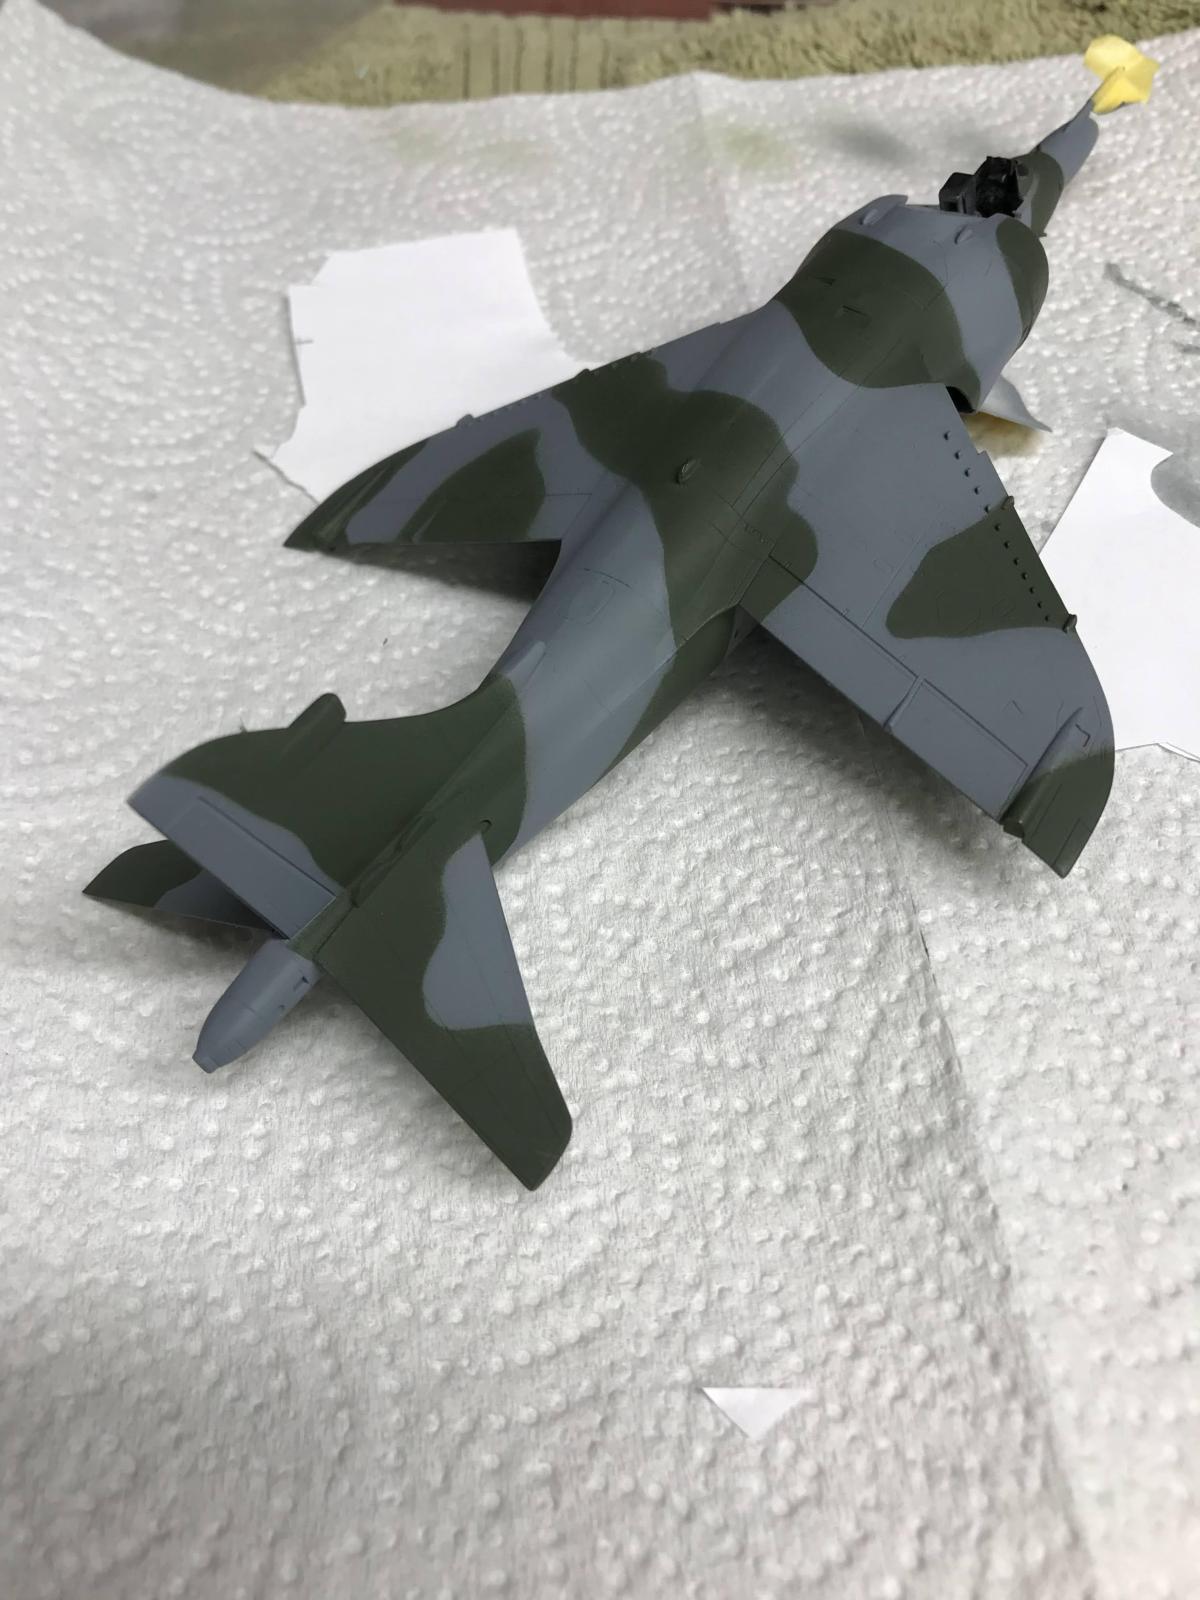
This worked pretty well, though there were a few needed rounds of touch-ups. It might seem that thicker paper is needed, like card stock, but I found that regular copy paper worked fine so long as you're not too heavy with the paint. The copy paper is easy to cut and position on the model. My feeling is that this is a successful technique, though I suspect it could be challenging on aircraft with more complex or convoluted surfaces. Incidentally, it is probably possible to make sole use of the Tamiya curvy tape, though the tape can't really do sharp or hairpin-type curves: paper templates are probably the easiest way to make truly arbitrary shapes.
Oils for Weathering
Enamel and clay washes are popular media for weathering, though I've found they're a little too thin to create certain more concentrated effects, like soot build-up or grease streaks. Mig Oilbrushers are marketed as easy-to-use oil-based pigments available in a wide range of colors, for creating oil smudges, highlights, rust stains, you name it. They have a nice brush-tipped applicator so there's no clean up. I've read on a few forums that they're allegedly not very “oil-like”; this may be, but they're quite a bit thicker and brush more evenly than the enamel washes I've tried.
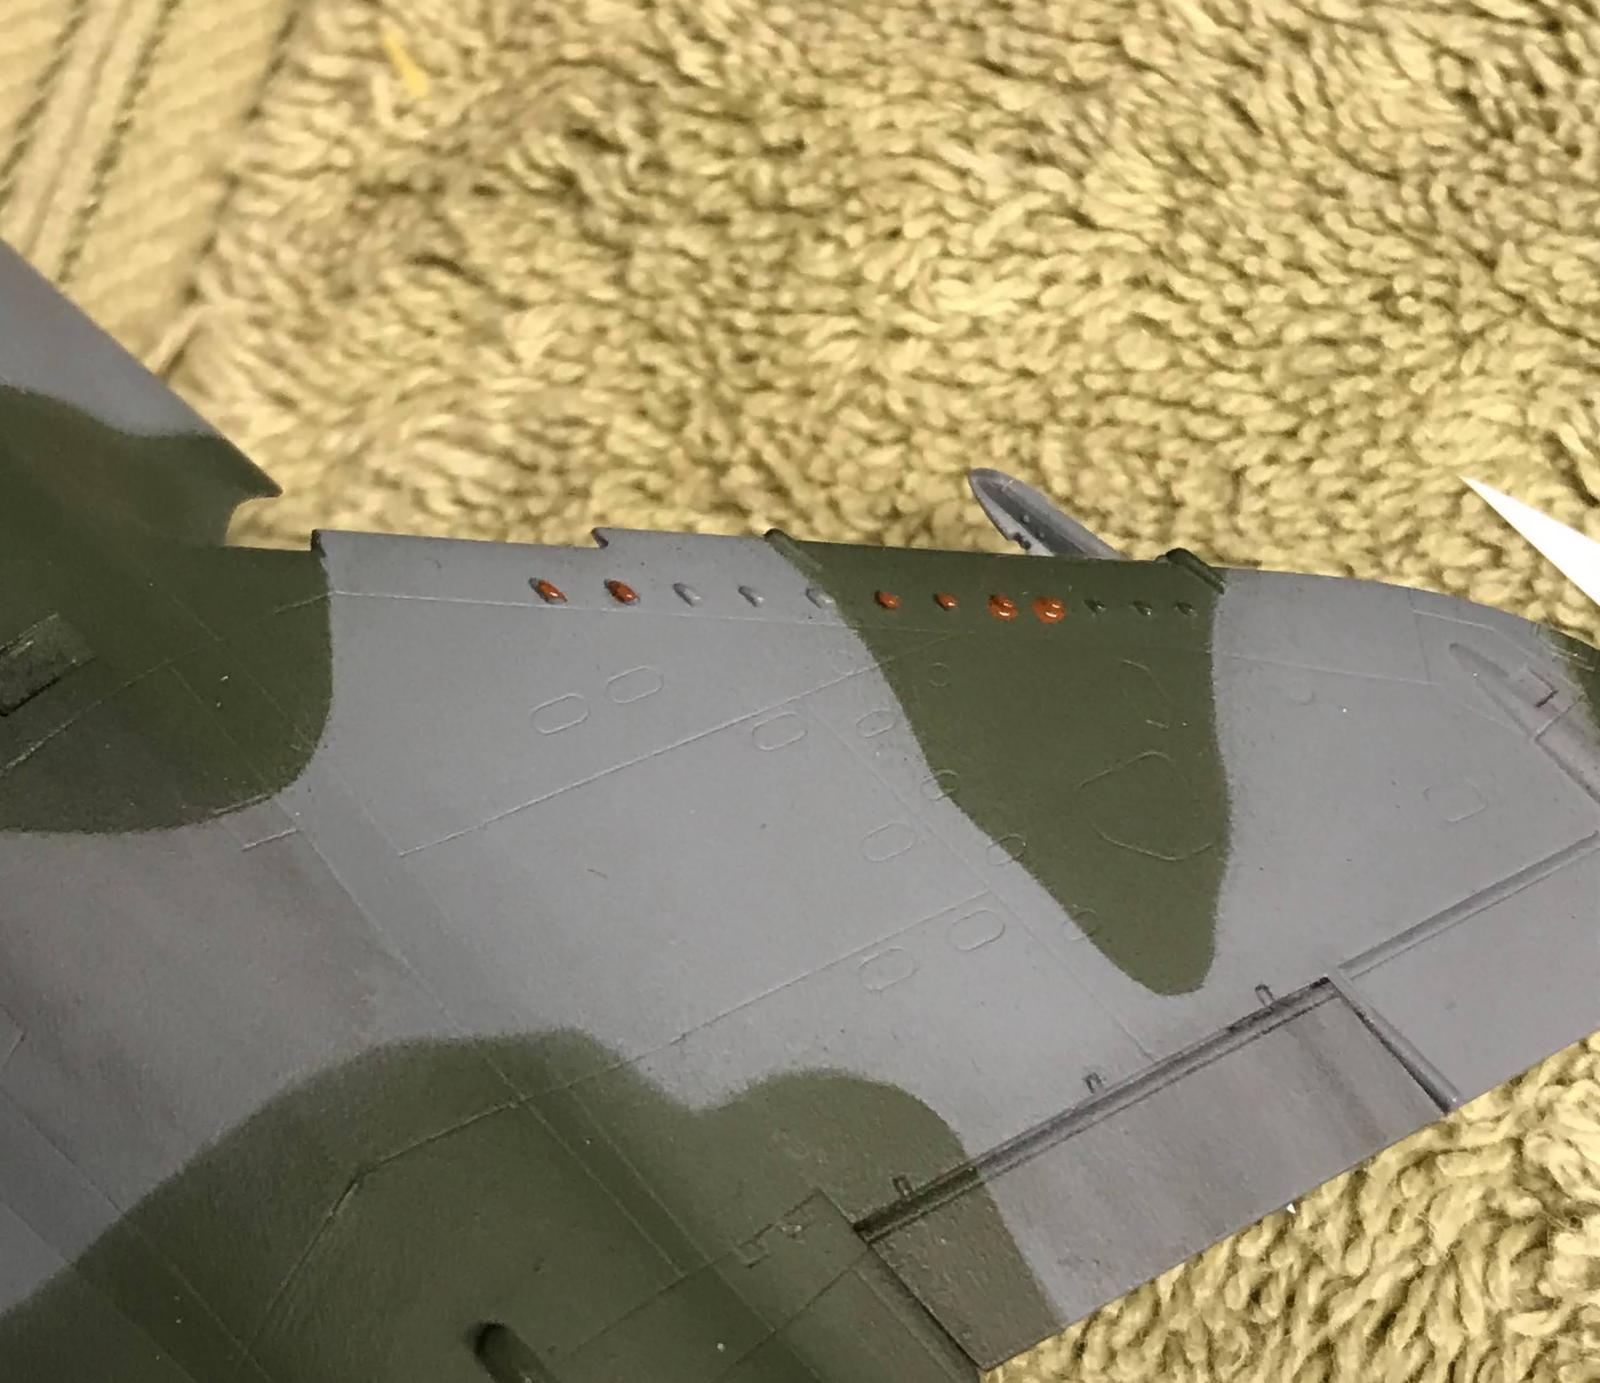
Two particular effects I wanted to try on this model were grime streaks on the ailerons, and some rusting. One caveat is that these should be applied before any varnish (unlike washes); otherwise, they don't blend but just smear around like water on teflon. To apply, just dab a bit on in the general area and let it sit for several minutes. Then, blend it in with a brush lightly dampened with oil paint thinner (I use white spirit). This helps spread the oil but also picks some of it up (which is usually desired). In the three photos below I show how I applied rust to the wing's protrusions (from top to bottom): dab on, blend, final product.


Seams
Virtually every model has seams where parts come together, and virtually every modeler has to deal with them. Sometimes the seam occurs where the actual vehicle has a panel line or real seam, in which case it might just be left alone. In the case of this model (as with most model aircraft), there is a seam running the length of the fuselage at its apex and bottom where a true seam typically does not exist. Furthermore, the model wings meet the fuselage at a place where there is not a seam on the real aircraft. And so, they must be extirpated.
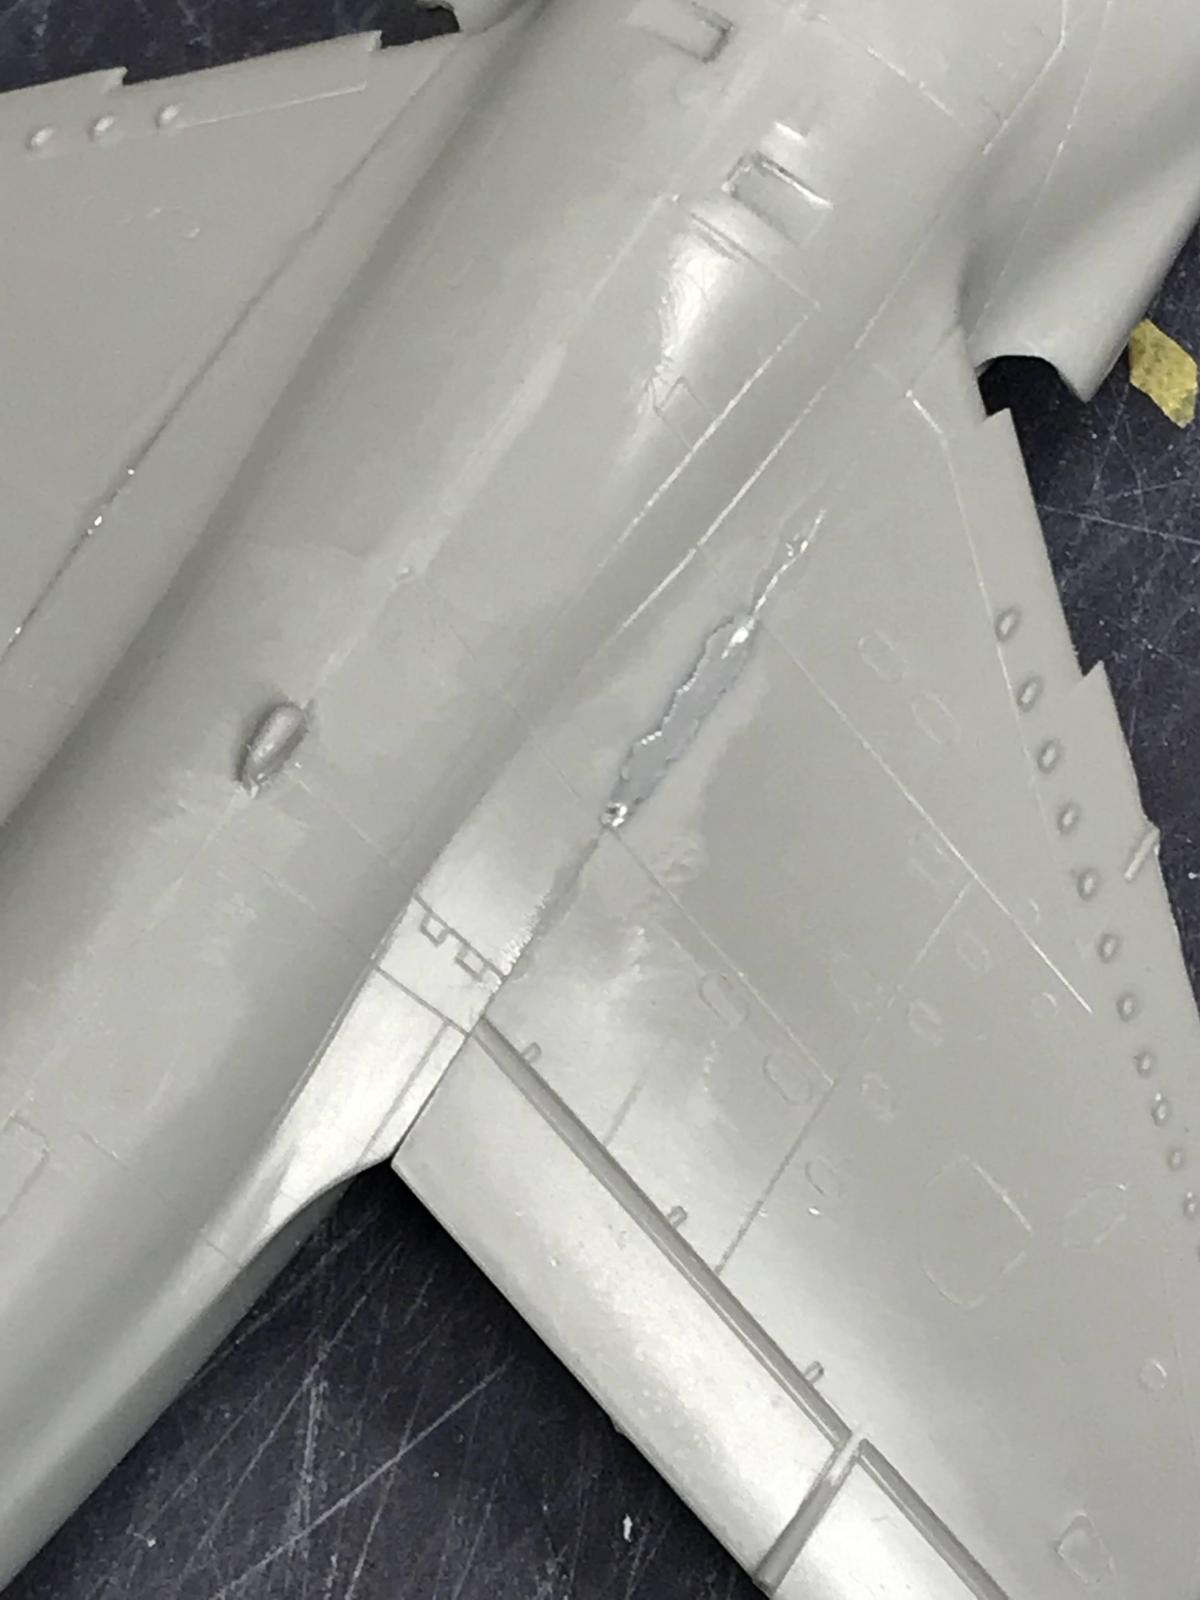
One popular method is to apply glue a bit liberally at the joint so that it squeezes out a bit when the pieces are joined; let it dry, and then scrape it off and sand. Since the glue melts the styrene, this method can quite literally erase the seam. This works great for big seams but can be overkill for those that are more delicate (lots of sanding is required and this can do collateral damage to detailed areas around the seam.) I wanted to explore a different technique this time around: after gluing the joint, I brushed some Mr. Surfacer 500 along the seam, let it dry, and sanded. The advantage over the scrape method is that you can control how much solution you apply where (with the scrape method, the glue just comes out where it will); it also sands off us more easily than dried cement. Here, I'm applying it to the middle panel on the right wing:

The resulting seams are much less pronounced. I found that using Durasand sanding twigs were great for precision sanding. Each pack comes with a variety of grits: they are foam board coated on two sides with sandpaper; the foam is easy to cut with scissors or hobby knife to clip off dead ends or to create a more angled tip. They are also very cheap (5 packs for something like $13 on Amazon).
But, even still, it's easy to sand away fine details like panel lines. When this happens, you can try to “re-scribe” the panel line using a sharp tool and a steady hand. I came across this
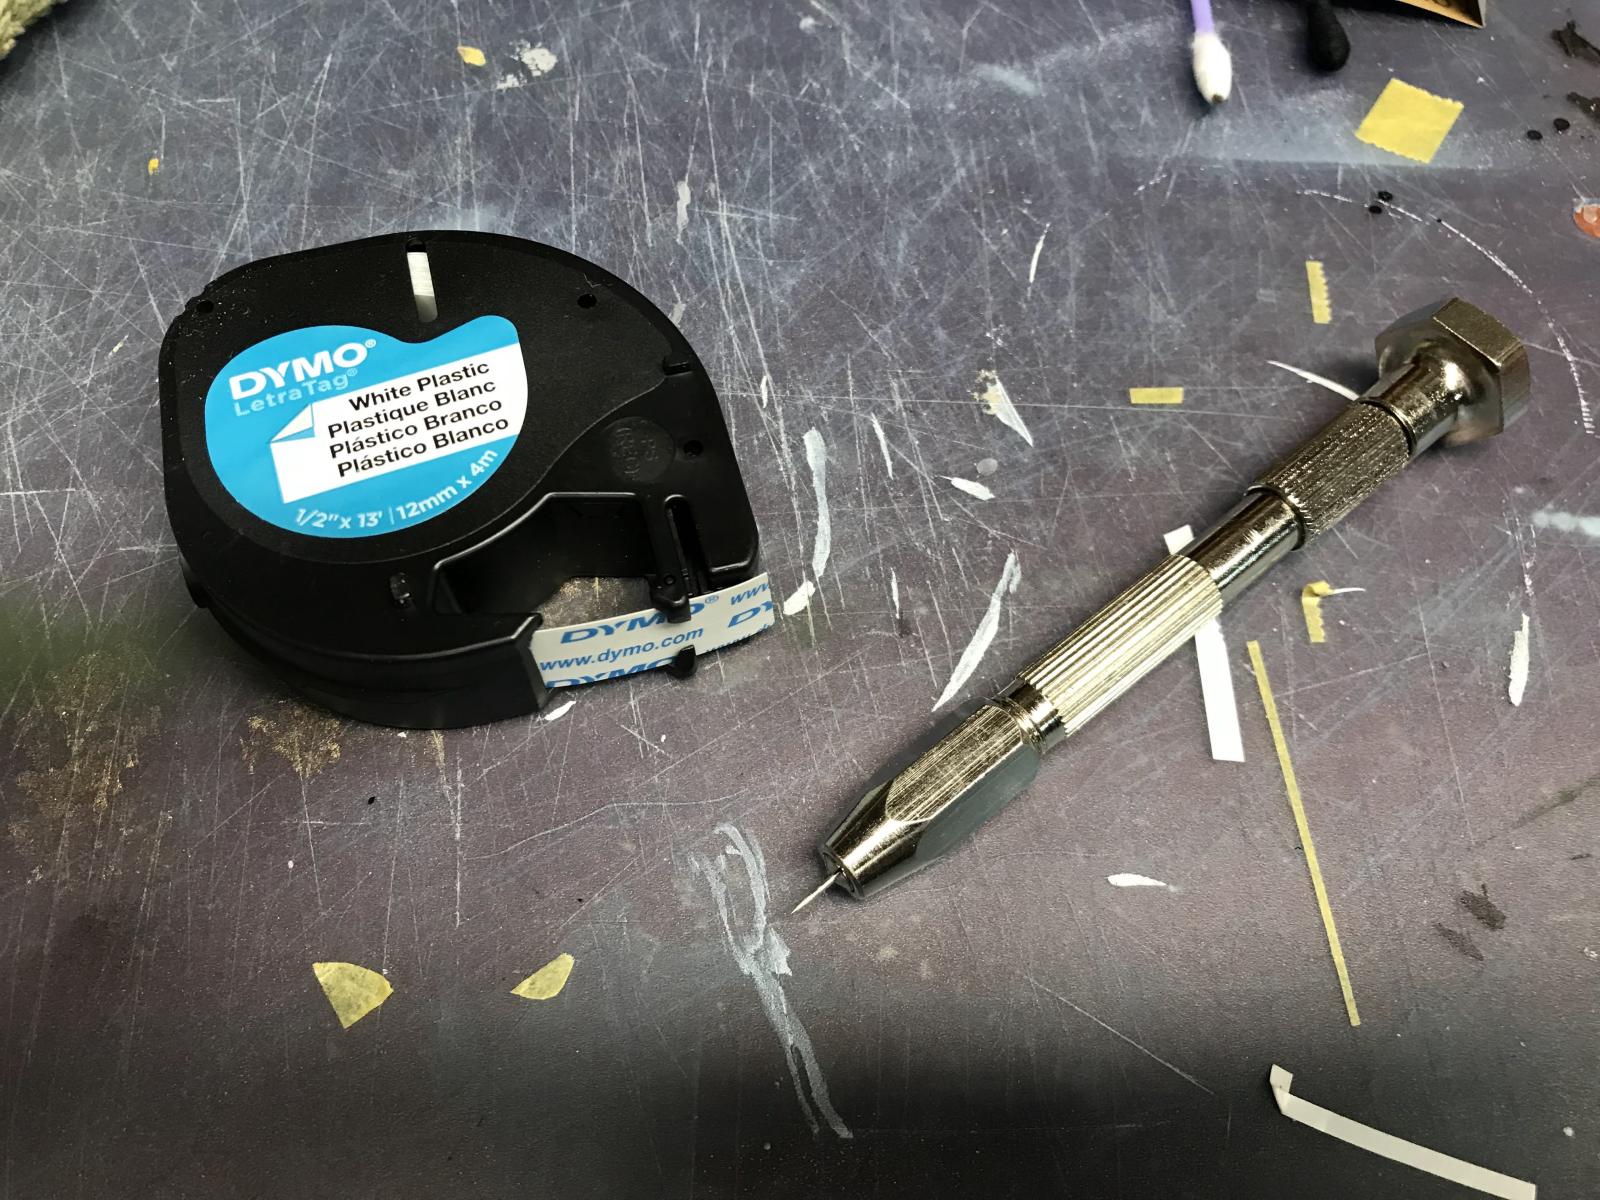
awesome video on how to essentially invert raised panel lines: place thick tape along the panel line and scribe with a pin vice. The recommended tape is that used with label makers: it's thin plastic, sticks well, and doesn't leave behind any residue. Here are the two tools of the trade:
Here are a couple (mostly) successfully re-scribed panel lines:

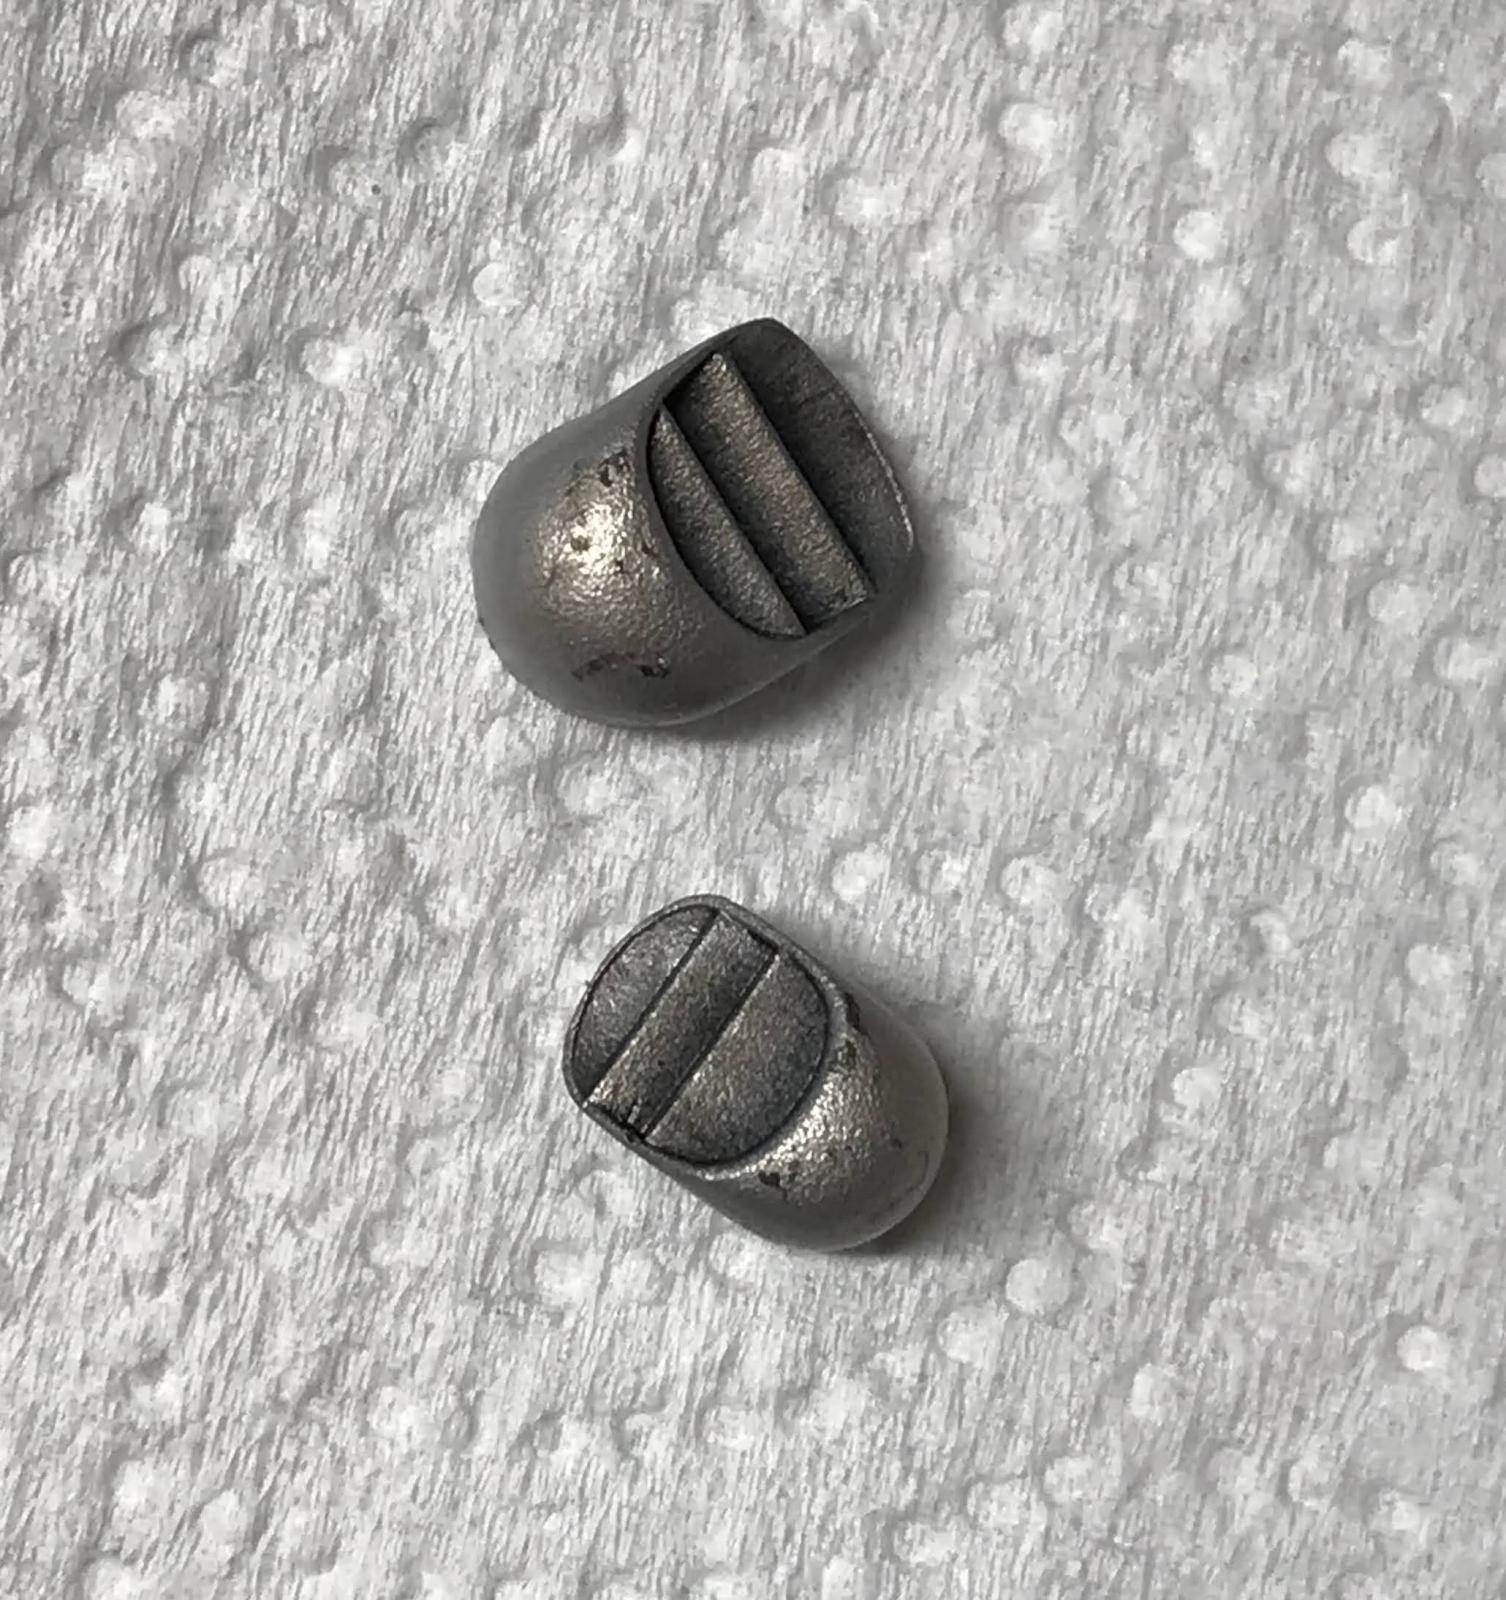
Engine Nozzles
The engine exhaust nozzles are annoyingly not open:
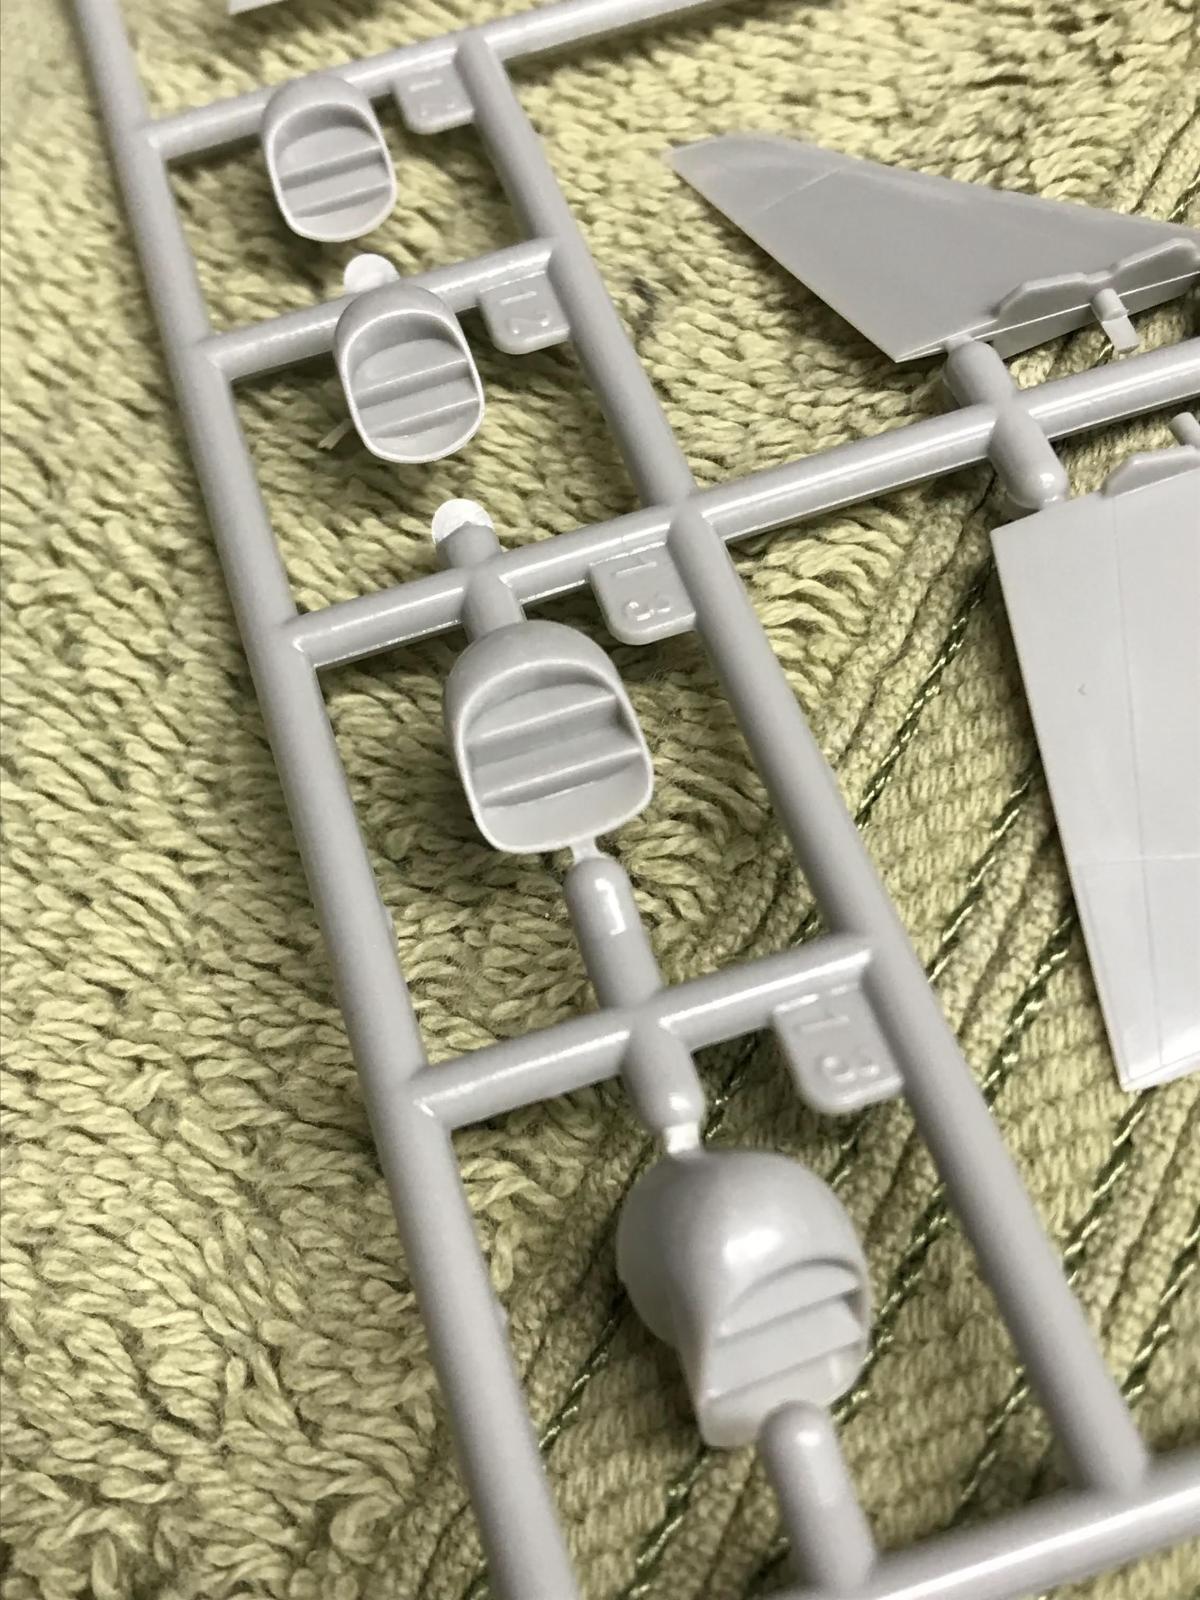
Rather than vanes with space in between, the nozzles resemble steps. To simulate what should be empty space, the ‘risers' need to be painted black. This was the first step, using Tamiya flat black. Next, rather than mask off these areas, I planned to apply the metallic finish directly downwards so that no spray would hit the risers, covering instead the veins and the outside of the nozzle. But how to do the finish?
I found several good examples of real exhaust nozzles online. There is some variation in the color and condition of the metal, ranging from dark iron to a burnt metal, with or without dings and stains. I decided to go with a lighter metallic finish, and so first put down a coat of Alclad Flat Aluminum. The flat aluminum, on top of a flat black base coat (versus the glossy black primer recommended for high-shine metallic finishes), is about as dull a metallic coat as you can get with Alclad, though it still had a fair bit of luster. This is what I wanted, since none of the nozzles you see on operational aircraft look like burnished silver. Next, I lightly applied some Alclad Burnt Metal, aiming at the vanes: on the real nozzles, these thinner metal pieces are more prone to discoloration due to hot exhaust than the outer metal of the nozzle. Next, I applied some Tamiya Black Panel Line Accent to fill in the edges and give the vanes a dirty look. Finally, I lightly stippled some Tamiya Dark Iron on the surface of the nozzle to create small blemishes on the finish:
To create the heat guard, the slightly concave plate behind the rear nozzle, I used Flat Aluminum followed by Burnt Metal as above, and then lightly sprayed some Alclad Jet Exhaust near where the plate meets the nozzle.
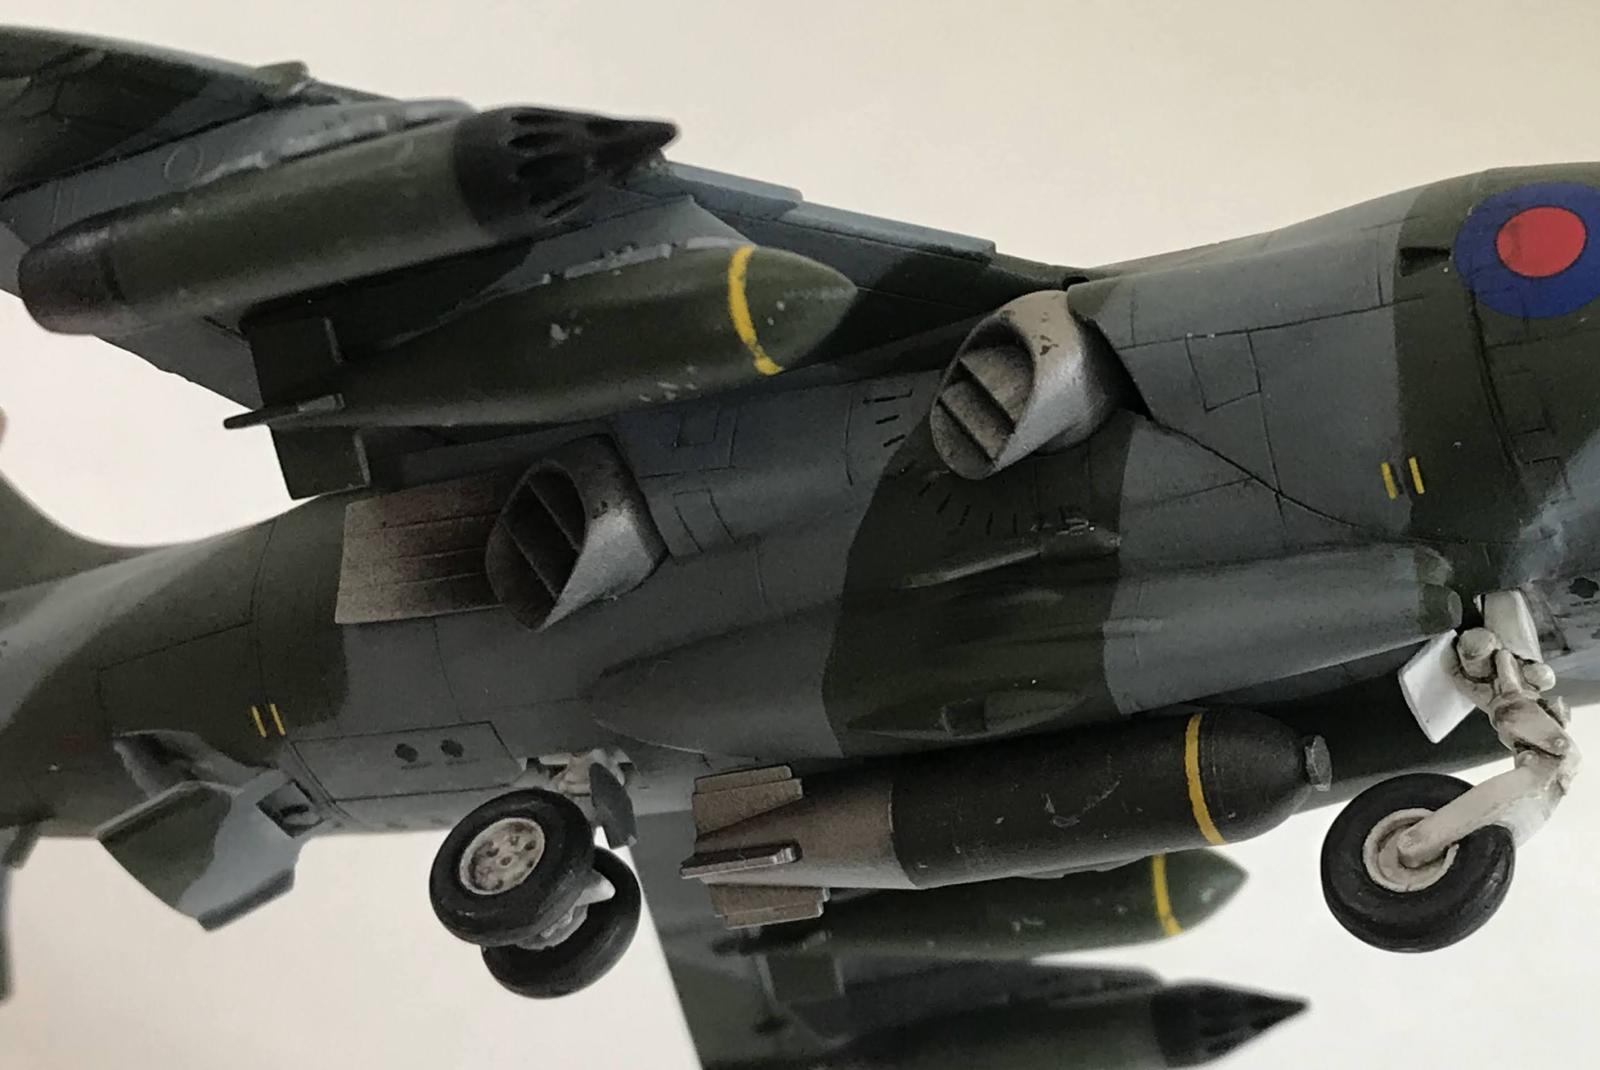
Ordnance
The Hasegawa Harrier Gr Mk. 3 has two 1000 lb bombs, two rocket launchers (under-wing pylons), and one cluster bomb (under the fuselage.) In the many photos I found online, the 1000 lb bombs always appeared oddly shiny, with the usual paint chips and nicks, whereas the cluster bomb seems to be of a darker, flatter green. Together with a single photo of one of the LR-155 rocket launcher, again showing some scuffing and chipping on an otherwise glossy surface, I had enough references to get going on the ordnance.
I used the glue & scrape method to do away with the seams and painted the 1000 lb bombs and rocket launchers the same NATO green as used for the body; the cluster bomb got a darker shade of green. I painted the yellow live ordnance markings using the method described in my A-10 Warthog build post. Next, I applied a gloss coat to all but the cluster bomb. To age the 1000 lb bombs, I stippled some Tamiya Sky Gray to simulate chipping paint, and lightly blemished the yellow ordnance markings with NATO green:
The rocket launchers were similarly weathered, with some Sky Gray dry brushed onto the cone of the launcher to simulate wear around the rocket holes; I also did some dry brushing and stippling on the pylons to give them a slightly worn look:

Decals
So decals terrify me. They come at the very end, after all that hard work. And I've not had good experiences: with my first two model aircraft I had annoying silvering and wrinkling, some decals just not adhering, and so on. I've read a lot on proper technique: gloss coat and setting solutions, for example, but I've still met with difficulty. On my last model, I found myself addressing silvering by cutting set decals with my Xacto knife and trying to deposit Solvaset into the cut so that it could flow under the decal and seal it down onto the surface. Partial success, but not ideal. In hindsight, I suspect my gloss coats wasn't sufficiently smooth, so this time I was careful to apply two full coat of Aqua Gloss. I also decided to use only a softener for setting the decals: rather than setting them and then applying the softener on top, I applied the softener on the model surface and slid the decal onto it (as one would use a setting solution). This way, the softener is where it needs to be from the start. I'm happy to say this method worked very well.
The Solvaset worked as advertised, getting the decals to settle down into the panel lines and various indentations. In the photo below, you can see the delicate small square auxiliary intakes:
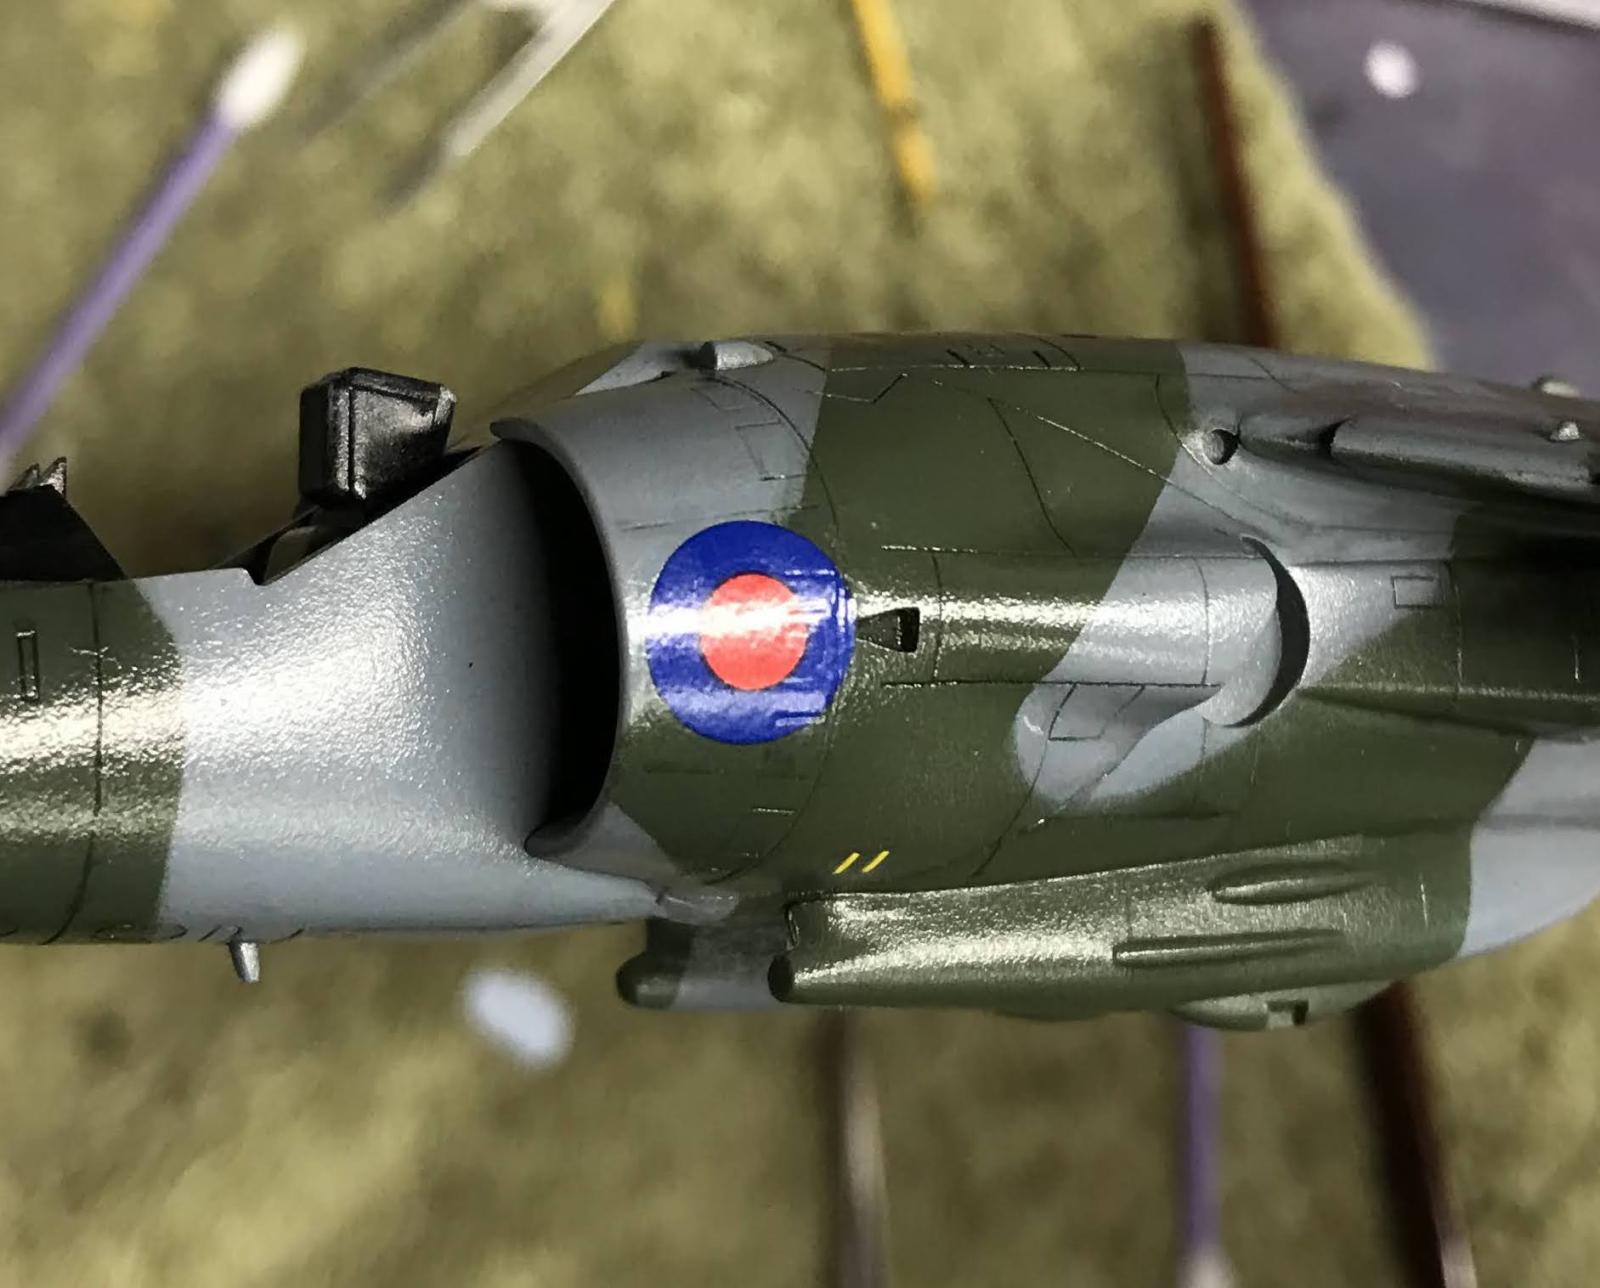
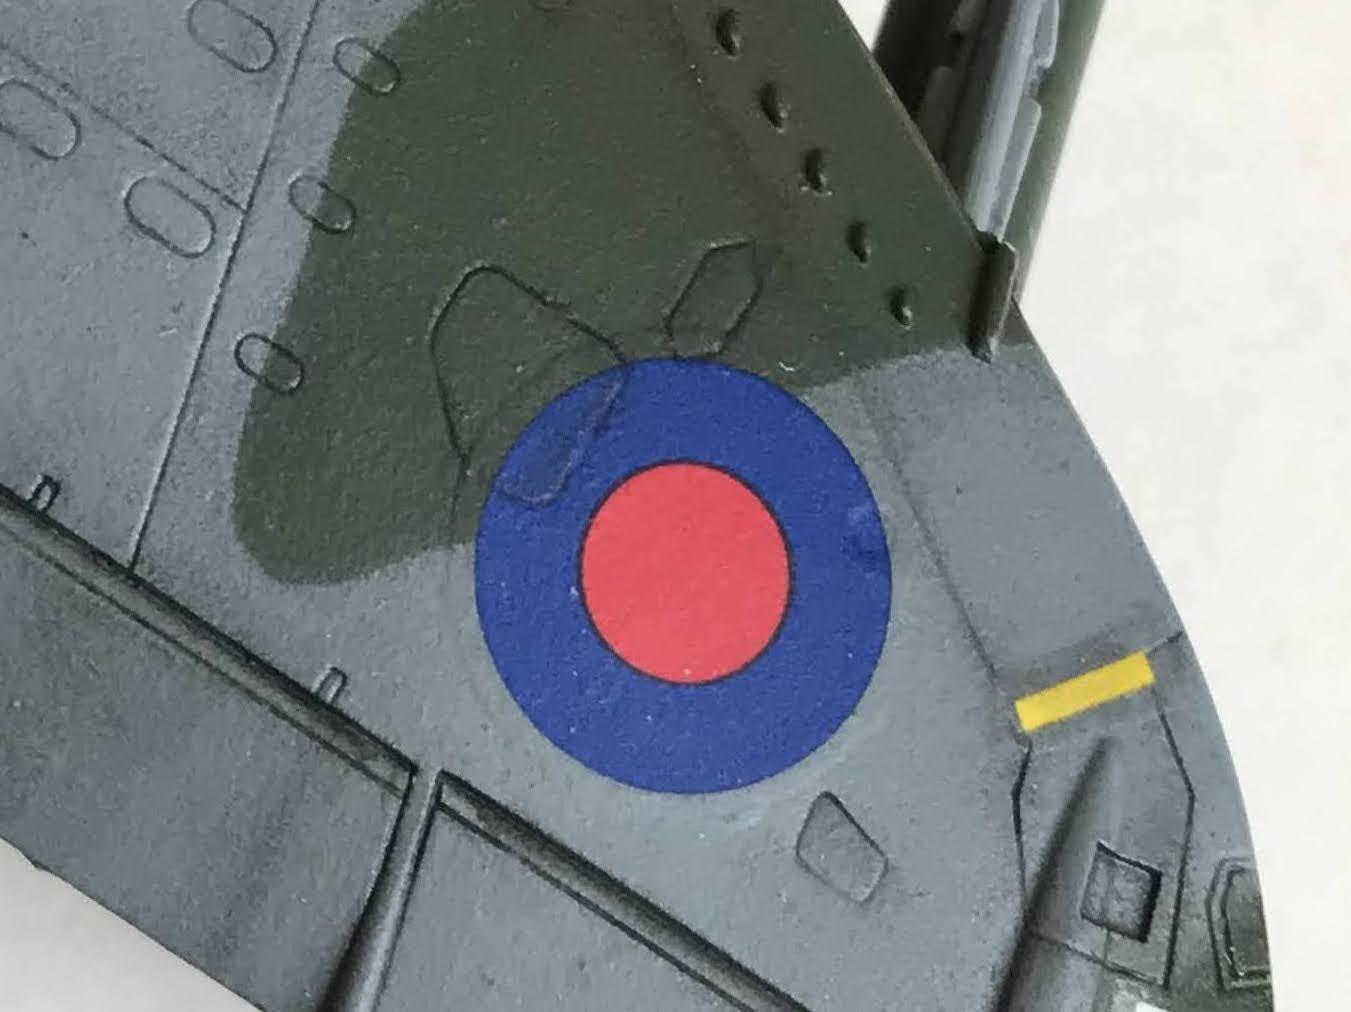
After setting the decals this way, I still needed to apply several rounds of Solvaset over the course of a day to get the decals to smooth out completely. I was then able to apply more gloss varnish and go over some of the decals with Tamiya Panel Line Accent (photo above).
One annoying issue is that some decals simply didn't fit where they were supposed as per the instructions, due to a protrusion or similar obstruction. This required me to cut softened decals with my Xacto without destroying them so that they'd fit. Not an easy thing. So, as is perhaps obvious to any seasoned modeler, never assume the instruction are correct: test all decal (and more generally, parts) placement before committing!
That's all for now...thanks for reading!


A superb result, Brian and an equally superb article!
Thanks for sharing all this very useful info!
Thanks Spiros!
Excellent write up Brian, and a great looking Harrier jet as well. I really like how you use your articles so thoroughly to explain your techniques and learning as along the way.
With regard to making the camo, one option you might consider (either separately or in conjunction with the paper masks) is to lay the masking edge with tacky putty. I use blue Loc-tite putty, rolled up to "worms" about 1-3mm in diameter. This allows you to lay the putty in any configuration or shape, and make adjustments as needed. An additional benefit is that it if sprayed carefully, the putty will allow a slight feathering of the paint on the demarcation line for the camo. Best of all the same putty can be reused, or used to hold parts to painting pallets.
All that said, your camo turned out great with the paper masks.
My only other bit of advice is to be careful with using setting solvent from the get-go until you know how the decals react to it. Oddly enough, different decals and carrier films react wildly different to setting solvents, sometimes instantaneously, or not at all!
Keep up the great work, and happy modeling!
Thanks Andrew! I've tried the camo method with worms of blue Fun-Tak, but couldn't get it to stick onto the model reliably. Is the Loc-Tite putty something different?
And, indeed, I have learned to test the Solvaset on an unused decal from the sheet before using it on the actual model, since I read in a bunch of places that Solvaset can run a bit strong. I'm pretty confident at this point that Aqua Gloss holds up well to it, though I have noticed very slight clouding if I'm a bit too liberal with the Solvaset and let it pool. (Incidentally, this clouding appears to vanish upon application of any later dull coats). I suppose the real unknown is as you say, how some random decal sheet of questionable age will do.
Sincere thanks for the advice. It is truly welcome!
Brian, the Loc-tite brand blue putty is marketed for hanging things. After a good initial meading, I've never had issues with poor adhesion. Best of luck!
As for the solvaset, it sounds similar to microsol in the effects of has on paint. As with application to the decals, it's usually best to apply thinly and allow to dry completely with minimal tampering... nothing you haven't already learned through experience... that's the only way any of us really know anything, and there is always more to learn no matter the level. 🙂 just keep building!
Excellent result, Brian @bapowellphys
Your article makes it clear that you are indeed learning on the way, improving where you can and trying new approaches.
Some very interesting ideas as well like using that Dymo tape for rescribing.
You are definitely on the right track.
Awesome Harrier, Brian. Always had a fascination with them ever since I saw one at Biggin Hill in 94. Thanks for explaining the process, Noobs like myself definitely appreciate it
I built this kit 35 years ago while in college. I remember it to be a fun build. You’ve done a beautiful job. Oh, don’t forget to paint the red beacon on the spine!
Ha! I've got some Tamiya Clear Red coming in the mail any day now...
Excellent looking Harrier, Brian. Nice work with the wrap around camo paint.
Great article and build, some interesting tips.
Great work, Brian. Always nice to see a Harrier.
Nice result.
A better/easier way to mask is to use drafting tape, a very low-tack tape available at artist suppy and office supply stores (it's not "masking tape" - it's "drafting" tape). Cut your pattern, then run a thread around the inside about 1/16 inch in from the edge to lift it. If you need "scale overspray" aim toward the mask; if you want "hard edge, aim away from the mask. You can get more complex patterns over difficult shape surfaces (like the Harrier) doing this.
Excellent, I will try this on my next camo job. Thanks for the tip!
Excellent model, and your skills are progressing rapidly I'd say! Keep tuning in to all the feedback, and I'm sure you'll be entertaining us all with wonderful models!
Looks Super Brian.
Thank you for the detailed “ how to “. learning as I go myself I appreciate You sharing this process
That Grime effect looks really good... congrats