The Martin T4M-1 and Plus Models
This article is both a review and commentary on the new Plus Models 1/72 Martin T4M-1. Previous T4M-1s have been released in resin (Ardpol 1/72) and as a vac-form (Esoteric 1/72). This is Plus Models first foray into 1/72 aircraft and to be honest it shows. We have a desirable subject but with gaps in research and short cuts. To be fair to them - a lot of the material out there is confusing and there is very little on the interior. Still with more time taken it could have been a much better first model. One choice that would have been better considered would have been to have a separate sprue for the floats. That would have eliminated several of the short cuts. The kit comes in two boxings - a wheeled version and a floatplane version but all that differs between boxings is the decal sheet.
I'm going to focus on the wheeled version and the version of the T4M-1 that can be built out of the box is a later wheeled version with some qualifications. When T4M-1s first entered service in 1928 they came with exposed wire spoked wheels, tail skids and fore and aft hooks.
-

- 1. Early T4Ms of VT-1B. The front observer's windscreen has been temporarily detached from both aircraft. Also visible are open spoked wheels, tail skids and underwing details missed by Plus Models.
Certain parts also need replacement particularly struts and wheel braces. From photos it is clear that some of these were round in cross section but Plus Models have made all of them a kind of aerofoil section. Particularly worth replacing are the tail support and actuation struts which are wrongly shaped and overscale, the interplane support struts and stays for the undercarriage. Another aspect that needs addressing is missing surface detail. Ribbing, access panels, the starboard side hatch and fuselage spine rails are all omitted and these are features which were present throughout the aircraft's career. Despite the aircraft representing a later modified aircraft with tailwheel the engine baffle plate is the earlier variety and the engine though a nicely detailed resin product lacks the oil sump
-
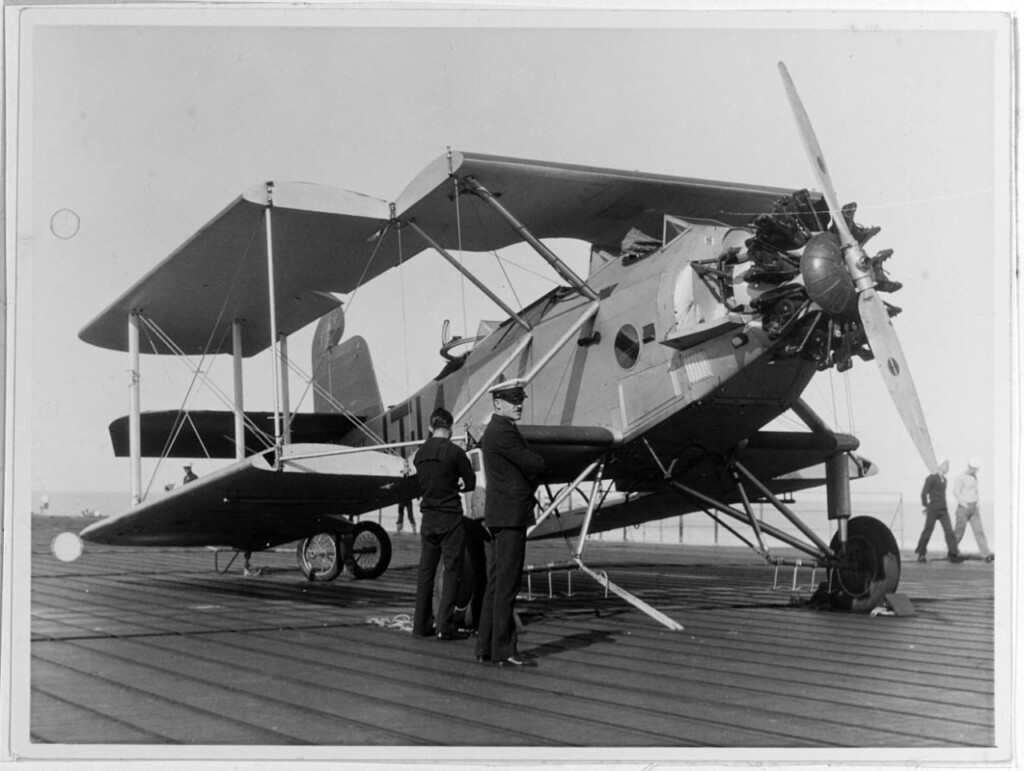
- 1. 1-T-14 with fore and aft hooks, red tail. The oil sump is also visible between the bottom two cylinders. Finish is overall aluminium.

For colour schemes there is a similar confusion - Plus Models have chosen to do three aircraft from VT-1B of USS Lexington and one aircraft from VT-2B of USS Saratoga. The latter seems to be the most accurate decal wise representing an aircraft in 1930. Others suffer from what seems to be reliance on the dubious profiles of Wings Aviation (though there is a lot of valuable research and information on that website). Unfortunately the US roundels provided with the decals are of one kind only - with the red circle touching the corners of the star (there was some variation at that time)
-
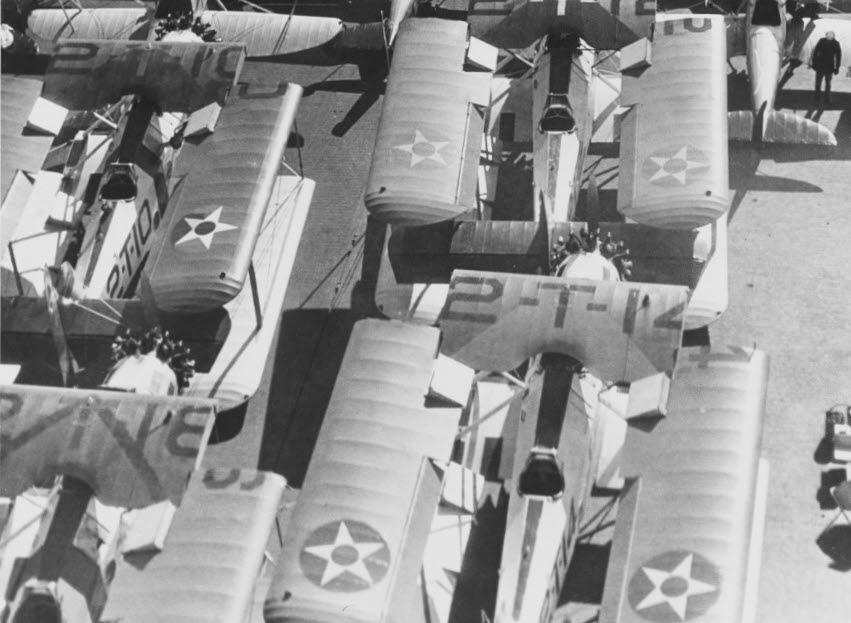
- 1. On board Saratoga in 1930 showing two different sizes of red circle on the roundels.
-
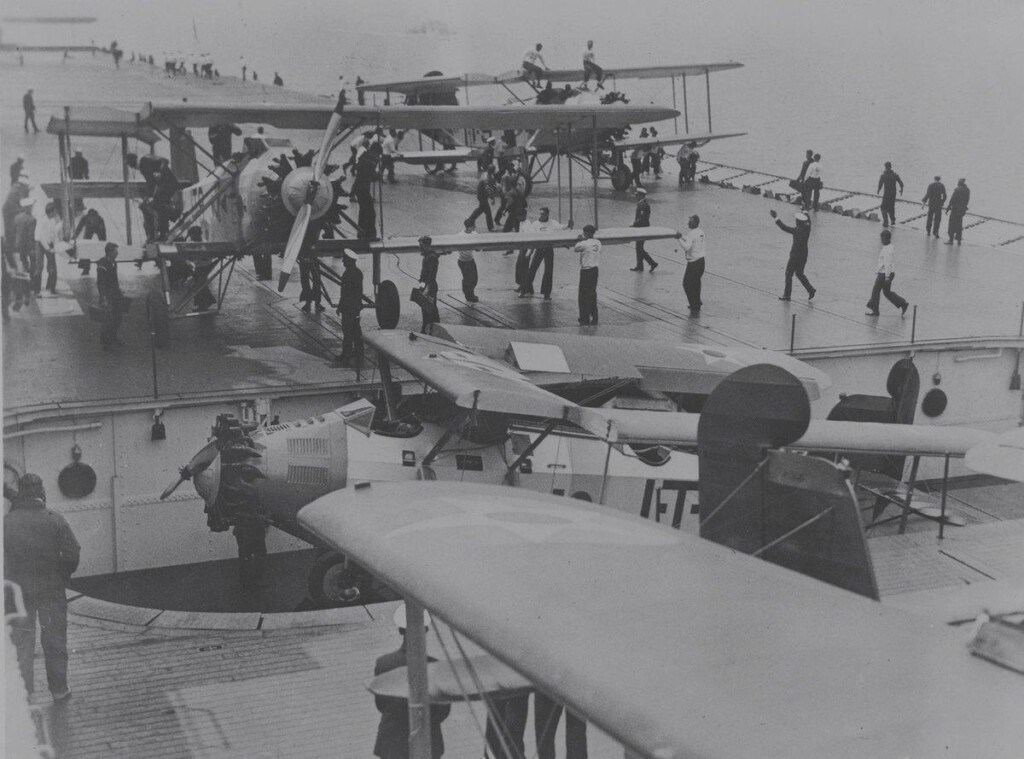
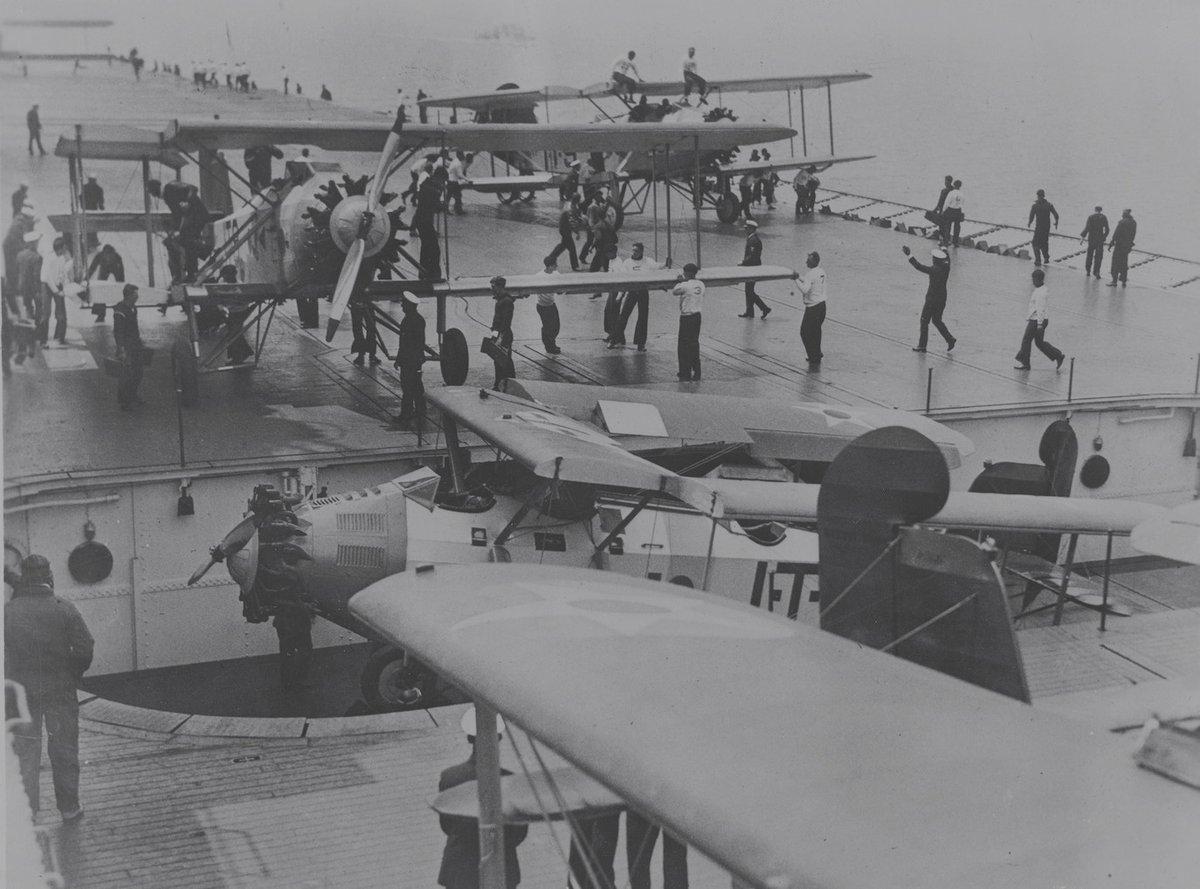
- 1. VT-1B aircraft getting ready for a mission. Visible are the red tails and tailplanes
-
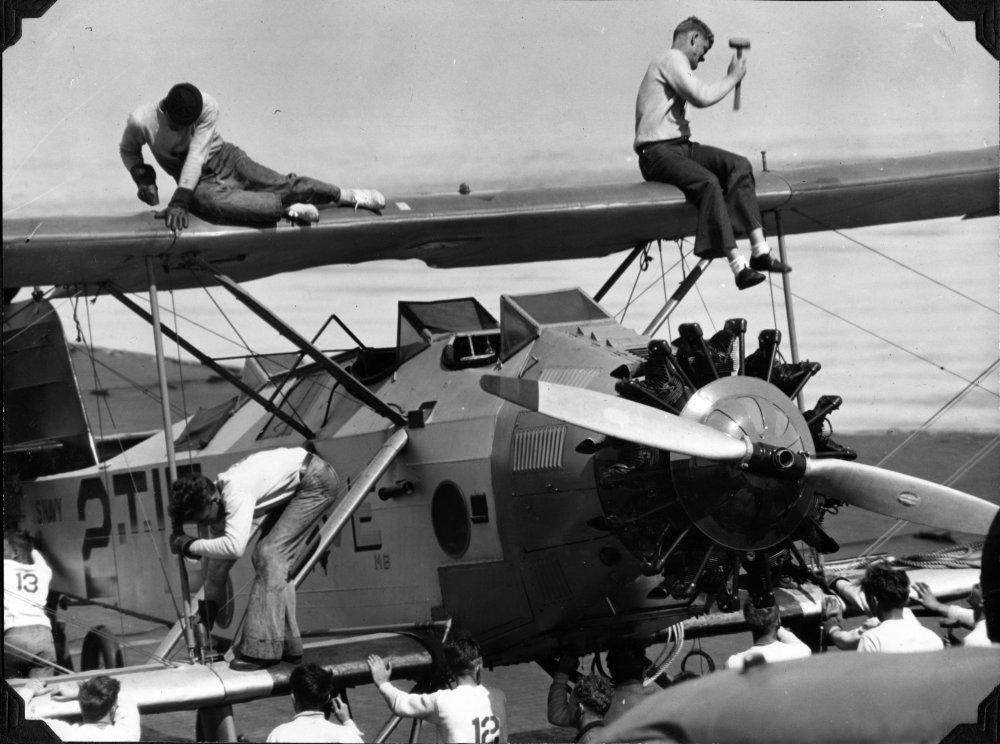
- 1. Locking the wings into position on a VT-2B T4M. The grey painted metal parts are clearly visible
To summarize the Plus Models T4M-1 is a first model and one shouldn't expect perfection but also one can expect a better effort than Plus models have actually put in. Minimal reliance on photos and short cuts have combined to create a disappointing effort which requires more correction than it should. The engineering options taken also indicate inexperience (the interior in particular) and a disregard of what the molding technology Plus Models use can actually do. One hopes Plus Models do continue to make aircraft as they started with an exciting option but one also hopes that their next kit is more carefully planned and researched.
Brengun are planning to release an etched brass detail set for this kit. A look at the set suggests that it contains a lot of useful items. In particular, the torpedo comes in for extra detailing and the fore and aft guide hooks (remember to add a tail skid in place of the tail wheel if using this option) are included. Seat belts are included but one should omit the shoulder harness as US Navy aircraft didn't come equipped with those until 1942. All in all a very useful addition.

Yet another superbly researched article, Christopher! Thanks for sharing all this valuable information!
Thanks for saving me the money, Christopher.
Absolutely valuable, Christopher @christopher
Thanks a lot for sharing.
Thanks for the kind comments everyone. I've just assembled the engine (which looks quite good) and added the oil sump (that came from an old Matchbox engine) and individual exhaust pipes for each cylinder.
Thanks, Christopher. I purchased one of these about a month ago and plan on building it soon.
Enjoy the build but watch out for the roundels.
Hi Christopher
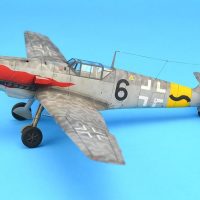
I've been given one of these to build for Airfix Model World. It's very interesting and helpful to read through your excellent research. Also, it would appear I'm not alone in thinking this kit is essentially poor. I've completed the prop and engine - looks okay but none of the parts fitted very well. I'm now working on the cockpit interior. The framework parts are so poorly moulded that it's proved easier to replace the lot with plastic rod. I don't want to tempt fate by suggesting that things can only get better...!
Hi Peter (@fearonntlworld-com)
Thanks for the kind comments. I also replaced the framework parts with plastic rod. Your engine looks like a good start. Other points to note - for the early period aircraft individual exhaust pipes (one per cylinder), later period aircraft combined exhaust pipes. I drilled out the propeller shaft as well but this is optional.
Christopher
Hi Christopher
Thanks for that.
I'll be starting work on the cockpit in the next day or two.
Can I ask your view about dihedral? The kit has slight dihedral on both the upper and lower wings, but the drawings I found show straight dihedral. What do you think? You've found a better range of sources than I have!
Best regards
Peter F
Peter F
Hi Peter
The kit's dihedral is extremely slight and matches the photos pretty well. My example only has the slight dihedral on the lower wing, the upper wing is straight. The Paul Matt drawings do indeed show no dihedral on the lower wing but it was frequent practice on biplanes for only the lower wing to exhibit a dihedral. I followed the photos.
All the best
Christopher
Thanks Christopher
Very helpful - I think I'll leave things as they are.
I've just about finished the cockpit interior. Not too bad, despite the poorly moulded parts.
Best regards
Peter F
My pleasure, one thing I did do was to replace the windscreens with scratch built items and also the front instrument panel. I was able to find a photo which showed the correct layout for this.
All the best
Christopher
Hello Christopher
A bit more advice required.
I've assembled the fuselage halves, attached the lower wings and am in the process of a considerable amount of filling and sanding necessary to eliminate the poor alignment of said pieces. Looking at photos, there seems to be some sort of external spine on top of the fuselage between the second and third cockpits. I just can't get a really good photo view to confirm it - I may even be imagining things! There's nothing represented on the kit parts. What do you think? Does anything need adding?
Best regards
Peter F
Hi Peter (@fearonntlworld-com)
Sorry for the delay in responding. Sanding and filling is a must for this kit. The spine you mention is in fact two rails - one either side which the kit does totally miss. I represented these with 0.3 mm square strip. Here's a photo of 2-T-5 which shows them clearly.
All the best
Christopher
1 attached image. Click to enlarge.
Hi Christopher
That's the perfect picture, thank you.
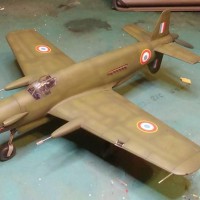
There must be some interesting back story as to how a carrier based aircraft ended up in a rough field. Despite the terrain, it doesn't appear to have any obvious damage. Wonder how it got there?
Best regards
Peter F
Hi Peter
It looks like a forced landing after an engine failure. The location is East Boston Airport in May 1930 and it's a Leslie Jones photo. I rather suspect the engine failed on approach.
When the carrier was in port - the air group would operate from a land base. Quite a few photos of T-4Ms show them on terra firma.
All the best
Christopher
Hi Christopher
Fantastic research!
As far as the model goes, I've just about finished filling and sanding the fuselage. I'm doing a bit to improve the top wing - I've sanded off that awful overscale fuel pipe (one or two of your photos help with the size and nature of the replacement). I'm just about to scribe the wing-fold lines. Amazing that the kit could miss these. I've found some lovely replacement Lewis guns, 3D printed by a company called ScaleFiend here in the UK. They do a pack of five for the equivalent of $5.
Best regards
Peter F
1 attached image. Click to enlarge.
Hi Peter
Those do look very nice! I omitted the guns as they weren't often carried. I did do the torpedo though - that needs a lot of work. The fuel venting pipe I actually left. I wasn't surprised they managed to miss the wing fold lines - if you look at the fuselage there are missing footsteps and ribbing.
All the best
Christopher
Hi Christopher
I've been making some progress over the last few weeks.
I've included a photo for your info.
Hard work isn't it? Thanks again for the help you've provided. I hope to have it finished in the next week or so.
Best regards
Peter F
1 attached image. Click to enlarge.
Hi Peter (@fearonntlworld-com)
It is indeed hard work but you certainly are mastering the model. That's a nice colour scheme. One thing you might want to add are the black stripes that ran along the leading edge of the lower wing from strut to strut (see attached). This is something Plus Models also missed.
1 attached image. Click to enlarge.
Hi Christopher
Thanks again. The message about the black stripes is very timely, I was going to attach the top wing in the next day or two and it's obviously easier to add them before then.
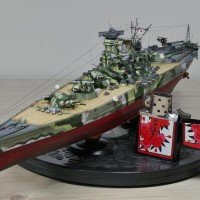
Your model looks a beauty - what's the scheme?
Best regards
Peter F
Hi Peter
Thanks very much - it's aircraft 1 of VT-1B flying off Lexington in 1928.
All the best
Christopher
Finished at last!
Way off perfect I know, but was under some time pressure to get it finished. Despite the (many) issues with the kit, I rather enjoyed the project.
Your help was invaluable - many thanks again.
A final request - do you know of a Public Domain shot of the real aircraft? It would be nice to include one in the article if I could.
Best regards
Peter F
My pleasure. Way off perfect describes any result with this kit. By Public Domain photo I assume that you mean 5-T-2? I know of one photo but that is an ebay photo(which incidentally shows a Plus Models booboo with the colour scheme - the T is black). The US Naval Heritage Website might have something else though.
Any photo of the T4M would, it doesn't have to be the actual subject aircraft. Just as a long as I can use it without copywrite issues!
This one is always a good one to use (it shows bird poo as well) - it's also copyright free, from the US Naval Heritage Website.
1 attached image. Click to enlarge.