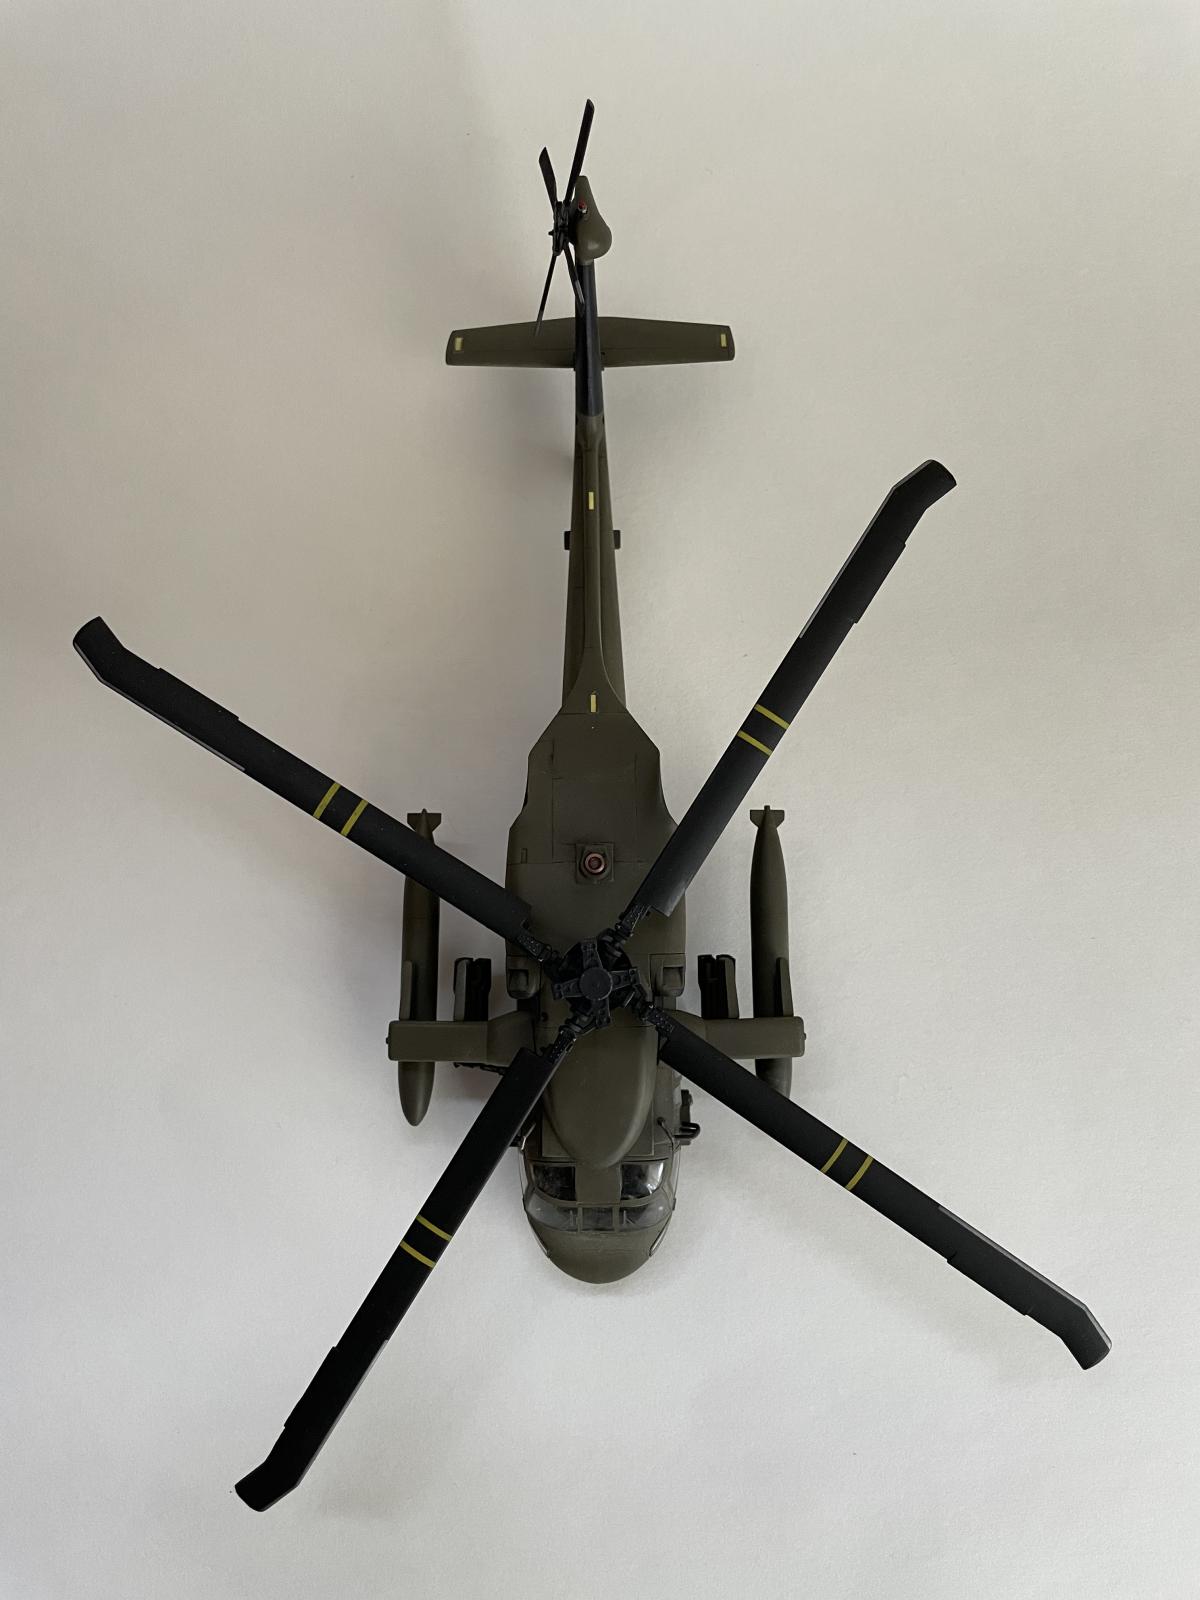
1/72 Hasegawa UH-60A Black Hawk
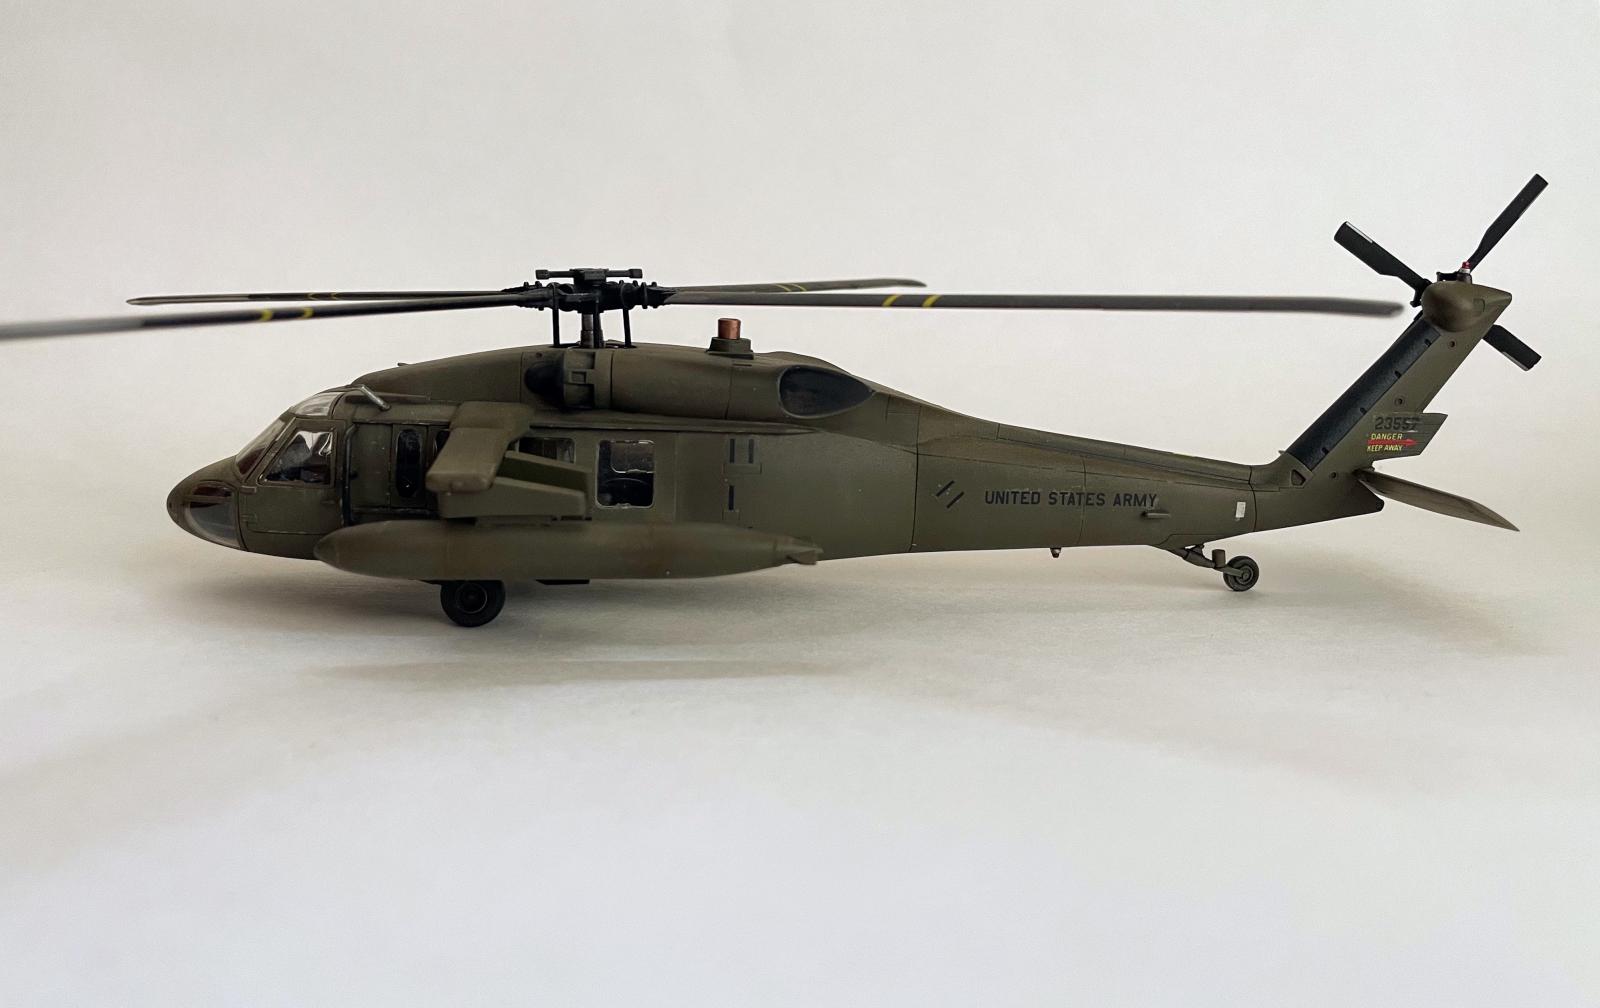
The Sikorsky UH-60 Black Hawk is a four-blade, twin-engine utility helicopter originally developed for the US Army in the mid-70's. It serves primarily as a troop carrier (fitting 11 combat-ready soldiers) and logistic support aircraft. Though ostensibly a utility chopper, the Black Hawk can lay down some smack: it can carry up to 16 Hellfire or Stinger missiles, with 0.5 cal machine guns mounted inside the windows.
The UH-60's first major deployment was the Gulf War in 1991, but it has since seen action in almost every theater. Highly modified Black Hawks were used by US Special Forces during the Bin Laden raid in 2011.
The Black Hawk is a dependable and capable aircraft, with advanced avionics and countermeasures. It has been exported to dozens of foreign militaries, is the protagonist in its own Hollywood film, and can apparently even be purchased by regular folks like you and me (google “UH-60 Black Hawk for sale”), sans the Hellfires of course.
The Kit
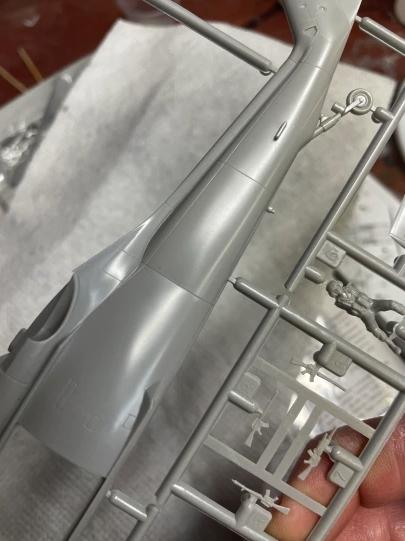
Yeah, I know. Helicopters aren't sexy. Especially not 1/72-scale helicopters. It isn't easy to find 1/72 helicopters with good detail, which is unfortunate and also a little odd (can't just be the diminutive size, since there are plenty of tiny WWII aircraft offerings with exquisite rivet detail, for instance). Even popular choppers like the Blackhawk aren't done justice by the major manufacturers. When researching which UH-60 kit to build, it seemed to come down to Hasegawa and Italeri: the latter had raised panel lines but superior interior detail. Neither seemed to have much exterior detail. Since I really like engraved panel lines and other details, and since I wasn't planning on opening the side doors, I went with Hasegawa.
Here is the level of detail on the exterior:
and the interior seating:

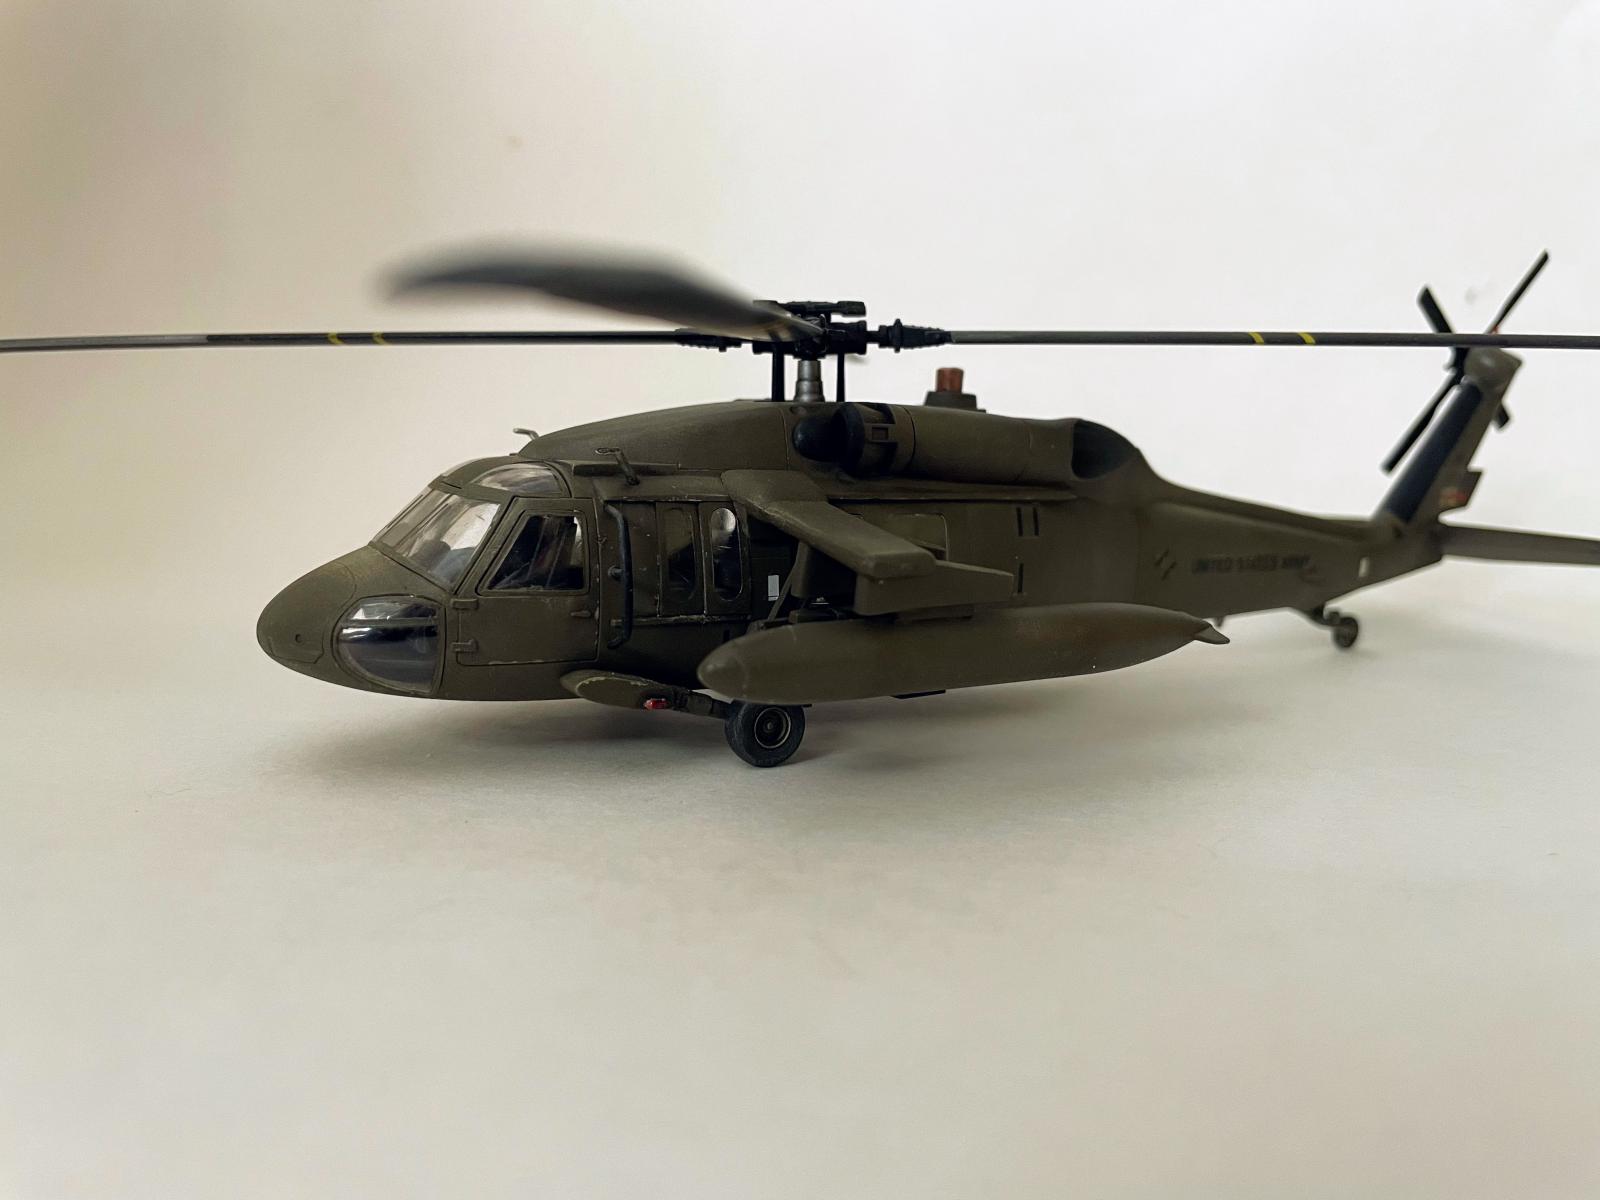
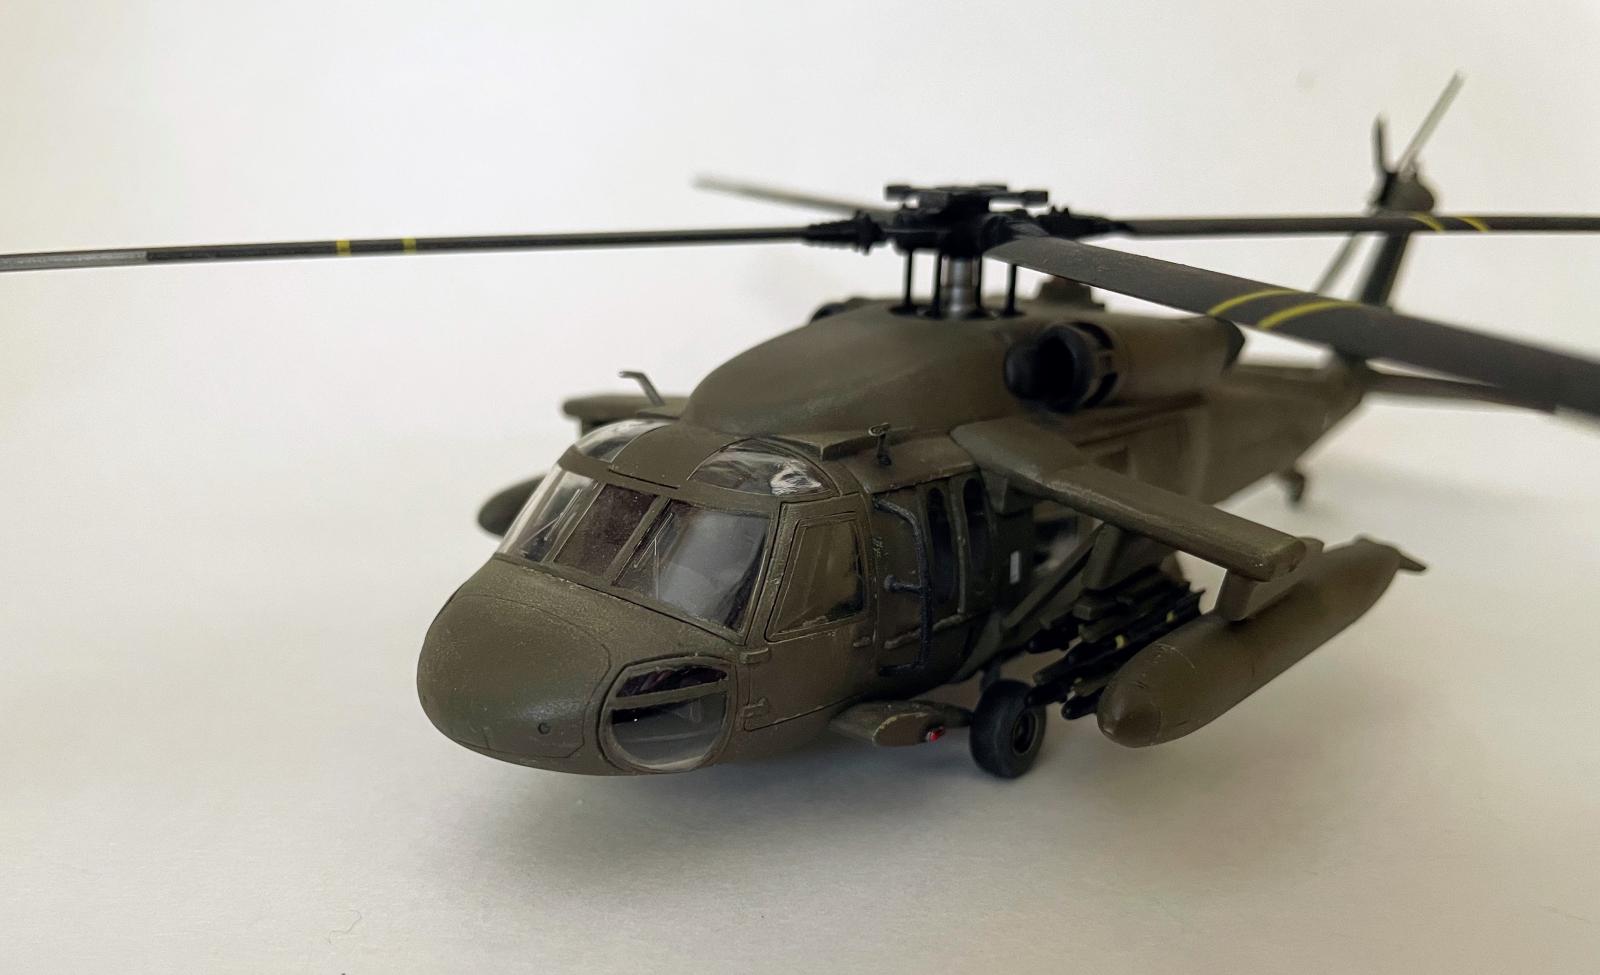
Oddly the drop tanks have raised details, and one rather serious nit is that the exhausts are closed. The kit comes with 8 Hellfire missiles and several 0.5 caliber guns that can be positioned at the windows which can be completed in open or closed positions; the pilot's door can also be opened, as can both sliding doors.
All in all, it's an OK kit. But, I really like the UH-60 and it was enjoyable to watch this thing take shape into a little Black Hawk, so that makes it a good kit, I guess.
The exterior is painted in Mr. Color 12 Olive Drab (1). I deviated from the color instructions a bit because there were inaccuracies: hellfires are black (not olive), the rotor assembly is metallic (not olive), the tail rotor is black (not olive).
The window gun is painted in Mr. Color 104 Gun Chrome followed by black Tamiya panel liner.
I didn't include the figures because 1) they are awful and 2) this just isn't my thing. I have never seen a figure done nearly as realistically as the accompanying vehicle, even by superbly talented modelers, and so they always detract from the presentation.
Thankfully all the clear pieces can be applied from the outside, so that they go on at the very end after the body is complete and don't need elaborate masking.
I made some rookie mistakes, including applying Mr. Color without thinning first to the clear parts, which resulted in some gnarly brush strokes that had to be sanded down (Mr. Color is thick as molasses btw). A very nice thing about the oval-shaped sliding windows is that the border is slightly raised, allowing the paint to settle up against it, giving a sharp edge.
The decals were thin, and there was very little time to work with them once Solvaset was applied. For decals with lots of carrier film, I'm in the habit of applying Solvaset first (instead of a setter) so that the solvent gets in between the decal and the surface, obliterating any chance of silvering, and this generally works very well. Of course, then you're racing against the clock especially with thin and delicate decals. For example, the decals on the Hellfires took some getting the hang of to place and set properly.
For weathering, I first applied AK's Brown and Green Camouflage panel liner followed by Mig Oilbrushers Buff, applied to some of the larger flat areas to create a sun-drenched, dusty streaking effect. I then applied some Mig Oilbrushers Medium Soil to various nooks and crannies where dust and dirt might build up. I finely applied some Tamiya X-57 Buff along window and door edges to simulate some paint chipping and scuffing.
After the gloss coat, the fading effect was considerably diminished, so I re-applied it. I also worked some Mig Oilbrushers Starship Bay Sludge and Abteilung Burnt Umber into and around a few panel lines to increase contrast. Lastly, I gave the Hellfire missiles a light gray oil wash to soften up the black tone. After the final dull coat, I brushed some Tamiya Weathering Master pigments (sand and light sand) in certain areas to give the model some texture.
I might have overdone the weathering: I have found that it helps to work with oils for a short time only, then walk away. When you come back later, you see the model through new eyes: what might have looked good an hour ago now looks messy and overdone. I wanted this thing to look dusty and tired, but maybe it's too dusty and too tired.
I had some surprises with how the varnishes affected the oils: as I said above, the first gloss coat killed the lighter effects and seemed to amplify the darker ones. Perhaps it's best to apply oils as late in the game as possible so that you capture the precise look you're after.


This is a beautiful model, Brian! Helicopters are not easy, let alone the 1/72 ones, but you did a really great job.
Thanks for your build and painting details, your article is equally great!
Thanks Spiros! Yeah, helicopters offer unique challenges. It's fun to throw one in the mix every now and again.
You did an outstanding job, Brian @bapowellphys
As said, a helicopter in 1/72 is even more challenging but you clearly mastered it.
Beautiful paintwork.
You did nice work on this!
I too have found that certain types of weathering disappear under clear coats, especially lighter shade pigments or pencils and oils on darker finishes. When I use chalk powders or pencils (like AK weathering pencils), I only use darker colors against a lighter paint color and never vice versa. With oils, it is a challenge. Some filtering to modify shades of panels will hold up ok. Other dot filtering and more subtle techniques can disappear - again especially light oils against dark paint tones. I will often clear coat after all dry pigments are done, and then finish with oils if I plan to use them, without further clear coat. The oils dry in a way that adds a nice patina anyway, so for me (in 1/72) that strategy works most of the time!
Thanks Greg. Good to know you've had similar experiences and it's not just me!
Great looking Blackhawk! Helo kits can be a challenge {to me}. as was working on the real thing, the prop stops, and you drop.
Nice chopper and detail. Thanks for sharing the build process .
It looks great, Brian, definitely well weathered. You obviously enjoyed this build and it shows.
Nicely done Brian.