Tamiya G4M1 ‘Betty’ & A6M3 ‘Hamp’ 1/48, Operation Vengeance Collection
This article is part of a series:
-
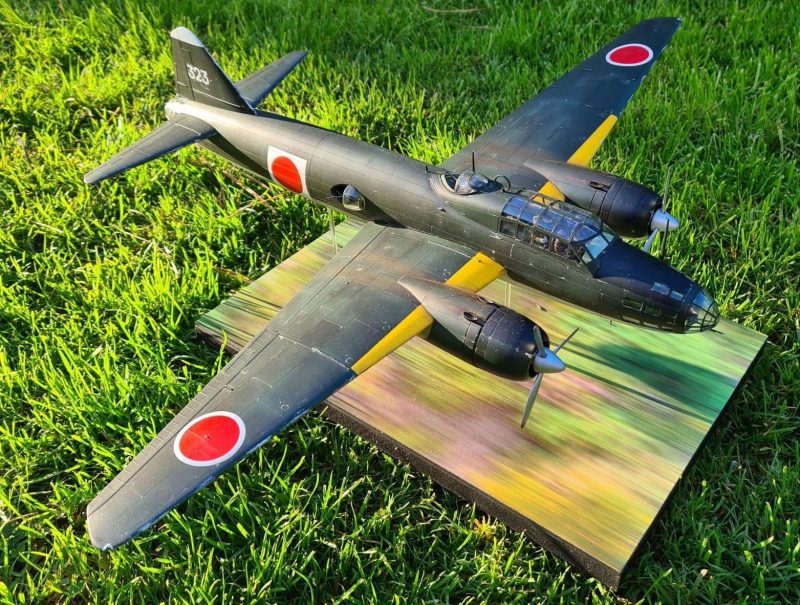
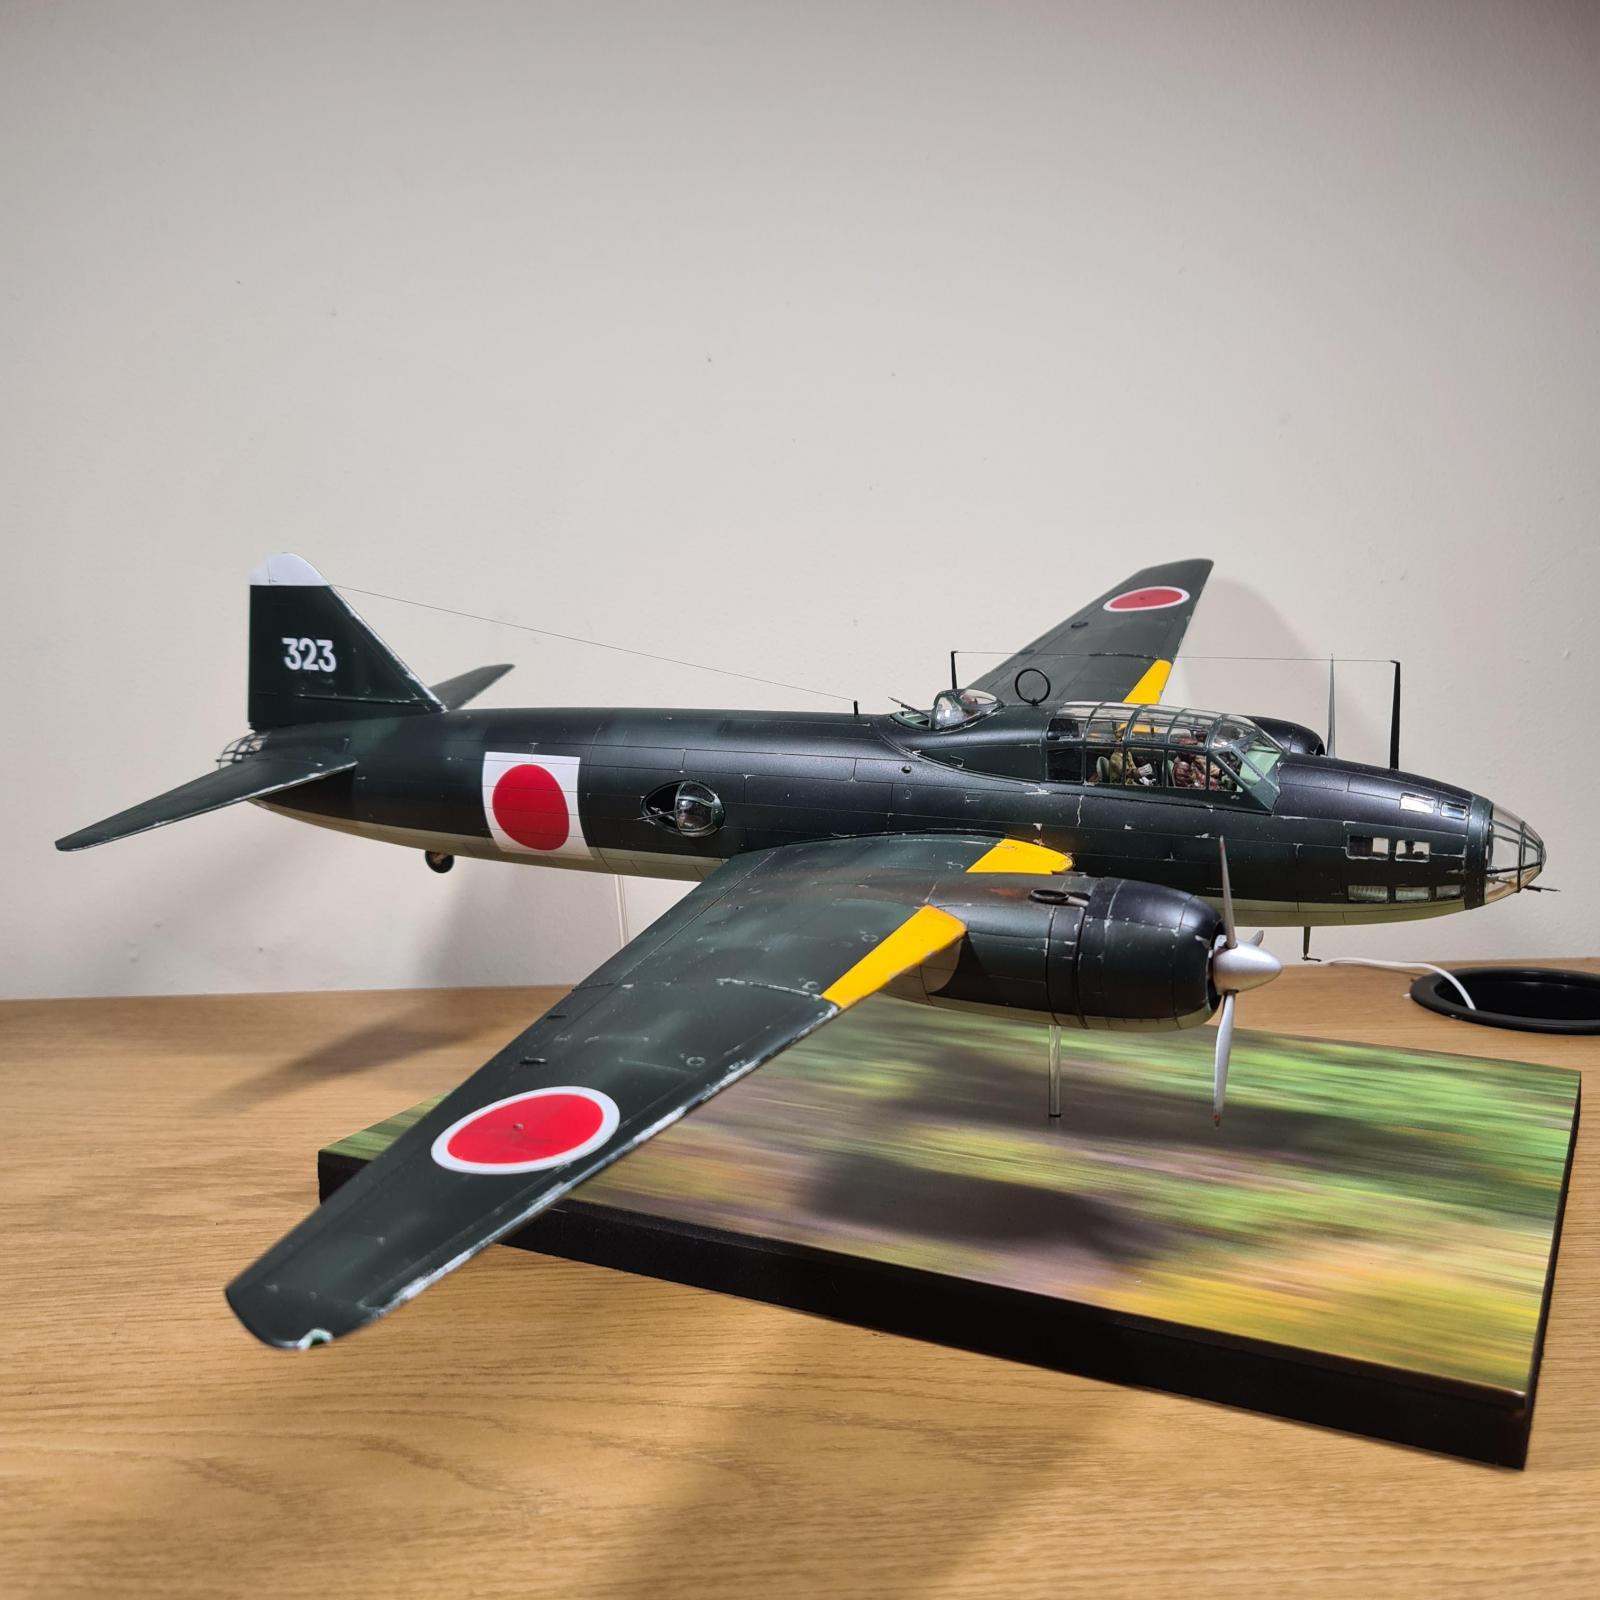
- 1. The G4M1 is so big, that the best place to take photos is outside!

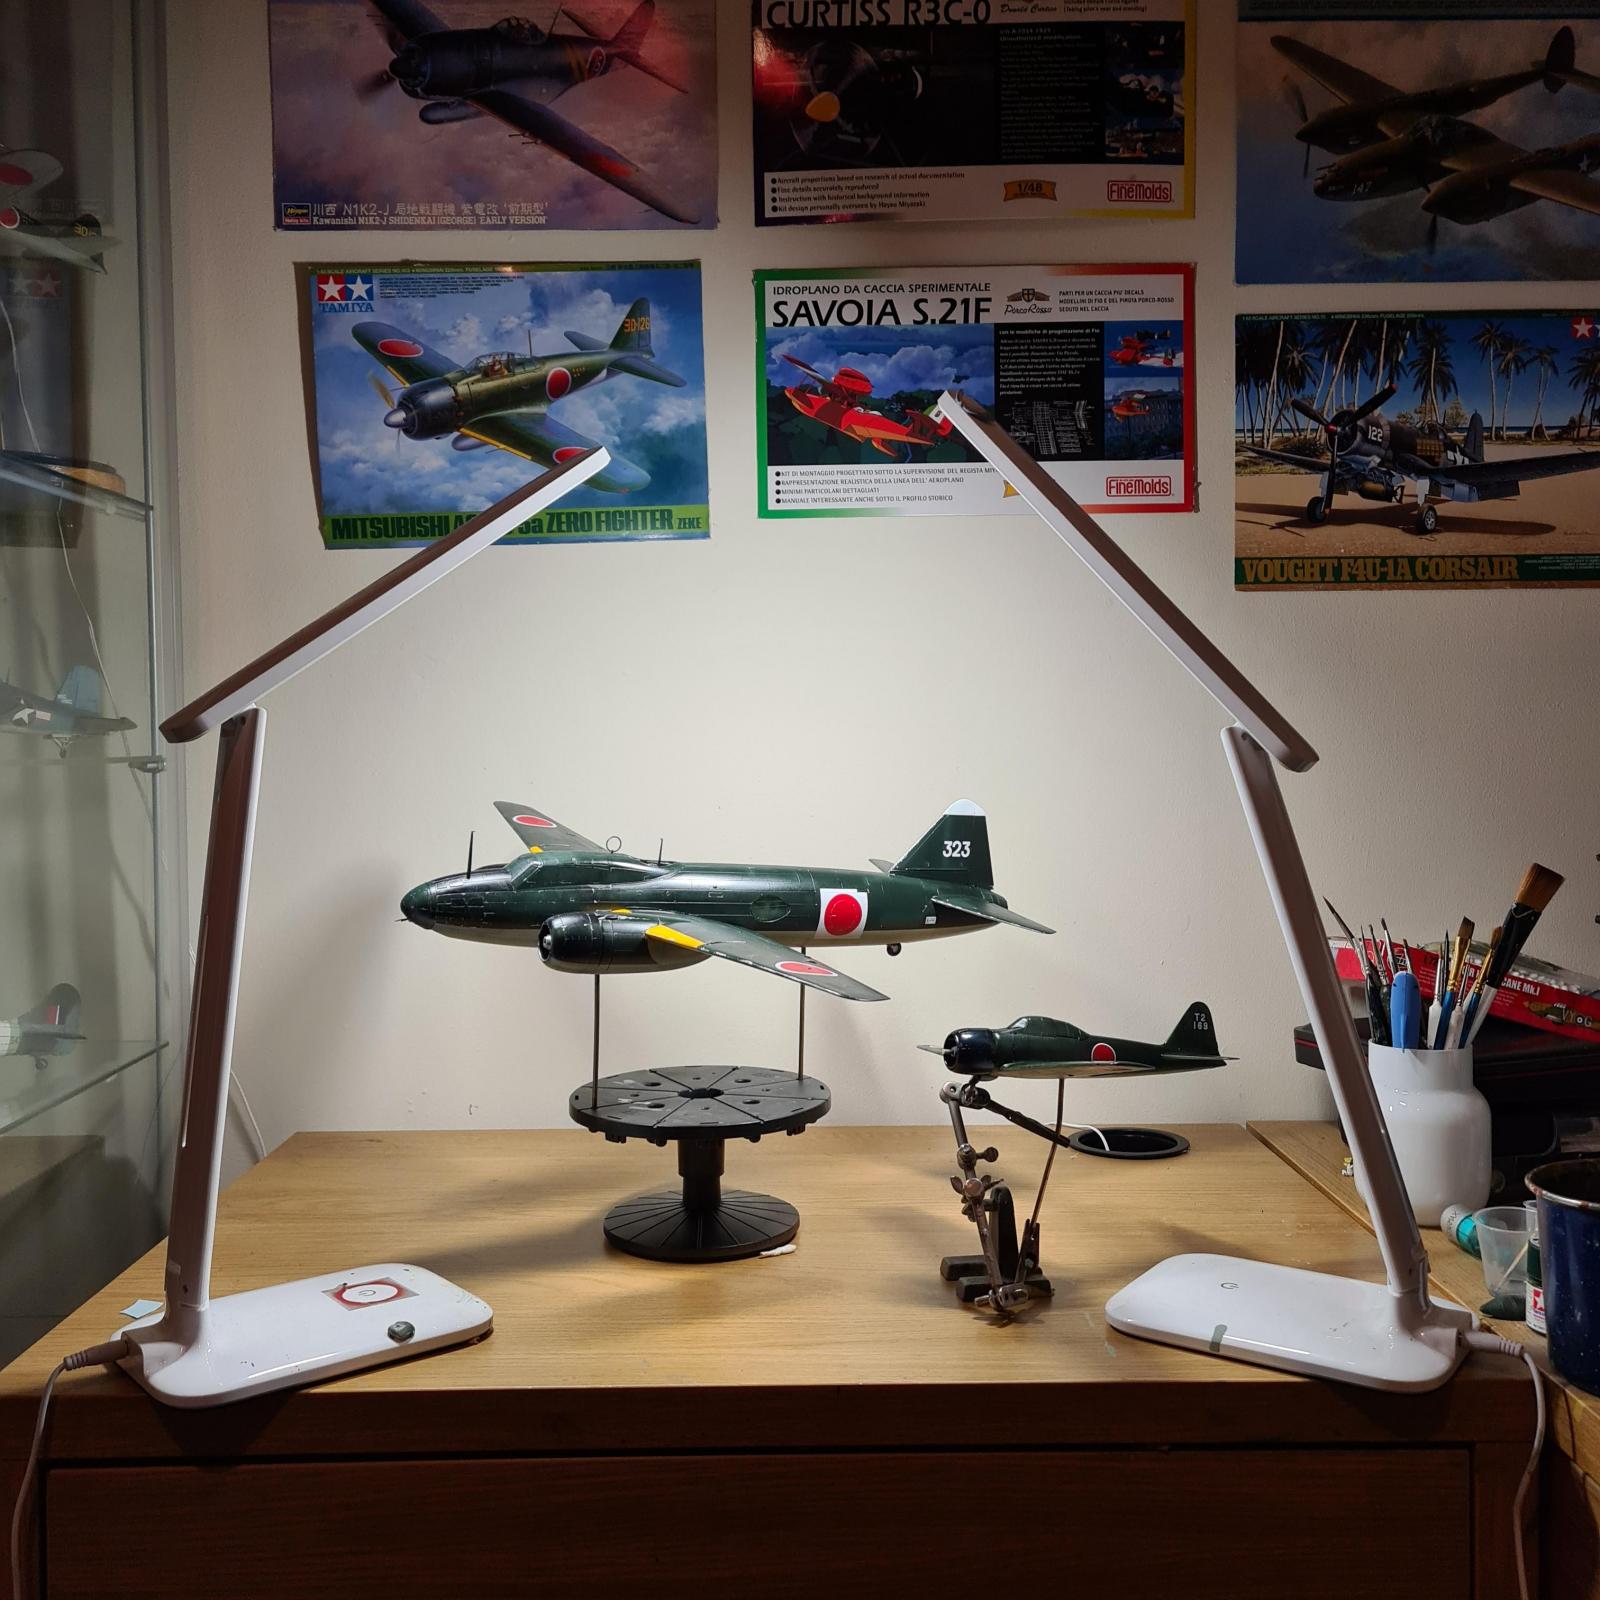
I like to think I know a fair bit about WW2 aviation, but I didn't expect how massive the G4M1 was until the box arrived in the post. At a wingspan of 41.6cm, and a fuselage length of 51.8cm, this model dwarfs anything else I've made and doesn't even fit in the cabinet! This Betty is the perfect example of why I love building in one particular scale and that's so I can see the size comparisons between aircraft, seeing that something has a 20m length in a book is interesting but I didn't quite realise just how big that was until I got the kit. For comparison, the G4M1 is actually slightly longer than a B-24 and about a metre shorter than a Lancaster.
I built this as part of an operation Vengeance trio consisting of Yamamoto's G4M1 '343', Kenji Yanagiya's A6M3 (more on that below as I don't feel its worth making a seperate post as it was a quick side project), and of course 'Miss Virginia' which was the P-38 that shot down Yamamoto.
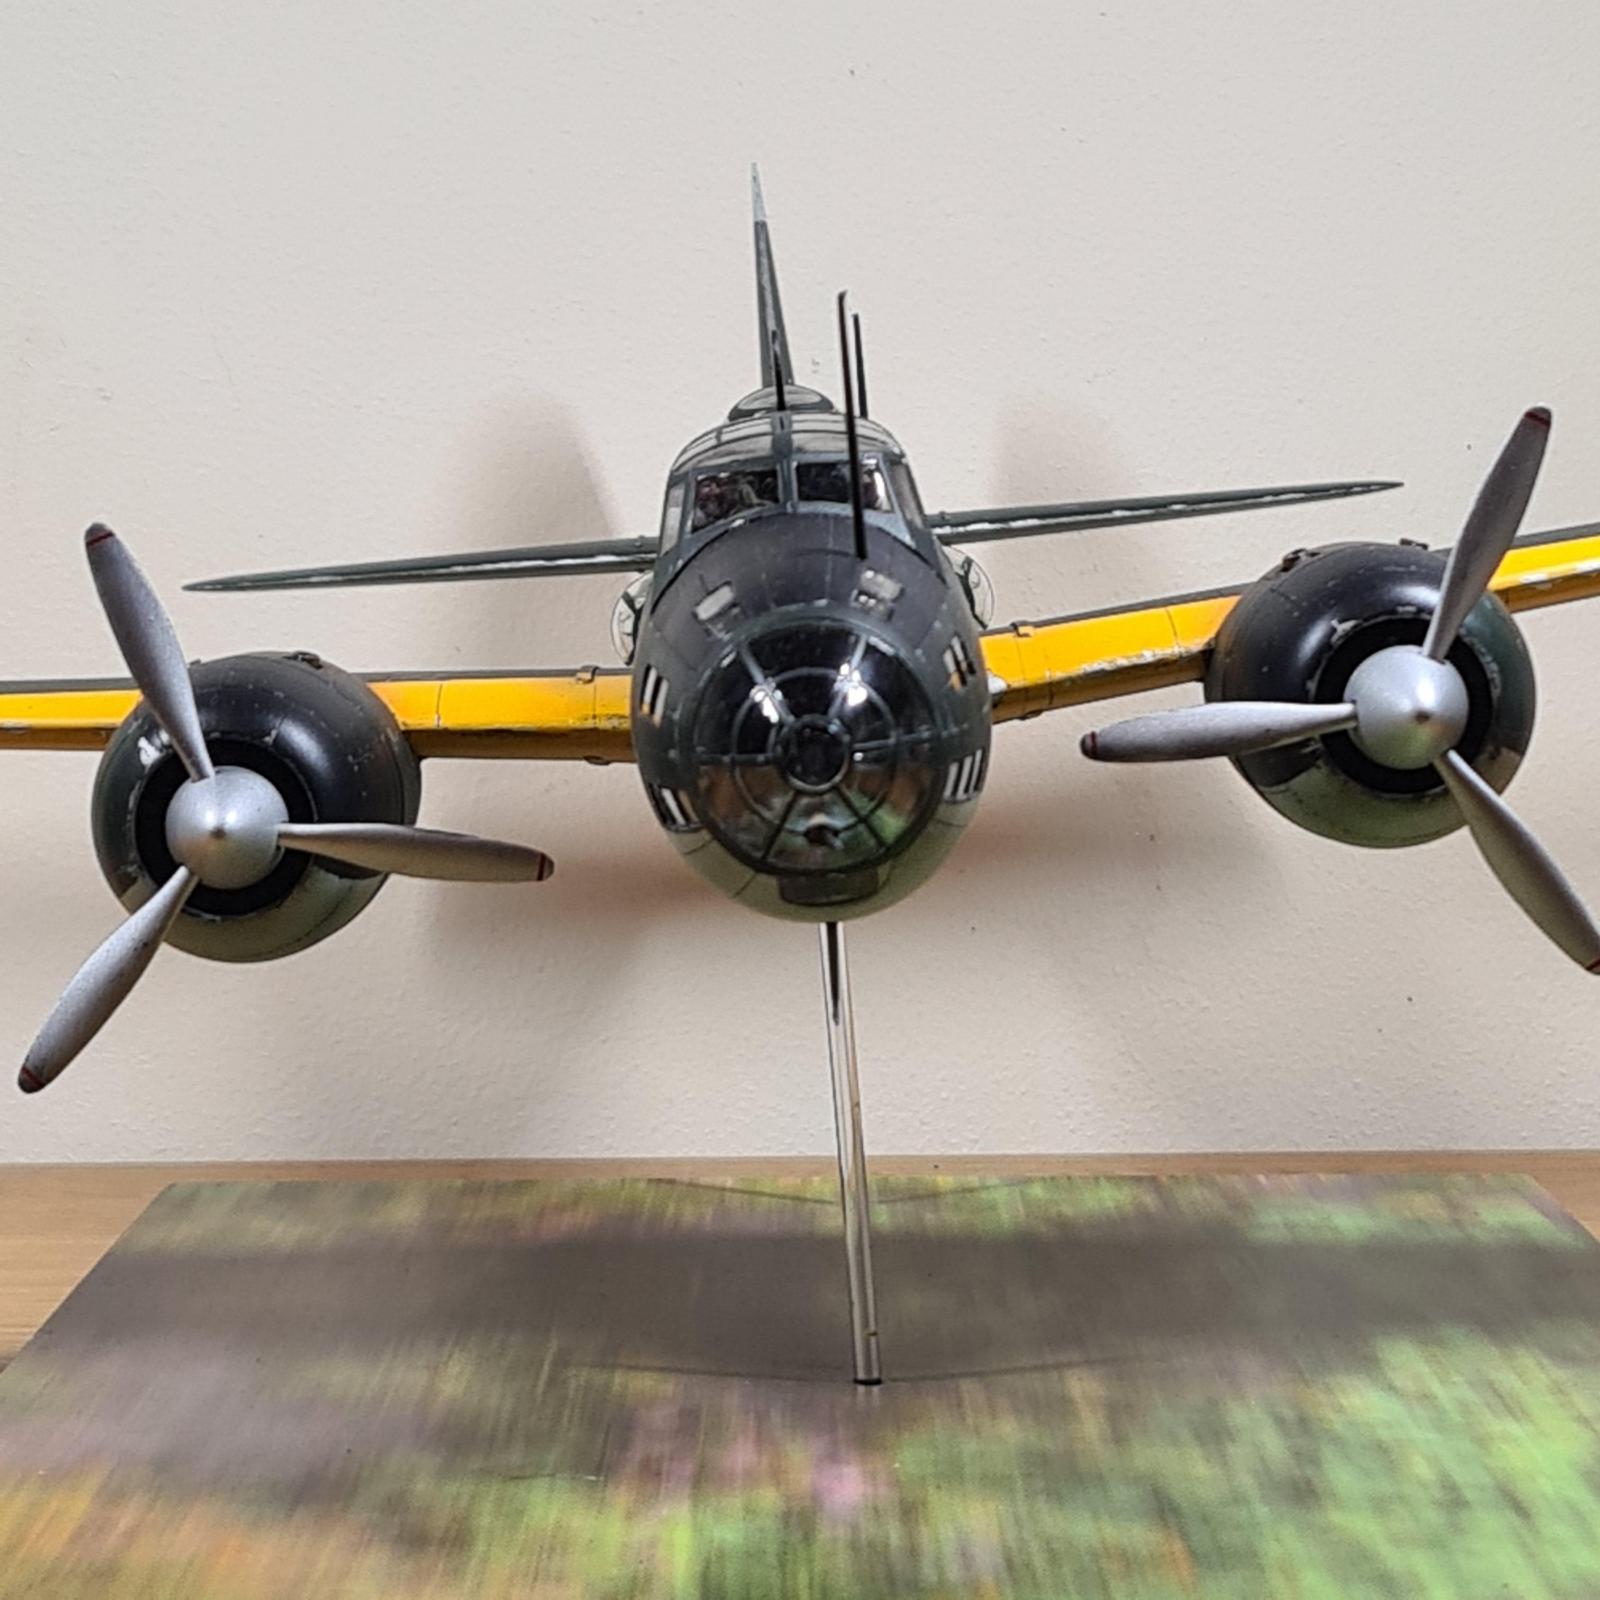
The kit was pretty simple, it's a mould from 1996 reboxed in 2011 for this Yamamoto version. The kit also came with 17 (!) figures, which were 4 crewmen (the real thing had a crew of 7), 1 Mr Yamamoto, and 12 awful 1970s moulding ground crew with faces with worse detail than green army men, needless to say those 12 figures didn't get painted. Details of the kit are also worth noting, the exterior detail of the panel work is pretty good if a little too deep, and interior detail of the cockpit seems decent. However there is no sidewall detail and the dorsal gunners section is completely empty with the guns and blisters in the closed position, furthermore the kit only comes with 2 open gun positions (rear and dorsal), with only the rear gunner having a figure to mount the cannon.
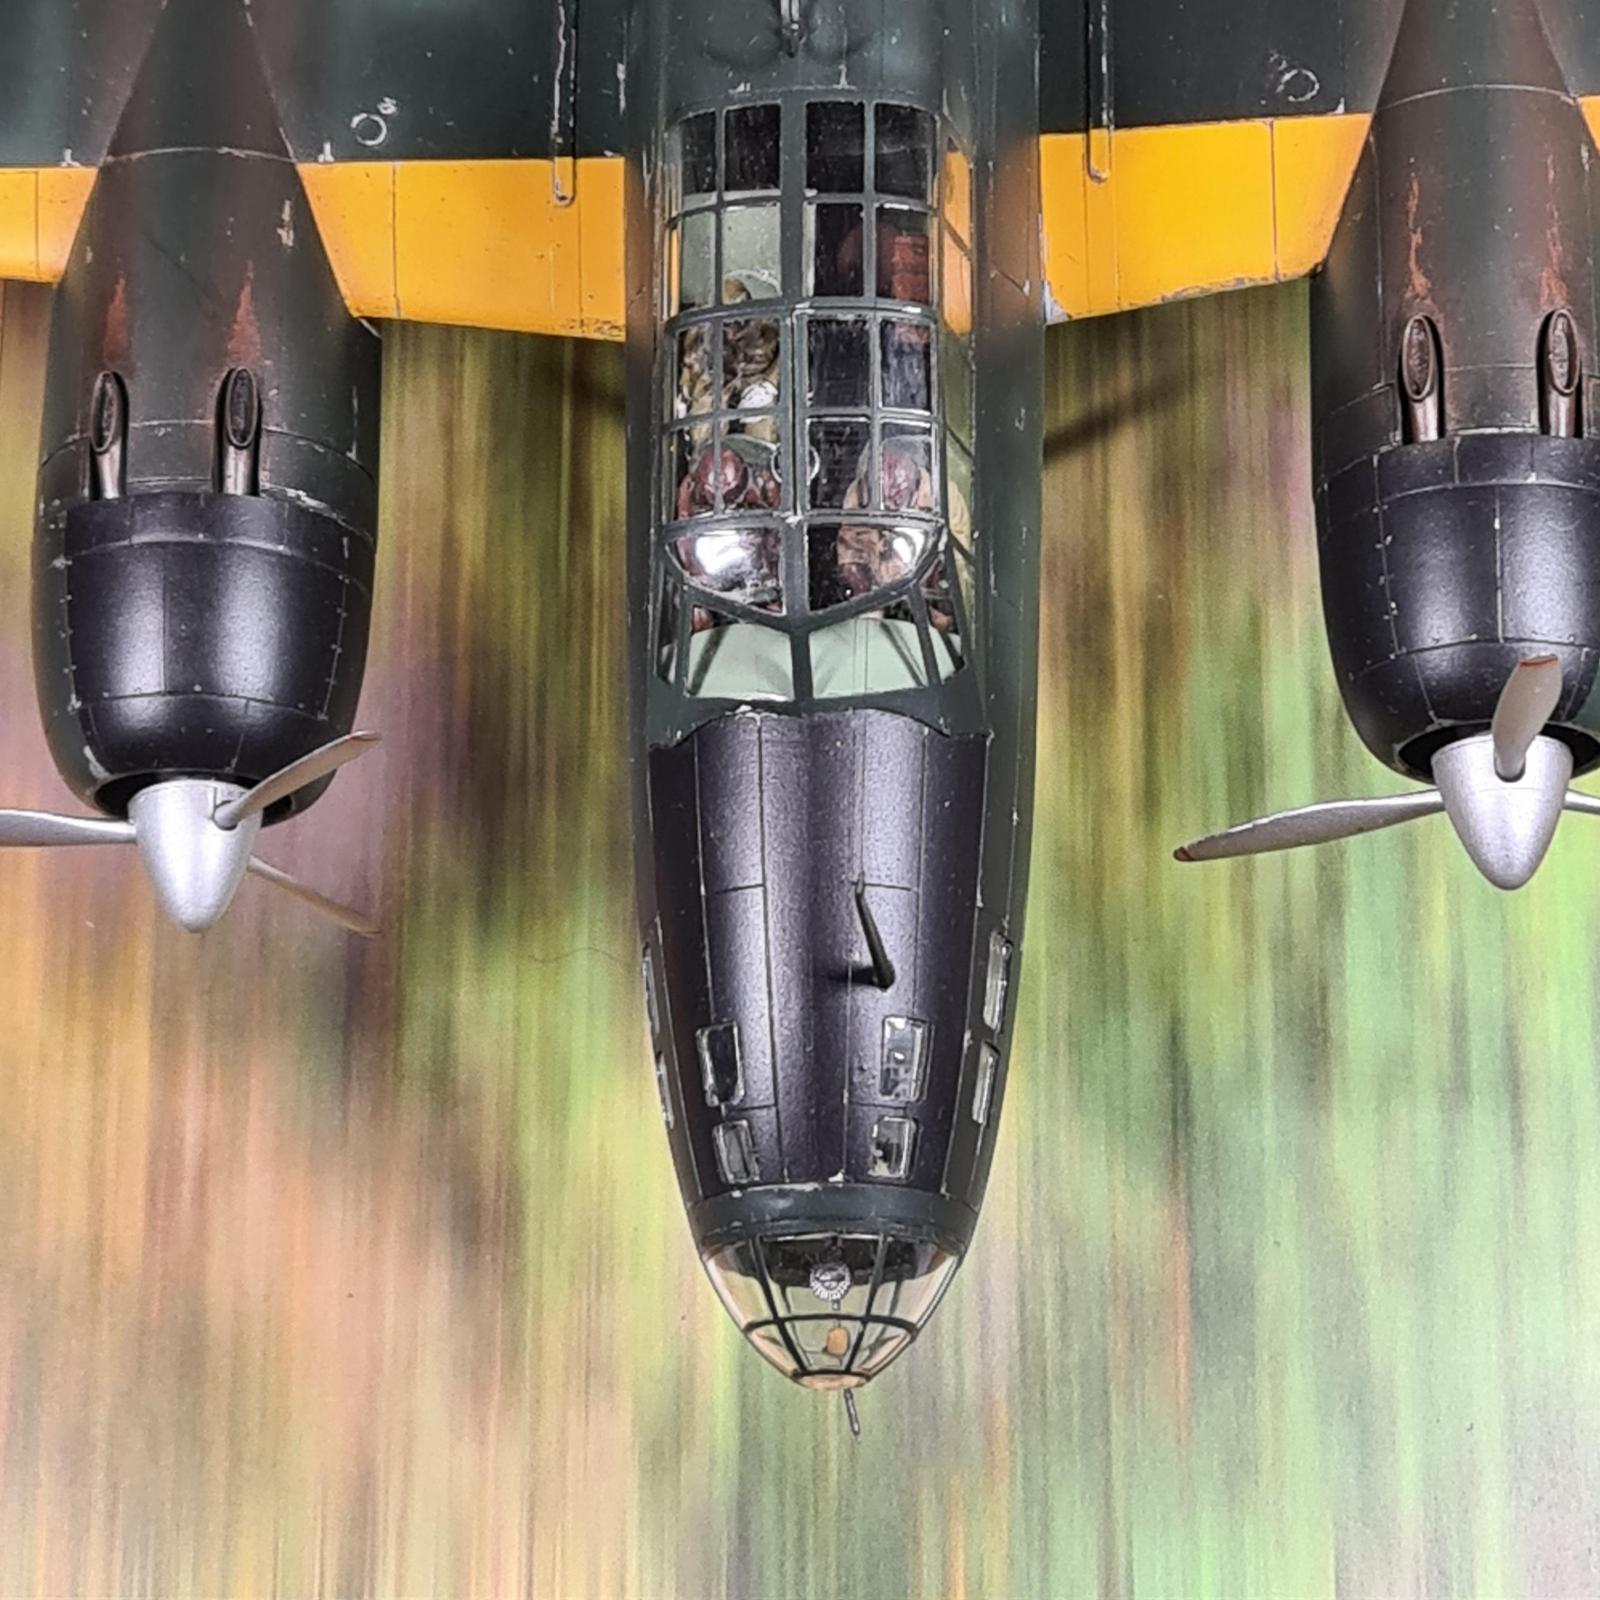
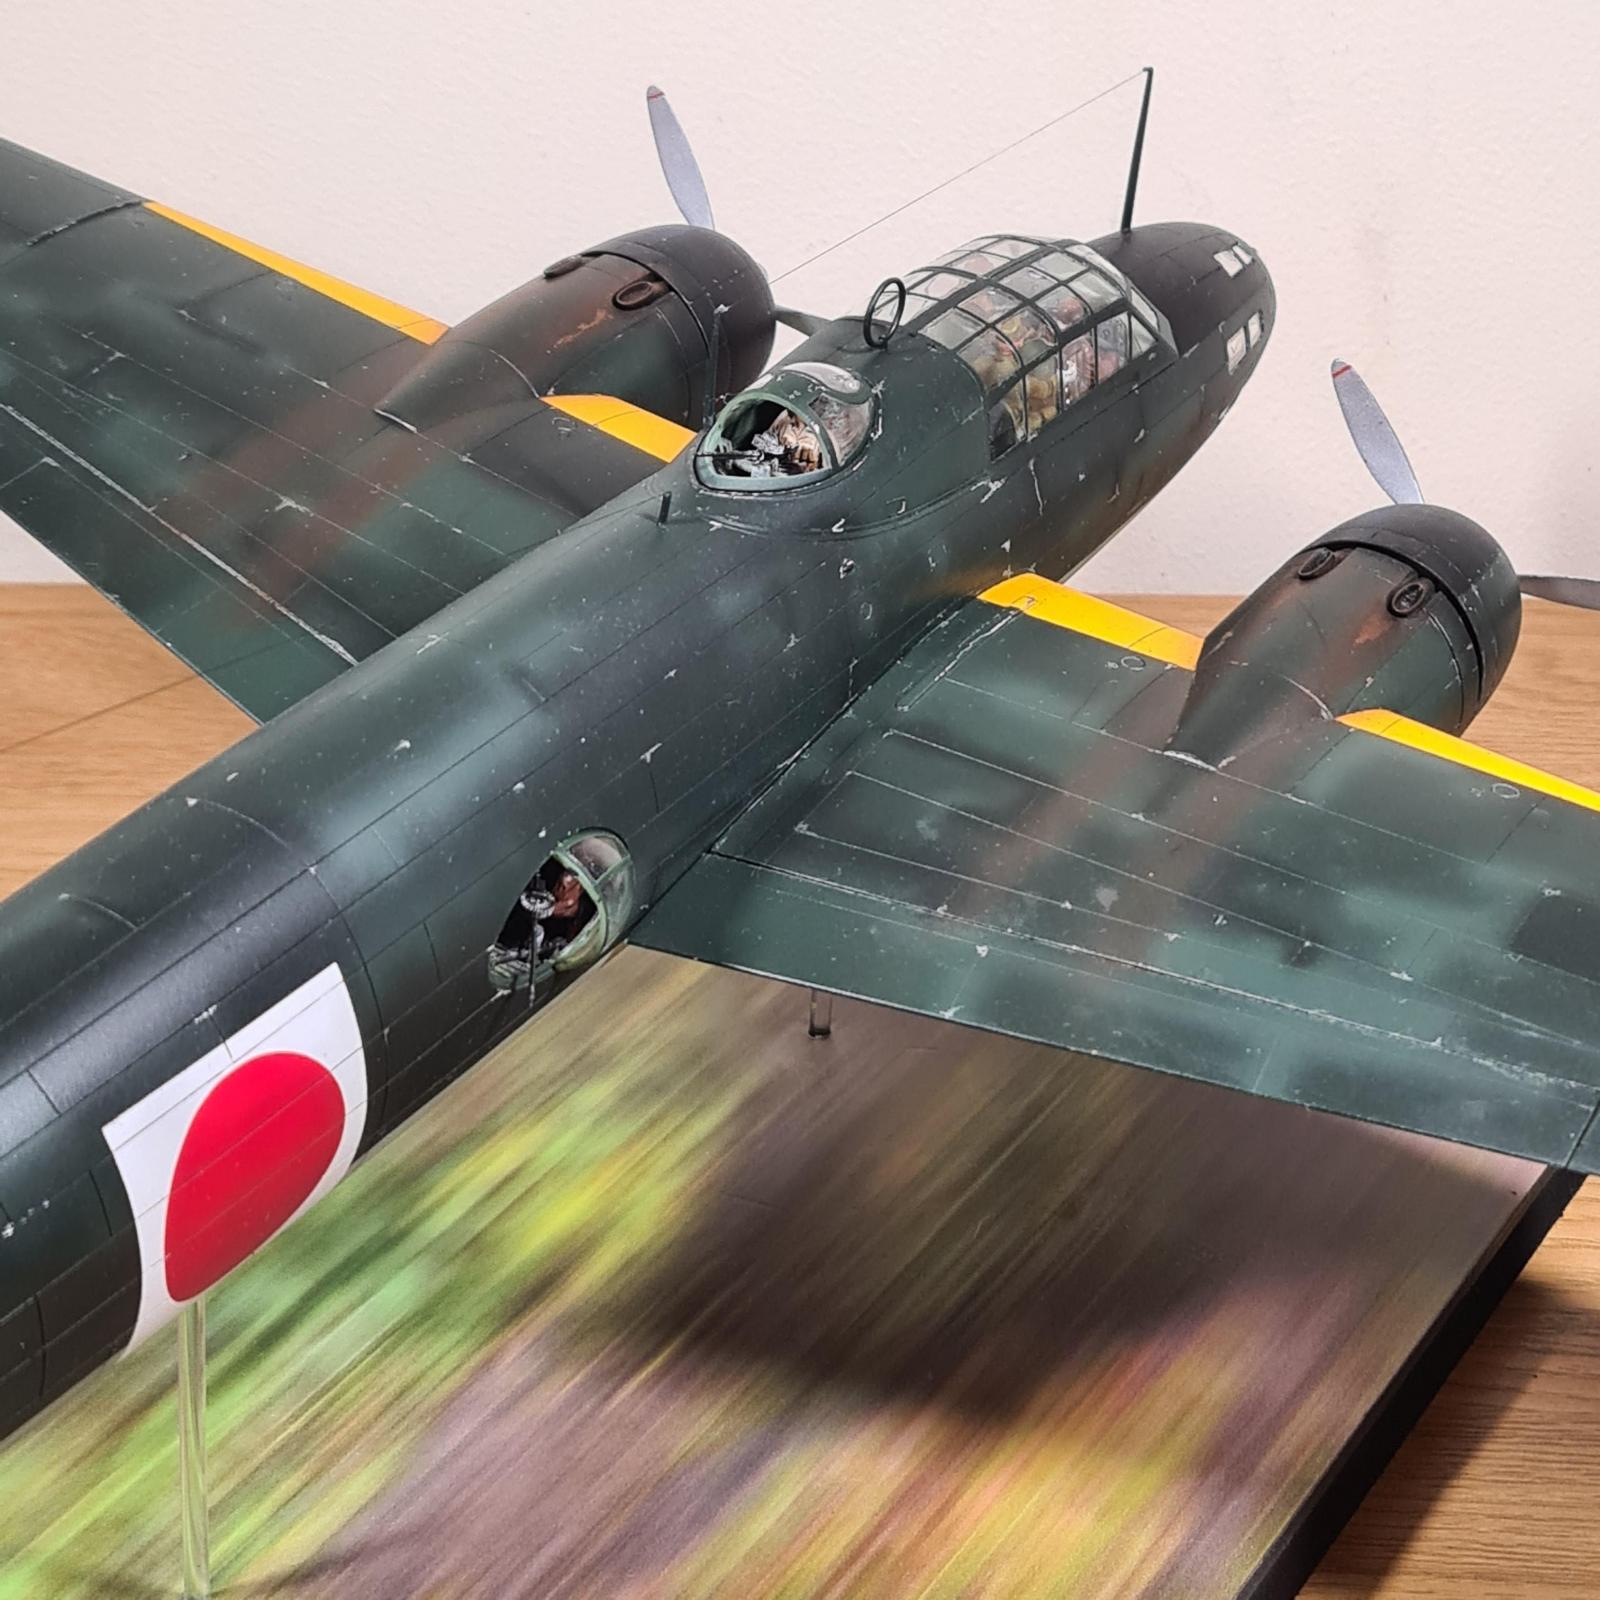
A few simple modifications were made with the blister windows being cut so they're open, and the awful Type 97 machine guns being replaced with Vickers K resin replacements (basically the same gun, just actually available in resin). Emphasis must be placed here on how the default guns are literally the same size as a gun found on a space-marine, interestingly the Type 99 cannon in the rear is relatively well moulded in terms of size. I didn't have enough spare Japanese pilots, but I had a few. The G4M1 used Yamamoto and two pilots as come with the kit, the standing observer got recruited to be the dorsal gunner, the rear gunner was placed as intended, and some random sitting pilot was put in one of the side positions. If I was to do this again I'd spend more time modifying the interior but to be quite honest I had such a huge trouble finding any interior information on the 'Betty' that I didn't bother aside from adding a few drum magazines here and there. Considering the real '323' was shot down with 11 passengers, 7 of which being crewmembers, I have no idea if this plane had an extra seat or two installed or not. Likely due to some mistake I made when building the internals the fit between the two halves was very difficult and too a decent amount of filler, but I definitely put this down to be misplacing something rather than Tamiya. Other than this the fit was perfect as expected. The wheels were modified to be up the it was a simple modification inwhich I used plasti-card to create a sort of shelf to put the doors on.
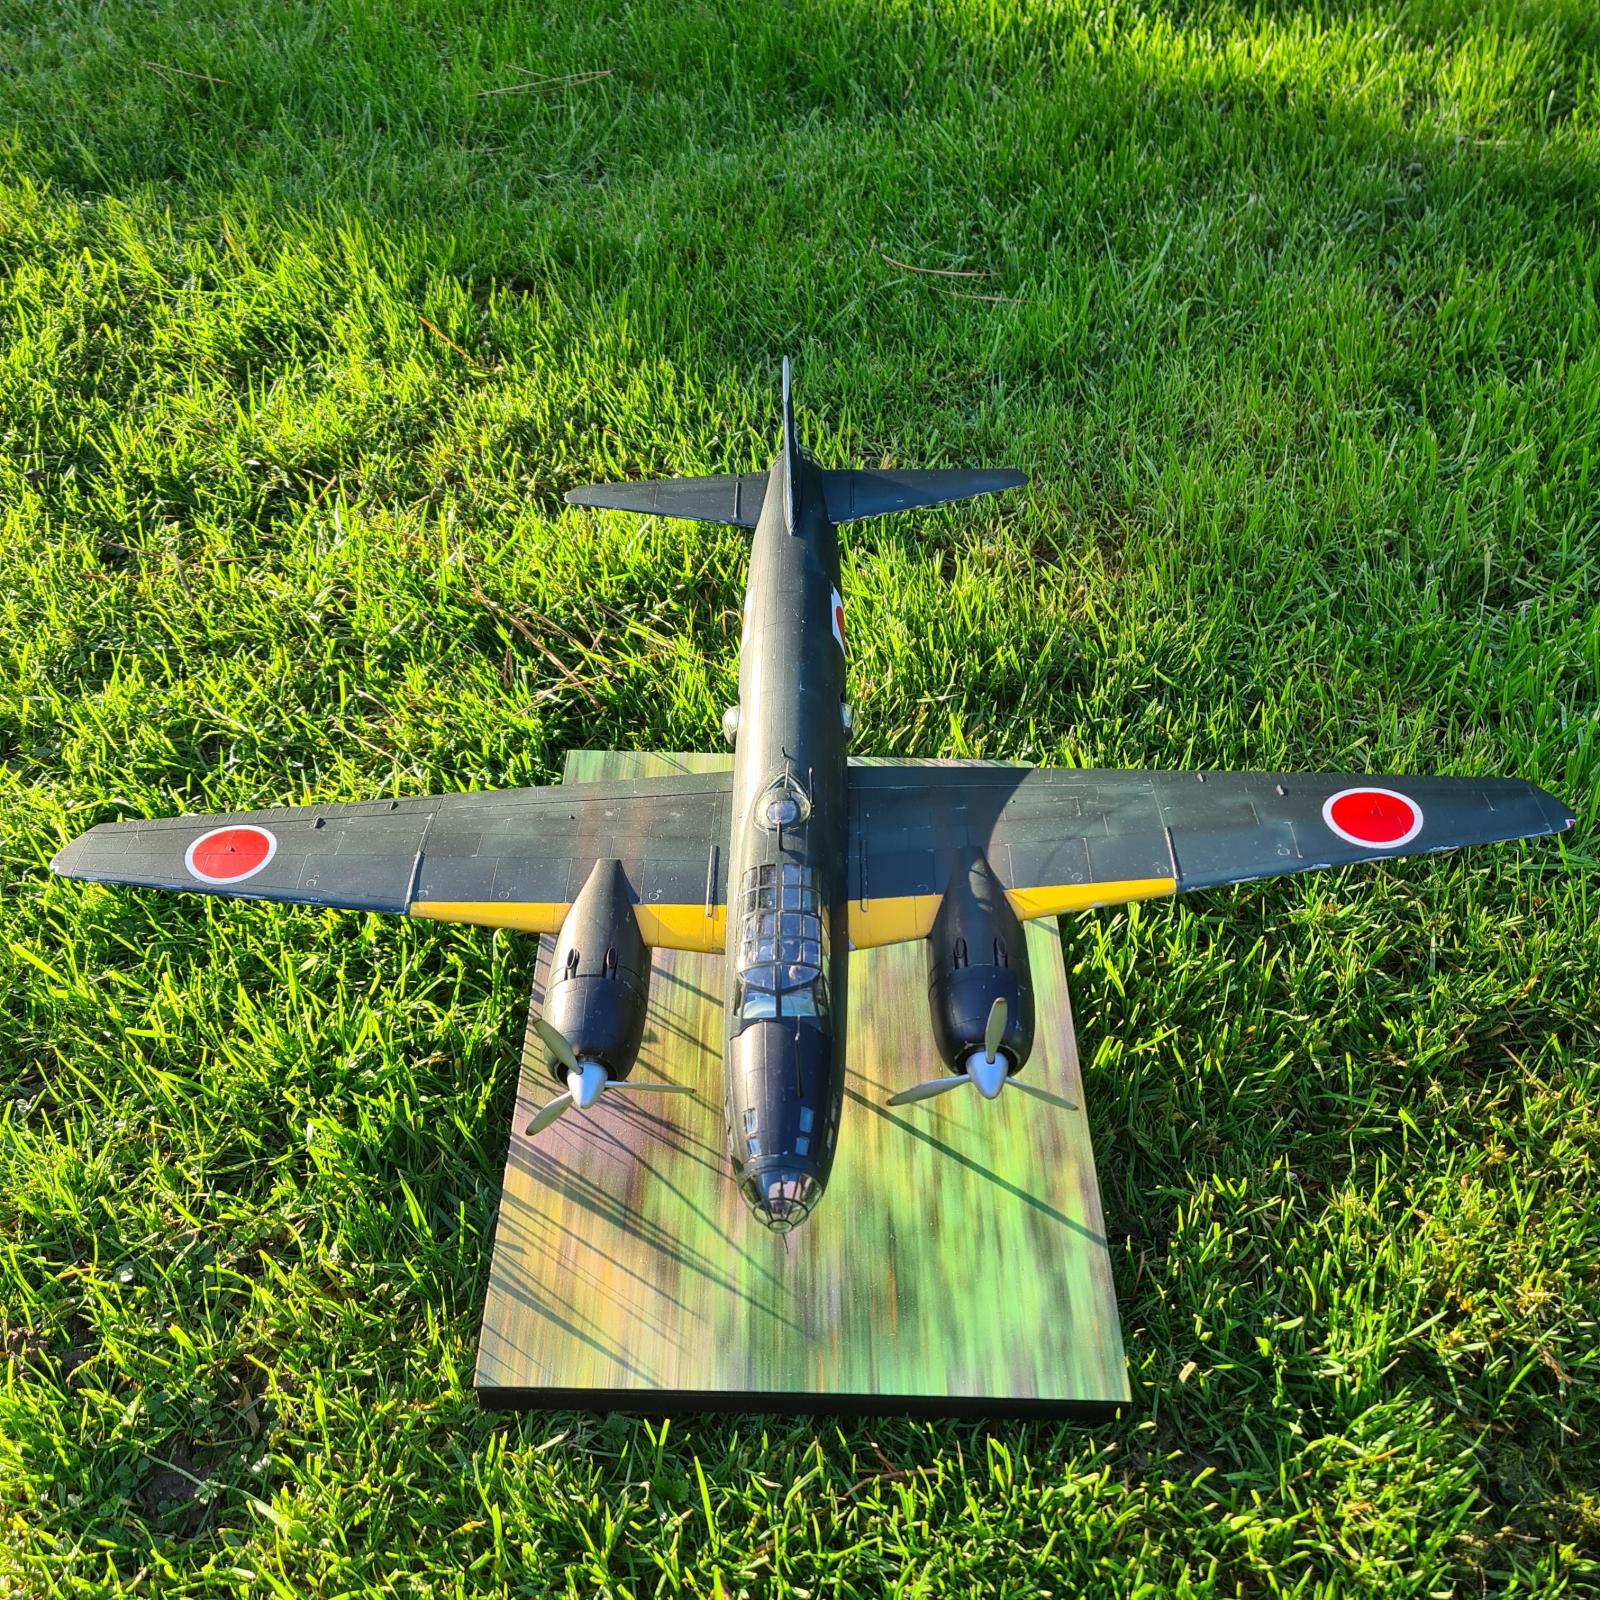
Painting was done as standard, firstly the aircraft received an aluminium paint scheme and then some chipping fluid, but the fluid bubbled up and so I sanded it down and did without. The markings were then painted on with montex masks, before being covered and the camouflage being painted. One thing of note is that I painted one of the roundels in the wrong location, so I stripped the paint, sanded it down and started again without issue. The underside of the fuselage and wings was done first, followed by lighter and darker tonal variations, before the exact same was done to a masked off upperside. One interesting feature yet totally useless for someone who uses an airbrush is that this kit came with both regular unpainted clear parts as well as ones with painted frames for the entire kit, I feel these would be useful for someone painting the model with the recommended tamiya spray cans but if you use an airbrush and mix darker and lighter tones you'll never get these prepainted frames to actually match the model. As such a few of these were used to cover areas when spraying. One issue I ran into is that the Eduard masks didn't actually fit onto the model very well, overall its not noticeable but it was annoying, I think this is due to the 1996 kit having the 'cone' rear gunner position with the 2011 one having the cut down and opened one for better visibility. Due to the size of this kit the wings were glued in at the very end after painting, weathering and clear coat phases, naturally being a Tamiya kit there was no issues in the fit of the wings. Chipping was accomplished by picking away with a toothpick and a knife in some areas where the initial aluminium paint survived, other parts were done with Vallejo Model Air and a brush (which in my opinion is the best aluminium paint to brush paint).
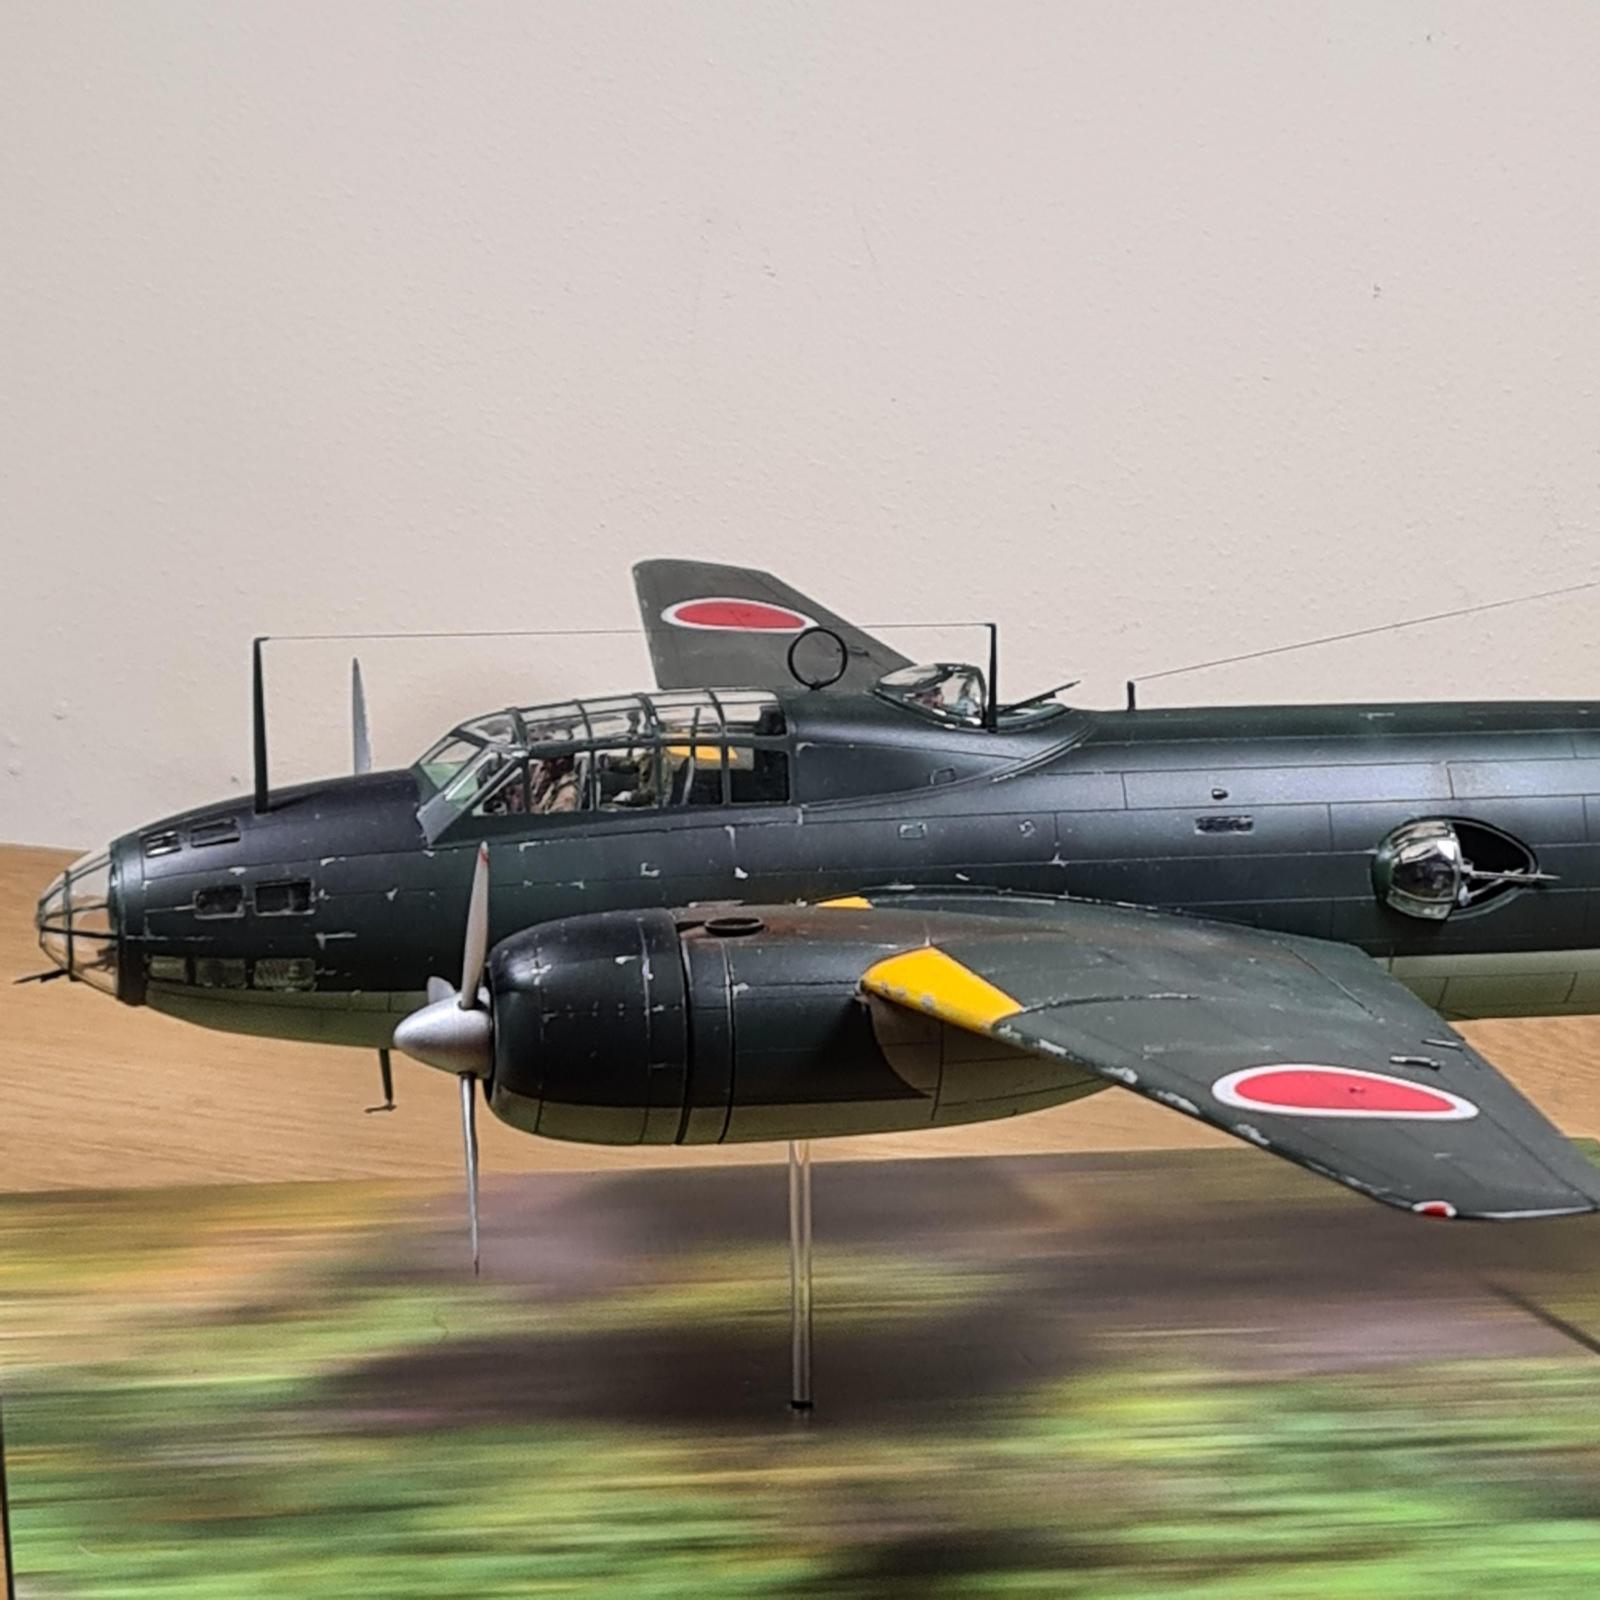
Finally the base was made from a 'Coastal Kits' A4 base, plus an A4 MDF board, two 3mm holes were drilled in the base and the plane so I could insert either brass or acrylic rods, with the front rod being slightly shorter due to the nose having a floor for the rod to hit whereas the rear rod goes straight to the roof of the fuselage.
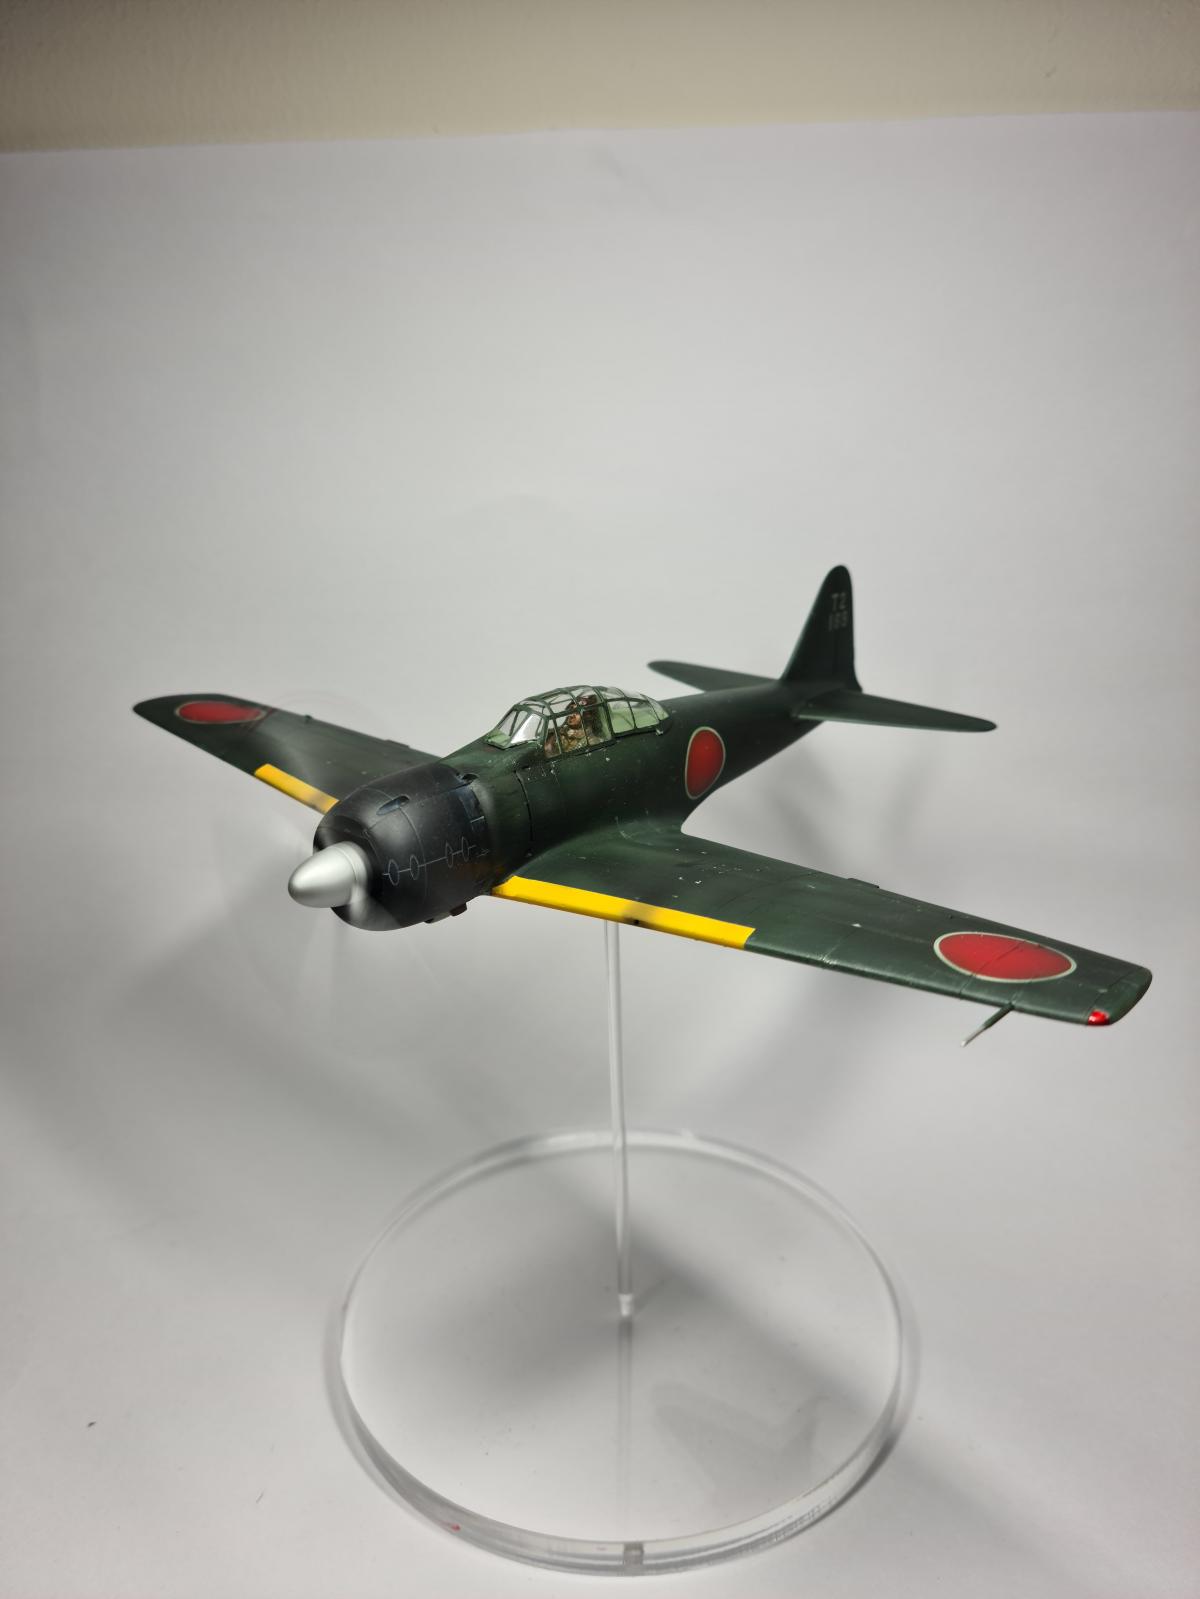
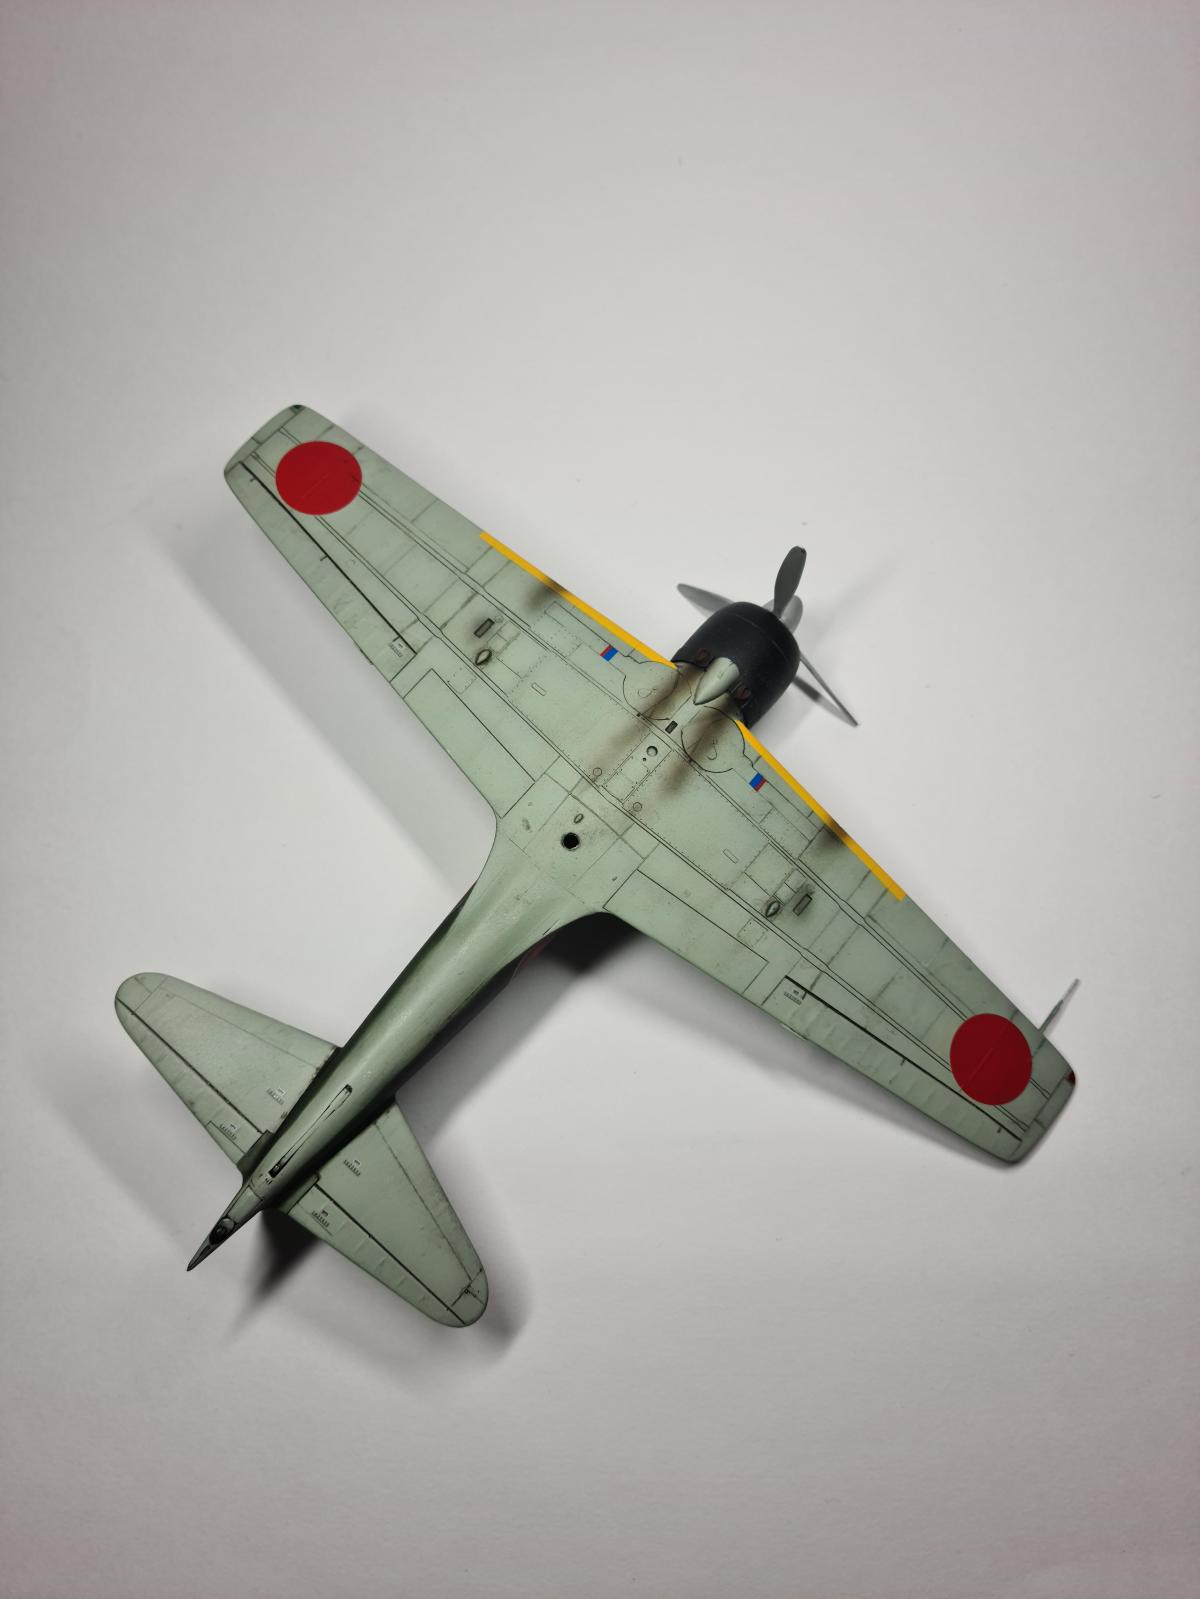
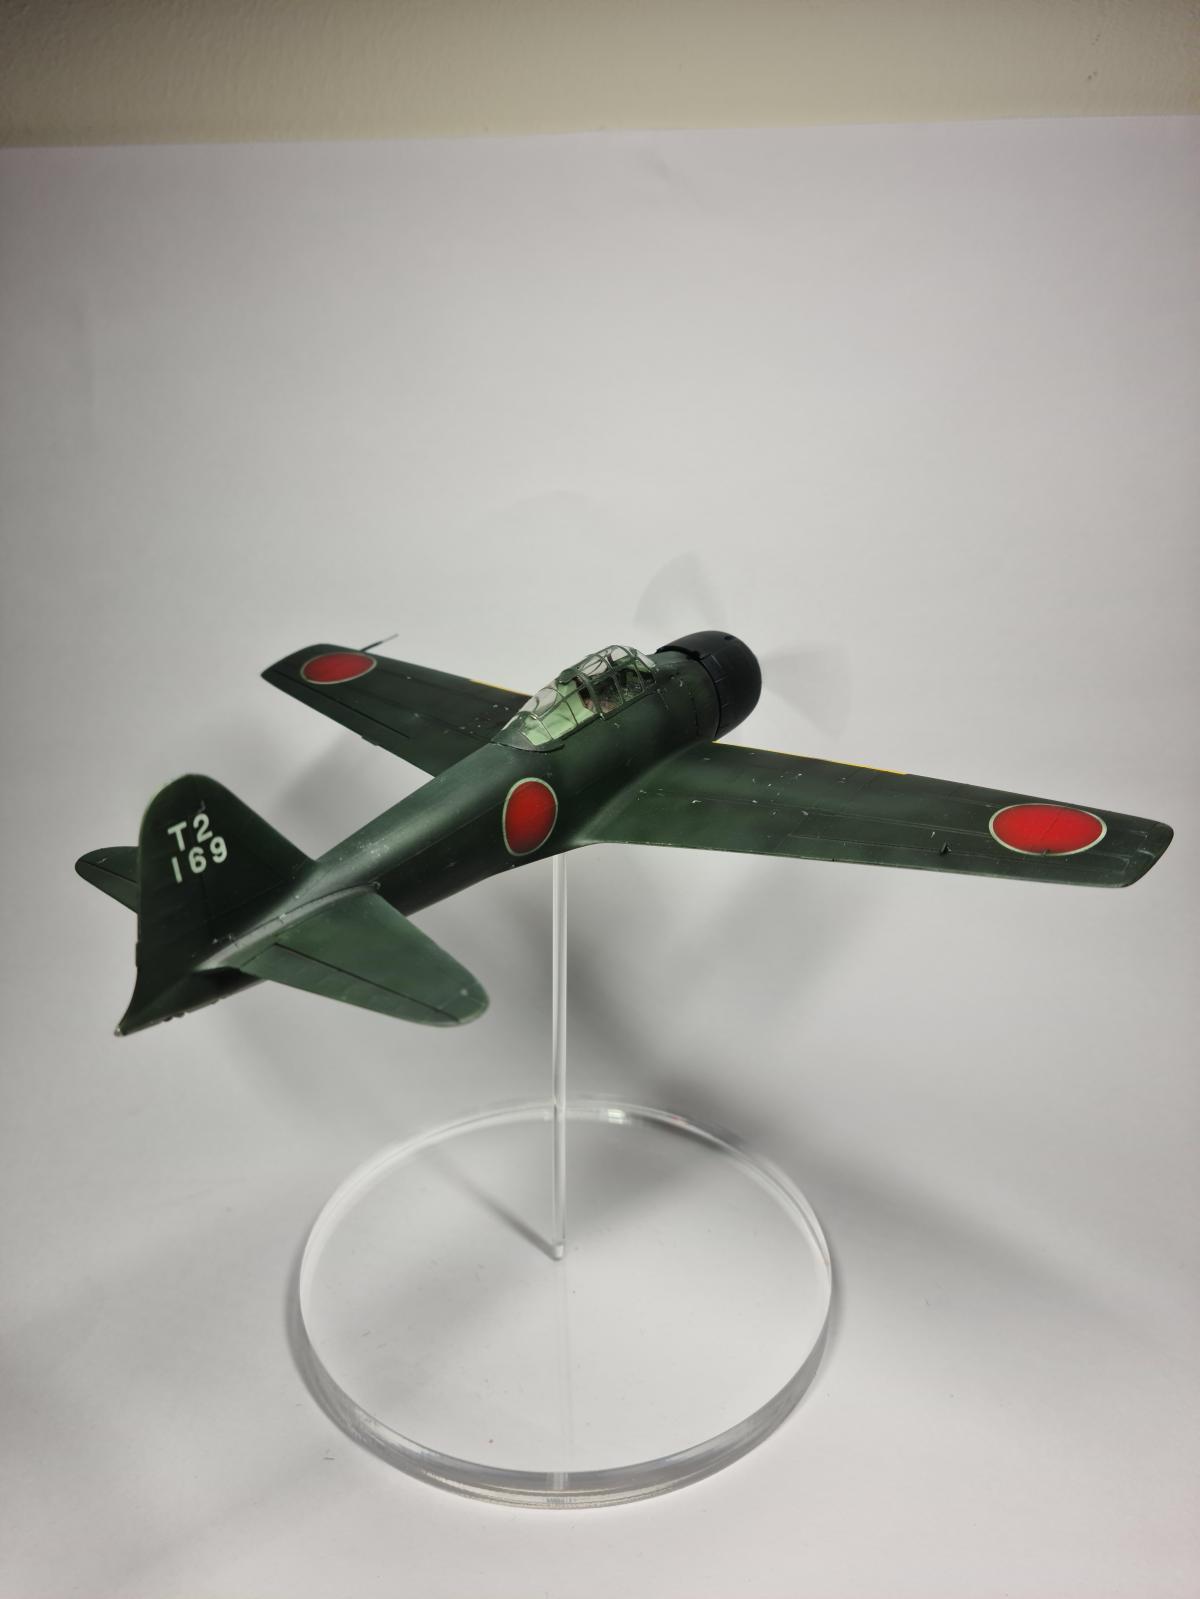
Now just to mention a few bits about the A6M3, this is another Tamiya 1/48 scale kit but I don't feel like it's worth making a seperate post. The model went together quick and simple, and it should as its a 1982 release based on the 1973 mould, and comes with the finest raised panel details as recessed panels weren't a thing Tamiya kits yet I assume. I wanted to buy a Hasegawa Zero but I couldn't find the A6M3 at all, so my only choice was this old one. Plane was painted in the overall grey-green/apple green/mitsubushi grey/that infamous paint, and then the upperside was painted in dark green in quick thin layers to make it look like it was applied in the field. Decals were aftermarket but I can't for the life of me remember who by, but the decals were then briefly sprayed around the edge to give it more of an in-field painted feel. Overall the kit was fine, but lacked detail compared to today, but it was very nice to have a wheels up option which seemingly has disappeared from all 1/48 kits except from Airfix. The model was painted in Kenji Yanagiya's A6M3, a notable pilot as he scored the only kill against the US interceptors on that day as well as being the only pilot of the 6 escorting Zeros who managed to survive the war.

-

- 1. One nice part of these older kits is they use a simple pin to keep the propeller spinning, meaning they freespin much better than the polycaps used today.

-
- 1. An older WIP of the two, showing off the size difference between the Mitsubishi sisters.

Betty beautifully done. Can't get enuf A6's, yours is great.
Thank you! It’s not my favourite as it just seems rather plain to me, but I’ve never really worked with raised panel lines so wasn’t sure of a solution. Tamiya’s A6M5 from 2008 is an amazing model in all aspects but it’s a shame that they never updated the A6M2 or A6M3 Mod 32 to such a standard, even though they updated the A6M3 Mod 22 with the non-clipped wing.
A few unused parts in the new Tamiya Zero kits hint at a future Model 11/21 release. Particularly the earlier style throttle. Hopefully they'll get to it one day. I was also intrigued by the engineering of their Ki-61, which suggests a future Ki-100. [fingers crossed]
Fingers crossed indeed! I do wish Tamiya would release more kits every year, it seems like 1 a year if lucky is the average for 1/48.
Yanagiya's post-war testimony about the event was crucial to the final establishment in 2006 that the loudmouthed braggart and liar Tom Lanphier had nothing to do with shooting down anything that day. Proof that you have to be sure who files the after-action report. (For those interested, my new book coming in May, "Under the Southern Cross" has a chapter devoted to the events of April 18, 1943 - it's a very interesting tale; there's more to it than most of us think).
Your model of the Betty is really nice. I remember doing one and thinking that it is the one Tamiya kit where they didn't "go the distance." Despite that, you have a great result here.
As to the Zero, you definitely got more out of that box than Tamiya put into it with your result. The A6M3 from Hasegawa is "out there" - I found one on eBay a while ago for close to the original price.
"Liked"
Thank you! I'll have another watch for that Hasegawa A6M3 and see if I can nab one for a non-astronomical price. It's certainly very interesting reading up about the events of that day and how much Tom Lanphier got away with considering the testimonies from other pilots including Yanagiya all paint the story much differently, it's a shame that the kill credits haven't gone to Barber and Holmes despite the petition.
Great looking Betty - I like the paint work on it - nice variation in the tones of green and grey. Well done.
Fantastic builds, Harvey.
I was not aware that those Betty's were so big.
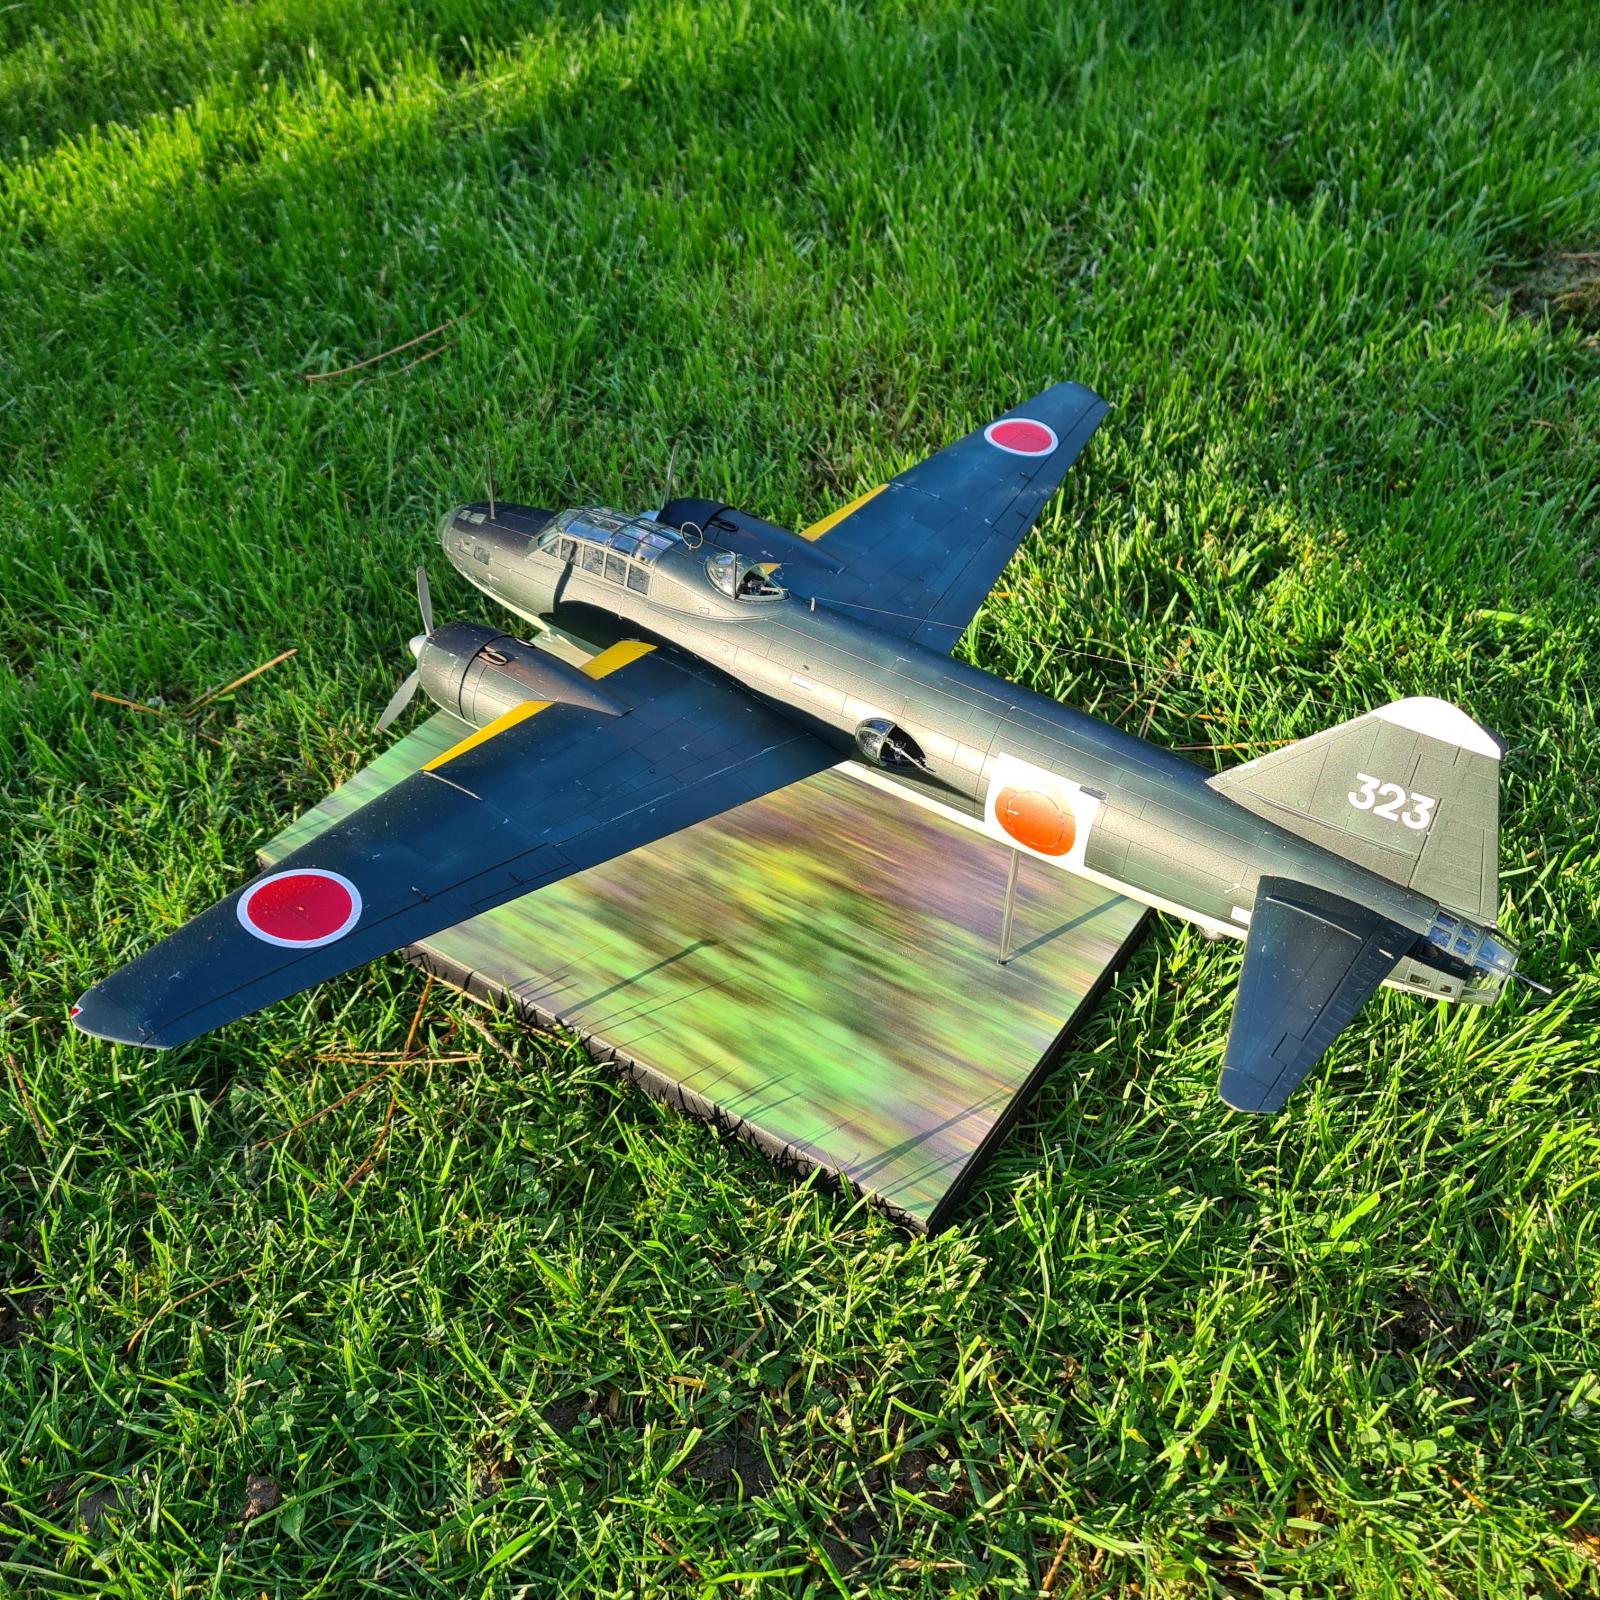
The way you took the pictures is great, looks like it is performing some low level bombing mission.
I remember reading about a visit by some German engineers to Mitsubishi (from Heinkel or Dornier, I think), who saw a G4M fuselage under construction and couldn't believe it was for a twin engine aircraft. They thought surely it must have four engines.
It's certainly a monster in the size department, it comes into perspective when you compare the range of the Betty which had a ferry range of 3,100 miles, compared to the Ju-88 with 1,700 miles. When you consider the Betty was designed to be an extremely long range torpedo bomber (not a medium bomber) then it was very well suited for this role, but all torpedo bombers large or small suffered tremendous losses without fighter escort and the G4M discovered the cost of the sacrifices to save weight and extend range very dearly.
Thank you! I think in my head it's meant to represent the aircraft flying low to try and escape/crash. If I was to do it again I'd learn how to do realistic battle damage and do a more dramatic and broken model as it heads downwards.
Harvey, @scalerambush
I have this exact build thread with a pair of Tamiya G4M's, one being built as "Yamamoto's Betty", a pair of the new tool Tamiya P-38's and 5 different A6M's, some (Hasegawa and some Tamiya) that I started well over a year ago. The last update was well over a year ago... and like you I was building all aircraft in 1/48 scale.
Here's a link to it should you be interested.
https://imodeler.com/groups/work-in-progress-aircraft/forum/topic/operation-vengeance-tamiya-p-38-miss-virgina-g4m-1-yamamoto-betty-and-a6m-3-zero-in-1-48-scale/
Now having seen how nicely yours looks, I might just have to revive this build.
I definitely pressed the "liked" button ! 🙂
Thanks for linking me that, it's very interesting and I hope you continue it some time! I'm very jealous about that Hasegawa A6M3, I couldn't find one for a decent price when I was building this last September. One thing to note about Miss Virginia is if you look at photos you'll see it still has a distinct line on the panels where tape was applied when transporting it by truck, it can lead to a really interesting scheme that helps break up the monotone olive drab if done right. I'll post my one in a few days and you can see my attempt at it. Great kit that P-38, probably the best engineered kit I have made so far!
Harvey, @scalerambush
Please do post up your Tamiya P-38. I would really like to see how it looks. I have managed to locate several pictures of "Miss Virginia" and "Phoebe". For me, the research is just as much fun as the building. I will revive the build journal but when I do, it ill be located at our "Empire of Japan" group build.
Thanks again !
Excellent work!
gorgeous presentation and photos on the stand- awesome work dude! congratulations.
Thank you!
I really enjoyed reading the write ups, and Betty looks superb, definitely liked.
Thank you!
I really like your work Harvey.
Thank you very much!
I love the lines of both Mitsubishi planes, would build the Betty if I had the room. Yours looks terrific, as others have well-stated. Interesting article!
Thank you! My one occupies the space on top of my IKEA cabinet, it's the only place I can put it! That being said the amount of dust it collects is astronomical.
🙂 ... Greetings ... 🙂 :
Gorgeous all around work on this build Harvey.
Very good use of your painting skills, the subtle weathering is so well achieved.
Nicely done variations of green tones gives this model a stunning appeal.
Thank you very much!
Those are two amazing builds, Harvey @scalerambush.
You are right about the Betty: it's so unexpectedly big! I love the extra work you out in there, as well as the weathering!
Congratulations!
Thank you!
Great builds, and the base really gives me the sensation of low-level speed. Both winners.