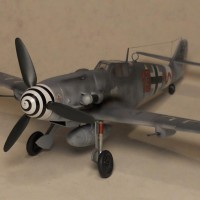
P-40 in Defence of Port Moresby
This the second of six P-40s I built earlier this year for a club display for the Australian Model Expo. I built them as one group of three and a second group of four. The seventh aircraft was not finished in time for Expo but is now completed.
-
P-40 in Defence of Port Moresby
Subject
The Battle of Port Moresby commenced on 3rd February 1942 with an attack by Imperial Japanese Navy Air Force (IJNAF) aircraft. The initial attacks were met with anti-aircraft fire and it was only with the arrival, on the 23rd of March, of the Kittyhawks of 75 Squadron to 7 Mile Drome, that Port Moresby had a fighter air defence.
Thrust into combat with minimal training, 75 Sqn held the line alone against seasoned IJN pilots for 44 days until relieved by the 35th and 36th Pursuit (Fighter) Squadrons of the US Army Air Force (USAAF) 8th Pursuit (Fighter) Group.
During their time in the defence of Port Moresby, 75 Sqn lost 21 aircraft and 12 pilots, including the Commanding Officer Sqn. Ldr. John 'Old John' Jackson. Command of 75 Sqn then passed to his younger brother, F/L Les Jackson, who survived the war with 5 kills to his credit.
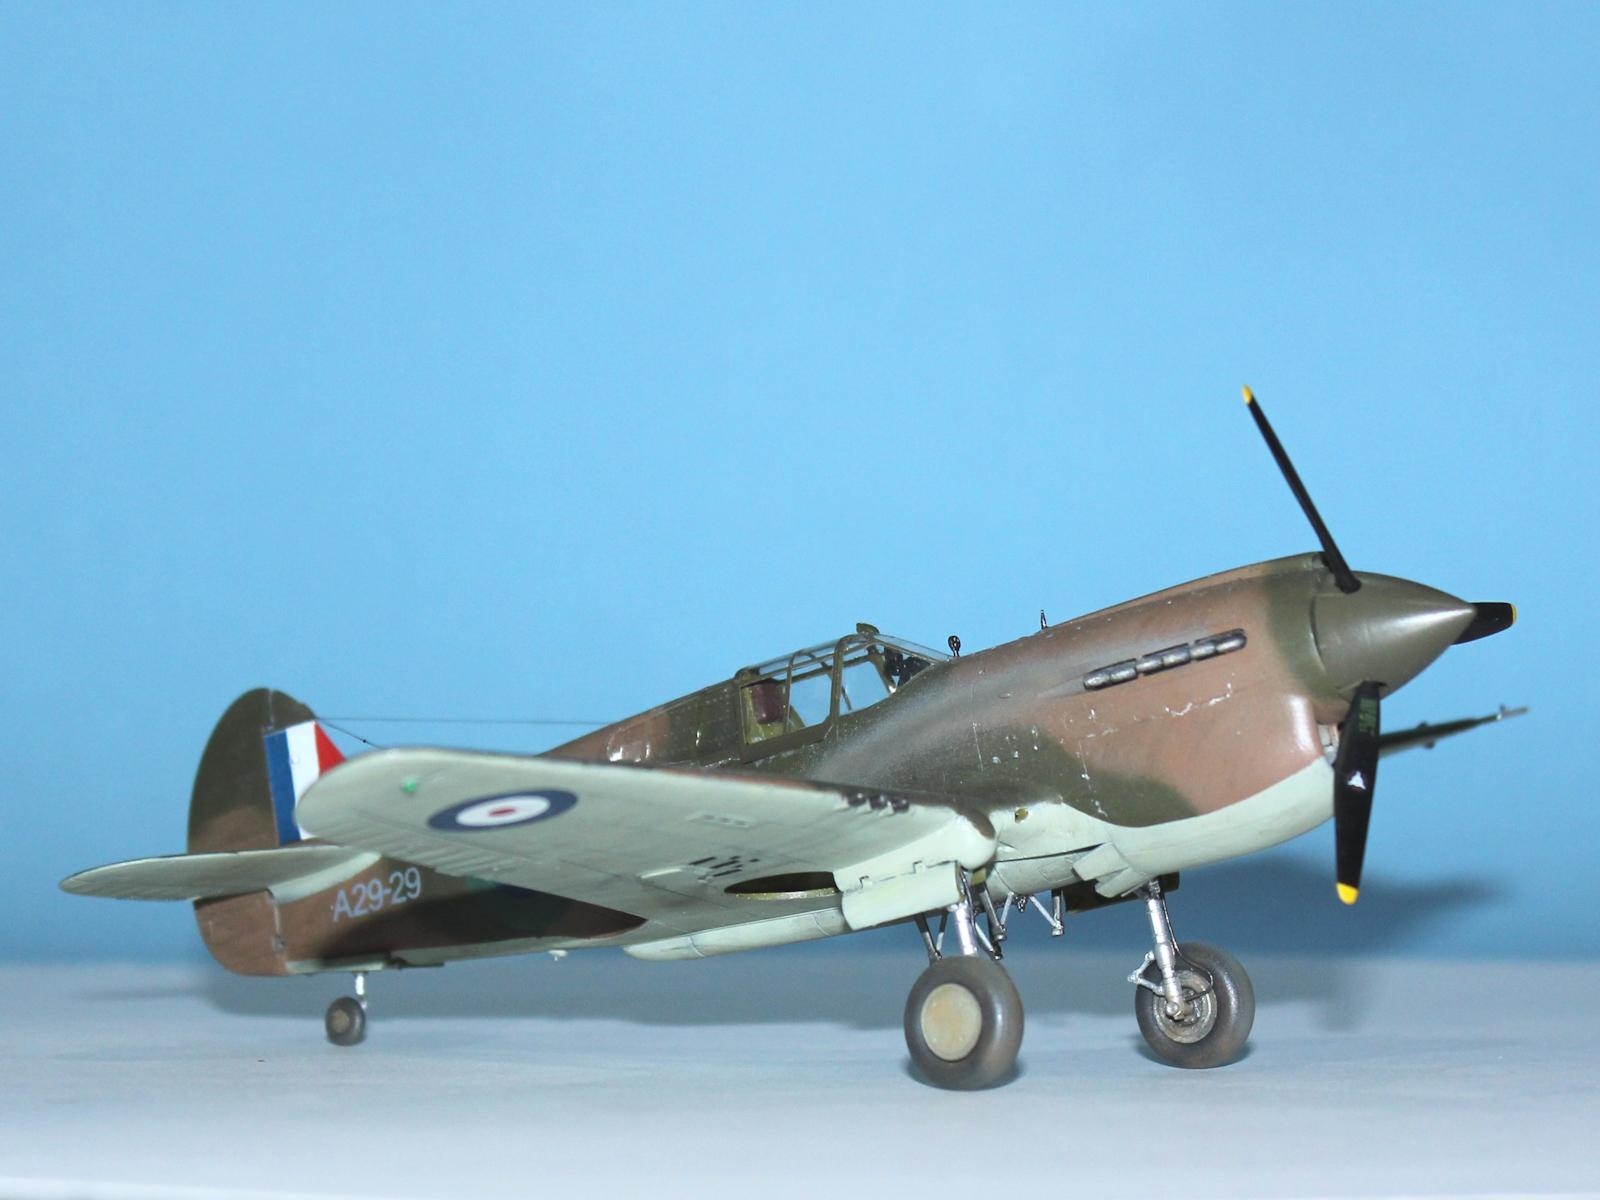
Les flew A29-29/I on the 17th of April when he single-handedly attacked a formation of five G4M ‘Betty' bombers and seven A6M2 ‘Zero' fighters, shooting one Zero down.
A29-29 had only been in in action for 25 days when it was lost on the 24th of April. It was shot down over Port Moresby with the pilot F/Sgt Michael Seymour 'Mick' Butler surviving.
Construction
According to the ADF Serials web site, A29-29 was a P-40E, serial number 41-5612. The Hasegawa kit, however, is essentially a P-40E-1, which is great if you want to build an E-1, but which requires modifications to build an E. (Note that, due to the use of common parts for other Hasegawa P-40 models, the following modifications will also be required when building them).
The "dash 1" refers to P-40Es built to UK specifications as follows:
-
Two blue formation lights mounted either side of the fuselage below the cockpit
-
An ID light on the spine behind the cockpit
-
An ID light lower starboard behind the flaps
-
A ring and bead gunsight mounted to starboard on the cowling
-
They may also have had a British gun camera mounted under in a fairing under the starboard wing
The Hasegawa kit provides for all of these features and so they had to be removed or not used on this build.
Firstly, the fuselage side formation lights: These are proud of the fuselage sides and Hasegawa would have you simply fit the lenses and presumably paint over them but I filled them with super glue and then sanded them smooth.
Hasegawa likewise ignores the formation light under the centre wing, but again I filled it with superglue and sanded the area smooth.
I did, however use the light on the spine as photos show that this was present on some P-40Es.
Likewise, the ring and bead gunsight is also present on many P-40Es.
I reasoned that in the hectic situation 75 Sqn found themselves in, they would be unlikely to have used the gun camera, nor had the facilities to process the film, so I left this off.
The P-40E was also fitted with a RAF Sutton harness for the pilot, for which I used an Eduard pre-painted etch set.
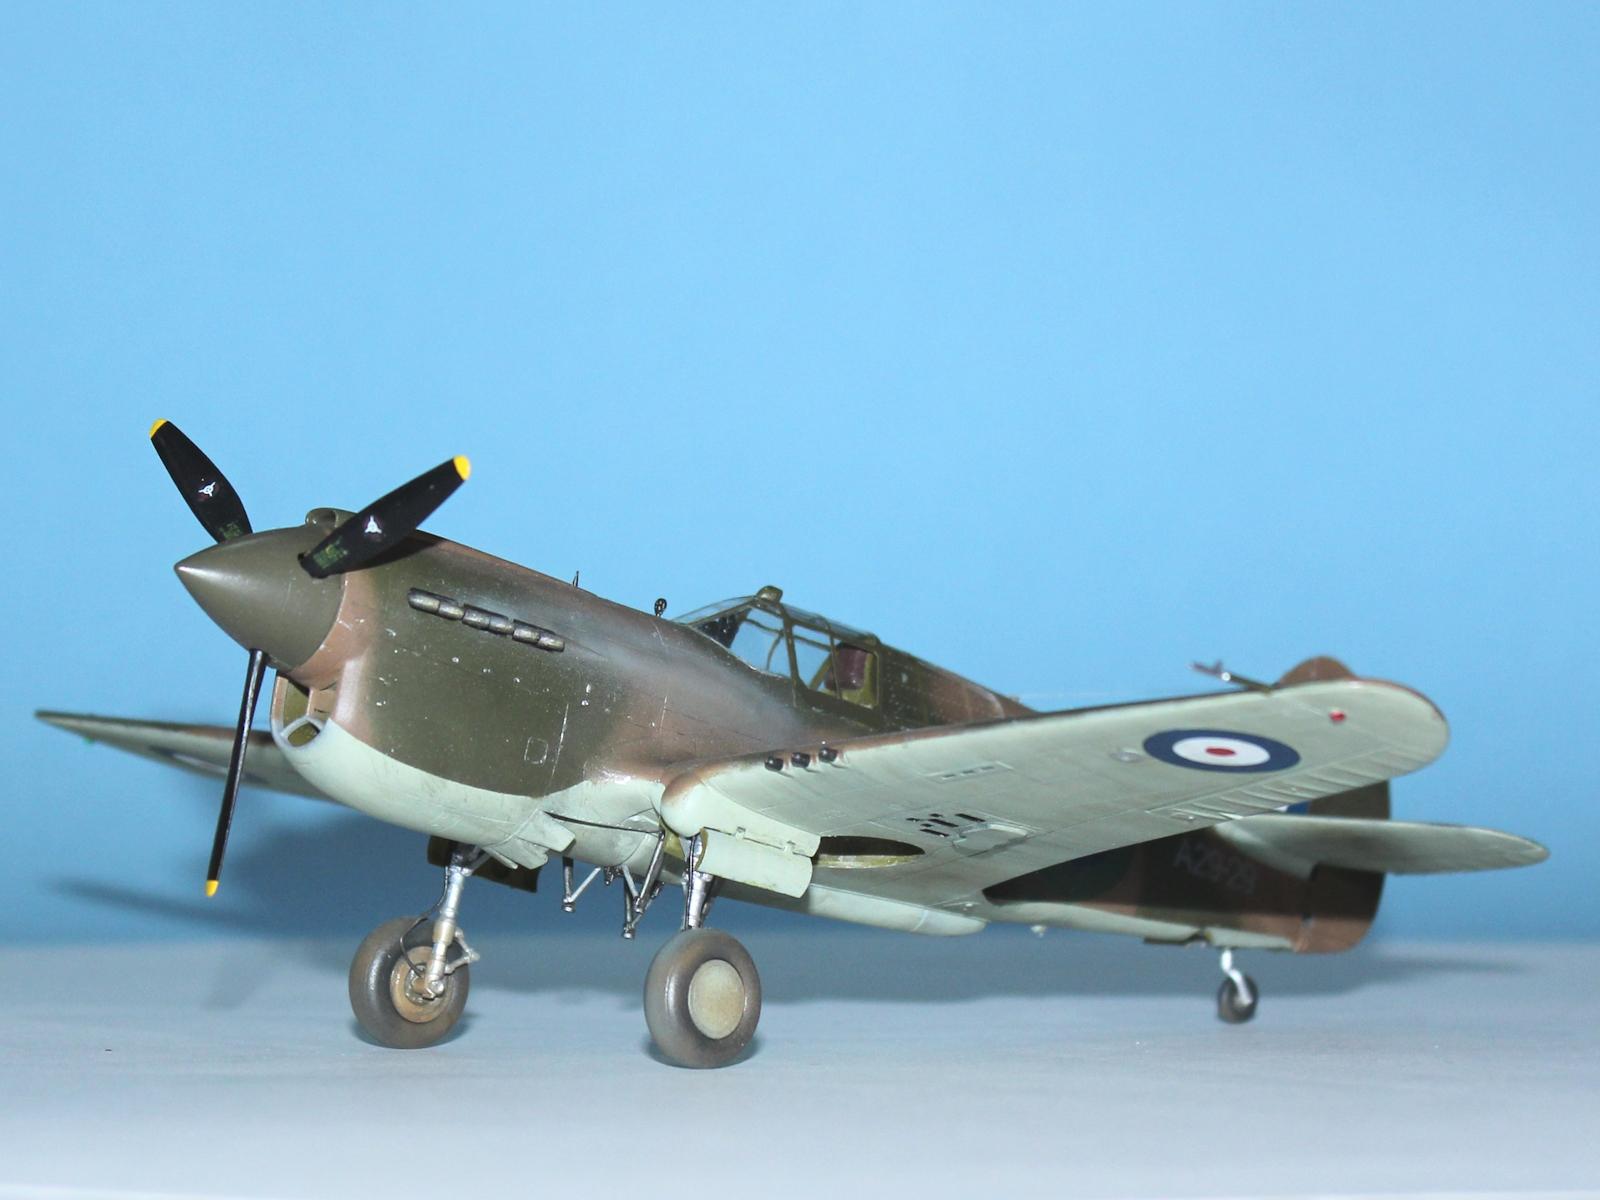
The cockpit was painted and assembled. Like most US manufacturers at this time, Curtiss had their own primer colour. After much research, I decided that Gunze Sangyo H81 Khaki was the best match and painted the cockpit, radiator interior and wheel wells that colour.
This is one of Hasegawa's modular kits which uses a series of inserts to allow them to model multiple versions of the P-40 and this makes for a finicky and sometimes frustrating build.
Hasegawa provides the fuselage in six parts, forward fuselage, tail and aft cockpit insert. I attached each tail half to the respective fuselage halves in order to get the best alignment and fit that I could. Likewise, I fitted the aft cockpit inserts at this time. This all required a bit of adjustment to get the two halves to fit together and a lot of work was required to eliminate and smooth over the fuselage/tail join. I also had to re-scribe some panel lines, which is one job I hate.
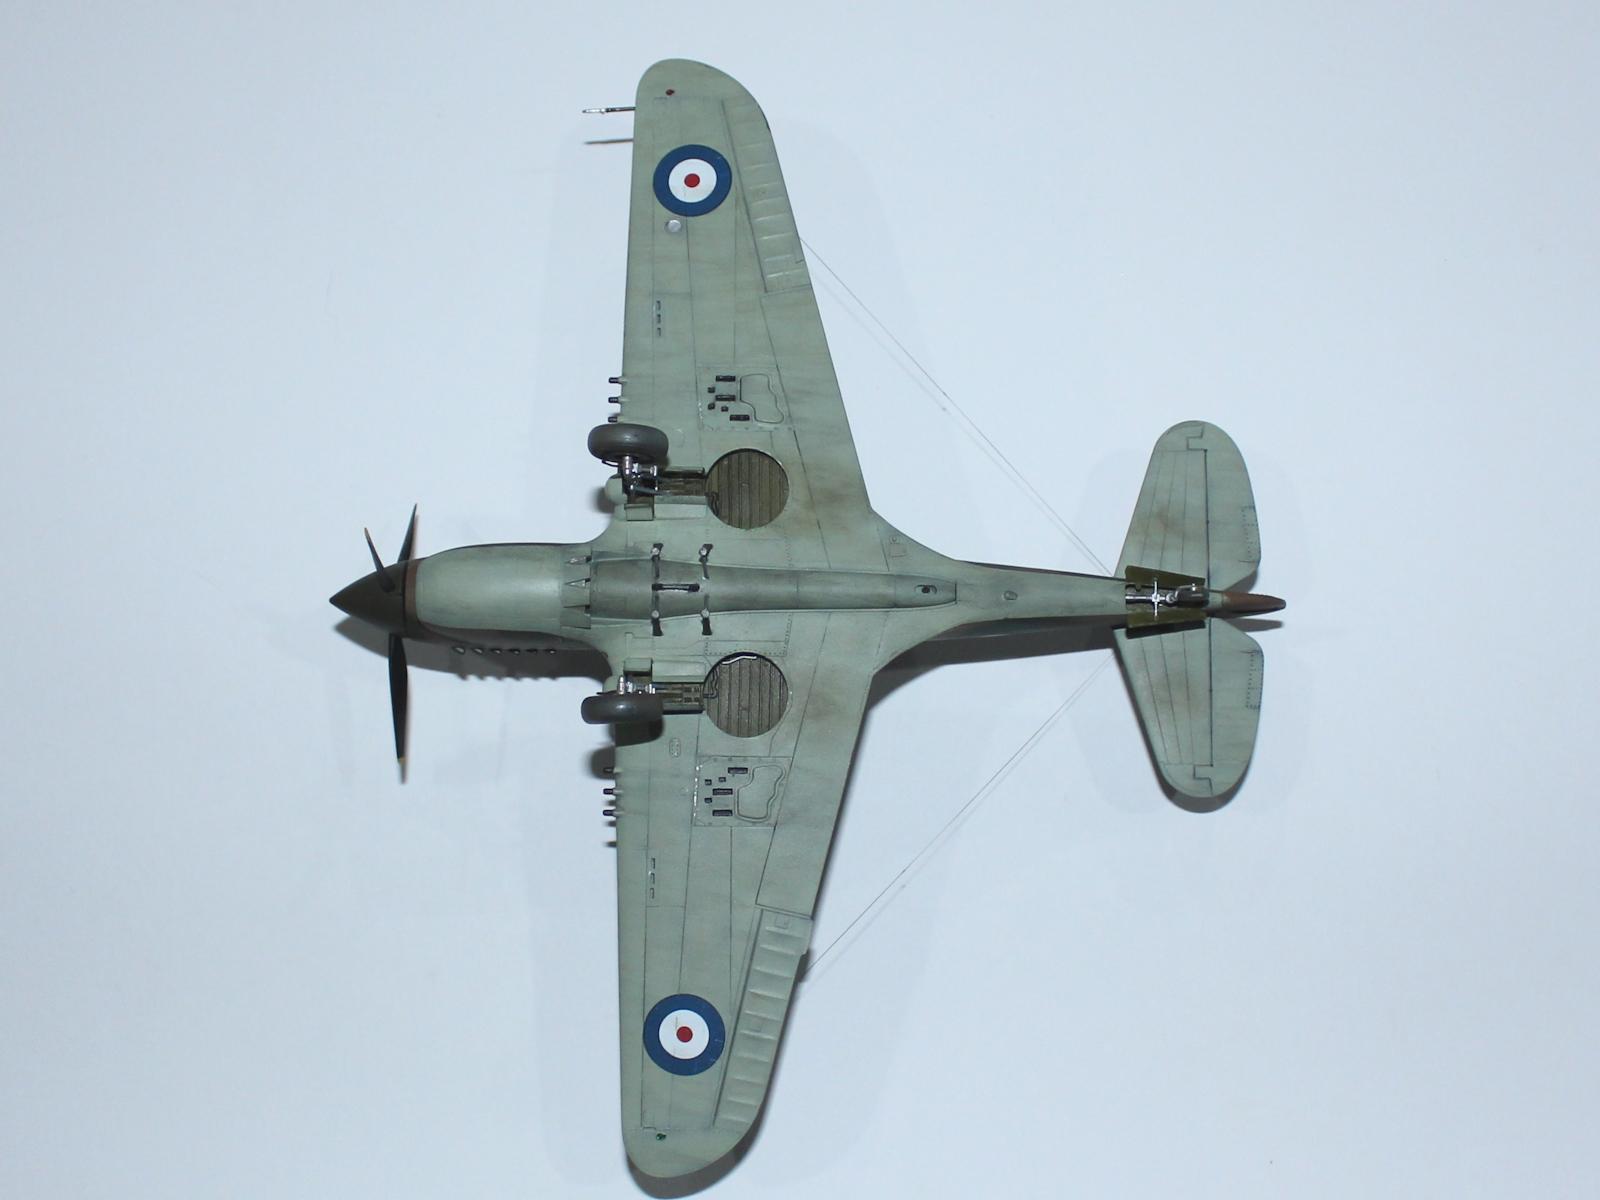
Perforated vents were fitted ahead of the exhausts from the P-40M onwards and the Hasegawa moulds allow for this. This means that for earlier versions, a blank insert is provided for this area. These inserts are too thin and need some packing behind them and the seams eliminated.
The lower wing has inserts for the gun ejector ports which fitted quite well but are best attached before wings were assembled. Another wing insert is the for the gun barrels. Of course, these don't fit as well as we would like, so a lot of careful filling and elimination of seams was required here too, particularly as they are not along panel lines. Also, there are two sink marks under the wing plus numerous raised circles that seem to correspond to internal ejector pins on both the top and bottom wing surfaces that needed to be dealt with.
The kit includes a later model P-40 gun-camera in the starboard undercarriage fairing that had to be filled and sanded - it would have been nice had Hasegawa provided an alternative part here.
The horizontal tails fit quite well.
Hasegawa provides the option of a centreline bomb or drop tank and a different set of sway braces for each option, which is a great touch. I decided not to fit either store but did fit the sway braces. These have a pad at the end that holds the store in place. Without the store, these would naturally rotate from the vertical to horizontal, so I cut these pads off the sway braces and reattached them in the horizontal.
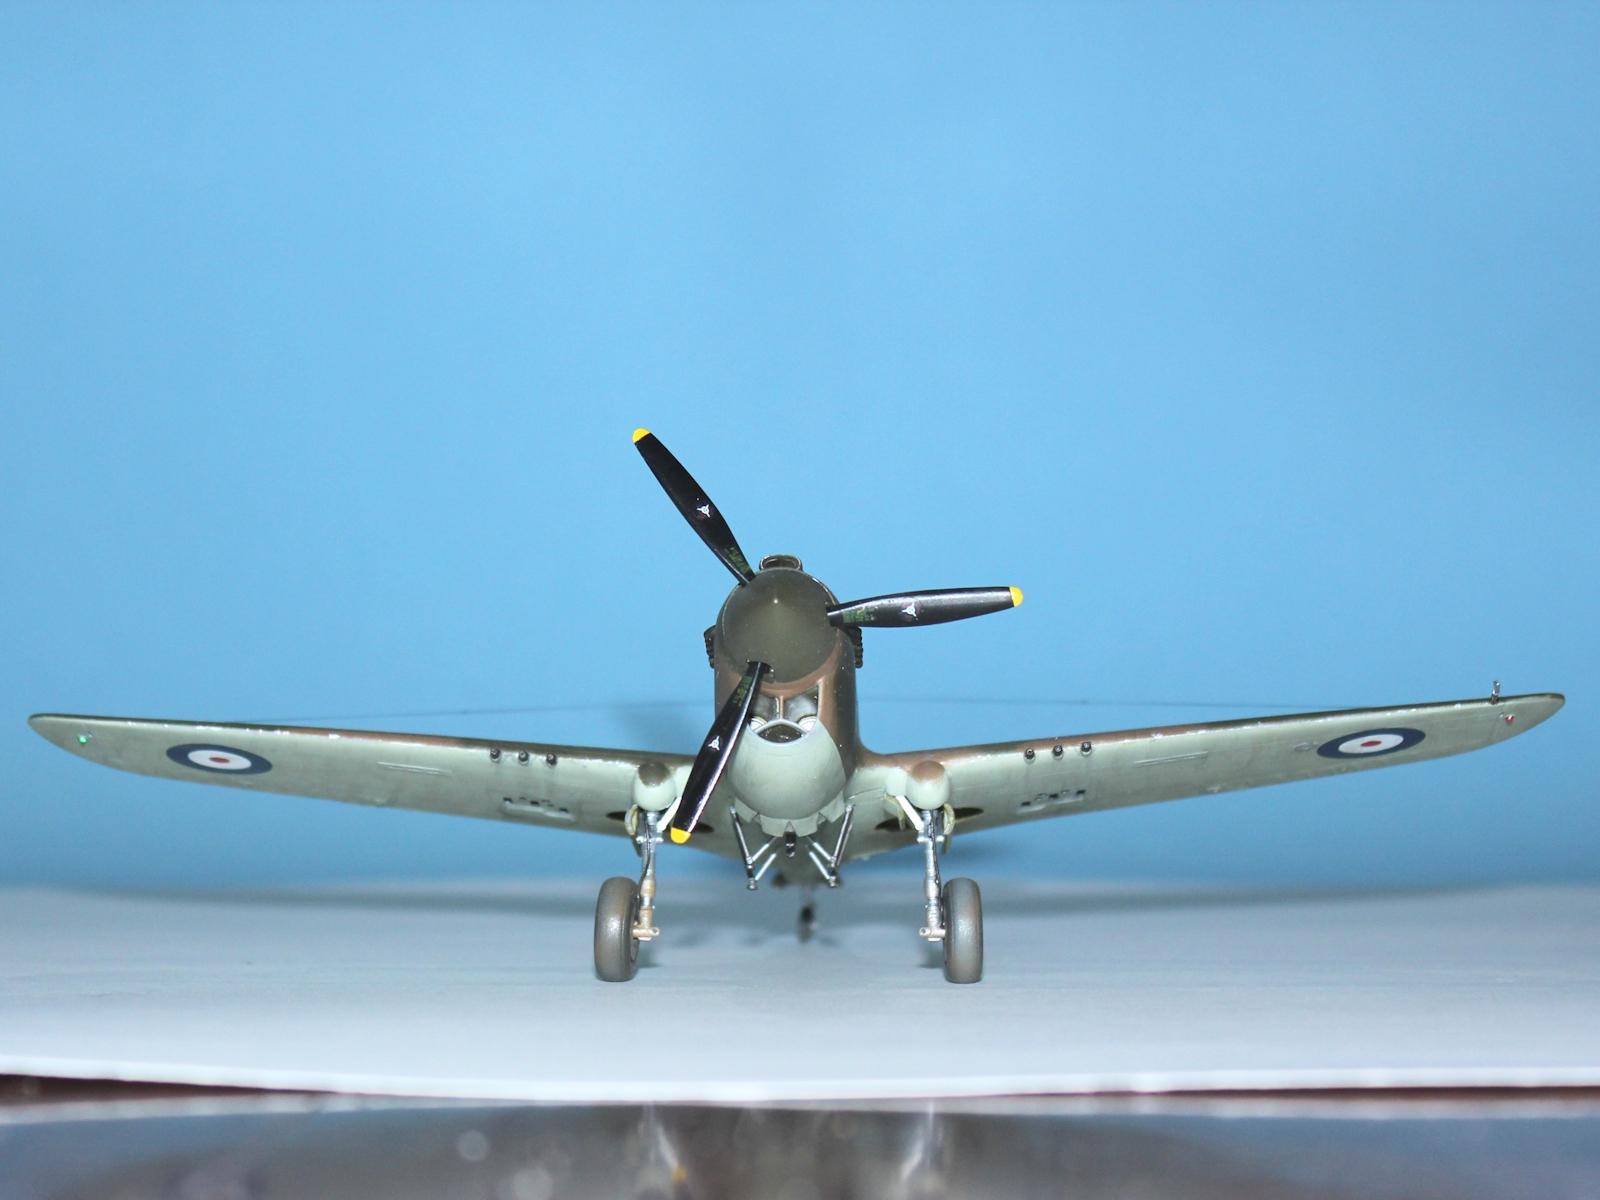
The undercarriage is quite complex with the main leg, a double strut to the rear and a strut to the side. Added to this is a long side opening cover on the outer side and a smaller cover on the inside. Hasegawa has the latter one opening far too far where photos show that this more or less leans against the side strut, so I adjusted the sit of this part.
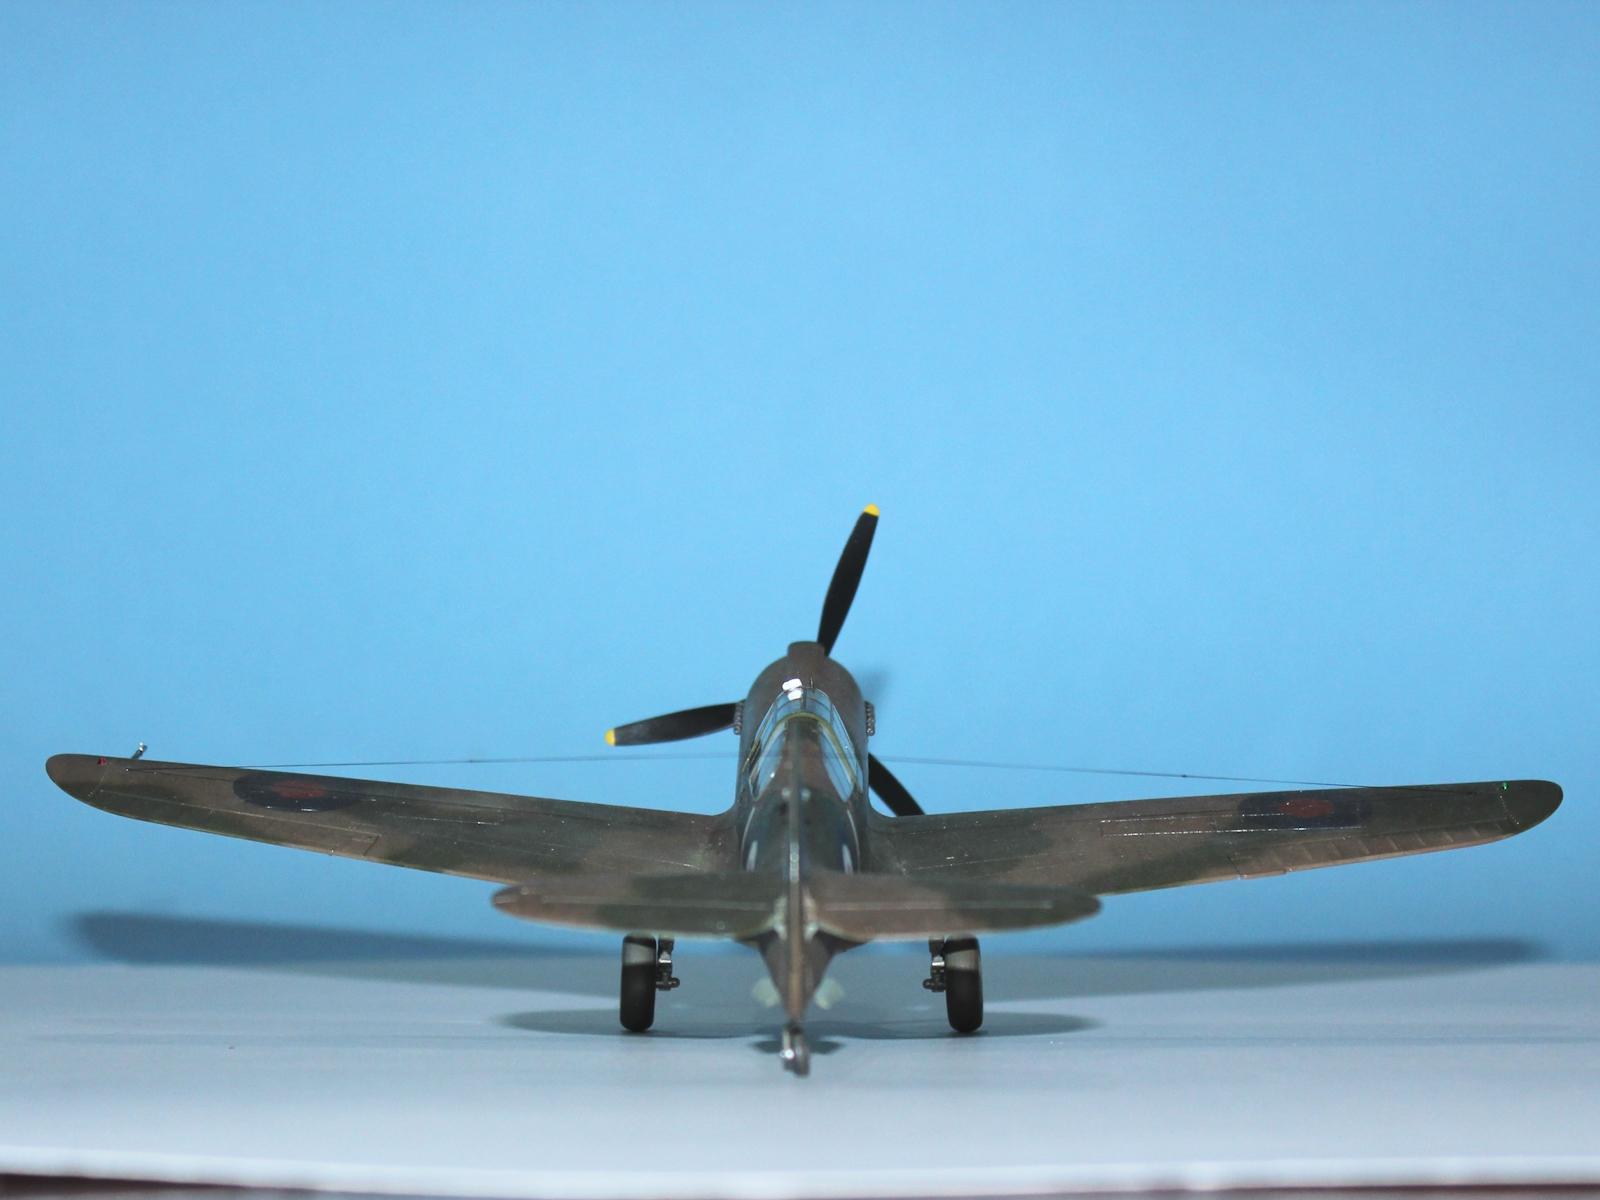
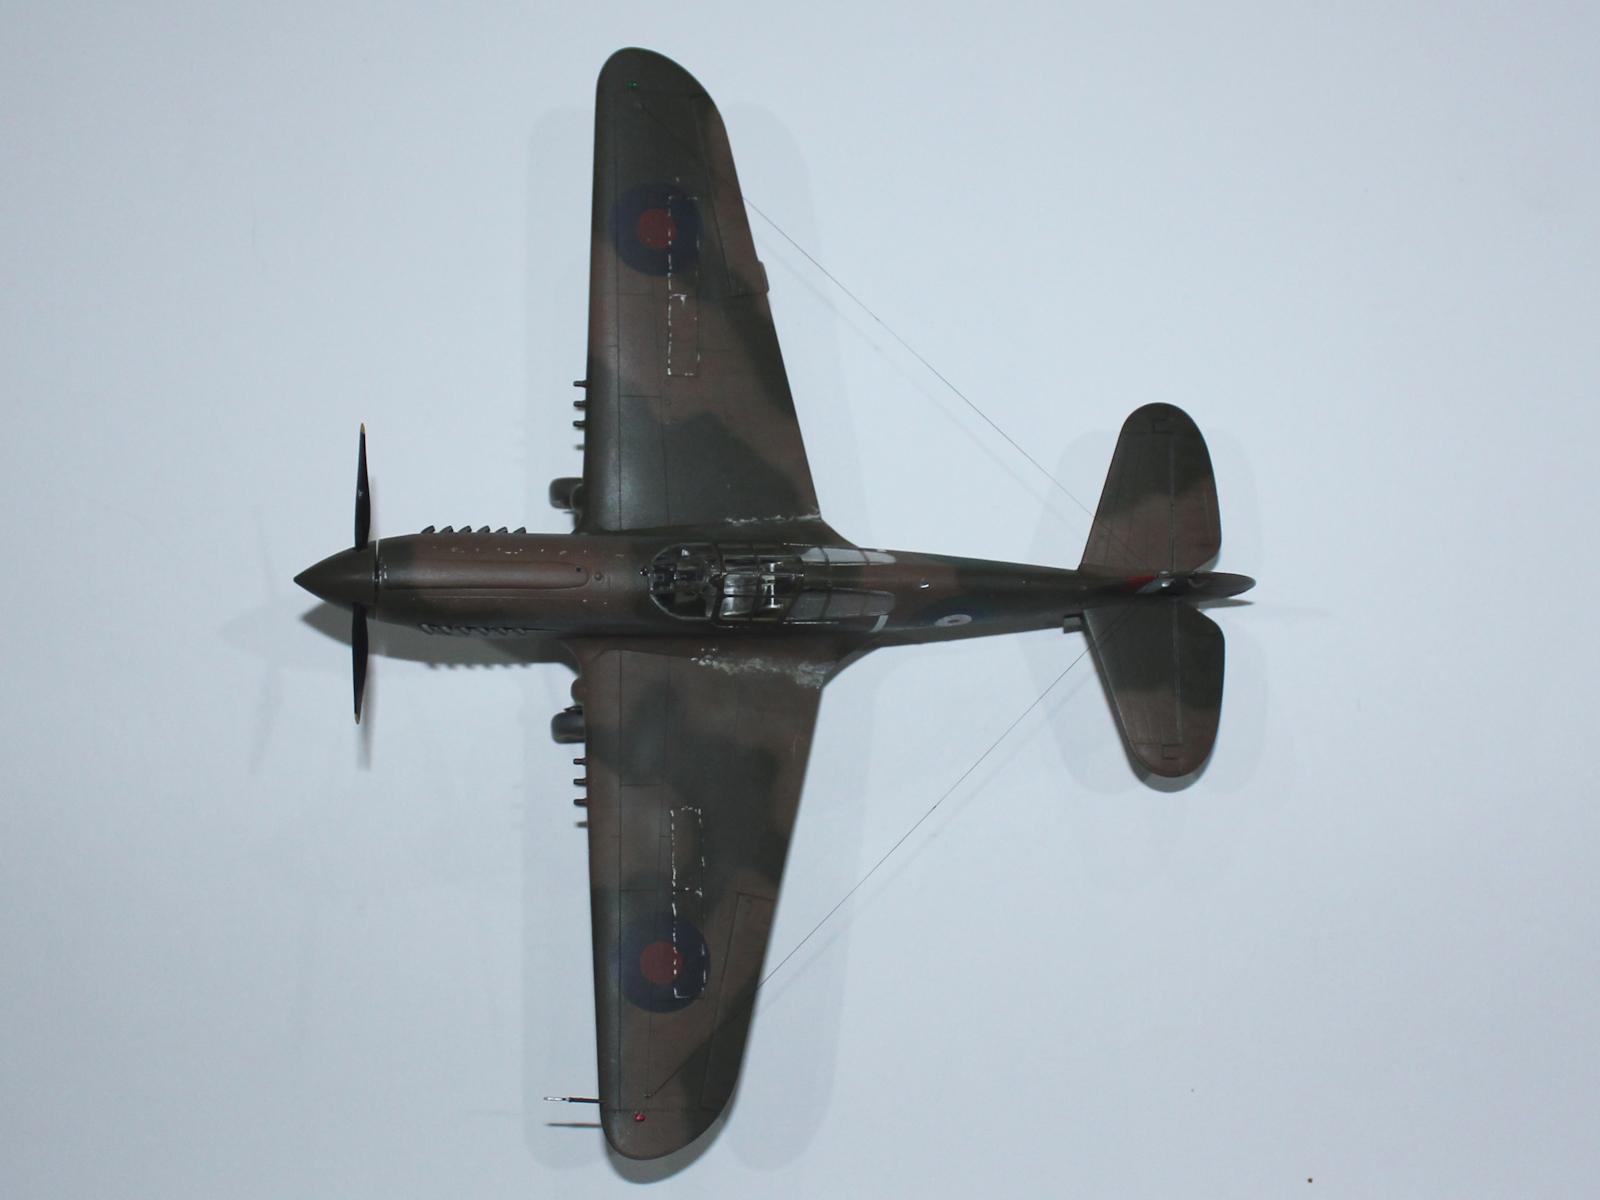
Hasegawa provides small clear parts for the wing tip and fin navigation lights, so I removed the moulded-on parts and drilled the required holes before painting.
Painting and Markings
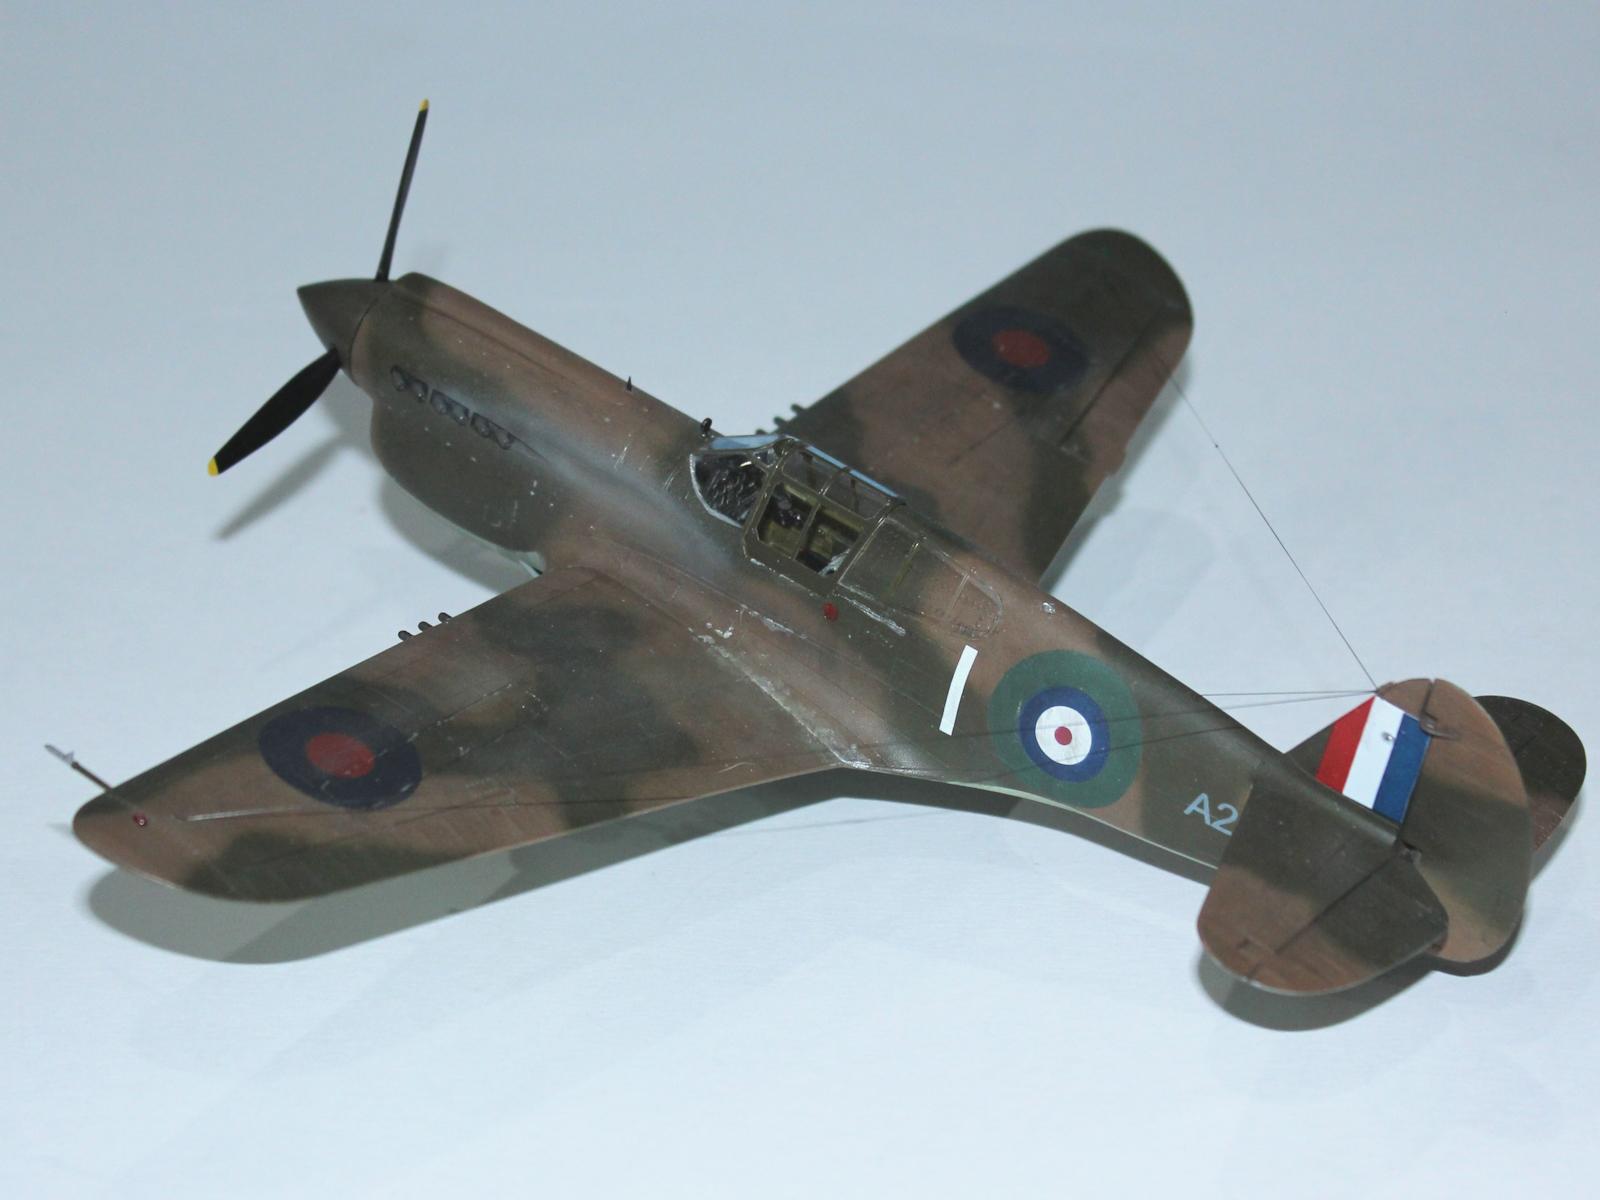
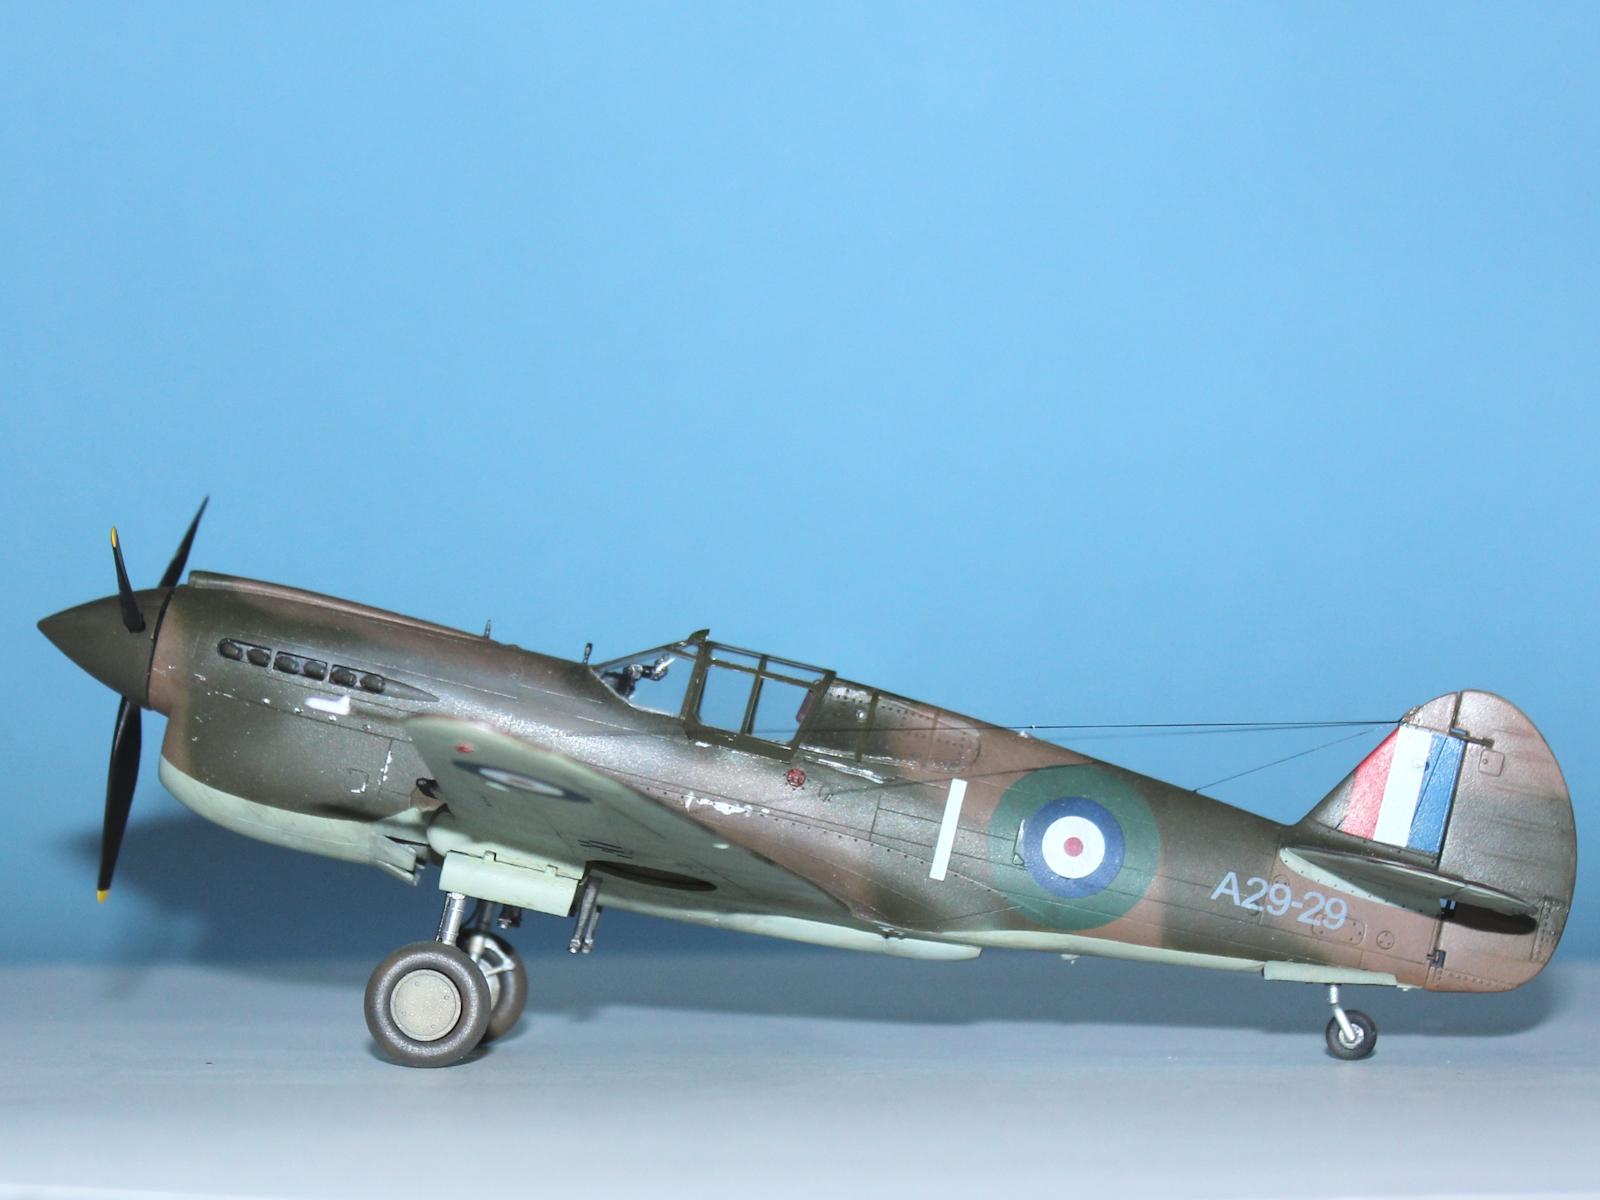
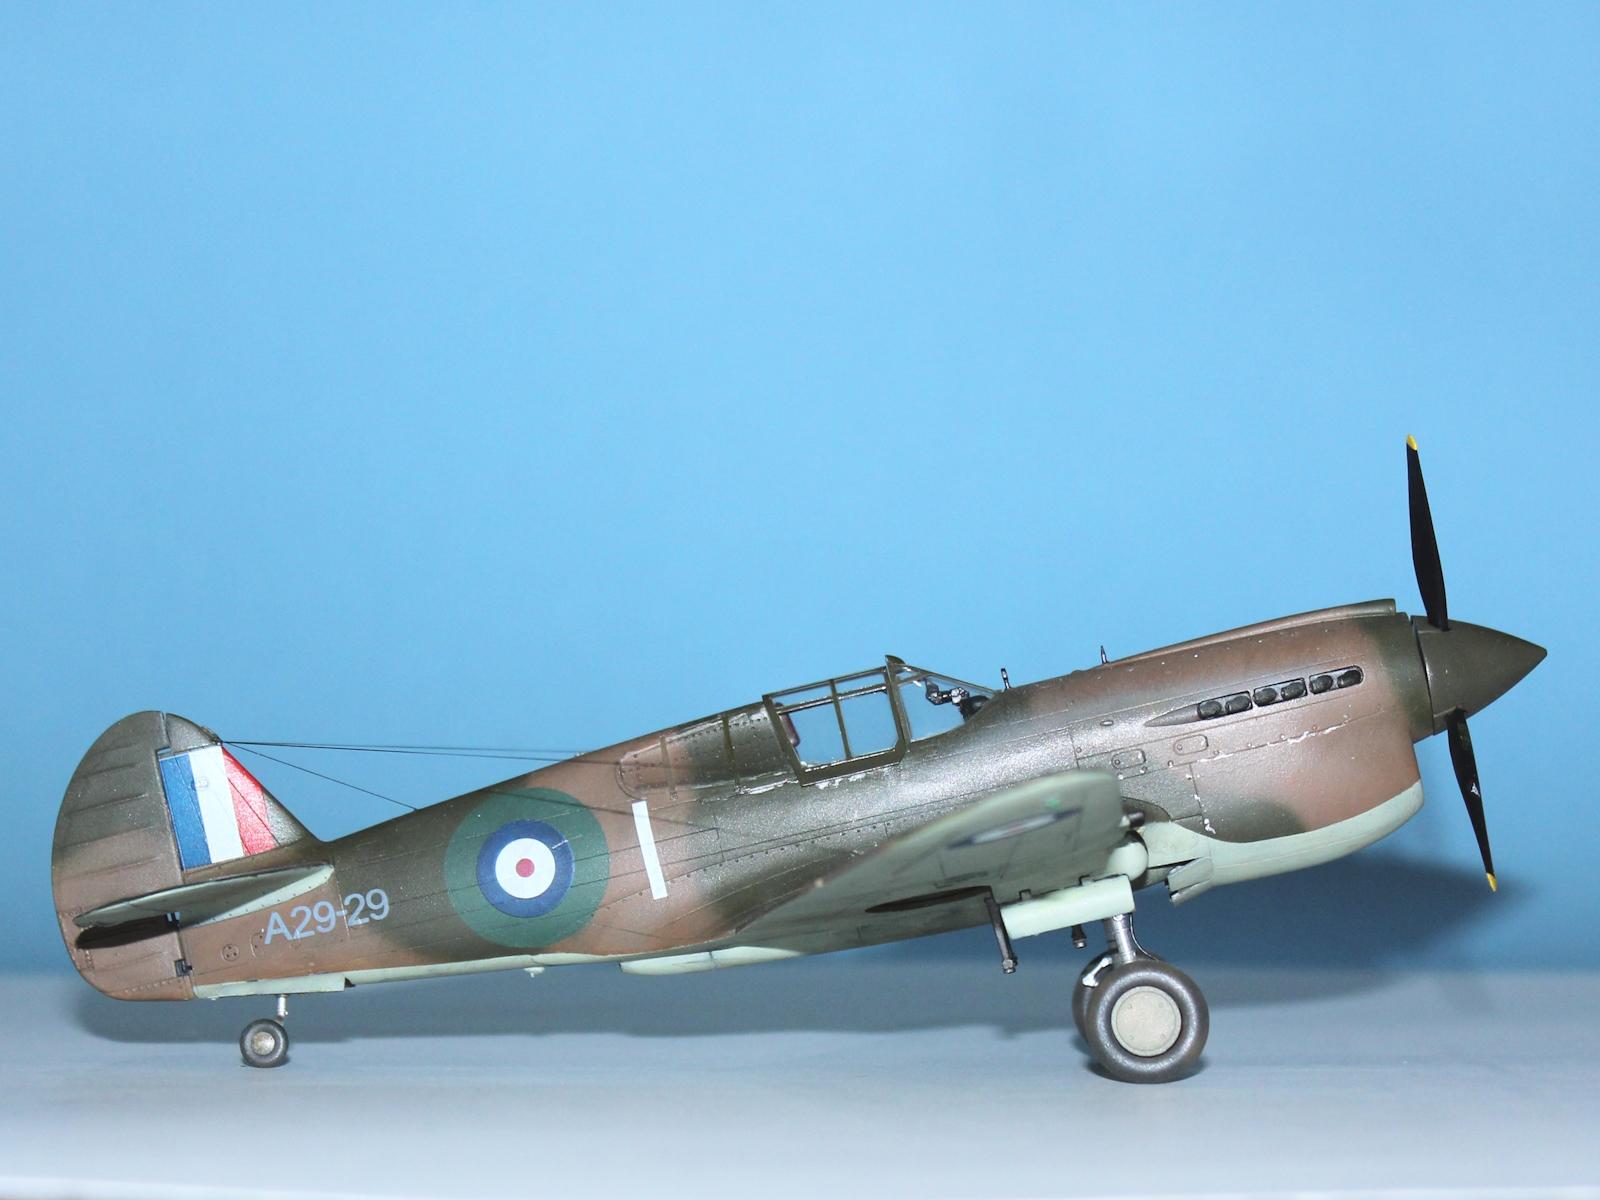
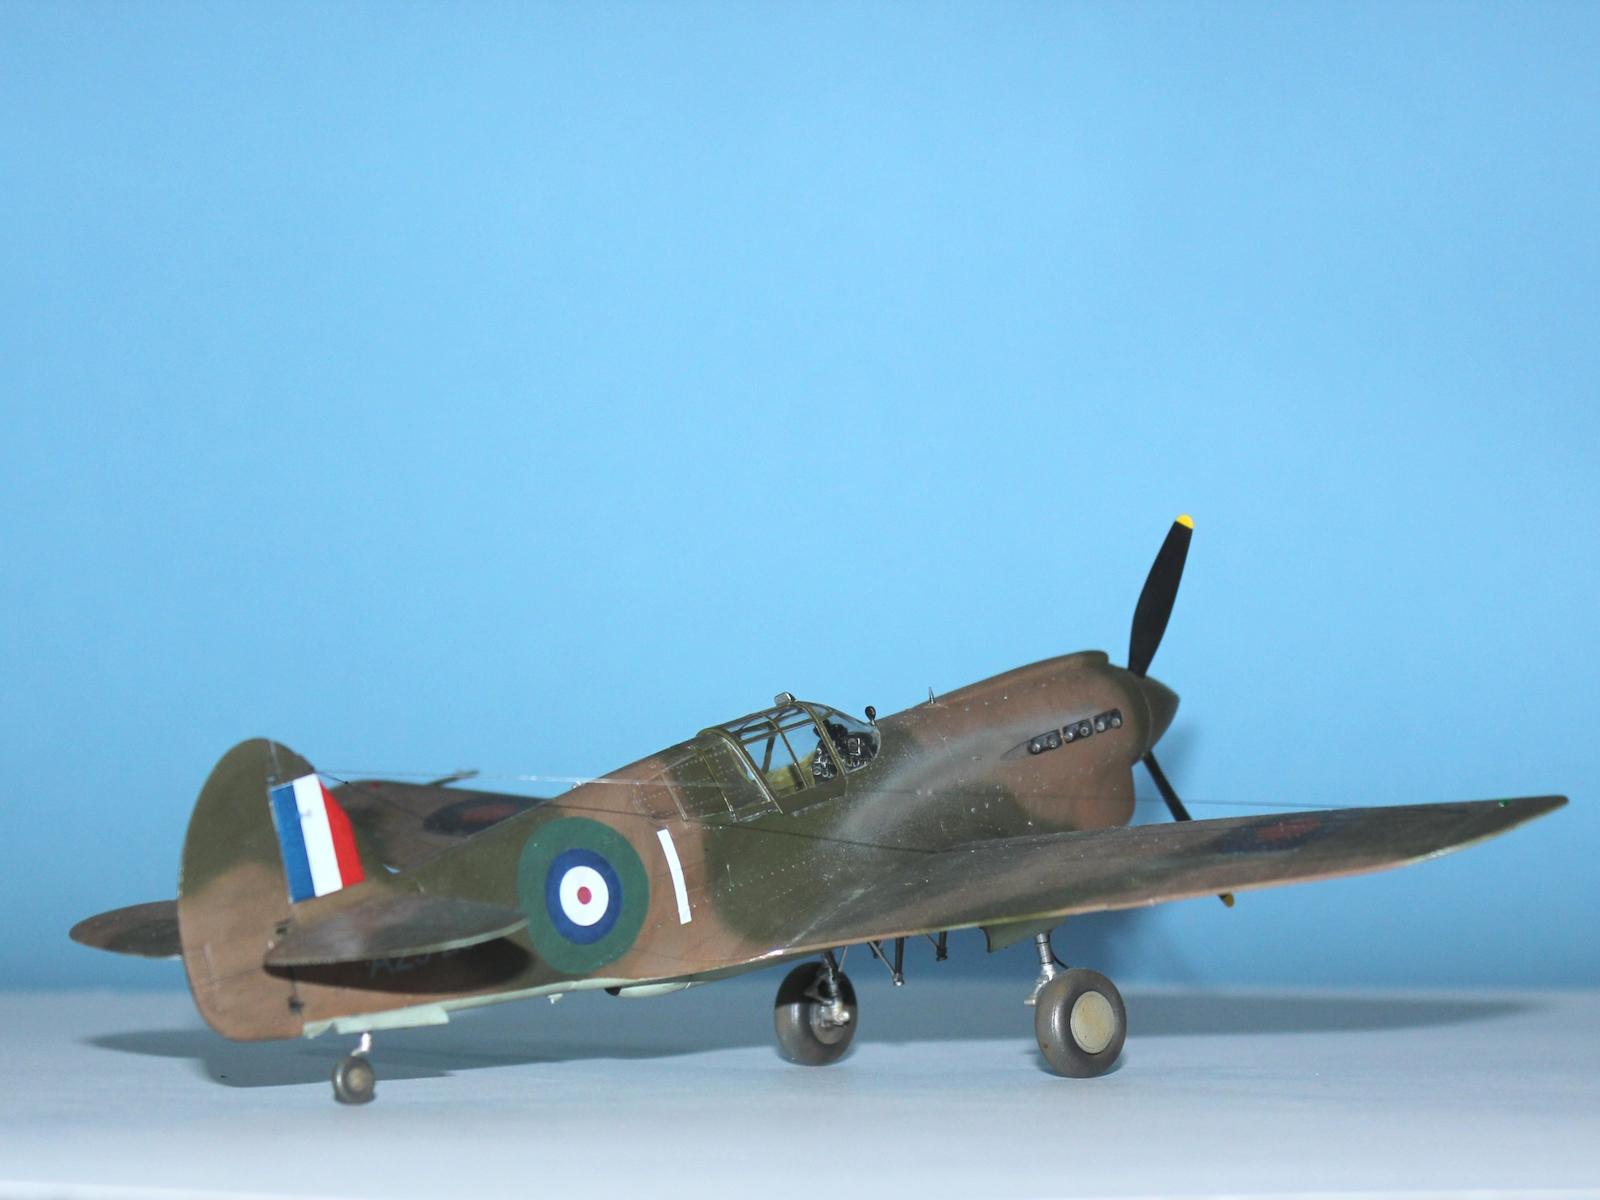
The Ronin decal sheet that I used for this build is titled "Royal Australian Air Force 75 Squadron P-40Es at Milne Bay", which is appropriate for all of the other aircraft on the sheet. However, A29-29 was shot down during the defence of Port Moresby in April 1942 and so could not have been present at Milne Bay. The scheme on the sheet seems to be based upon a well-known photo of another P-40E A29-101, coded with a "1" aft of the fuselage roundel and with the later blue/white RAAF insignia. The "1" is sans serif and so is easily confused with an "I". This aircraft in fact was serving with 2OCU (no. 2 Operational Conversion Unit) based in Mildura, 1943.
No photos of this aircraft exist due to the relatively short time of its existence and the pressing military situation, so what did it really look like?
Curtiss painted this, and other aircraft from the RAF order, using Dupont RAF equivalent colour paints. The Dupont colours were Dark Green 71-003, Dark Earth 71-009 and Sky Type S Gray 71-021. While they were close to the RAF colours, they were different enough that I decided to find paints other than the standard ones.
Dark Green 71-003 was close to RAF Dark Green, which was the successor to the WWI dark green that was the basis for the US Olive Drab. So, I chose to use Gunze H78 Olive Drab (2).
Dark Earth 71-009 was the first Dupont Dark Earth colour, the second being 71-035, and was a slightly redder version of RAF Dark Earth. After a long search of the various brown paints available, I decided that a new bottle of Gunze H37 Wood Brown was the best match. Interestingly, I have an old bottle of this which is lighter and brighter, so either the formula has changed or the colour has shifted in that bottle.
It should also be noted here that the rear quarter windows on the P-40 were removable and that the surface camouflage carried through under these.
The lower surface colour was the hardest to decide upon. Much has been written about the lower colour of P-40s because of the confusing description that the RAF supplied Curtiss of 'Sky', which could have been Sky Blue, Sky Grey or Sky type S. Also, the Dupont chart lists the colour as a 'Gray' when it is clearly a pale greenish grey. This colour is not as bright as RAF Sky Type S and is a little greyer. After another extensive search I decided that Tamiya XF-14 IJA Grey.
RAAF insignia in early 1942 still included the red component, which was progressively removed from aircraft after October 1942, and were identical to RAF insignia except for the absence of a yellow surround the fuselage roundel. However, when delivered to the RAAF, this aircraft most probably had standard RAF insignia, including a fuselage roundel with a yellow outline which would have therefore been painted out. To replicate this, I painted RAAF Foliage Green prior to painting the camouflage scheme and cut two circular masks, although I miscalculated the diameter and so the now green surround is a little too big.
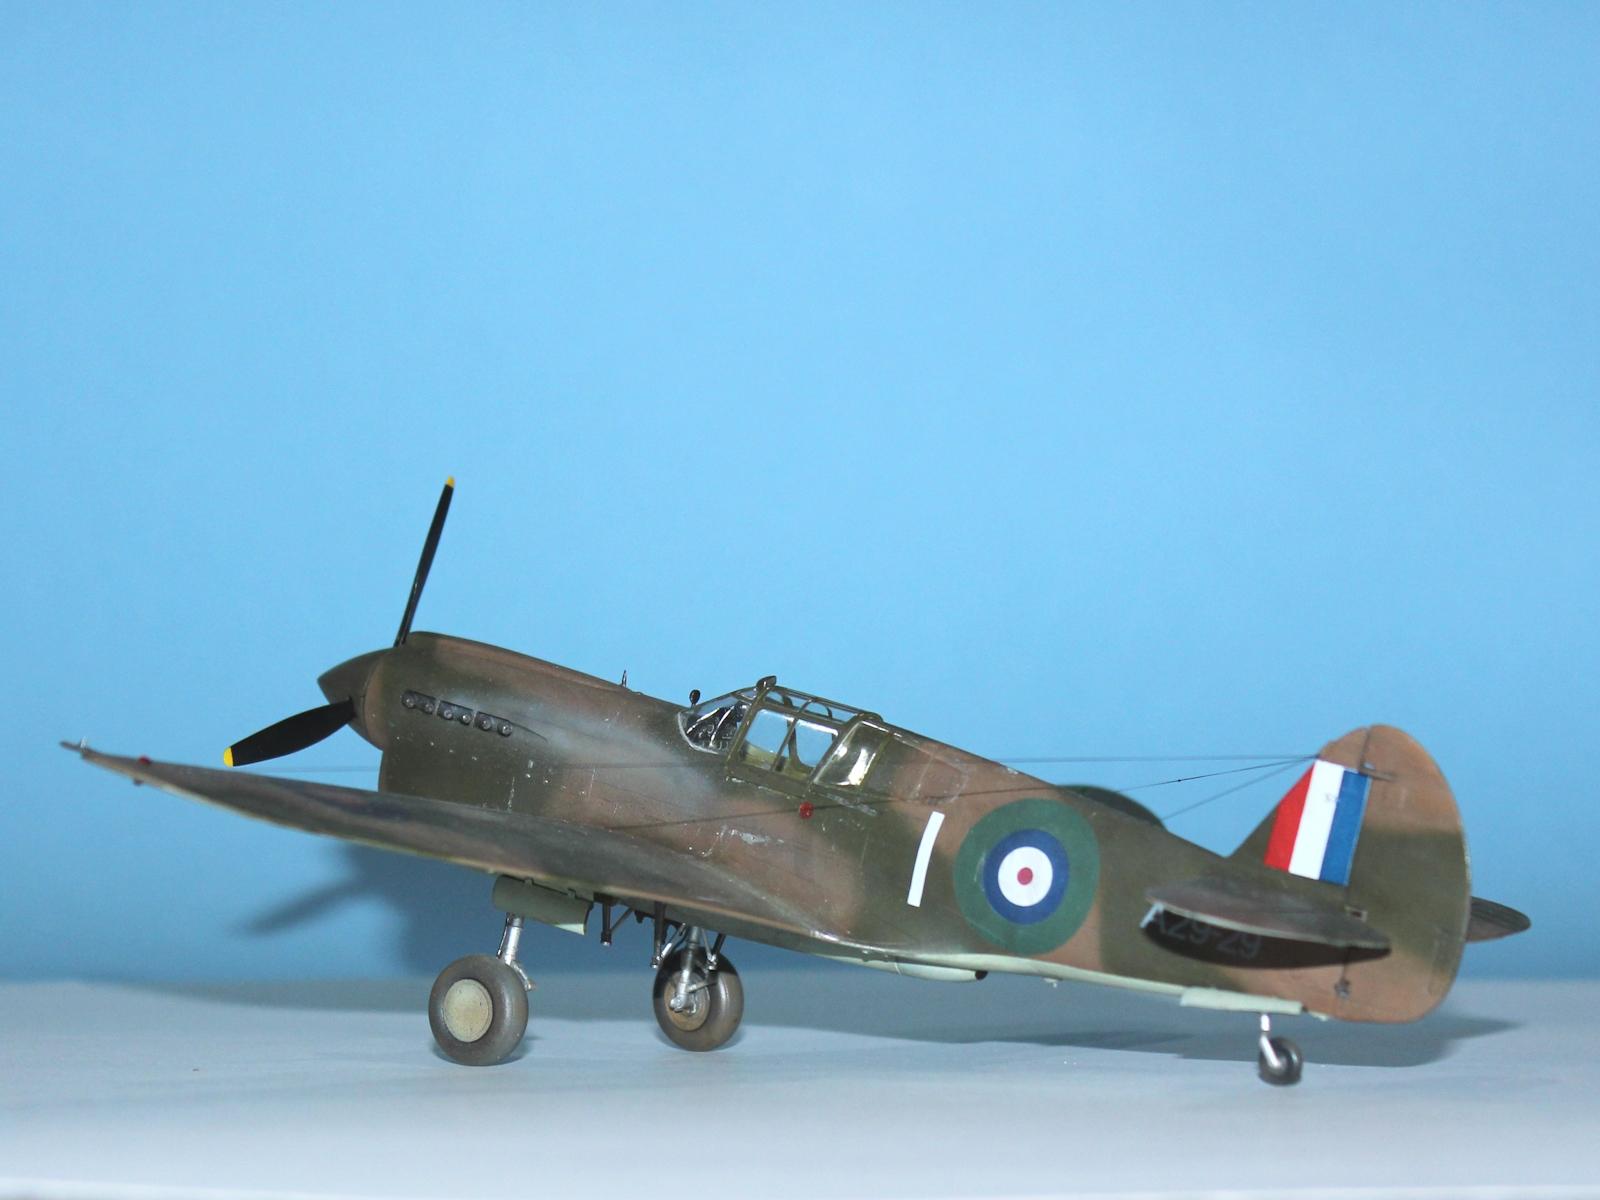
Photos of other 75 Sqn aircraft from this period show the individual aircraft letter ahead of the fuselage roundel. So, based upon this, I used the scheme for A29-1098/M/"Shuftie" on the decal sheet as a guide.
Once painted and lightly weathered, I attached the small formation lights on both upper and lower wing tips with white glue and painted the port wing ones clear red and the starboard wing ones clear green. Formation lights were likewise attached each side of the fin and left unpainted.
The final act was to attach the antenna wires. The lead from just below the fin tip to each wing tip, just inside of the formation lights. A third wire led from the fin to the mid upper fuselage. For the wire I used Infini Models Fine 1/48 Aero Black Rigging (0.082mm).
Conclusion
In spite of the Hasegawa inserts, this was a fun build and I'm extremely happy with the end result. This aircraft represents a challenging and formative time for the Australia and the RAAF.

Looks great. The Hasegawa's look spot on for shapes and lines, but do need some extra work.
75 really got the short end, thrown against the Tainan Kokutai at peak power. A tough bunch.
That's a great build of the Kittyhawk, your extra work makes it pop!
Very Good looking P-40!
Nice looking P-40. Great job. P-40 equipment and colors are always fun to figure out as Curttis orders were constantly getting switched from one country another then switched back or taken over by the USAAF, etc, etc. As for colors, every manufacturer had there own versions of the same color and no two were exactly the same, It's hard to pinpoint exactly what color shades were on any particular aircraft. You really can't go wrong.
Nice P-40, Michael!
Fantastic job, Michael! Superb research as well! Loved reading your article, not only for the historical facts, but also for all the construction tips that resulted in such an accurate model.
Well done!
You seem to know your subject very well. Great execution.
Excellent work. I had the same issues when I built the Hase P-40E, too.
Nice work @michaelt. I enjoyed watching the WIP on these P-40s.
Nicely written and interesting article, and your research has resulted in a good, well detailed model.
Beautiful P40, Michael @michaelt
Great article as well.
I'm impressed by the amount of antenna wires on this aircraft.
G'day Bill (@billkoppos), Chas (@chasbunch), Lis (@lis), Clint (@curtisshawk), John (@j-healy), Spiros (@fiveten), John (@jdtruby), Dan (@dbdlee), Tom (@tcinla), George (@chinesegeorge) and John (@johnb),
Thanks for having a look and your kind comments.