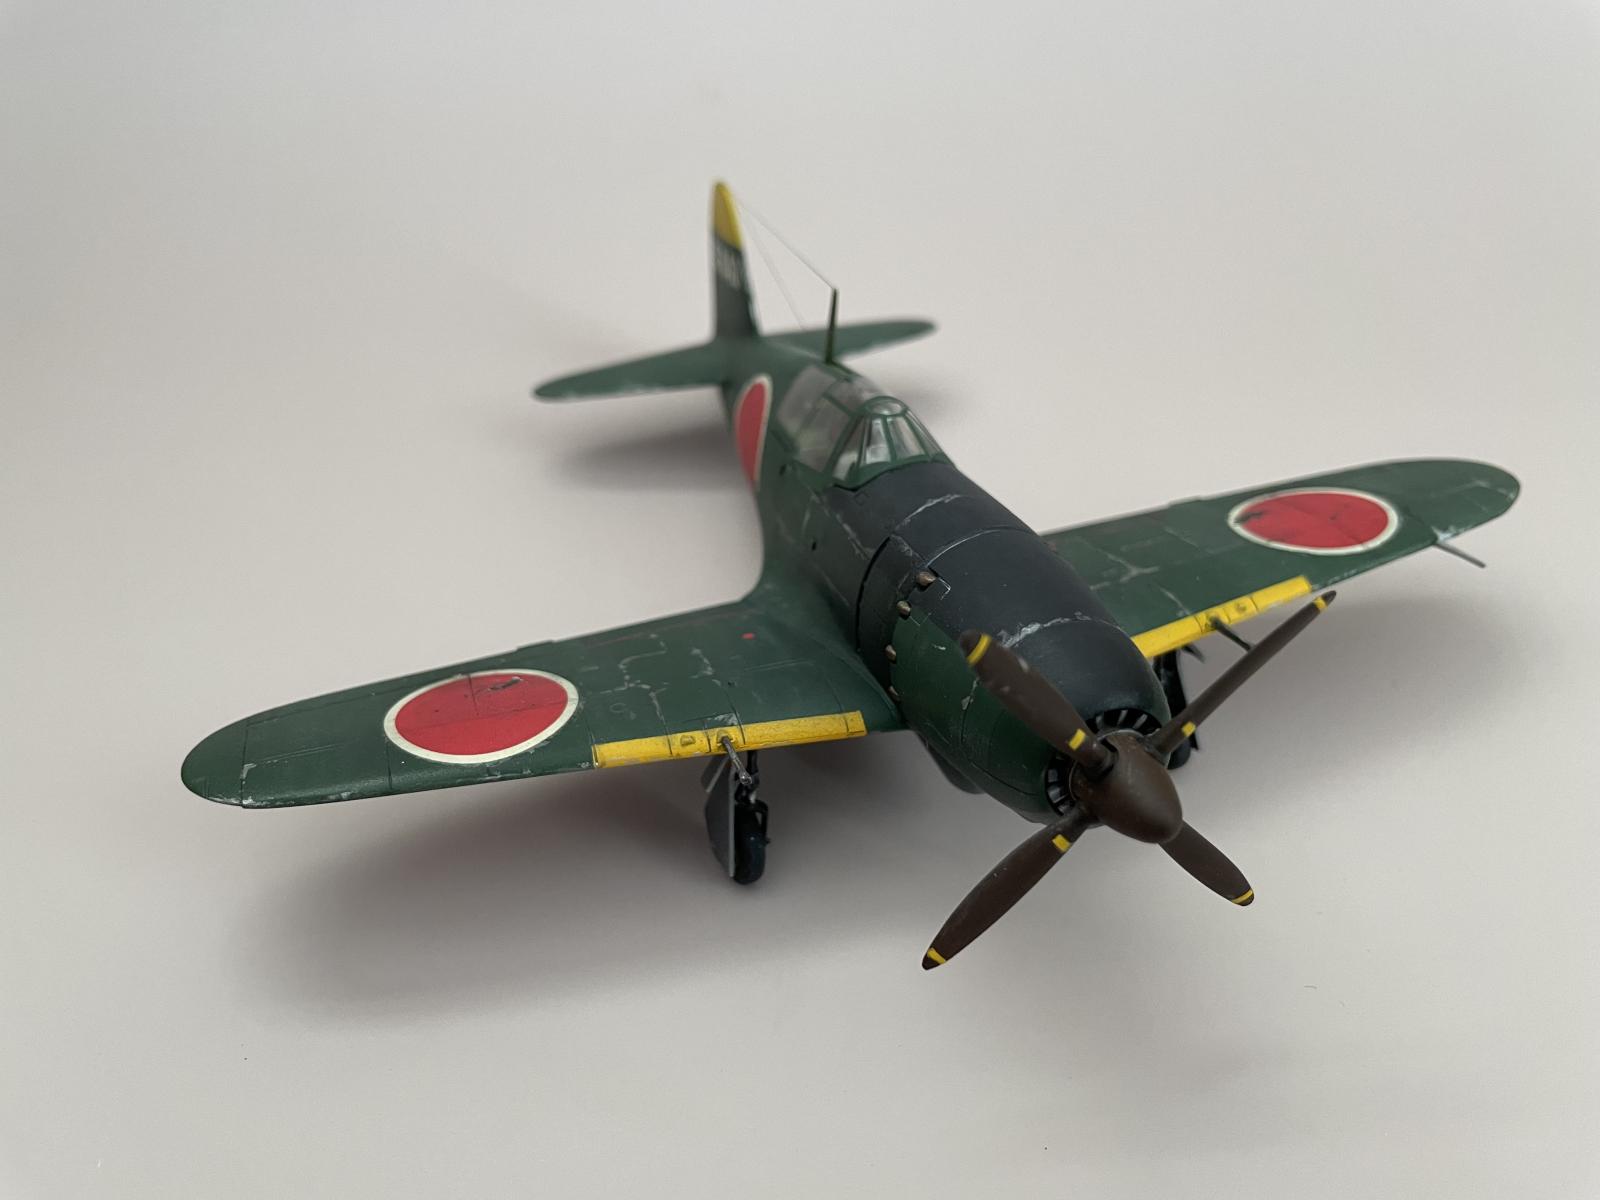
Hasegawa J2M3 Raiden
The Mitsubishi J2M Raiden was a local interceptor that served in the defense of the Japanese homeland against high-altitude Allied bombers. It was therefore a good, quick climber without frills. The earlier J2M2 and J2M3 (both designated “Raiden” but known colloquially as “Jack” by allied forces) was hobbled at high-altitude by the lack of a turbocharger (which helps to compress the thin air aloft and improve performance). By the summer of 1944, the high-altitude variant J2M5 (with turbocharger) was introduced enabling the Raiden to reach 30K feet and tangle with allied B-29s. Debuting at the Battle of the Philippine Sea, the Raiden would see action throughout the remainder of 1944 and into 1945.
In 1945, despite the enlistment of thousands of Taiwanese children to build the Raiden, production effectively collapsed with the continued Allied bombing of critical industrial infrastructure (including a direct hit on the Mitsubishi plant in Nagoya.)
The Raiden was involved in one of the last hostilities of the war when a group of J2Ms and Zeros encountered a formation of Hellcats over Japan a mere two hours before Japan surrendered; several aircraft on both sides were needlessly lost.
The Kit
This is the Hasegawa 1/72 J2M3 Raiden introduced in 1977. Though dated, it has fine, engraved details and overall excellent fit. Sword has a more recent offering with better detail in places, notably the cockpit and wheel wells:
but Hasegawa's offering is cheap and easy to find. It's still a solid choice for this aircraft.
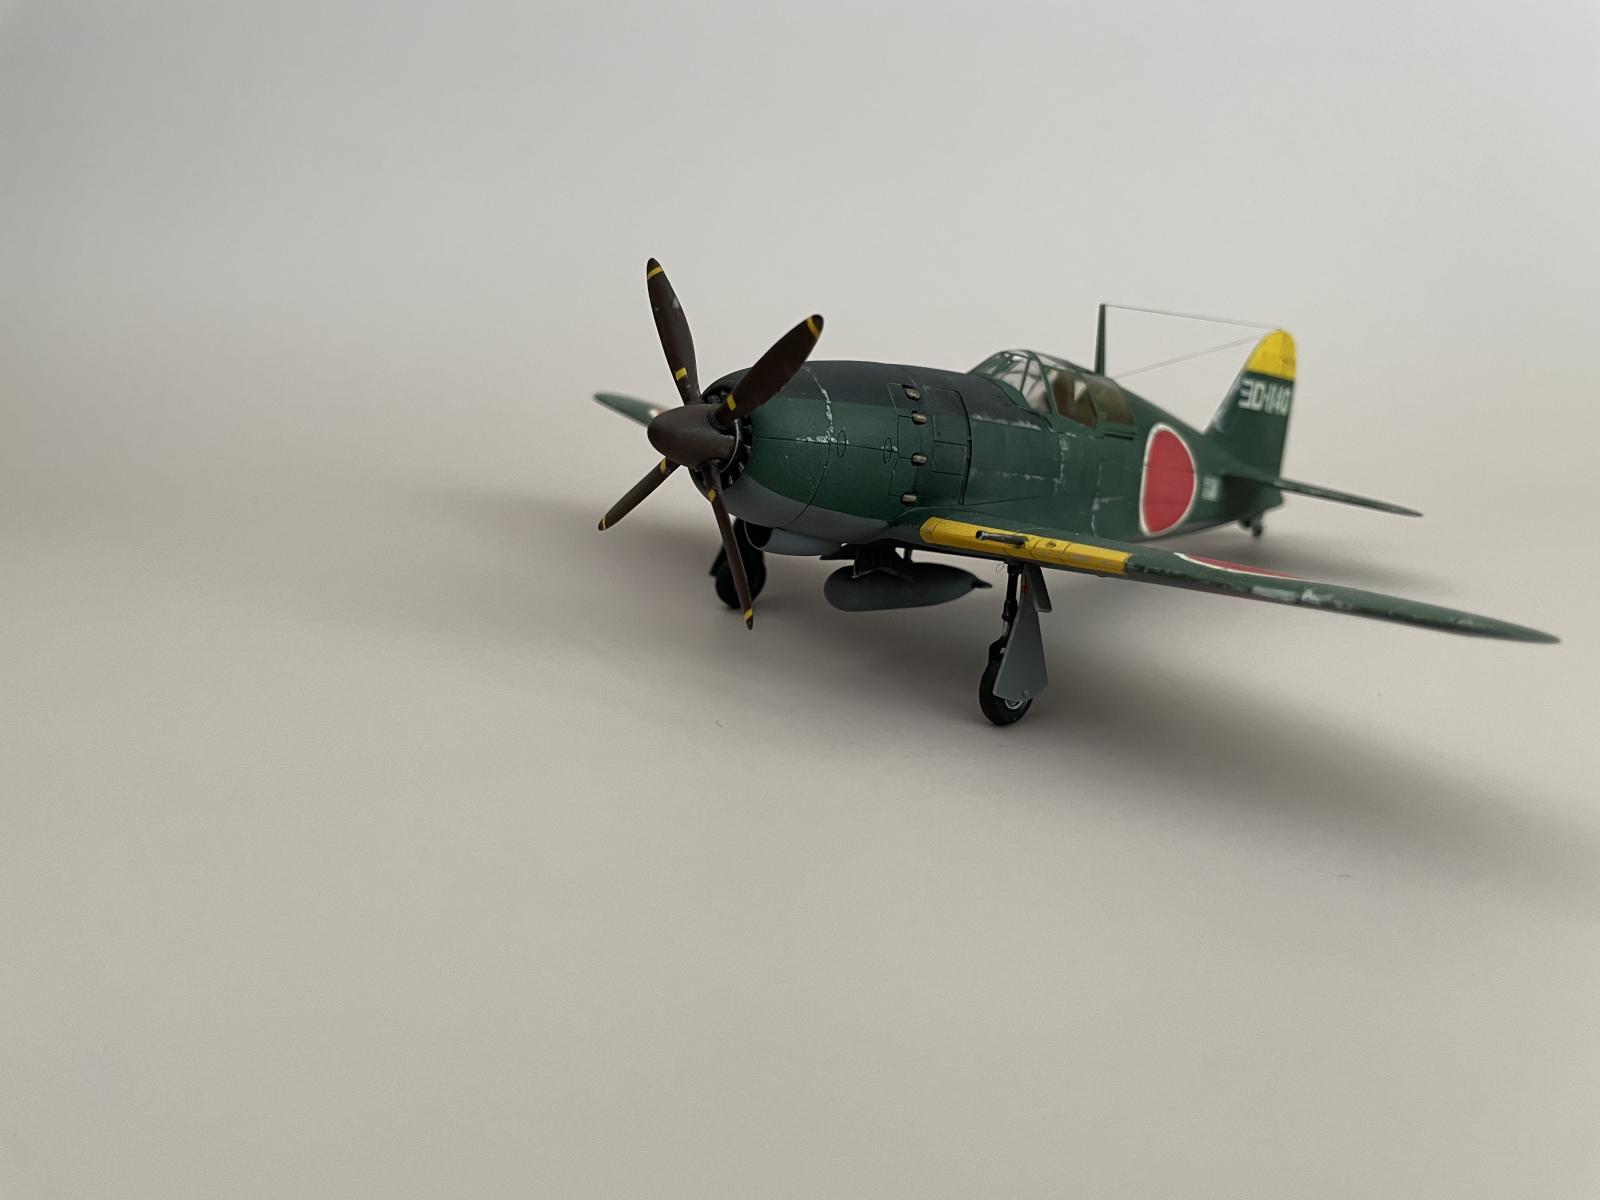
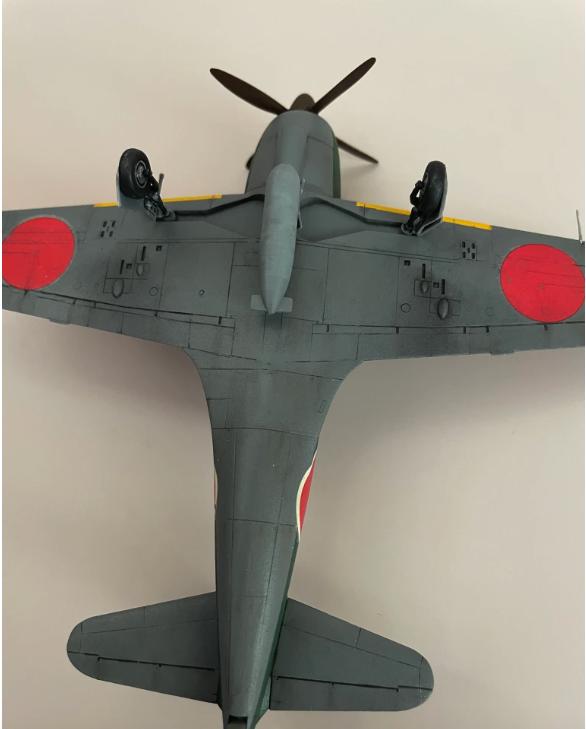
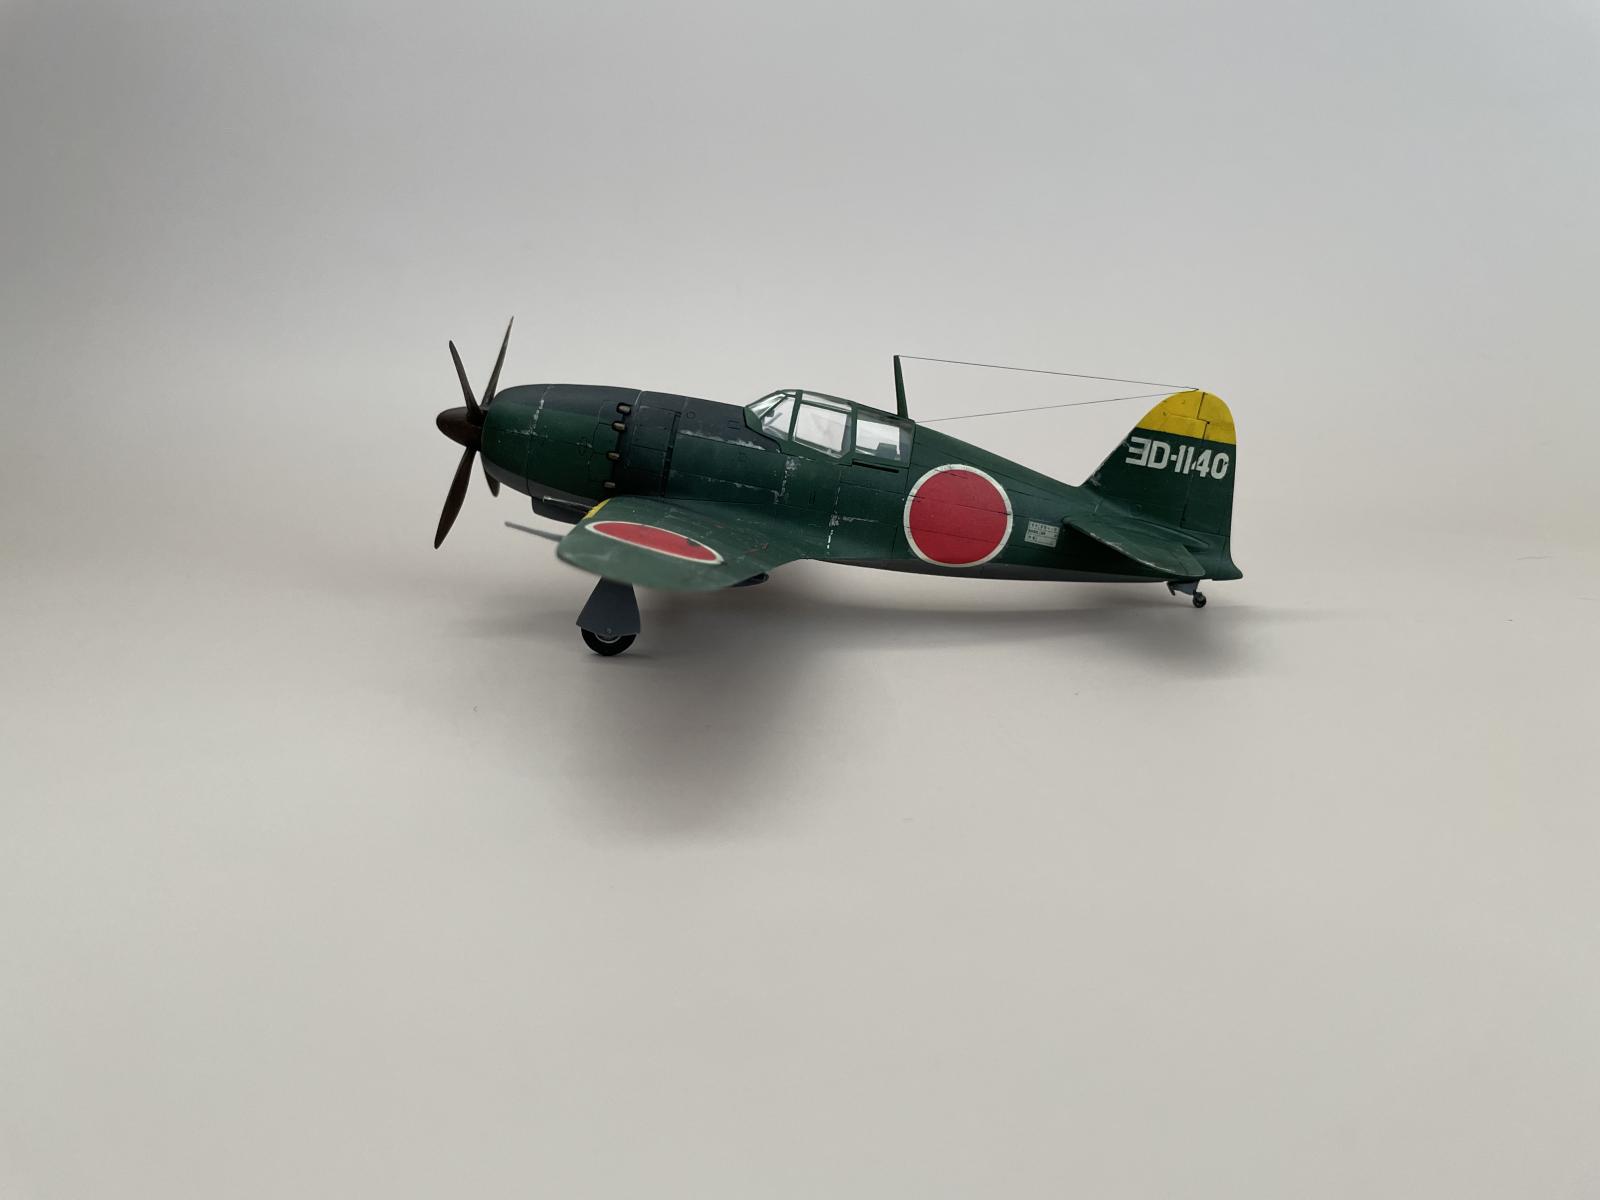
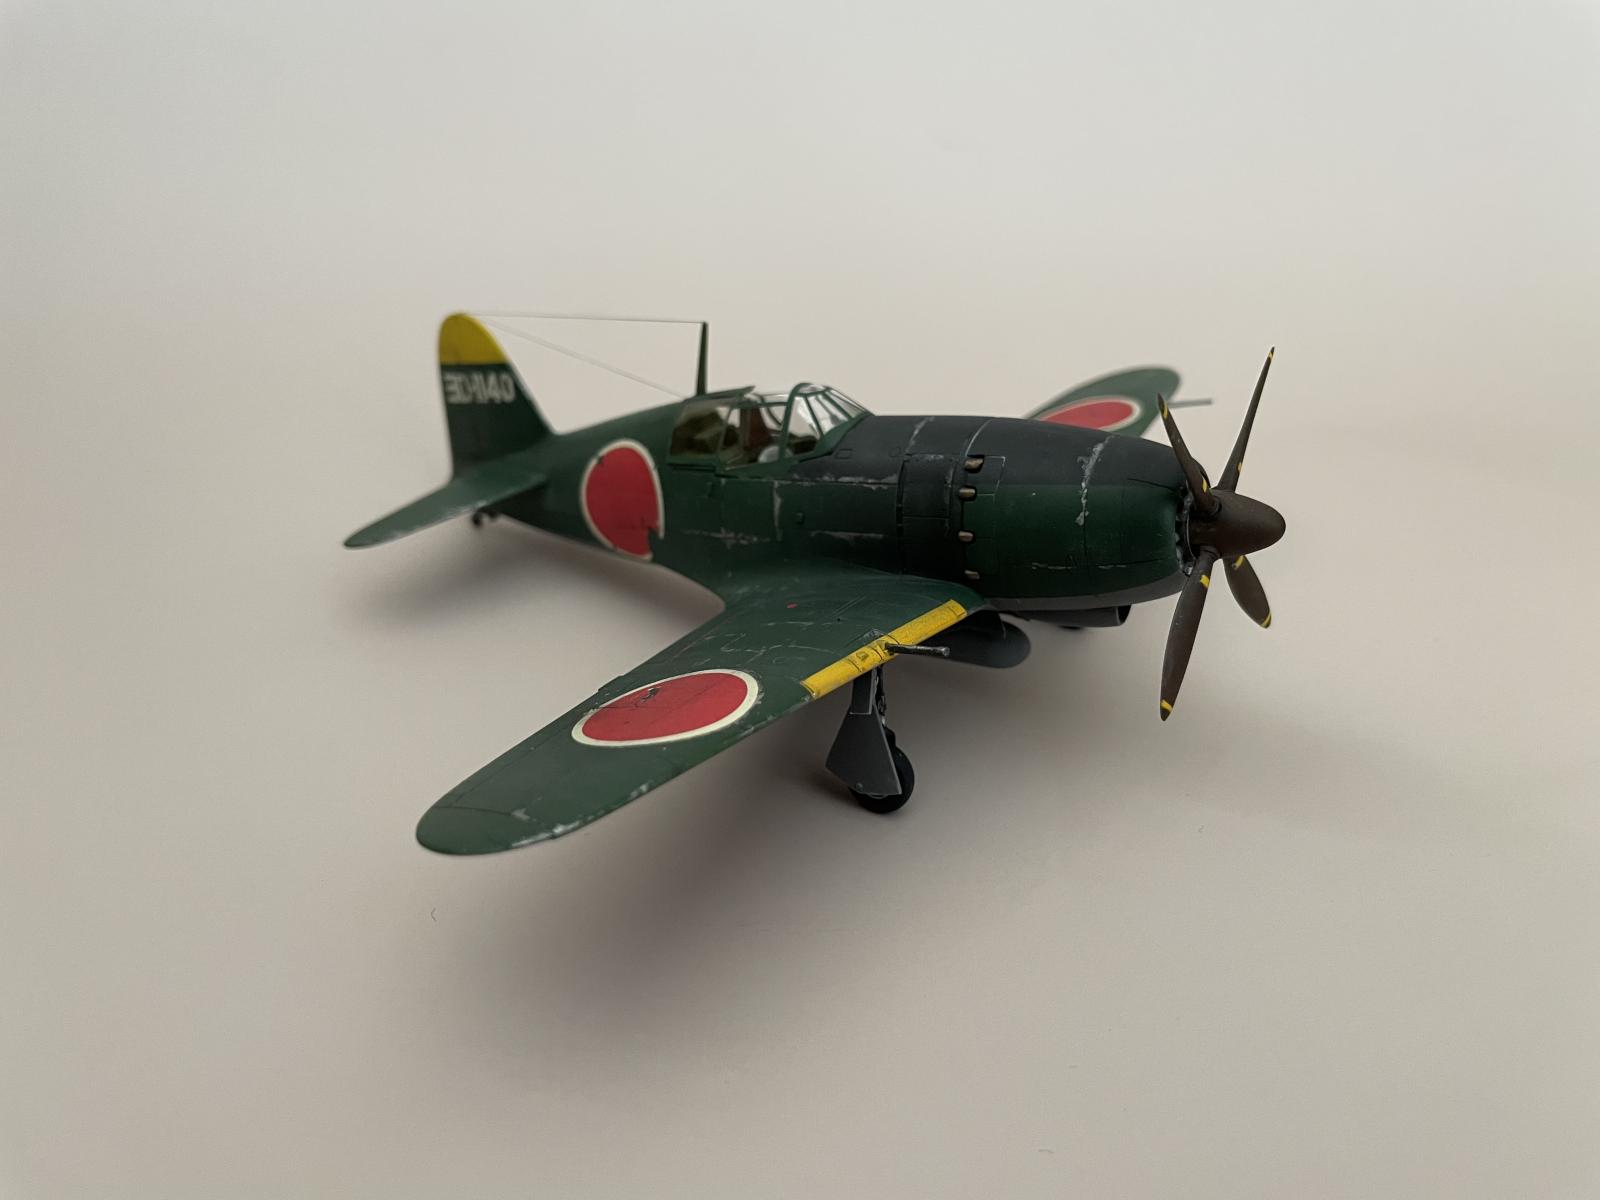
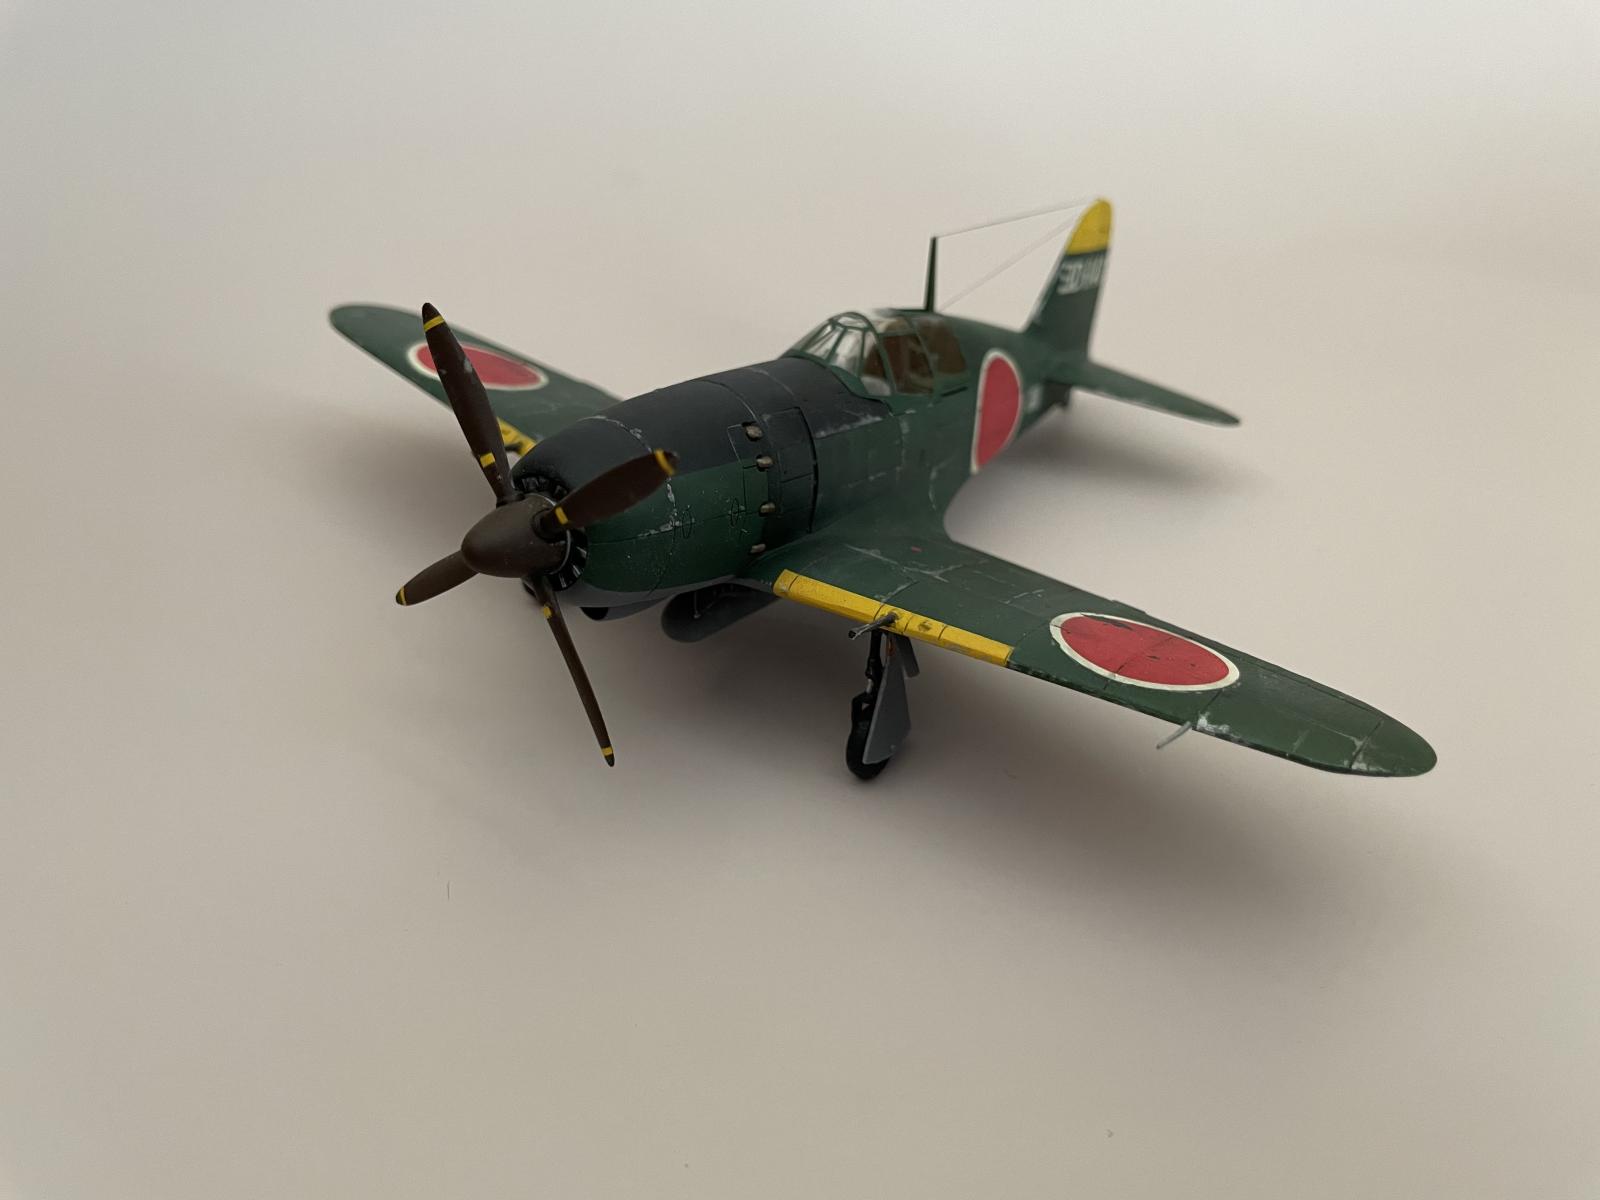
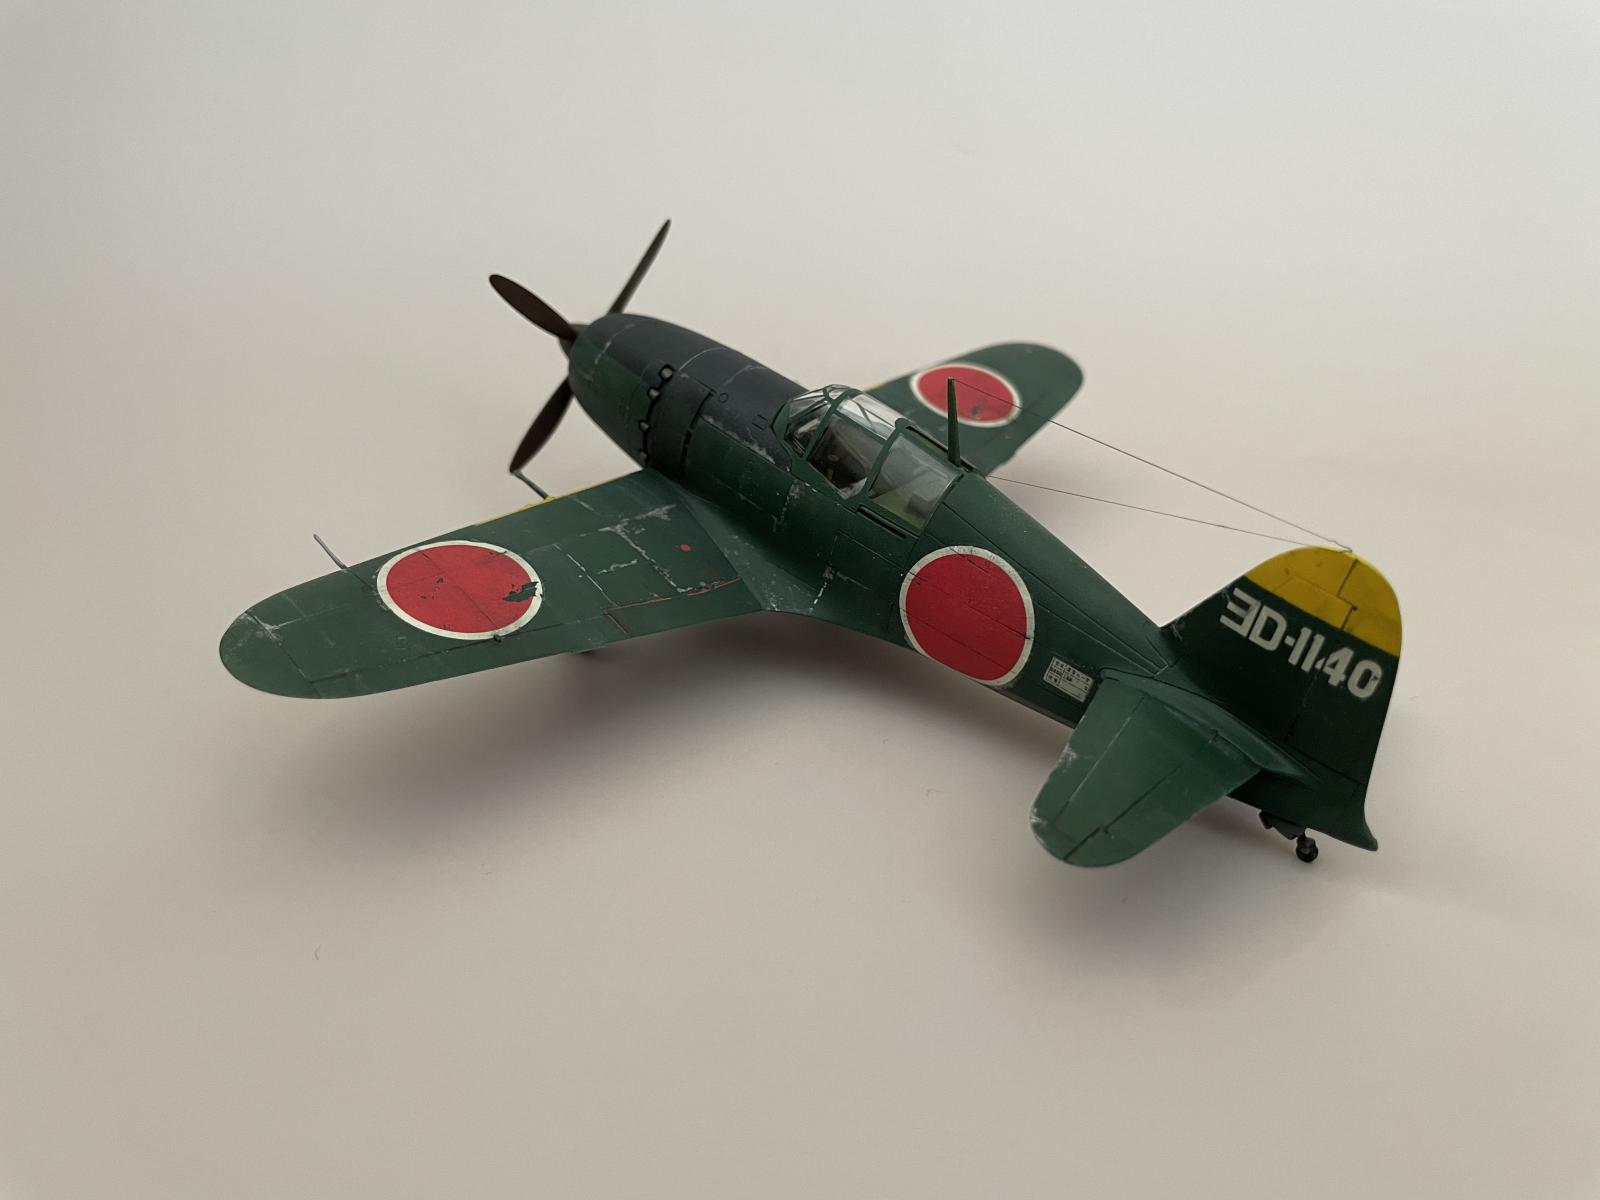
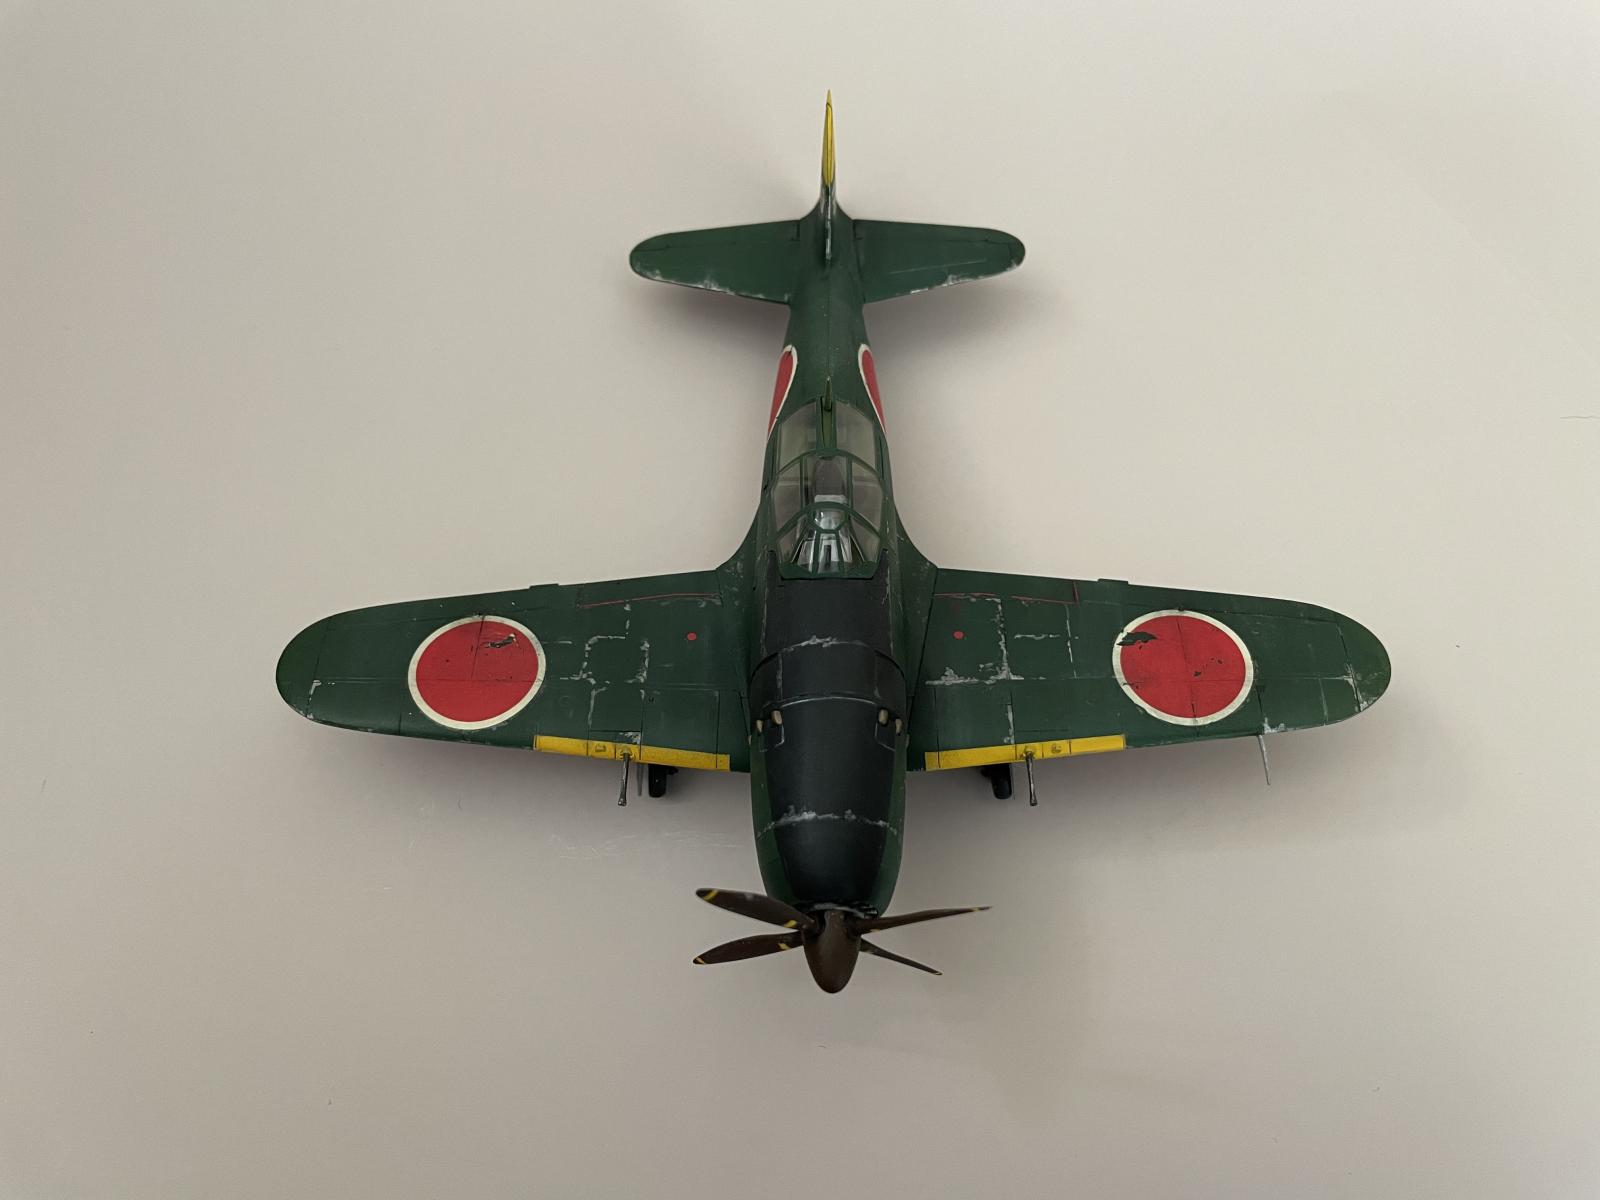
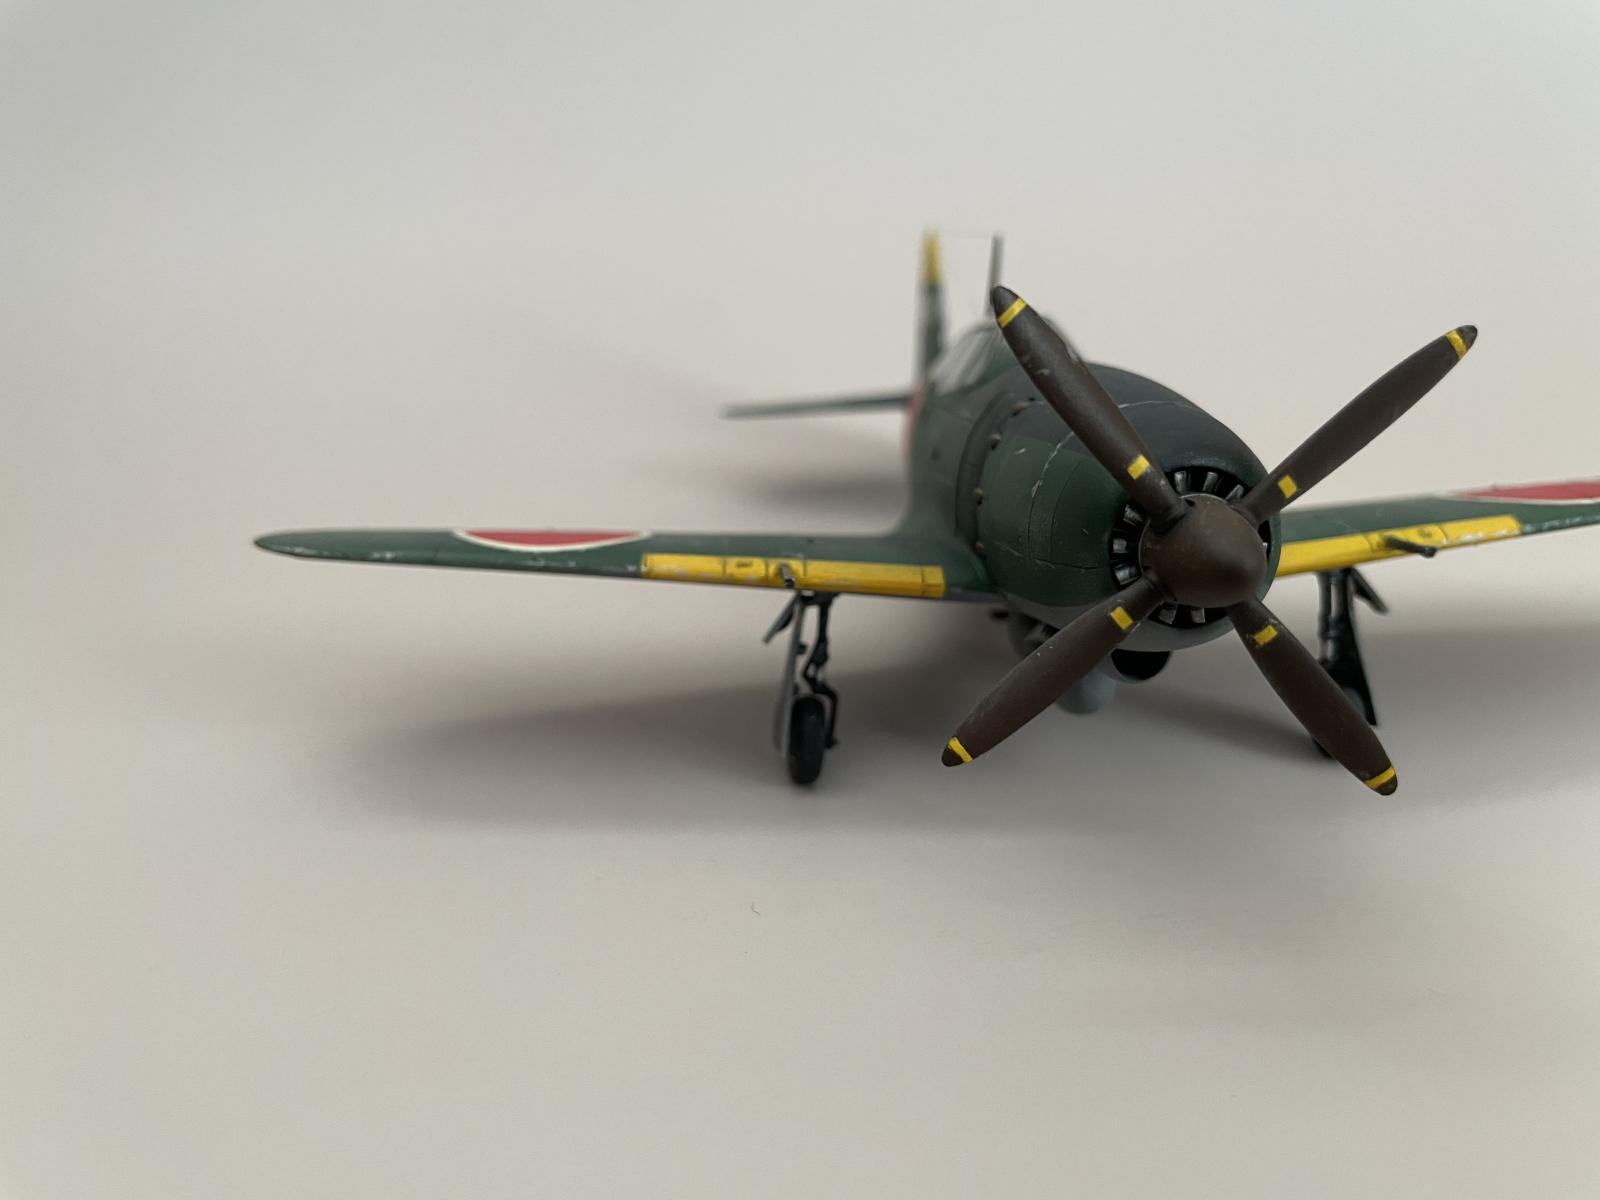
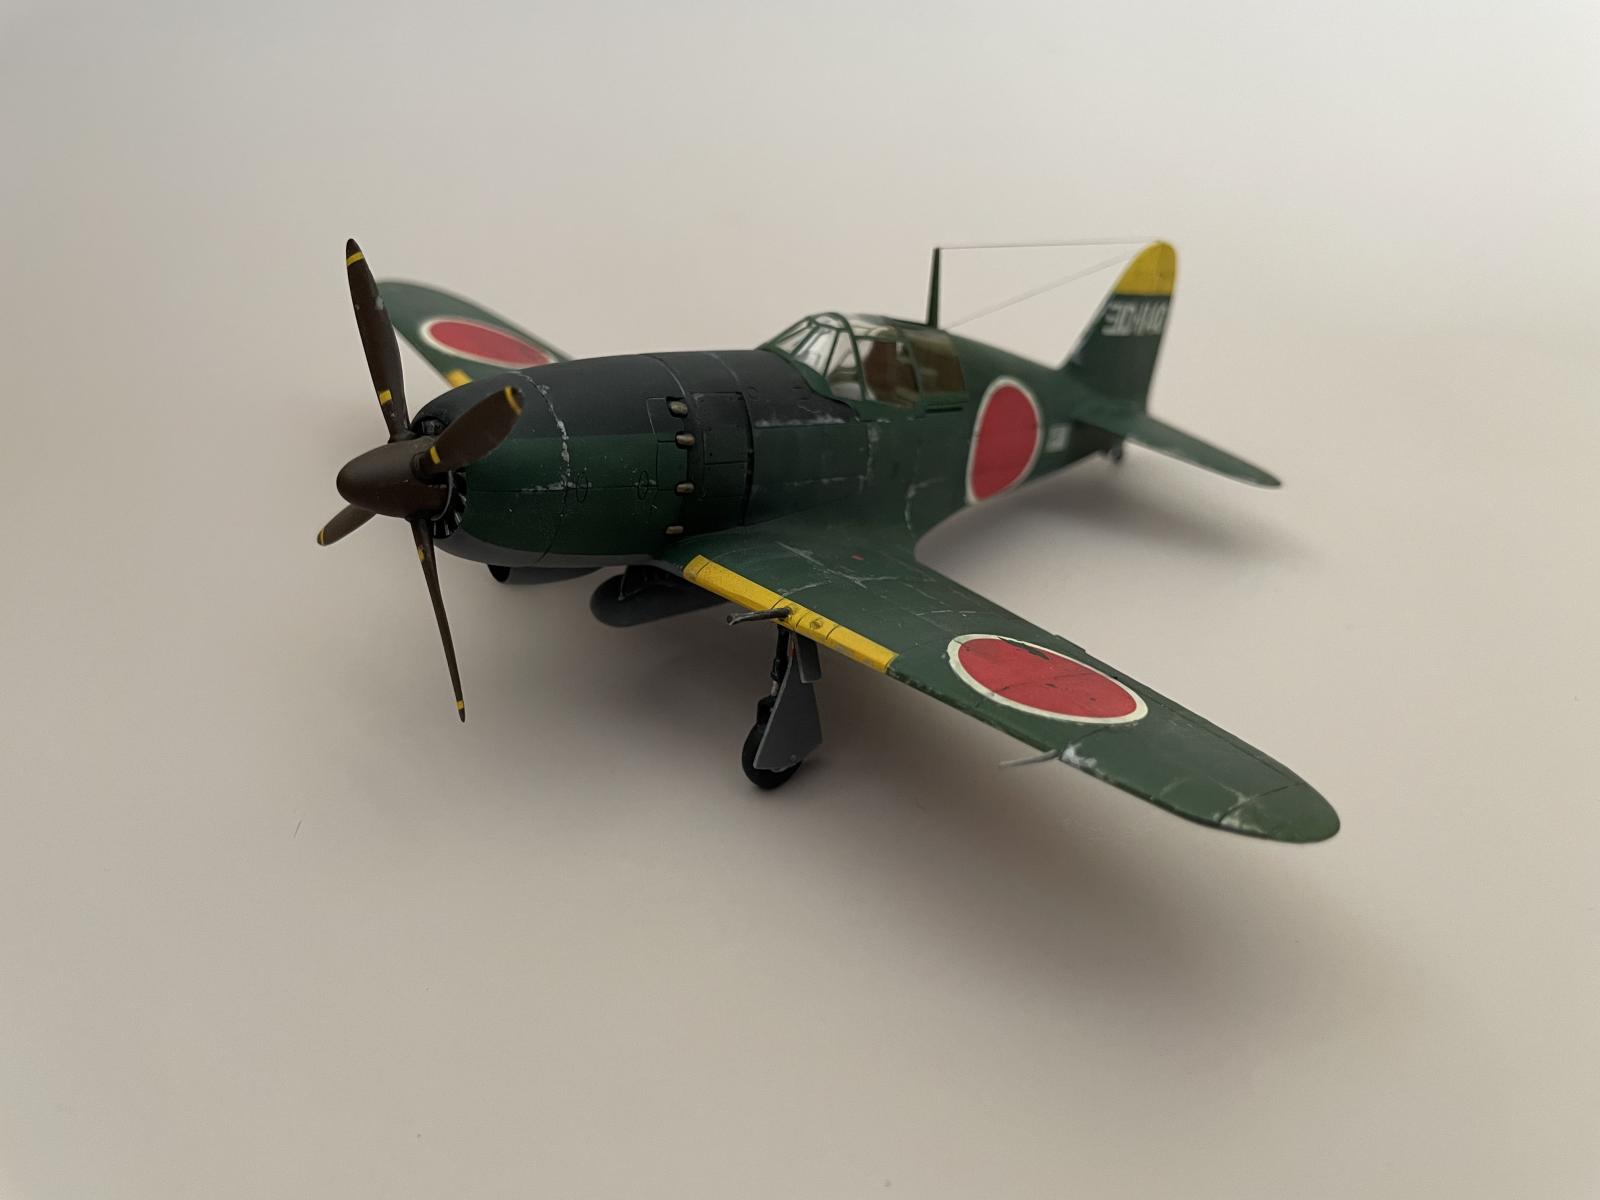
Construction was unremarkable. Base paint included Mr. Color 124 (Mitsubishi Dark Green) on top and Tamiya XF-75 (IJN Gray) on bottom. After a gloss coat, I applied a pin wash of Tamiya Dark Gray and Black and AK Interactive White enamel panel liners, the latter applied to the black cowling and a few other spots. I attempted a chipping effect along various panel lines with Tamiya XF-15 (Flat Aluminum); I think overdid this:

After another gloss coat, I applied some oils: on the top (green) areas, a filter of Abteilung Buff and Green and Mig Oilbrushers Blue, streaking backwards to simulate fading. Some Mig Oilbrushers black was applied near the engine exhausts and on the control surfaces; on the bottom of the aircraft, I created some grime streaks with Abteilung Sepia and Burnt Umber. All of this is subtle and gets muted by subsequent varnish layers.
The decals gave a little trouble. Typical Hasegawa: thick carrier film with generous borders, but they did not agree with Solvaset (at least not the amount necessary to get them to behave). The only problems were with the Japanese roundels, which began to wrinkle up in places after a couple applications of Solvaset. After the decals had set for a few hours, I rolled them tightly with a cylindrical eraser to “iron out” the wrinkles: this helped a little, but not enough. Now, I was planning on doing some decal weathering anyway and I figured: why not go to town on these guys? I might be able to make these various blemishes work for me; if things didn't work out, I'd have to remove the decals and start over anyway. And so I began scrubbing them at the wrinkles which tore away portions of decal. In the end, they looked really pretty badly beat up: considerably more so than I would have gone for. I can't imagine an aircraft in this cosmetic condition being permitted to fly by the IJN, but it's what I've got.
When I sat down to work the canopy, I realized just how intricate the lattice-work is and decided I'd really like a canopy mask. I hunted around on the web and found that DEAD Design Models makes a set for the Hasegawa 1/72 Raiden. The only place selling them at a reasonable price was BNAModelWorld in Australia: I was frustrated over the prospect of having to shelve this very nearly completed model while I waited for a tiny sheet of stickers from half a world away. But, BNA and Australia Post are ruthlesslly efficient and they arrived at my doorstep in 7 days. The masks are superb:

After a final coat of Alclad Flat I dusted on a bit of Tamiya Soot pigment behind the exhaust to strengthen the effect the oils that had diminished somewhat.
And so completes my first Japanese WWII aircraft. Worse for wear but a fun project.
You did really well on your first WWII aircraft, Brian @bapowellphys
Especially considering this is just a 1/72 kit. It definitely looks much bigger.
Well done.
A fine-looking build. @bapowellphys
That's a very cool looking model Brian @bapowellphys. I love the weathering and worn look on this. Top job.
🙂 ... Greetings ... 🙂 :
Nice and very satisfactory modeling on this one Brian!
Decent work on the weathering and chipping.
Very nice Raiden! I feel your pain with the decals. There has to be a better alternative to waterslide decals.
Nice job on this Raiden Brian @bapowellphys Just the right amount of “beat up”.
As an Aussie, I can vouch for your experience with Australia Post. We might not be able to do fast internet but we have snail mail down to an art.
Excellent job on this elderly kit, Brian and a superb result!
Fantastic result. I’m planning on building a J2M this holidays!
Well done on that little jewel!
Very nicely done! I have this kit in 1/32nd scale by Hasegawa, and if it turns out this nice I'll be extremely happy! Great job, Brian.
Well done on finishing this kit to such a high standard.
I've build that kit, and like it a lot - just enough detail for the scale. Yours looks excellent! Well done.