Review: Another Rescue from the Department of Lost: Classic Airframes S.79 "Sparviero"

I built this model 20 years ago when it first came out. I am including the review I wrote then, since Eduard is re-releasing this kit in February 2024, with the Spccial Hobby plastic and Eduard resin detail parts, and an Eduard decal sheet. If you get the kit and follow the construction instructions here, you'll have a great result.
Classic Airframes Savoia-Marchetti SM 79 Sparviero
The Airplane:
As William Green said of the S.79 Sparviero in "Famous Bombers of the Second World War," Volume 2, “Erything that the Spitfire was to the British and the Zero to the Japanese, the Sparviero was to Italy." The greatest Italian aces of the war were the crews of the Squadriglie Aerosiluranti, who made life hell for the Royal Navy in the "Sea of Storms" for two crucial years of the war.
The Savoia-Marchetti S.79 began life in 1933 on the design board of Allessandro Marchetti, chief designer of the Societa Idrovolanti Alta Italia (SIAI) as a three-engined, eight-passenger airliner, to be entered in the coming MacRobertson London-Melbourne Air Race. The airplane had the first retractable landing gear applied to any Italian design. Unfortunately the design could not be readied in time for the race, as the first prototype, registered I-MAGO did not take flight until October 8, 1934. General Guiseppe Valle, Chief of Staff of the Regia Aeronautica used the airplane for a tour of Italian East Africa in August 1935, and became an enthusiastic supporter of the design; his support was crucial since the air staff believed the trimotor concept was obsolete for a bomber.
By 1936, the bomber version was in production, and the S.79 entered service with the Regia Aeronautica in December 1936; it was known as the Sparviero, or "Sparrow Hawk." The bomber was faster than contemporary fighters. It was still unwanted by the air staff because of the engines and defensive armament, but of all the competing designs it was the only one to find any success - the others ranged from deadly to the pilots to merely poor in performance. The S.79 first saw combat in the Spanish Civil War, flown by the Aviacion del Tercio. The bomber had yet to meet determined modern fighter opposition in its career, since the only Republican fighter that had a chance of catching it was the I-16. When Italy entered the Second World War in June 1940, the S.79 was soon found to be very vulnerable to RAF Hurricanes in North Africa.
The Squadriglie Aerosiluranti:
The S.79 found its true calling when the airplane was modified to carry a torpedo, and the first aerial torpedo bomber squadron was formed in August 1940. Operating from Libya, the 278th Squadriglia Quattro Gatti ("Four Cats") found immediate success. On September 17, 1949, Buscaglia and Robone hit HMS "Kent", while Erasi hit HMS "Liverpool" on October 10 - both ships were out of commission for a year. On December 3, Erasi and Buscaglia hit HMS "Glasgow." By the end of 1940, the squadron had carried out 238 sorties and conducted 113 attacks. New Squadriglie were created in 1941, and by that spring S.79s were operating from Libya, Rhodes, Sicily, and Pantelleria. Their greatest effort was "The Battle of Mid-June" and "The Battle of Mid-August" in 1942, known to the Royal Navy respectively as "Operation Harpoon" and "Operation Pedestal," both major attempts to resupply the island of Malta. During Harpoon, the Sparvieros hit several freighters, got HMS "Liverpool" a second time, and sank a destroyer. During Pedestal, the S.79s sank HMS "Eagle." The two battles cost the Regia Aeronautica 50 aircraft and 176 aircrew which is indicative of how hard the fighting was.
In November, 1942, S.79s struck Gibraltar in the wake of the North African landings, as well as other North African ports. Leo Buscaglia, by now the top S.79 ace, was shot down and captured while attacking Bougie, though his fellow aviators thought he had been shot down and killed. Following the Italian surrender in July 1943, Buscaglia was released from POW camp in Canada and was one of the first former Regia Aeronautica leaders to join the Regia Aeronautica Co-Belligerante, the Italian Air Force that fought with the Allies. He was killed in the summer of 1944, test flying a Martin Baltimore.
The last Aerosiluranti strike came in July 1943 when HMS "Indomitable" was attacked unsuccessfully off Sicily. Following the Italian surrender, a group of S.79s were flown as torpedo bombers by the Aviazioni della R.S.I. as late as 1945, but with only limited success and many casualties.
The Kit:
There have to date been two S.79 kits available to modelers, both dating from the 1960s and both very poor renditions of the aircraft, one in 1/50 scale was originally released by Artiplast and is now manufactured by SMER, while Airfix still has its 1/72 S.79. A new 1/72 kit has been announced by Italerei but not so far released. The less said about the SMER kit the better; I know of only three modelers who ever finished one, and those projects took a few years each. The kit is ill-fitting, inaccurate, and more trouble than it has ever been worth. With the release of the Classic Airframes S.79, the SMER kit doesn't even qualify any longer as a "Jurassic doorstop."
The new kit is made with metal molds by MPM, and is representative of "new" Classic Airframes kits like the Reggiane Re.2000 and Re.2001. The parts are much cleaner and crisper than previous kits made with the old resin molds.
The interior detail and wheels are cast resin. The clear plastic parts are very clear and crisply molded. A fret of photoetch parts are provided for small details like throttles and other levers.
Decals are printed by MicroScale and provide two Spanish Civil War aircraft, one from the "Falcons of the Balaerics" and one from the Sorci Verdi, with the third being an aircraft of the 193rd Squadriglia "Electric Man" in 1940.
Construction:
Construction of the model was very straightforward, and I only needed to scrape a very little bit of flash off the parts. I painted and assembled the cockpit per instructions, and made seat belts for the pilots' seats with lead foil. I assembled the fuselage and set it aside.
There is usually one "tricky part" to the assembly of any Classic Airframes kit, wherein if you do not do it right you will have a very difficult time resolving the problem successfully. On this kit, the modeler's instinct to build the fuselage as a sub-assembly and then the wing too, must be resisted. DO NOT build the wing as a sub-assembly!
Here is the easy way to assemble the wing to the fuselage:
The wing is in five pieces - two upper halves, to outer lower halves and a center section. Attach the center section to the fuselage first, and align it properly. The wing does not have any dihedral. You will need to test-fit this part and modify it a bit to get a close fit, but it is easy to do. Once this center section has set up, attach the upper wing halves. You will find you need to change the shape of the wingroot to match that of the fuselage, but test-fitting and fiddling a bit will result in a nice tight fit and no further problems. Then assemble the outer lower wing halves. Seen head-on, the centerline of the wing should be entirely flat, with the upper surface sloping down to the wingtip while the lower surface slopes up. Once you have accomplished this, everything else is a breeze. Attach the horizontal stabilizers, apply some Mr. Surfacer 500 to the various seams, and set it aside to dry overnight.
After sanding the seams smooth the next day, I attached the braces to the horizontal stabilizer and attached the various small parts to the lower flaps and aileron surfaces - these are all resin, so be careful you don't break them taking them off the mold blocks.
I then painted the engines and glued the cowlings to them. Be careful here - the cowlings are marked to take the exhaust on the lower left side of all three, which is correct for the early bomber versions that the kit makes up as. If you are doing a later version, as I was, you will have to modify the right wing engine cowling to take the exhaust on the right side. I found that rotating the cowl 90 degrees set everything up close enough that I had only a bit of rescribing to do on that cowling. I attached the resin exhausts and saw there was going to be a need for a lot of putty at the front end, to properly fair them into the collector ring. I applied that and set the cowls aside.
I futured the canopy glass, and proceeded to attach it. The rear windows in the gunner's compartment are a bit big for the opening, so sand them down around the edges, and test fit - if you get them just right they pop in with no gaps. I also had to sand the edges of the cockpit canopy and windshield to get it to fit, then had to putty over the joint in the front of the "hump" to get it smooth. None of this was particularly difficult. I masked the windows with scotch magic transparent tape.
Once I had sanded out the exhaust fairings on the cowls, and then recovered them with Mr. Surfacer, we were ready to go to the paint shop.
Painting:
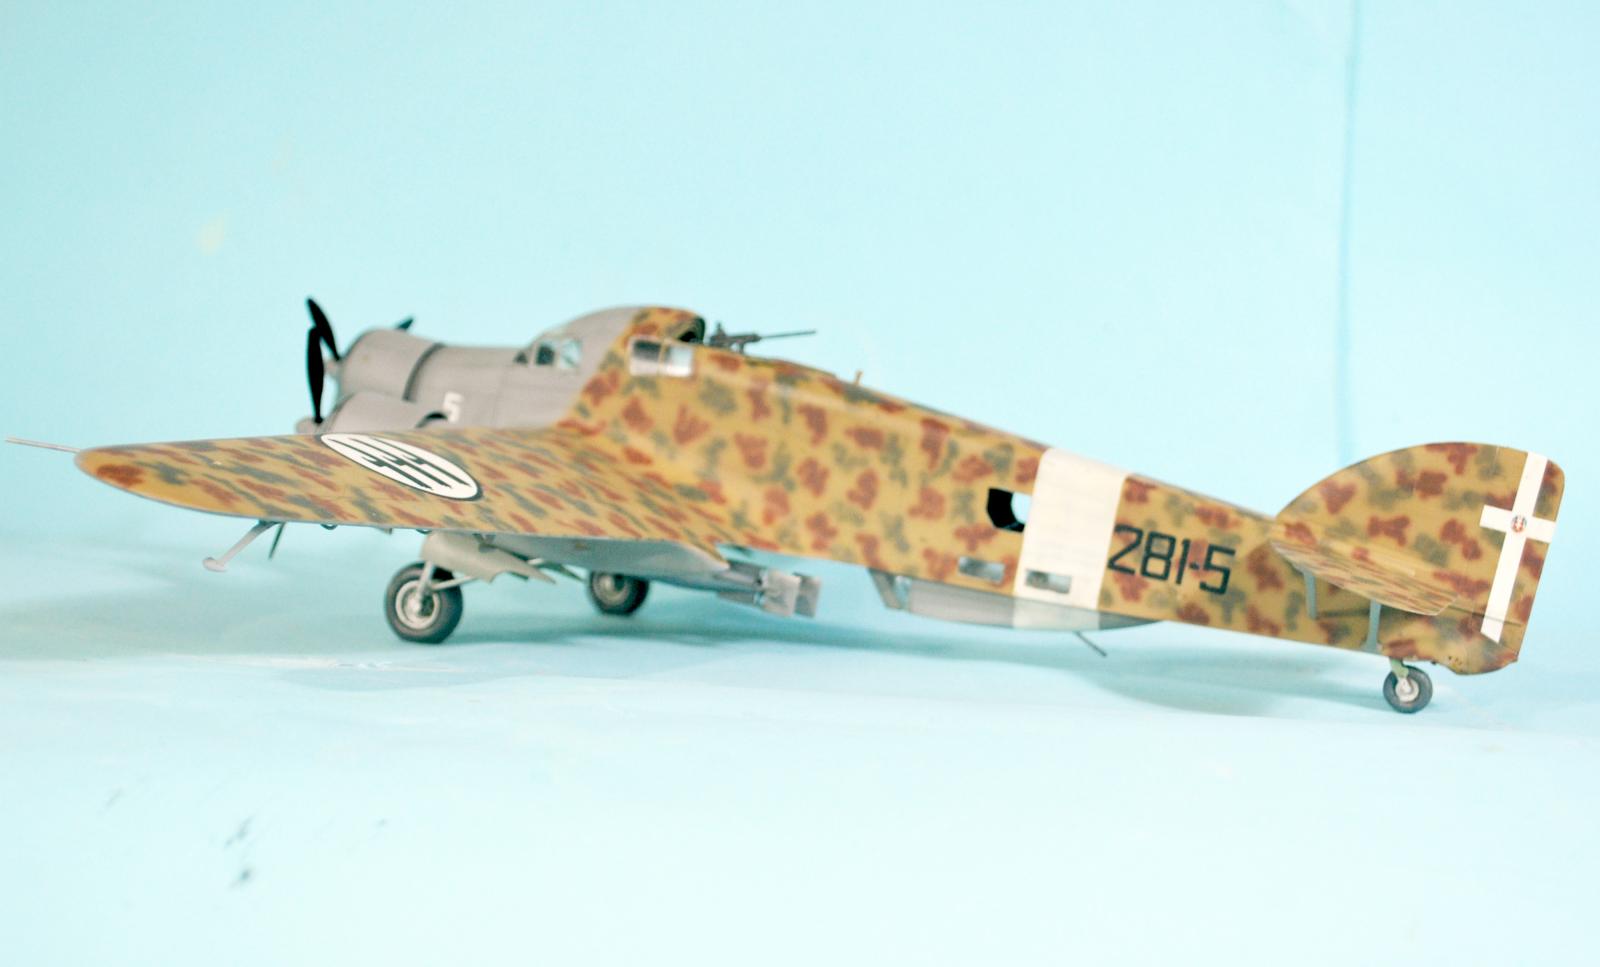
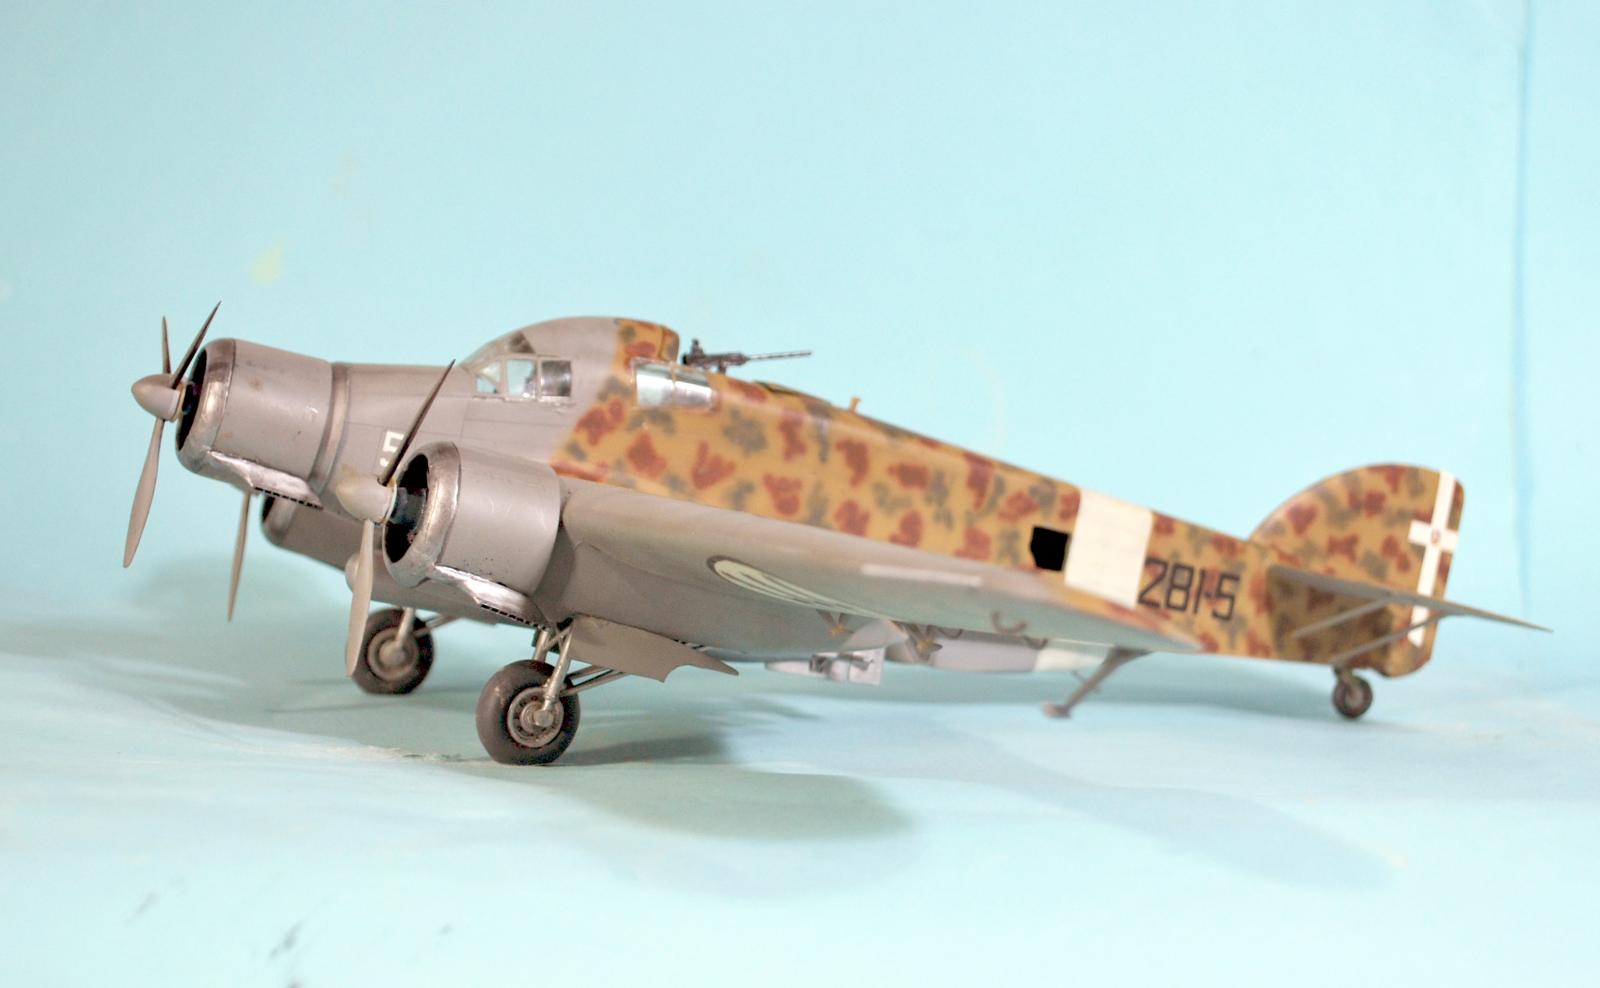
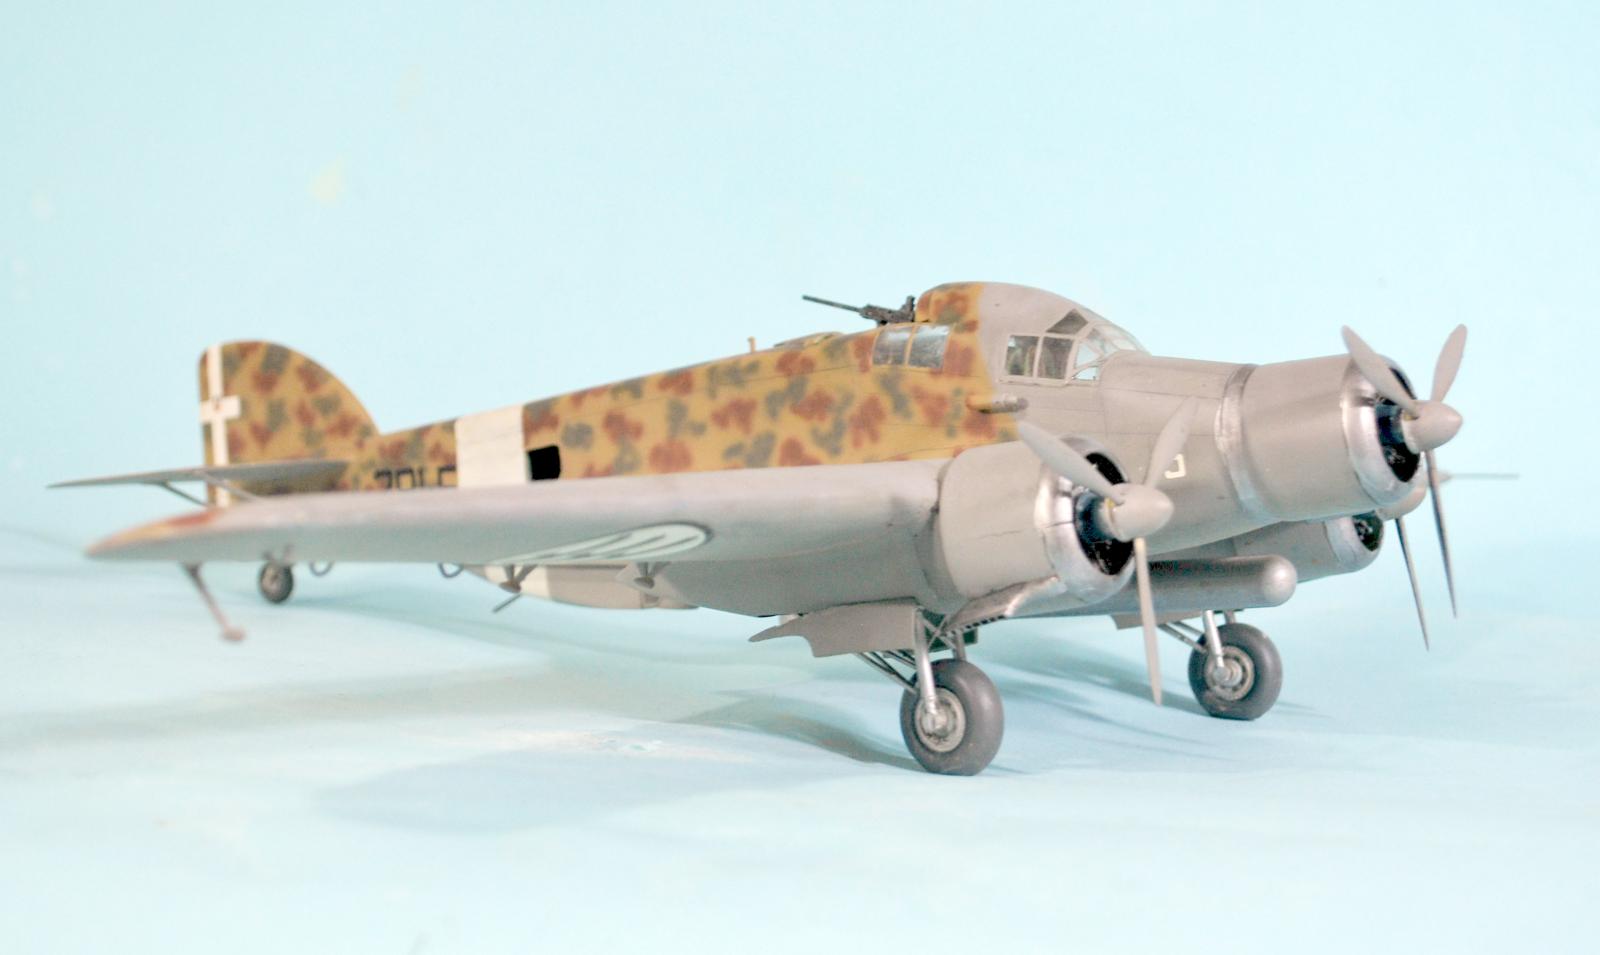
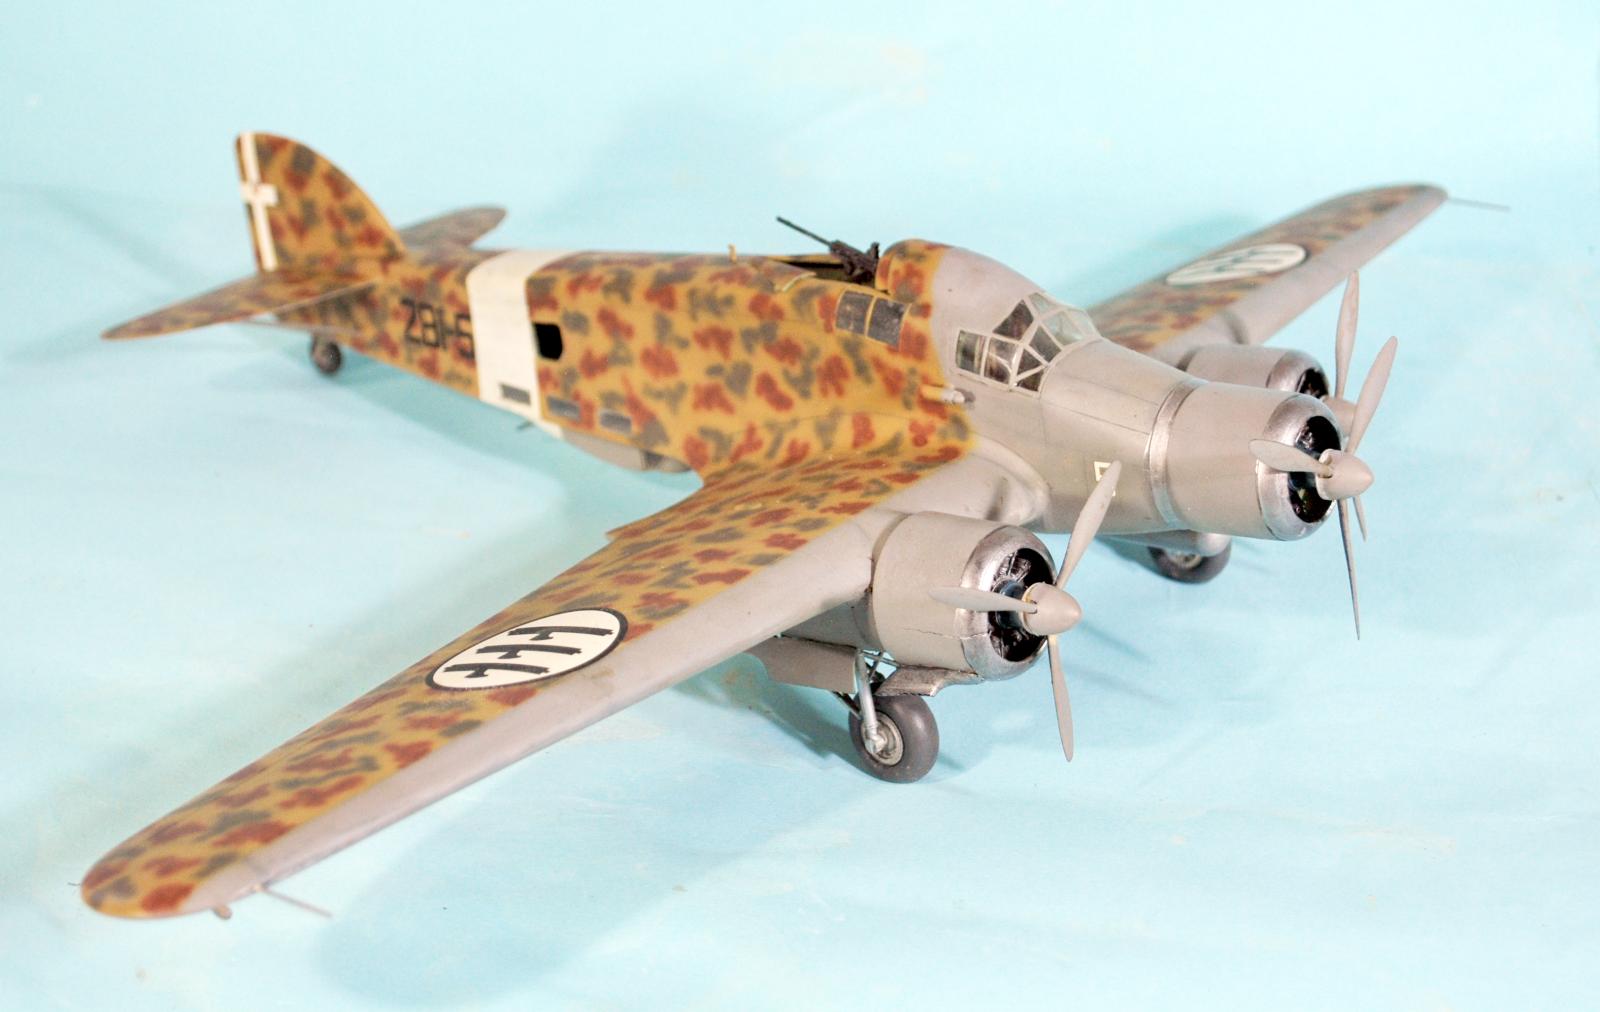
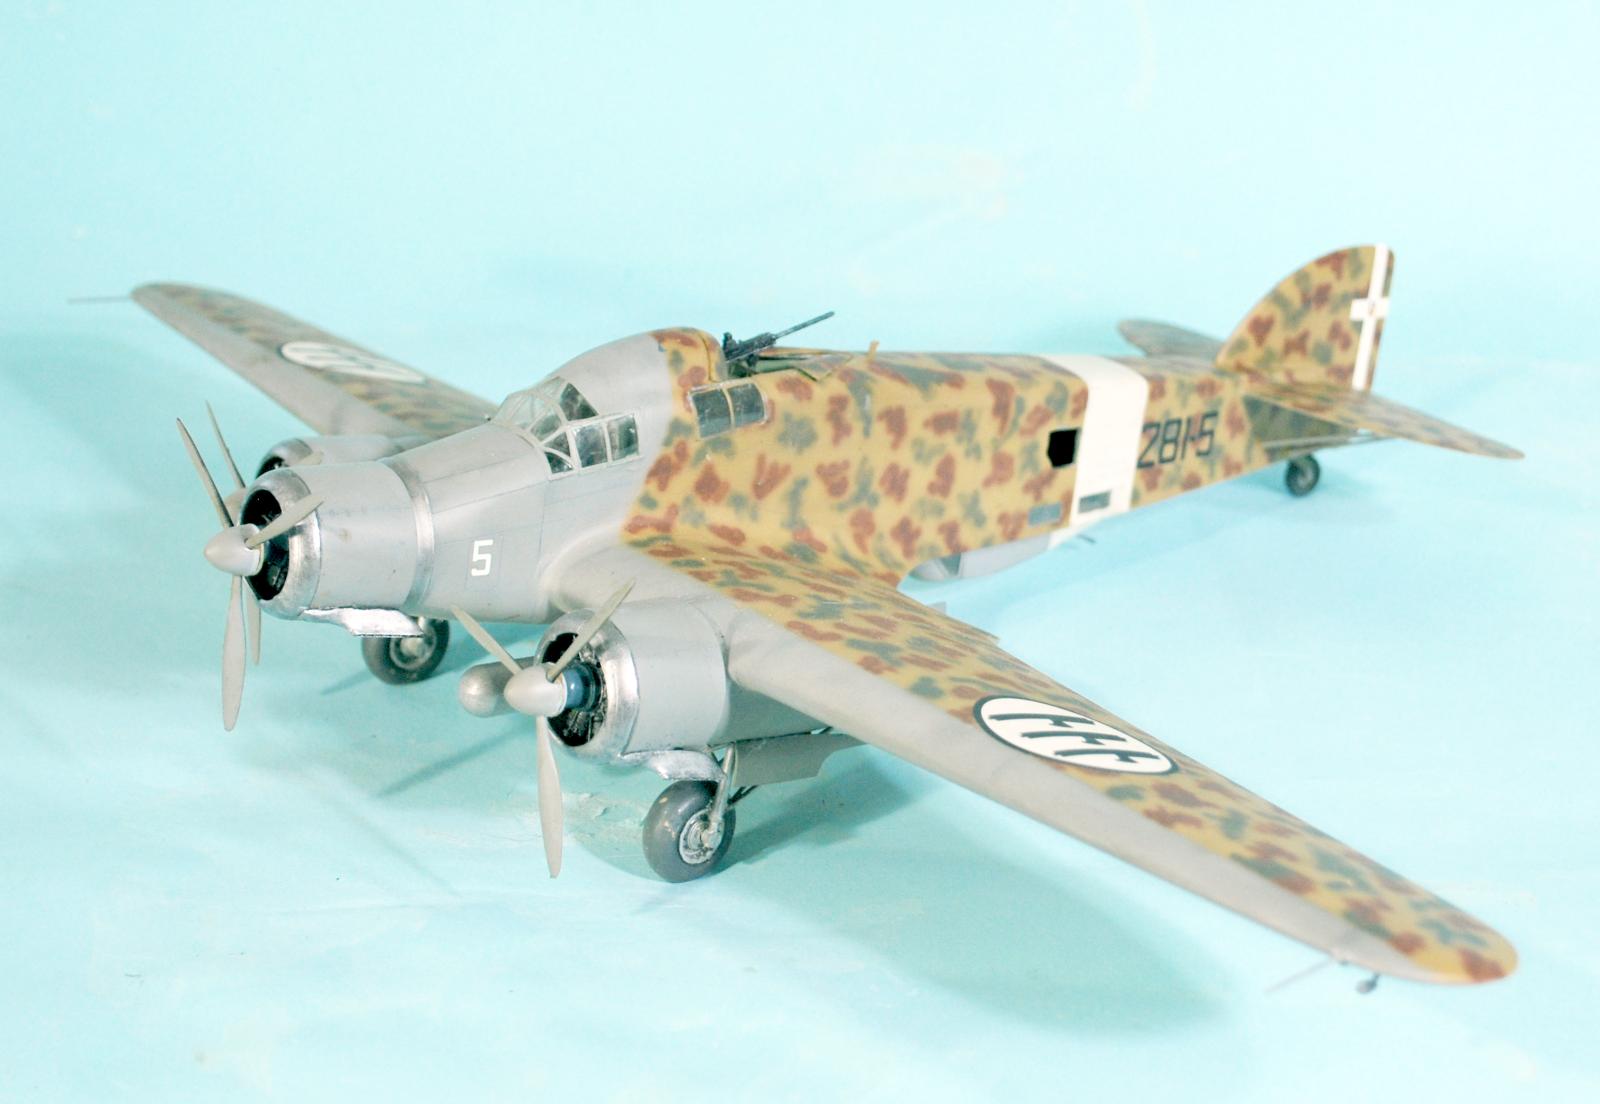
I wanted to do Buscaglia's airplane from his time as commander of 281st Squadriglia in 1941-42. The 281st has the most interesting camouflage scheme of any of the Aerosiluranti units, since they painted the forward fuselage, engines and leading edges of the wing a blue-grey to make the low-flying torpedo bombers difficult to spot as they bored in on their target. Fortunately, Pete Chalmers had photographs of Buscaglia's airplane, since it was different from all the other aircraft of the unit, and none of the published markings information is entirely accurate. Armed with a photo of the airplane, I pre-shaded the model with flat black, then painted the white fuselage band and masked it off. I painted the camouflage with Tamiya Sky Grey for the lower surface grey, Gunze-Sanyo H-66 RLM79 Sandy Brown with a touch of Tamiya XF-60 Dark Yellow for the upper tan color, Tamiya 81768 NATO Brown for the brown splotches and Gunze-Sanyo H-72 RAF Dark Green for the green. I used Gunze-Sanyo H-337 Grayish-Blue for the forward camouflage color, which I also used on the spinners and front sides of the prop blades.
Decals:
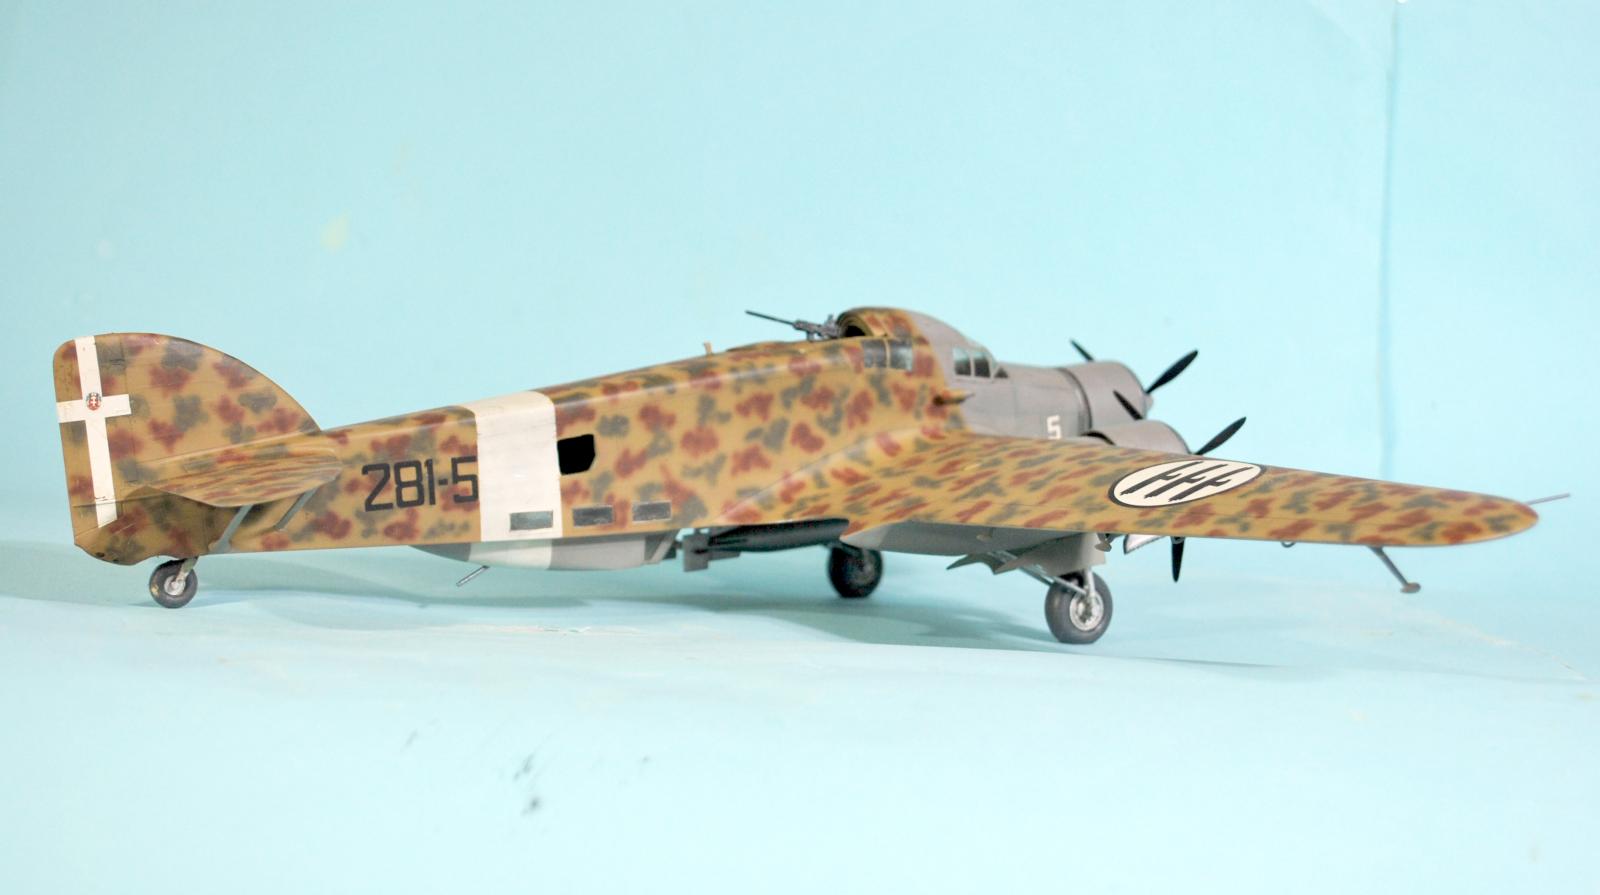
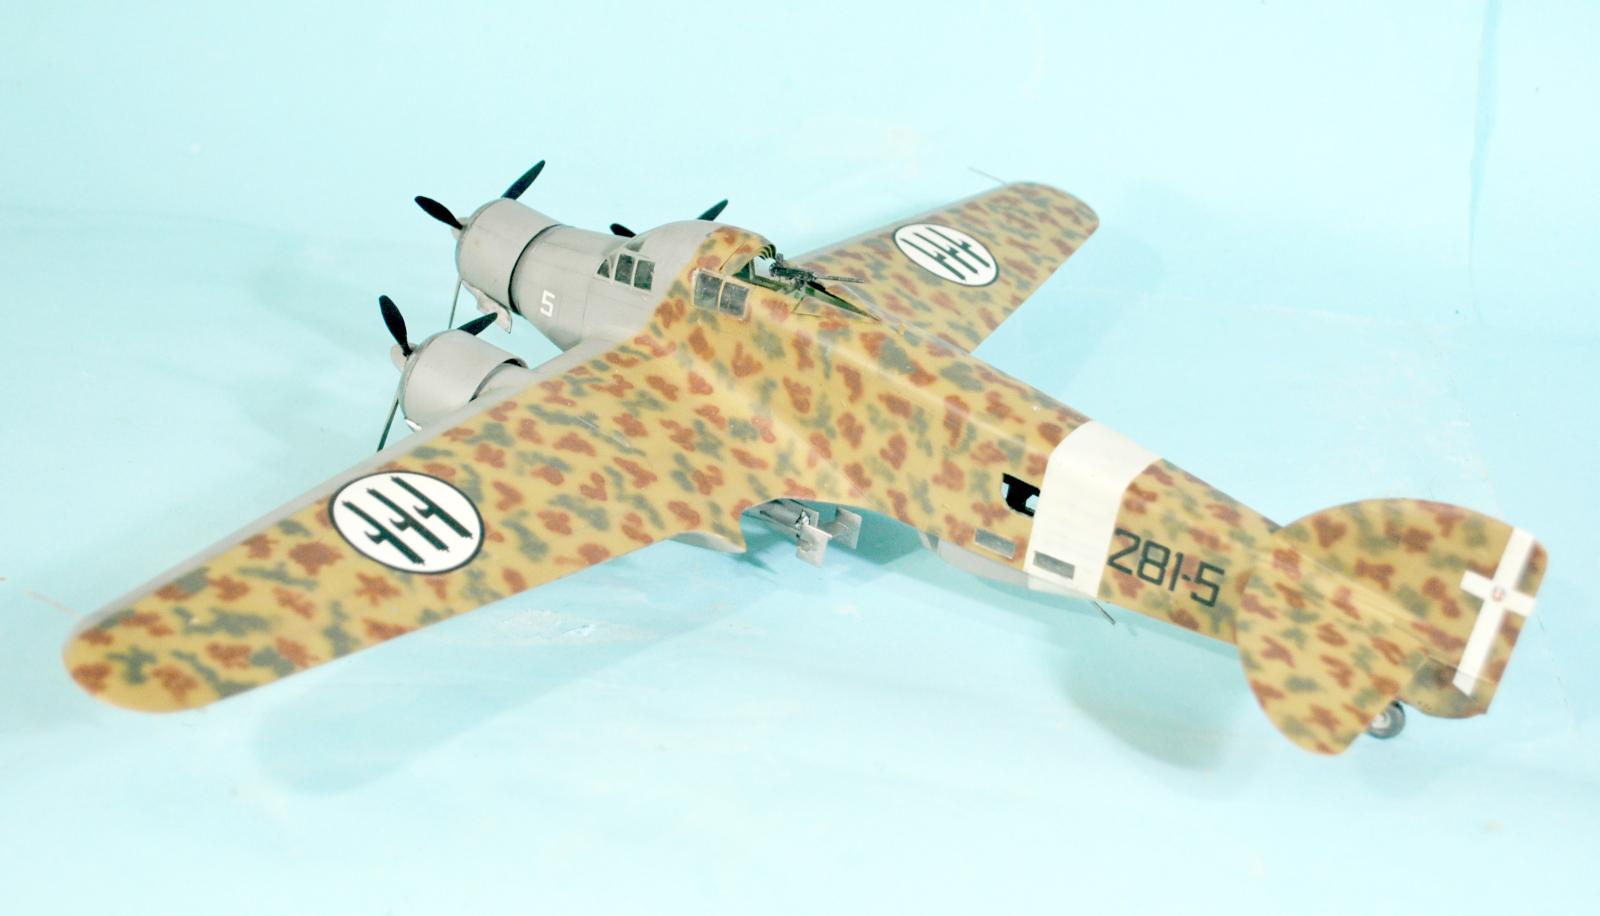
Fortunately, I had the SkyDecals sheet for the S.79. These are excellent decals, and the markings for Buscaglia's aircraft is on the sheet. Unfortunately, the markings plan on the instruction sheet is wrong regarding the placement of the squadron number - photos show it entirely aft of the white band, not painted over the band - and that Buscaglia's airplane, unlike all others in the unit, did not have the fasces insignia on the center engine cowl. (I rather suspect this is indicative of the fact Buscaglia was not a "good fascist") Also, the SkyDecals sheet has with wing fasces with the white background, which the photos show Buscaglia's airplane carried. The Sky Decals have no carrier film so there is no silvering; this makes it hard to lay down the numbers, but with a bit of attention everything works and these decals are highly recommended to this kit. Do be sure to have photographs of the airplane you intend to do, because of three markings diagrams from this sheet I identified in photos, the instructions the sheet had for all three were wrong in one way or another.
Final Finish and Assembly:
I washed the model after the decals had set up, and gave it another overall coat of Future. When that was dry, I gave the model several coats of thinned Dullcote, till I achieved the "very low sheen" flat coat (not dead flat) I wanted. I then unmasked the glass areas, and attached the props and landing gear. Photos showed the airplanes did not have heavy exhaust stains, so I applied that with a very light coat of Tamiya X-19 "Smoke" and flattened it a bit with a coat of Dullcote. Since the airplane was wood and fabric, there was no metal areas to weather anywhere.
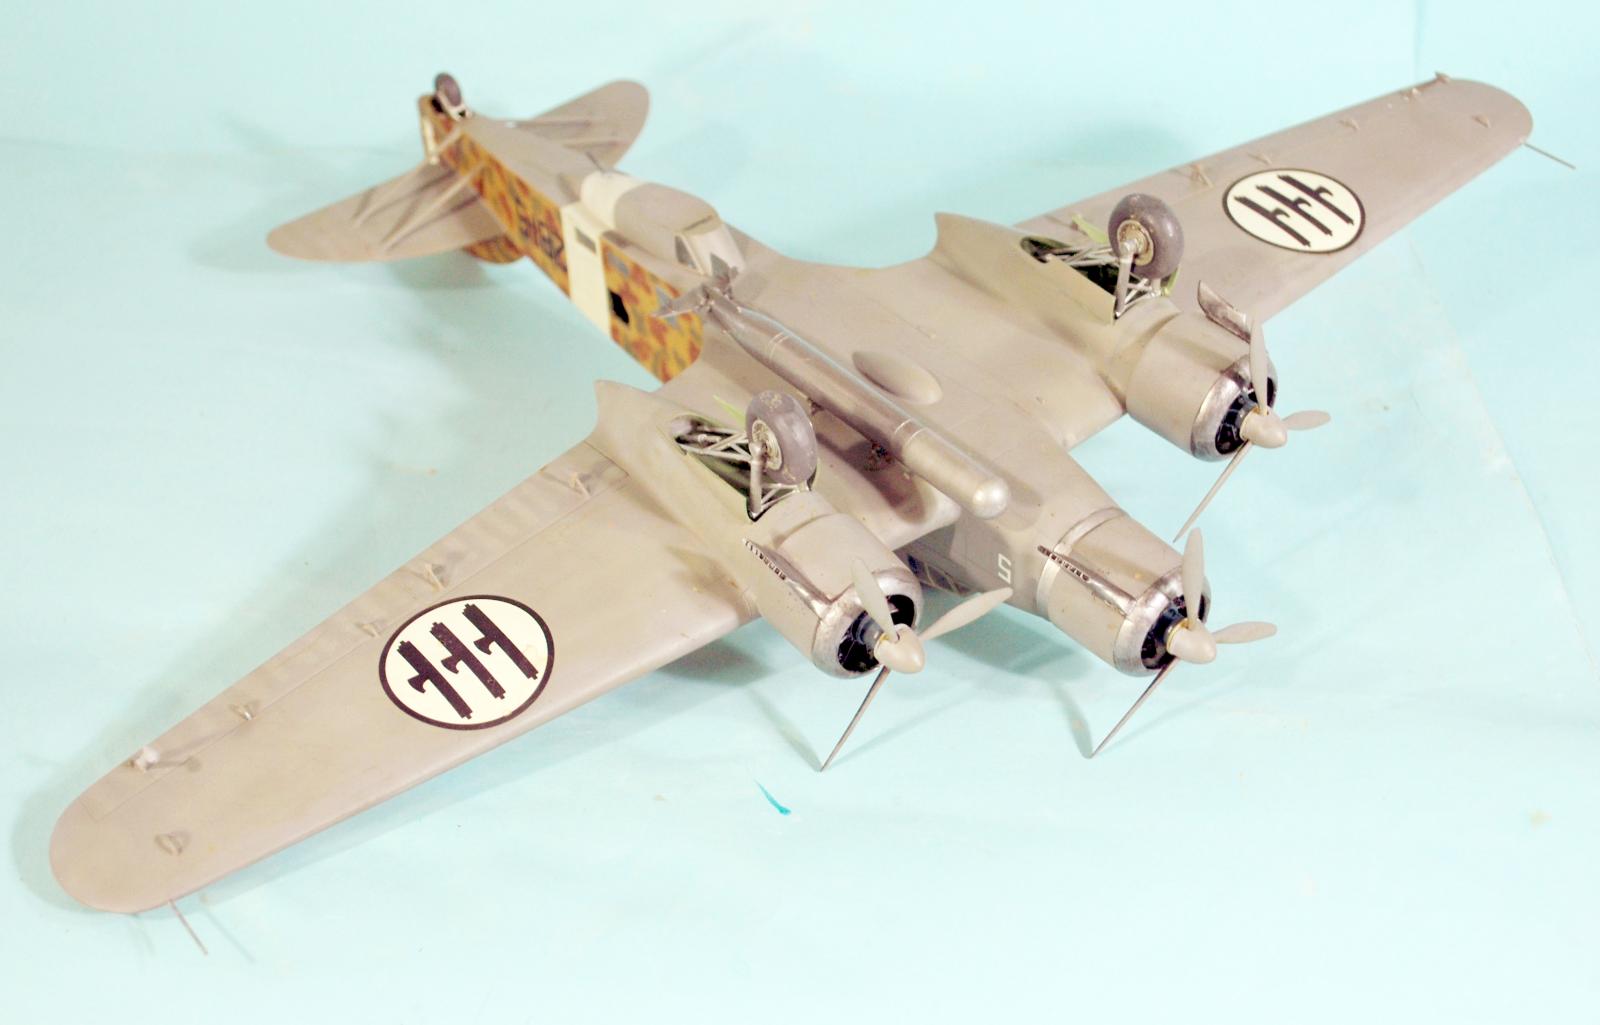
I used a torpedo from a Monogram He-111 - since the Germans used Italian torpedoes - with the attachments suitably modified to approximate the look of what was on the S.79; the Italian torpedo mounts look to my eye just a bit too thin to work successfully on a model with any strength; the result looks "close enough" for my tastes.
Conclusions:
This is the best Classic Airframes kit to be released to date. It assembles easily and looks good. If you have never built a limited-run kit, you should be able to do this as well as I did. The fit isn't "Tamiya," but it's very good and I needed nothing but Mr. Surfacer other than for fairing in the exhausts on the engine cowlings. Finished, the model looks dramatically different from everything else in the collection, due to its design and the distinctive camouflage.
Note:
For those who wonder how the Classic Airframes S.79 stands up to the Trumpeter kit, here is a link to a review I did directly comparing the two (Classic Airframes beat Trumpy running away):
https://modelingmadness.com/review/axis/ity/cleaver79.htm

Nice! One of my favorite aircraft. I have a very old Air Classics magazine with an article about them, captured my imagination as a young boy
Excellent model, Tom. The review is full of useful detail and construction tips as well.
Excellent post. I also did this one many years ago, it's one of my favorite Italian builds and one of my better Classic Airframes efforts.
Even though I’m not really an aviation enthusiast I found this an interesting read.
An absolutely fantastic model, Tom! I remember it initially posted, what an excellent article!
Really nice build of of beautiful aircraft, Tom @tcinla
Great work on the camouflage scheme as well, definitely not the most easy one.
Very good build and very interesting article. I have built one of these as well and it is still in my collection..
That mottling must have taken a while!
Probably your best camo job. The "Squiggles' are spot on in size and shape.
Tom Cleaver (@tcinla)
This is a really nice looking model and I remember seeing it on MM a while ago. It is one of your better builds and you have done a great job with the camouflage.
I especially enjoyed reading the article. When I was a child, I remember seeing a short video of a SM79 flying over a ship that was under attack and it was firing up into the bomber as it flew over the ship. Occasionally this film clip was used in various films of the Mediterranean or Malta battles. This film was captivating for me as a kid when I saw it the first time on a TV show that was called World at War. The sight of the tracer rounds going up and sometimes into the plane... wow.
I have this exact same kit in the stash and it’s been sitting there since they first came out. I have pulled it out of the box a few times and then put it back away. When I get around to making it I will follow your advice on the “map of the mine field”.
I definitely clicked on a few of the various “like” buttons.
Well done.
Thanks @lgardner!
Nice one, Tom. I had the SCW boxing but sold it to a friend during the great stash reduction a few years ago.
Perfectly mastered camouflage Tom. Those fluttery Italian camouflages have something to them. Very interesting historical details.
Great work on the camo, and thanks for revealing a scheme I wasn't aware of!
Really great painting!