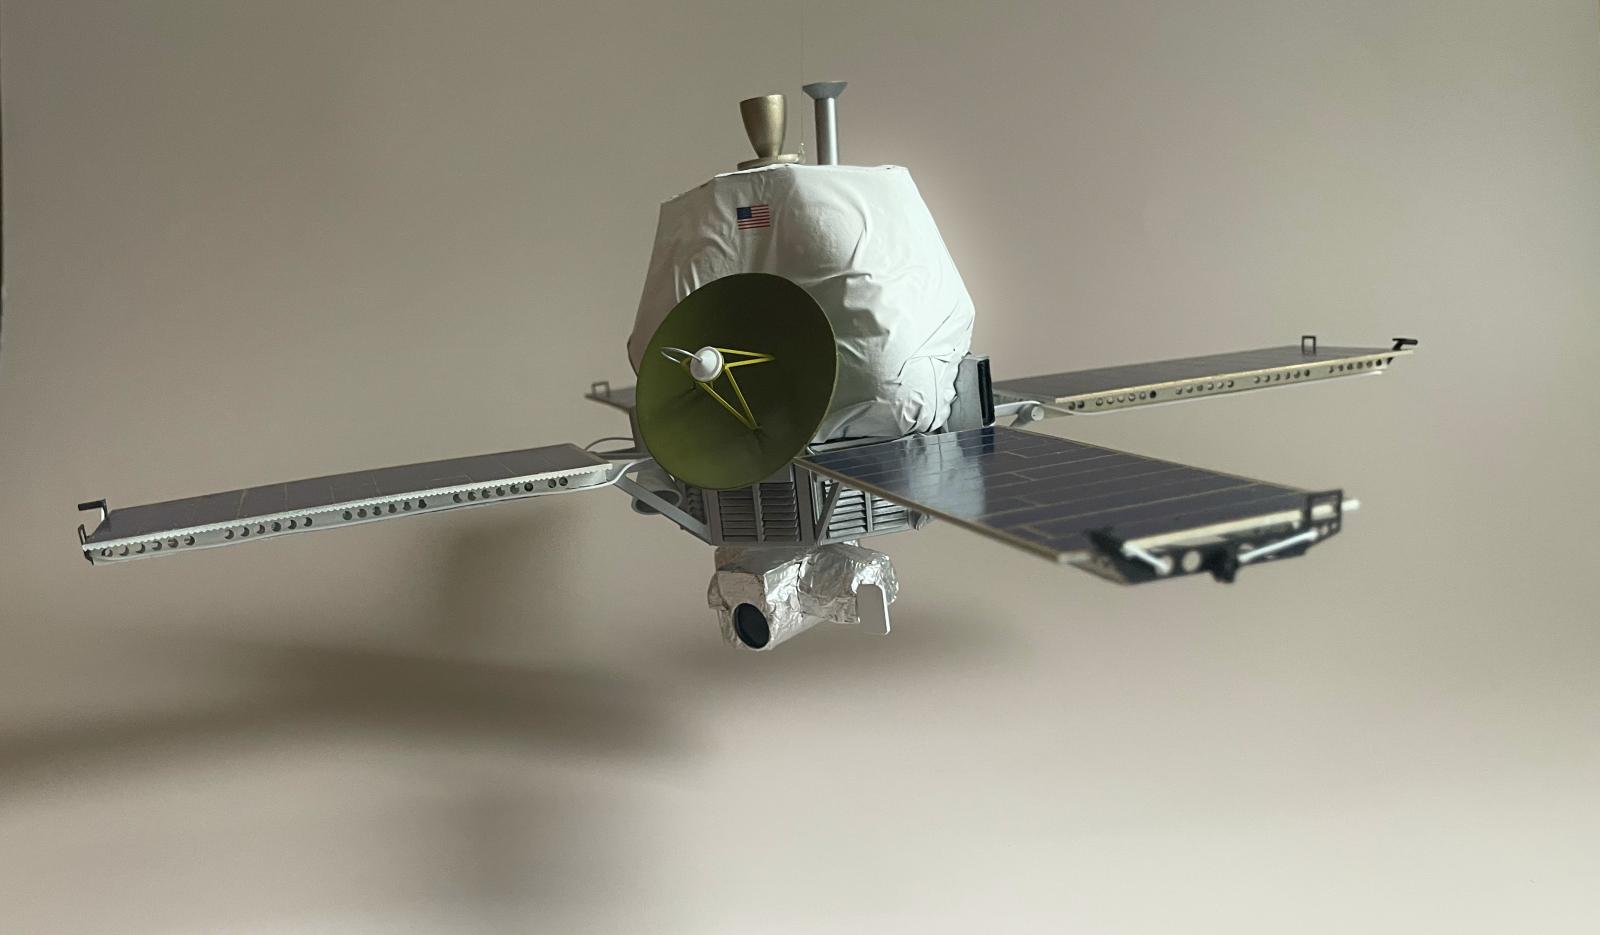
RealSpace Mariner 9
NASA's Mariner program had the goal of studying the inner planets: Mercury, Venus, and Mars, through a series of robotic space probes. Between 1962 and 1973, ten Mariner missions were attempted: though three failed, the others performed several successful fly-bys of Venus and Mars. Mercury 10 performed the first-ever flyby of Mercury. And Mariner 9 was the first space probe to ever settle into orbit around another planet: Mars, on November 14, 1971; it arrived a few scant weeks before the Soviet orbiters, Mars 2 and Mars 3.
Upon arrival, Mariner 9 was confronted with a massive dust storm that hid the Martian surface from the probe's cameras: "a planet-wide robe of dust, the largest storm ever observed." Due to its flexible mission software, Mariner could be instructed to wait out the storm before attempting its reconnaissance mission. After several months, the storm abated and Mariner got to work mapping the surface of the Red Planet. After nearly a year in orbit, Mariner 9 snapped over 7000 images accounting for nearly 85% of the Martian surface. These constituted the first ever, high-resolution images of the planet's geology and topography, broadening our understanding and directly informing the future Viking lander missions.
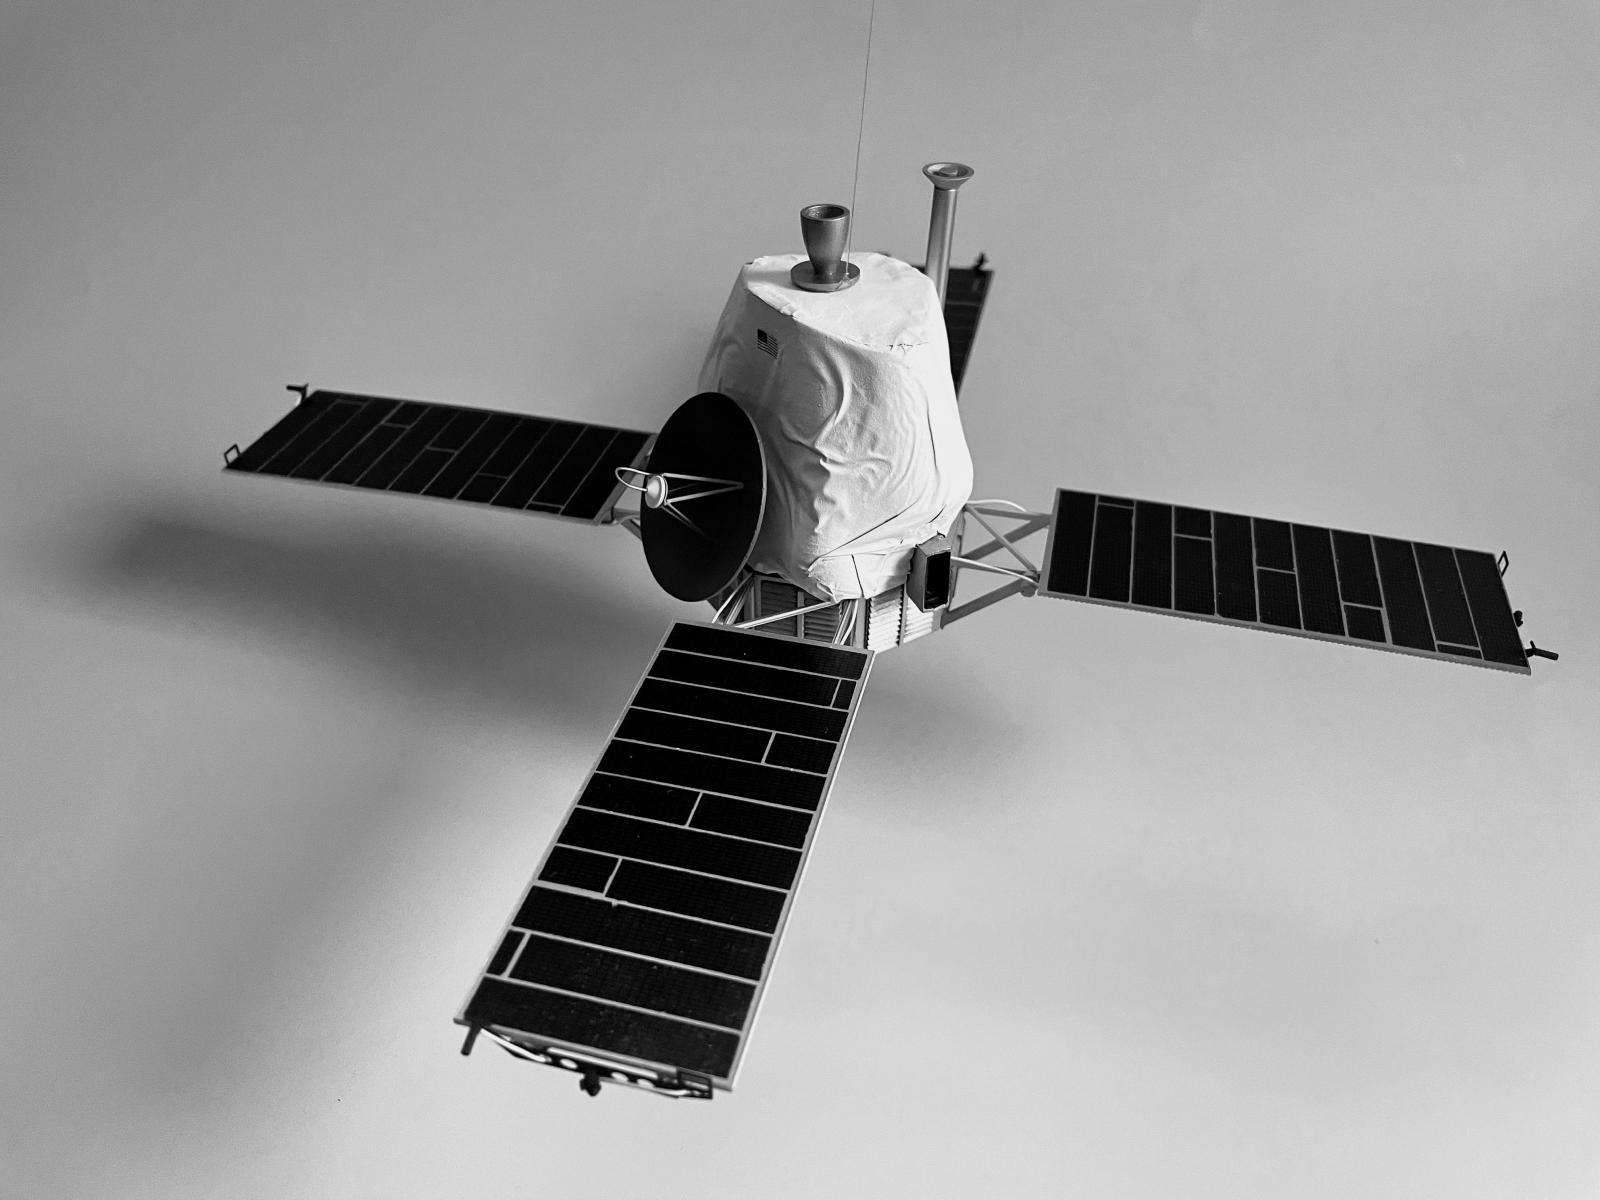
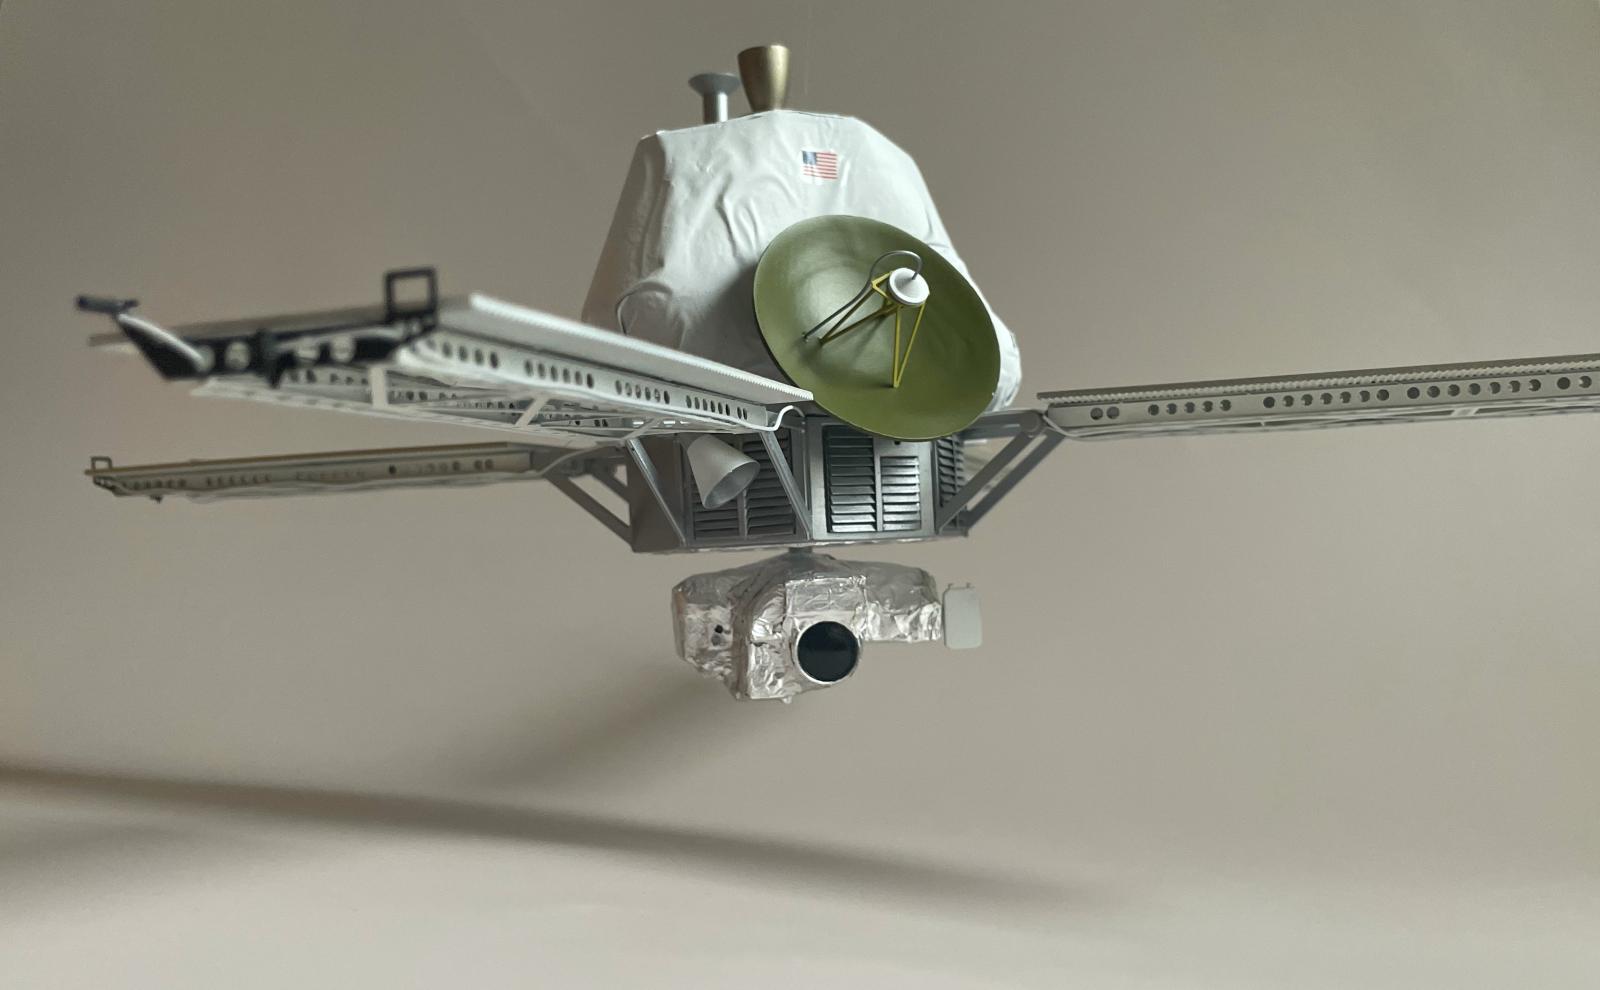
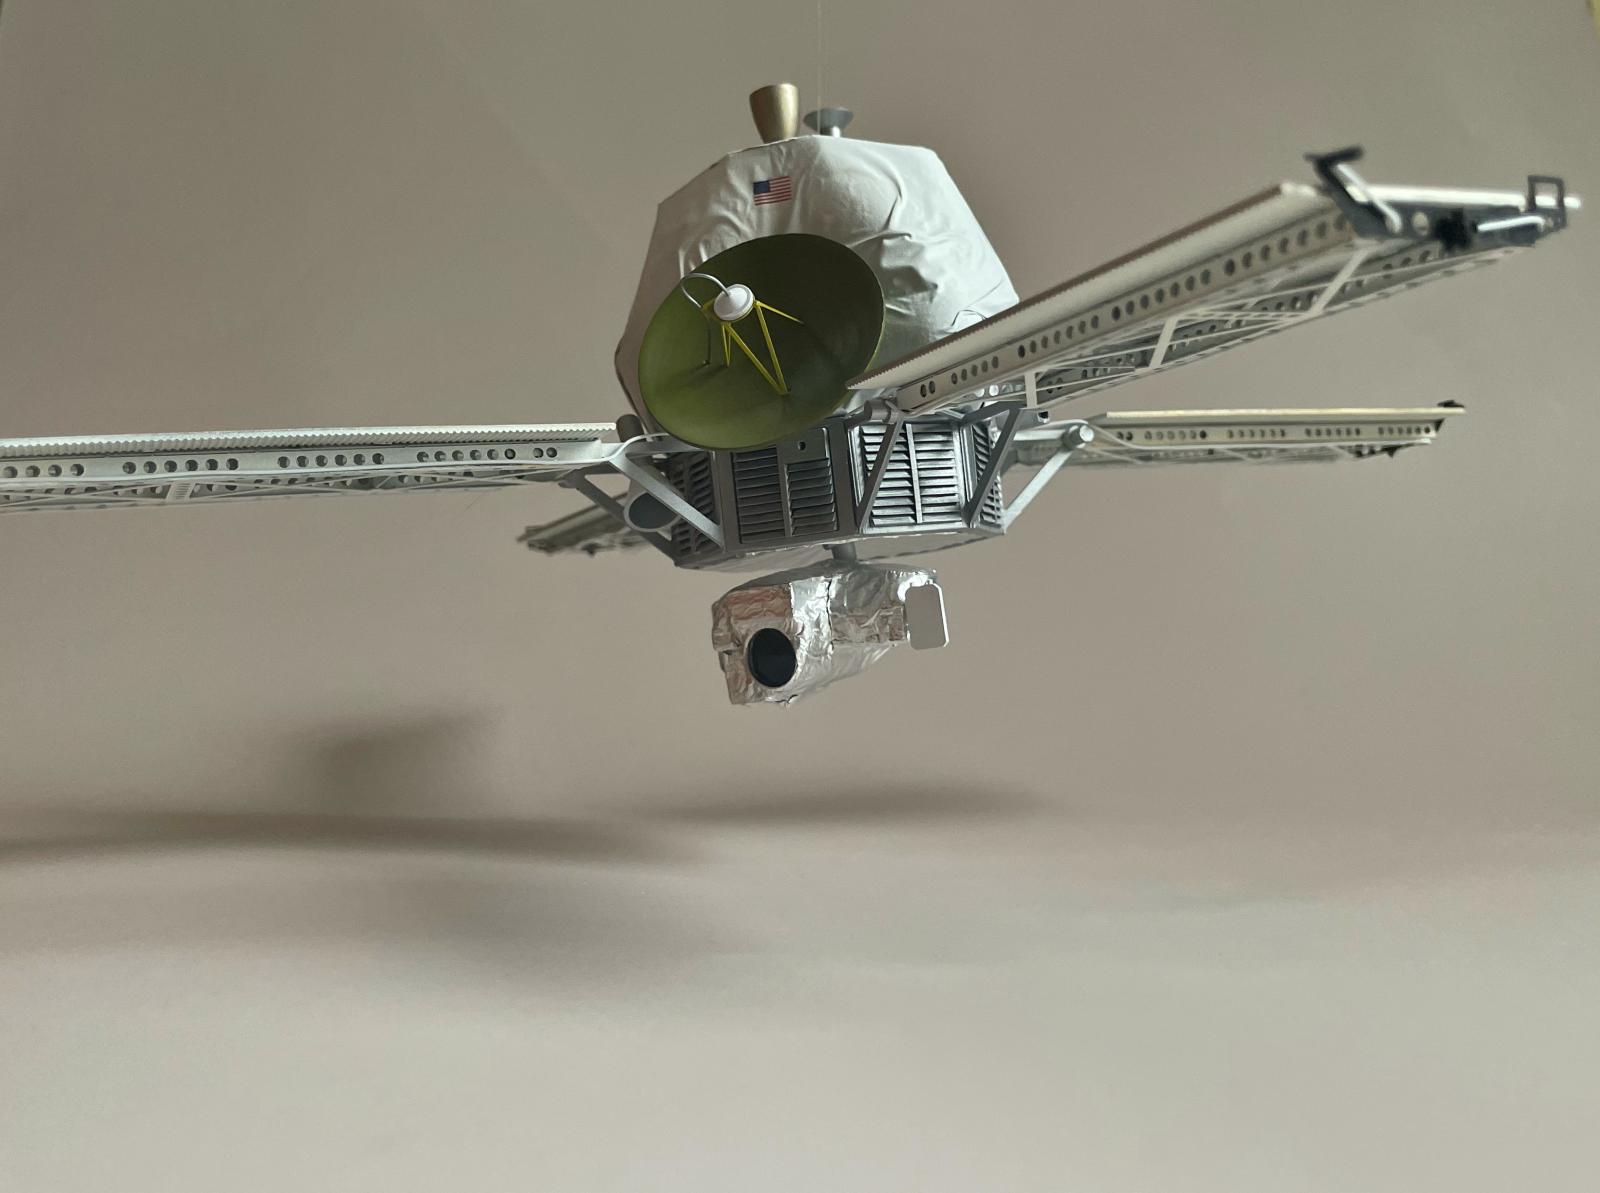
The probe itself was a basic octagonal bus with a visual imaging system, spectrometers, and a radiometer. It had a characteristic lime green high-gain antenna and four prominent solar panels for power generation. Contact was lost with the probe on October 27, 1972, and Mariner was placed in a slowly decaying orbit that would send it into the atmosphere "sometime within the next 50 years". Though nobody knows for certain, it is likely that by now the probe has met its demise.
The Kit
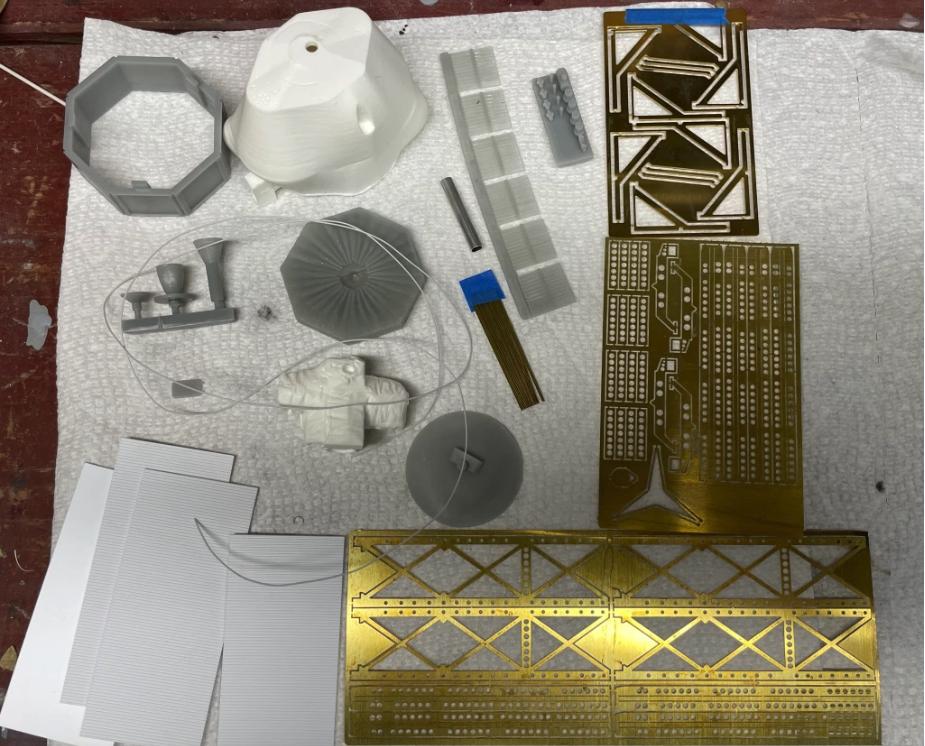
The 1/24-scale RealSpace Mariner 9 is the only of its kind, in any scale. It is a resin kit (cast and 3D-printed) with photo-etch and wire (brass and wrapping wire):
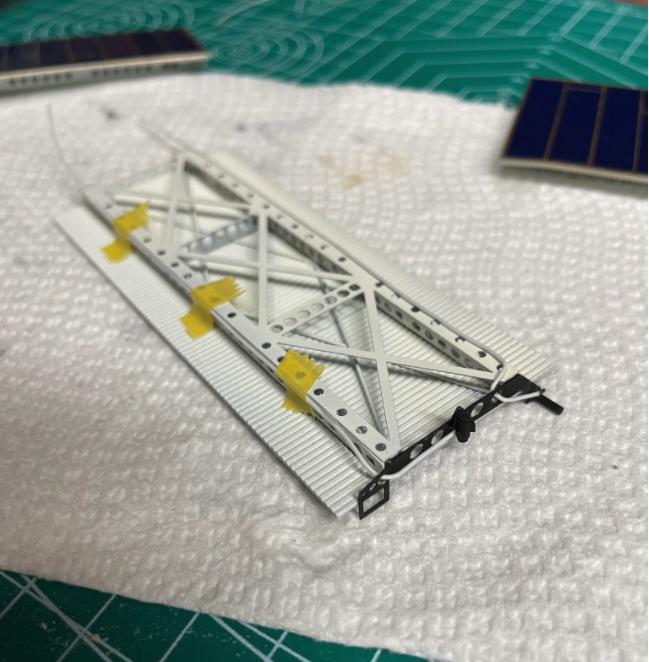
The solar panels are made of corrugated styrene, and involve a nice amount of structural detail on the undersides. This mostly went well, except some of the parts didn't quite fit:
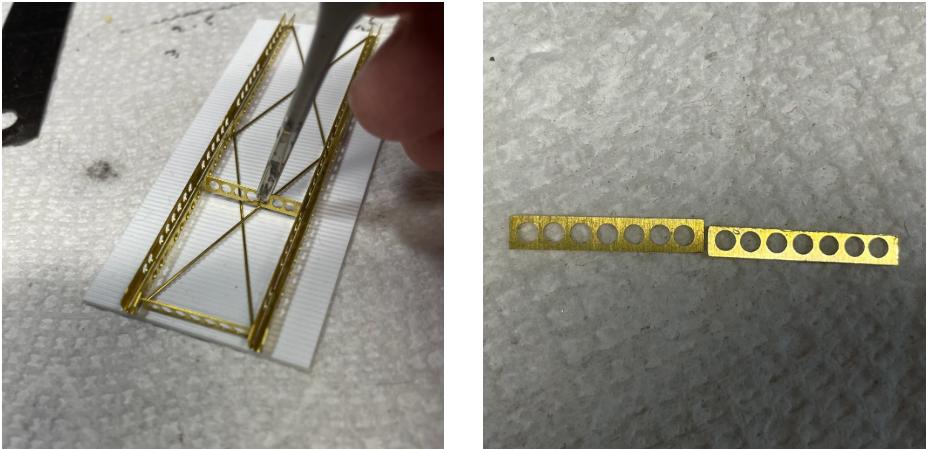
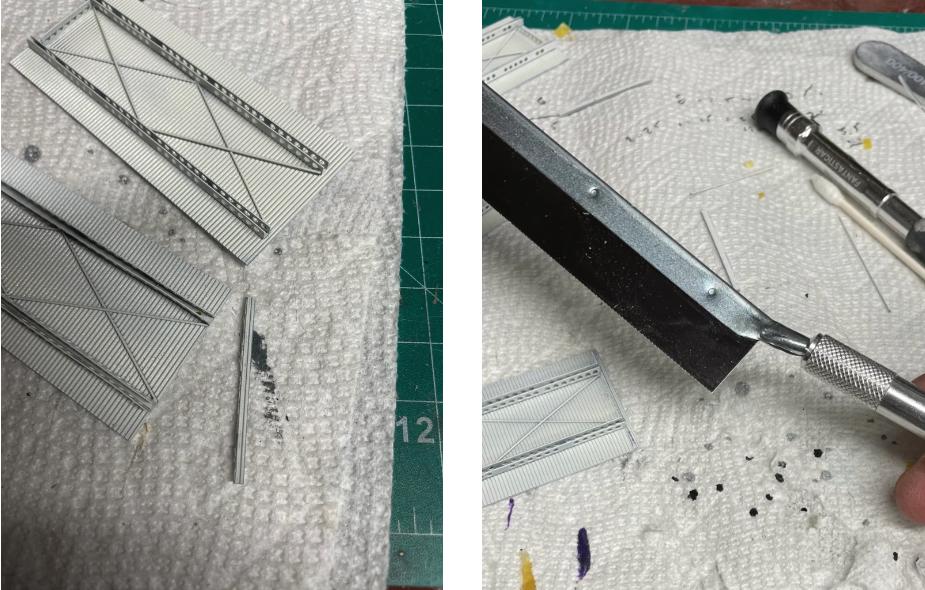
On the left, you can see that the cross beam hits the wires, not the styrene surface, making this part not level with the rest. These parts therefore need to be filed down considerably (about 1.5mm). The panels are also a little too long, but can be easily cut to size with the proper tools:
(I knew there was a reason to impulse buy that ridiculous saw at the hobby shop last time). The top surface of the solar panels are to get nice decals: dark blue solar cells with bright yellow interstices. The contrast is sharp and I thought maybe too much, and it seems the yellow should really be more of a pale gold. I decided to therefore try and do away with the yellow: I considered using a fine gold paint pen to color over the yellow, but passed on that idea after a few failed trial runs. The easiest way to get what I was imagining seemed to be to paint the panel gold, and then cut out the individual solar cells and arrange them in the original pattern on the panel.
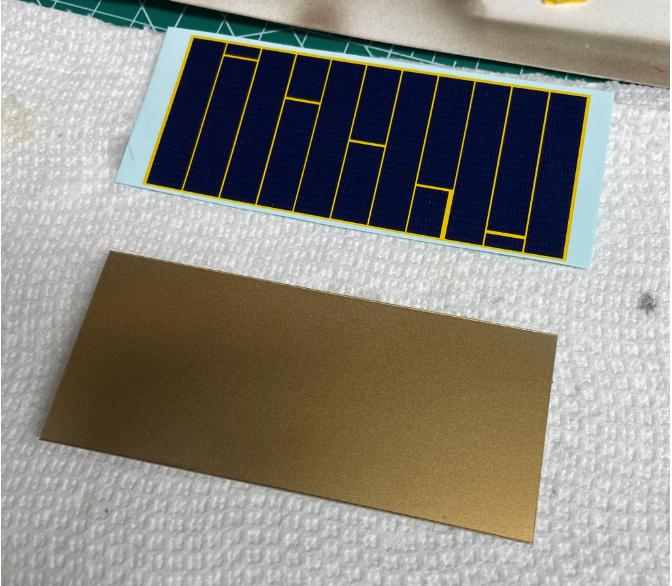
Cutting out the panels was time-consuming and careful work. I was sure to use a fresh X-Acto Z Series blade (the sharpest substance known to modeling man) and metal straight edge.
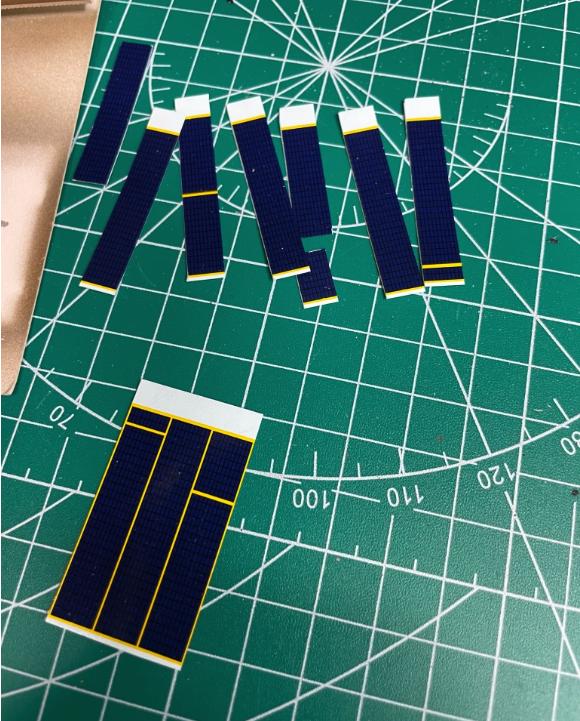
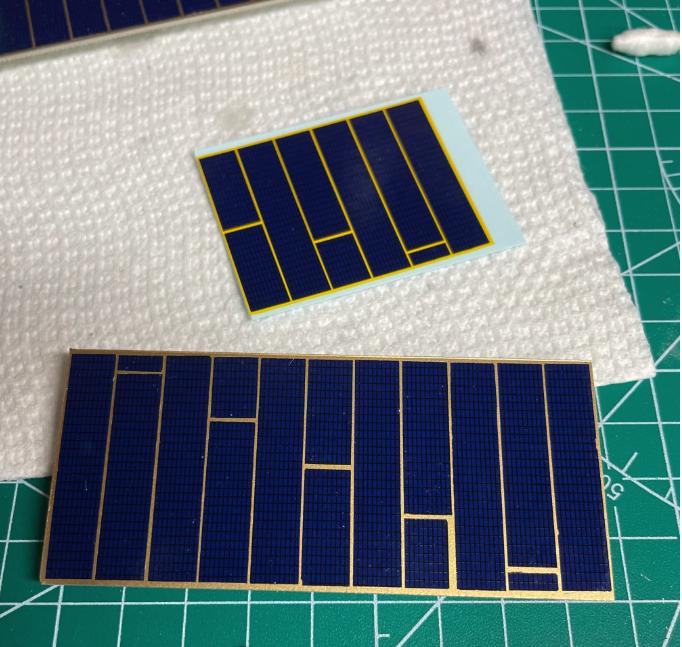
I gloss coated the panel and then sanded it with 4000-grit paper get things as smooth as possible. I used Micro Set only, not wanting to risk any decal shenanigans during such a delicate process:
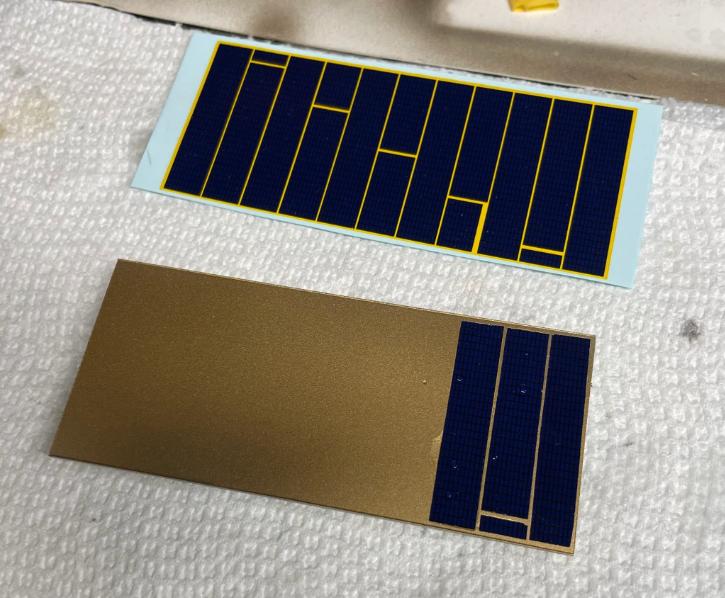
I allowed myself one panel a day (among other things) to make sure I didn't rush. At the end, I gave it one more gloss coat. Overall it came pretty close to what I was imagining, and I think it was worth the effort.
In a very nice touch, the kit includes electrical wiring leading to the small thrusters on the ends of the solar panels. The wire is relatively easy to shape, and I cemented it with ultra thin CA glue after taping it into place,
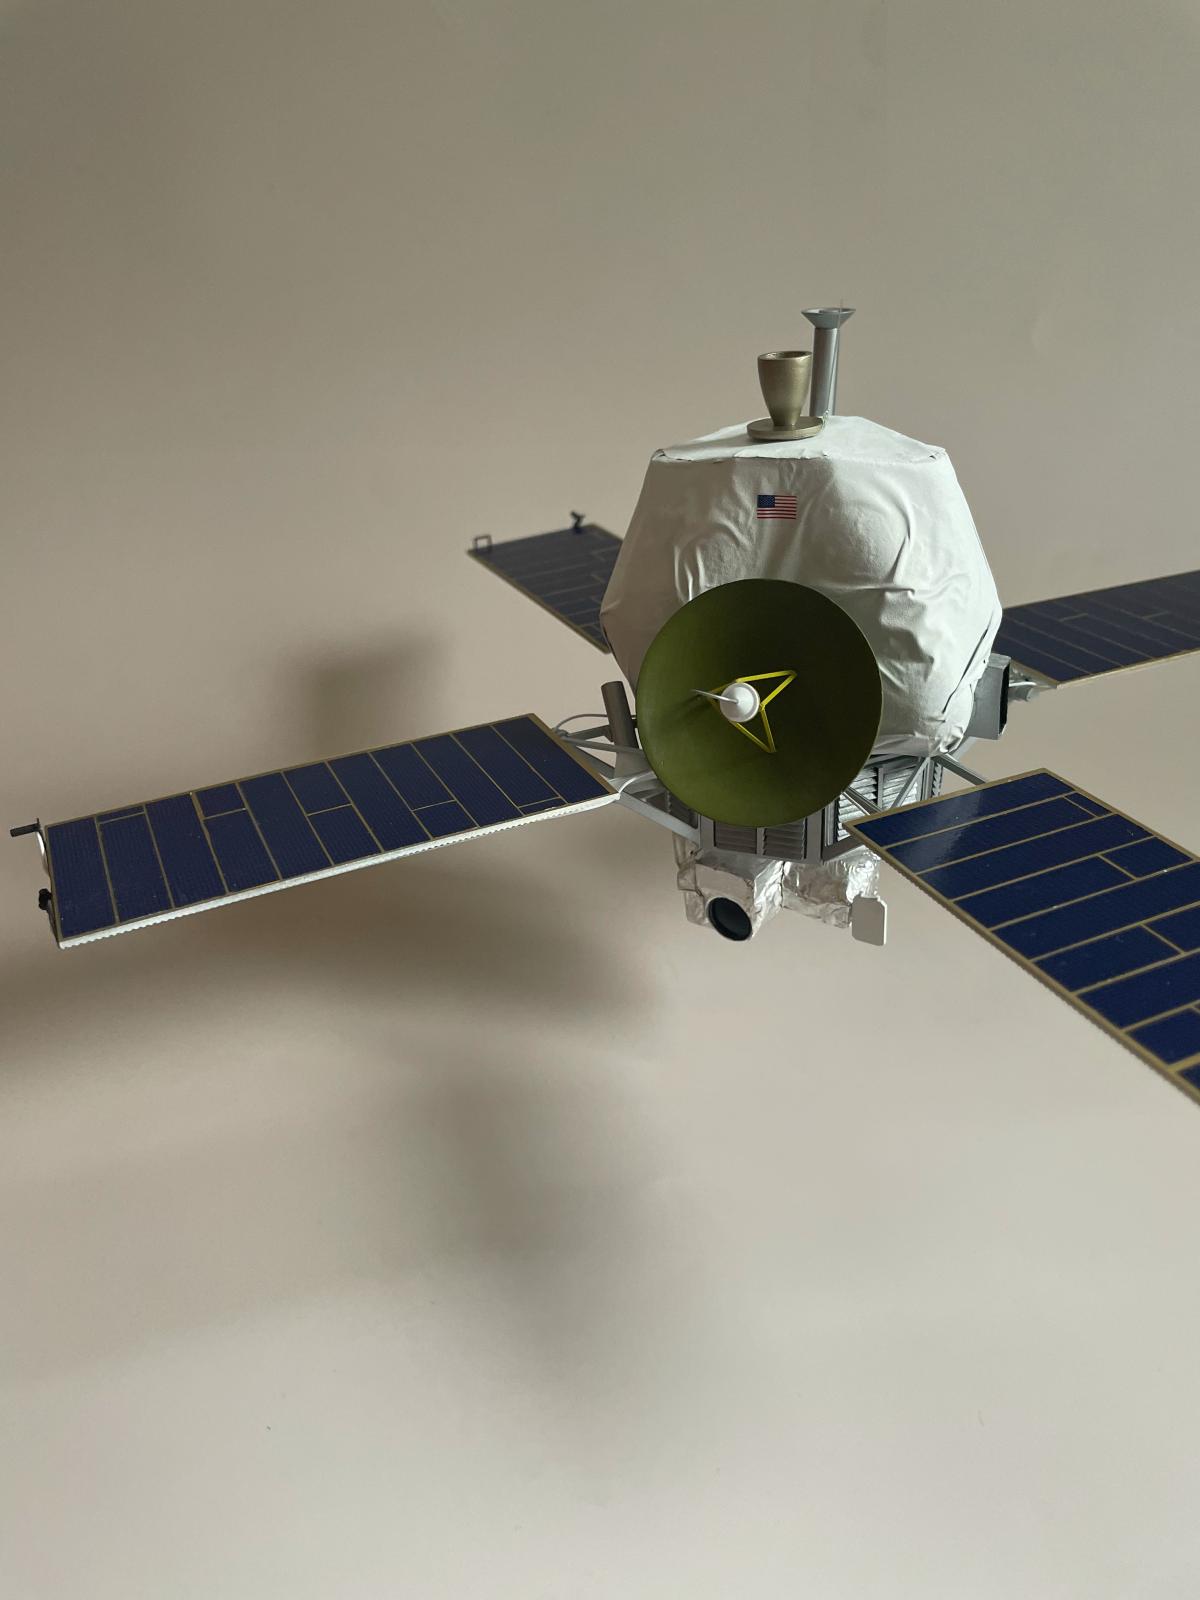
The hexagonal bus was constructed of 3D printed resin and has to be sanded smooth before the metallic finish. I used Alclad Aluminum instead of chrome as called for since I've had bad luck with chrome finishes on all but the glassiest-smooth of surfaces, which this wasn't.
The other modifications were to the white covering of the main probe body. This is a resin part with a sort of rough texture on it; meanwhile, photographs of Mariner 9 replicas show a sheet-like covering (with folds and creases in it). I therefore decided to try and recreate this: but what to use? Foil would be too, well, foily. Maybe plastic wrap? This was a good idea but all the wrap in my house has a bit of a texture to it and looks too obviously like plastic wrap. And so I finally settled on the LDPE plastic wrapping of a toilet paper package.
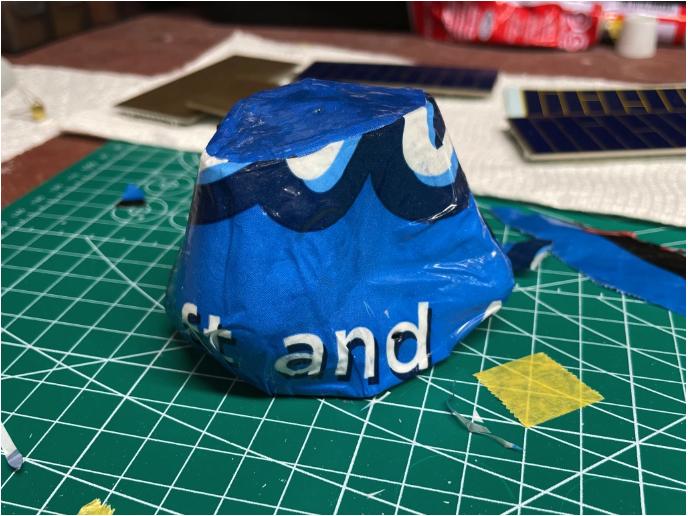
This "upholstering" job was a little challenging and took a few tries. To minimize seams running down the body, I wrapped a single piece around the body and used a separate piece to cover the top. Happily, the LDPE adhered very well to the resin with CA glue. I primed it and painted it flat white.
Lastly, the camera on the bottom of the craft in reality is covered in reflective foil. The piece from the kit meanwhile is molded to appear foil covered and is to be painted chrome. Rather than doing this I decided to simply cover it with aluminum foil. This too was a little tedious (fitting the foil around the lens, for example) but ultimately came out OK.
In conclusion, this was a fun kit. Not complicated by any means, but still challenging and requiring patience. Low-skill display options include either hanging via wire wrapped around the gold thruster on its top, or just sitting carefully on this camera.


An absolute wonderful result, Brian @bapowellphys
What an interesting subject. Your patience paid off.
Very cool.
That turned out really well. I should look into getting one.
Spectacular job and fantastic result, Brian!