Turkish Bomber
First of all thanks to Tolga Ülgür who introduced me to Özkan Türker who was an invaluable help with this project. Without Özkan's help I couldn't have achieved the standard of accuracy I desired.
Introduction
There's not a lot of information available on the Turkish Letov Š-16s. The Turkish Letovs differed from the Czech aircraft being powered by French Hispano Suiza 50 engines of 492 hp. Twelve Letov Š-16T were delivered in 1929/30 and shipped to Turkey by train. After assembly the bombers were allocated to front line squadrons and saw active service during the Ararat rebellion of 1930 were two were supposedly shot down. Also in 1930, three aircraft a round trip of the entire country of Turkey (5,000 km) without trouble. The Š-16 always had a reputation for reliability and the ability to fly long distances. The prototype flew from Czechoslovakia to Japan in August 1927 (some 23,000 km). Six Turkish Letov Š-16T (A/C Nos. 74-79) from the Izmir Air Regiment visited Greece in March 1934 on a reciprocal trip to attend the Greek national day celebrations on 25th March 1934. This was to reciprocate the Greek presence at the Turkish independence 10th anniversary celebrations in 1933. The aircraft returned to Izmir from Athens via Larisa, Thessaloniki and Istanbul. The Letovs gave excellent service to the THK but were getting a bit old and obsolete by the mid-1930s. They were all gone by 1937.
The Model
I've always liked the pedestrian but ugly looks of the Š-16, when Brengun brought out their Prague-Tokyo model in 2014 I ordered one immediately so I was very happy to spot their Turkish edition. This is a short run kit but of reasonably high quality. To cater for other versions Brengun expect you to be able to perform surgery on the kit. So for the Turkish version the nose needs to be cut off and replaced by a nicely molded resin version. The kit is molded in reasonably soft plastic and is fairly comprehensive with an etched brass sheet. There is an etched brass detailing sheet available as well (from Brengun themselves). Brengun supply ample colour call outs on their clear instruction sheet but the colours themselves are a bit generic. It is also a kit that needs extra detailing to really shine.
The Decals
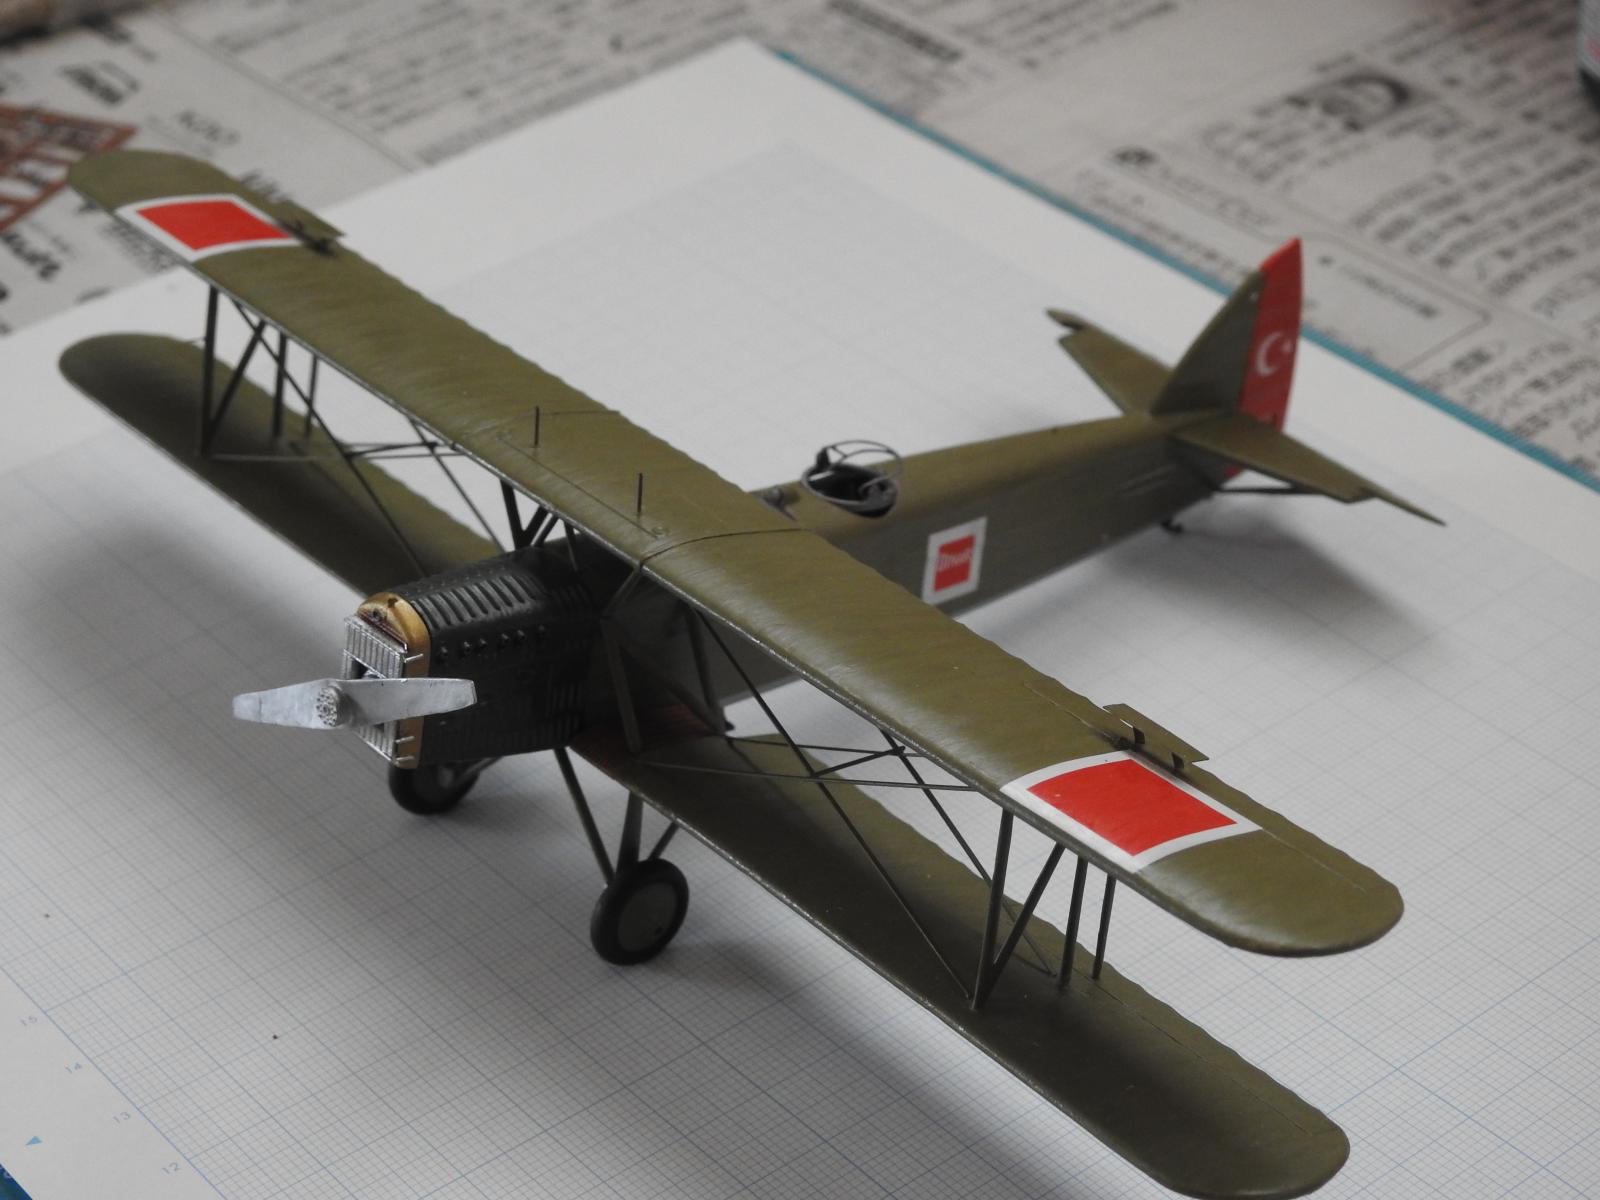
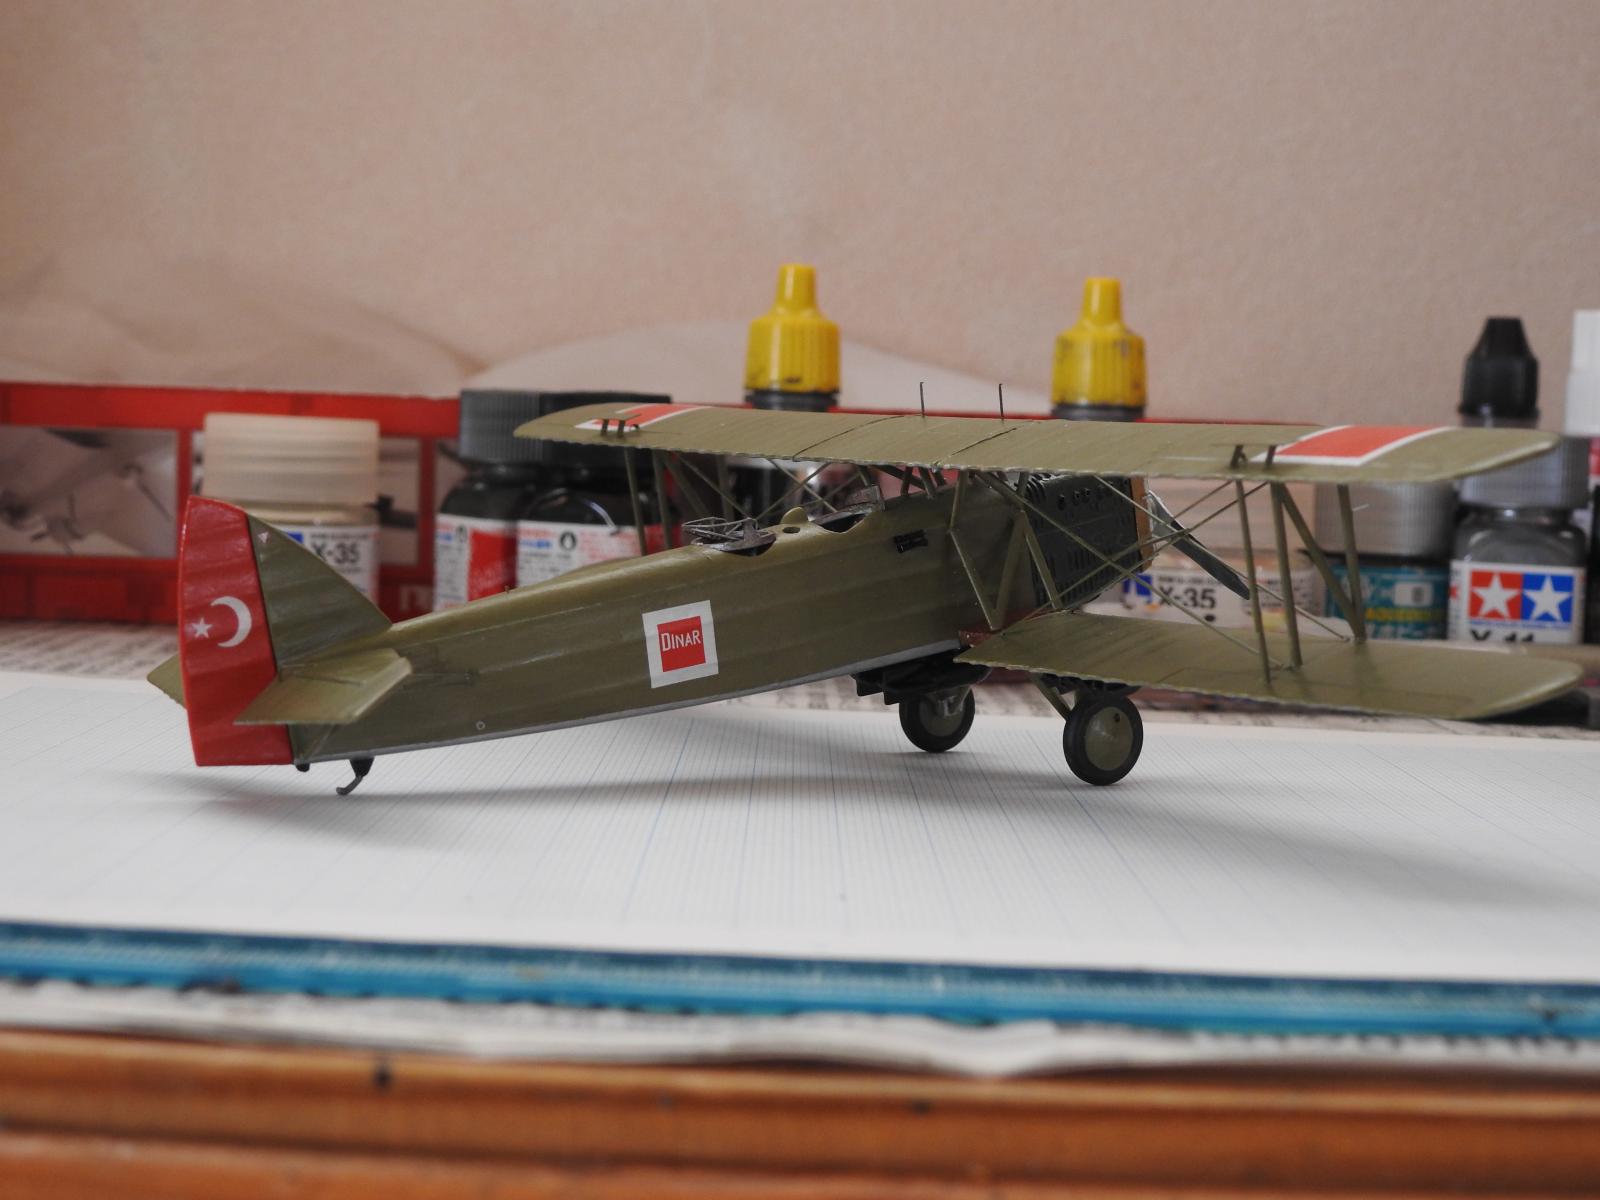
For the Turkish aircraft Brengun supply a special decal sheet. This is quite comprehensive - you get two versions of the Turkish star and crescent and three options. There's aircraft 78 from the 1934 Greece flight, 'Dinar' from the Ararat rebellion and an aircraft with a mixed scheme with Czech roundels on the rudder. The correct engine front colour is also referenced clearly. The decals are accurate and follow the available photos very closely. They do settle down nicely and saturation is very good. This is a nicely researched set of decals. The inclusion of 'Dinar' was very nice - Turkish aircraft frequently carried names of towns and sponsoring groups at this time usually within the Turkish national markings on the fuselage.
Building the model
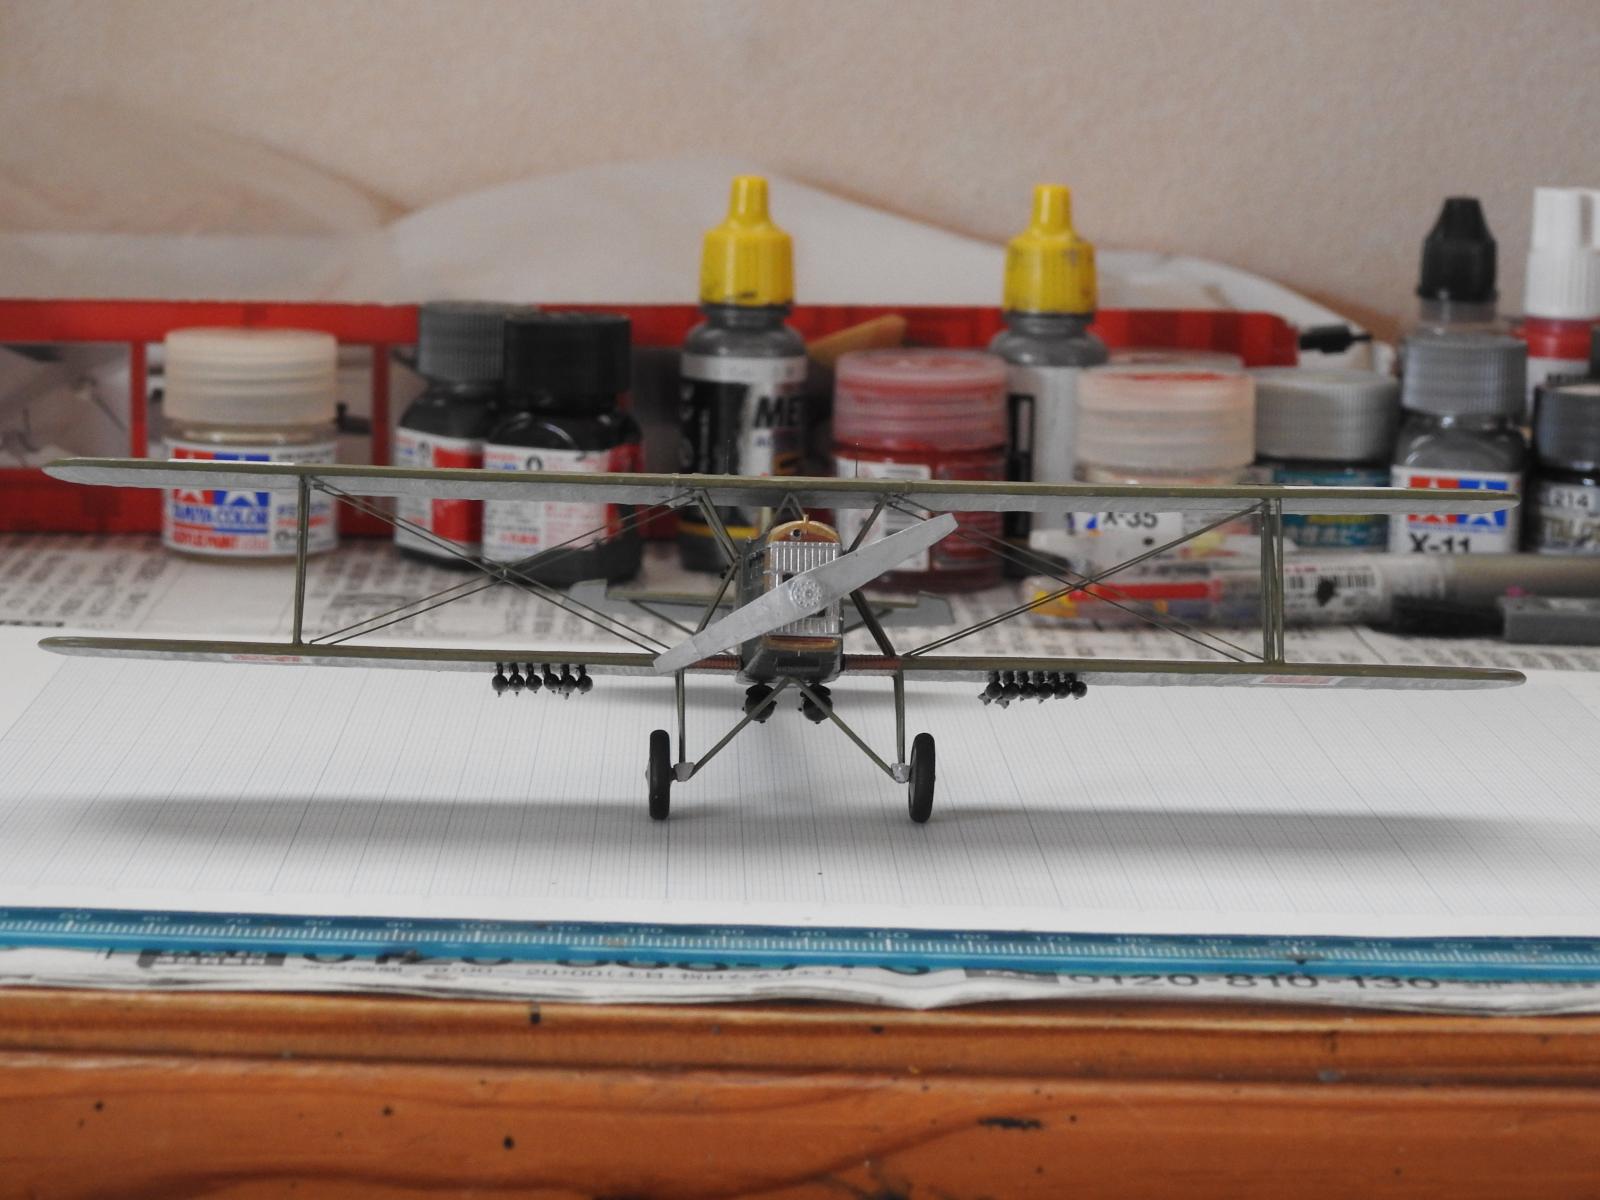
As I mentioned above this model does need some surgery. The major piece of cutting is to add the Hispano-Suiza engine and this involves cutting the entire nose off. Brengun clearly indicate where this cut should be made and it's very straightforward. The replacement nose piece fits perfectly. The wings on the Turkish aircraft also had cutouts at the roots but once again you have clear instructions of where to cut and how much to cut. Where things start to get tricky is the radiator front. For some reason Brengun had a major brainfart and made a complete mess of it. They have molded it with an open radiator but Turkish aircraft had radiator shutters. The engine boss is also wrong (that on Turkish aircraft was hemispherical) and so some surgery is needed here and a replacement boss. The shutters can be fabricated from one of the spare engine fronts included in the kit but this aspect of the kit isn't impressive. It's worth the effort to get this assembly correct. Turkish Letovs on the ground had dropped elevators so I cut these off and reattached them at an appropriate angle. Once the cutting was done I started on the cockpit - it's reasonably comprehensive though I did detail it further by adding levers and trim wheels. The gunner's seat is meant to be attached to an etched brass frame. Don't use this - it's too long. Replace it with 0.4 mm plastic rod cut to length (not difficult).
As I mentioned Brengun does offer an extra etched brass detailing sheet which includes cockpit levers and the like. I used some of my own but for the rear gun frame it might be a good idea to get this. The kit part isn't anywhere near realistic. I scratchbuilt mine out of 0.3 mm plastic and brass rod but I don't think everyone will have the patience to do this. The kit guns are wrong for the Turkish version. Turkish aircraft carried Danish Madsen guns and the only company that ever made these were Aeroclub and these are now as rare as hen's teeth. However, as photos regularly show the aircraft without rear guns they can be left off. The correct gun mount is a must though.
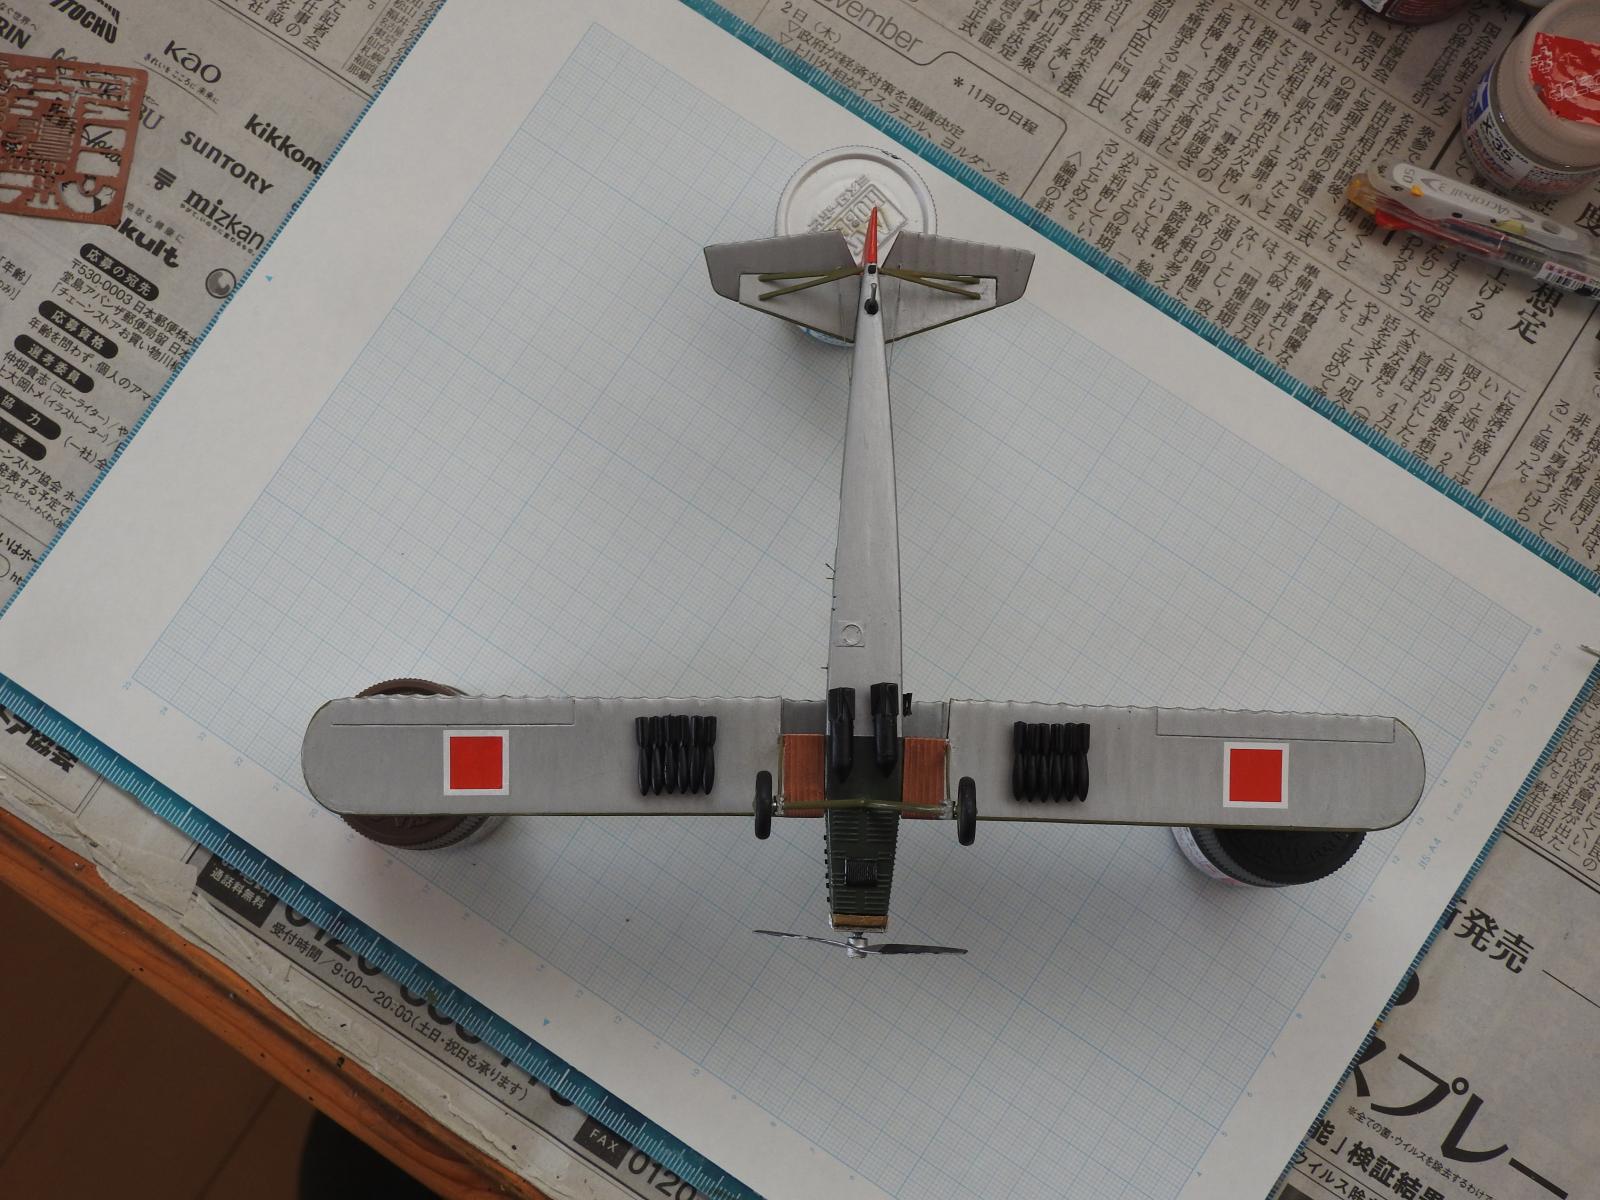
The kit assembles nicely but filler will be needed. Other things I added were lifting points and control wires for the elevators. A stalk for the position light which wasn't always carried as were other position lights. Note - if you do add navigation lights, they were located on the lower wings. Some aircraft also carried wing driven generators and these need to be scratch built or borrowed from other kits. Venturi tubes were a couple of Master pieces and these are superb. The upper wing can be fitted very easily - fit the interplane struts (which are vertical 'N' struts) and ensure they're vertical. Make sure to enlarge the location holes though (this goes for all holes in the kit). Then the inverted V struts can be added to the fuselage . The upper wing is cemented to these and the cabane struts fitted. Rigging is also easy - Letov Š-16 wires were sheathed and so one just needs four separate lengths of Evergreen strip (I used 0.28 x 0.56 mm) which are fairly simple to fit with superglue. I also added the spacer bars from 0.4 mm rod. I do like the rigging for this kit.
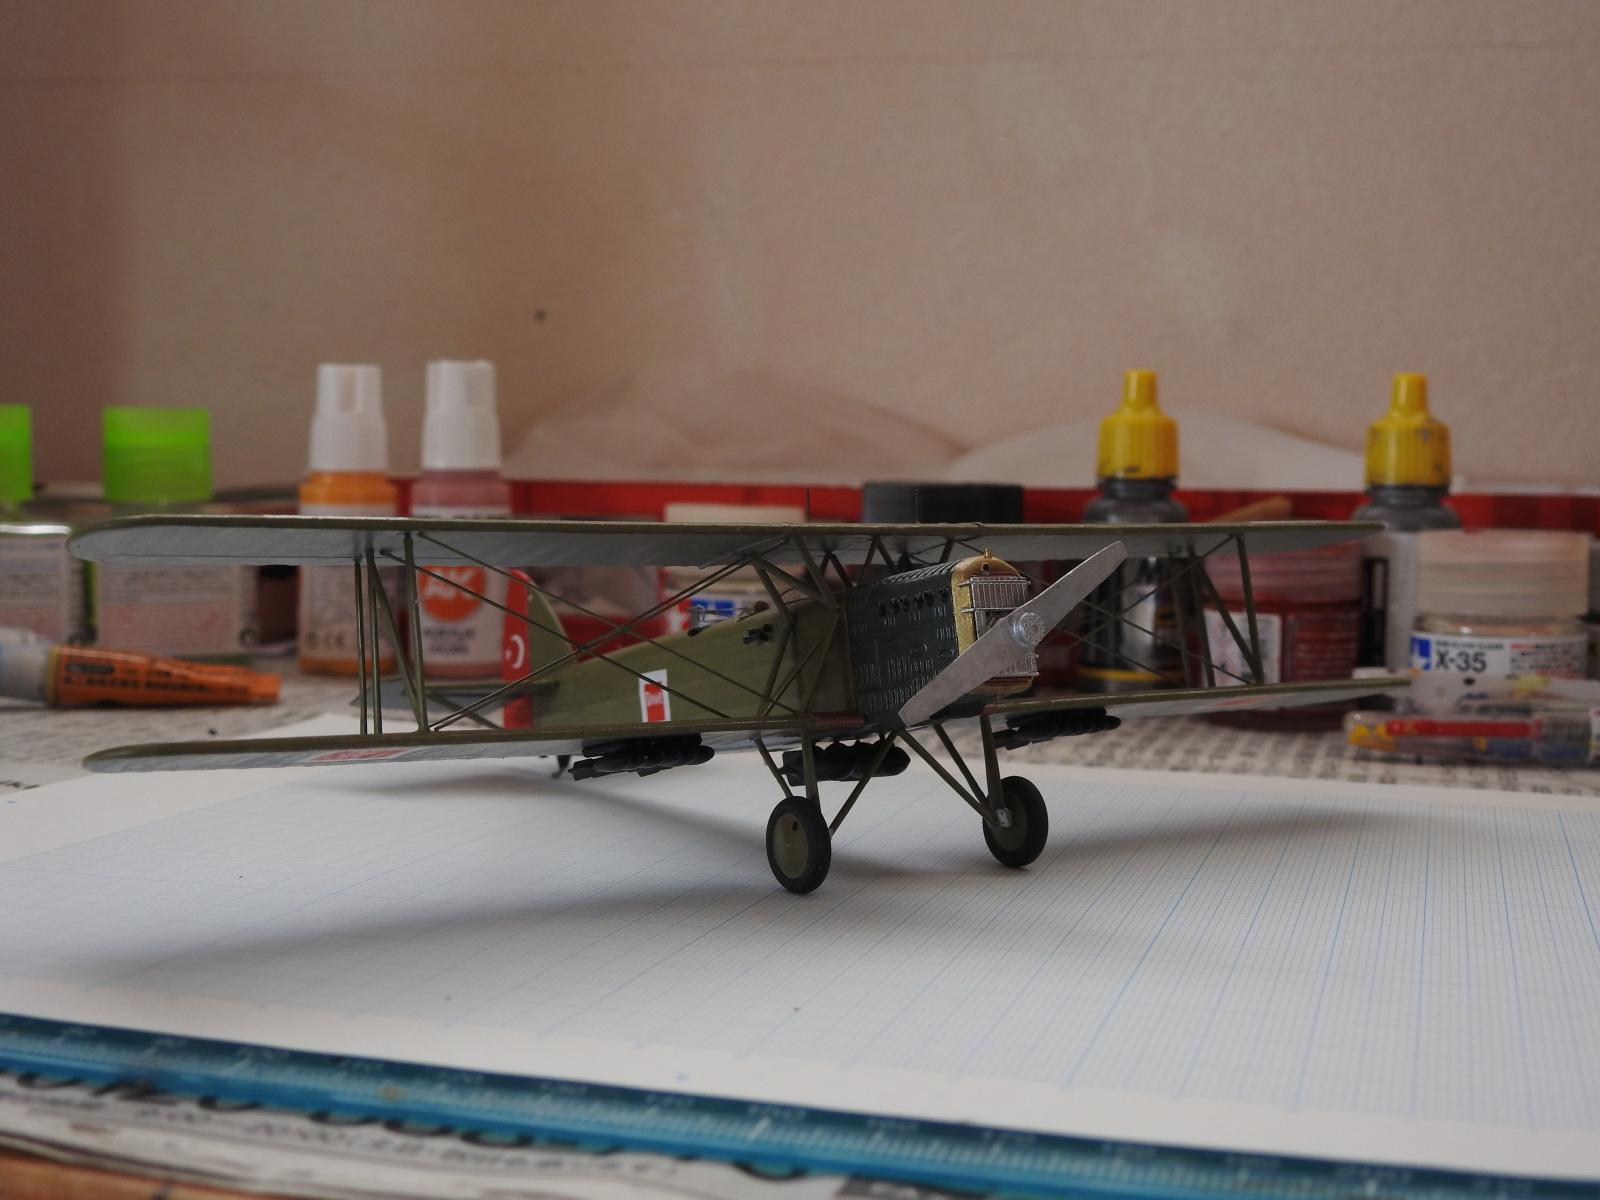
For bombs I used the kit parts for the wings suitably modified but contra to the instructions glued much closer together to match the photos. The under fuselage bombs were from a KP Bloch 200 kit as I was modelling a different configuration to what is normally seen. The under fuselage bomb carriers for the standard Turkish Š-16T need to be scratch built as the kit parts don't match the photos. Paints were Tamiya enamels XF-16 for the sliver dope, Humbrol 30 for the dark green engine front, Tamiya XF-49 Khaki for the camouflage and AK Interactive 'Blood Red' for the rudder. Everything was satin varnished.
Conclusion
This kit is a very nice build - it's challenging but it's actually quite straightforward if you take your time and plan ahead. I do like the Brengun Š-16s. They're detailed and accurate and build well. Modelling skills are needed to complete them though particularly if one wants to get the radiator accurate and to build an accurate gun mount. The Turkish version is great fun and adds a very nice model to the collection.
Another fantastic result, thoroughly researched and beautifully built, Christopher!
Kudos to Tolga Ülgür and Özkan Türker for their assistance, in order to come up with such an accurate esoteric subject!
Congratulations!
Many thanks Spiros and what a quick response! Özkan provided an enormous amount of freely given help.
The very thorough research, and help from your friends, have resulted in another superb model in your collection of slightly unusual and rare aircraft.
Hi George
Thanks for the kind comments. The models I build often need help from others and I'm always overwhelmed by people's kindness.
This is the first Bergen Letov I see completed and even more rare in Turkish markings, a very esoteric subject to build for sure. Looks like a solid build even more considering the mods needed to achieve the results you present us. Is the model brush painted?
Hi Pedro
Yes everything is brush painted. The kit is a solid build and if one watches out for the separate struts on the inverted Vs on the fuselage even the upper wing is straightforward. Even when one has to cut the model it's well thought out.
Well done Christopher.
Thanks ever so much Allan. This is a very nice kit and one just has to go with the flow.
Excellent result, Christopher @christopher
With all the research and valued help from your friends you created a wonderful build.
Your brush paint skills are amazing.
Hi John
Your very kind comments are much appreciated and thank you ever so much for the extra kind comments on the finish.
Well done - I like seeing unusual subjects like that displayed here!
Thanks ever so much Chas - you're very kind.
You nailed it! Love the unusual subjects.
Many thanks Greg - like you I like unusual aircraft and this one certainly fits the bill.
Your collection of very unusual and very rare models, all so well-done, is amazing. I have to admit, I didn't know this airplane ever existed. So I got a history education and an account of building a superb model. iModeler is the best club around for getting help from fellow members.
Thanks ever so much Tom. The Czech interwar aviation industry is really interesting and the Czechs are justly proud of it. I agree with you 100% about iModeller.
Excellent interwar build! Like many here, I didn't know they existed. Thanks for the lesson!
Hi Dan
That's really kind of you to say so. This was a fun build as well.
Good job, looks really beautiful.
Many thanks Milan - it's very kind of you to say so.