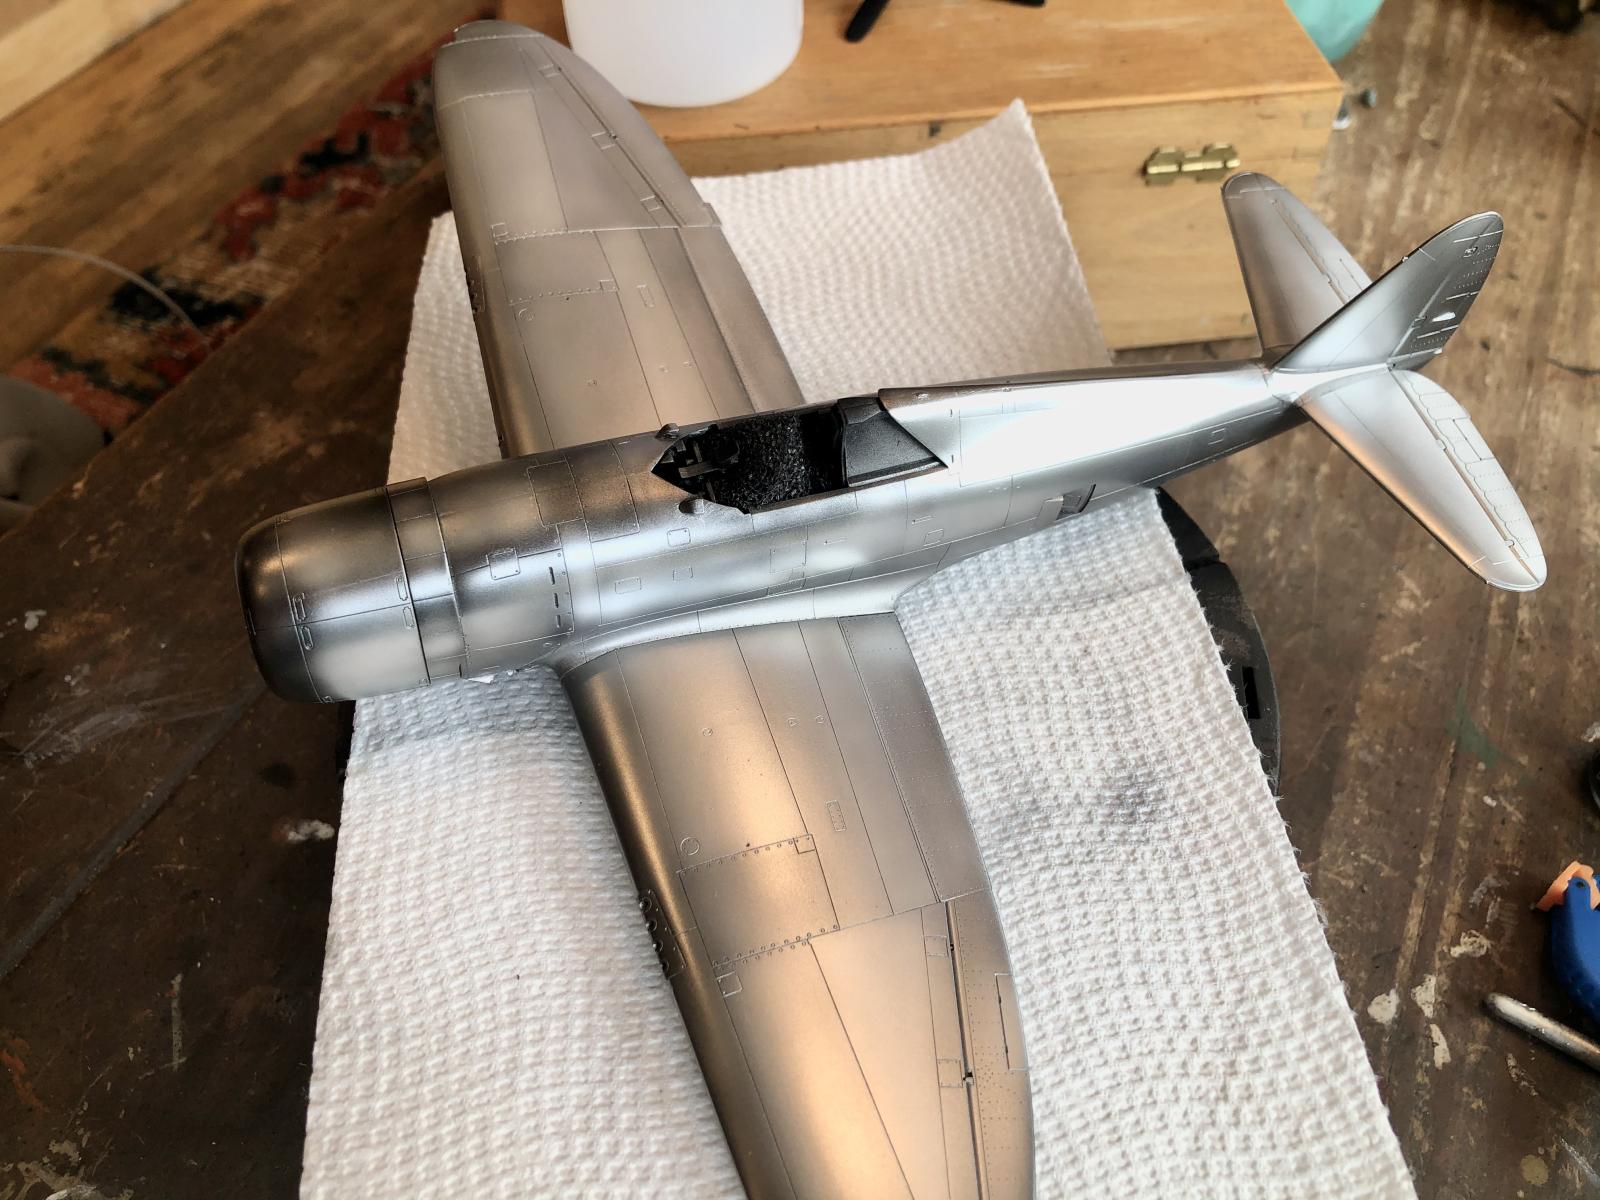
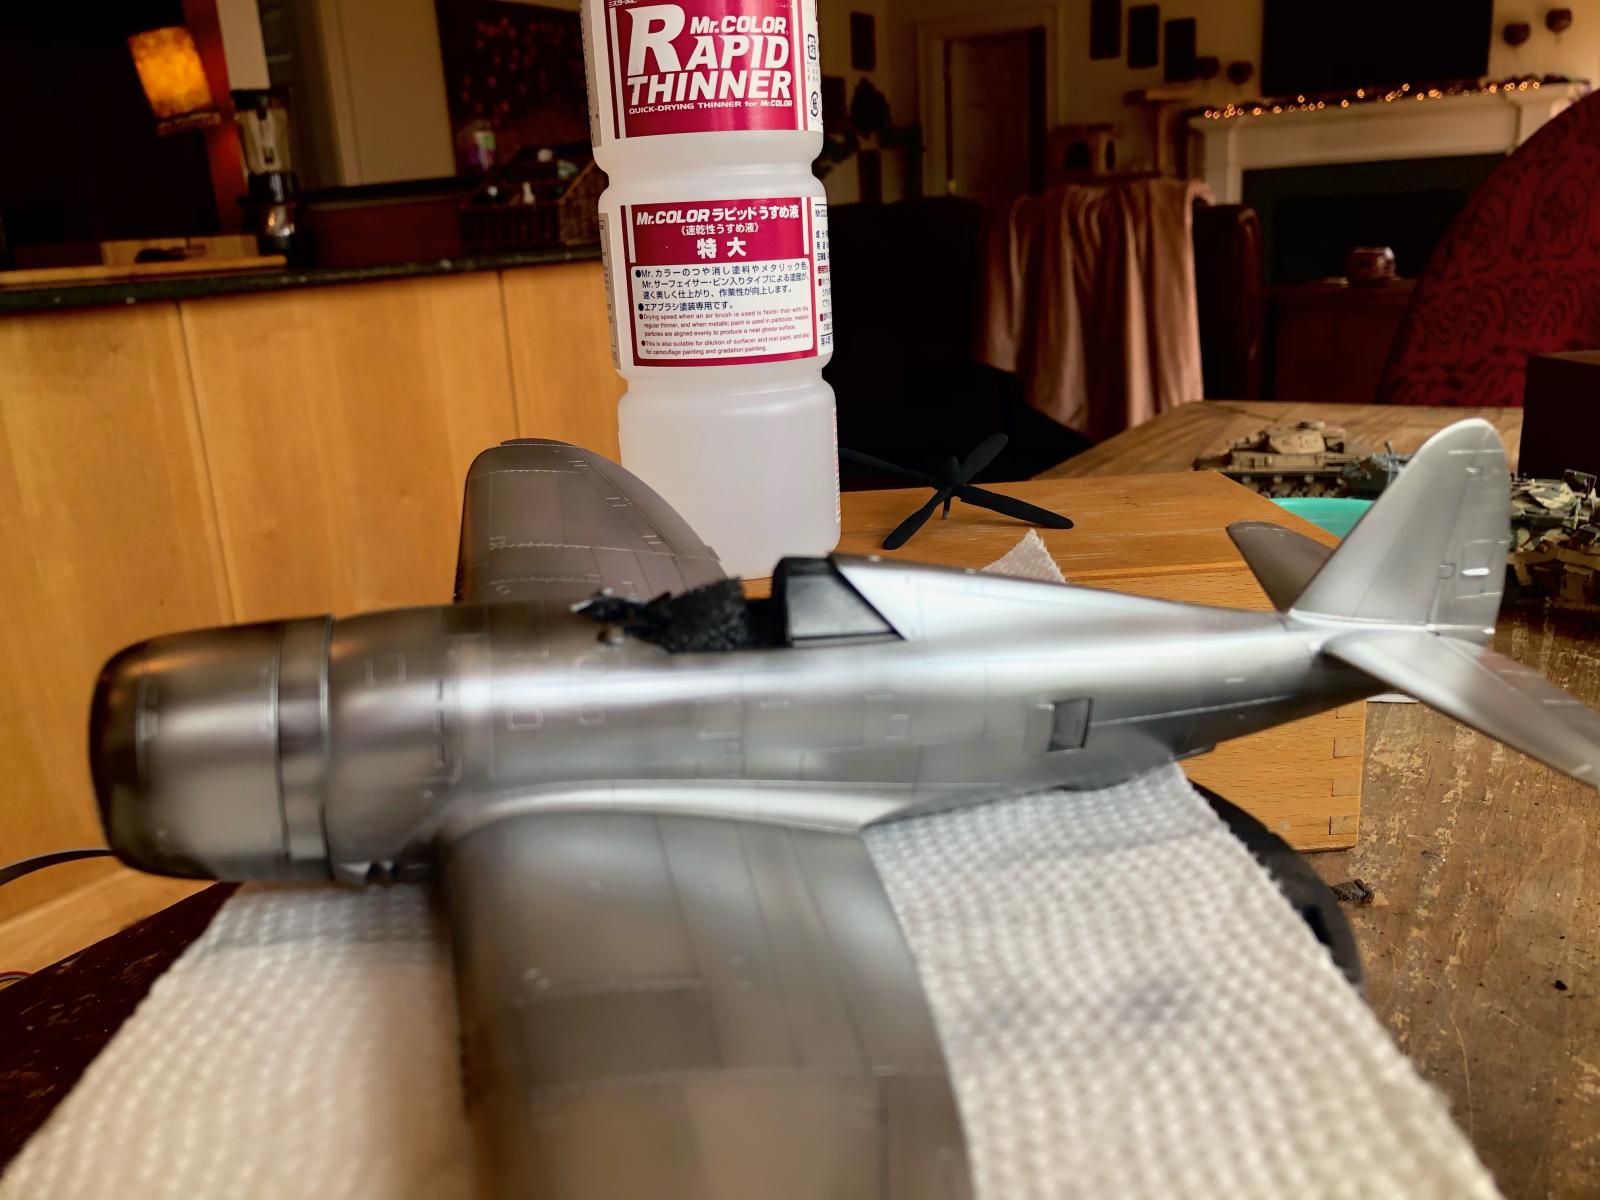
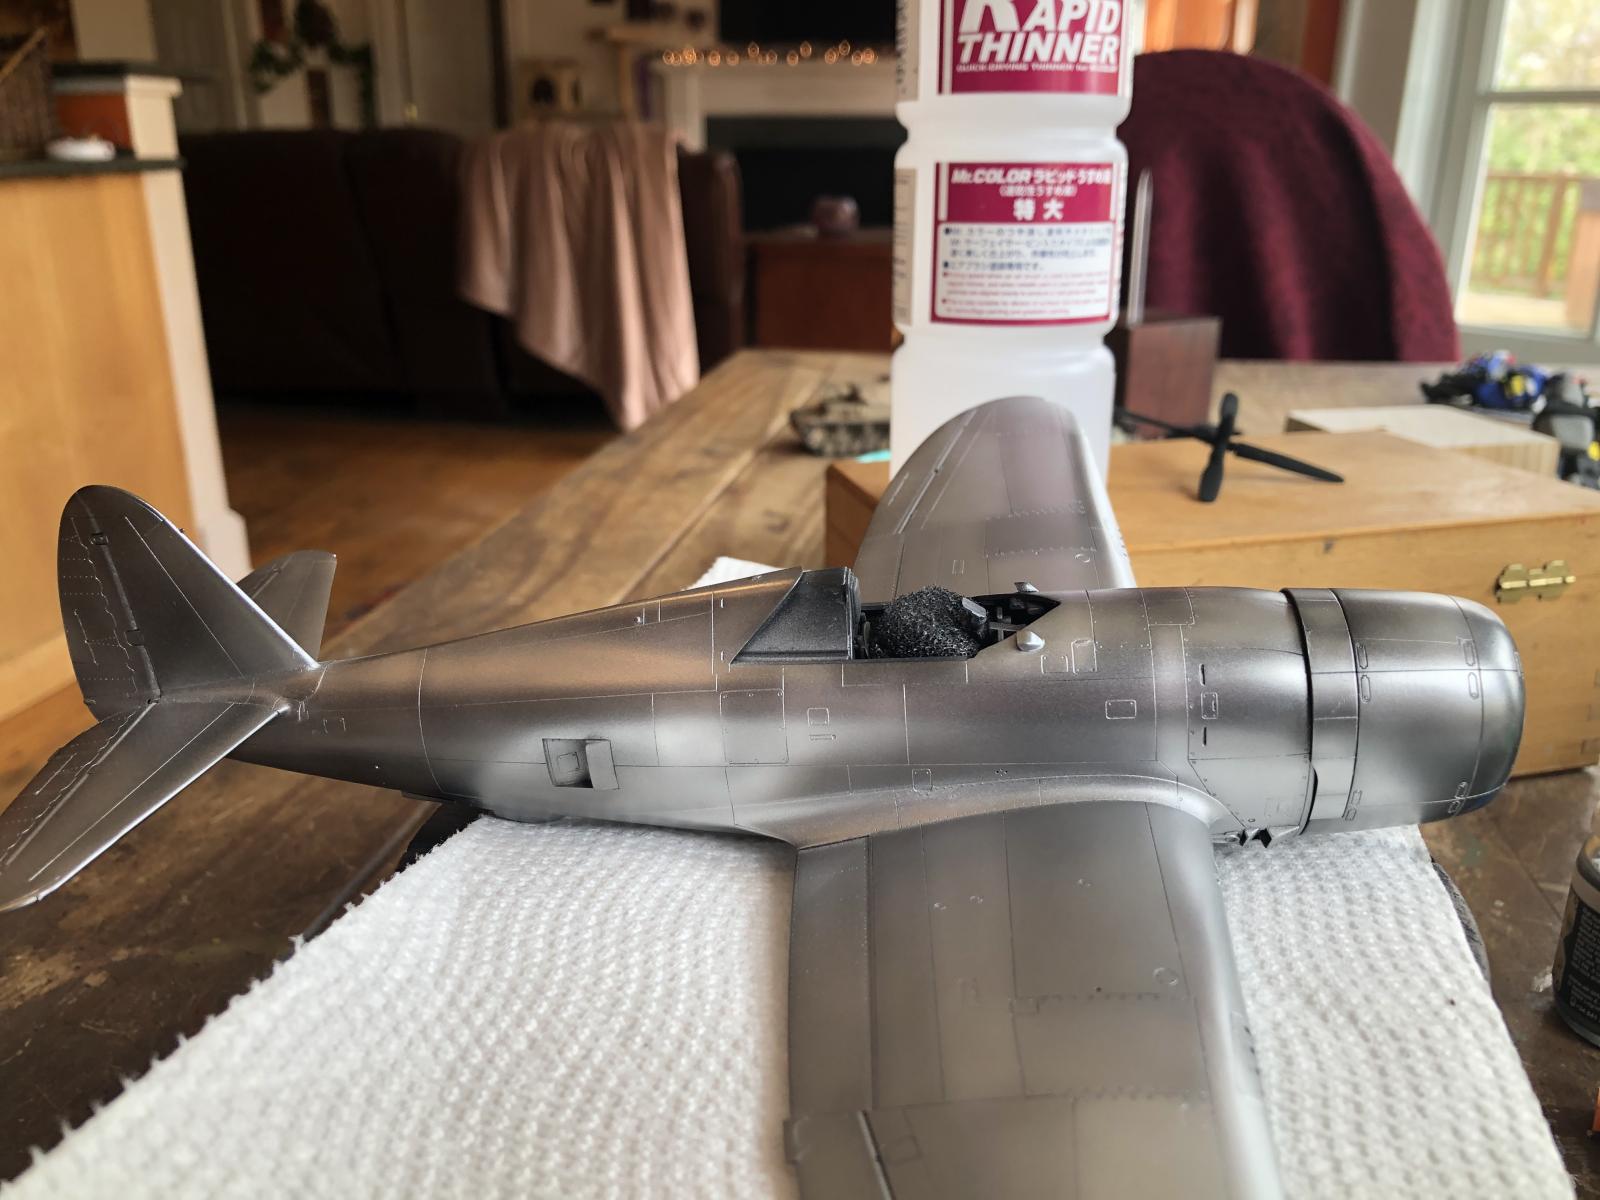
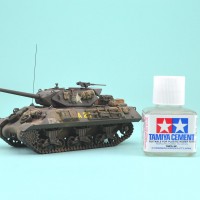
WIP: Tried the Mr Color Rapid Thinner. Me Like!
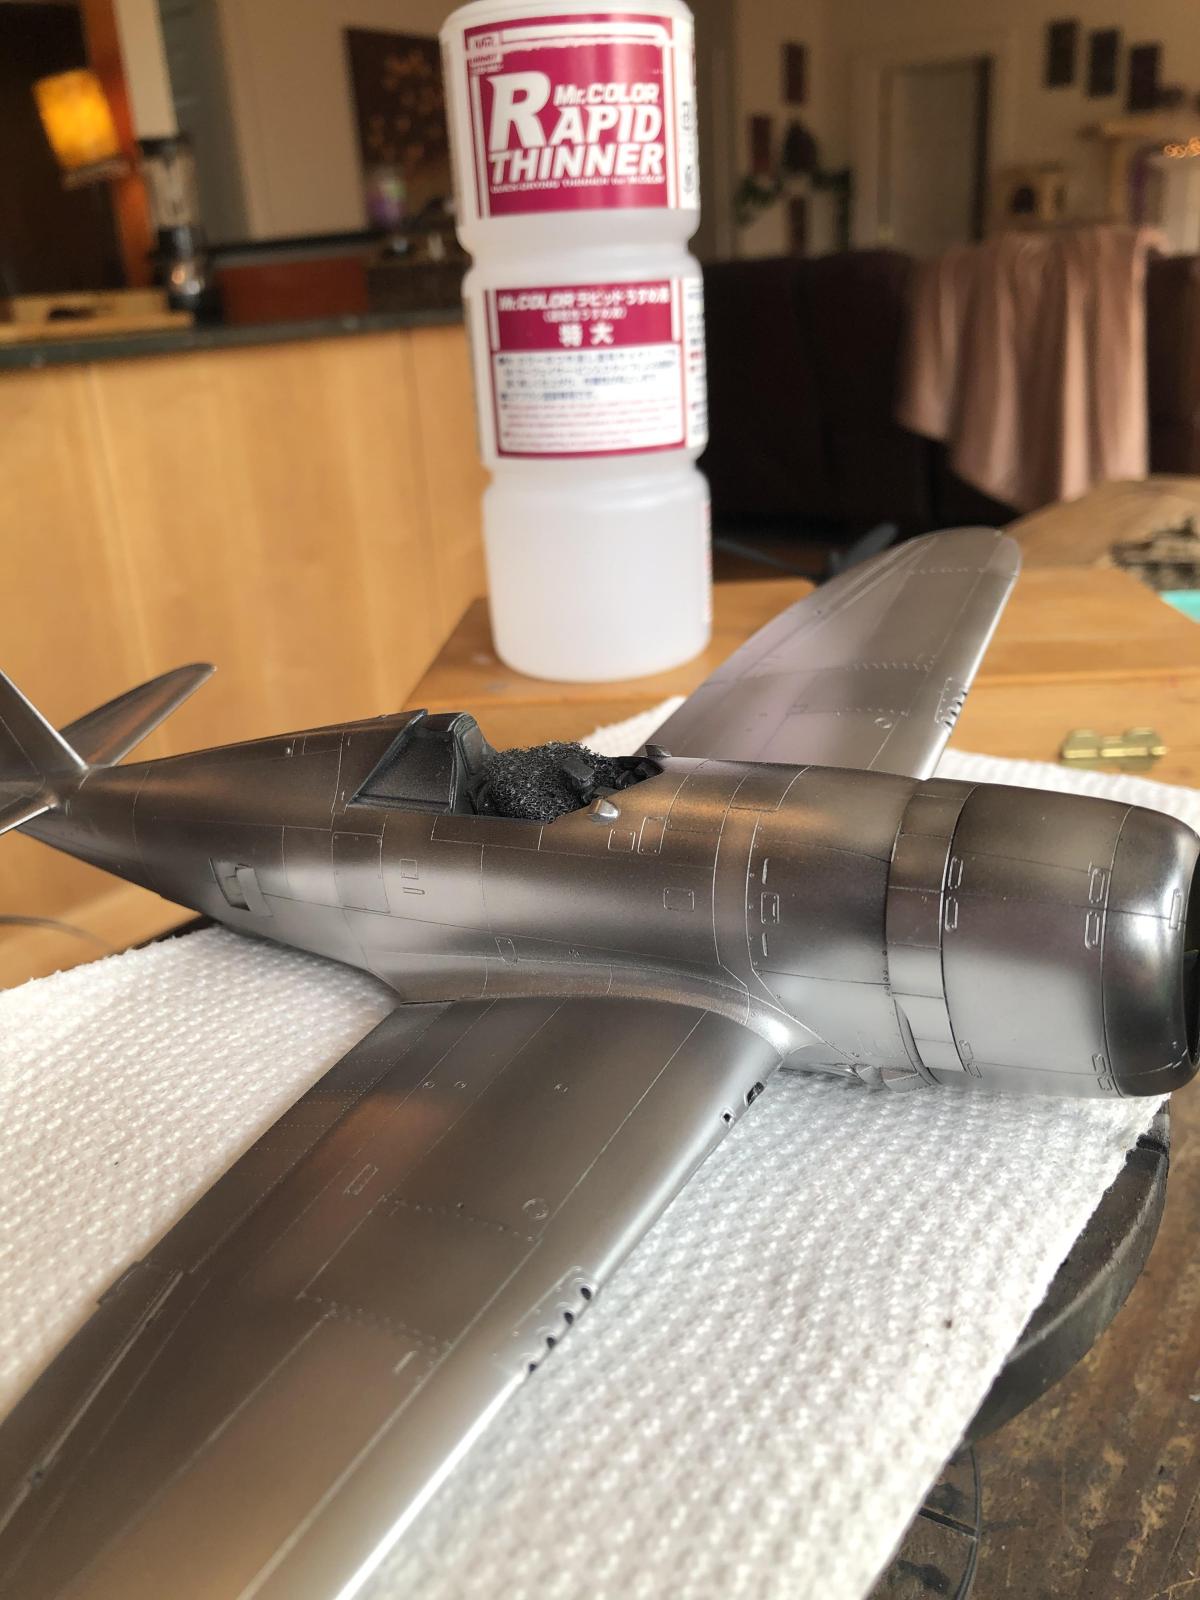
I used the Mr color Super silver and Stainless steel on my Mustang with the Mr color 400 thinner. In general I was happy with the results. Although I wanted a tighter silver and less "sparkles".
I had read somewhere that Mr Rapid Thinner was the trick to use with the Mr color metallics. So, I gave it a go and I was really pleased with the results. This is sprayed with 70/30 thinner to paint and over Ueno black, buffed and polished with MRP super clear coat. It's much more metallic to me and I created the panel line differences using only the Super Duraluminum from Mr Color. Use less paint, and you get a darker, but shinier tone. Add more layers or intensity and you get a whiter, more satin tone. I hate taping, so this was a nice way to get panel differences without having to tape.
The paint and rapid thinner dry really fast. I tested taping over on a spare part and within minutes after painting I could hard pull the tape multiple times and rock hard. Me like that. What do you think?
Questions, comments, and critiques welcomed. G


Graeme: Thanks for the tip. I have some of the rapid thinner, but never knew how to use it...thanks to you, now I know. I'll give it another go.
Thanks again.
Great @marvin. Hope it helps.
I’ve tried it with AK metallic. Tamiya paints. Seems to work well with all. Does sooooooo fast. Tight. For someone like me with no patience it’s a great thinner.
Beautiful metallic finish!
Thanks David @tolss.
That's a really cool metallic finish Graeme - me like it too 😀
Thanks Scott @scottiya. Nervous now about the taping and painting of the colors.
That's looking promising! I'm not a plane guy, but I do use Mr Color metallics, and you've just opened up another realm. Thanks for the inspiration, buddy 💯👍
I tried doing a test on a drop tanks I will not be using. I only used the Ueno black and then right to the duraluminum with no buffing. No clear coat. No sanding. Nothing. Honestly, it gave a brighter metal and reflective finish. I am happy with how mine came out with my multi step process, but makes me wonder if all that effort and stress was necessary. Bottom line, we need as smooth a surface as we can achieve in as little steps as possible. The plastic itself is super smooth. Light coats of a gloss black and no fuss right to a hard, fast drying metal may work. I did that with the large drop tank I will be using and no buff, clear coat, nothing and looks just as good or better than all my work. I'll post the finished product soon and we can decide together. I'd like as simple a solution as I can get.
Thanks for the tip, Graeme!
Awesome finish, again, thanks for the tip. The fuss in prep is part of the reason I shy away from NM finishes. This may help, alot.😉
A wonderful looking NMF, Graeme @graemestreet
Thanks for sharing this approach to get a nice and shiny outcome.
beautiful result! nothing to say 🙂
Some good insight! I've heard good things about the AK metals but still have a full stock of the Vallejo metals, and I'm happy with them at the moment. However, I'll keep this post as a reference if they fail me, as I really like what you achieved with your treatment (and sounds like you found a way to simplify the process, which I like even better!)
Mr Hobby recommends MRT with their metallic paints (Specifically the SM series). They state that the reduced amount of retarder (the "rapid") allows the pigments to settle faster by flashing off faster and create a better finish than with Levelling thinner (more retarder, MLT). MRT is also recommended to create a more matte finish. I also use it when painting markings using masks, it allows the paint the dry faster and reduces the change of seepage (I use 75/25 ratio)
PS: the "400" is just the volume, and not related to the thinner characteristics.
Yup. That's what it's for but I hadn't thought of the reduced seepage angle. Good drills👍
Looks great! Amazing work, Graeme.
Are the mixtures acrylic, water based?
Thanks George. Everything is lacquer based here. Mr color Ueno Black (satin, oily looking finish--great for NMF), sanded back, polished, applied again. Then clear coat of MRP gloss. Then buffed out with Tamiya fine and finish compounds. Cleaned off with water and brush. Dry. Applied a layer of Future floor polish for final sheen, then onto the Mr Color Super Duraluminum at various intensities and layers. That's what you see above as complete. Then once allowed to cure, I applied a coat of Alclad Clear Base as my protection for the next steps of color painting and decals. I learned this trick from a Youtuber and makes a lot of sense. It's a super hard drying clear coat used obviously for a "base" right over plastic to begin with NMF if you don't want to use a black base. This technique uses the base LAST as a final clear coat to make a hard protection over the silver. I have tested already with 24 hrs cure time with every decal softener and tape I have and seems to hold up great. Rock hard. We shall see because I have to mask a bunch today to get my colors on and then decals. nervous, but we shall see. I will update with final reveal.