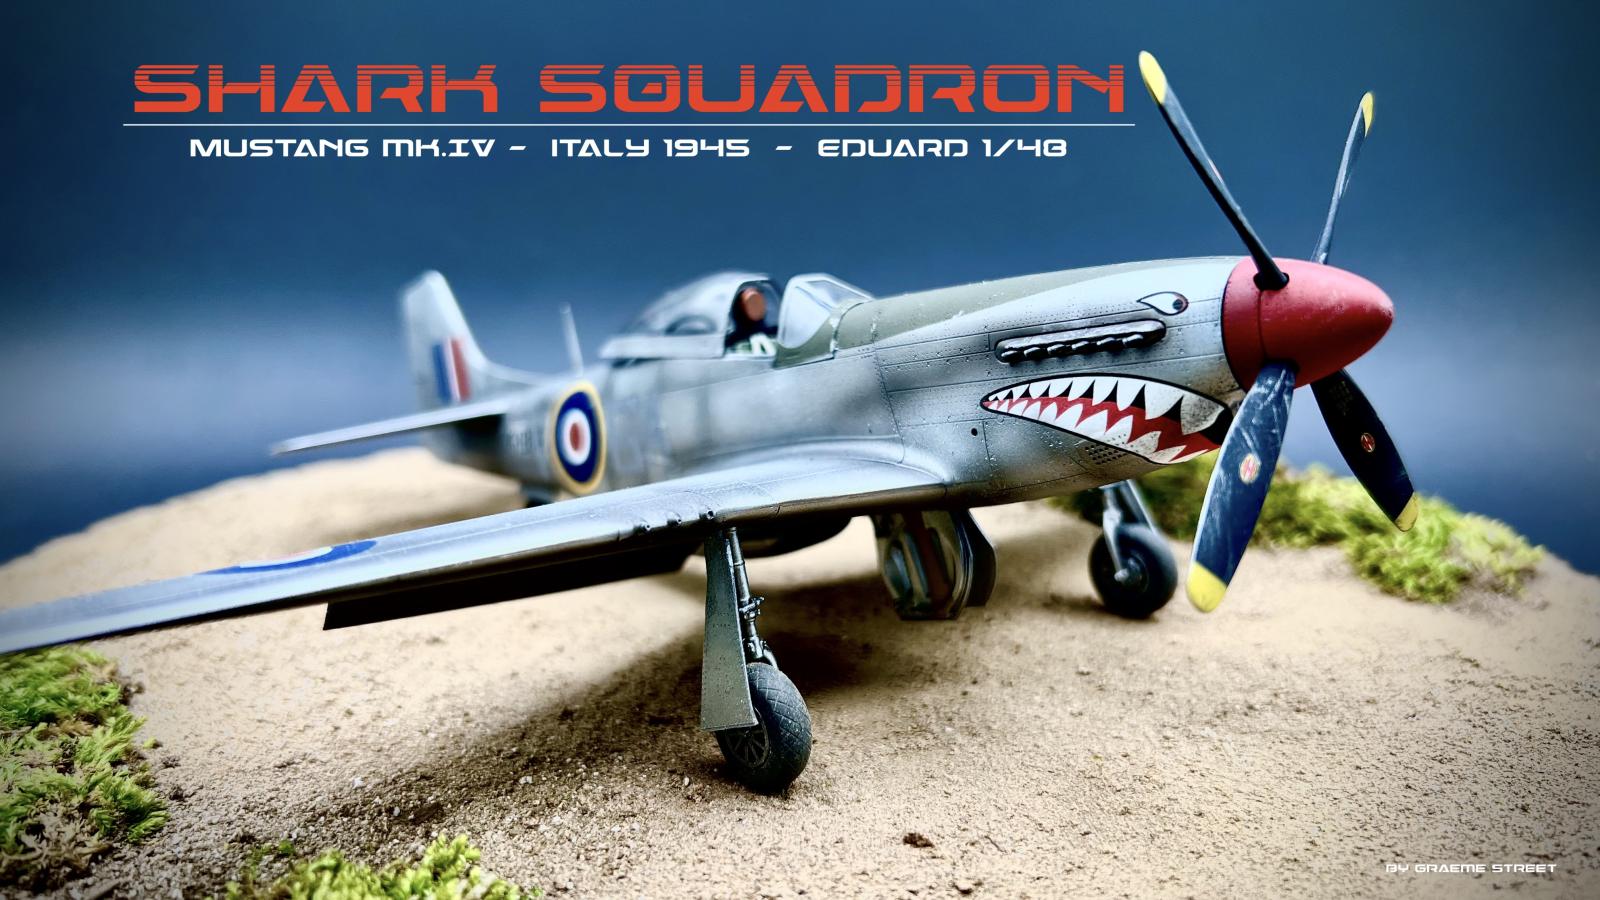
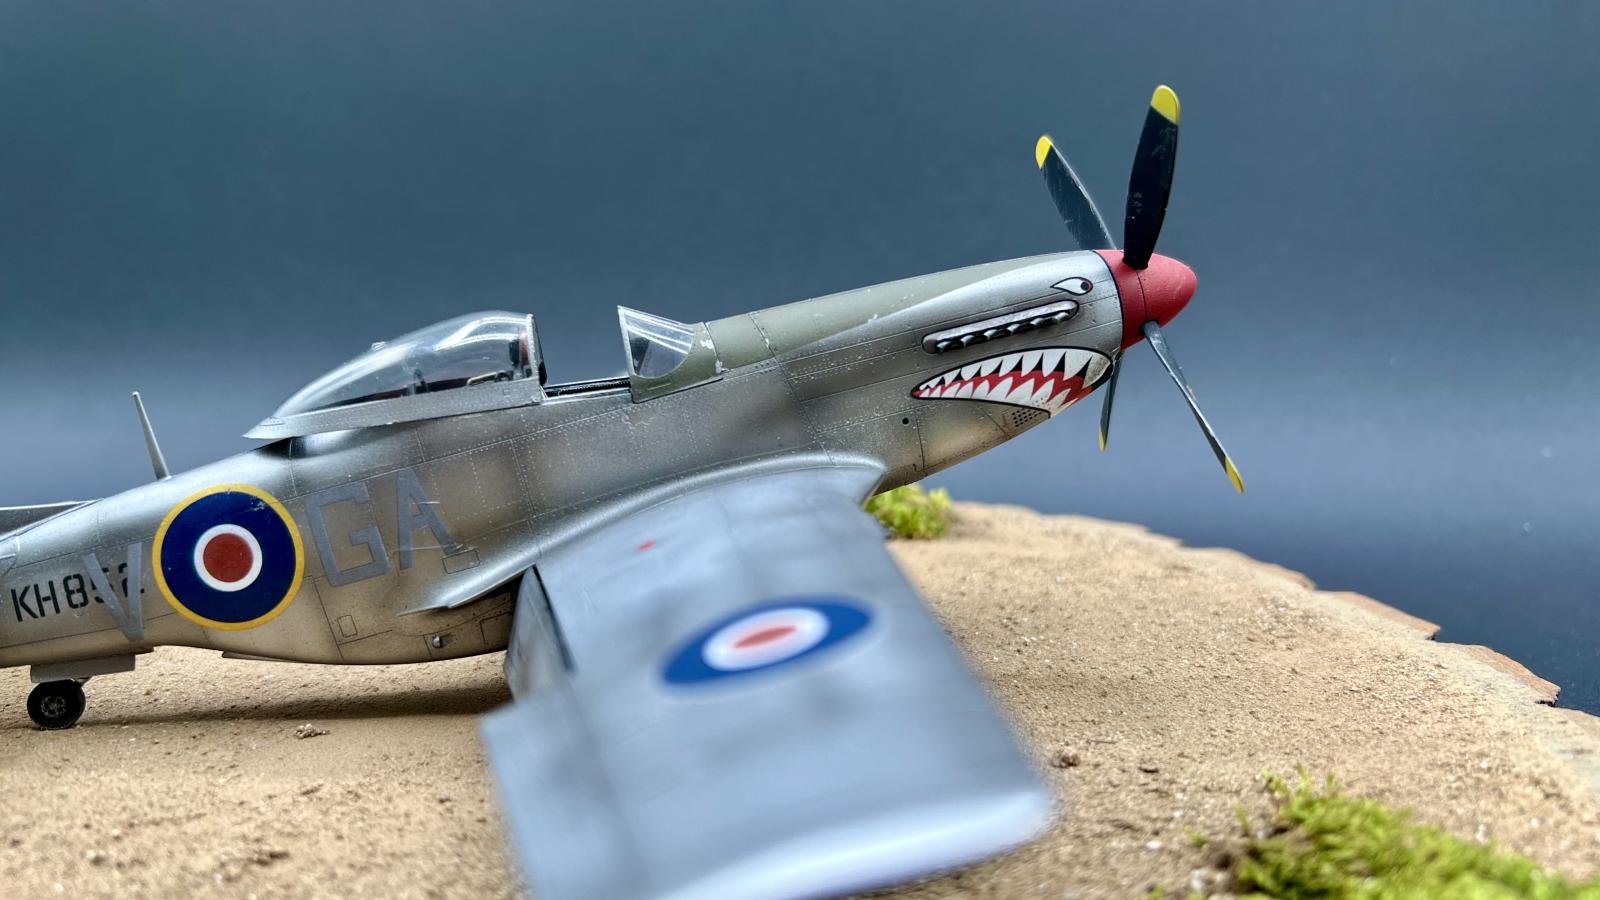
"Riding My First Mustang" (Mk IV, Eduard 1/48)

Hey Everyone.
As you may recall, I have been trying to challenge myself more with attempting more plane models and getting myself out of my armored comfort zone. I started with the Wurger, then onto the Corsair and now I've tried riding my first Mustang. Again, I know this is probably the most modeled airplane there is and I did my best to achieve two things; 1. to do my first ever NMF and 2. Attempt to do the Mustang the justice it deserves with an appealing to the eye portrayal of this machine.
Not sure I achieved either in my first attempt, but it's a good starting off place to learn moving forward.
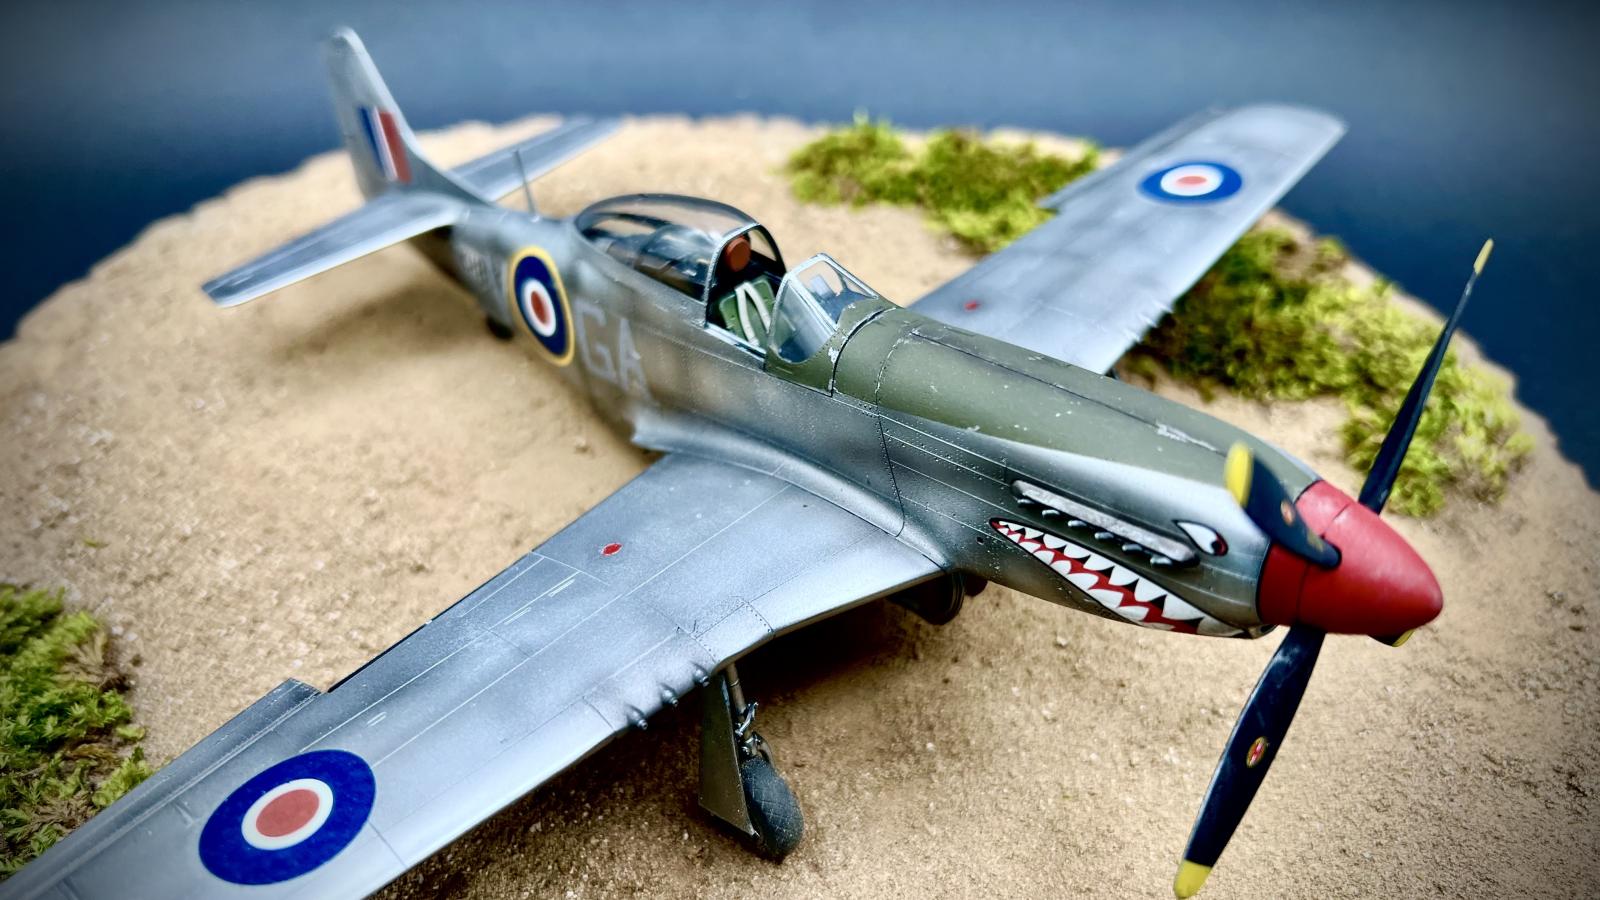
I chose to try Eduard's Mustang Mk IV, stationed in Italy at the end of the war and part of the "Shark Squadron". I've always liked the shark mouth's on WW2 planes and although I was worried about using a decal for it, it turned out to be the best decal of the bunch. (More on this below).
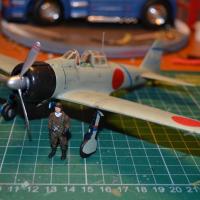
Truth be told, I am not a die hard fan of the Mustang. I think it's beautiful and I understand the significance of it's role in WW2, but as a subject it's not my first pic. I decided to enter into a STGB over on britmodeller.com for the stang and this is it. We'll see how it goes. I think it's important as a modeler to sometimes do models that are not your first pic, and use them as a learning experience and to challenge your skills in a new way. It's so easy to do the same thing over and over again. My Tiger fleet as an example of staying in our comfort zones (pic below).
The Build
Not only was this my first stang and NMF, but also my first time doing an Eduard kit. I'd love to say it went well, but alas, it really didn't. I had some monster fit issues with with the fuselage. I guess there are two guide pins near the cockpit that really need to be removed. I didn't know that (why would I) and had to use some serious muscle strength to get it to go. It created quite the warp around the cockpit which of course caused a chain reaction of problems down the line. I was able to get it to work, but it wasn't pretty.
Everything else in general went together well. I wasn't looking to do anything crazy, at least not on this build. I'm taking it slow as I ooze into planes.
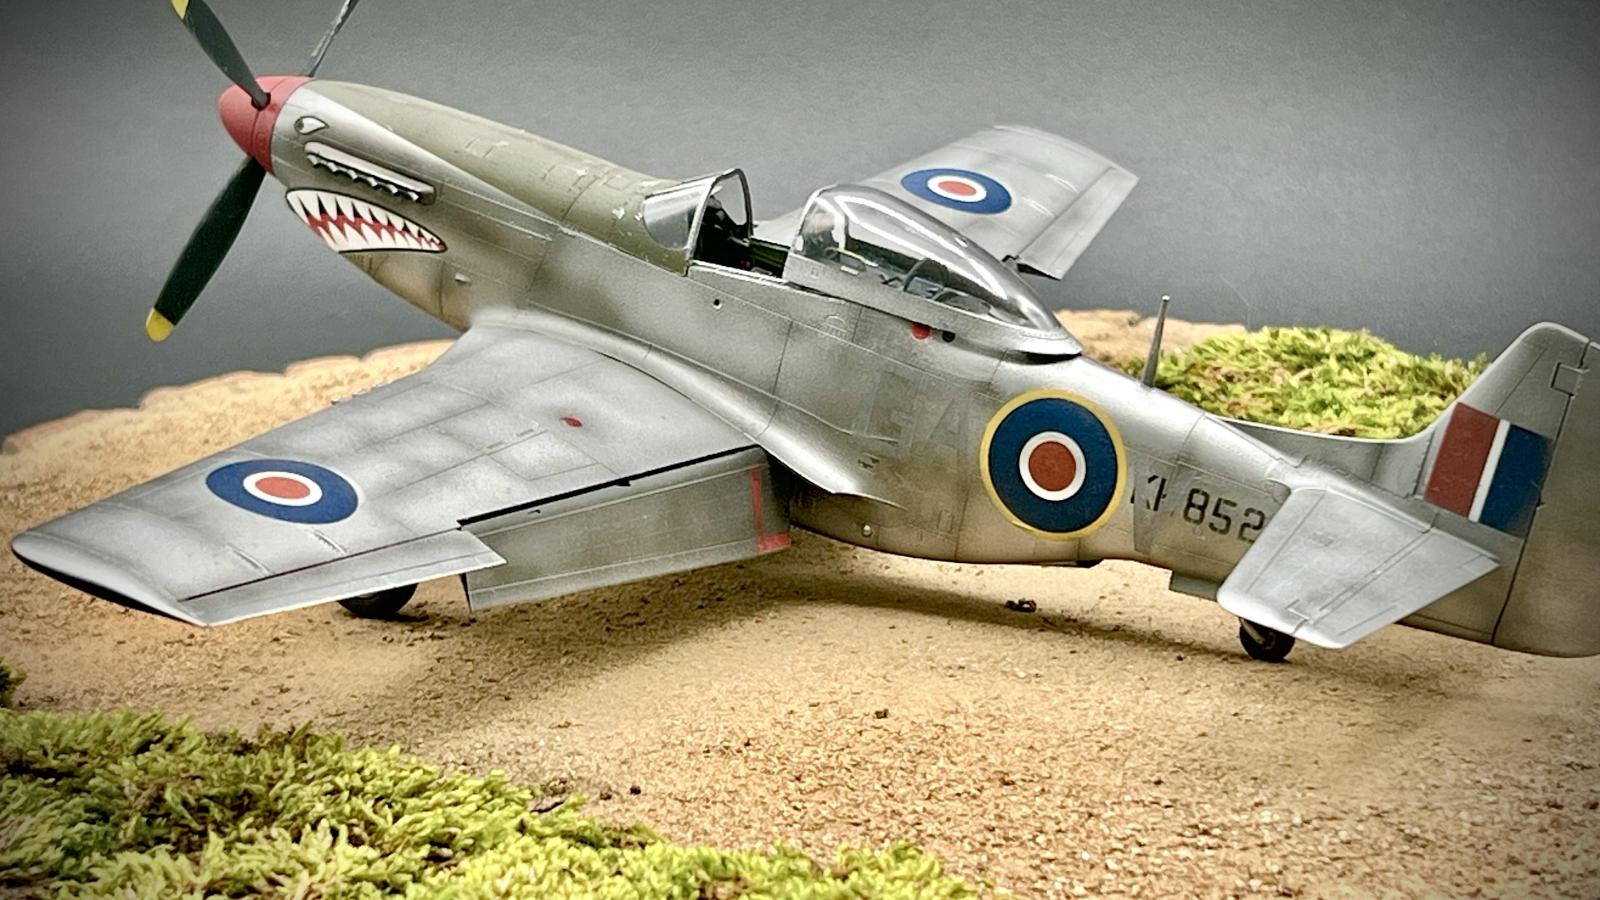
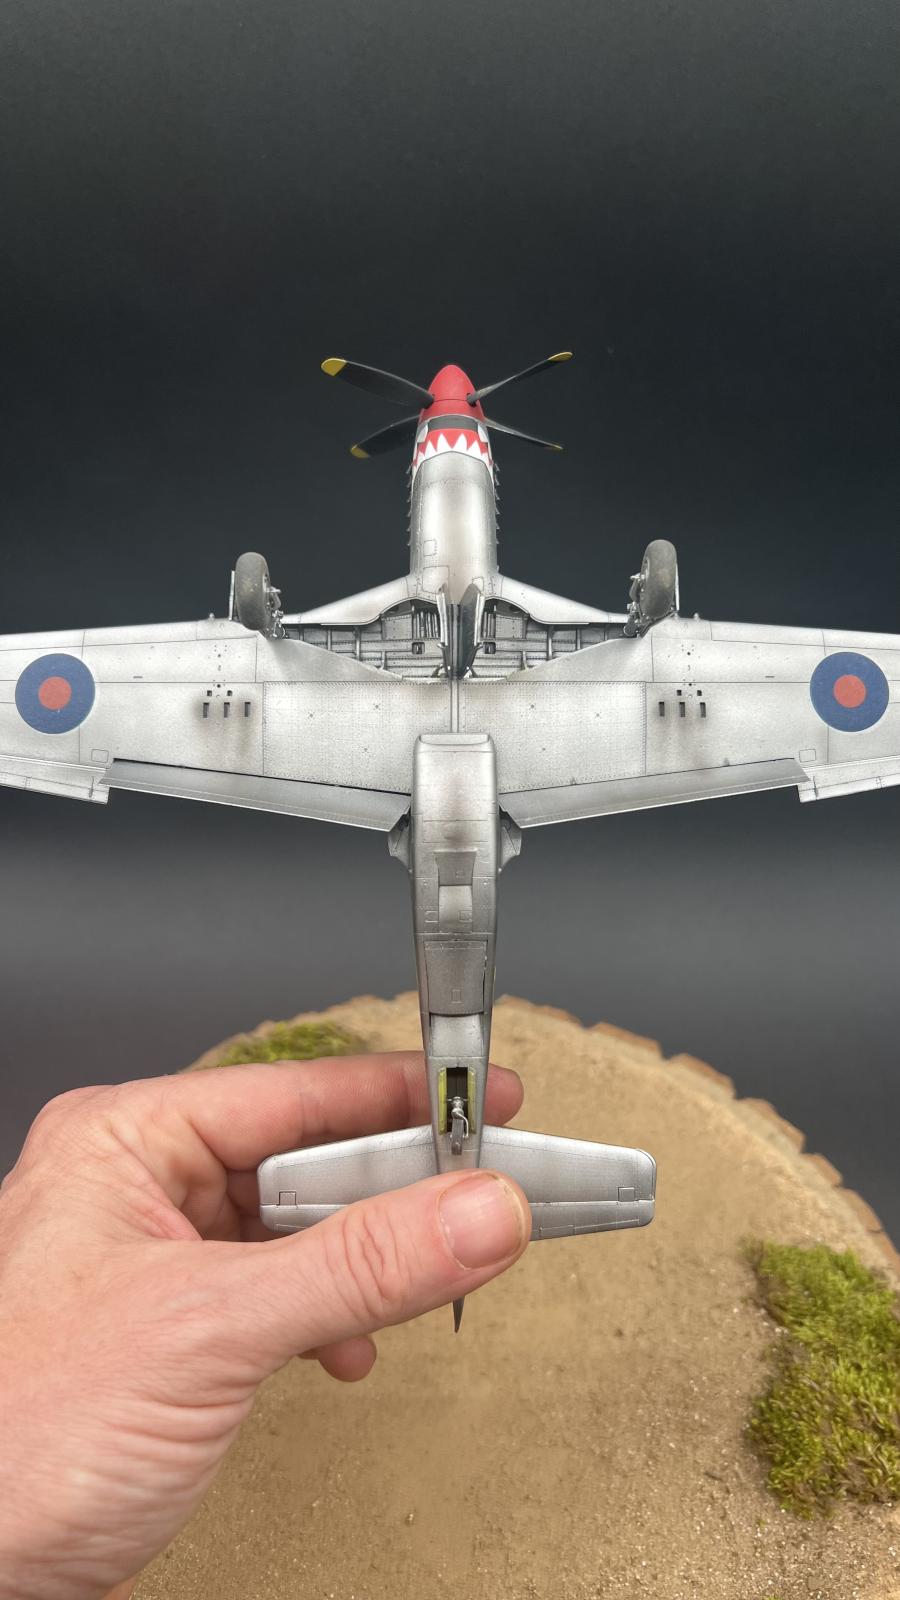
The NMF
I've never done one before, so this was a new experience. You can read more about that process here...
Then came the DECALS!
Oh my word. These of course are the new Eduard "peel film" decals and at first I was both excited and petrified at the process. I watched several tutorials before attempting. I did everything to the letter BUT ran into problems.
First, I am a microset, microsol dude. I was out of both. I had decided to try something stronger with Mr Mark Setter and Softer. I was excited as I like Mr anything usually. Yah, they both caused monster issues with the paint. This was of course AFTER I sealed my work with MRP clear as well as FUTURE, which I thought would guarantee no issues. Wrong, even after 24 hours of cure time, when I would apply Mr Mr, I would get paint issues. Blotches of residue. No problem, just use some water and wipe away. Yah, no go. I had to sand back, repaint with the decals in place. Only thing that saved me was some good AB skills. Very frustrating. After I got that resolved, I let the decals dry 24 hrs.
OK, so just peel and remove yah? WRONG. Although I could get the film to give way, it of course came with the decals in tow. I had to make a decision, try to finesse my way through or kill the removal and make do with the film on. So, I kept the film on. I knew proceeding forward with all the decals would guarantee ongoing issues. I even had a test subject with a spare decal, large marking. Still had the same issue. So, I had to go back to Mr softer and work the film back on. Again, now causing paint issues, again. UUUUUUGGGGHHHHH.
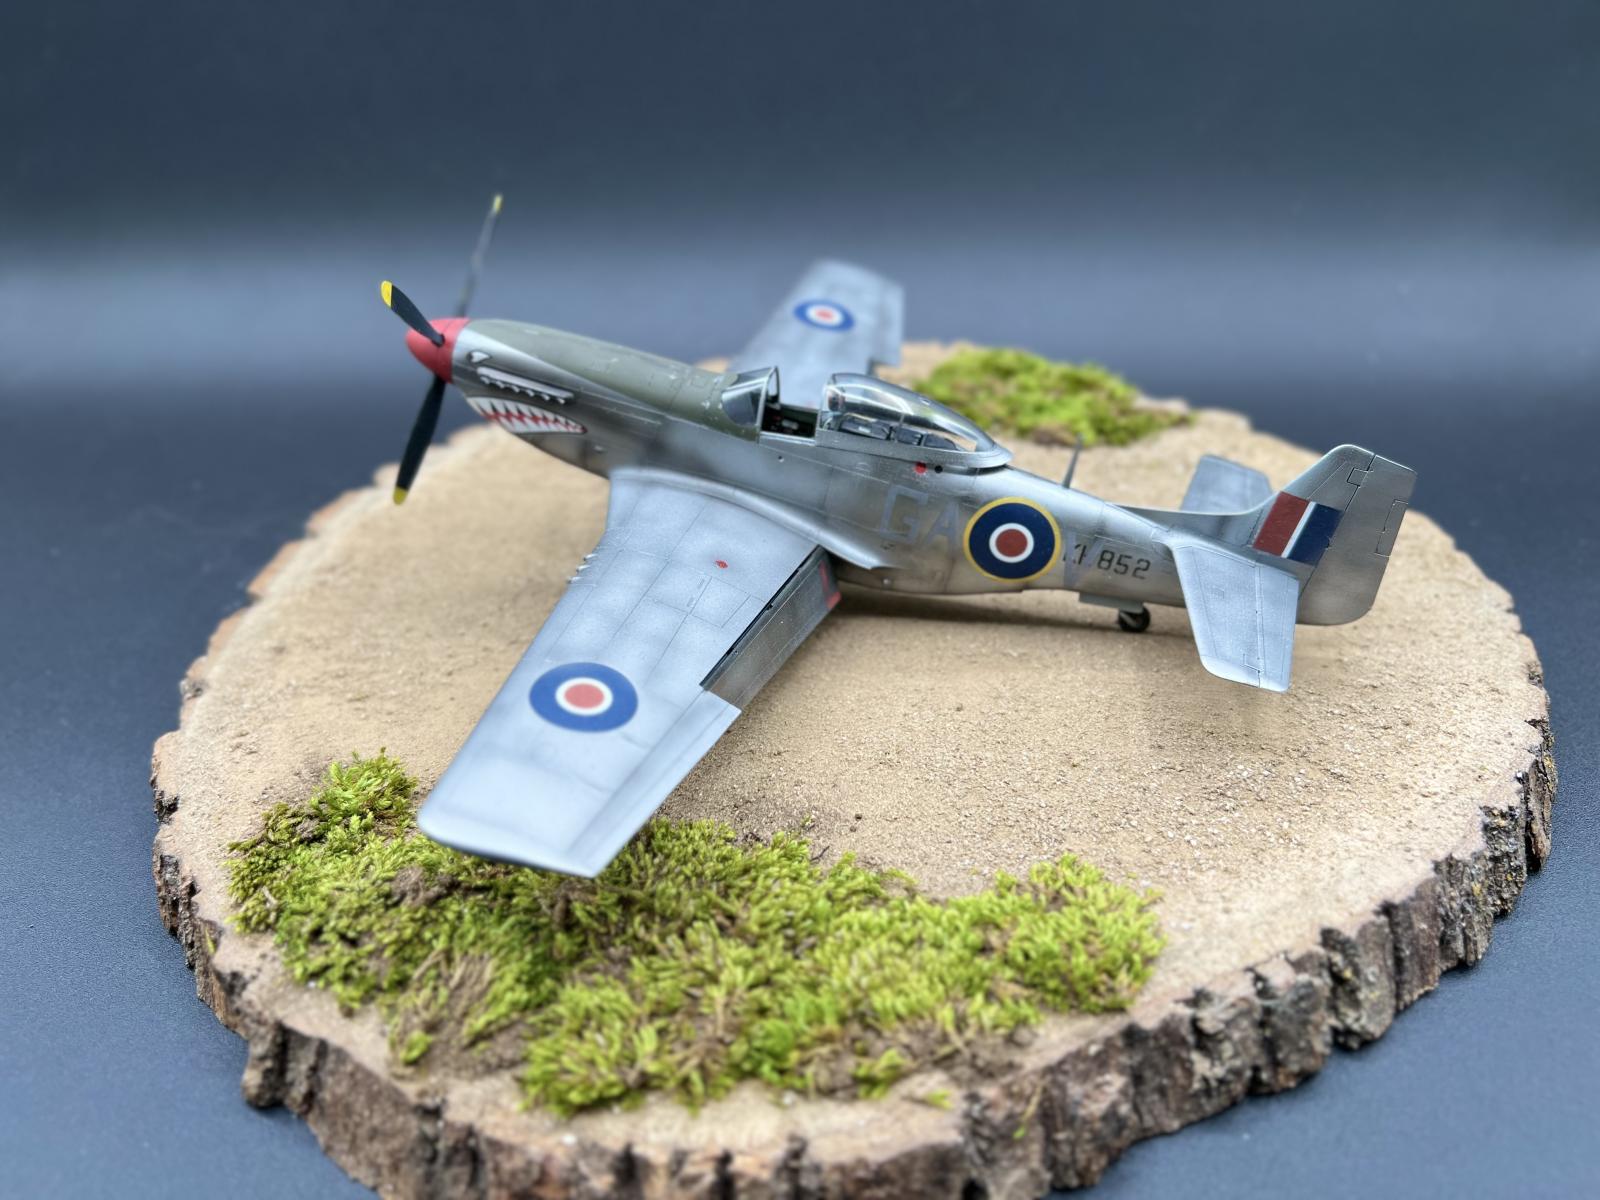
I did finally get to some middle ground I guess. BUT, I had to forgo using all the stencils. It was just too many opportunities for problems. I used vital ones, and had to leave the rest off. I'm OK with it really. I know some modelers will scoff at the idea, but to me, perfection with a model is not mandatory if you can enjoy the final result regardless of faults. That's just me. This is a hobby.
In any case, this is my Mustang. Mistakes and all. I have fallen in love with trying NMF and am already preparing to do a Tamiya P-47D in NMF next. I have already bought decals for it as I know Tamiya is really not the best.
Hope you enjoy the pics and please feel free to comment, critique, and smash if needed.
Cheers,
Graeme


I think it looks great!
Much thanks @jkelleycrna
Looks pretty spiffy.
Thanks @kahu. I’ll take spiffy.
End result is nice! I have yet to build an Eduard kit and attempt their new style of decals, but from the mishaps I've read about, I'm thinking "why bother?" Just leave the film alone...
Thanks @gkittinger. Yah I was bummed I couldn’t get them to work. I’d just prefer a decal with as little margin film as possible. I’m sure they work, I just couldn’t get em to work for me. Not sure I’ll try again. But we’ll see.
An amazing result on this Pony, Graeme @graemestreet
Although this is outside your comfort zone, you have done a superb job on this kit. Hard to believe this is your first ever NMF.
Much thanks @johnb. I did a lot of homework on the NMF before I started. It’s a really fun challenge and look forward to trying it again. Looks like it can really become quite the rabbit hole.
Really nice, I love the MUSTANG
Thanks @bmolloy. It’s grown on me during this process. It is a pretty bird.
Very nice. I haven't tried the new decals yet and I'm not sure when they were introdused
Not sure either. I have nothing against it. Problem is that even though Eduard says they didn’t intend for peeling the film to be done, the film is very wide over the decal edges. Making it easier to peel I assume, but in the event you can’t or won’t remove the film the film size and fragile nature makes it harder to keep on. It makes me hesitate to do another Eduard kit which is disappointing. Their kit detail is excellent.
Excellent result despite the decal challenge, Graeme!
Surely the "peel film" Eduard decals have raised some controversy!
Thanks @fiveten. I have a 109 from eduard I'd love to start, but bought it before I tried their new decals. I need to find a solution because I like the decal set with this and really don't want to buy another.
A good idea when attempting a model you have never done before is to consider that those who have made several of them and written about the process might indeed have a clue how to deal with what are - to you - the unknown difficulties of the project.
I have written several articles on building Eduard Mustangs that include suggestions on how to make them less "fiddly" in construction. Any of them would have solved the problems you tripped on your shoelaces with here. They're right here for your use, for free.
Thanks Tom. I appreciate your help but I’m fine making mistakes on my own and stand by them as they are pivotal for my own growth. I’ve modeled for over 40 years. Mistakes are what it’s all about. No, I don’t spend my days finding the lone gunman with the secret tips to kit mistakes. They need to be learned by each modeler and overcome. I overcame them on my own to the best of my ability. Thanks for the help. G
What a beautiful nmf bird, Graeme @graemestreet! It looks great. As i am contemplating building an Airfix Vampire in nmf i wonder how you achieved that awesome weathering?
Thanks @fxrob. I did a quick post on the NMF here.
As far as weathering I really didn’t do much at all. A little bit of the silver with some Ueno black added and post shaded. Usually a no no on NMF but I can’t help myself. No pigments. No oils or washes on this kit. Mostly because of the trouble I had with the decals. All airbrush.
Glad you like it and looking forward to your vampire!
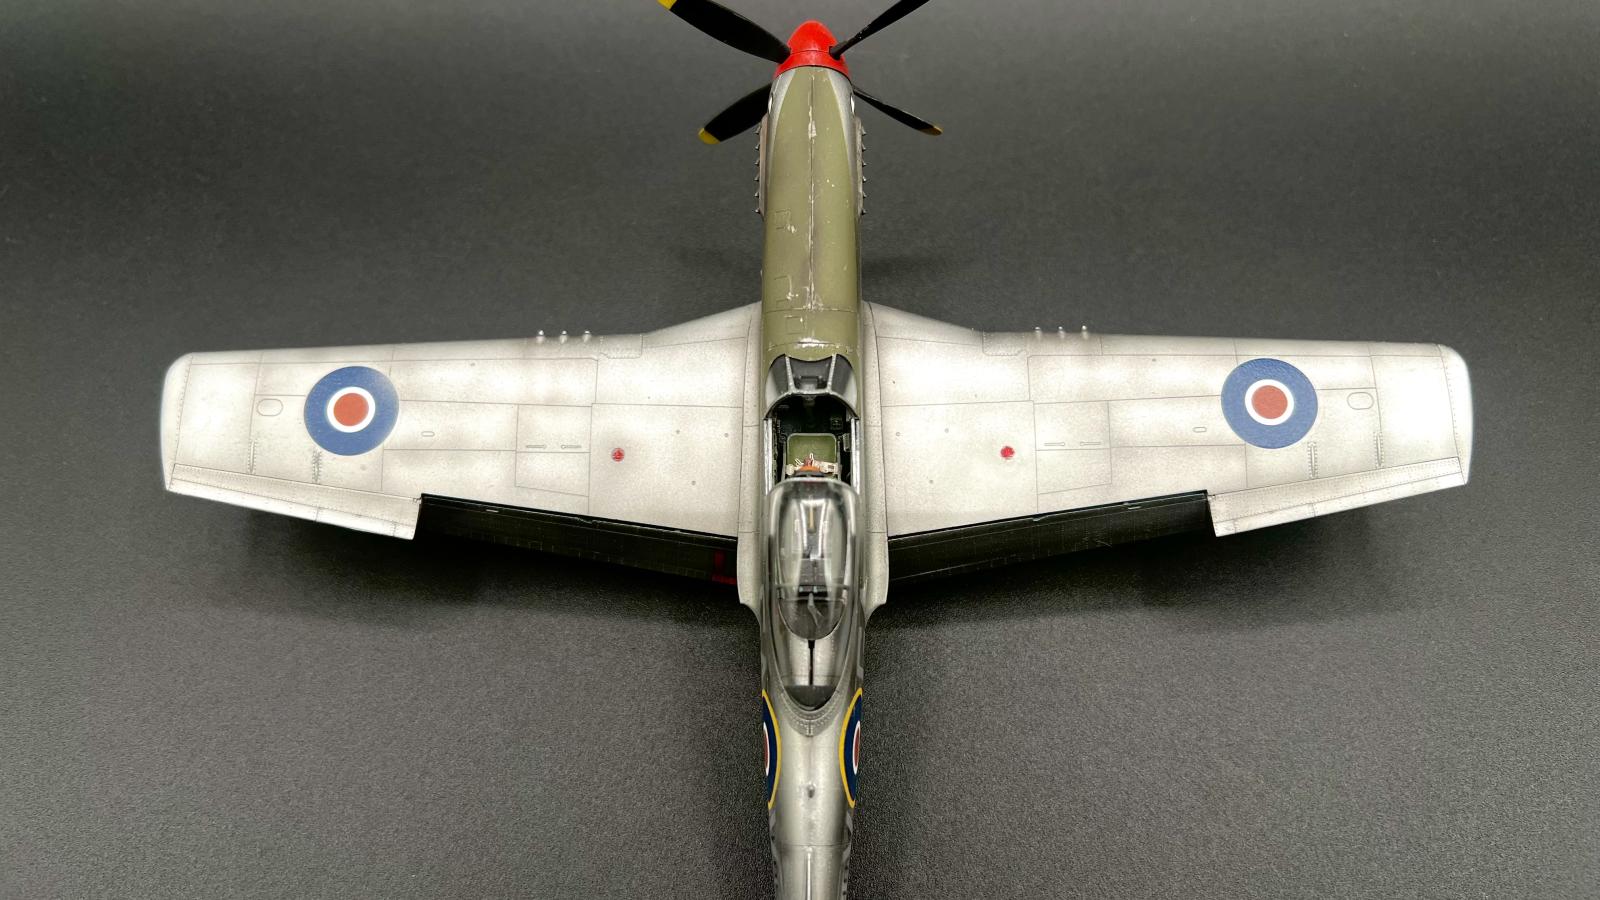
Thanks for the quick reply, @graemestreet! Do i get this right - you got these awesome panel lines simply by airbrushing multiple layers? No wash, no oil? It looks amazing!
Yep only airbrush. No pre shading. No washes. No oils. No pigments. Usually I would do all of the above but this one I kept it simple as I could.
G’day Felix (@fxrob),
All valid questions re a great natural metal scheme, but keep in mind that the Vampire was of mixed construction (wood fuselage as per the Mosquito and a metal wing) as well as that the British painted their aircraft silver all over, including the metal surfaces.
So, you want to do a weathered silver scheme.
Dear Michael @michaelt,
Thanks for the heads up! It is certainly going to be a challenge for me either way. I am going to experiment with oil too for the first time.
Hey Graeme,
Mustang looks amazing mate, especially dressed up in RAF colours ha ha!
Sounds like it was "fun", but I think the finished article looks even better for the problems you encountered and overcome. Great job mate!
Thanks @scottiya. It was fun kinda. I’m still really struggling with the process of a plane. I struggle with the multiple stages. With armor I finish the kit in full usually. Then paint and have fun. With the planes it’s broken into so many stages. It’s a weakness for my brain. I’m trying though because I like the planes a lot.
Yeah I get ya - I don't always follow the assembly sheet step by step. I assume most people don't wait till the end of the construction stage before painting, because it becomes too detailed.
I like to build up as much of a sub assembly as I can so that I can paint it all in one common colour then add any extra details. I'll try to mask off any glueing points where possible and just touch up those areas later.
I love the process of black basing and then doing the marbling and pre shading on the panels before applying the final paint scheme. So mostly I enjoy the challenges of the different stages that the instruction sheets don't tell you about.
Keep up the great work mate, the challenges are good for your brain ha ha 😀
I like the black basing and marbling the most as well. Sometimes I just want to leave my models in B&W honestly. Simple. Ironic.
G’day Graeme (@graemestreet),
Ignoring my teens, I’ve only attempted a natural metal scheme twice - one a Mustsng and the other a Ki-61 with streaky camo on top.
Of course, I have a bunch of kits/schemes to do and I’m in search of the best paint/techniques to use.
Right now I’m conteplating how to do a burn metal fuselage for my Phantom.
As you say, we try things and learn.
This is a great (first) natural metal build.
Liked!
Much thanks for the comment @michaelt. Burnt metal should be really fun! Somehow I really think Mr color Ueno black I used here can come in handy as a base. Plus whatever silver paints you want. I used their stainless steel and they also have a burnt iron color. Maybe utilizing smoke from Tamiya could be used after. I’d try a test subject first. Have some fun and play first. I want to see though!
Here is the blog
Thanks. I will check this out. I have almost pulled the trigger several times on a phantom but been intimidated. Not sure I have the patience for one. Yah, sad. But it’s honest. The stencils alone look too much for my constitution. My wife would agree. It is one of my favorite planes though. I’ve been up close to one and man they are impressive! I’ll keep looking in on yours. Looks cracking so far! Thanks for sharing. G
Great build Graeme. She certainly stands out 😊 those things with tracks in your last pic neatly lined up not targets for the Mustang by any chance 😉
Yah I wonder how many of those the Mustang would have taken out? I keep them on opposite sides of the room.😉 Thanks for the comment. G
I agree with you on the stencils @graemestreet. I rarely put them all on because, in my opinion, at the distance my models are normally observed, they are only slightly visible and certainly not readable. They are just opportunities to make mistakes. The aircraft in my display cases are for my enjoyment and I don’t miss the stencils. My F-4 is almost completely devoid of them and I think it looks great! You’ve got a wonderful Mustang here, enjoy it!
Thanks @tolss. That's really nice to hear. I thought I was doing something sacrilege by not using them all. Makes me want to pull the trigger on the F4 finally. My wife hates you now.😘
Tell your wife that I only have your mental well being in mind and that building an F-4 without stencils would do wonders for you!
Ha, I shall do that.
Nice Mustang, Graeme!
Thanks John @j-healy.