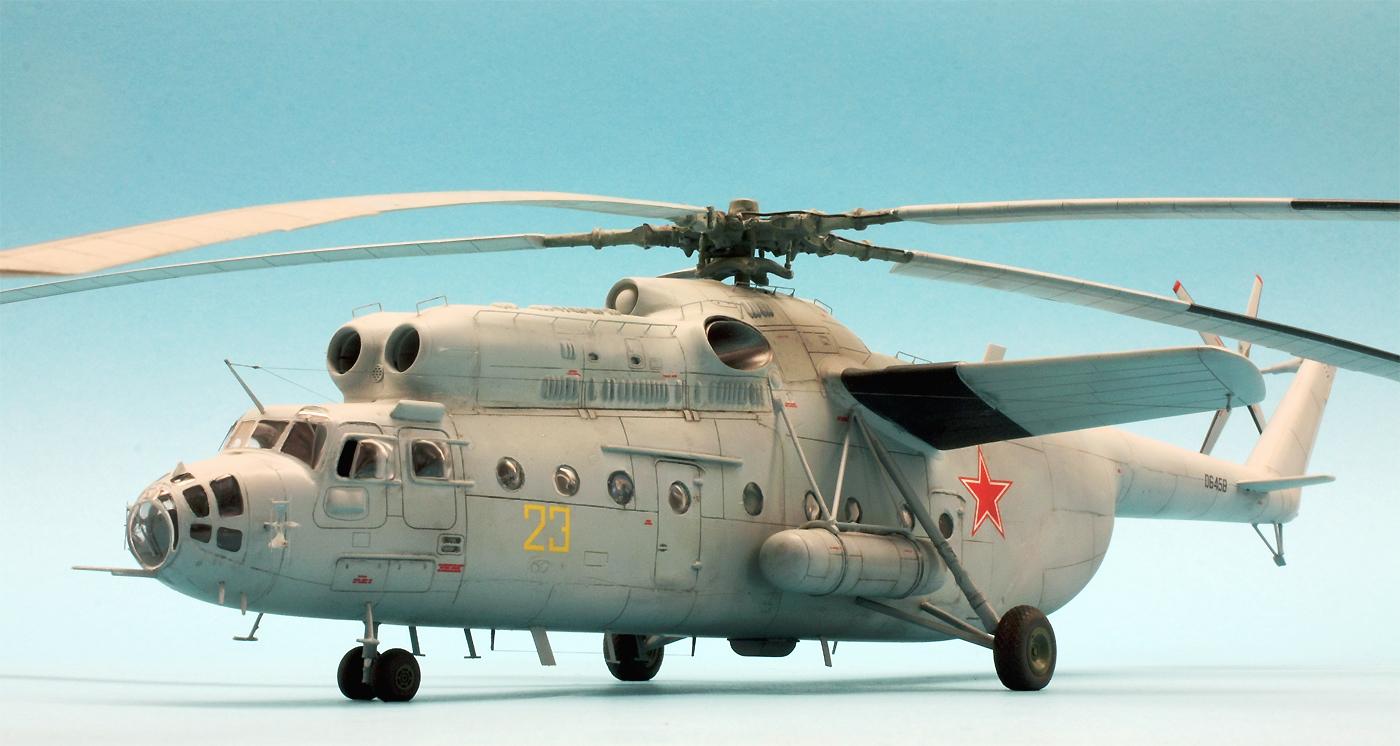
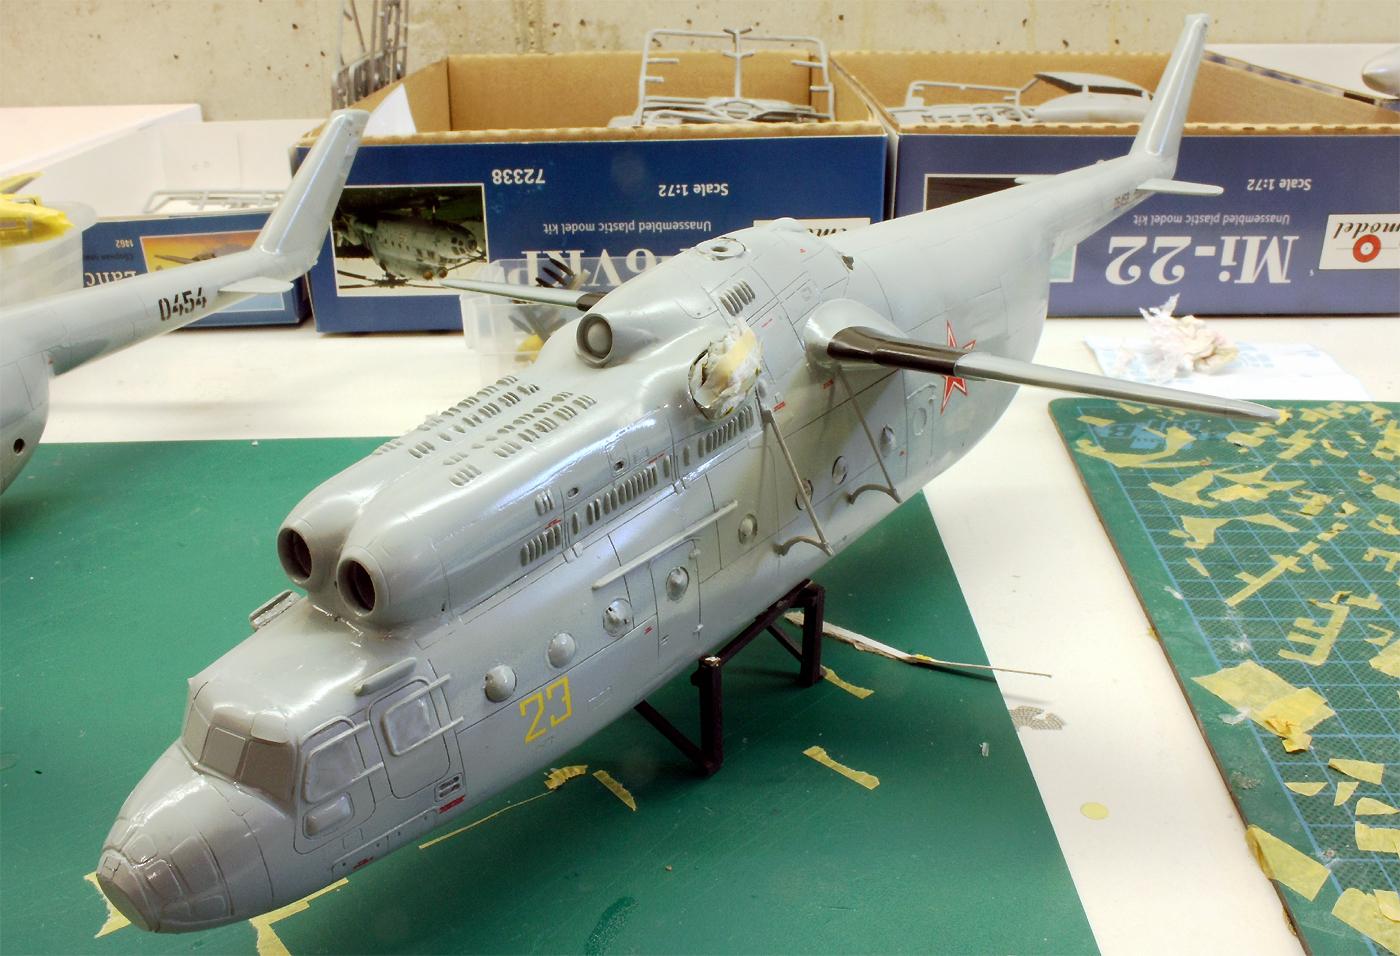
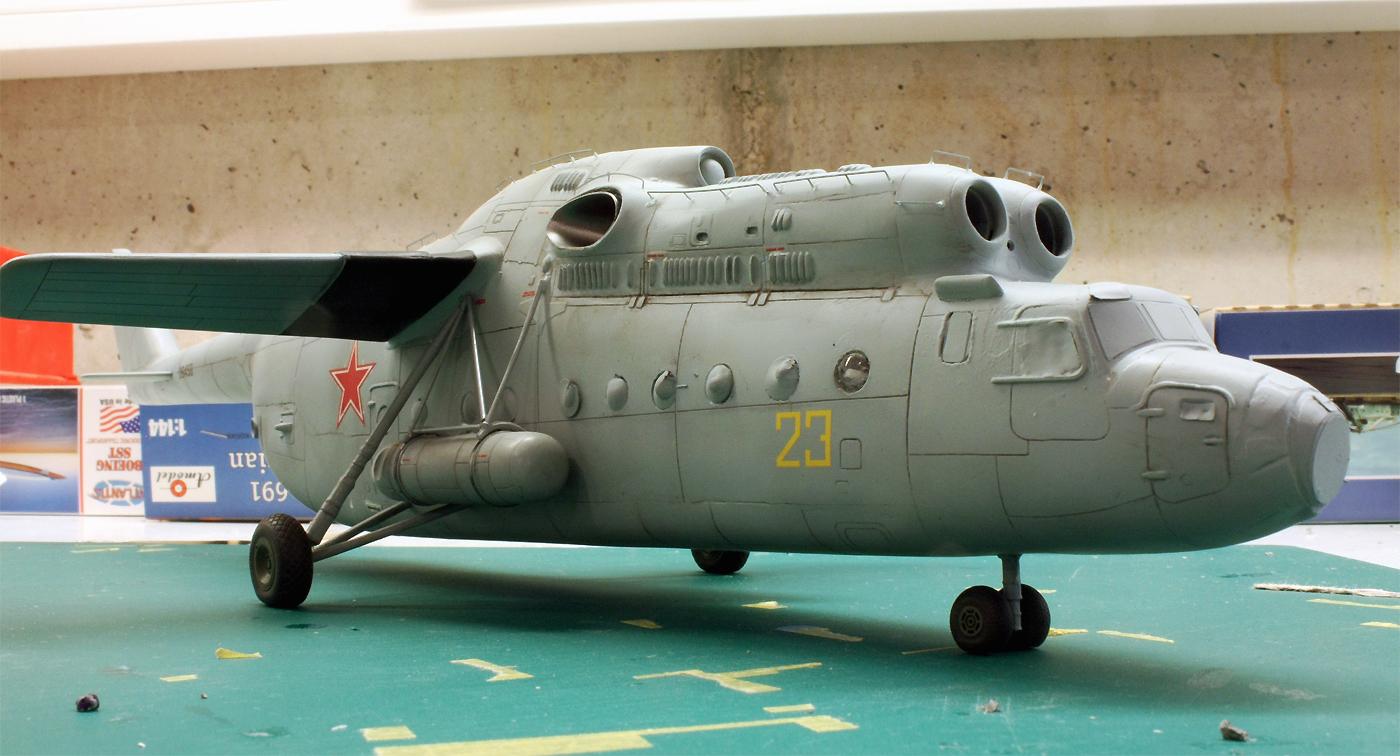
I almost got hooked: my experience with Amodel's gigantic Mi-22!
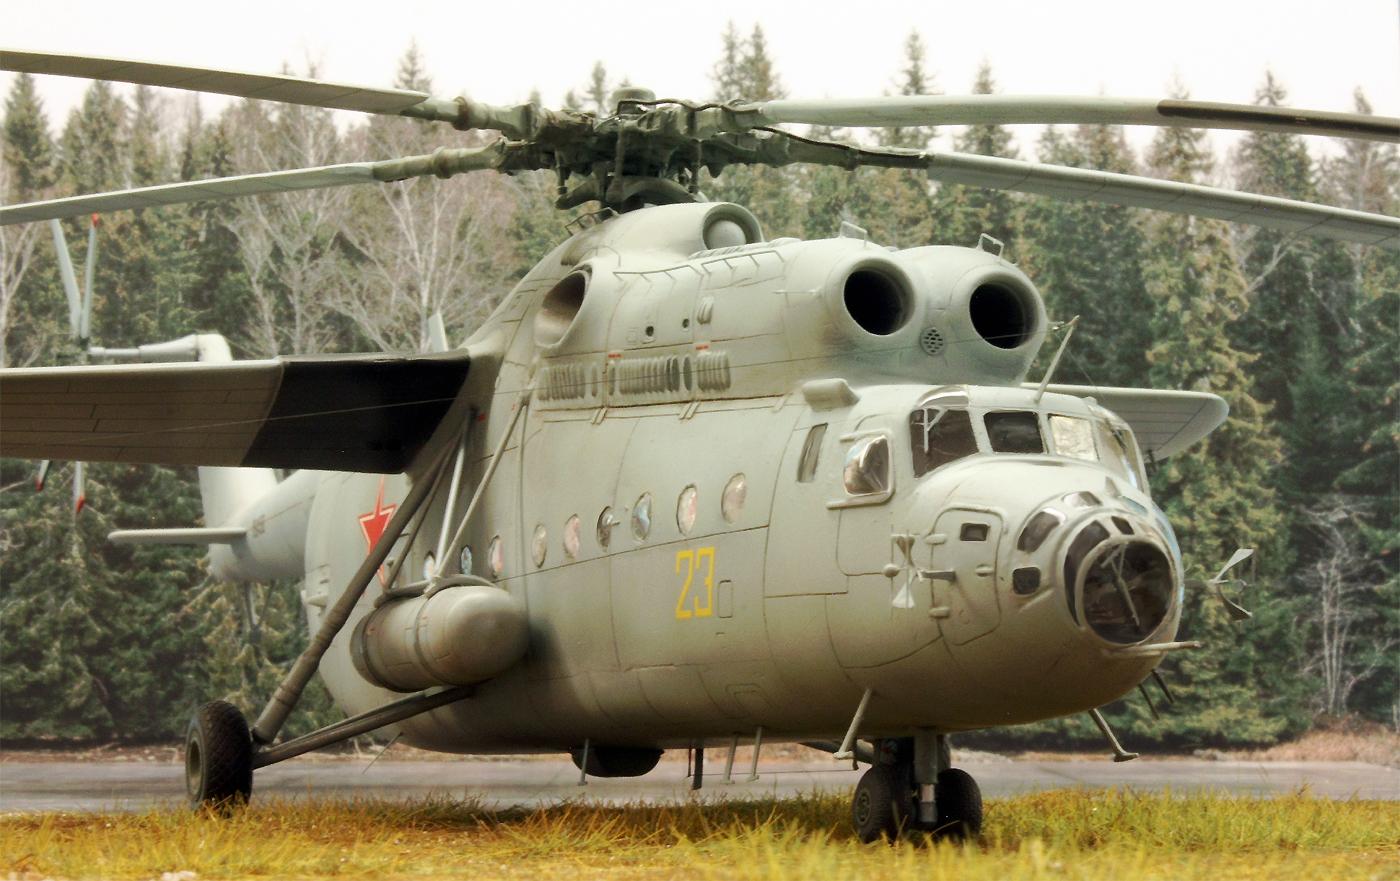
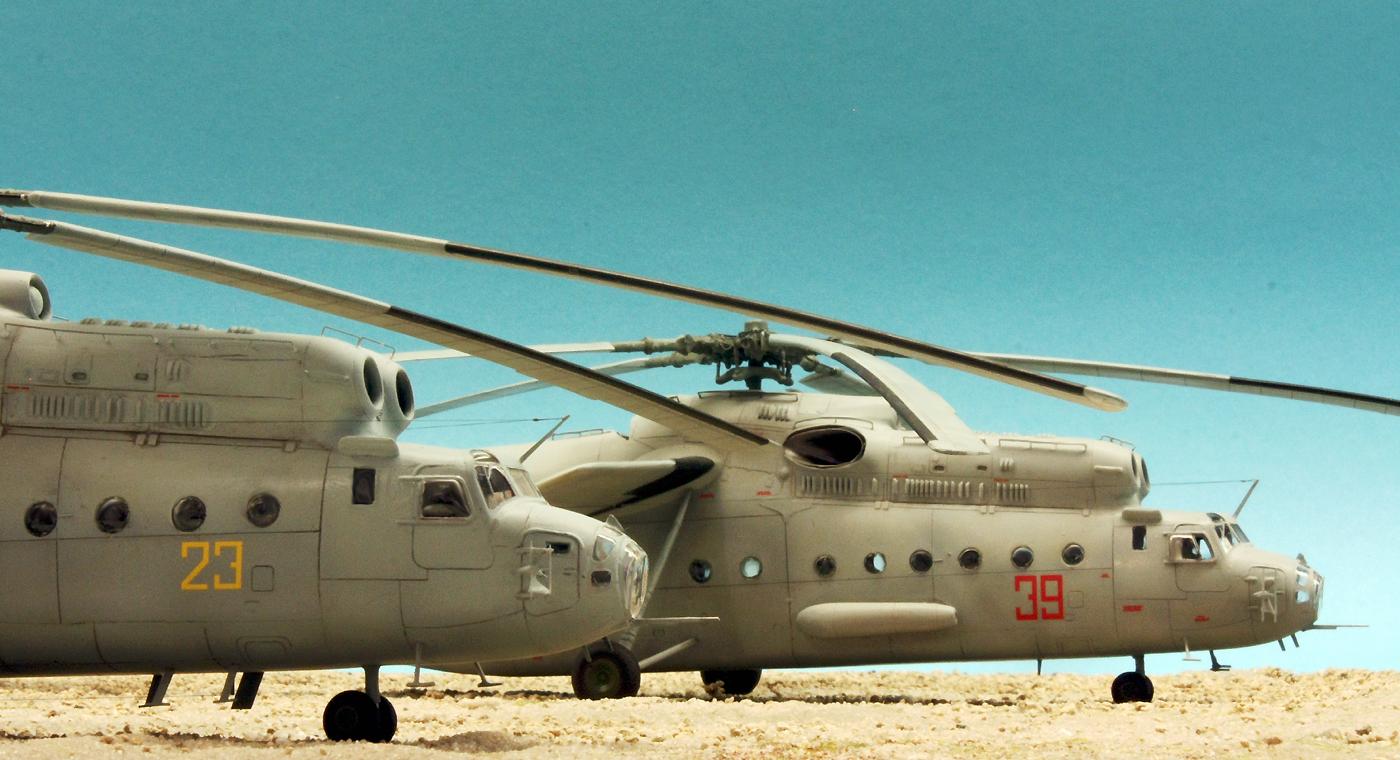
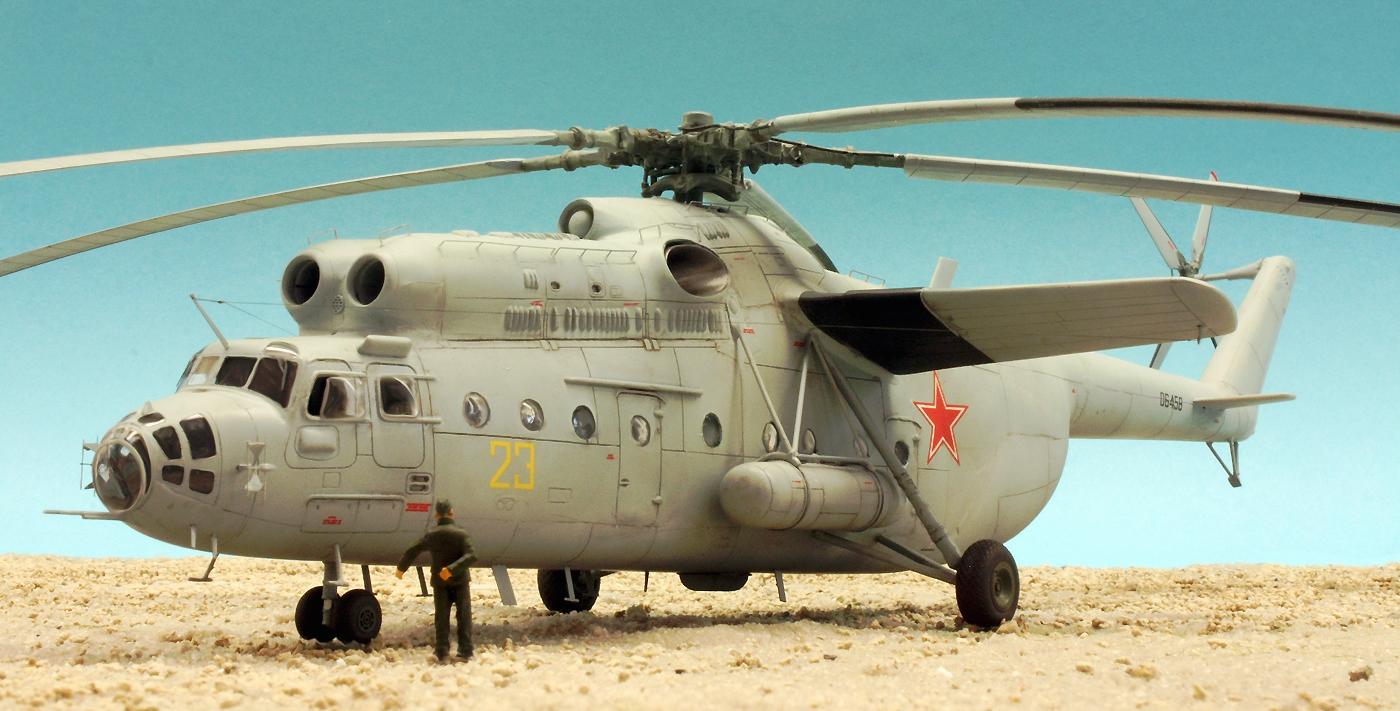
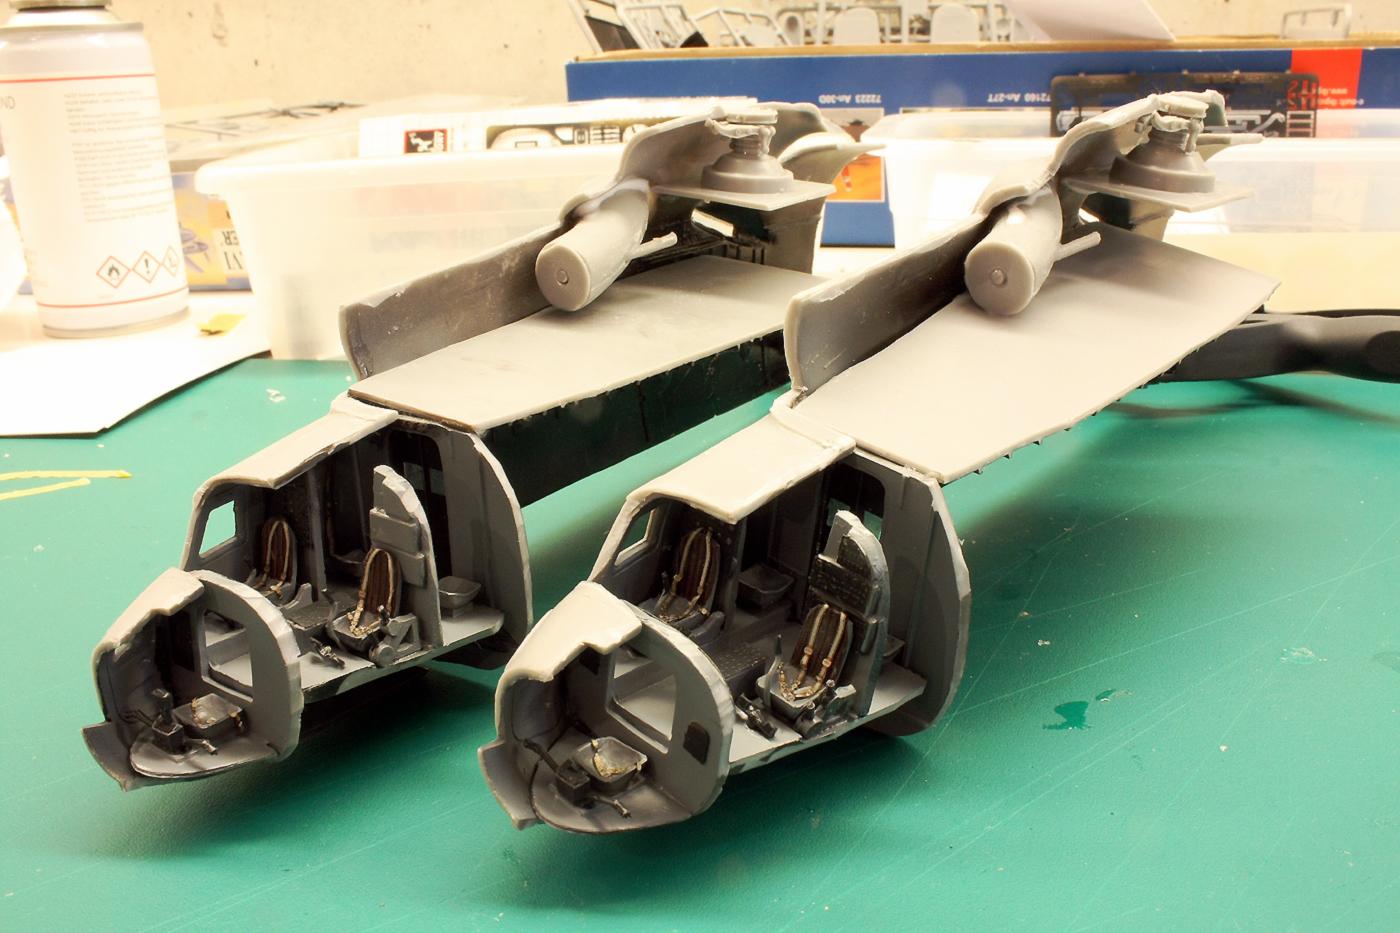
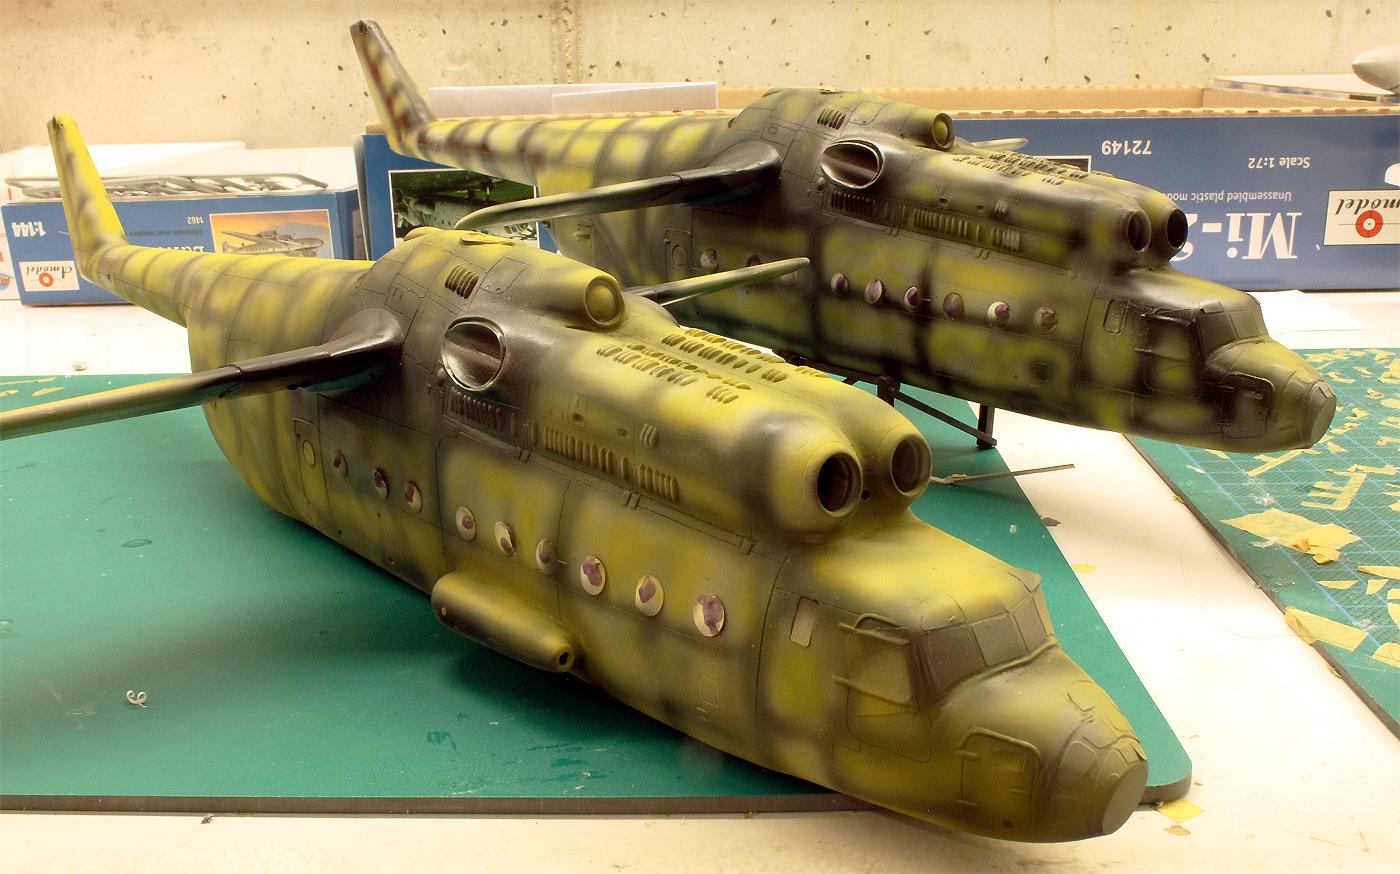
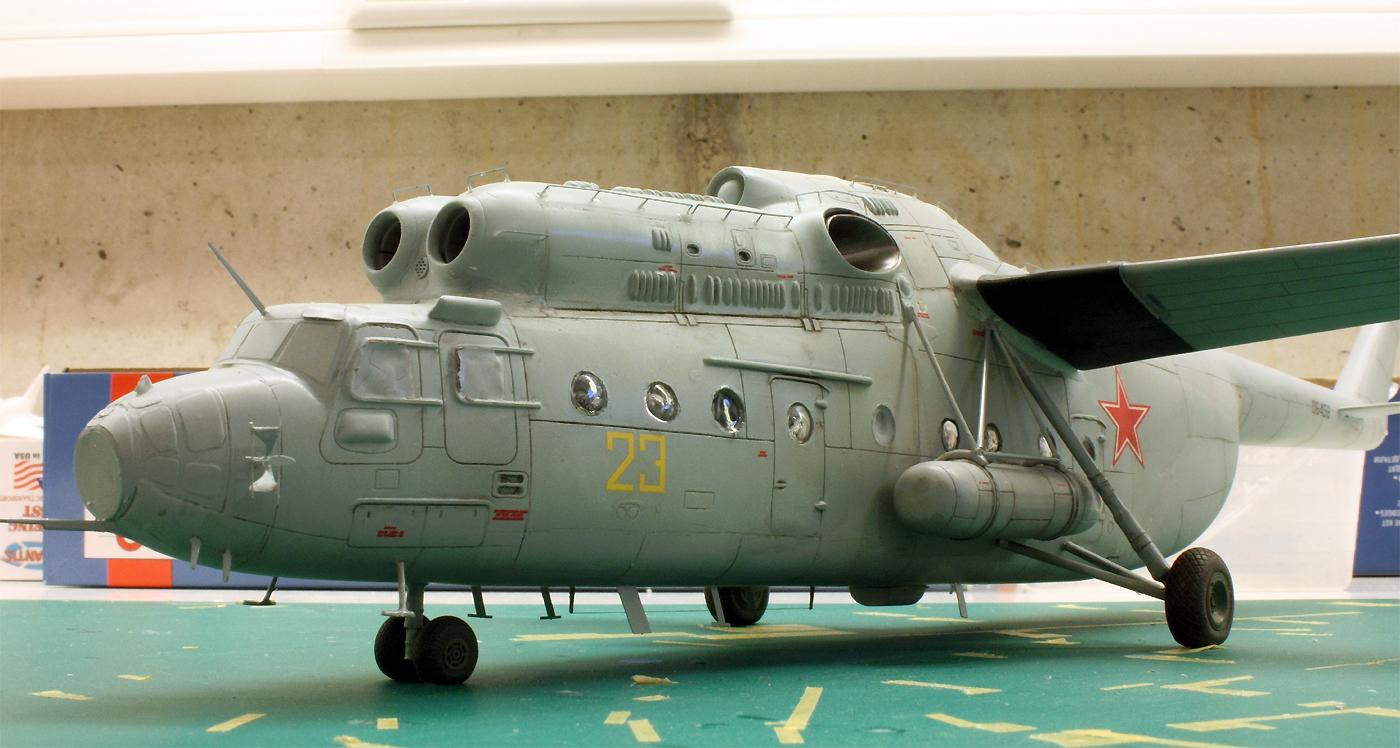
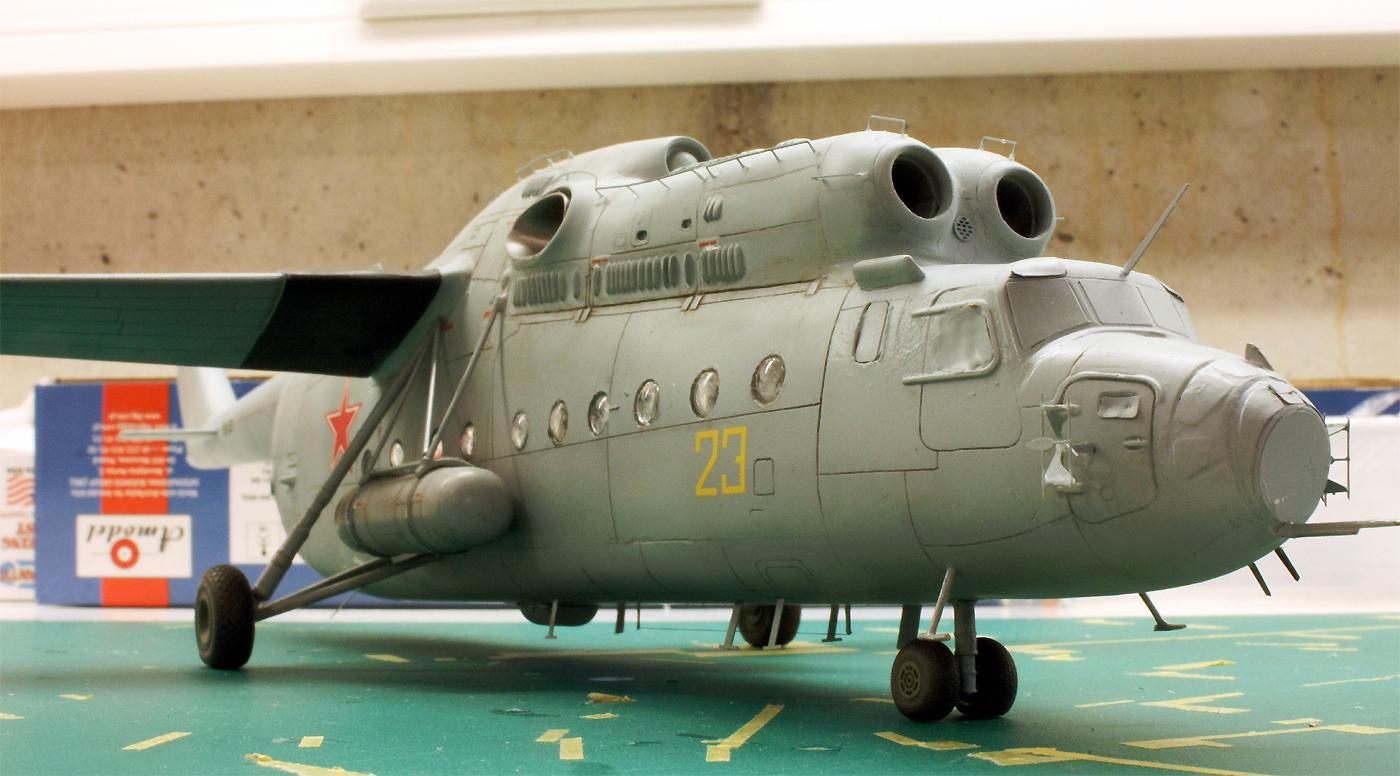
The Mi-6 "Hook" from Amodel is a real challenge in many respects. The fact that I have built two of them in parallel is directly related to this: solutions that have been found in one model should be given the chance to prove themselves a second time. The Mi-6 presented here in the Mi-6AYa/VzPU version, which has also become known under the somewhat simpler title Mi-22, was the model on which the improvements found on the first Mi-6 were incorporated - if you want, you can compare the pictures in the first Mil-6 "Hook" gallery post with those here and check whether the Mi-22 is actually a little more successful and, so to speak, built more confidently!
The first article on Amodel's Mi-6 also contains a brief outline of the history and technical aspects of this impressive heavy-lift helicopter, but here I would like to focus on describing my experiences with the kit and the building process. Perhaps this will result in one or two informative hints or even useful tips for anyone interested.
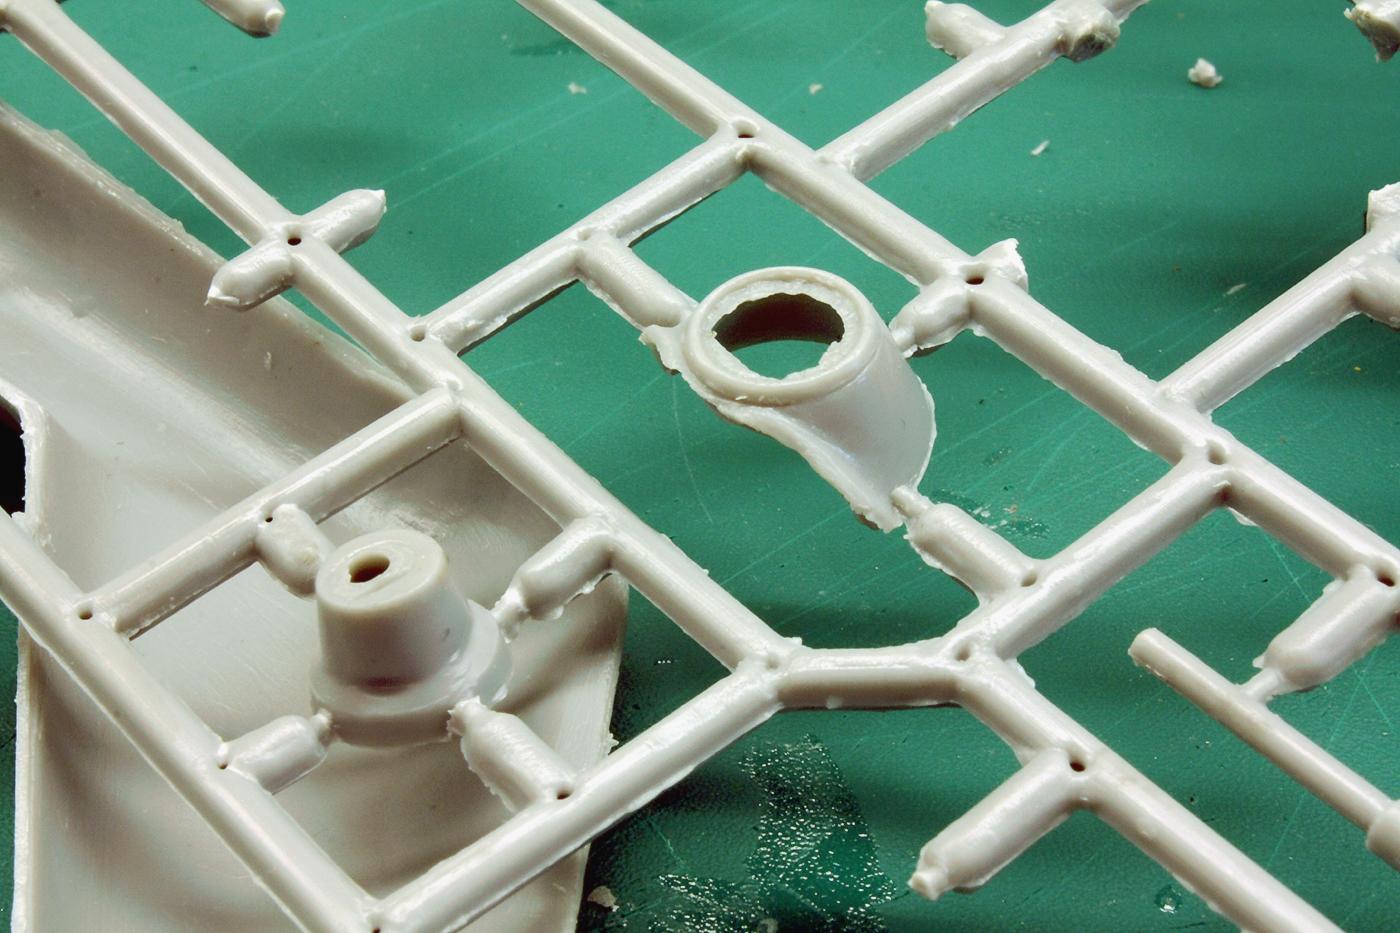
What are the challenges I referred to at the beginning? There are two main areas that need to be mentioned here: the consistently extremely rustic casting quality of the parts and the (resulting) poor accuracy of fit.
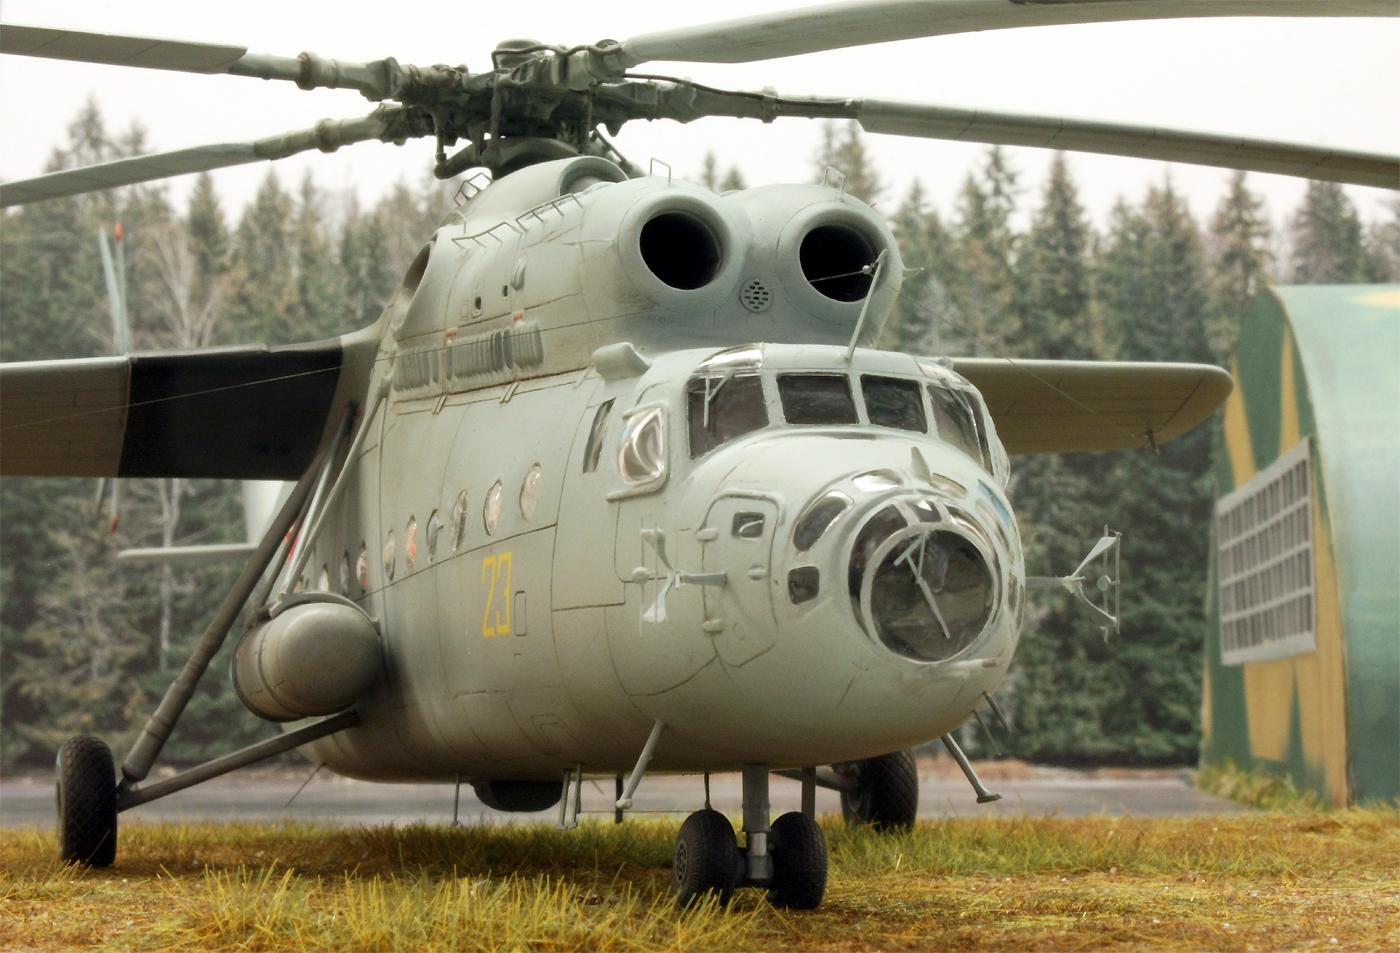
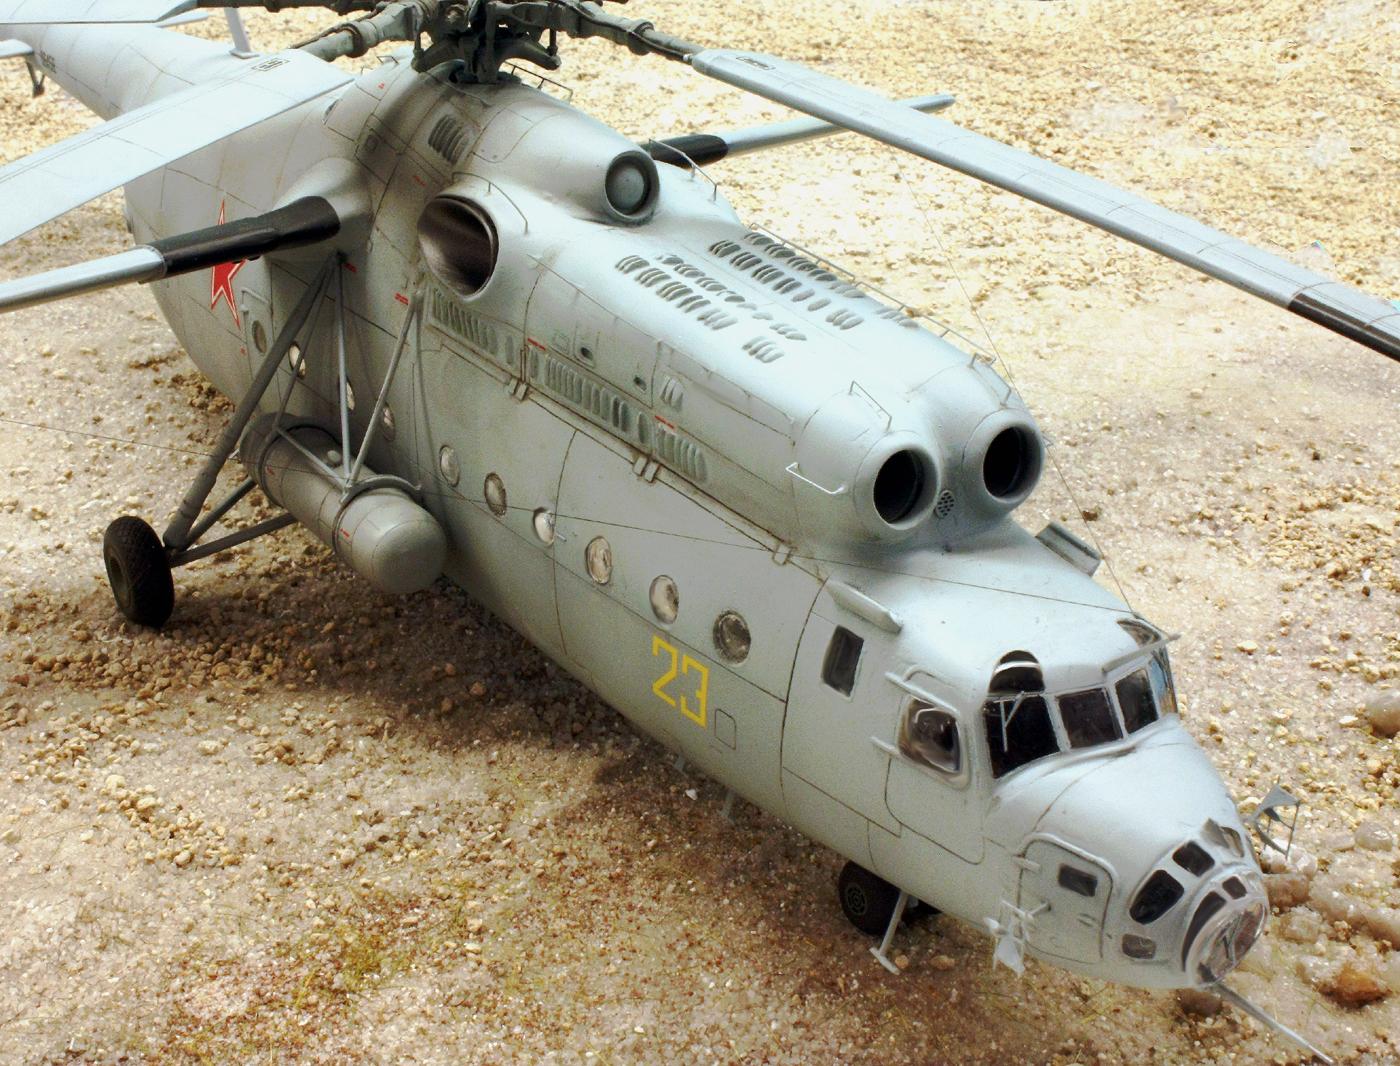
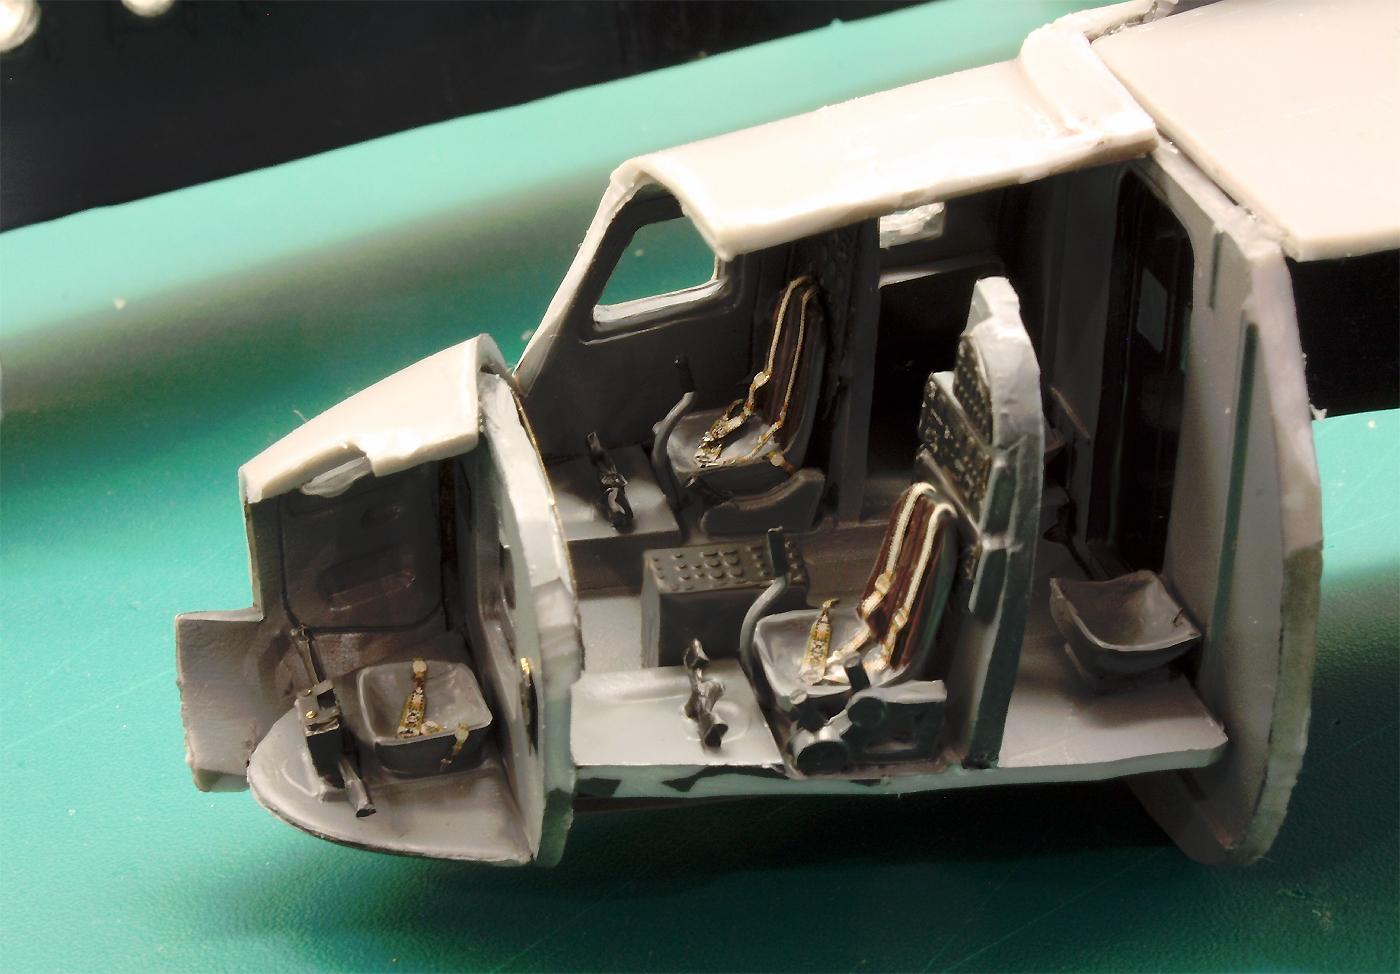
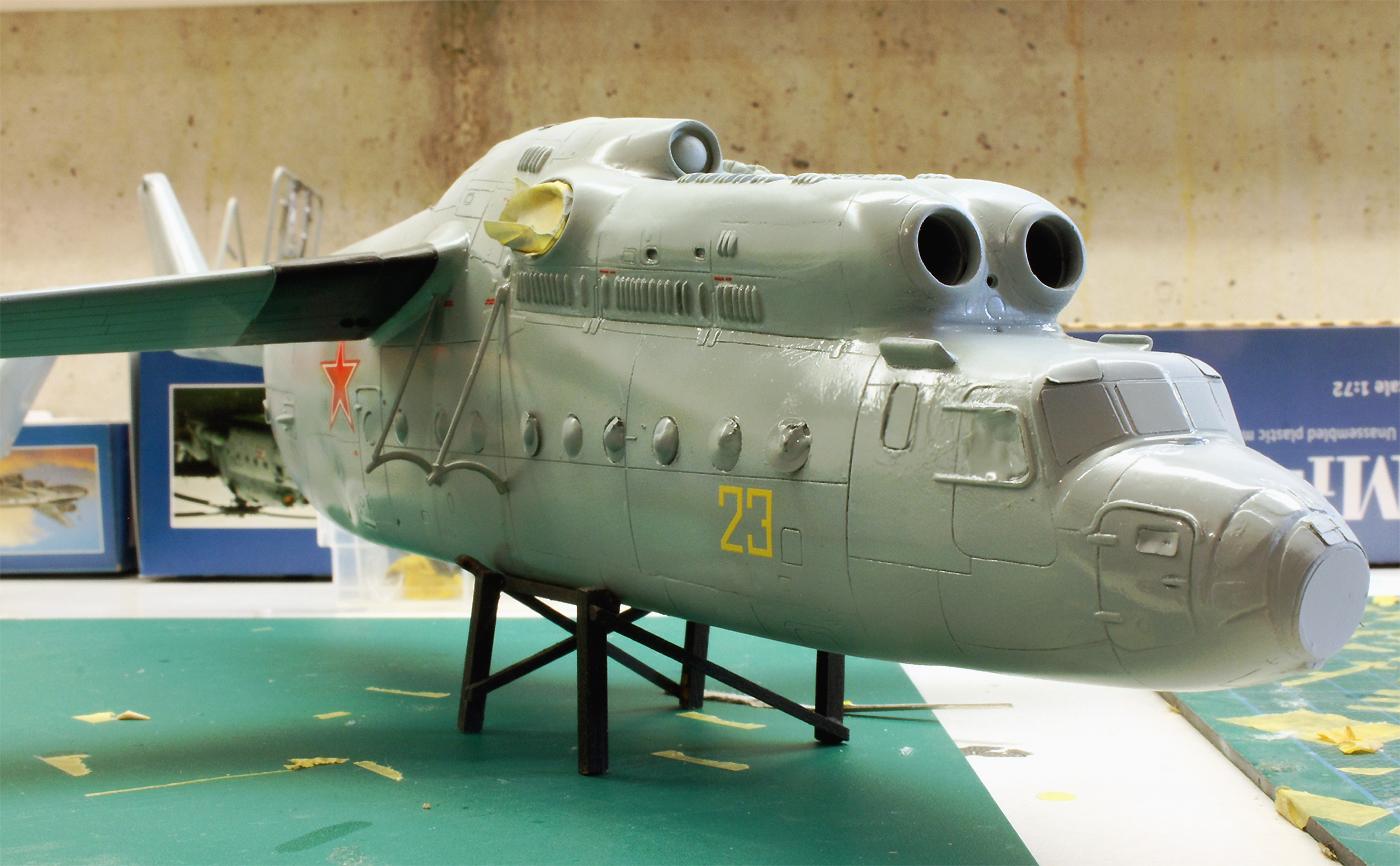
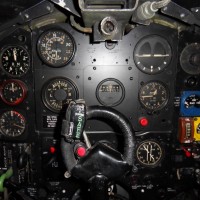
But it all started so well! A first glance into the large box impressed me with an almost overflowing variety of parts, which can be found on an equally impressive number of frames. A first orientating glance at the graphically well laid out building instructions seemed to confirm the impression that this was a well thought-out kit with a logical structure - a positive impression that was to be confirmed in the subsequent building process. I found the level of detail provided in the kit for the cockpit and the glazed bow compartment to be quite adequate for the scale. The instrumentation can be represented by the decals supplied, but seat belts must be provided by the customer.
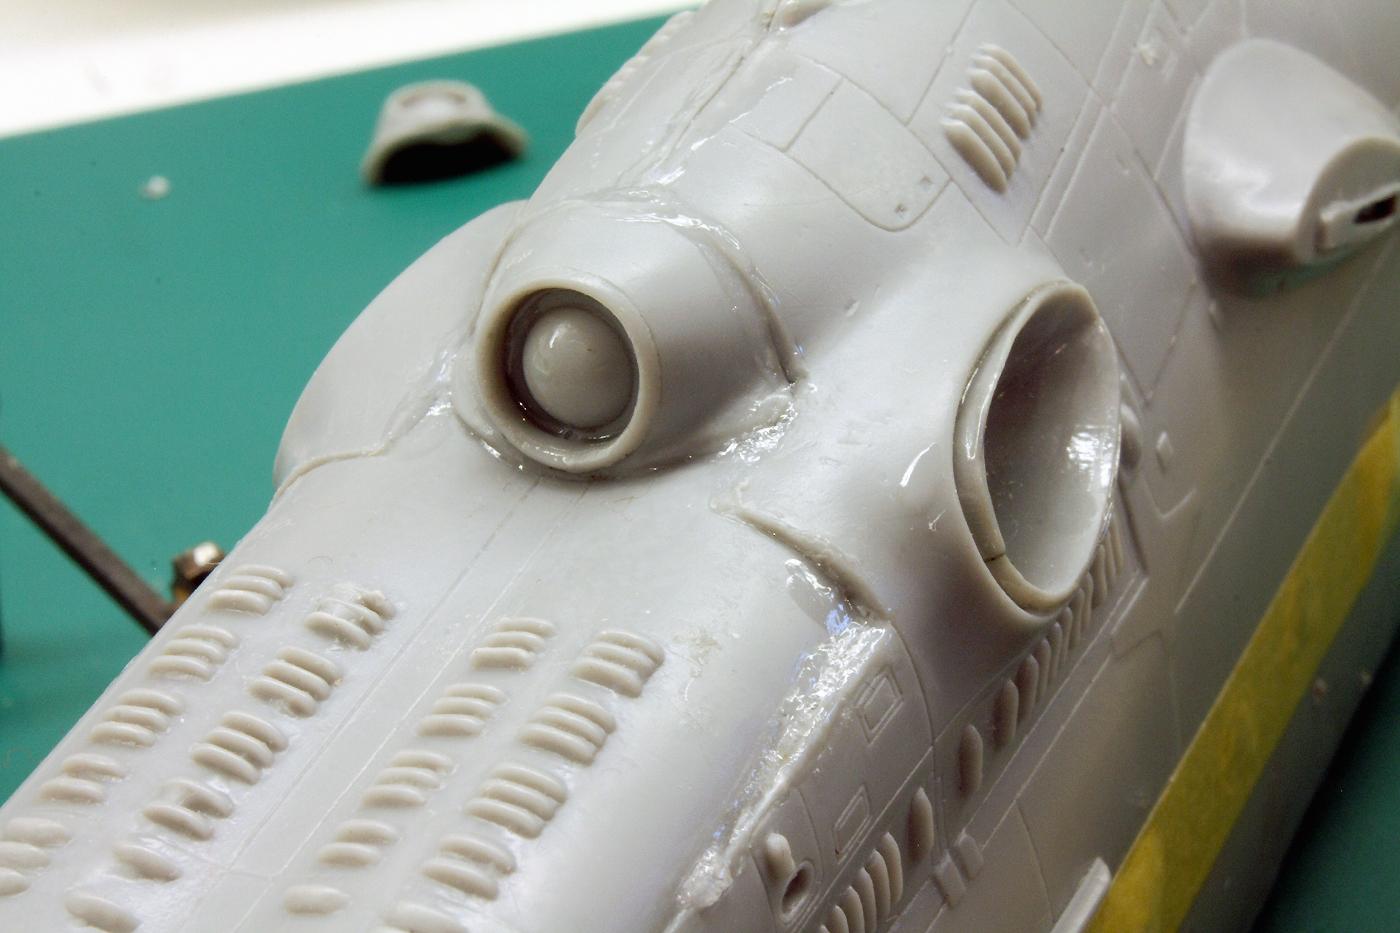
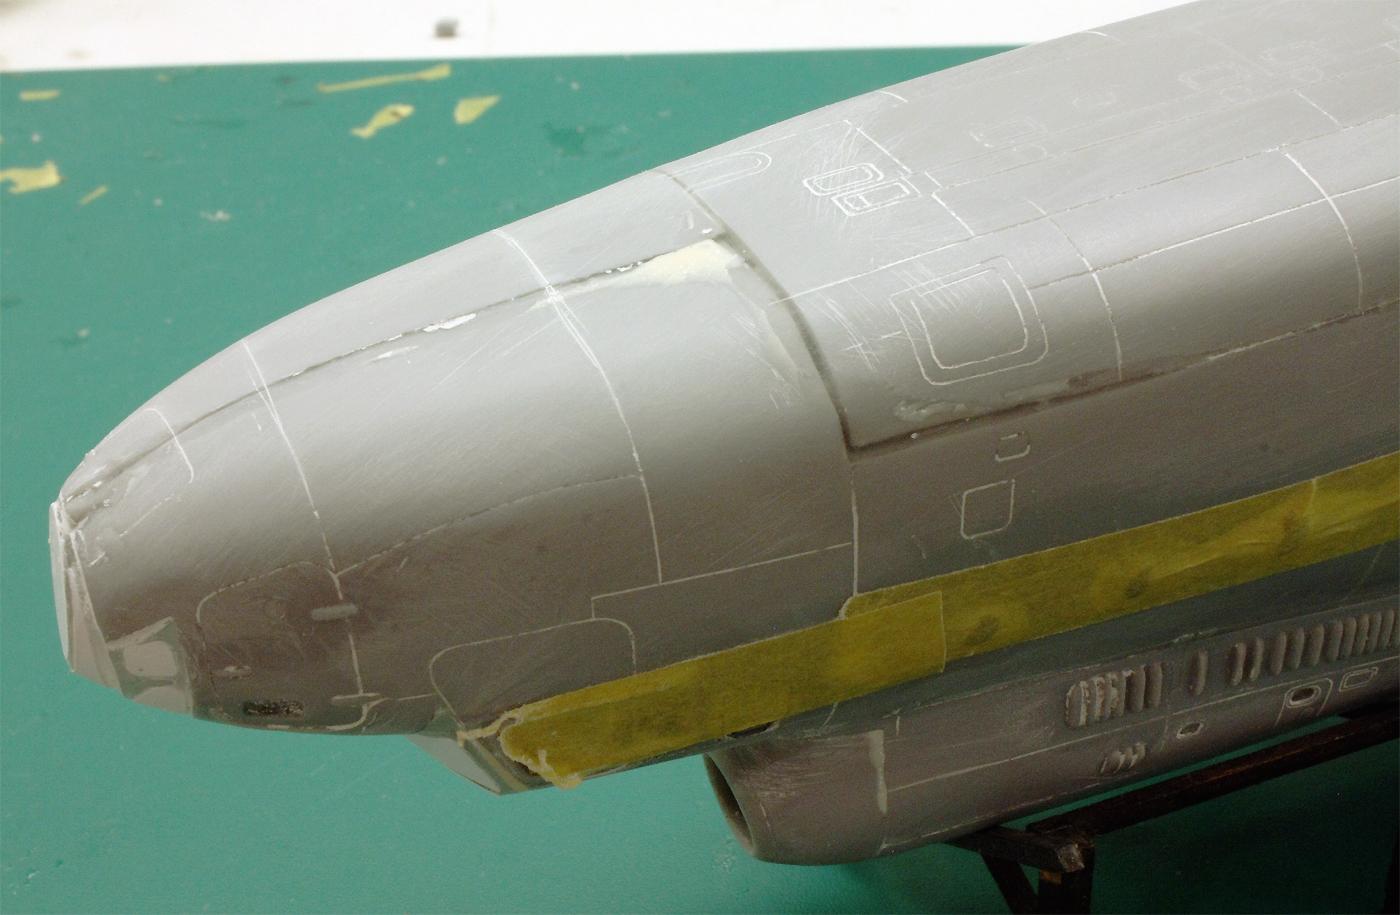
However, the reality of casting the polystyrene quickly threw a spanner in the works: the parts on the moulding bars turned out to be rough throughout and, above all, impressively unclean. The result was that virtually all parts, large, small and very small, had to be trimmed. Given the large number and often complex shape of the components, this is quite an effort. One annoying aspect is that many parts are damaged during reworking; the fine parts in particular break quickly when they are shaped with a scalpel and sandpaper.
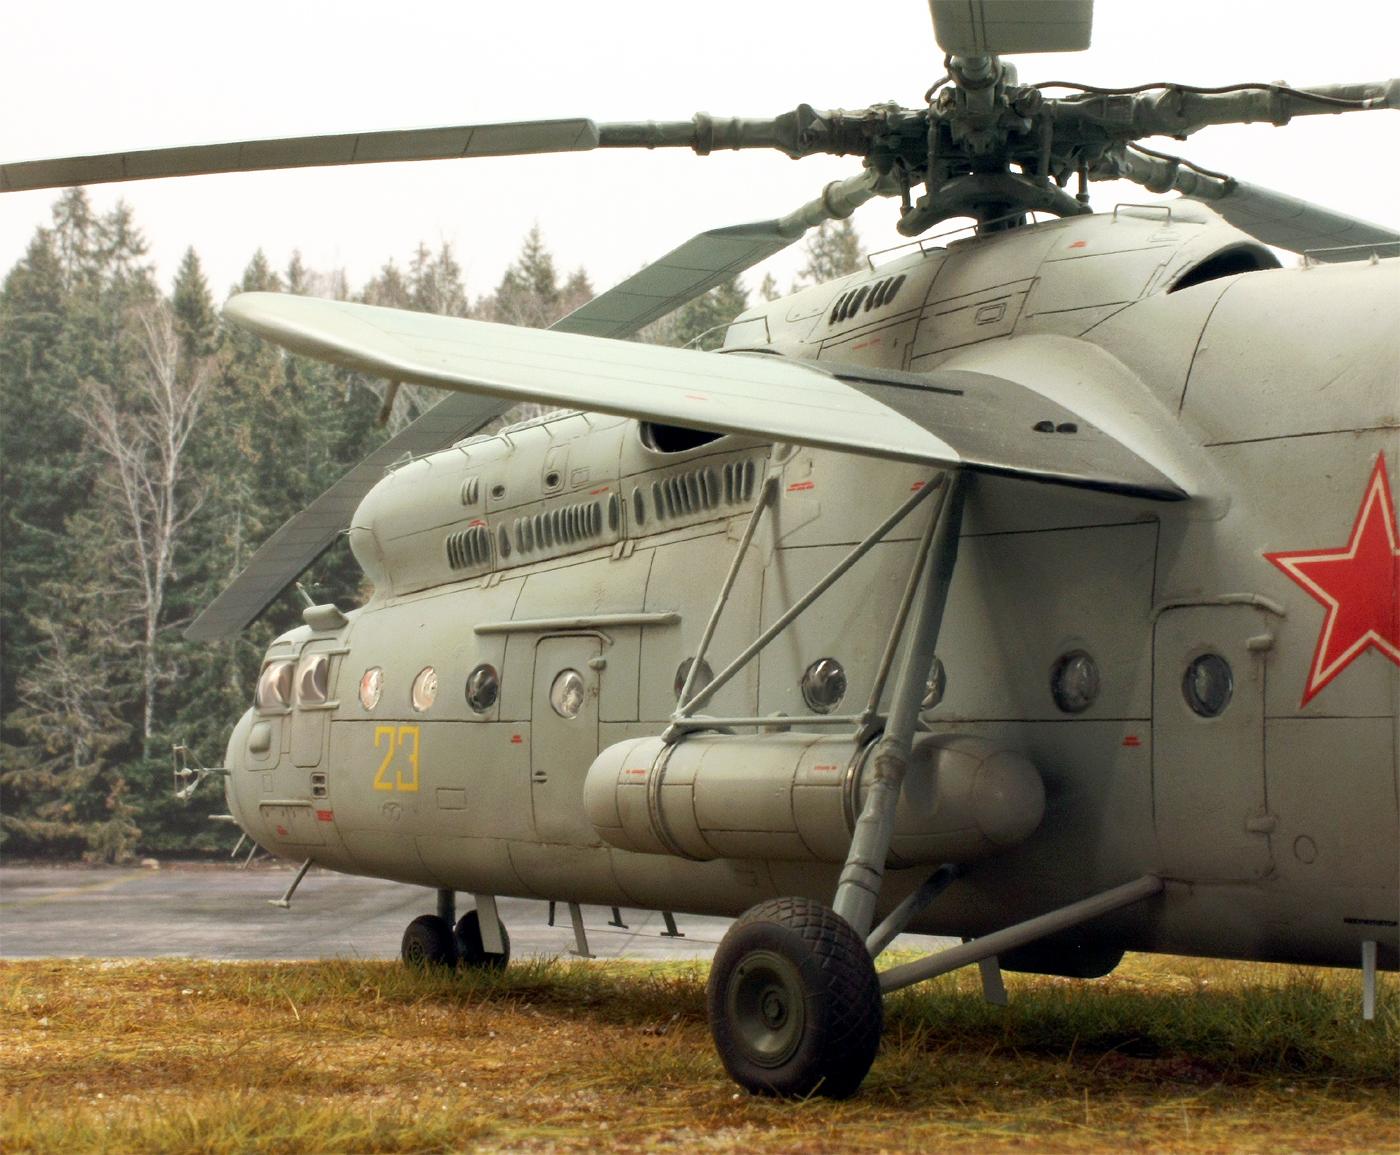
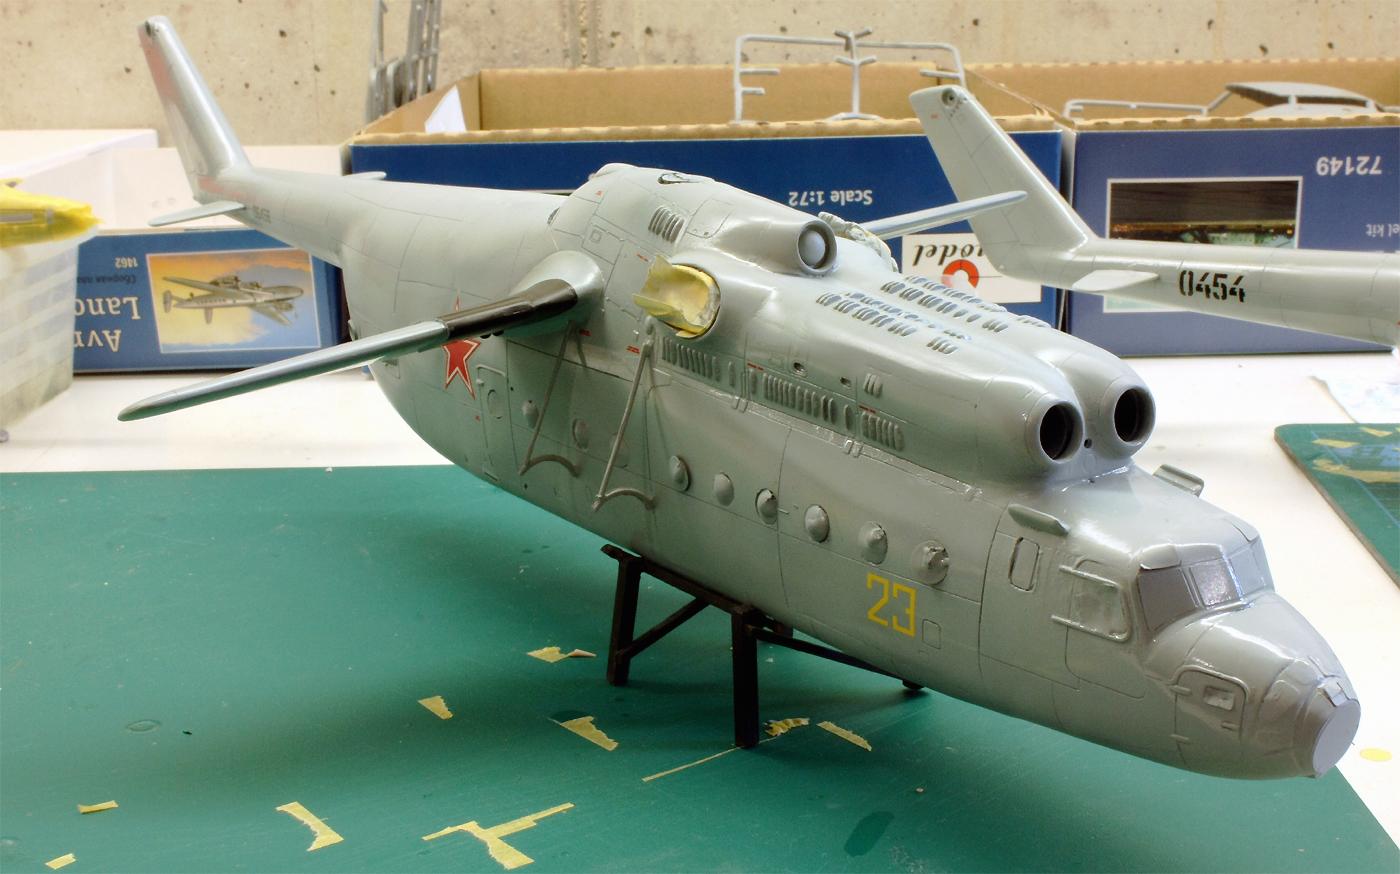
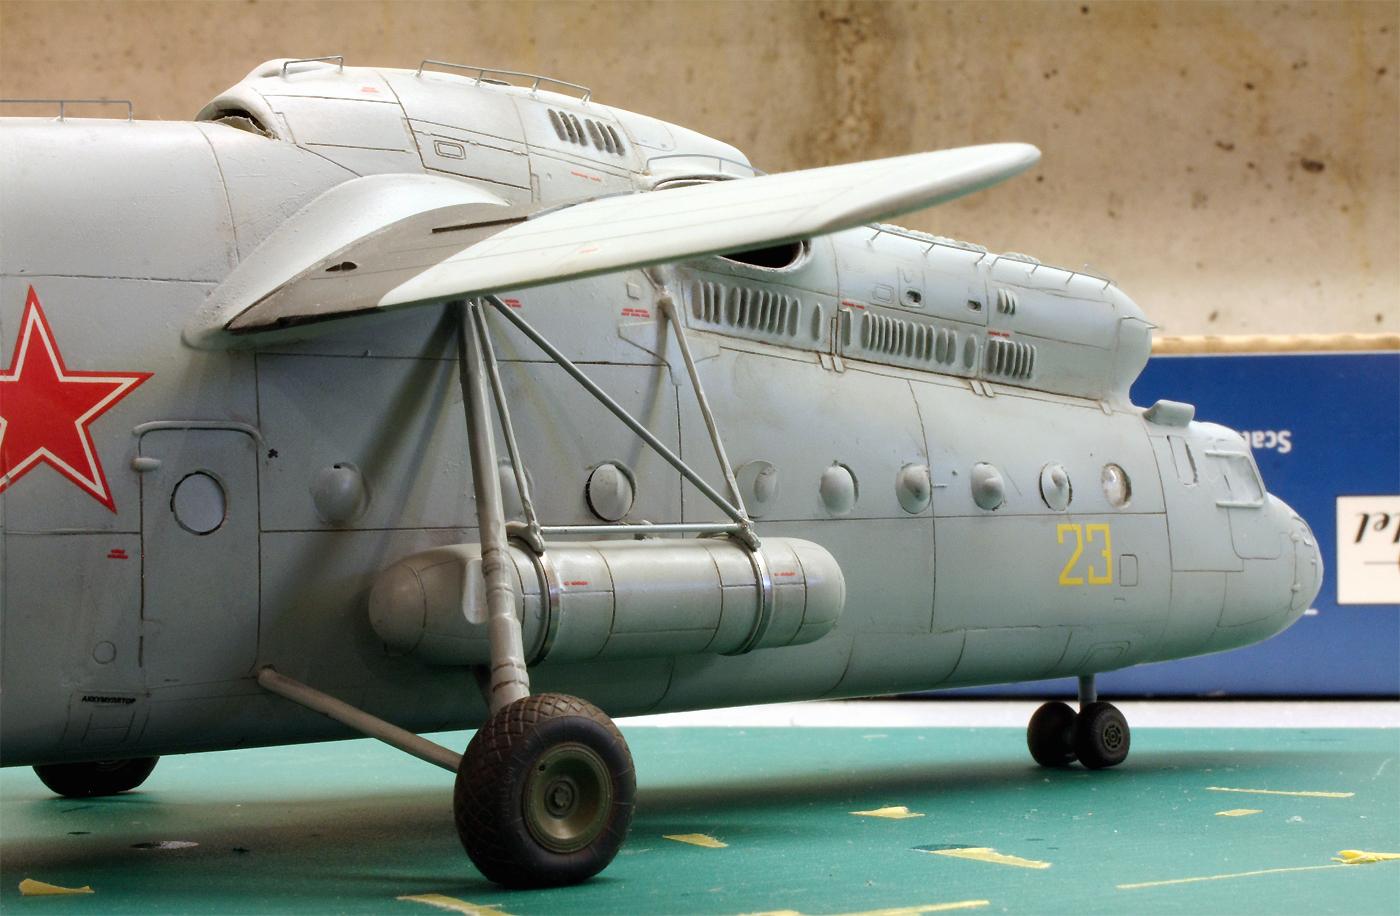
My reaction to this was to replace the original parts with wire, sheet metal or etched parts from my stock wherever possible. An example of this are the handrails around the engine area: the kit parts are much too thick anyway and also relatively brittle; there is a high risk of breakage when sanding away the sprues. In the case of the Mi-22, for example, they are replaced with etched parts from the Brengun detail set, while the first "Hook" was built using sheet metal from the leftover box.
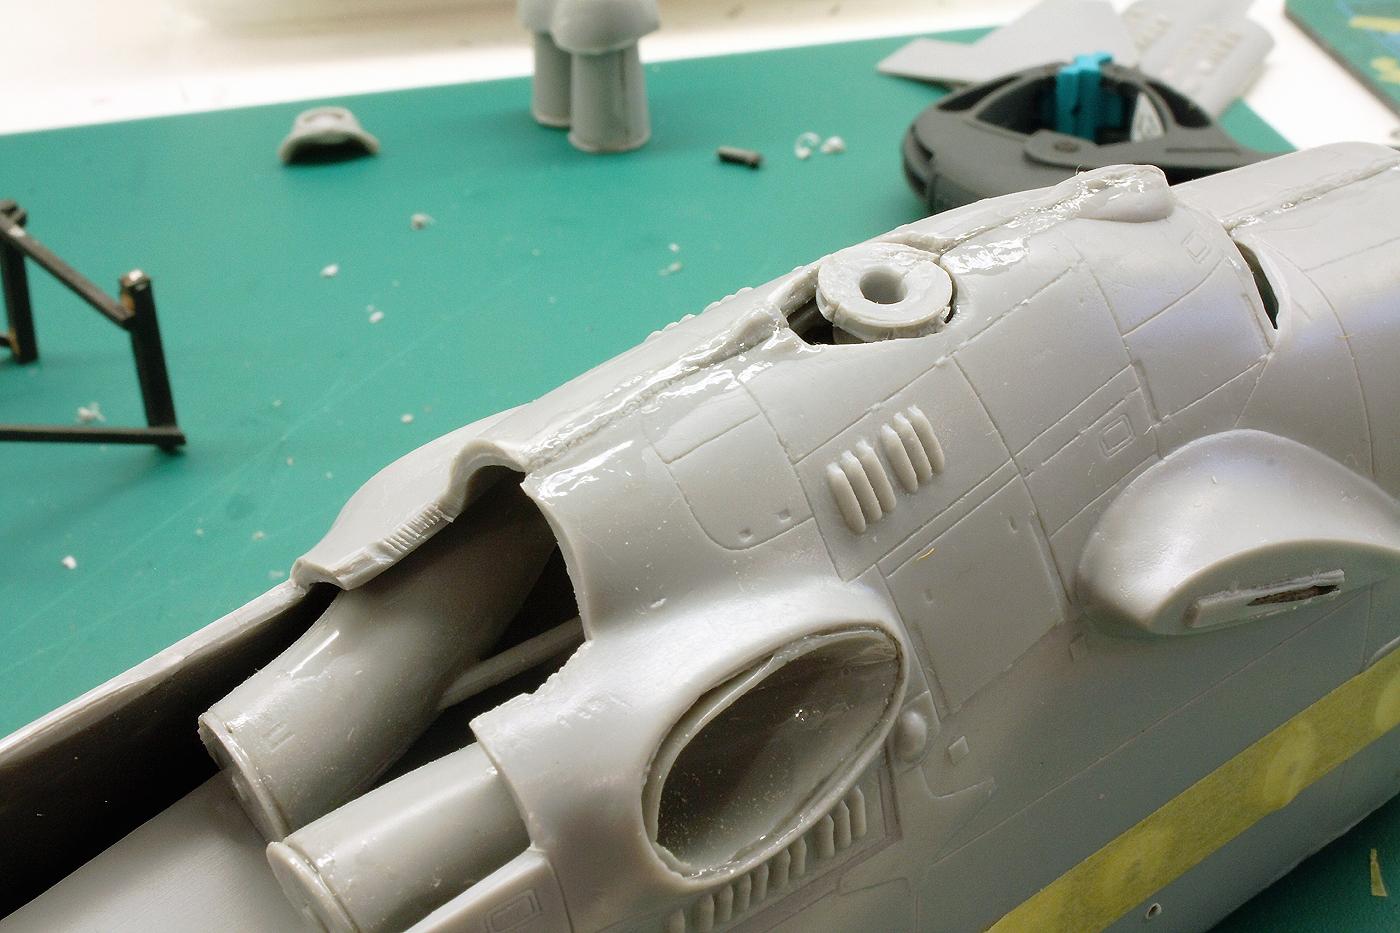
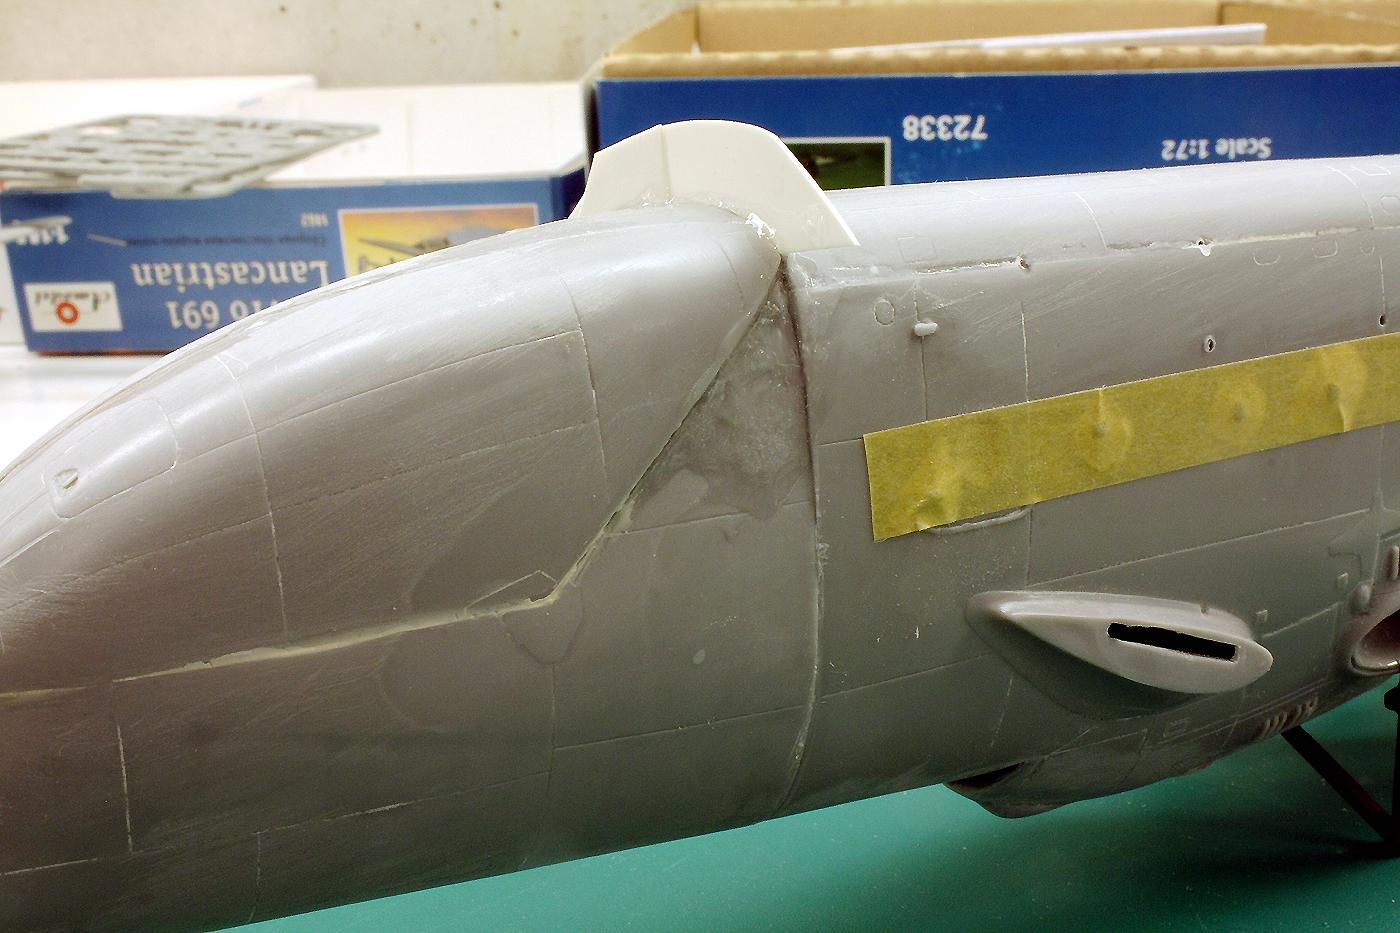
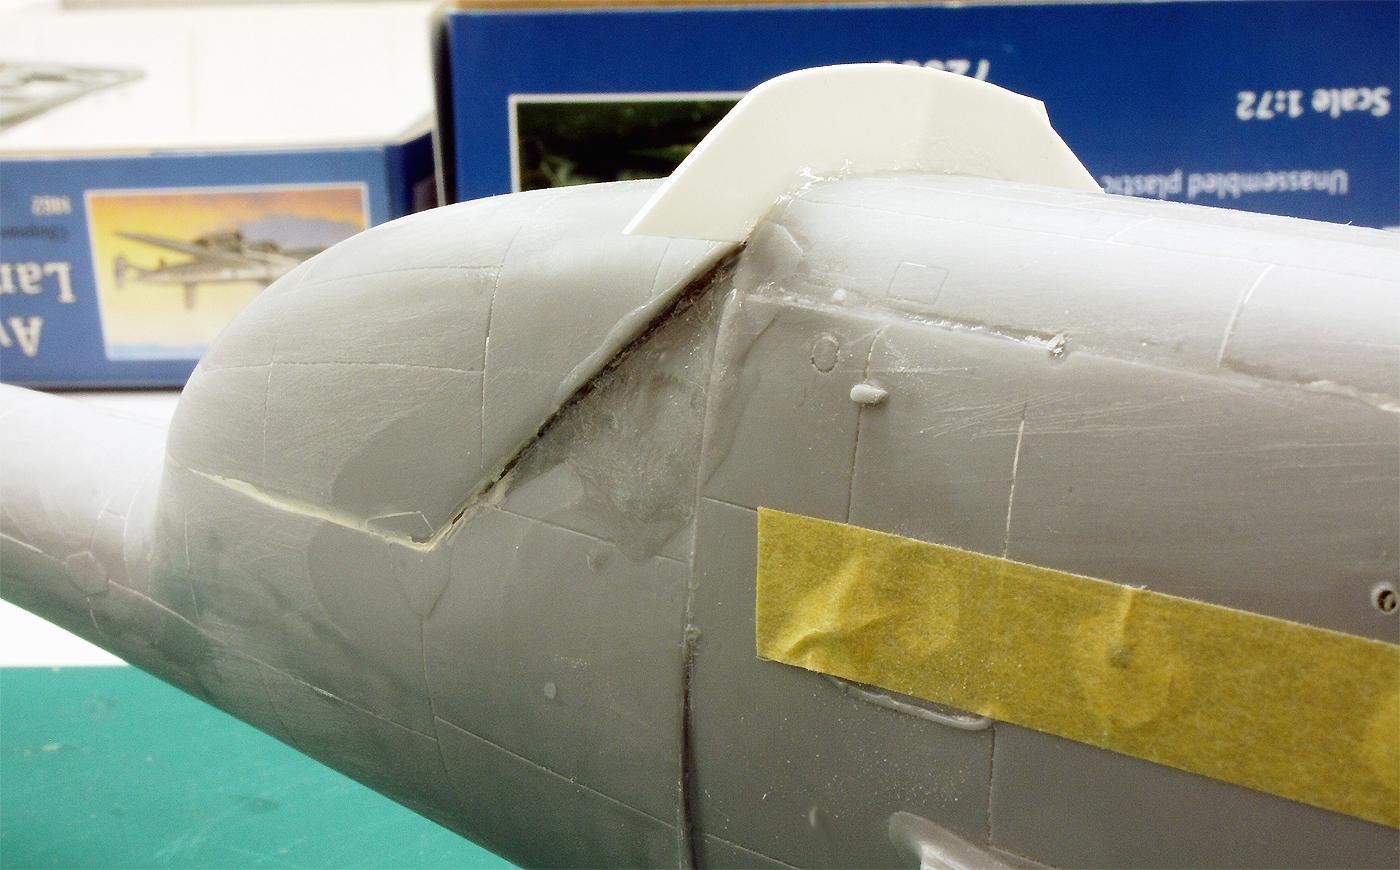
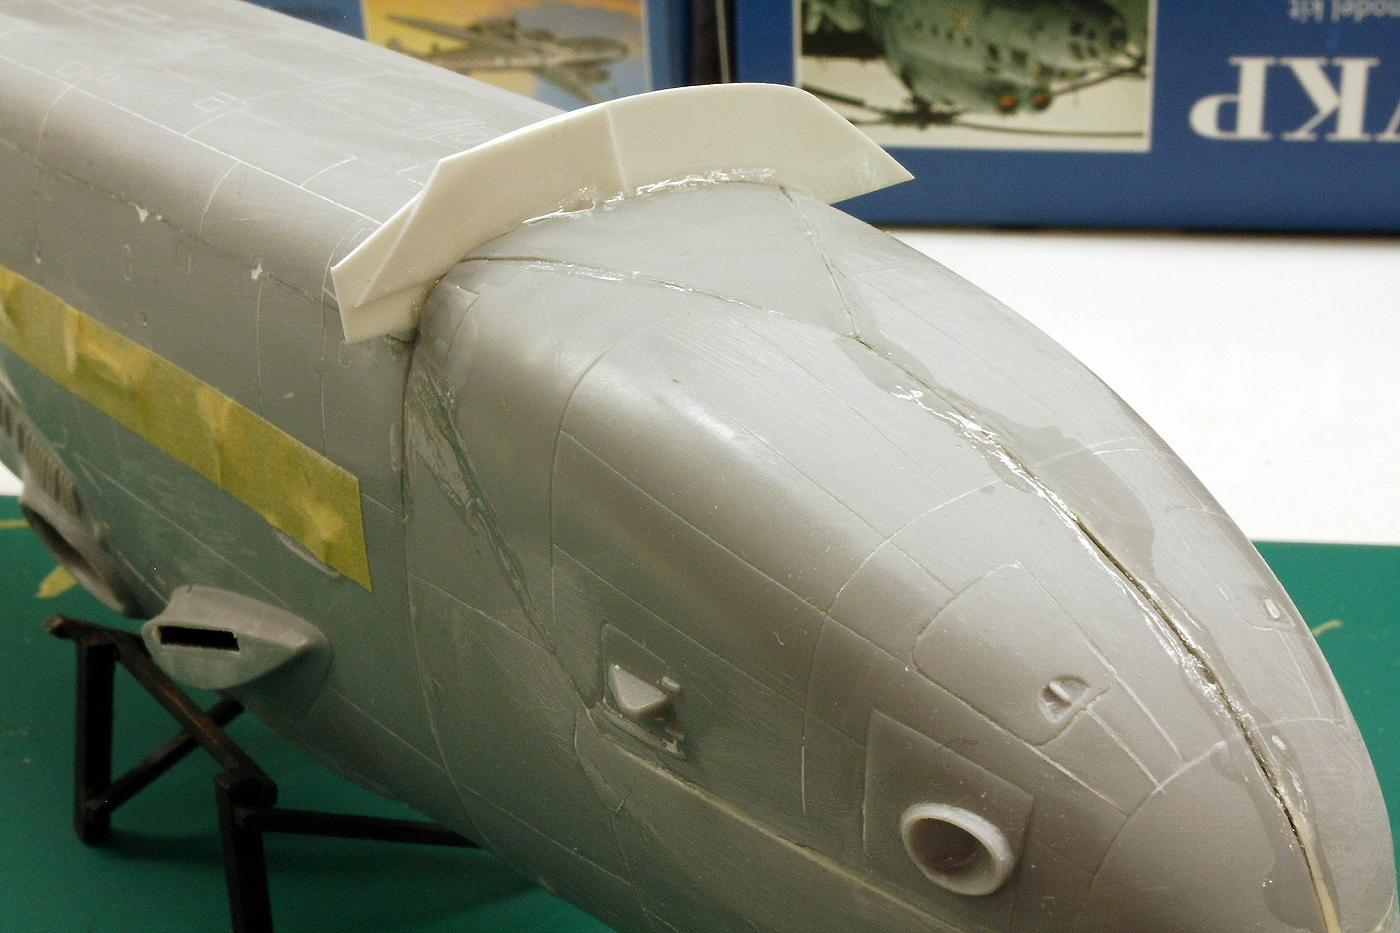
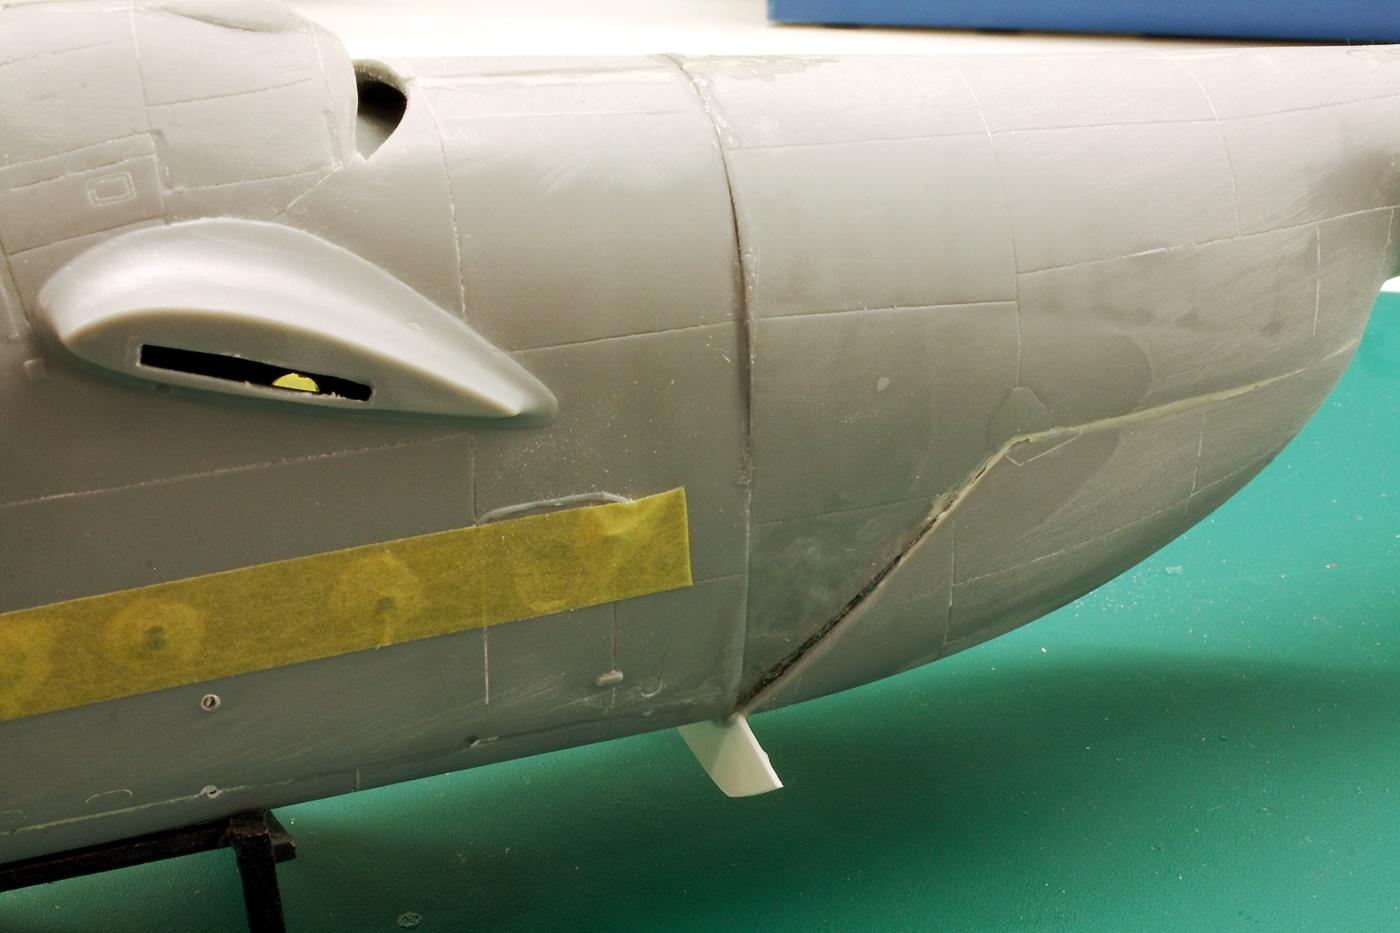
However, the accuracy of fit also proved to be problematic throughout. In many areas this was not a major problem, but only meant additional time: the really large gaps and gorges were filled with cyanoacrylate and then shaped with several sanding passes, while smaller ones could simply be filled and sanded. In some areas, however, things got a bit hairy with the warped and misaligned parts: the fuselage consists of eleven large and several smaller elements, which all had to be joined together to create flush outer contours. Given the poor quality of the parts, this is bound to lead to difficulties - at least if you approach the matter as unsophisticatedly as I did!
I chose a procedure that is suggested in the building instructions, but which I strongly advise against: after I had first completely assembled the front section of the fuselage up to the cargo doors and then made the tail boom together with the tail doors, the next task was to glue the fuselage and tail flush together. Unfortunately, the fuselage and tail boom were now so warped and out of scale that I had great difficulty with this. A more effective approach would have been to build up the left and right fuselage half-shells from the nose to the tail in one piece and then glue them together to form the long fuselage of an Mi-6.
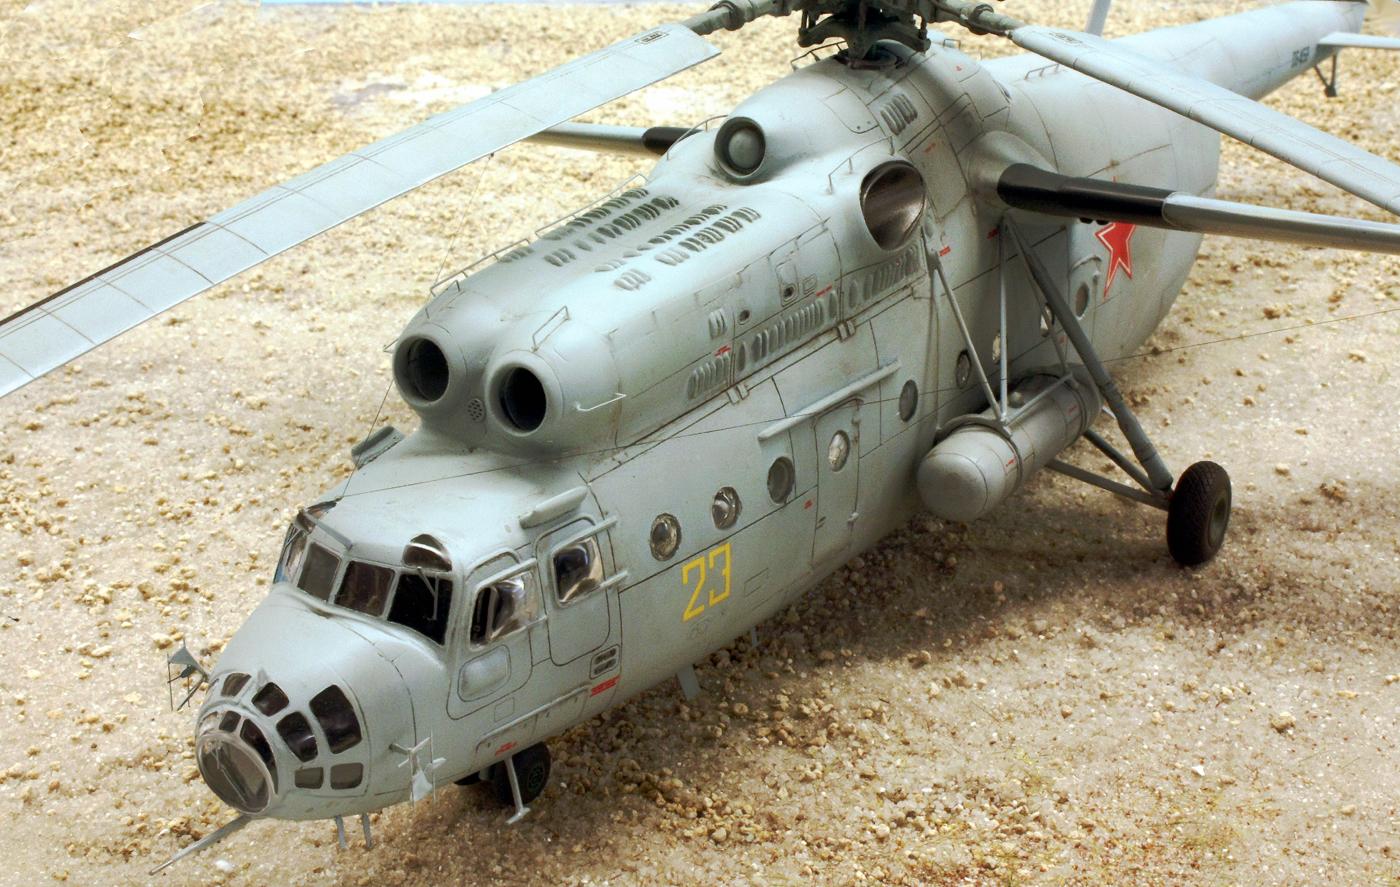
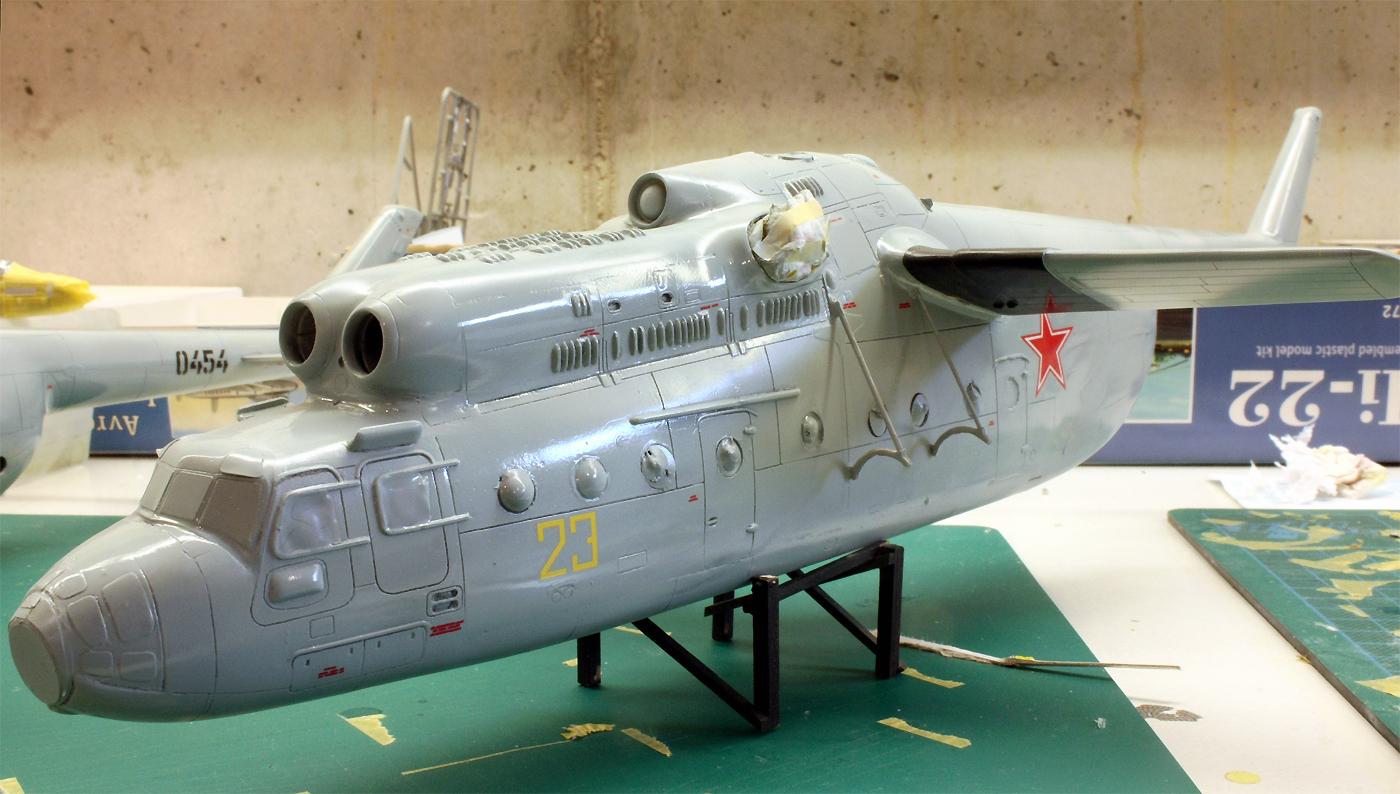
Another issue that needs to be addressed here is how to deal with the round and outwardly curved rows of portholes in the cargo hold. Although the transparent parts themselves are of quite good quality, it is their attachment that causes difficulties. According to the building plan, they should be attached from the inside, but this cannot lead to a satisfactory appearance: the window openings on the hull unfortunately have unintentionally different diameters and also frayed edges. Gluing the curved transparent parts from the outside didn't seem to be a good solution either - and so I tried to come up with a new idea to achieve a better result.
As white glue hardens crystal clear, I filled the frayed edges with a little glue, which sometimes brought an improvement. However, where this was not possible, I resorted to a more radical solution: the empty round window opening was filled with glue using a toothpick, the surface tension of which ensured that a closed white glue surface was formed. If you add enough glue material and hold the component accordingly, the still liquid glue begins to sag under the influence of its own weight. If you do this patiently and correctly, the glue hardens with a slight curvature to form a shape that at least closely resembles the desired appearance of the portholes. However, as this is a very time-consuming procedure, the result of which is only a compromise for me, I am not really satisfied.
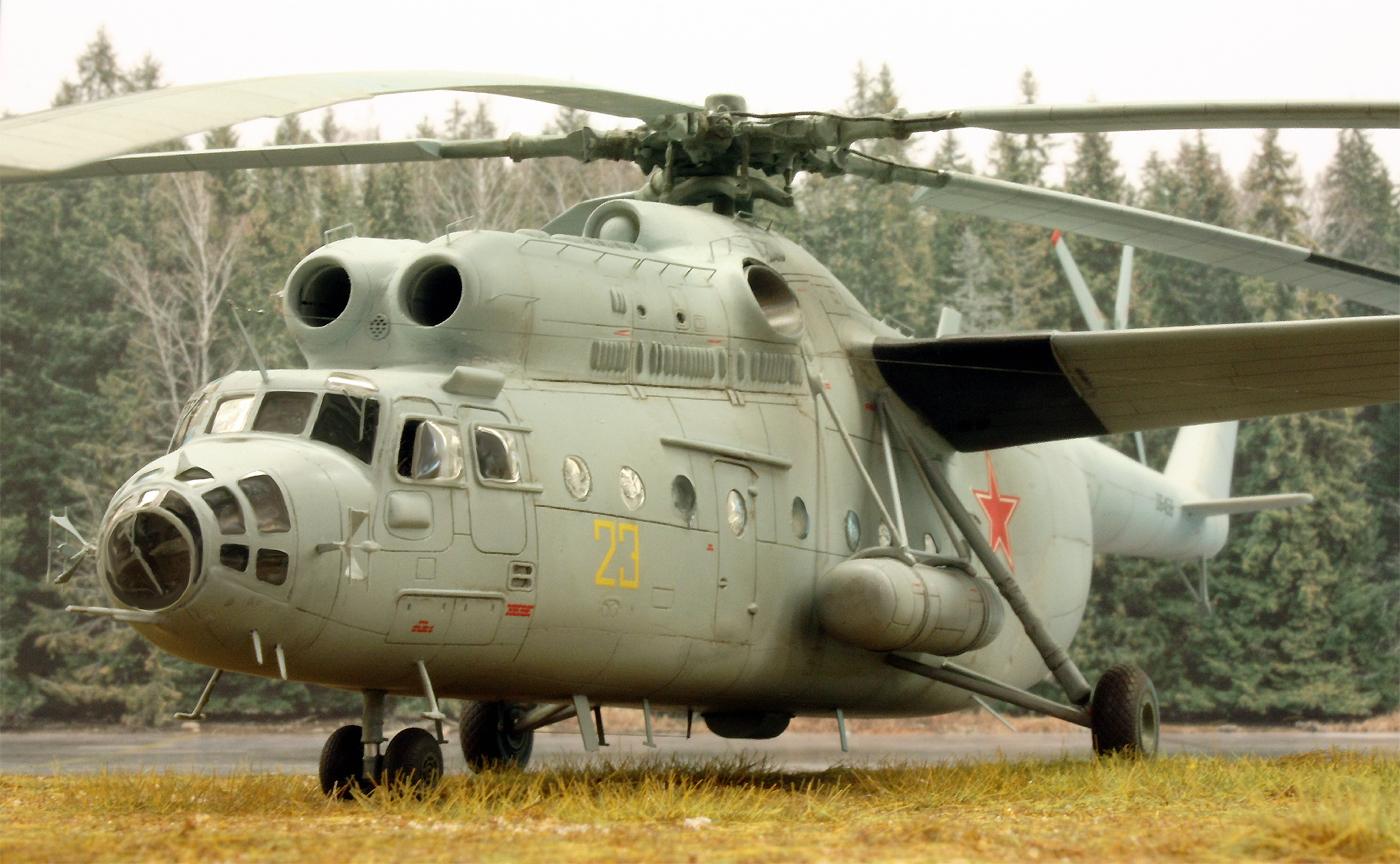
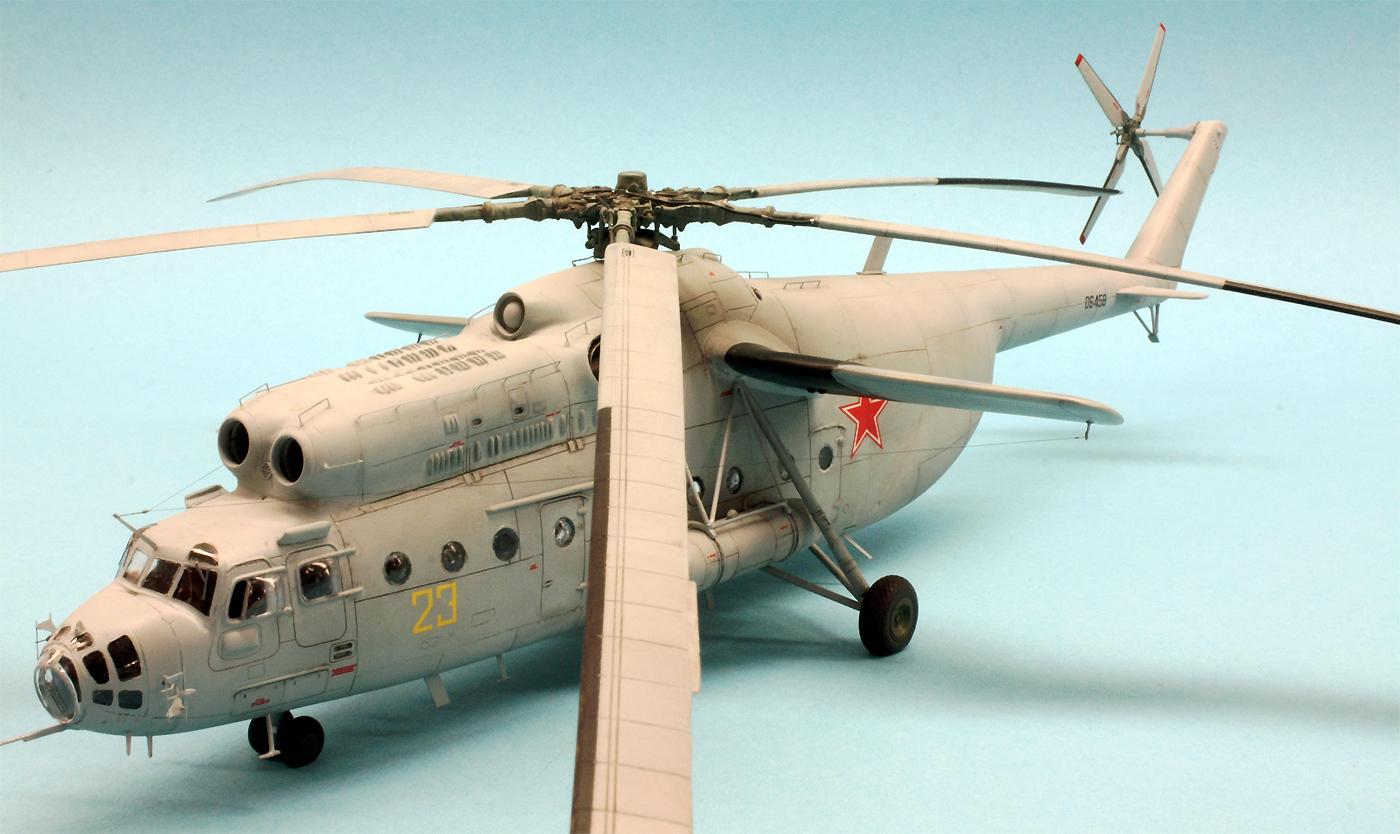
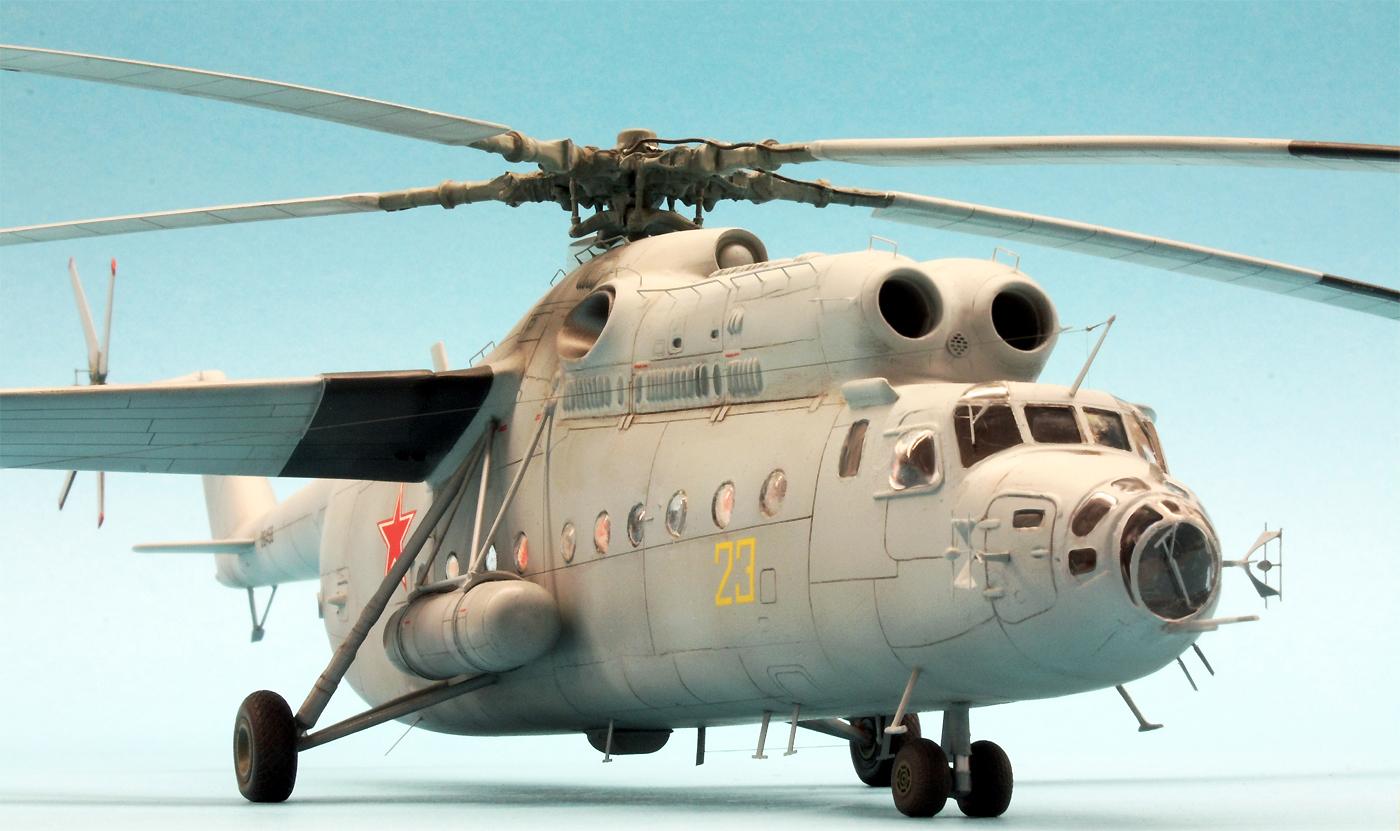
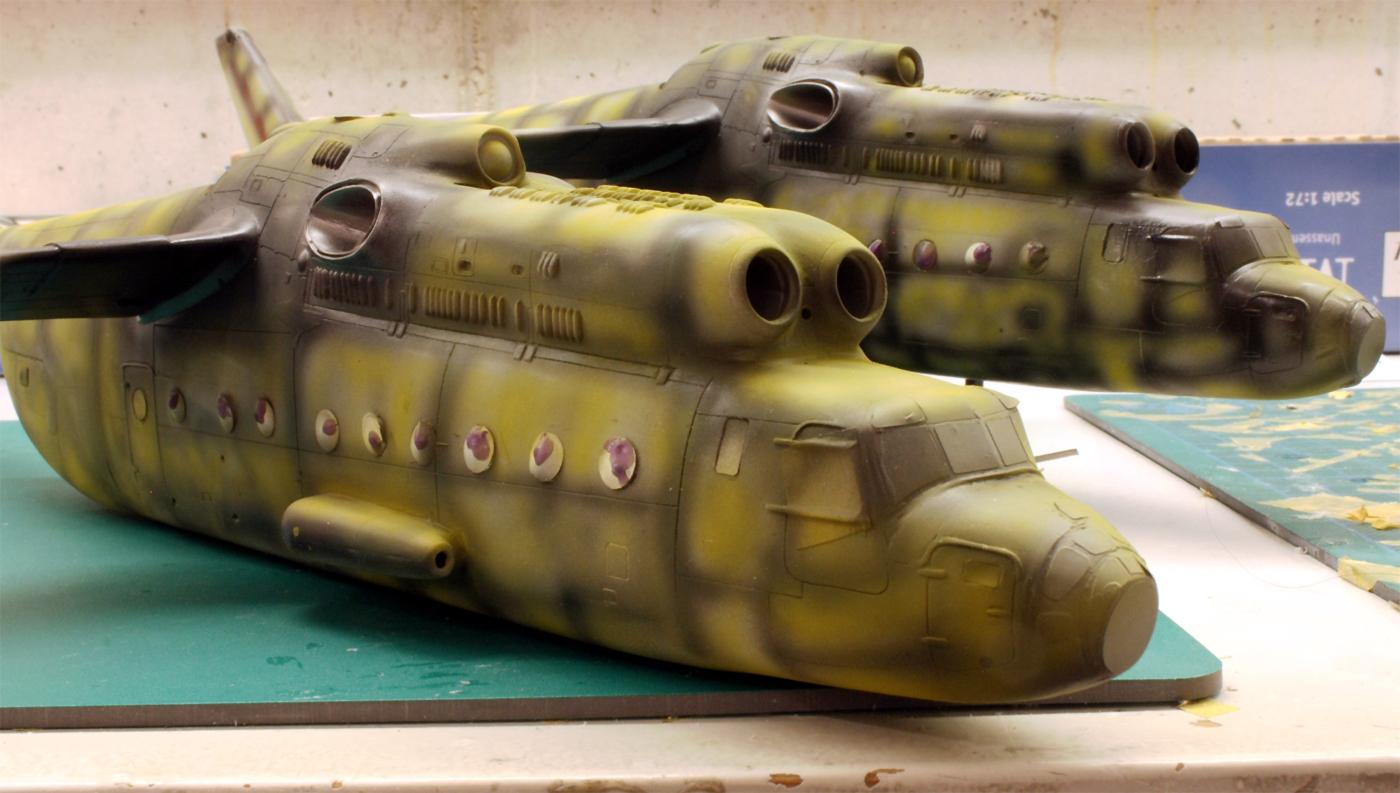
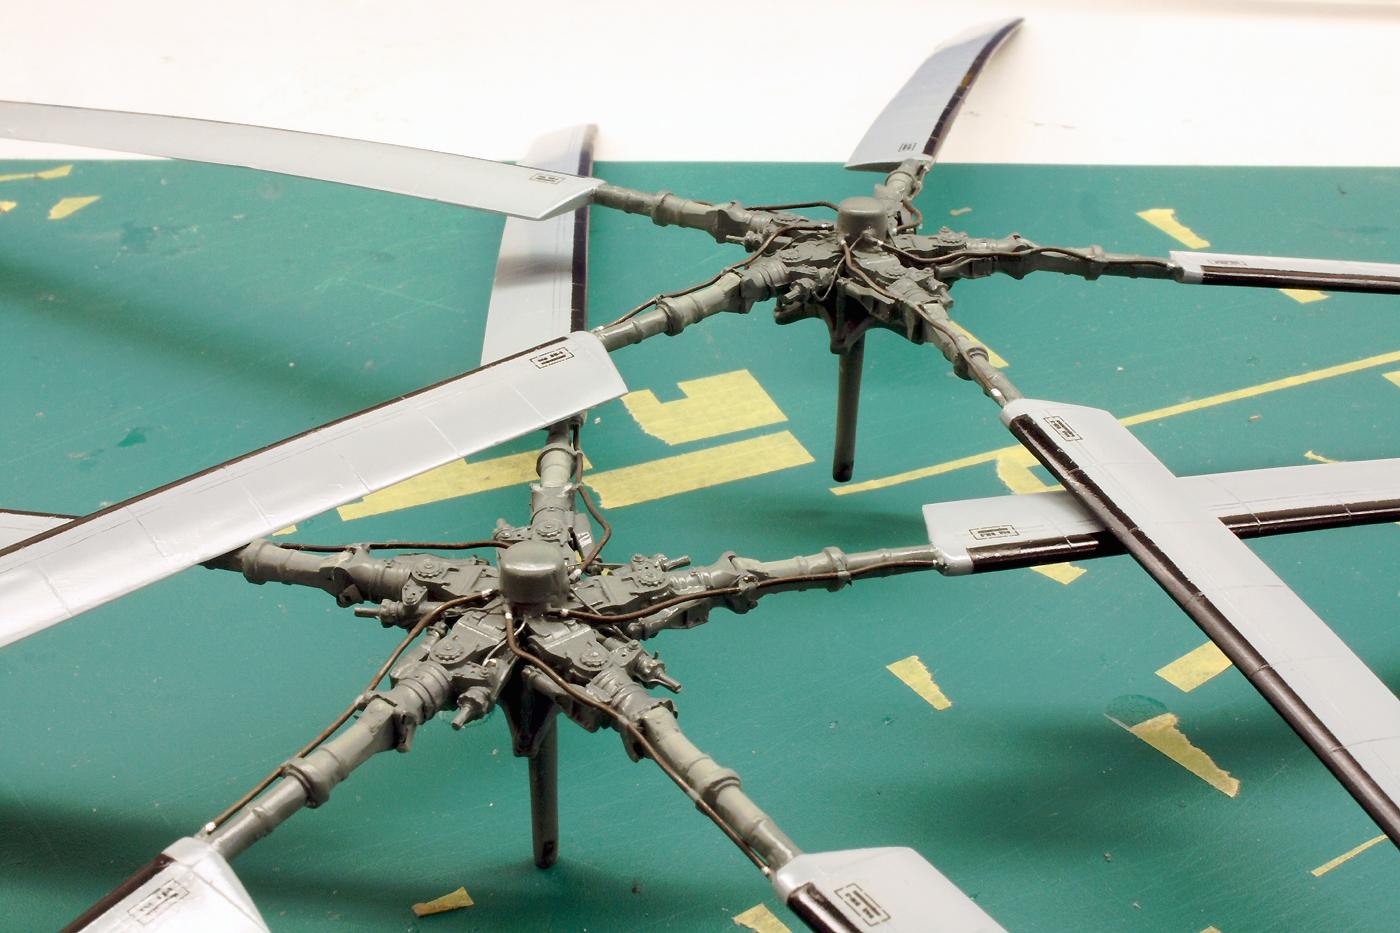
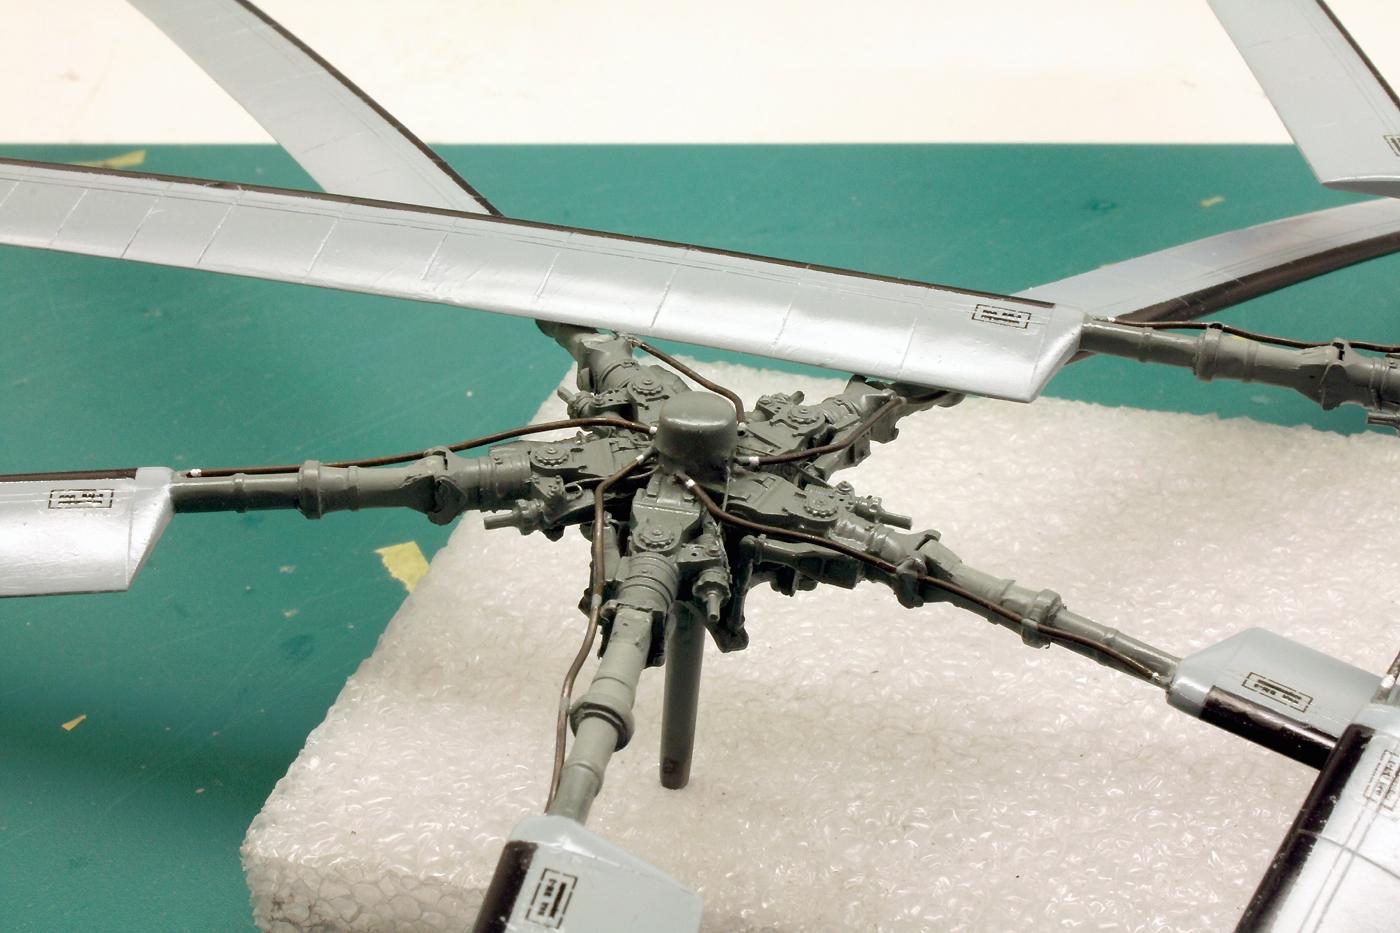
This describes the most remarkable features of the kit; everything else that I encountered during the construction process can be found similarly in other projects. For example, it is obvious that the impressively large rotor heads benefit considerably from subsequent detailing with wire and the etched parts from the aforementioned Brengun set. I replaced some of the undercarriage struts and the mountings for the two external tanks with suitable pieces of wire. The reason for this was the brittle and poorly moulded material of the kit parts. The majority of the many aerials are etched parts - which emphasises that I would highly recommend the purchase of the available parts.
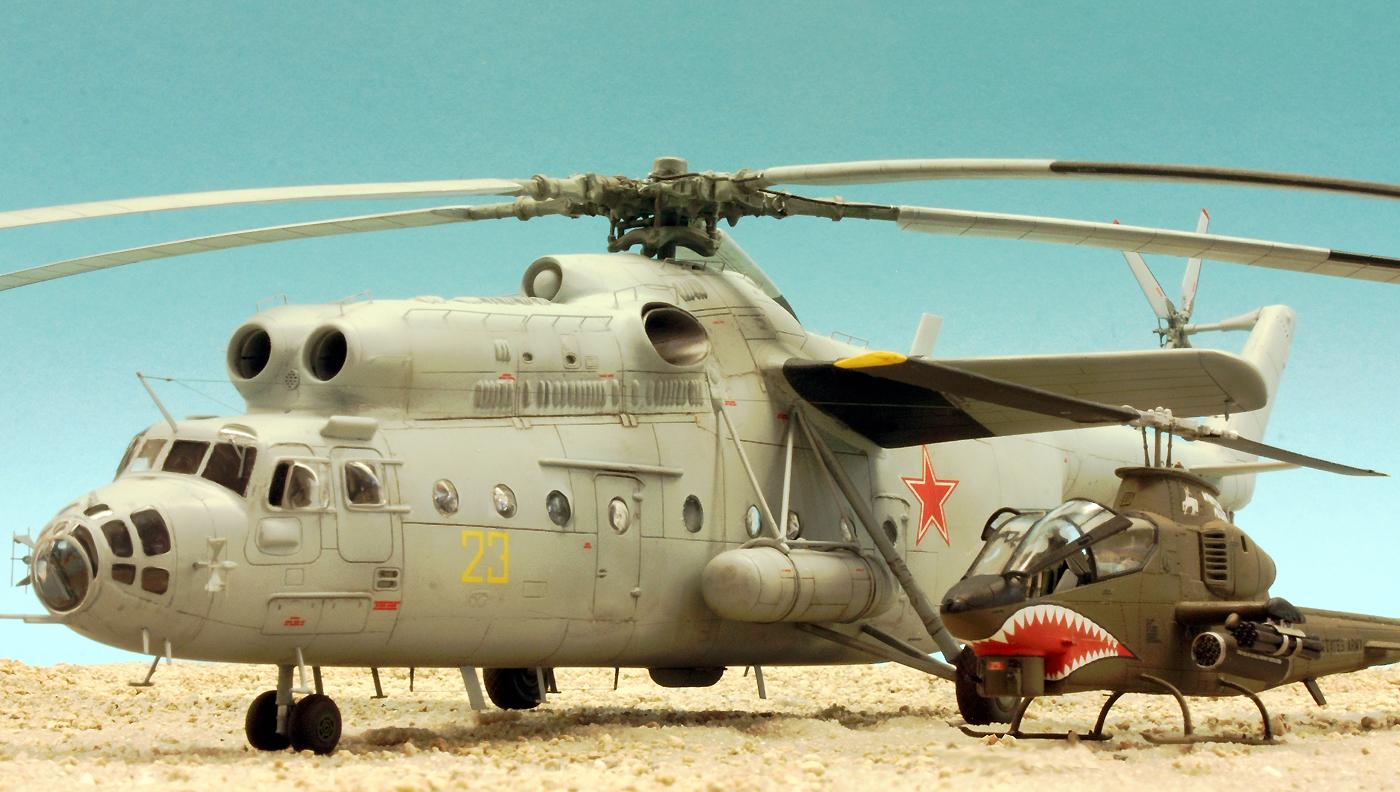
The Mi-22 shown is one of the fifty or so "flying command posts" built, derived from the Mi-6 heavy-lift helicopter. This purpose also explains the exterior of this helicopter giant, which is peppered with aerial and communications equipment.
Amodel is indeed to be praised for repeatedly offering exotic, but highly interesting aircraft as realisable kits. But sometimes you also have to face certain challenges. However, if this results in an interesting model as well as new insights or even new skills, that's not a bad thing. With this in mind, I am delighted with my first two attempts to build an Mi-6 - and in the light of the above, I warmly recommend this spectacular kit!


What a beast! Great, if not epic, build Roland.
Well, thank you very much, Jim!
As beautiful as the previous build, Roland @rosachsenhofer
Well done.
Thank you John!
At least you finished the beast and it turned out well. I would have done a much sloppier job because I would be frustrated to no end and found a quick/dirty way to finish the kit (for some reason several of my modern Russian subjects end up that way.)
An A-model kit can test a person's patience, skill and sanity.
Couldn't look any more REAL. Great build & finish.
Wow - two excellent results from a very difficult kit! a real beauty!
Given the obvious fit problems of that kit, it is a wonder that you were able to get the results you did. Excellent end result Roland!
This is incredible. You should be very pleased with your beating Amodel into such lovely submission.
Especially well said! 🙂 Thank you!
Another fantastic result following a superb job, Roland! You overcame the kit's challenges in a most effective way!
Magnificent builds...Congratulations!
Awesome job. Reminds me of when I built the 1/144 scale Eastern Express An-22.
I would like to thank you all for your interest, your motivating comments and words of encouragement! I am very pleased and proud that you like this model - thank you for your very welcome reactions!