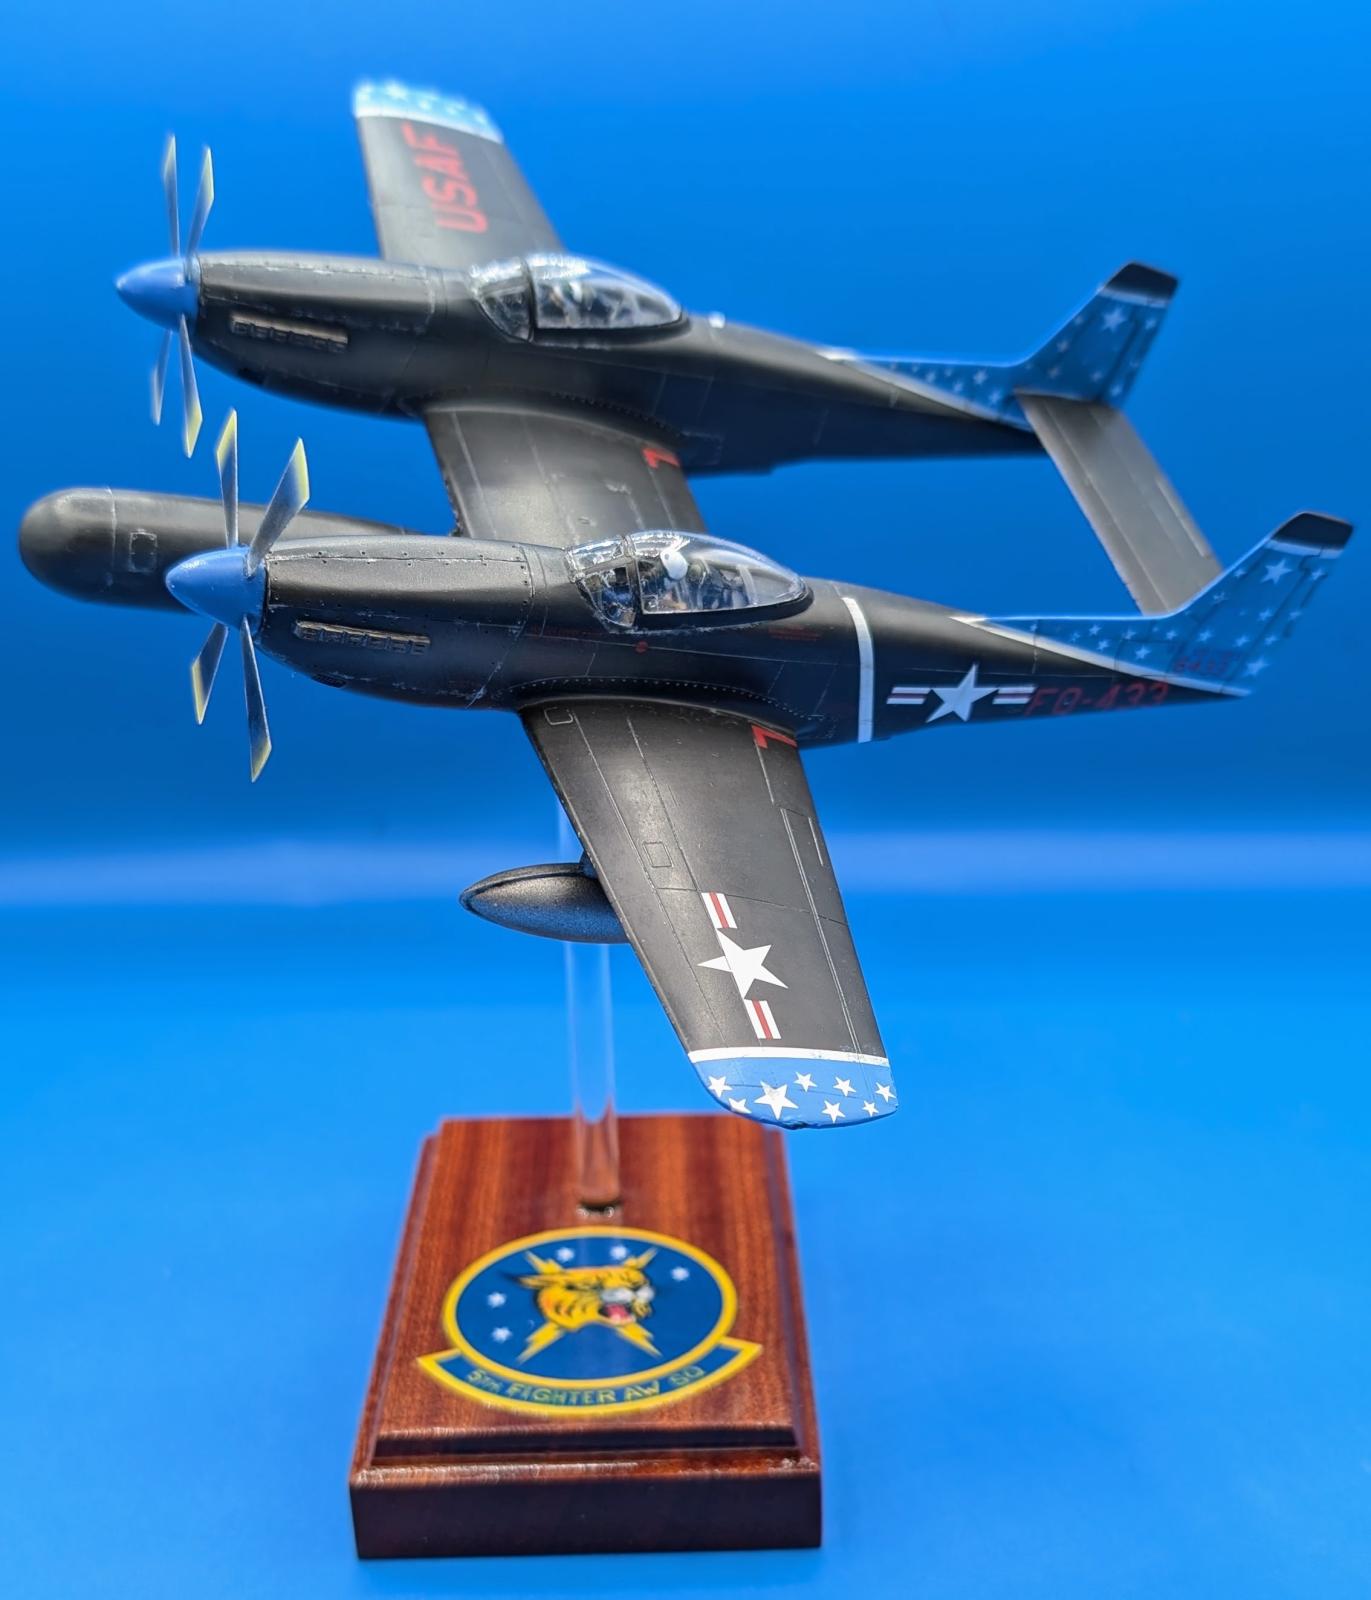
Hobbycraft 1/72 F-82 Twin Mustang
For Christmas in 2022, my son bought me a few model kits that he thought I might like. Now my son is not a model builder, and therefore knows nothing about the various pluses and minuses of different kits. He was more interested in the aircraft's design and the box art of the kit.
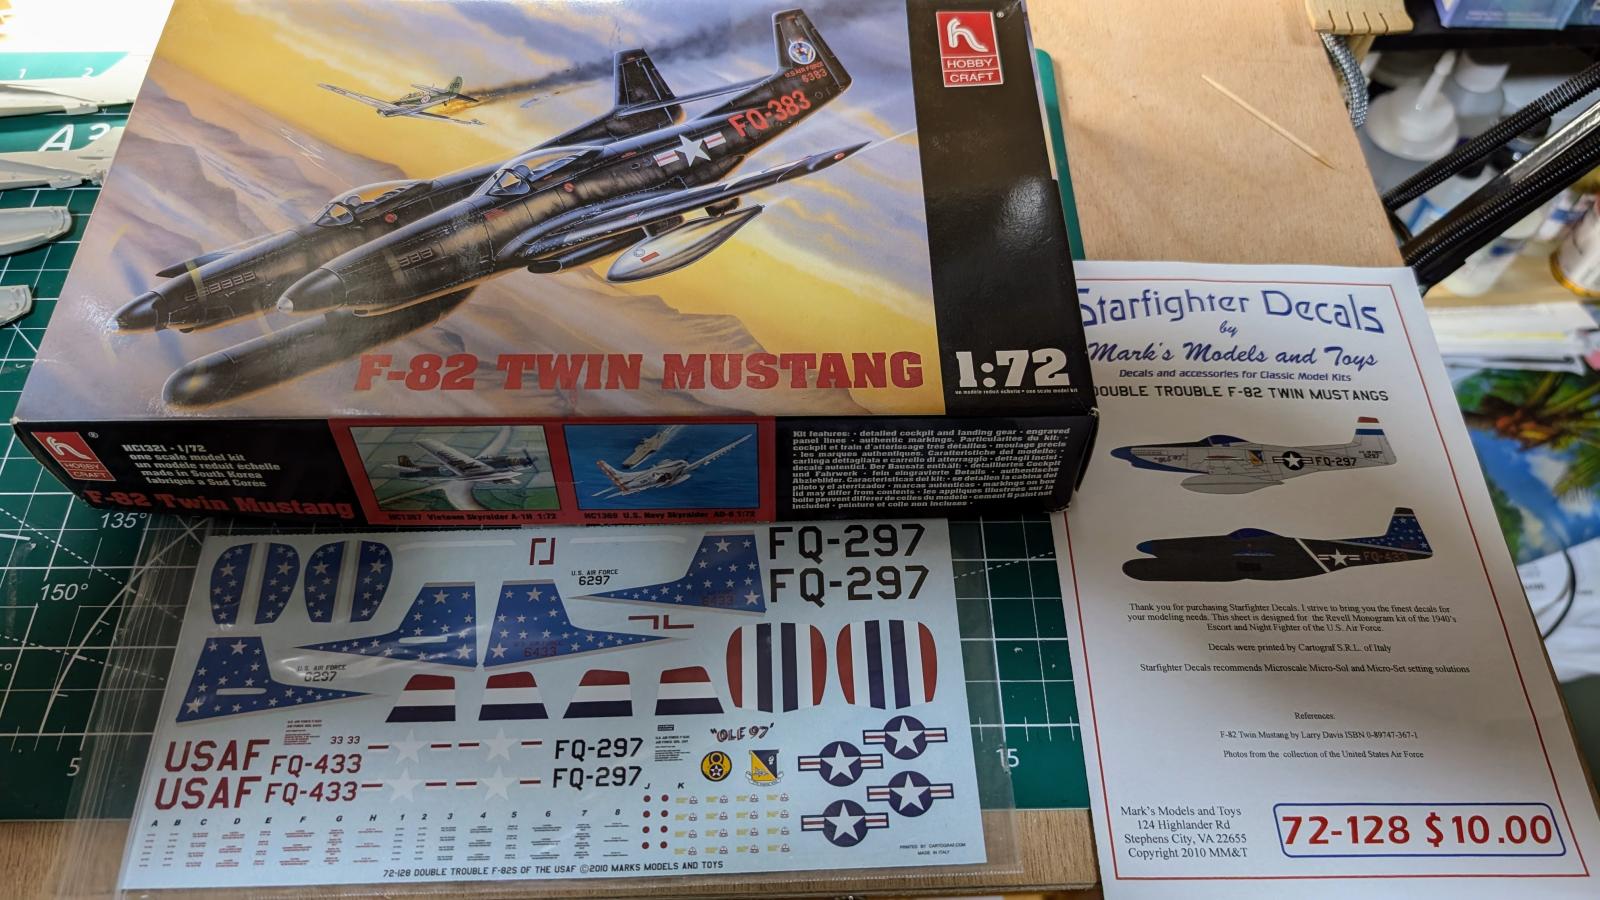
One of those kits was Hobbycraft's North American F-82 Twin Mustang in 1/72 scale. This kit has been around for decades. When I first started researching this kit, I mistakenly associated it with Monogram's 1/72 F-82 kit. I am not sure how I made this mistake, but later I found out that they are different kits, with this one descended from an Idea Model (Korea) kit released in 1985, according to Scalemates.
I can't speak for the Monogram kit, having never built it or even seen it in person. But my experience with Monogram, in general, tells me that it should have been a nicer kit than this one was. My research indicated that the Hobbycraft molding of this kit suffered from quality issues, and I can attest to that. There was considerable flash and some misalignment of the molds when this particular kit was made. The kit had raised surface detail and fairly crude shapes for the very prominent Mustang lower intake. Like many kits from that era, several of the openings on the real aircraft were molded closed.
On the plus side, there was an attempt to provide a gun bay in the center wing with machine guns and a separate access panel.
But the kit had major fit issues and canopies that required considerable effort to get more clear and usable.
Anyone who knows me, knows that I like taking on challenges and often will try to improve on older models when I can. I don't pretend to be really good at it, but it does help me to improve my skills and I get satisfaction from the build when it's finished.
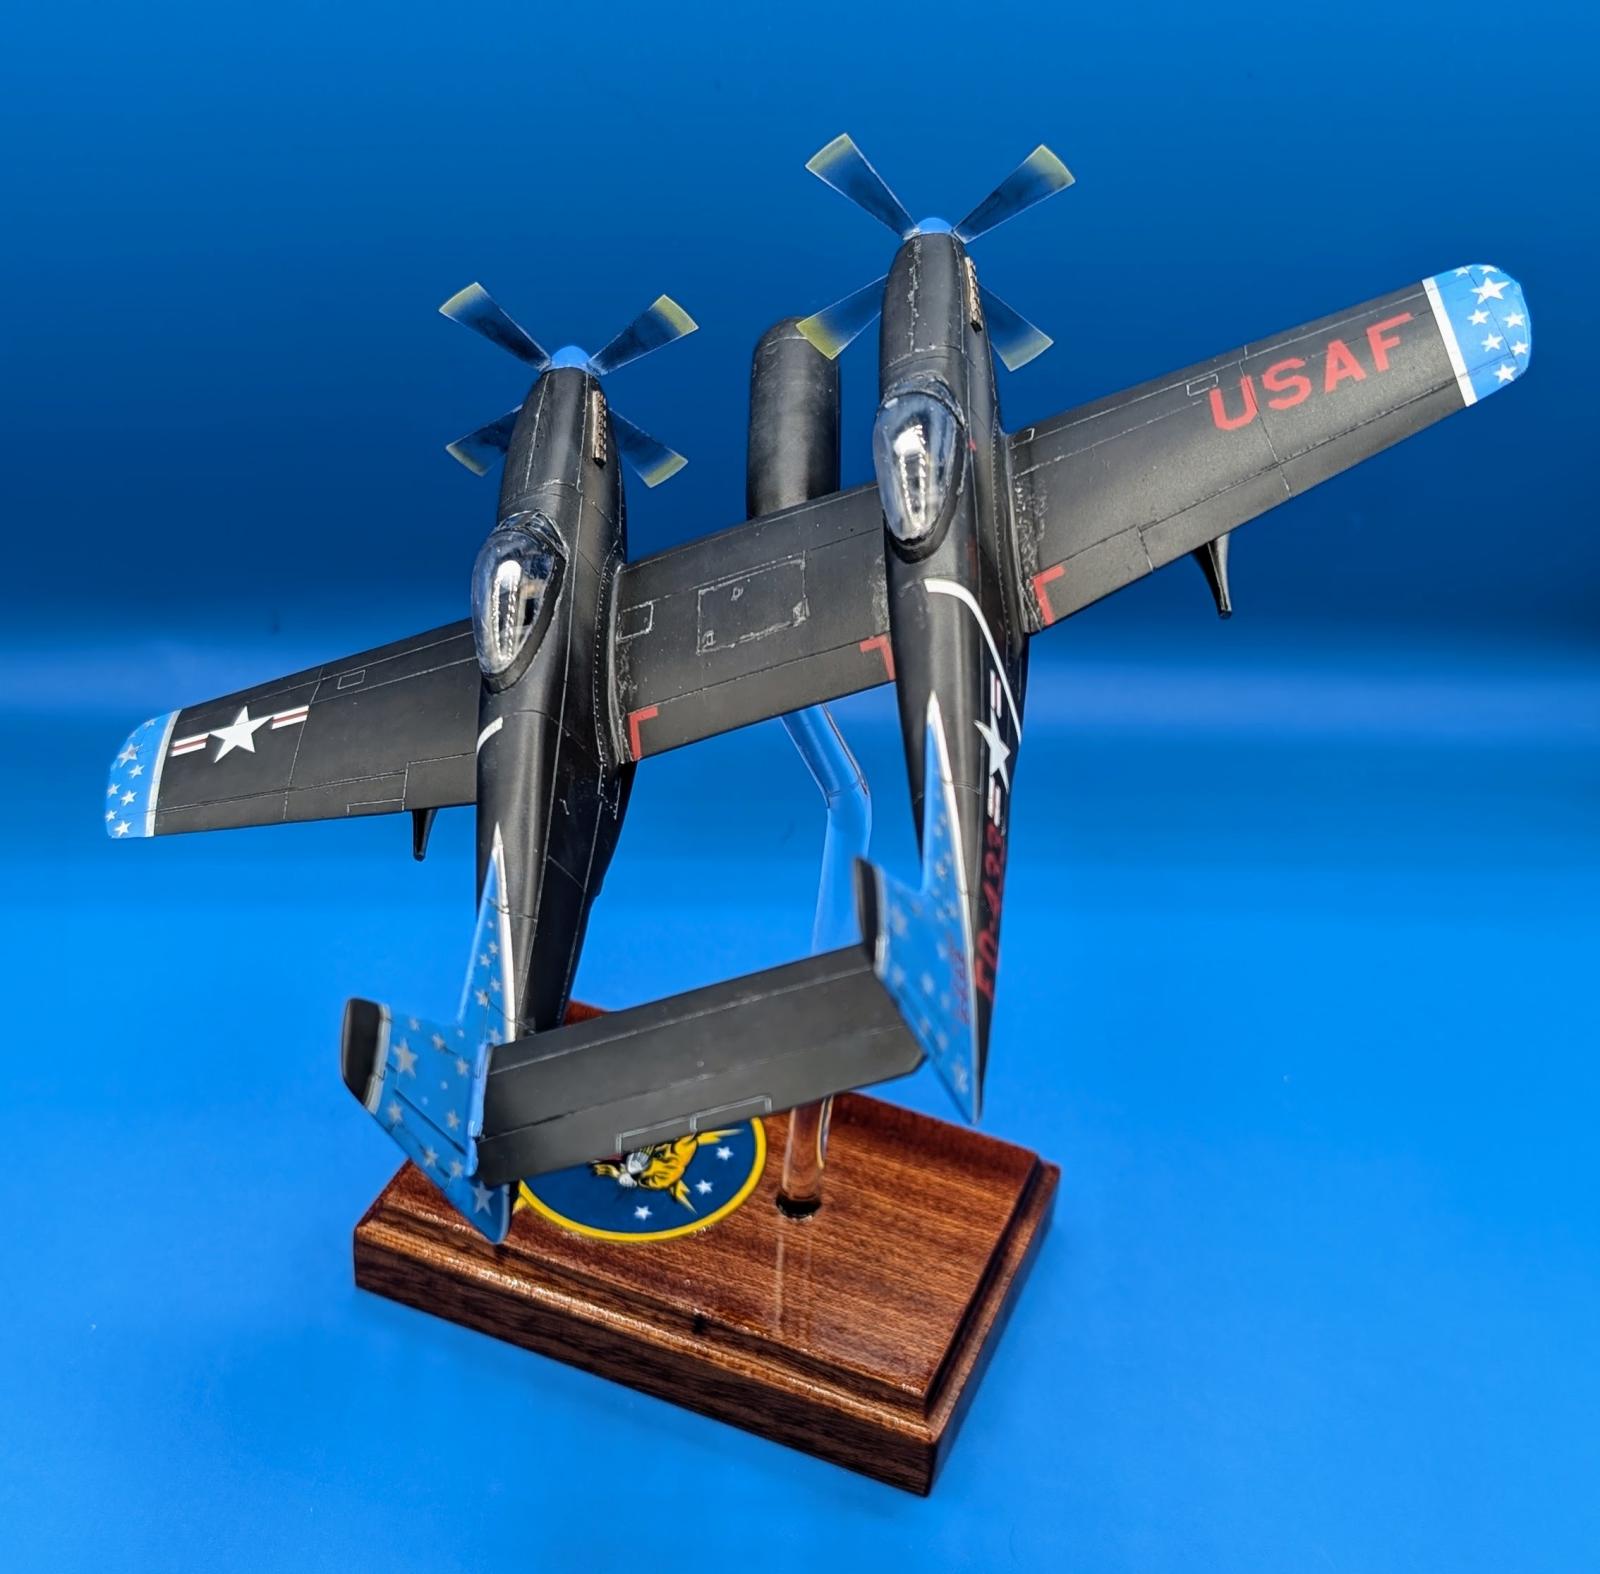
To improve this kit, I sanded down all the surface detail and rescribed the basic panel lines and main fastener details. Rather than try to improve on the landing gear, I elected to build this model in flight (which is my general preference anyway). This required closing the gear bay doors, which were extremely poor fitting. The tailwheel doors were molded open and had to be removed and replaced with styrene.
The intake trunk was filed and sanded to improve its shape. The opening at the aft end of the intake trunk was opened up. The canopies were sanded and polished and then coated in Future Acrylic Floor Care. Since no framing was molded on the windscreens, I replaced it with aluminum foil glued to the windscreen.
The cockpit was fairly simple and I added a few details including a simple scratchbuilt instrument panel. The pilot figures were cleaned up and used. The exhausts had their definition slightly improved using a small micro chisel.
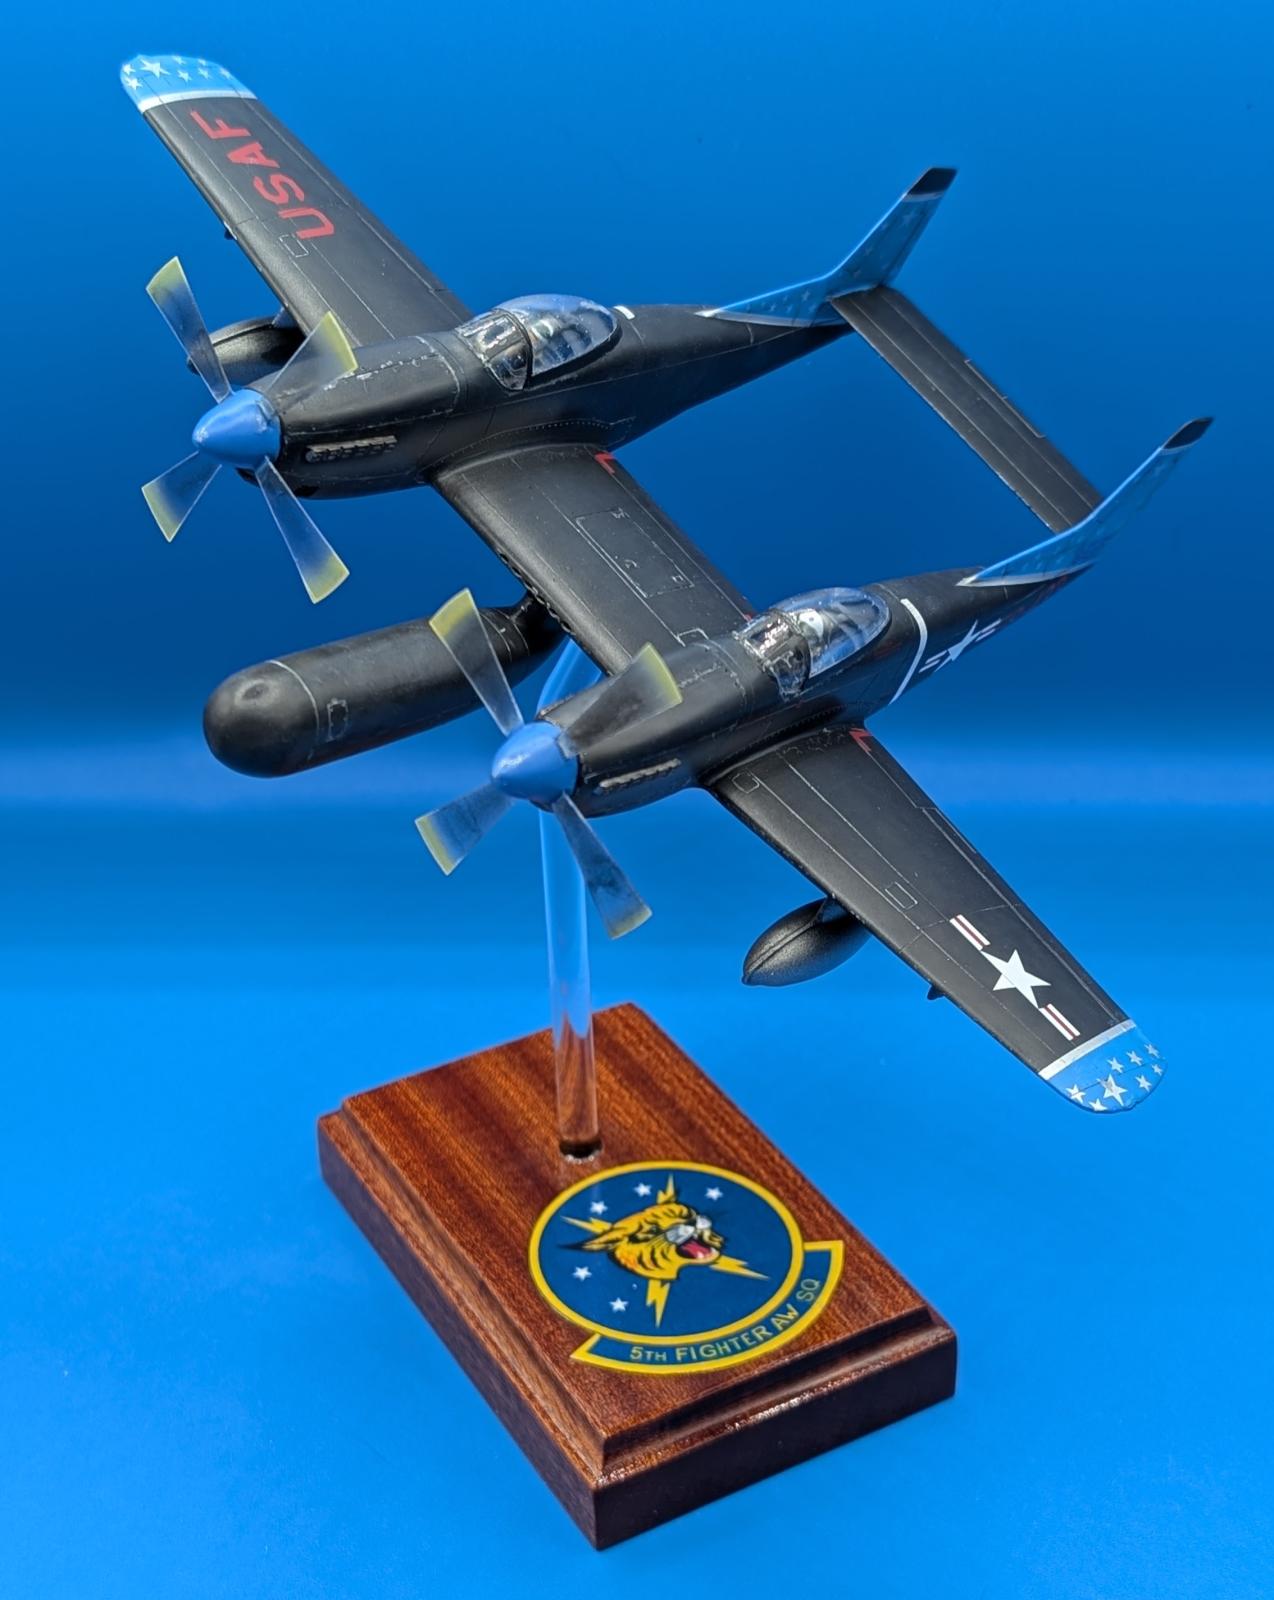
For the display base, I used a small piece of African Mahogany, varnished, and gloss coated. Prior to doing the gloss coat, I located an image of the squadron patch for the scheme I wanted to use. Then using the Inkscape drawing program, I reproduced the artwork. I had originally planned to cut this as a mask and paint the patch on the base, but this proved impractical at the size I needed. So I instead elected to print it and glue the print to the base prior to gloss coating (to seal it in).
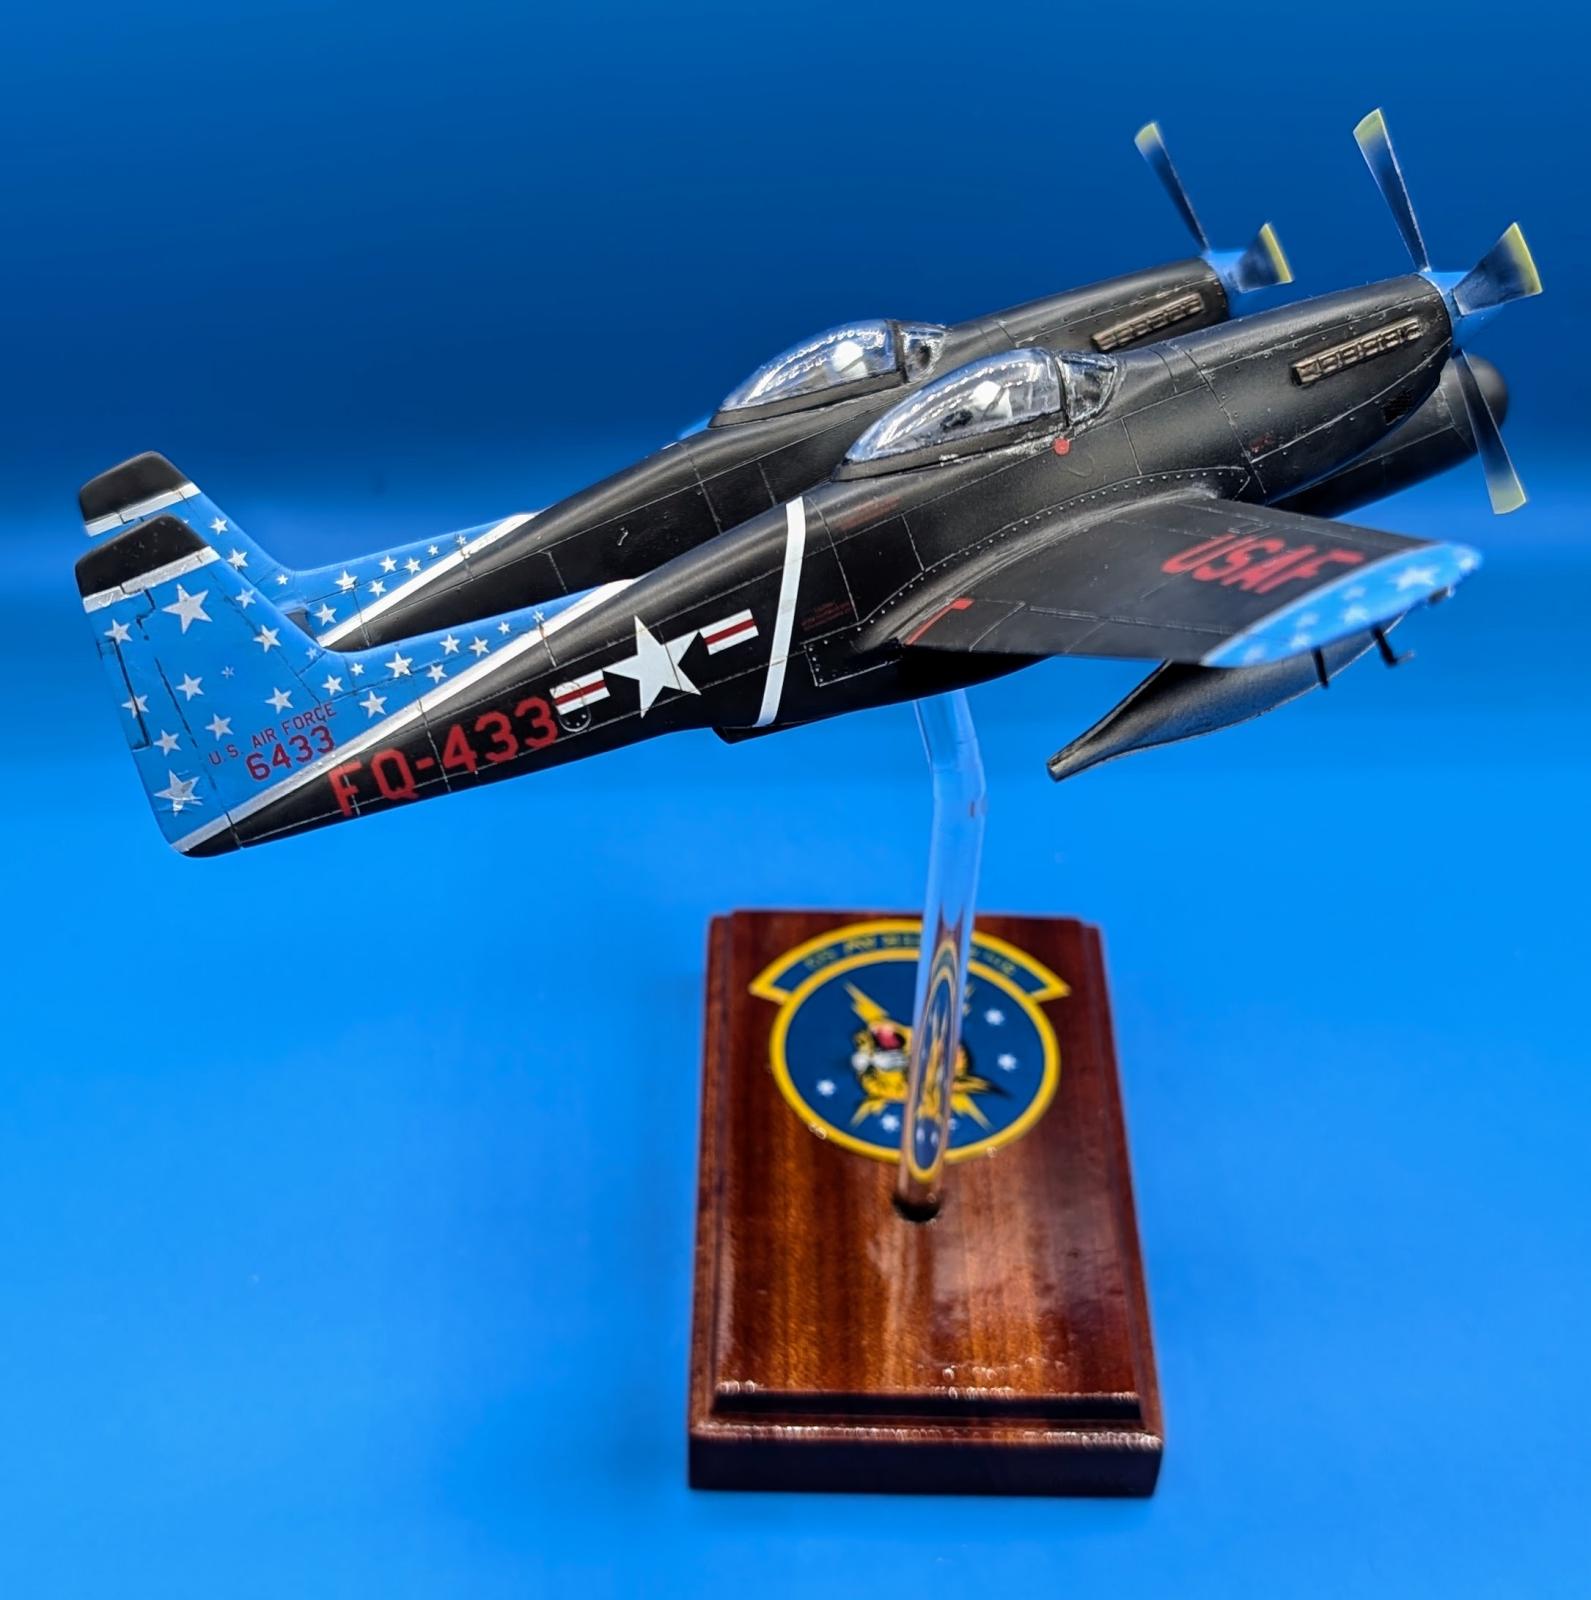
For the scheme, I had purchased Starfighter decals for the Monogram kit (before I realized the Hobbycraft kit was not a derivative of that kit). The scheme is a night fighter used by the 5th All Weather Fighter Squadron based out of MItchell Field in New York in the late 1940's and early 1950's.
The decals didn't fit great and I had to cut and trim these decals to fit, but in the end, I was able to get them to work. They make for a colorful aircraft and I like the end result.
I have a build thread for those interested in more details about the build in the “Work In Progress - Aircraft” group at
https://imodeler.com/groups/work-in-progress-aircraft/forum/topic/f-82-twin-mustang-mojo-build/
I wanted to thank those who followed along. Here is the final result, not perfect, but acceptable to me. Even better, I can know my son feels good about me completing something he gave me as a gift.


Not a very easy kit. Well done!
Thanks Dan (@dbdlee)! A lot of fit issues, yes, but probably no more difficult than short run kits.
You definitely got the best result out of this challenging kit, Carl @clipper
A very nice scheme.
Thanks John (@johnb). It was fun regardless of the extra effort required.
Wow, you actually made a fine cloth purse from this sow's ear! Excellent work.
Thanks Tom (@tcinla). It's kind of funny because I have not bought the much better ModelSvit Twin Mustang, mainly because this aircraft never really interested me that much. I was originally just going to build it as is out of the box, but it needed so much work, and I just couldn't let it go.
Very impressive. Colorful is an understatement. How did you attach the stand rod to the plane?
Thanks Mark (@markhedrick). I drilled a 1/4 inch hole (slowly and stepping up from smaller bits) in the bottom center wing surface. The model is light enough, that nothing more substantial is needed to support it. I used 30 minute epoxy for both ends of the acrylic rod. Just had to stabilize them while the epoxy cured overnight (for best strength).
Great result, Carl!
Thanks John (@j-healy)!
Looks great. As per the Hobbycraft kit and Monogram F-82. I have copies of both and compared them side by side and it appears that the hobbycraft kit is a re-pop of the Idea kit which was what appears to be a copy of the Monogram kit with the parts been somewhat cruder.
Thanks Mike (@planefreek). That's an interesting observation, especially given how much fit issues I had with the decals. If the Idea kit is a copy, and I wouldn't be surprised if it is, it must have been a pretty poor one.
Excellent result out of a less than perfect kit, Carl! Your attention to detail and perseverance really paid off! Loved following your build thread.
Congratulations!
Thanks Spiros (@fiveten). It was a pleasure to share the build. I'm glad you could follow along.
Really nice! Inspired me to secure some decals to pull my box of this kit out of mothballs and give it a go... (though haven't started yet, it is on the "on deck" shelf with a few others).
Thanks Greg (@gkittinger), I look forward to seeing what you do with this kit.
It was a real pleasure watching your build, Carl (@clipper). This kit had a lot of challenges, and it was fun watching how you creatively overcame each one to elevate this model to a real showstopper.
Thanks George (@gblair). Overcoming the challenges , as you know, is often what makes the build more fun. With all my challenging projects this year, I am, however, ready to do some newer kits with minimal fit issues, good detail, and good engineering. Just need to finish up the remainder of the other projects.
It's weird how we keep doing these models that are supposed to be easy and relaxing, only to have them become a real project.