Killer E: 1/48th Monogram F-4E Phantom II
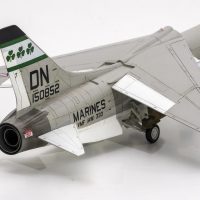
Although this 2004 kit is boxed as a 1/48th Monogram F-4E Phantom II, the plastic mold is actually the 80s Hasegawa F-4E. I built this aircraft in the markings of 68-0338 which had two MiG kill markings on the splitter plate. The victories were from two separate downings of MiG-21s over North Vietnam, one on 31MA72 by Bruce G, Leonard Jr. & Jeffery S. Feinstein while with 13TFS 432TRW and one on 16SE72 by Calvin B. Tibbett & William S. Hargrove (call sign Chevey 03) while with 555TFS 432TRW based at Udorn.
You can see more detail and photos of this build at: https://www.flypastrush.com/post/killer-e-1-48th-monogram-f-4e-phantom-ii
Thanks for looking & good luck on your next build.
David
(Fly Past Rush)


Awesome result!
Love this Phantom!
Thanks Spiros, it was about time I improved the look of my F-4E collection here 🙂 - Got to love a Phantom
That's a fine looking Phantom, David @flypastrush
Thanks John (@johnb), I learned a few things since I built my last F-4E and tried to put them to use with this one.
Nice job, F.P.R.
Thanks Gary, That's the second E I have built, but not the last 🙂
Looks good!
Thanks Greg, I am getting quite the collection of USAF TAC Jungle aircraft here.
When I was a senior in high school (1969) we lived in Austin and our house was right under the landing path for Bergstrom AFB. At that time there were RF-4s flying over constantly in this livery. As they came over our house - low - they were just putting gear down. Super smoky and a roar I will never forget. Great job here.
Mark,
That must have been some sight (& sound) to have that close. Those F-4s do tend to smoke as well 😉
Thanks for your comments,
Fabulous Phantom.
Love the background too. Can you tell me where it’s from?
Thanks for sharing this awesome build.
@flypastrush
Thanks Alfred, (@alfred)
This is a DIY Hangar I built up to photograph my 1/48th aircraft. I built it large enough to accommodate a C-130, so it's a fair size. There is some more detail on this display at my website if you want to take a look ( https://www.flypastrush.com/display ) Let me know if you have any questions.
Are you using a photo backdrop for your Hangar? Is the floor essentially done this way as well. Pretty effective. I may have to try something like that cement paint style on the ground in my Hangar. Still have some details to add when I can find the time for that sort of thing. In the meantime it does the trick for now.
Thanks for your answer, David!
@flypastrush
The backdrop I use is from coastal kits.
Your DIY one is really next level. I’m really inspired by it, and now considering to convert my backdrop (which I have to assemble for each photo session) to something more permanent by adding a frame and some lighting.