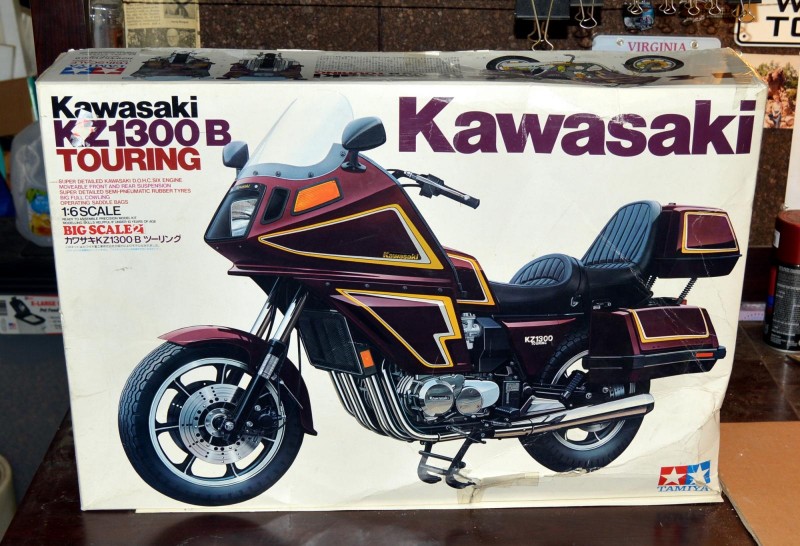
TAMIYA 1/6 scale KAWASAKI KZ1300 B TOURING
The model of the Kawasaki KZ1300 B Touring motorcycle finally arrived. Needless to say I wasted almost no time in opening the package. I did a visual inventory before opening the plastic bags. The, one by one, I opened them to make sure that any loose parts could be easily accounted for. There were a few that had come loose and broken away from the sprues. But not that many fortunately. I took photos of all the sprues before I started this build. I do this for a couple of reason. First, it's so I can look at them if I happen to misplace one. Second, it helps me after the build to show folks just what's involved.
I won't bore people with placing the photos of the sprues in this commentary as we ALL know what those look like.
This is a 1/6 scale model and will be huge when completed. As are all of the Tamiya 1/6 kits.
Follow along as I put together this 6 cylinder beast of a touring motorcycle!
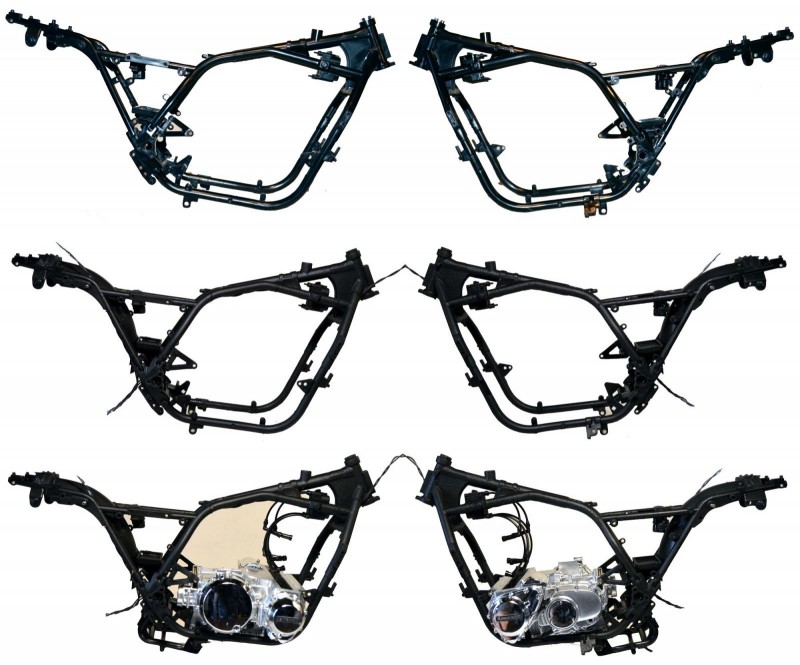
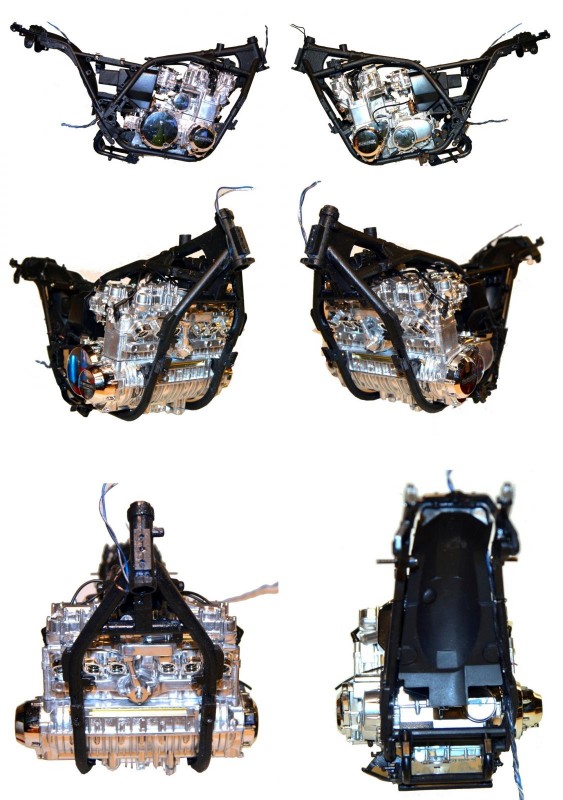
The frame on this one went together in typical Tamiya fashion. VERY little flash and, as long as one follows the instructions, almost puts itself together. The only slight issue that I found was making sure that the small 2mm nuts stayed in their proper places. I added a small drop of Tamiya cement to hold them in place. In the last photo you see the addition of the lower engine casing.
A few closeups of the lower engine casing. I did not strip a lot of the chrome from this model as I have done to others. Simply because in the early Eighties when these were produced, chrome was, in fact, heavily used on a lot of the big touring bikes. I did bring out the "KAWASAKI" logo by using a slight bit of flat black and the removing the paint from the chrome before it had completely dried.
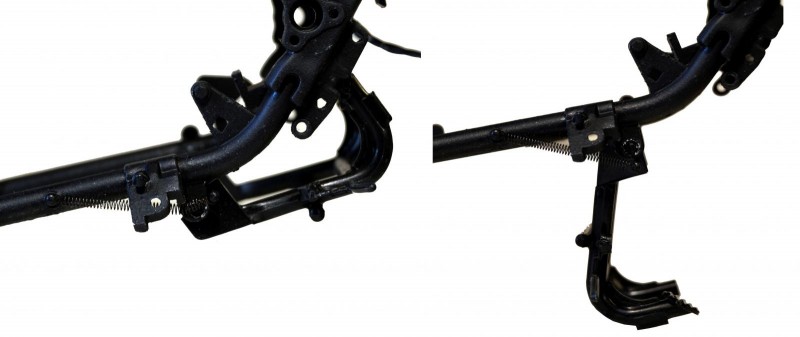
A closeup of the center stand assembly. I was surprised at the detail of this as opposed the the Harley's that I have built. There are multiple parts that hold this in place. I did have to be extremely careful to not get any glue into the areas where there would be movement. The springs ((two of them)) had to be adjusted slightly to insure a tight fit as well as being able to move freely.
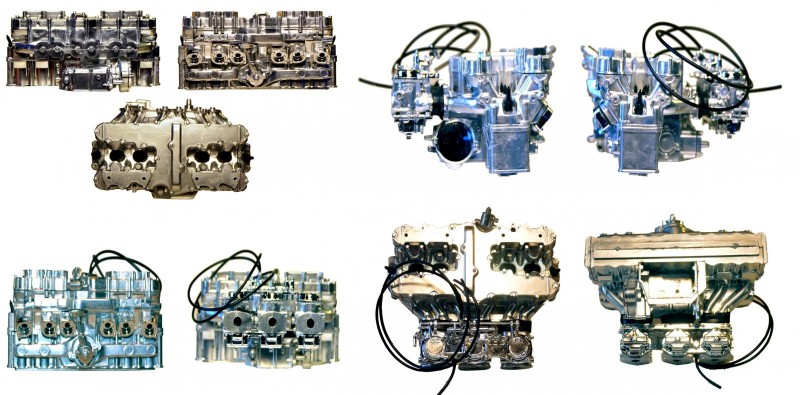
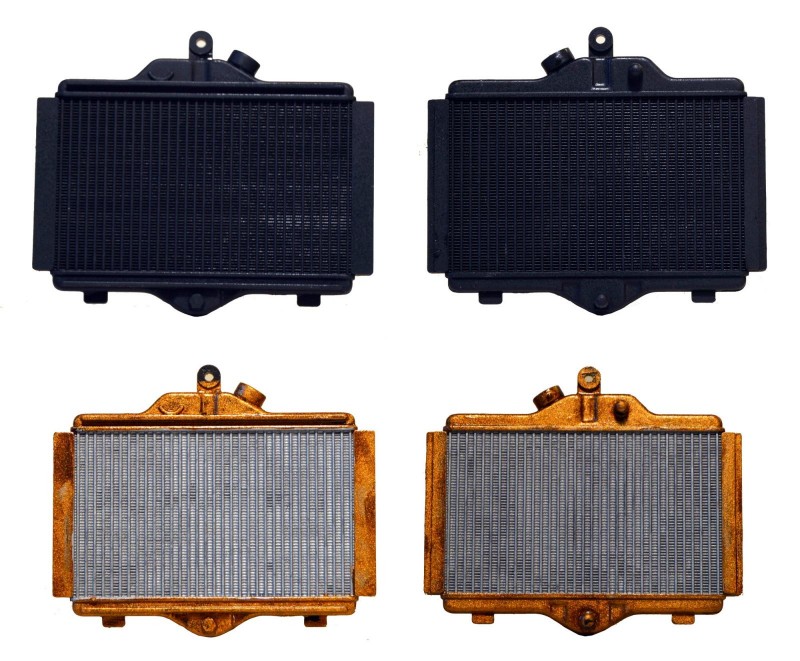
This is the upper engine assembly. The spark plugs MUST be set in place at this time as you will not have access to them once it is set into the frame. I had to make sure that they stayed glued in place towards the center of each one so the addition of the plug wires later would not be an issue. Also pictured is the radiator assembly before installation.
Here's the entire engine assembly in the frame. The addition of the upper assembly is a VERY tight fit and care must be taken in it's placement. I had one small part pop off that won't be an issue to get back in.
In a some of these photos you can see a few wire feeds for lighting. I had to add thees a lot earlier on this model due to the fact that the lights that I will be adding are embedded in the fairing, trunk, and saddlebags. This should provide for a lot less exposed wires that I will need to hide.
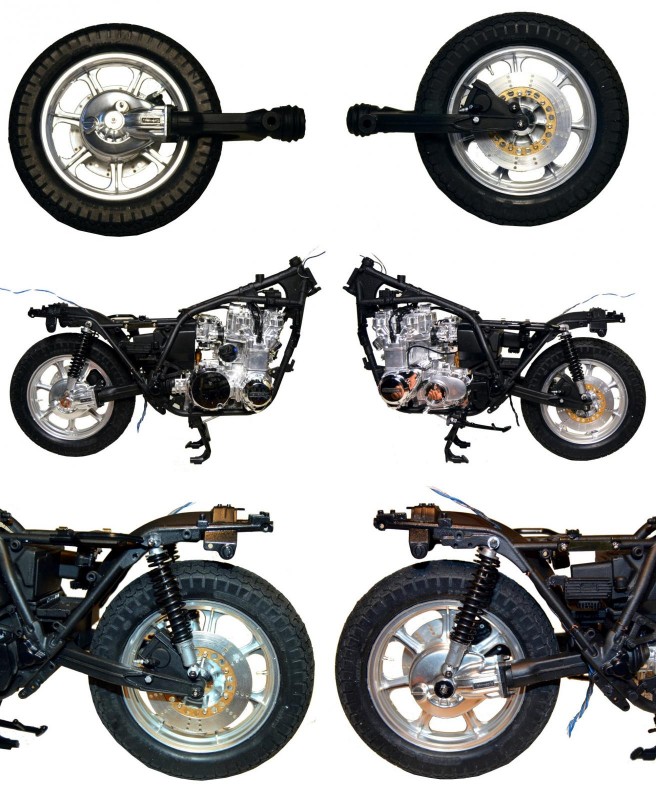
Assembly of the rear wheel and springs. Since this is a shaft drive motorcycle you won't see the standard sprockets. The wheel assembly went together with little effort. But you must pay close attention to the instructions as there are some small inner wheel parts that must go in before completing this step. The same holds true for the springs. The long screw must be inside and tight before adding the spring. It would also be advisable to do any painting before completion.
These are closeups of the rear wheel and springs after assembly. This is where those missing parts would make a difference if one didn't follow the instructions in the earlier steps. The nuts and screws are used to hold the wheels and springs in place.
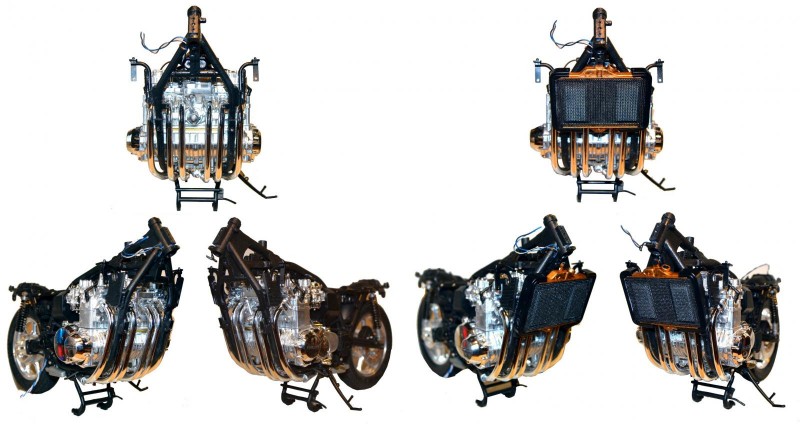
This is the header pipe assembly. There are six of them and they must be installed in a specific order. I found that working on each side from the outer pipe to the inside was the best way to do this. They line up quite nicely but should be held in place for a few minutes, one by one, until the glue has set.
The right photo show the addition of the radiator assembly. The fan is behind this and, although it does spin, it's in one of those hard to see areas so it's not easily viewed. The coolant hoses fit very tight and must be cut exactly to the suggested size. Anything bigger and this assembly would not fit correctly.
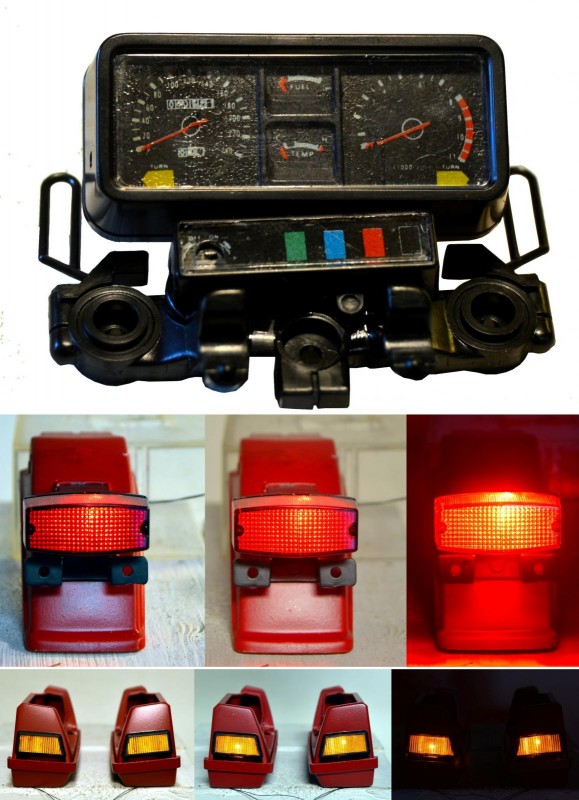
The speedometer cluster is almost complete in this photo. Decals were a bit tricky to get placed correctly as they are put on long before the final assembly.
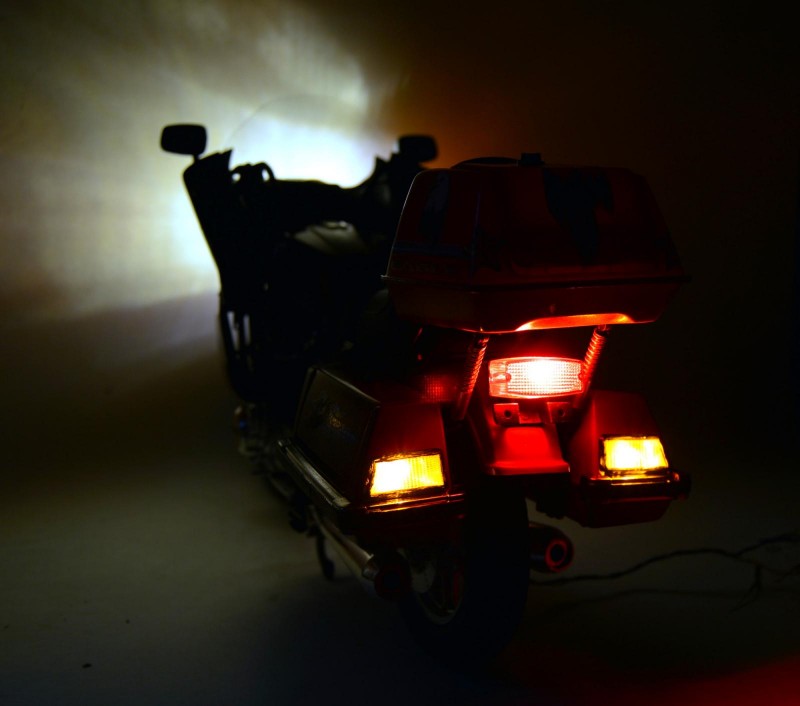
Also shown is the rear brake light and turn signals. All operating and I have even added flashing turn signals for this one. The photos, from left to right,are full light, partial light, and total darkness.
The LED's that are used here are the 0402 type SMD. These are easily obtained through quite a few vendors. Installation is relatively simple. The real trick comes in when hiding the wires from direct viewing.
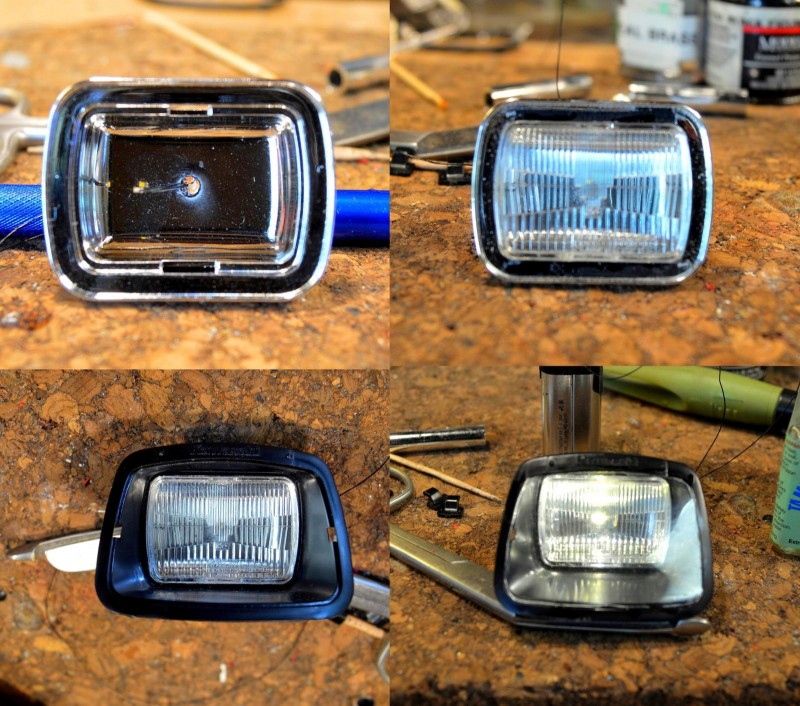
This is the construction of the main headlight. In the first photo you can make out the 0402 SMD that I used. A hole was drilled through the chrome bucket at the center. Then the light was passed through this and attached in place by a drop of CA glue ONLY on the wires.The other photos shot the headlight through various stages of the build. The last photo is with the light on after being completely assembled.
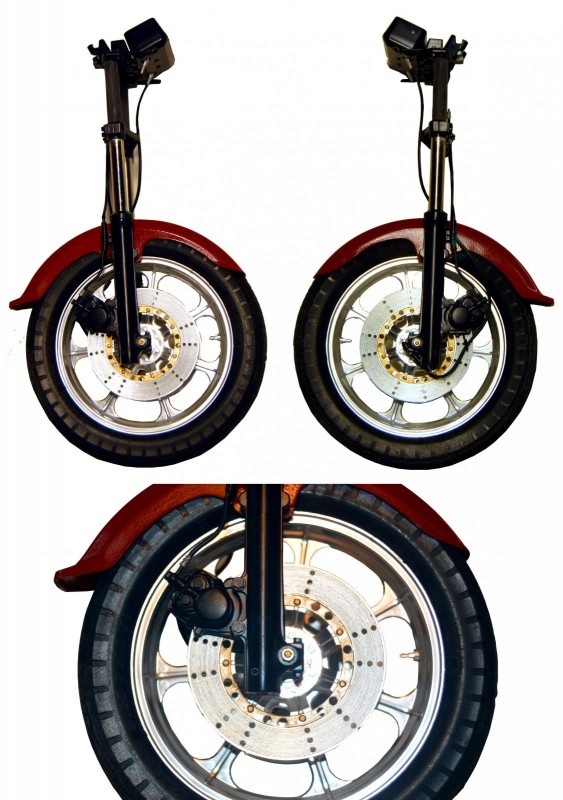
These photos show the front fork assembly. The detail here is quite nice and I have provided a close up shot in the first photo of some of that detail.
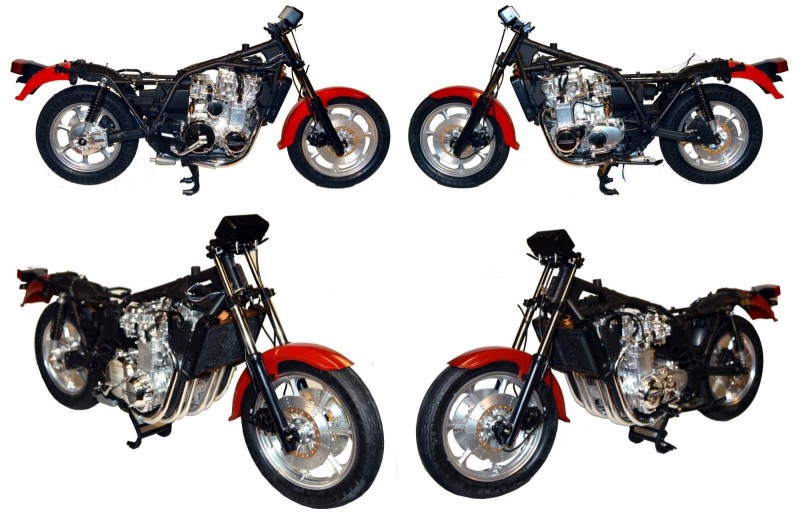
This photo is that "WHEW" moment that comes with these 1/6 scale kits. This is when you finally get to add the front forks and HOPE that you made no mistakes. Why? Because everything here is a VERY tight fit. Mistakes in the sub-assembly will have quite an effect on this part of it.
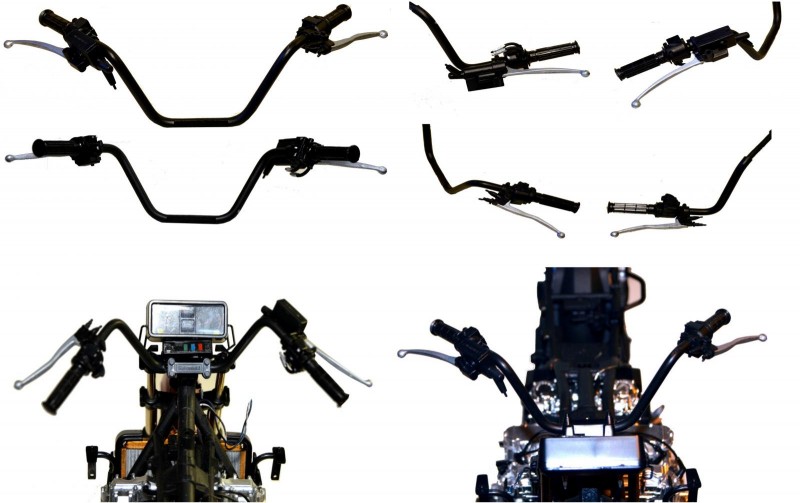
These are various shots of the handlebar assembly. Once again the Tamiya detail comes through. Always quality as is expected on the larger scale kits. I was quite impressed with the way that the small parts went on to the metal handlebar. Much, MUCH better than the way the Harley ones go on.
This is the rear framework for the saddlebags and trunk. Tamiya kept true to the original motorcycle with this as it was added on to the standard KZ1300 and was not designed as a part of the original motorcycle.
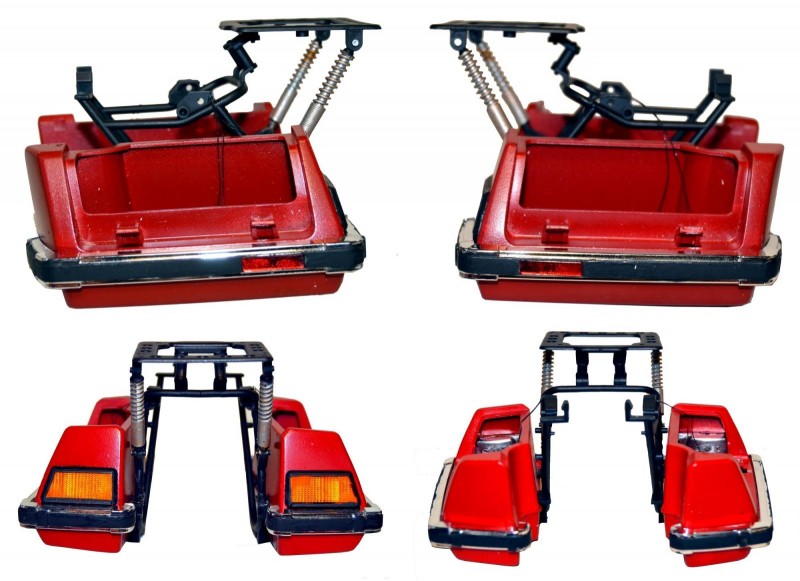
These are the saddlebags after attachment to the framework. Still great attention to detail and true to the original motorcycle.
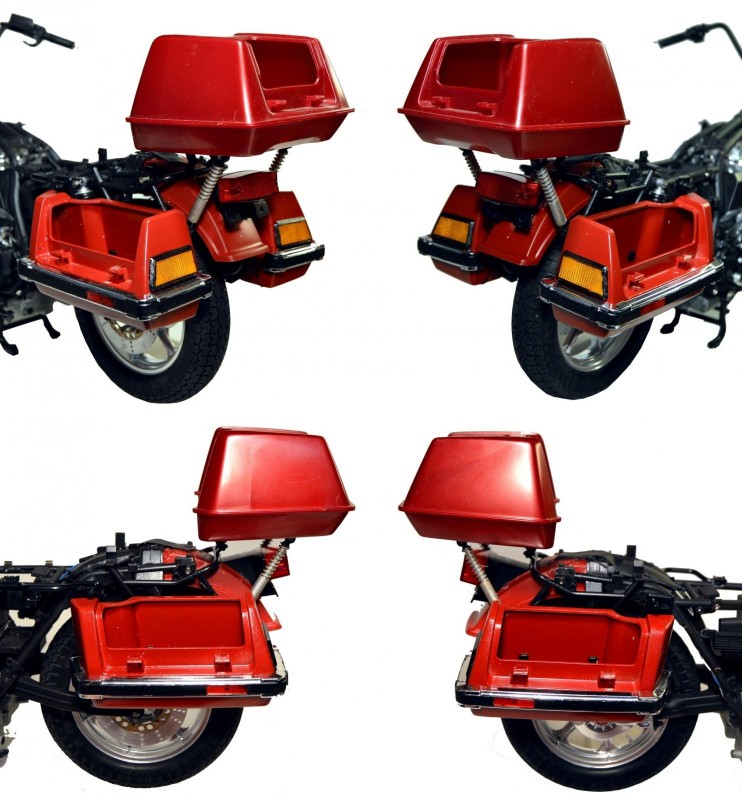
This shows the final mounting of the saddlebags and the test fit of the trunk. There was a slight problem with the fitting of this since I have run the wires for the lighting. It's such a close fit that some nominal trimming of unseen areas was necessary to get the bags to seat correctly.
Fairing lighting test before installation.
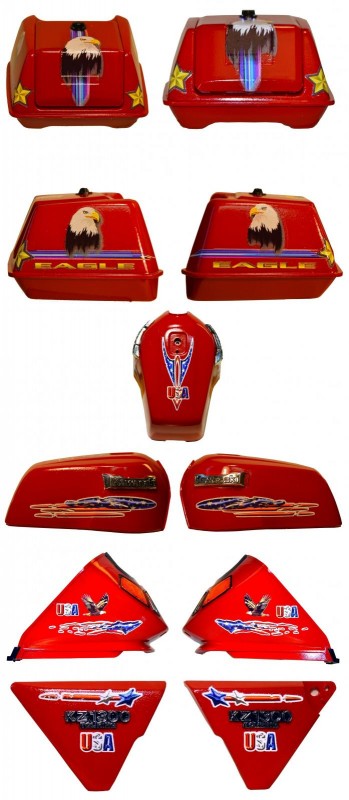
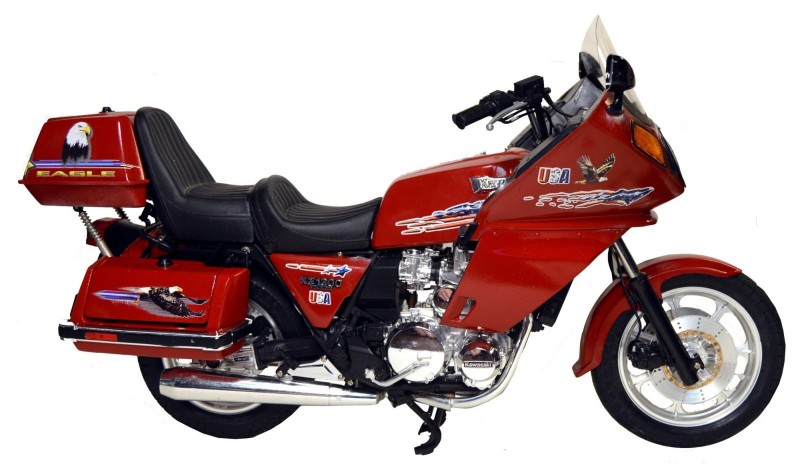
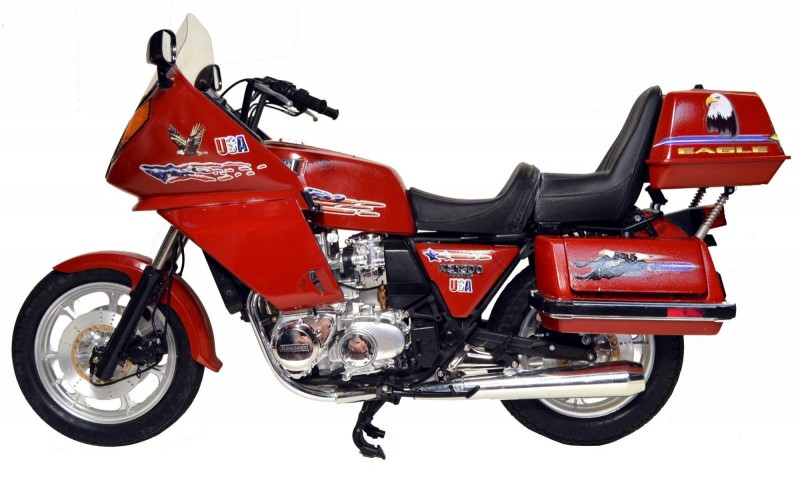
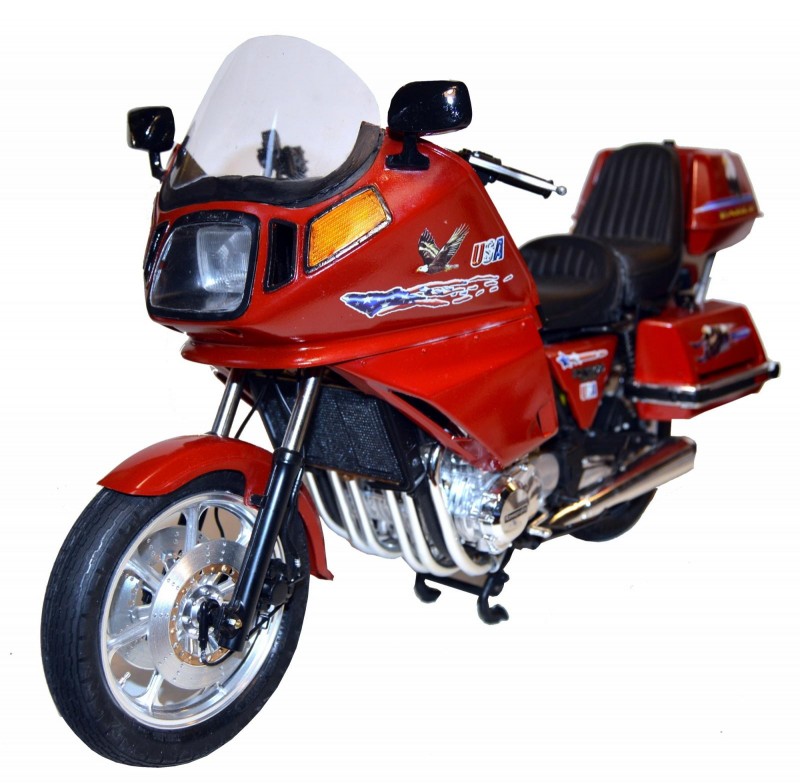
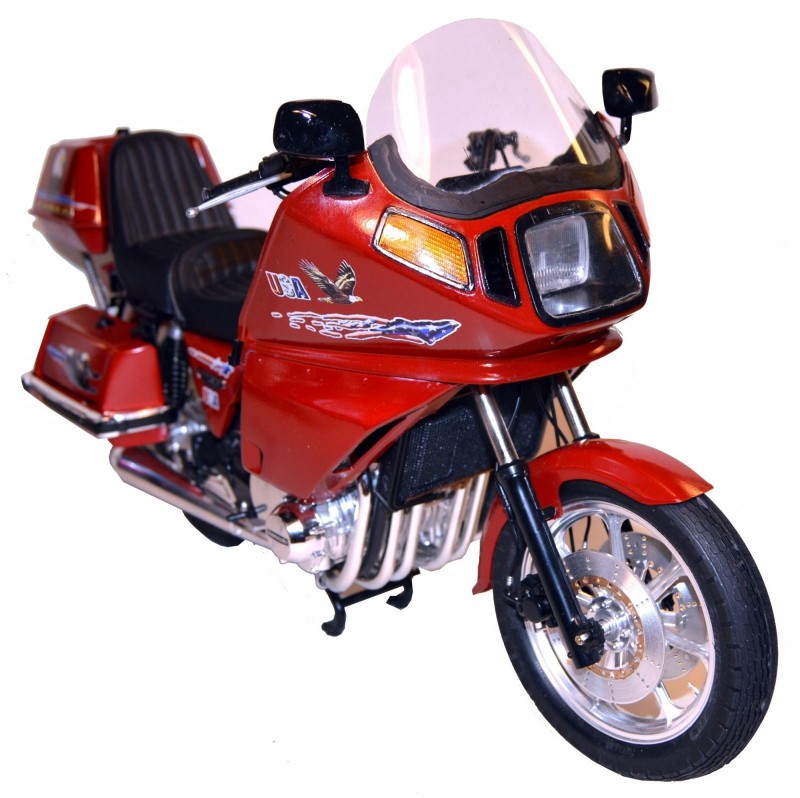
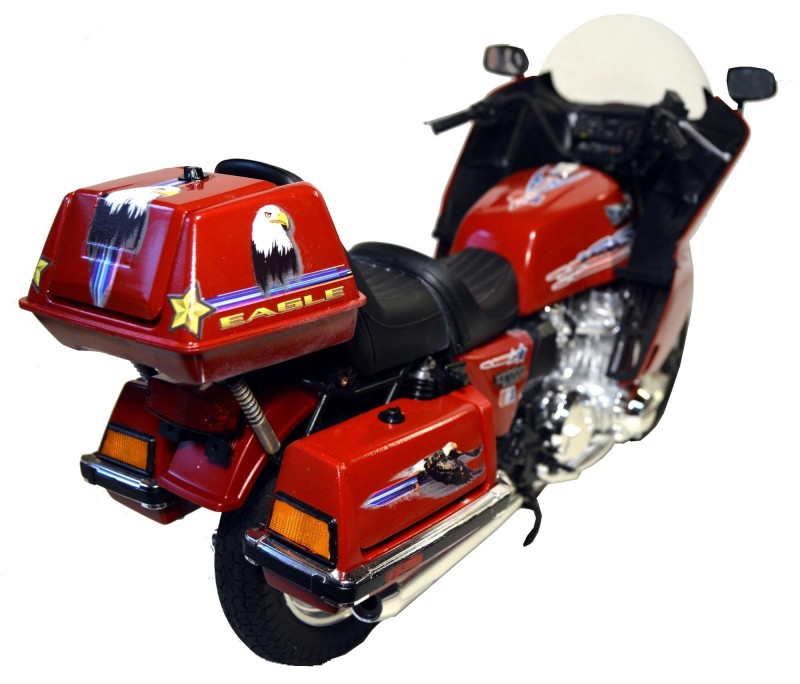
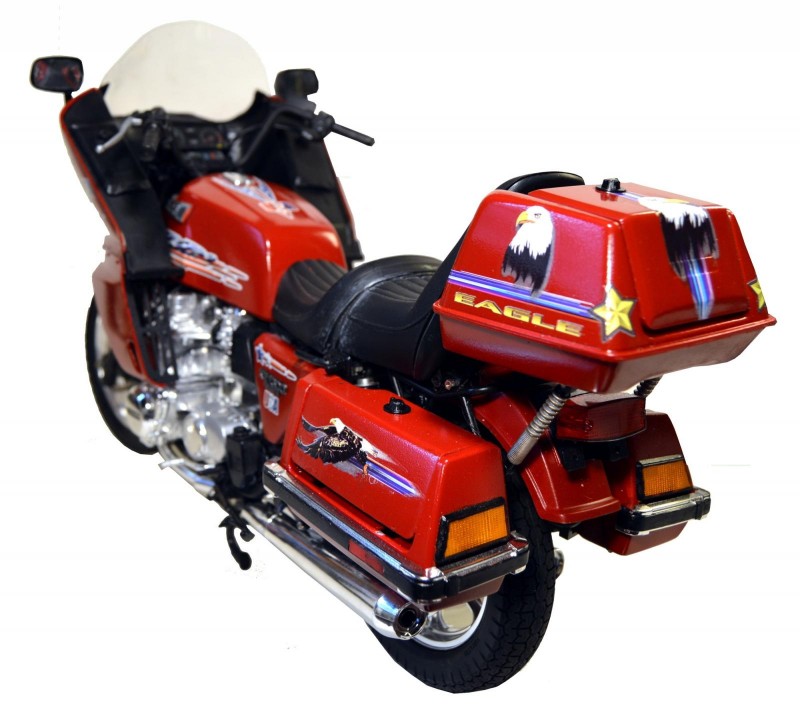
Unfortunately, the decals that came with this kit were unusable. Due to the age they had yellowed and cracked. These are rub-on decals that are usually used for the pine cars. I went with this theme due to the fact that this motorcycle was manufactured at the Kawasaki plane in Lincoln, Nebraska.
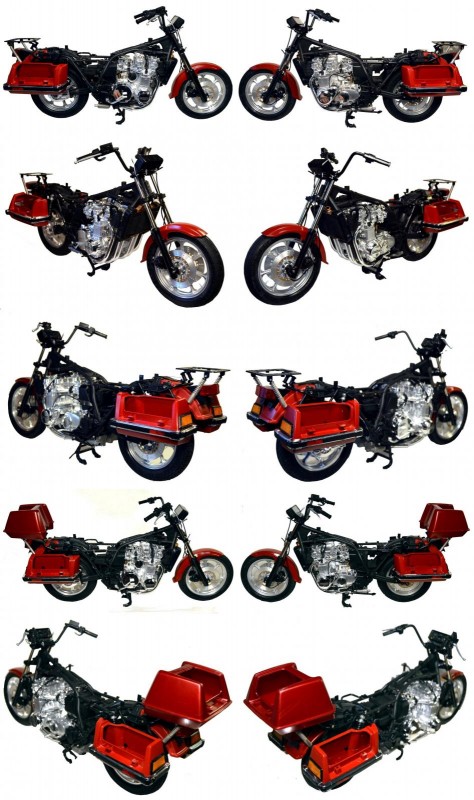
These are the photos showing the completed model. Including the lights in operation. The signals do, in fact, have flashing capabilities but that cannot be shown in a static picture.
As with all of the Tamiya models that I have built this one was am amazing build. This was my first non-Harley in the 1/6 scale models. I hope it's not going to be the last.
If you have ANY questions please feel free to ask. I'll be more than happy to answer.




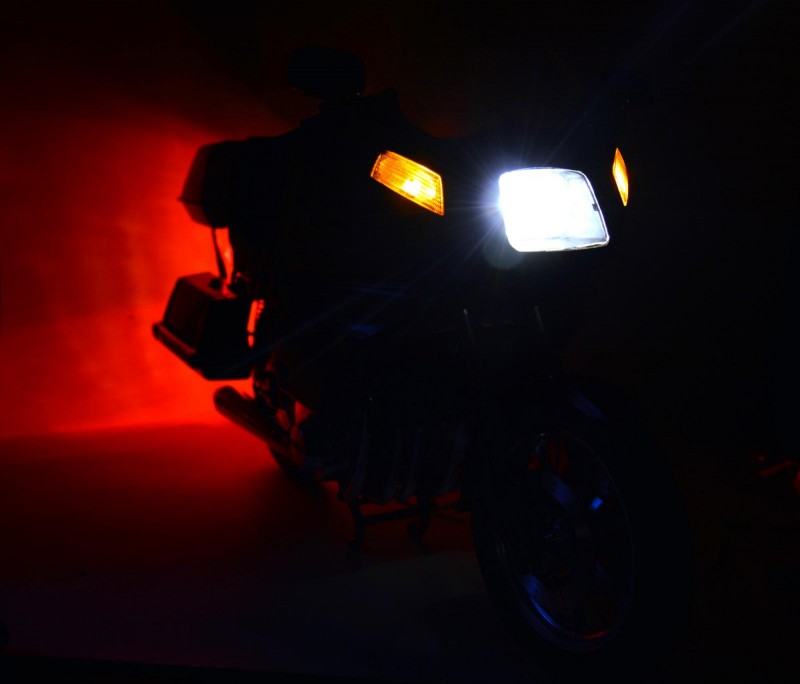

Another fantastic build...the nighttime photos with the lights on looks very realistic. Your skills and attention to the little details amazes me. Adding the lights is like icing on a cake ! Well done Sir !
I really like it...
Thank you. I strive to get as close to "real" as I can.
A true craftsman is what you are, my friend. The bikes you build are simply amazing! I think "WOW" about covers it. LOL
Thanks! That's appreciated!
The big Tamiya kits are amazing, but the largest I have is the Datsun 240Z. Might have to find a REALLY big kit of a bike in 1/6! I didn't know Kawasaki even made a 6 cylinder bike! (I did see a Honda CBX in the bike lot at EAA last year though! That engine was huge!)
1/6 scale bikes by Tamiya are a great build. Even the older kits that are now out of production are amazingly detailed.
Yes, Kawasaki did a 6 cylinder motorcycle. Unfortunately, when they added all of the extras to make it into a touring bike they didn't take in to account that all of that extra stuff, ((trunk, saddlebags, fairing)), would add a LOT of weight. Making the bike top heavy. A friend of mine had one and he let me TRY to ride it. Hard for me to even get off the kickstand. Suzuki and Yamaha also tried to jump in to the touring bikes much too soon. Following on the success of the Honda GoldWing. They were all good bikes but most with the lack of engineering to make them successful at that time.
Wow, Harry, you really get the most out of these big Tamiya bike kits, this latest one is really something else, and it's good to see you building something other than a Harley! I see that Tamiya have just released a Honda Africa twin in this scale...
Yes, I saw that the Africa Twin is now available. Looking to get that one as soon as finances will allow.
Harry, I am not really a Bike Guy, But superb build, wonderful photos and great post - thanks for taking the time and effort,> I'm looking forward to the next one!
I am always looking forward to the "next one" myself! I have NO idea what that could be yet.
Great build, Harry. It looks ... well, real. That's about as good as it gets!
Bravo!
Thank you for that compliment!
Nicely done! I'm not a bike guy either, but I did own a Honda CB650 Custom for awhile, and seeing your build reminds me of those youthful days...
Glad I could stir some, hopefully, good memories!
Amazingly realistic!
Thank you. "Realistic" is one of the best compliments that I could receive!
Congratulations on that one mate! Looks the business!
The article is amazing as well, very professionally put together!
Thank you. I am not a writer by any stretch of the imagination. I try to write so other modelers can understand. Glad you enjoyed it!
Hello Harry,
Master "Motor" modeler. This model should go straight to the museum.
Regards, Dirk / The Netherlands.
Thank you. I don't know of too many museums that would be willing to accept this. But I really appreciate the compliment!
Seriously I thought that you were posting reference pics of the real thing to your build. Its very very realistic looking. You know where I can find an 09 kawasaki vulcan classic? Seems like you build lots of bike models. I know tamiya makes superior stuff, but theres nothing for me to match my bike
I have not seen anything like you describe available from any manufacturer. I am sure that I would have seen one someplace. The closest I have seen is the Yamaha Road Star model in 1/12 scale if that's any help to you. ((but I doubt it)...
And, yes, I know bikes, both real and models. Thanks for that compliment, I really appreciate it.