Custom Republic Marine Star Wars clone trooper
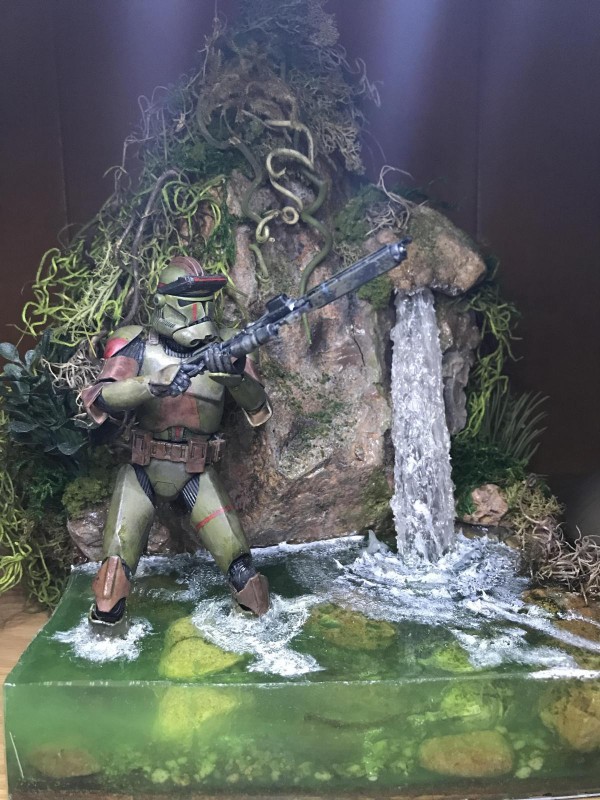
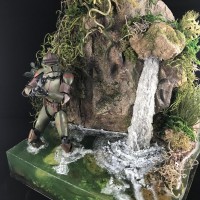
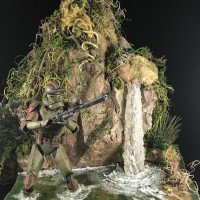
Where to start with this build? Bandai 1/12 Star Wars Clone Trooper. Started off trying to do something unique with the paint scheme did some research and my goodness there are tons of different variations people have come up with! It's almost it's own sub culture in the Star Wars universe these clone troopers and their different units and unique markings. So as I dug deeper I wanted to know if this clone armed forces had a Marine Corps, they sure did but in my opinion was lacking in imagination! The “Interglactic Marines” were no more than the Snow Troopers from The Empire Strikes Back but with purple helmets and purple sleeves! I'm sorry if purple is a close and dear color of yours and I know purple was a revered color in the Roman Empire but I will be damned if in my project a Republic Marine clone trooper has purple as a main color! This is an older project done last summer and boy did I learn a lot about 2 part epoxy resin! I've rambled enough let me know what you great modelers think!


Nice effect(s) you've achieved there, my friend. Good-lookin' build - I like it.
@craigindaytona, Thank you sir!
Very nice job here. Bravo!
@jamesb, Thanks , greatly appreciated sir!
Absolutely oustanding work!
Those water effects are simply beautiful and certainly required a lot of work to achieve!
I only worked with epoxy resin once many years ago, but my piece of a river is flat, no moving waters.
How did you do the cascade and that amazing effect of the water falling?!
Bravo!
Cheers!
Dolf
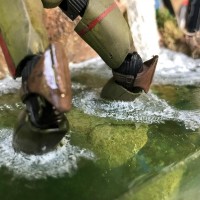
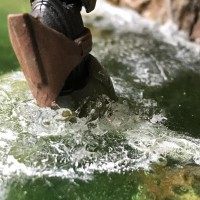
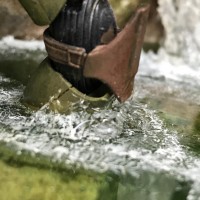
@dolfdylan, Thank you for your kind words sir! For the splashes, I used clear silicone caulking (you can get at the hardware store) and a toothpick, for the ripples my daughter had some water effects in a tiny tub from a diorama kit she was given years ago, I cracked it open and found it was still usable once it was dried I just dry brushed the ripples with flat white (it dries clear). For the waterfall, I turned to the clear silicone caulking again and some very thin clear plastic sheets (originally used to protect paper or magazines in binders) put down the silicone and modified with a toothpick, once dry I simply shaped to a more cylinder shape instead of flat so when walking around the dio the water wouldn't simply be flat and easy to see the plastic sheet. The one thing with the clear silicone caulking is your going to have to add some sort of gloss once it is dry. Because when you first lay it down it's brilliant, but as it dries it dulls (it doesn't get milky though just dull) I added a photo to show the silicone caulking after about 20 min of laying it down on the plastic sheet. This is just a brief explanation. If you have further questions I'll be happy to answer them!
1 attached image. Click to enlarge.
Hi Travis! @Snaps0351
Thank you very much for the excellent and detailed info! Very much appreciated!
It's really a superb effect that you achieved in there, and really ingenious how you did it!
Once again, congratulations for this amazing piece of art! Brilliant!
Cheers!
Dolf
I am not familiar with this type of trooper Travis, but fabulous work!
The dio and the water is superb - your attention is drawn away from the Trooper (which is great in its own right)!
Fantastic all round.
@davem, Thank you, sir, I appreciate the compliment! The trooper is from the prequel Star Wars movies in episodes II and III, I think. In the movies, they're of course all white but for my project, I wanted something at least hinting at being tactical. This is my own paint and color scheme, in fact, I based it off the colors when I was in the Marines except for the red (I had to keep something absurd and Star Wars like). Glad you like it and thanks again!
Oorah! Looks great, nice swamp!
@roofrat, Thank you sir and Semper Fi!
Fabulous work Travis.
And the geeks shall inherit the earth...
Great diorama, with the water. Well done, Travis.
@tecko, Thank you sir!
Great work on the diorama, and I will chime in with everyone else and say the water effects are superb! I have a question (as I am working on a similar water design, but not star wars )
)
what did you use to contain the water while the resin cured? I want to do something similar where you can see through the sides of the resin into the underwater section, so basically a square of clear resin similar to what you have done here. I'm just unsure how to create the form around it, so that when the resin is done curing I can pull it away and have the sides be clear.
Thanks!
@feroc, Thank you sir, for the kind words! Securing that resin is still a work in progress for me to find a sure-fire absolute procedure. I simply lucked out on this project. My wife had a clear plastic box that contained, I think either Christmas ornaments or a candle of some sort that she bought from Hobby Lobby. I simply reinforced the corners with hot glue on the outside and placed the diorama in the box and poured in the resin. One caution I do want to mention when I poured the resin I did it in one go all 16 oz I believe it was and it got extremely hot! I mean ouch that is hot to the touch hot, it was steaming and I was afraid it was going to melt the sides of the plastic container and the model itself! Fortunately, it didn't but thought I would share that experience so you don't have to go through that anxiety attack
thank you very much for the explanation @Travis
I have learned (the hard way) about pouring too much resin in at one time, but that was a good reminder! I have one very-melted model as a result!
Were you able to then just peel away the clear plastic box after the resin had cured? I'm thinking the resin would hold onto that, but sounds like I am wrong?
@feroc, Yeah it actually peels off pretty easy with just a touch of elbow grease. I'm horrible at chemistry but it appears that almost any kind of clear plastic can be easily removed. If your project is small I suggest the clear plastic sleeves used to put paper in three-ring binders. That plastic just simply peels off the resin. On my very first project, I cut up strips and used them for the border, securing them with just Tamiya masking tape for the sides and bottom. But I also only poured not even 1/2 inch of resin. This is when I thought this isn't so hard and got cocky tried more complex designs more resin and I was horribly wrong! The thin plastic sheets are great for little stuff, they can't hold back deep pours, why I thought they could, because I thought I had mastered resin and again sadly mistaken! Like I stated in my earlier post I'm still learning what is the best damming procedures for stuff that doesn't have clean straight edges.
@Travis - thank you for the detailed reply and for being so helpful! I may give the clear sleeve idea a try. I was actually hoping to do a cylinder type shape, but that may be a bit ambitious. Unless I can locate the perfect size, I would worry that using a clear sheet to make the form would result in a seam line. I'm probably overthinking it. It is really great to know it will just peel right off.
Sounds like I need to do a bit of trial and error.
again, really appreciate the tips and advice - thank you!
@feroc, My pleasure sir glad I could help if it's a cylinder then definitely check out Hobby Lobby if you're in the States. The tubes that Christmas ornaments come in could help you out and can you believe they have already started putting Christmas decorations out?!
The water effects are totally convincing and realistic. The figures is good too, but the base is what makes this click.
@tcinla, Thank you sir!
Love it
The figure is good, but the complete diorama is great
Water effects are stunning
This looks really nice. We'll done.
@tiking, Thank you sir, greatly appreciated!
@mireson, Thanks man, glad you like it!
Excellent work! Nice tension and movement caught by the dio and the pose of the Marine (and I'm with you - purple is no color for a Marine, except for the medal...)
@gkittinger, Thank you sir! I also agree with you Purple Heart is the only purple tolerated and thanks again for the feedback!