Aluminum Foil
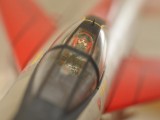
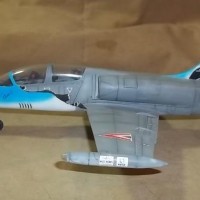
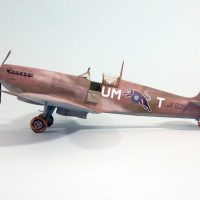
A few pictures of my 1/32 Trumpeter English Electric F1A Lightning and 1/48
Monogram F-86D Dog Sabre, both in foil. The Lightning is my 2nd foil job and the Sabre is the 4th and is a proof of concept to see if foil can be used in smaller scales. I also did an
RB-57F with the long wings and a 1/100? Aurora 1955 F-104.
I toiled for 15 years to master a Natural Metal Finish with every type of product I could find and all except the foil looked like what it was Silver Paint.
Never again will I do a NMF except in foil as nothing looks like metal than metal...
The secret is put the adhesive (Micro-Scale Bare Metal Foil Adhesive) on the model ...NOT...the foil and work 1 panel at a time and grain it with 4/0 steel wool, sandpaper
to put a grain in the foil.
All aircraft aluminum panels were stamped or cut out and some put thru rollers to give them a curve which put other GRAINS and machine marks on them.
Tough to do on a painted surface, but I won't say impossible, but I've never seen it and would love to see a painted NMF match a foiled one.
Takes a little more time, but not really much for the results you can achieve.
Please if anyone has any questions, I'll be more than happy to try answering them.
Post a few more pictures later
Thanks
Jack
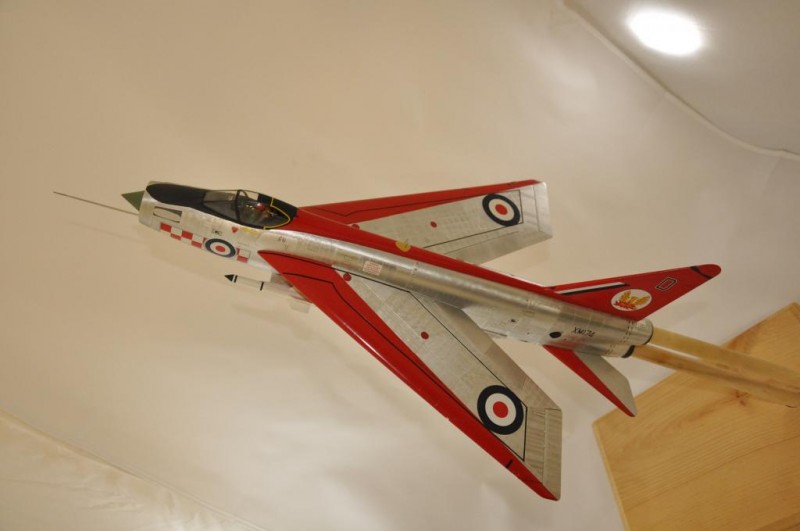

This is very impressive and inspiring although I shall always stay with my acrylic metals. Its just because it would take me years to learn that technique and I don't have that much time left on this planet.
Thank You for the kind words Paul,
It is not difficult at all and the first foil job was on a 21st Century Toy P-47 to figure out some things and to see if the decals for the Lightning were any good. Paul the Lightning is my second attempt at foil.
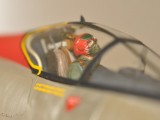
Great work with the foil, Jack...and an outstanding paint job on the [pilot] avatar (wish I could do as well painting figures).
Thank You Craig, I like my A/C in the "AIR" and just keep working on painting pilots.
Jack
Amazing! Great work there Jack.
Thank You Gregor, I appreciate it
Welcome onboard, Jack. This looks awesome, thanks for sharing.
Thank You Editor,
Only the name has been changed to protect the ?
It's Martin. At your service 🙂
Thank You Martin
I would post some of my F-84 pics but they are in photobucket and can't figure out how to get them here.
I'll take some more later and try again
Can't say I blame you for not wanting to paint NMF anymore. If seen other examples of using foil on aircraft but yours is by far the best. I use foil on my car models & know it takes practice & a steady to get a good application. Also, like the NMF paint it shows everything underneath so prep is critical.
Do you trim your panels on the model?
Hi Al Yes I apply the adhesive to the panel, "grain" it and then t
trim around the panel. Some "sheet" foil an area on the model,but I find better results from doing 1 panel at a time. Aircraft are built from panels "flying in close formation" and have a personality of their own.
Thank You
Interesting work, Jack.
I still use Alclad when possible. I've tried the foil with OK results, but find its a problem to get variation in metalic panel tones, which I like to see. Even real panels show variations depending on the way light falls across them, and this is easier (for me) to replicate using lacquers.
I find if the model is sprayed with Alclad's black under-gloss, followed by metal lacquer finishes the results are consistent and reliable.
That said, your EE Lightning here is particularly well-rendered.
Thank You Rob, If you could rotate the Lightning ( or any of them) 360 you would see all the variations in the foil naturally without being "forced" color changes. The foil acts like a "hologram" when you change it's relative position to your eye.
It's difficult to show in photos unless you rotate and photo it thru
Nice job Jack, I am with Rob on the subject of NMF`s. I am about to try out Alcad having heard a lot about it on this and other forums.
Thank You Simon, I would say DON'T, but then you would be suspicious that I 'm trying to entice you to the "DARK SIDE" and I have to be subtle. Did I write that? I try to point out that foiling is not hard, it is another finishing technique in your arsenal that will make you wonder why you wasted time learning and smelling Alclad and all it's steps when you could have learned foiling
Good luck with that, Simon.
I'd advise before painting to ensure the surfaces are wiped with a dust-collector type of wipe (as used in home decorating), and after Alclad black gloss coat (acrylic will also work but not enamel as the latter will craze when the lacquer hits it), the top coats should be laid on lightly rather than a single heavy coat. You can see the finish build up even as you work (it dries almost instantly, so no break in application time really.
(Jack, apologies for hijacking your thread!)
Rob I have you right where I want you HEHEHE!
YOU wrote "Good luck with that, Simon" and took the words right out of my mouth that I couldn't say, cause everyone would think I was being unfair to painted nmf.
I'm always recruiting new members to the "Dark Side" as I have on other model sites and if I get 1 convert then my job is done.
I'm like a thorn, I get under your skin and you think about it all the time, til you have to do something about it. HEHEHE!
Very impressive finish. I agree with Jack that other than foil, all painted models don't have that certain "look" when attempting to achieve the NMF. Still, some builders on this site have accomplished miracles with their Alcad and buffable paint. On the other hand foil can be more than time consuming; it can look "toyish" if the foil doesn't match the panels and on some kits the panels are not well defined. Still an outstanding job on these two models, I can't wait to give it a go on my B-36.
Question: do you ever use Bare metal foil?
Thank You Mike, I agree that I've also seen really nice work with the "metal" paints, but how much time did thy spend to create that finish in comparison to foiling it? My point is that the two are relatively close in time spent to get your finish product. I spend time foiling each panel then focus on the whole where others spend time painting the whole and then focus on the
panels. Metal is metal and paint is paint and there ain't no way around that.
Mike the only time I use BMF is masking canopies or trim on cars
as it is too thin and it has the adhesive on it.
The Microscale Foil Adhesive says to put the adhesive on the foil, but since I can't follow directions I put it on the model 1 panel at a time and then work the panel. No messy adhesive on the panels around where I'm working, it is more precise and clean. The adhesive will clean up with water when it is wet, but will take mineral spirits to take off when dry. I have helped a couple of others on another site to convert to the "Dark Side" and proved it ain't rocket science. i'll shut up now Thanks
WOW Jack That looks Fantastic, i would like to give it a go but to be sure of what to do i would like to see it done first i will check out Utube to see if there are any tutorials on there, one question is it a special foil you buy or is it every day baking foil ?
Thanks for sharing Jack
Beautiful work there mate
Hi Mark, I commented on your 1/72 Lightning yesterday on facebook and somehow found this site and I Thank You for that and the kind words.
I use light and some heavy duty foil from the grocery store. The heavy foil will stretch some and is good on compound curves , but otherwise it's the cheap stuff, It is not really a difficult Process, just takes practice.
The adhesive is made by Microscale and can be found where you find their
decal solutions and the 4/0 steelwool from the hardware store and I'm sure you have an old kit to experiment on. My first was a 21st Century Toy P-47
and the Lightning was the second.
Outstanding work Jack. I've tried using foil in the past,but was never able to develop a way to deal with the wrinkles and cupping that happened when I was working on panels that were both convex and concave such as curved leading edges and conical shapes like drop tanks etc. I tried cutting wedges, etc but then the panel no longer looked like a single piece of metal. Appreciate any advise and techniques you can share on those situations.
Again beautiful models, would love to the them "in the flesh"
Thank You Rick, Drop tanks and wing tips can be a royal pain and some curves can throw you. First you can't be afraid to pull the foil off and start again. I think the key is to think like the manufacture's, in that the parts are made up of multiple parts and have a natural panel line whether the kit folk molded it that way or not. Check your references for these and try to use them. Also sometimes plan a scheme that might eliminate the PITA's is a good way around the problem. Your wedge idea is right on the money and
if you lay the foil down with no adhesive first you can get an idea where the trouble is going to be. If you have to use the wedge method, lay the first piece down and trim it, then take a 1500 or so sand paper or stick and from the middle sand the edge of the foil down REALLY thin, then place the second piece down and do it again til you go around the tank. Once you foil the tank you can blend it with your steelwool.
You can remove some wrinkles with sandpaper. I'v used 600 grit before to remove a wrinkle and blended it. This stuff is tough and will take SOME abuse.
The intake on my 1/32 F-84 baffled my til I put a piece of foil in the palm of my hand and PLUNGE molded a nose ring.
Yes you have to think out side the box and stretch yourself and make mistakes and cuss just like you did when you goofed up that gun stain, exhaust stain, Filters, and all the others we do WHILE WE LEARN.
I can not stress enough that like all the techniques we use, we have to PRACTICE and be willing to make the mistakes to learn. Other wise we might as well build OOB with no paint cause we may screw up.
Thanks Jack, you make some excellent points that I hadn't considered. I know what you mean about practicing, I'm getting that message loud & clear from a vac kit I'm working on.
Yes Sir I know the feeling on the Vac kit, I have a 1/144 c-97 that I 've been toying with as a side build.
We just have to "stretch" ourselves once in a while
Jack,
Your work is extremely impressive and I admire what you have done here and what you are accomplishing. However I must confine my work to the old way of painting. This way I can concentrate my time admiring what you are doing. My compliments. I also like the method you use to display your models. Excellent work
Thank You Frank , I just wanna spread a technique that seems to have a lot of builders intimidated and it's just not that hard to do.
I like my A/C doing what they were designed to do and I don't have to fool with landing gear or the bays...ME LAZY!
Thanks again
Outstanding work! Doing an new boxing of the old Monogram F-104G with raised panel lines, and not sure if I'll get comparable results. I'll scribe it shortly after pigs fly...
Thank You Bryan
I hate to tell you that according to GEICO pigs DO fly, so I guess you better get the scriber out.
If you sand the raised lines down to just visible the foil looks fine, but trimming is the fun part
i like your display stands. did u make them yourself or can they be purchased from a suitable vendor?
Thank You Michael
I buy the wood base at HOB LOB and we have a local plastic supplier that I purchase the acrylic rod from