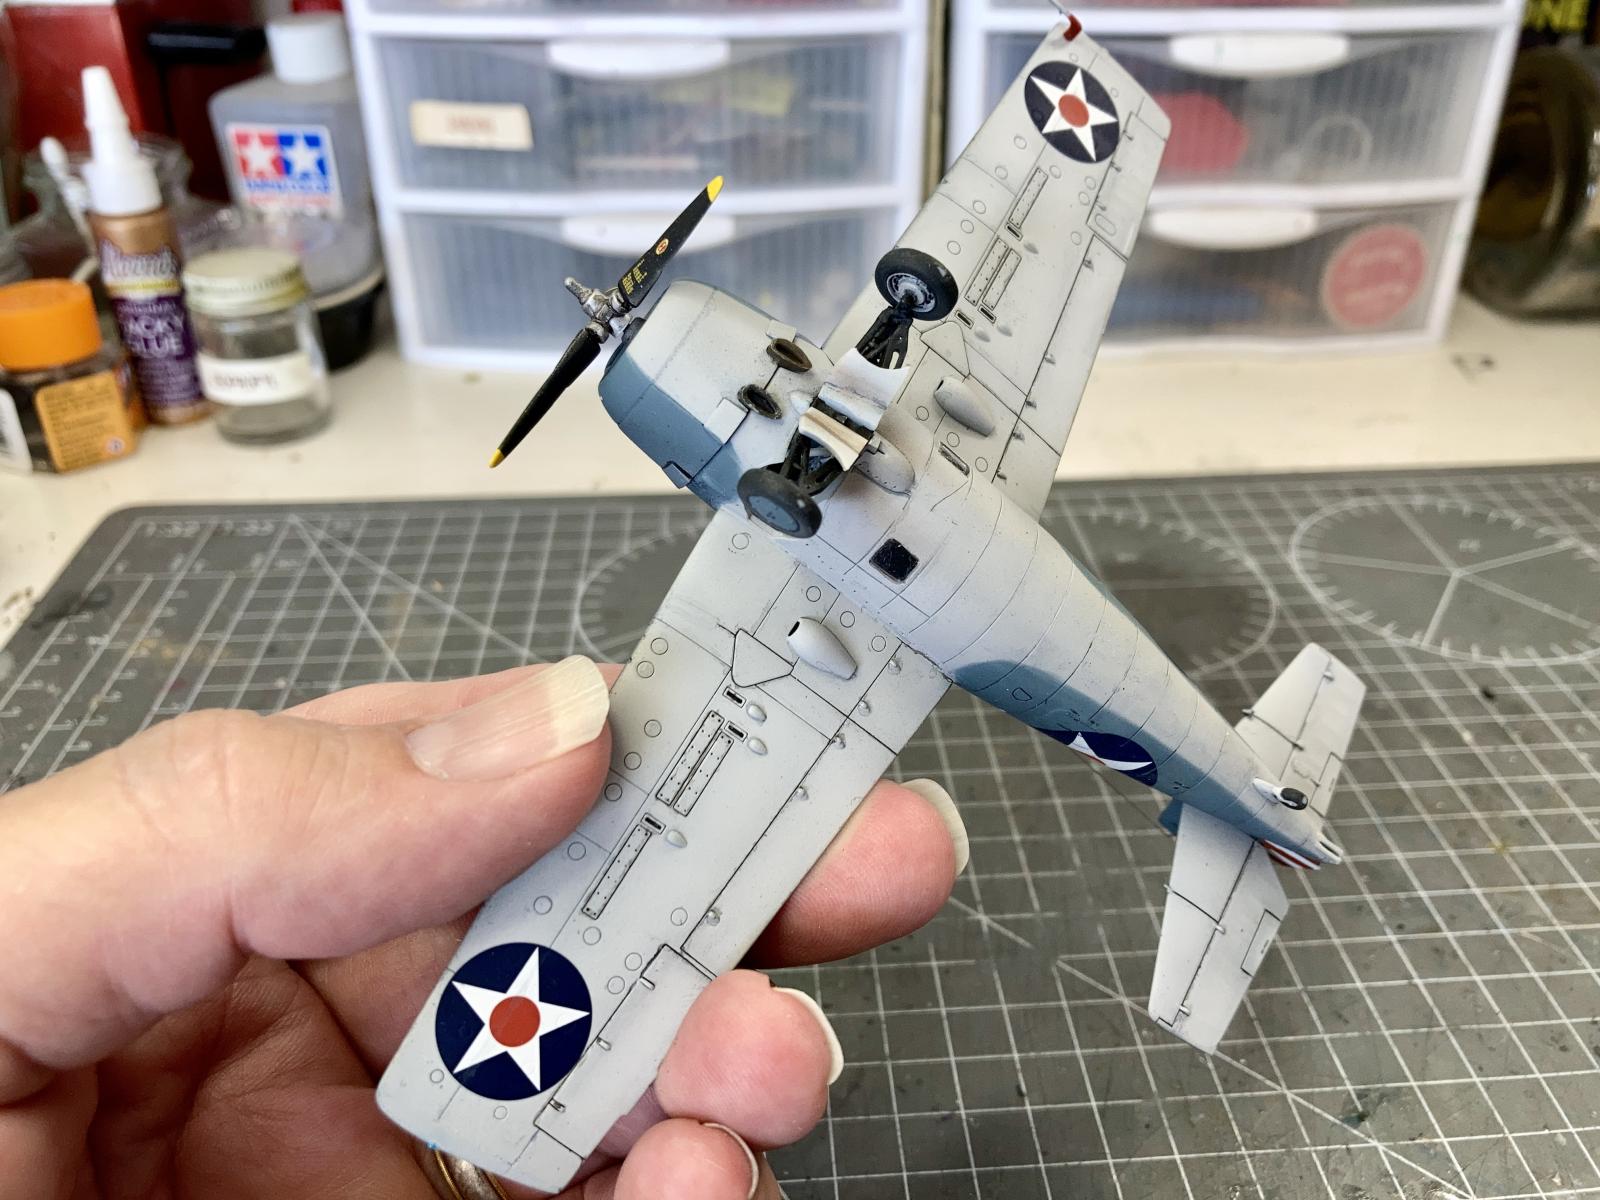
Grumman F4F-4 Wildcat, Airfix 1/72
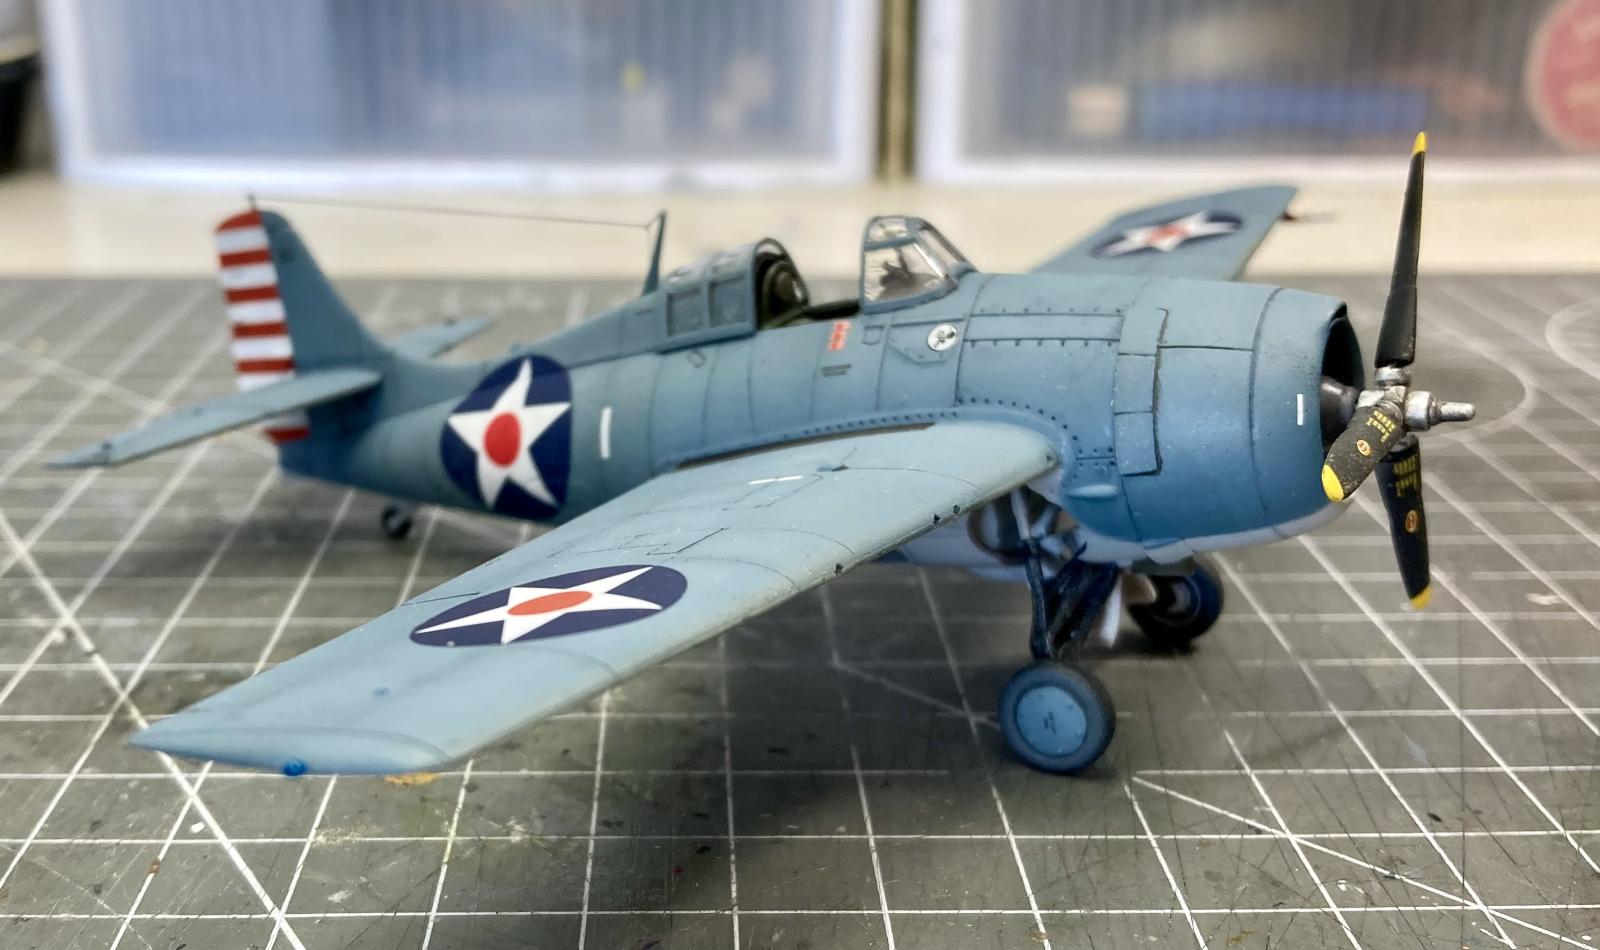
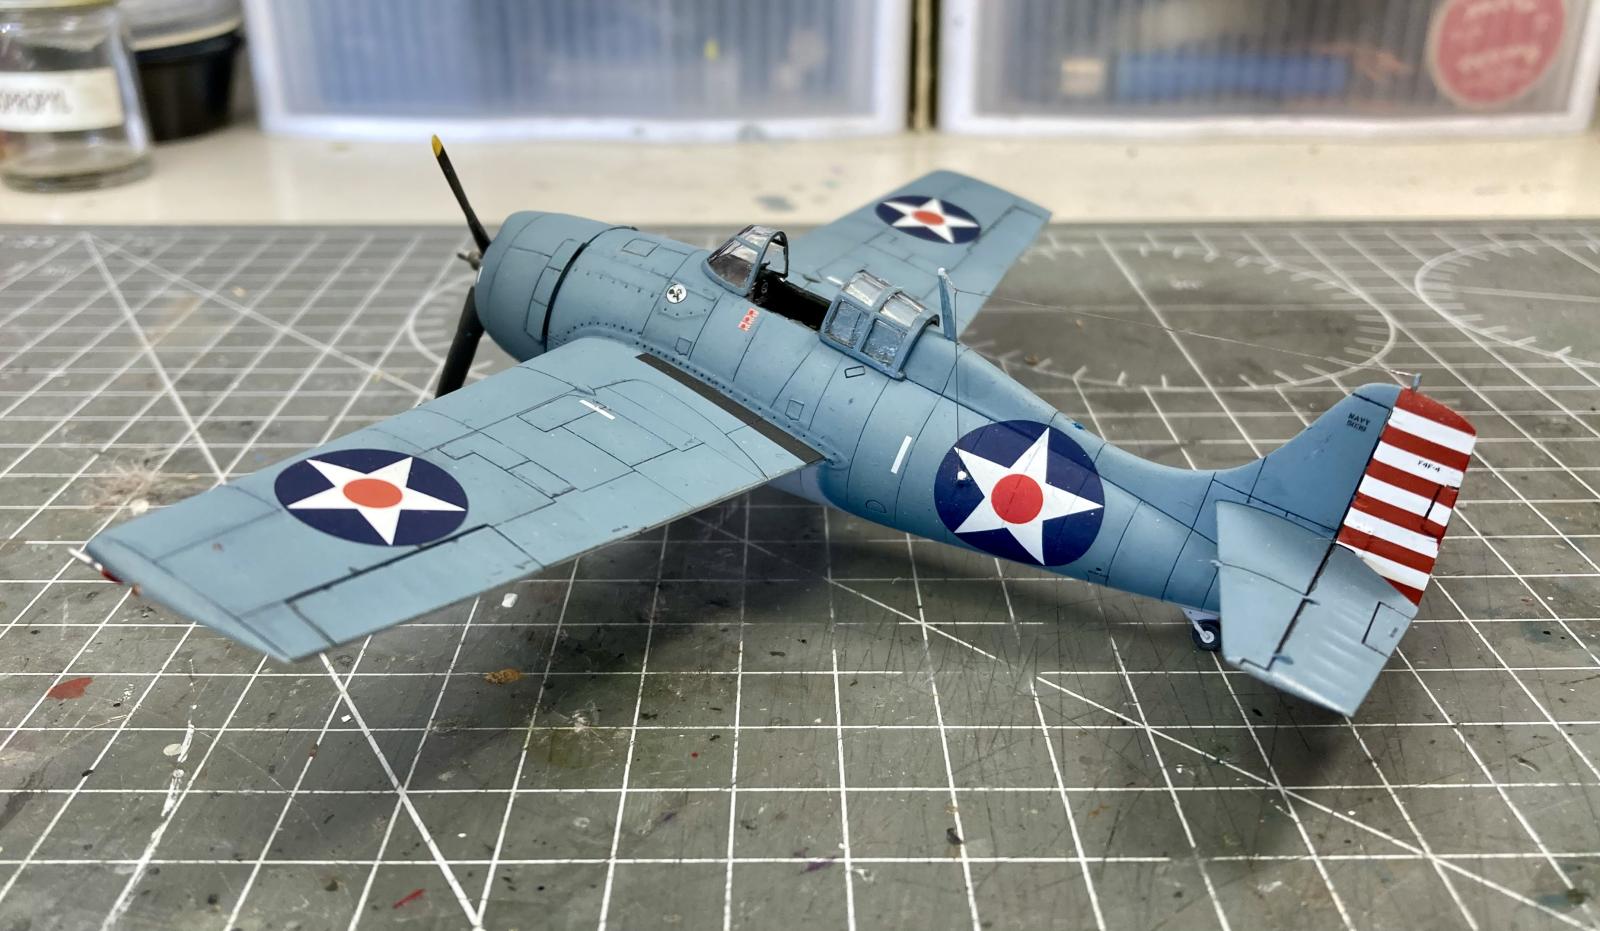
My earliest memory of the Wildcat was seeing Jack Leynwood's classic box art on Revell's original release of their 1/32 kit in the late 60s. It shows a pair of Wildcats led by CDR Jimmy Thatch flying over a frantically maneuvering Japanese carrier. That artwork inspired my build of Airfix's 1/72 scale F4F-4. I wanted to portray CDR Thatch's aircraft (Navy BuNo 5171) from VF-3 as seen at NAS Kaneohe Bay, Hawaii, on 5 May 1942, with the red and white rudder stripes and large fuselage insignias. Fundekals has a sheet for this aircraft and some other interesting Wildcats in 1/32 (FD32012) and 1/48 (FD48034), but not in 1/72. Their website has great photos and historical information for this plane, which Thatch used to down a B5N2 Kate during the Battle of Midway on 4 June, 1942.
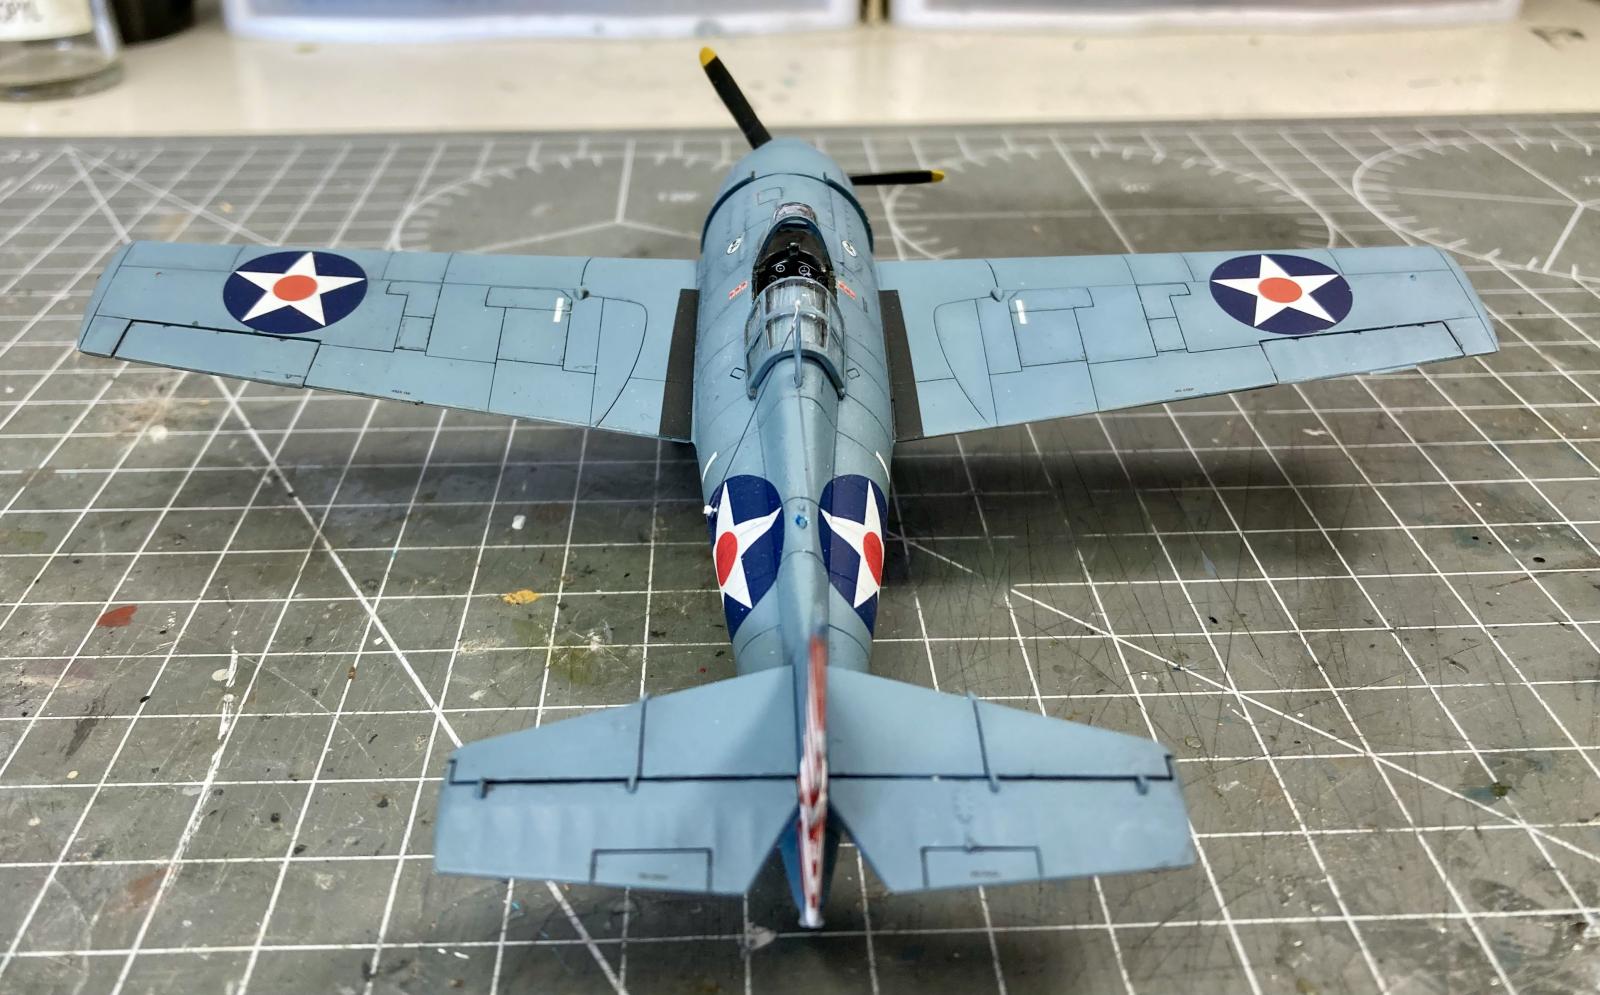
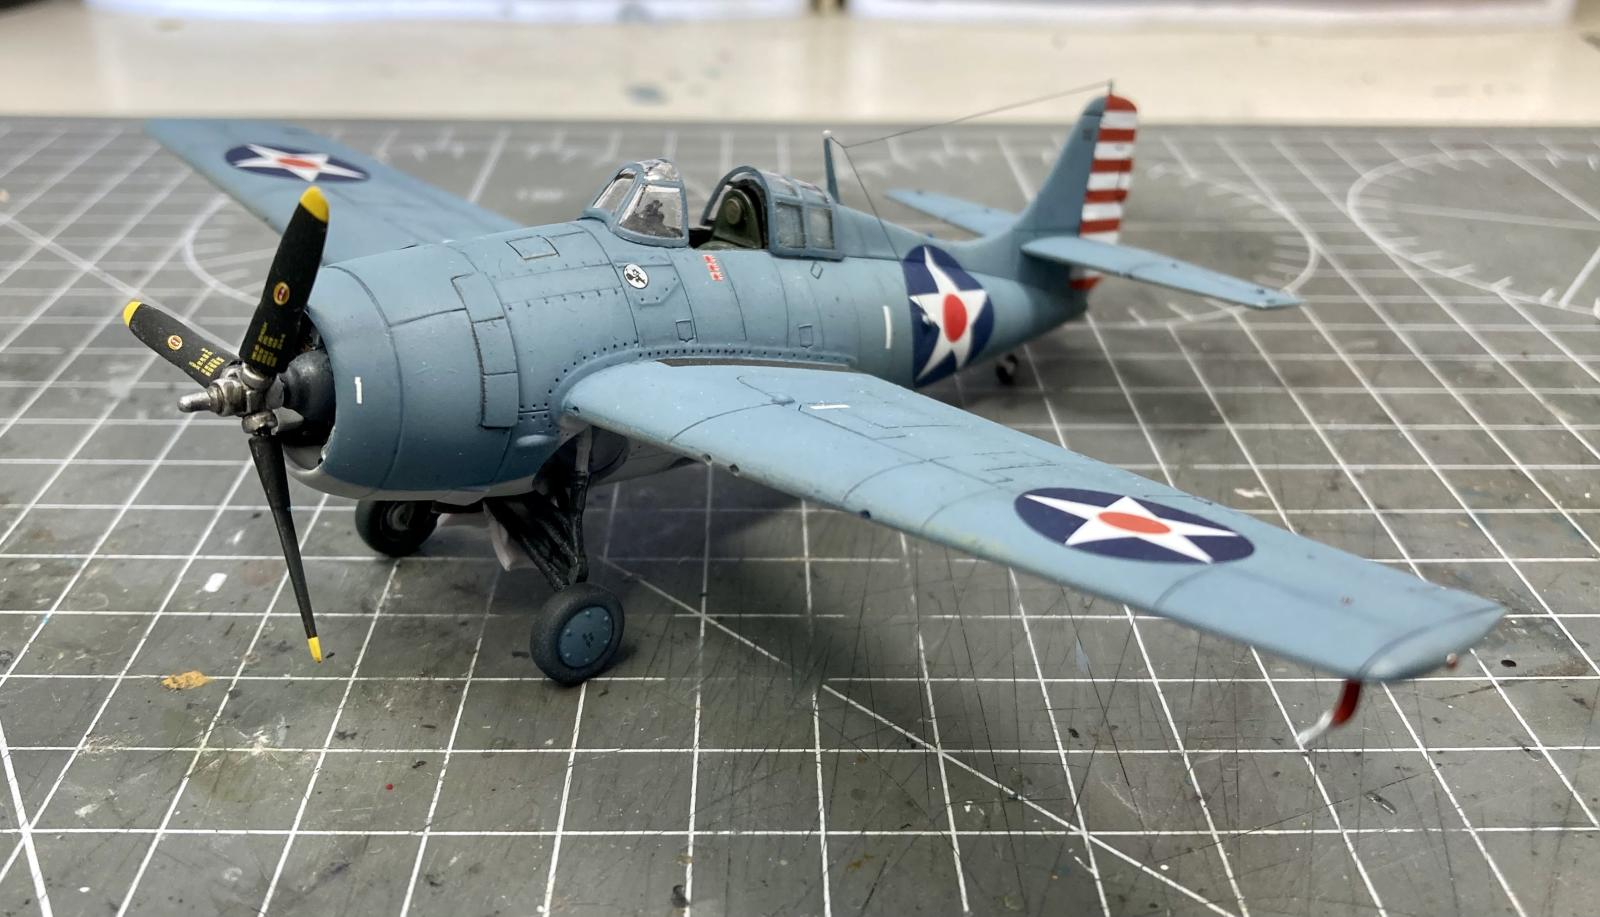
This kit, a new mold in 2015, is typical of Airfix releases since Hornby took them over. It has an accurate outline, assembles quickly, and has good detail. It also offers the option of an open or closed canopy and spread or extended wings. The landing gear and arrestor hook can be assembled in the extended or retracted position. The cowl flaps are molded open. The rudder and ailerons are molded separately, and the rudder trim tab is slightly deflected. Wing-mounted 75-gallon drop tanks are the only external stores included. The tailwheel is the pneumatic type used from land bases. The instrument panel and consoles are represented by decals. The recessed panel lines are heavy, but I have become used to this from their recent kits. This kit has been released several times with different schemes, including a Royal Navy Martlet Mk.IV which has a different engine and cowling. The current release features markings for a VF-41 plane from Operation Torch in November of 1942, and a Marine aircraft from VMF-221 on Guadalcanal in 1943. The list price on Airfix's website is $17.99 USD. The one-piece engine in my kit was short-shot, and I emailed Airfix's parts department to get a replacement.
I assembled the cockpit, painted it bronze green using Tamiya paint (3 parts of XF-13 J.A. Green to one part XF-27 Black Green, plus a little XF-2 Flat White for scale effect), and used the provided decals for the instrument panel and side consoles. I added lap belts to the seat scratch built from wine foil with photo etch buckles. I painted the wheel bay interior in the same light gray as the undersurface camouflage. The landing gear assembly accurately represents the original without being over-complicated. I carefully removed any paint from mating surfaces before gluing the fuselage halves together. The fit of these new kits is so precise that any extra thickness can throw off the fit. Airfix uses lidar scans of real aircraft to create these kits, and there is a modern beacon light on the fuselage spine (the one closest to the tail) that needs to be removed. I used the extended wings option, which fit perfectly over the wing spars that extend from the cockpit assembly. I thinned the inner edge of the cowl flaps with the back side of a hobby knife. Fit overall is very good, although I did use some putty on the fuselage (most likely an assembly gaffe on my part).
I used the closed canopy to mask the cockpit, and sprayed the model with Tamiya fine white surface primer. I used Tamiya black accent color to pre-shade the panel lines. For the light gray undersurface color I used a 50/50 mix of Tamiya XF-19 Light Gray and XF-2 Flat White. I used rolled bits of blu-tac to mask the lower surfaces, then painted the blue-gray using a 50/50 mix of Tamiya XF-18 Medium Blue and XF-2 Flat White. I used lightened versions of both colors to add some highlights to the center of panels to add some visual interest to the scheme. I prepared for decaling by spraying the entire airframe using Vallejo gloss varnish. I used a combination of the kit decals (which are excellent) and large insignias from old Aeromaster sheets to portray “Fox 1” as seen in photos from 4 May, 1942. I used Vallejo matt varnish for the final coat. This was a fairly new plane, so I kept weathering to a minimum. I used pastels to create exhaust stains on the belly. I added the opened canopy and windscreen, and used EZ Line for the aerial.
I enjoyed the build and recommend the kit. I have not seen or built any of Arma Hobby's more recently released F4F series, which seem to have more detail and refined surface textures, as well as a higher price. The Airfix kit has the advantages the option of folded wings and easier assembly.

Solid build & nice paint work! Great to see!
Steve
Very nice
Sharp build. Thanks for sharing!
Great! Do You have any problems with closing fuselage?
A little. I had to use some putty on the seam.
me too.
Beautiful job, wow.
Awesome job and really excellent result, Andrew!
Thanks, Spiros.
A good-looking Wildcat! Well done.
Excellent result!
Thanks, Rob!
Great job! I had a little trouble closing mine up at the wheel well area. In retrospect, I could’ve avoided that with a little more care in trimming/assembling the landing gear and that keel area.
Yeah My Dear Dad liked that box art a lot too. The 1/32 Revell was the last model (plastic) he built. All those 69-70 boxarts were great.
Your model looks really great, I don;t see how Arma could be any better.
Those box arts sold a lot of kits!
A beautiful Wildcat, Andrew @vacrat
Especially considering this is just a 1/72 scale.
Well done.
Gorgeous build, Andrew @vacrat. These new Airfix kits are so much fun! Great paintjob!
Thanks. They build up nicely. My biggest issue is the that the recessed panel lines are too wide. The harder and darker plastic that Airfix is now using seems to make them look smaller.
Nice job, Andrew.
Great job! It's a nice kit to build.
Great looking Wildcat, Andrew. That 1/32nd scale Revell Wildcat got to me as a kid too! I loved tha kit. I really have to build my little Airfix F-4F. For the money, it's hard to beat the newer Airfix kits. They have enough detail to them and most of the ones I have seam correct in shape. There great little kits.
Fantastic looking build, and in my favourite scale!