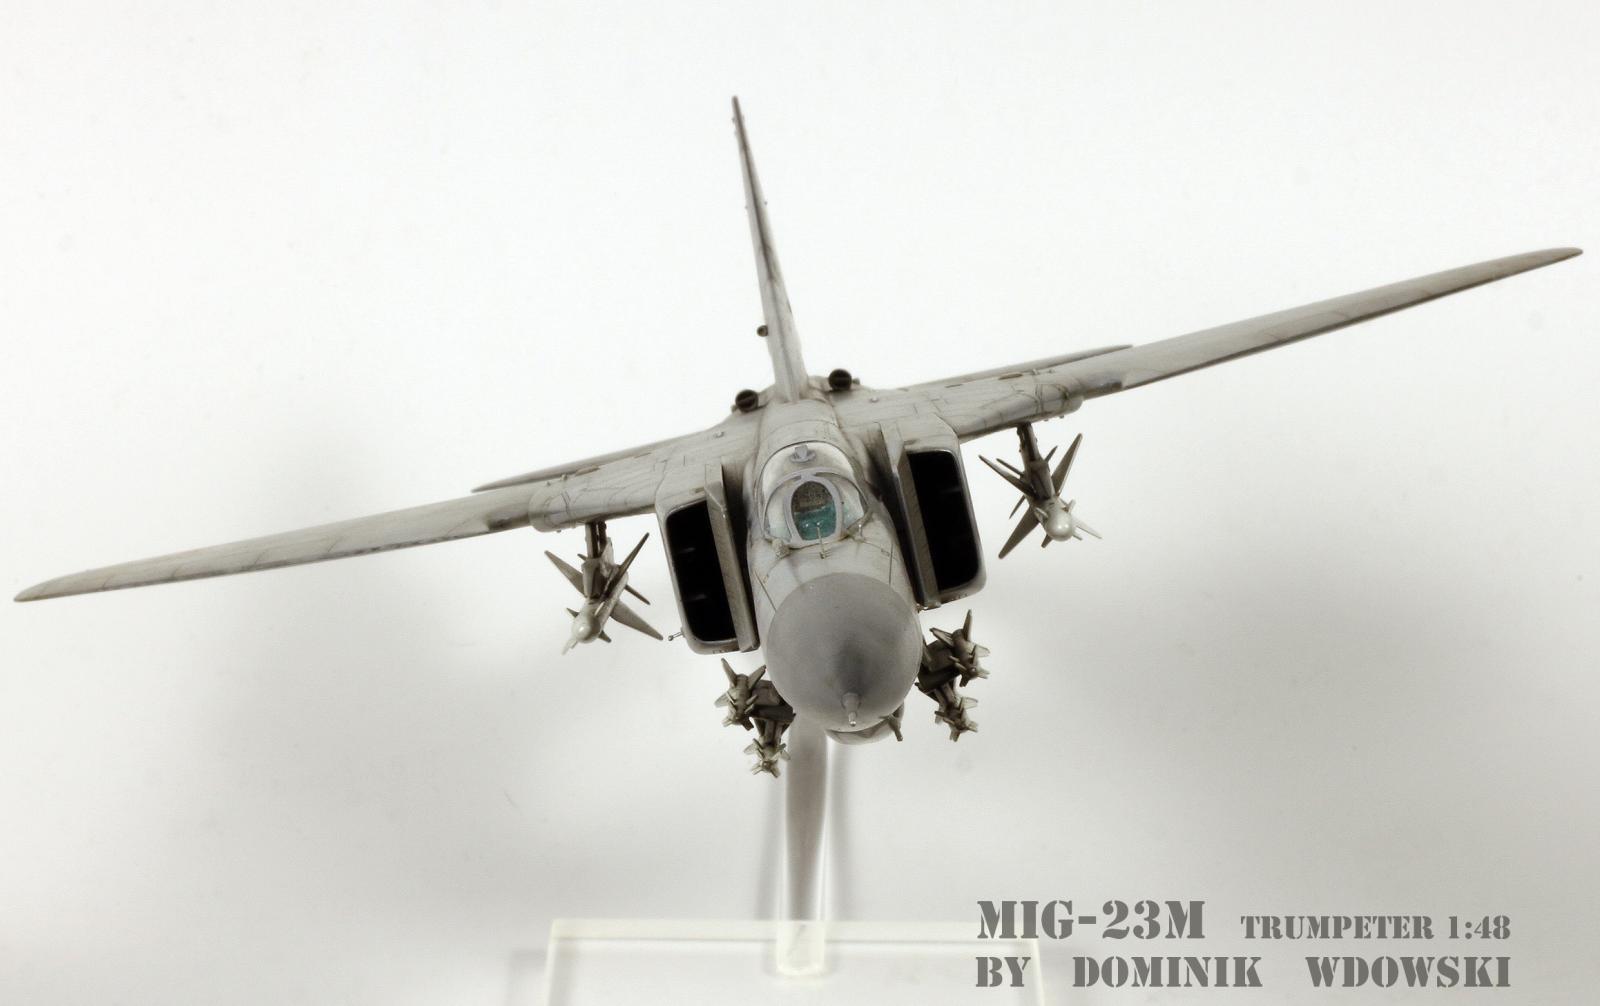
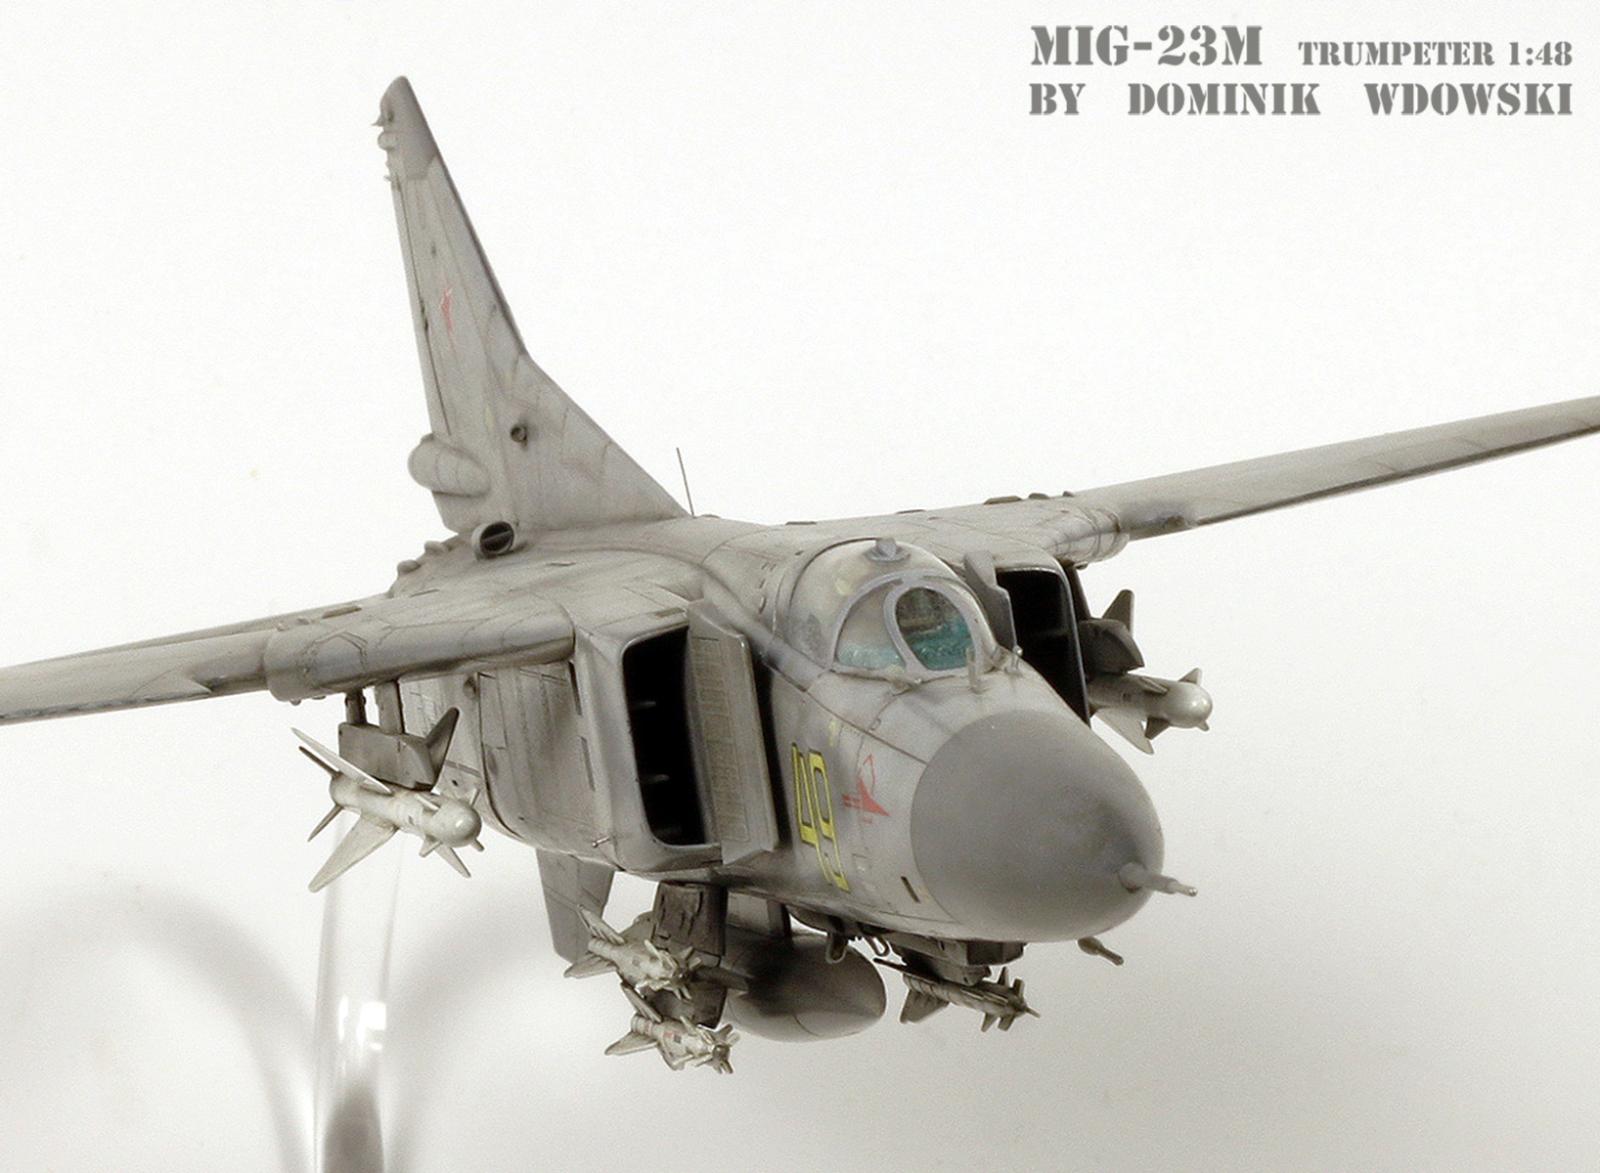
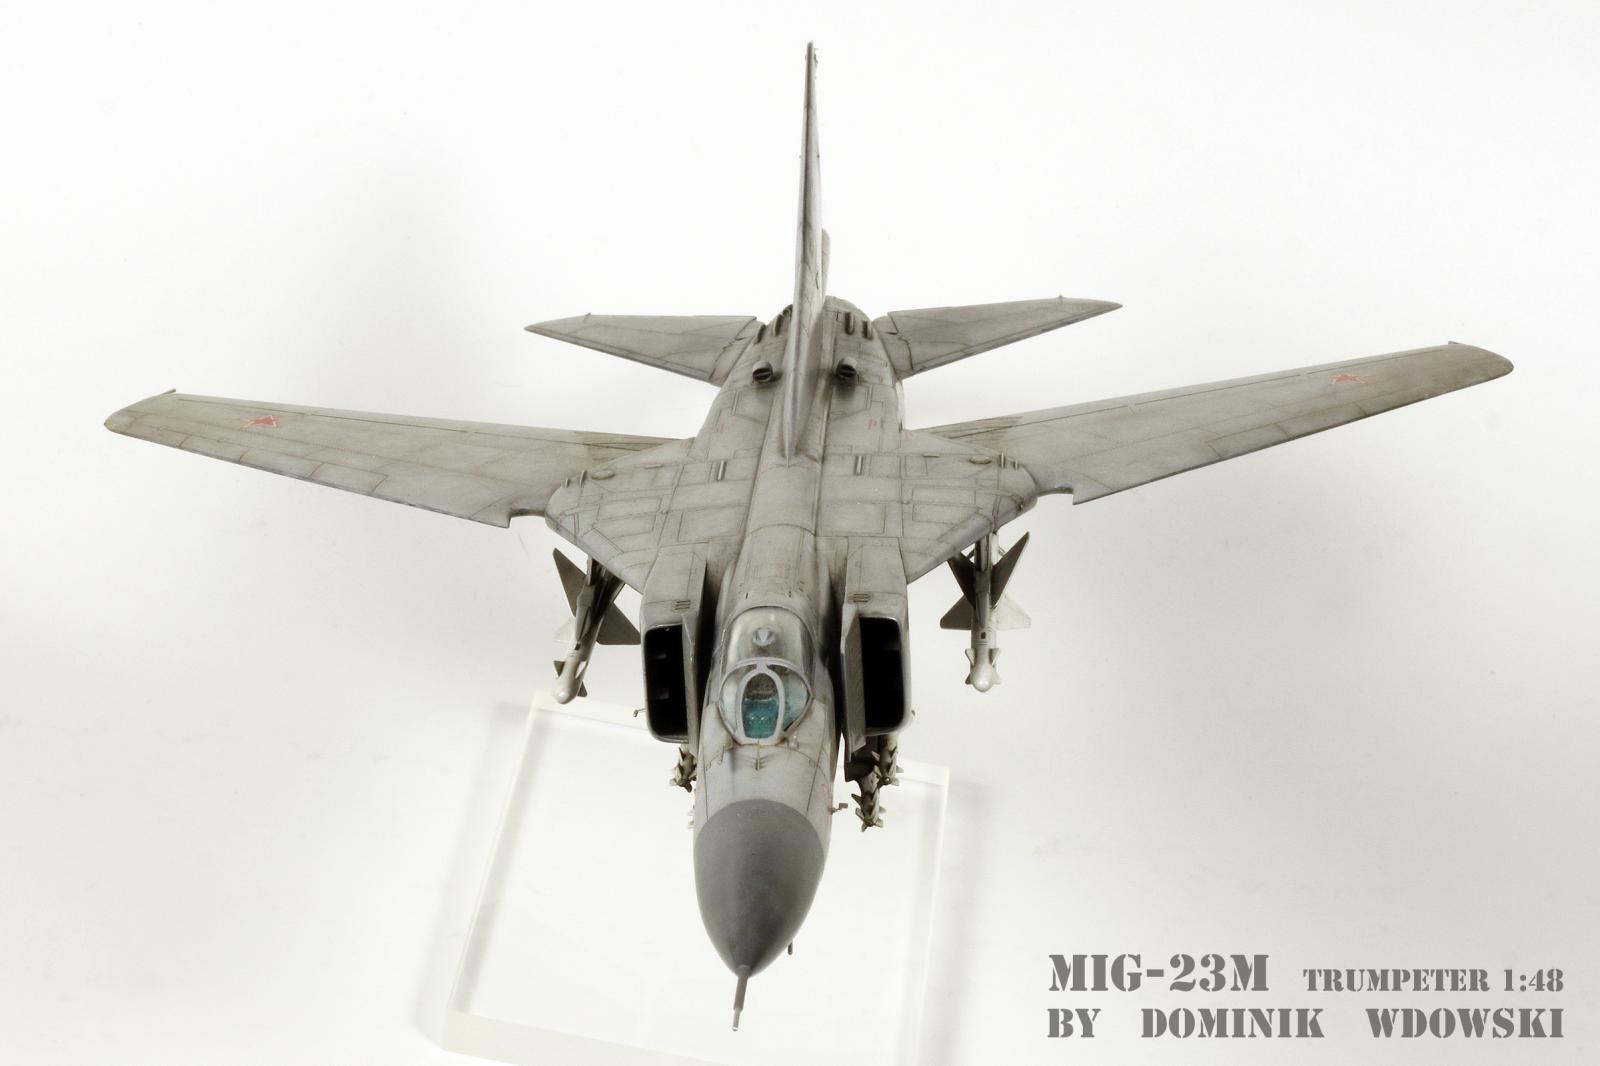
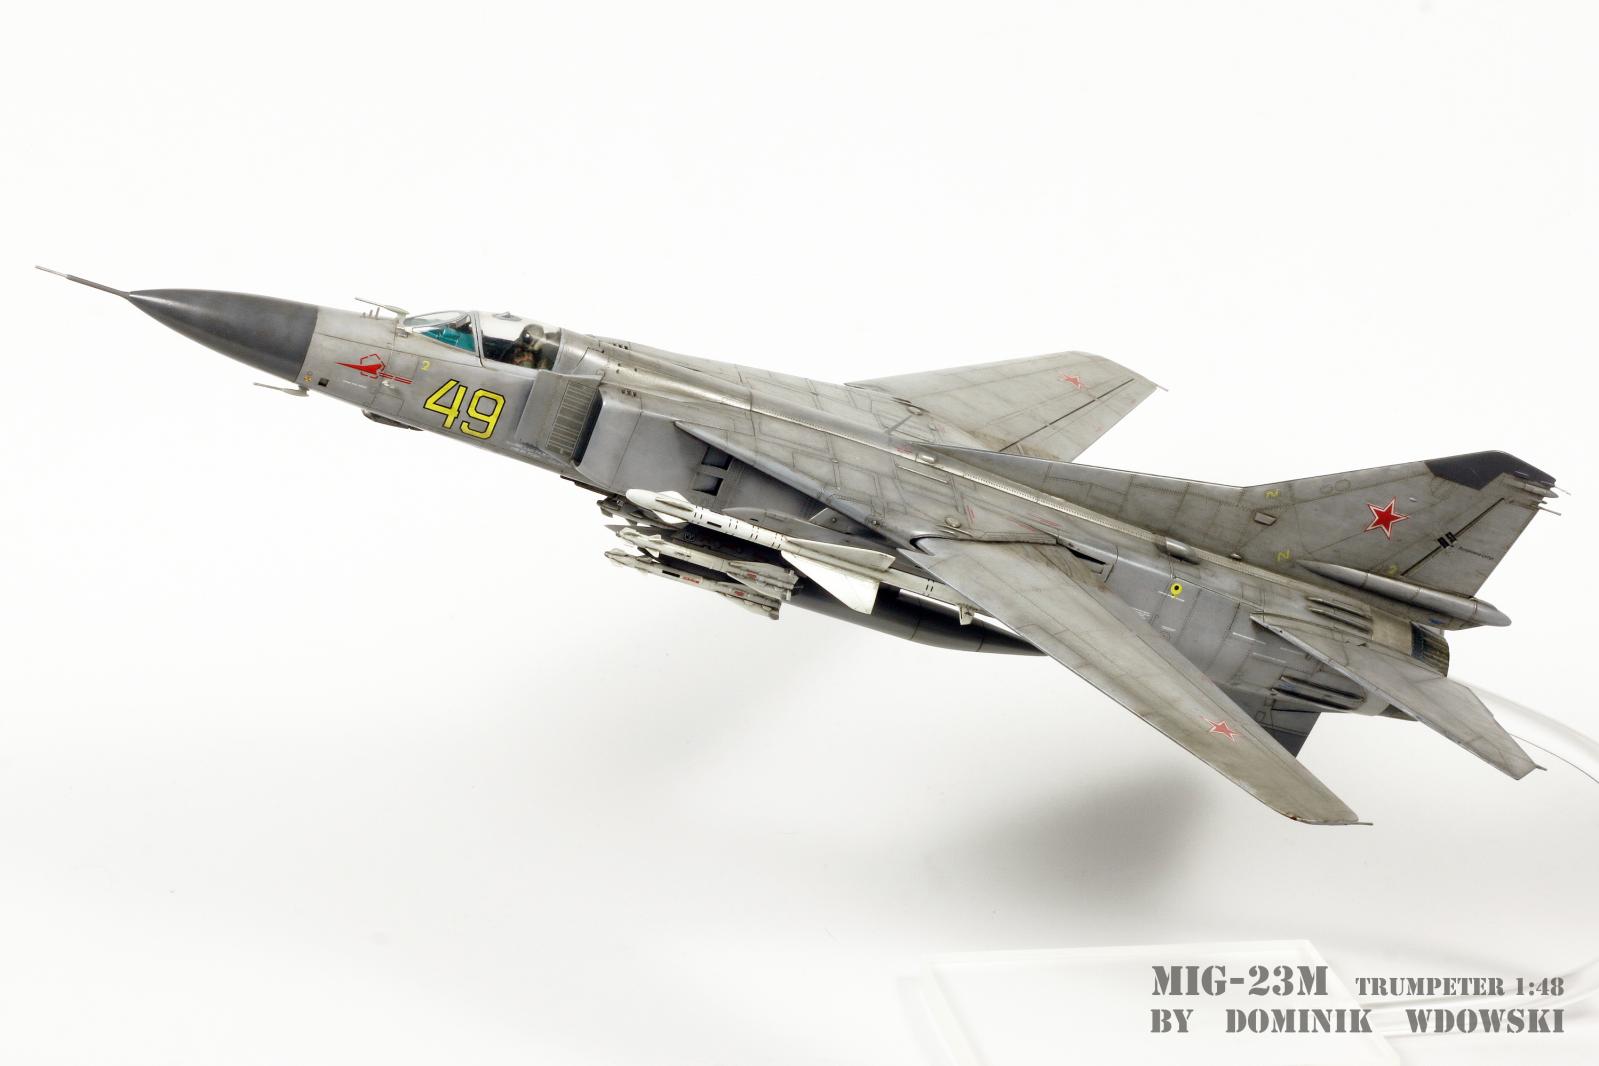
Flogger flyin' !
Hello all!
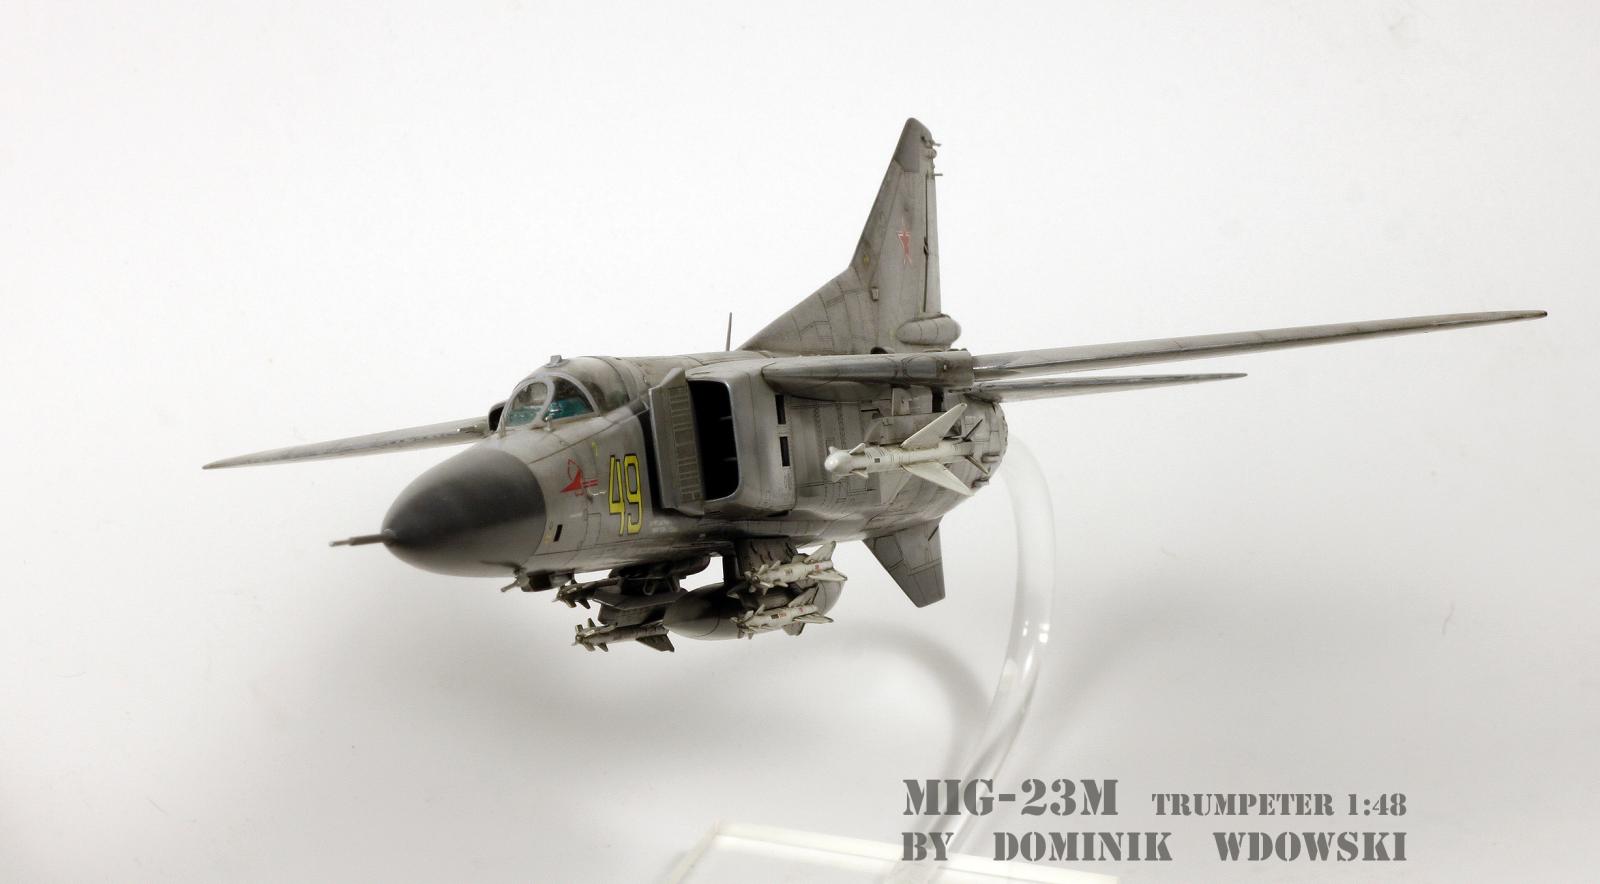
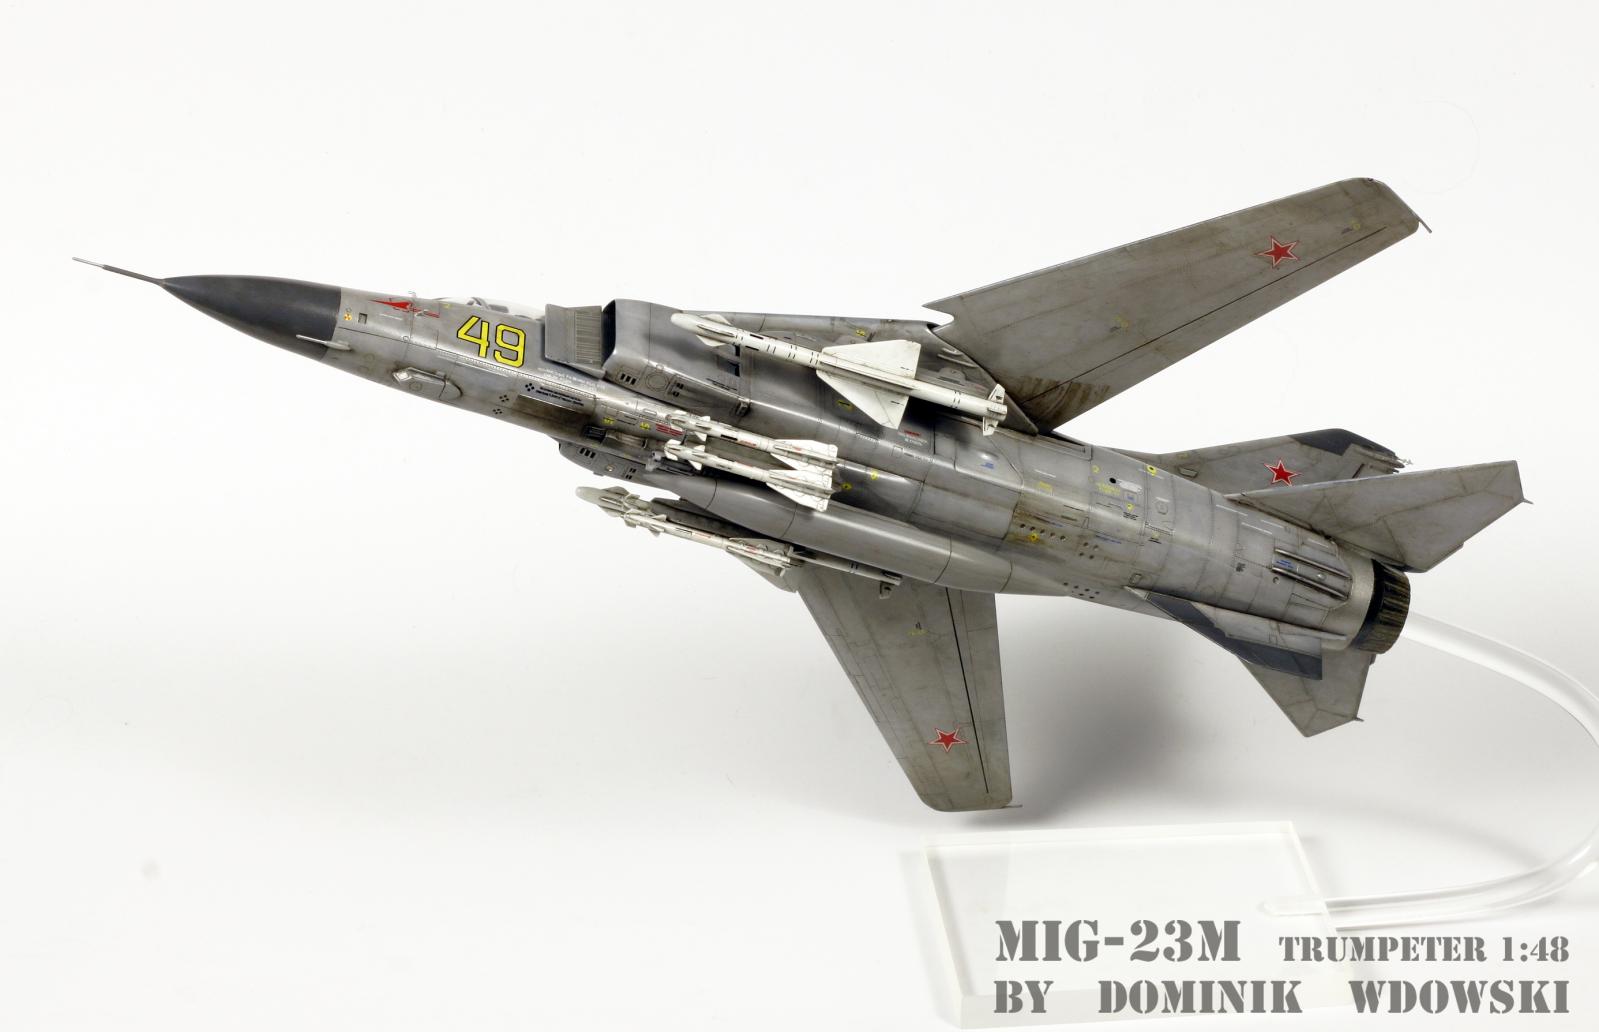
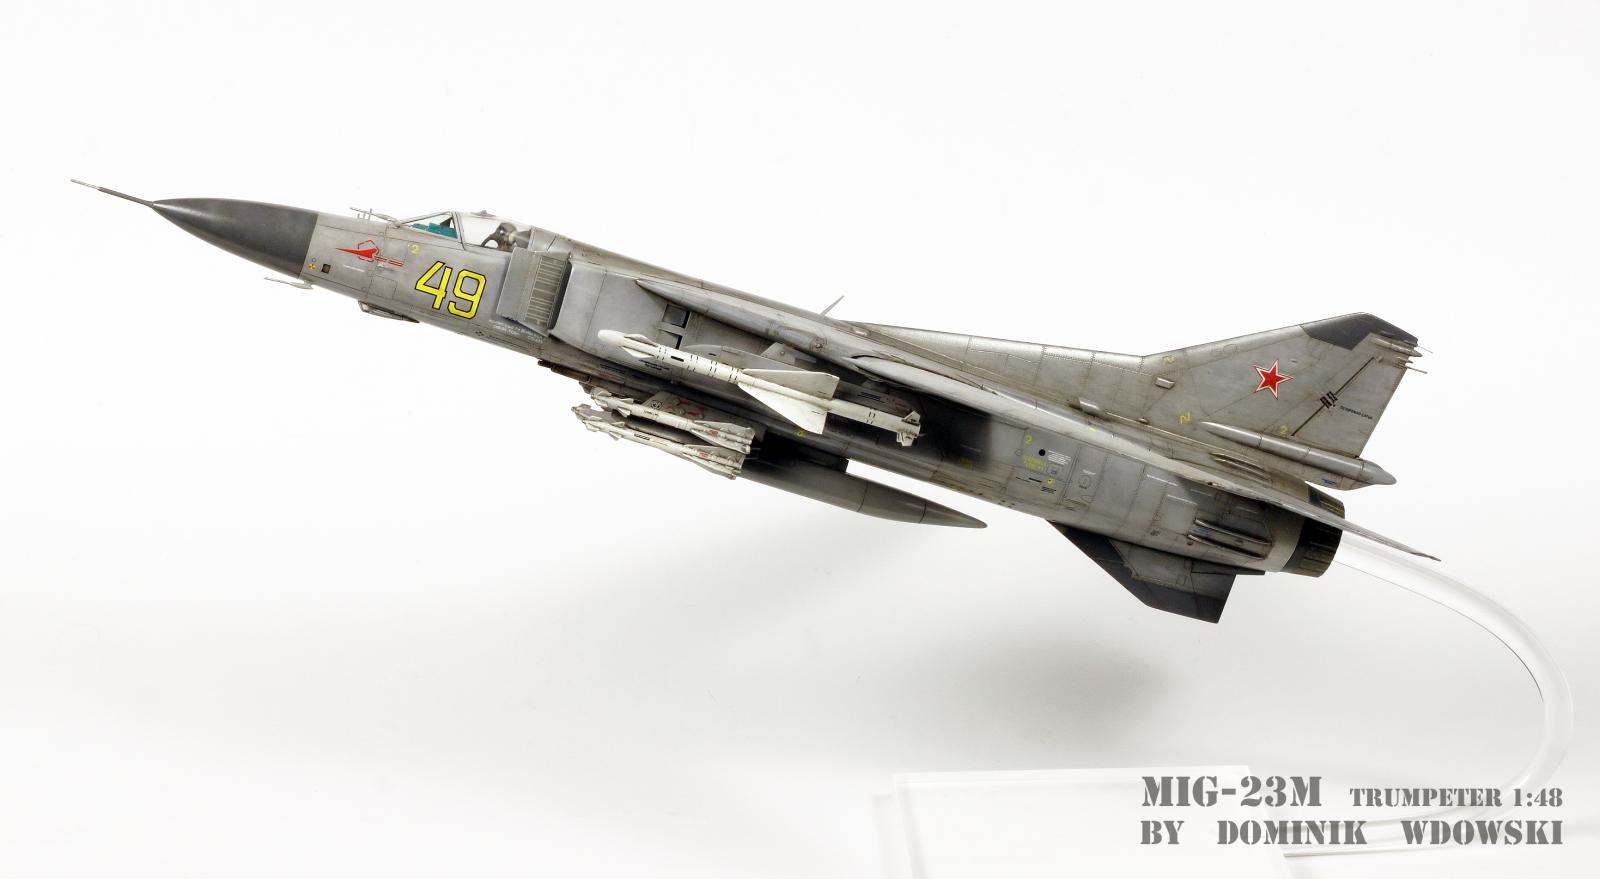
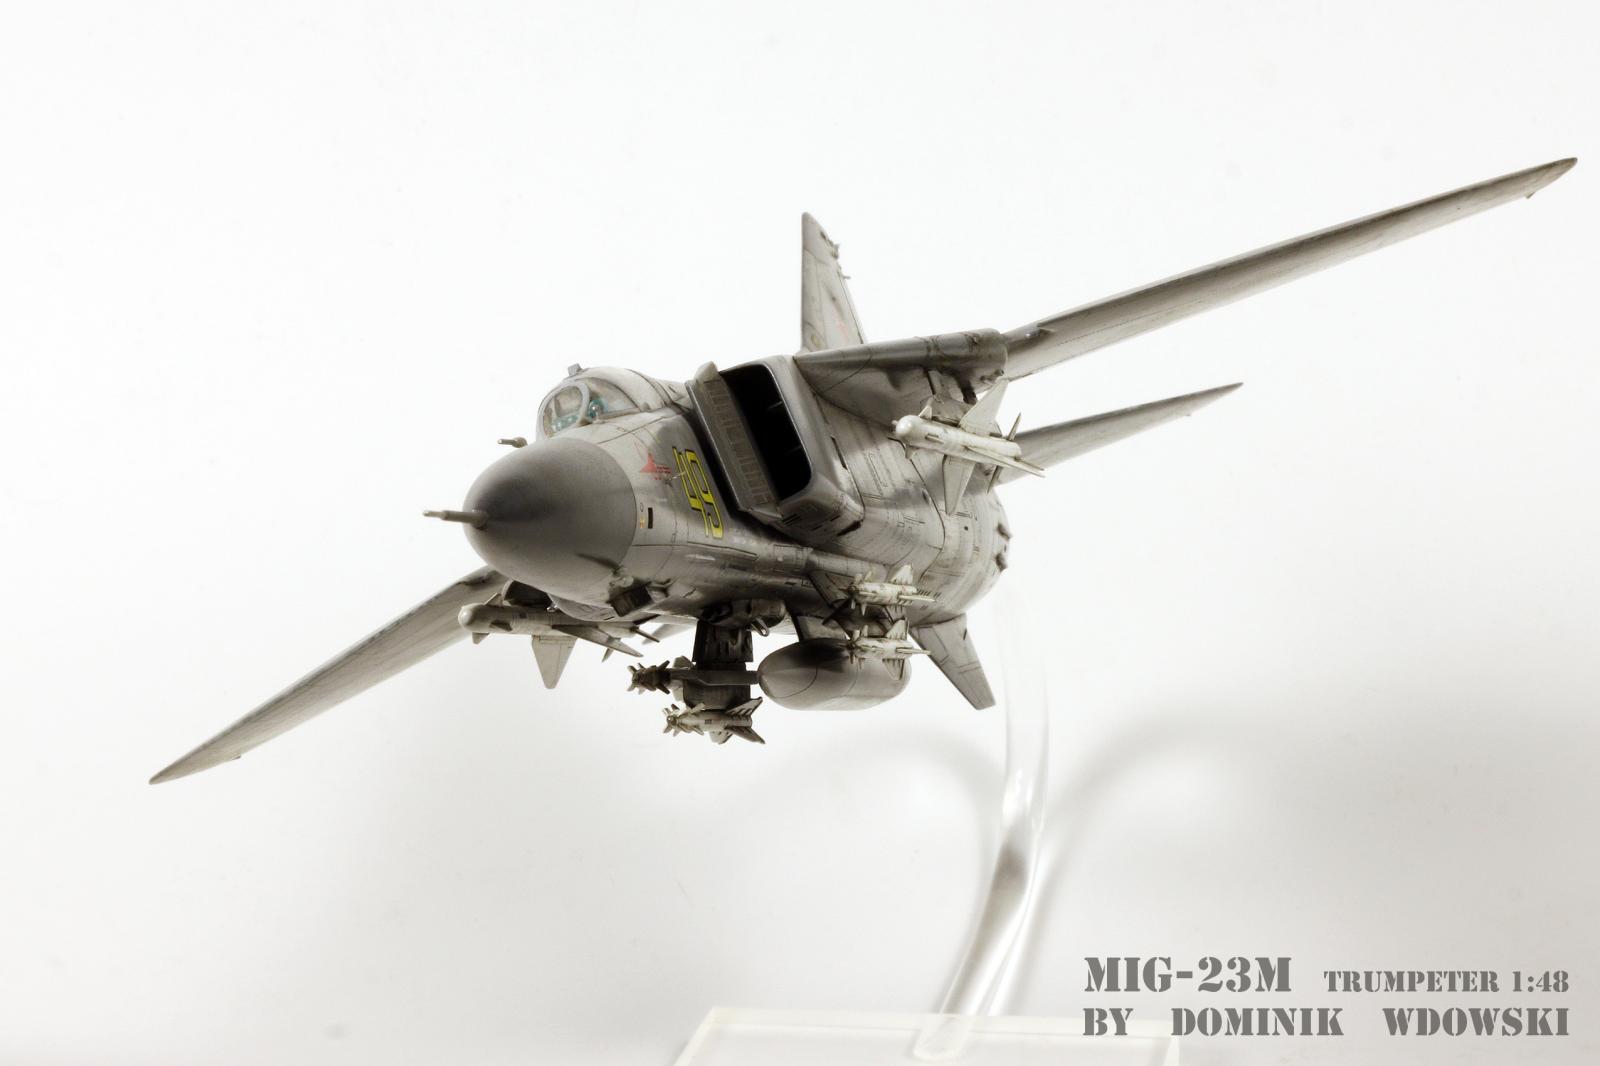
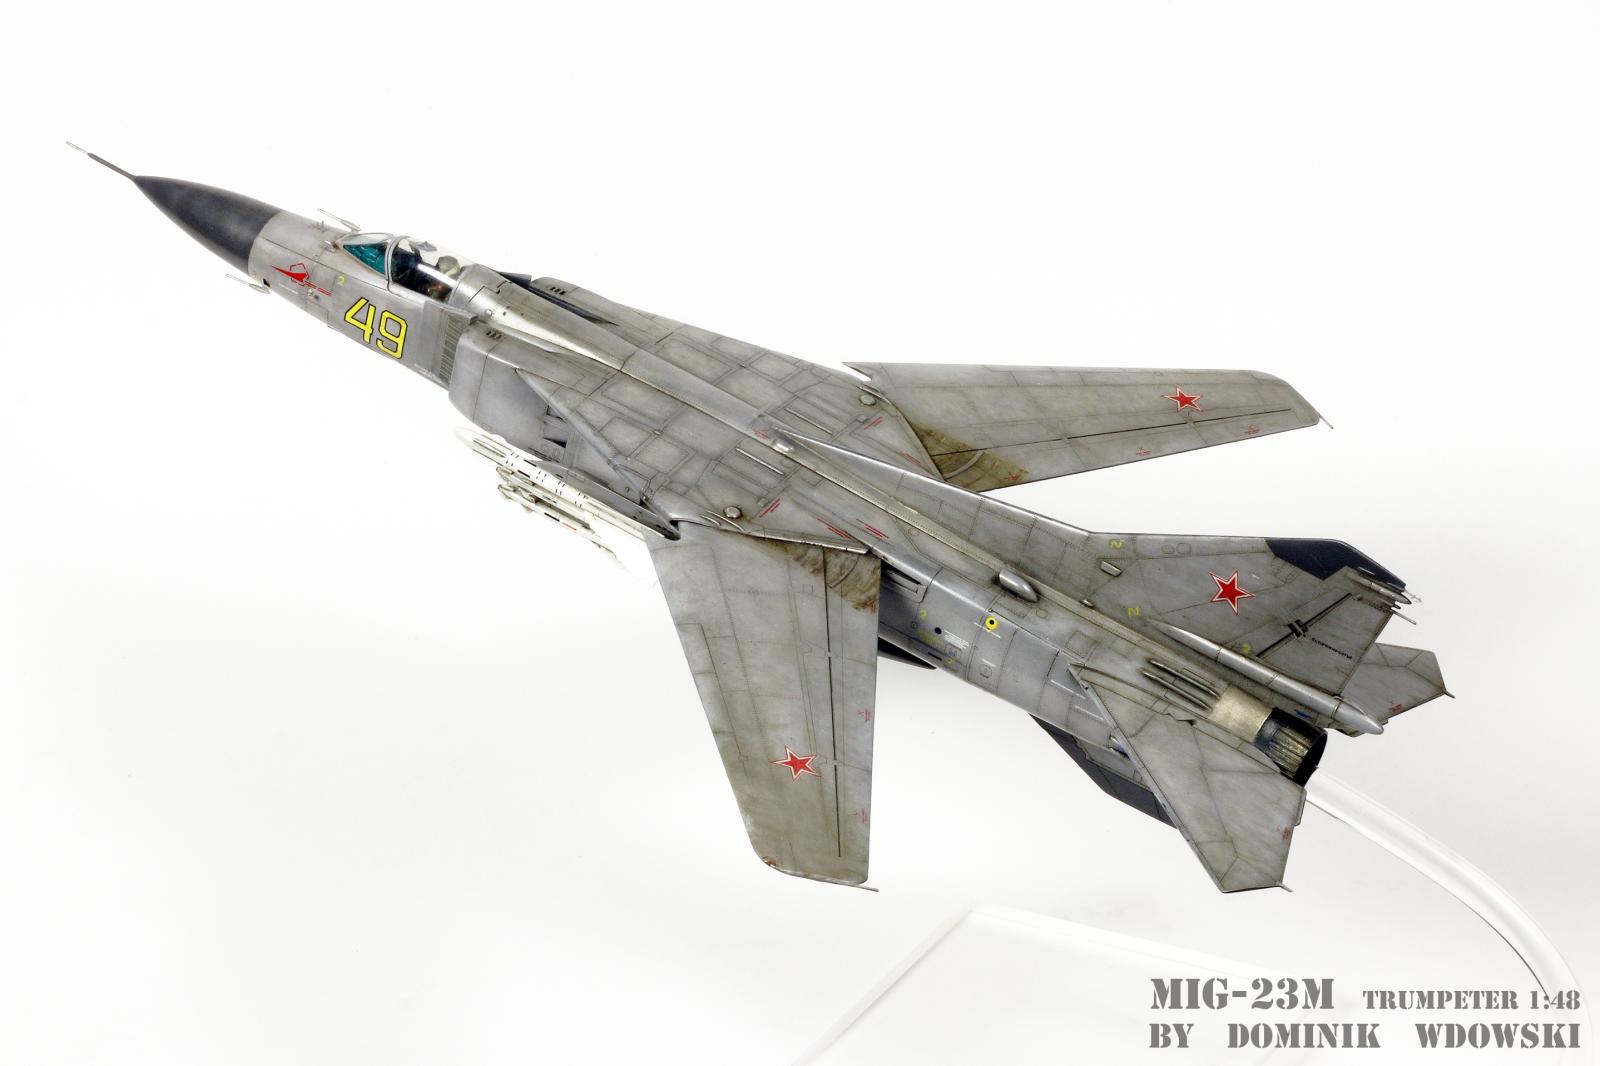
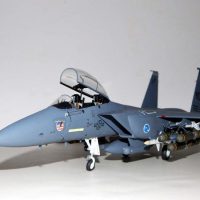
Here's another soviet stuff, finished before the invasi0n on Ukra1ne. How I wish I have made it in Polish markings! Well, to late for that, since model is already sold. Anyway, the kit is great. Great detail, big choice of weapons, almost perfect fit, PE parts, sprues well packed and secured, good quality decals. The build was fun, I knew from the beginning that I will make it in flight, because Flogger has this fancy fin on it's rear underside which looks bloody cool, but it folds when gear goes down, so... I had to add the pilot , of course - Hasegawa's US navy one, haha!
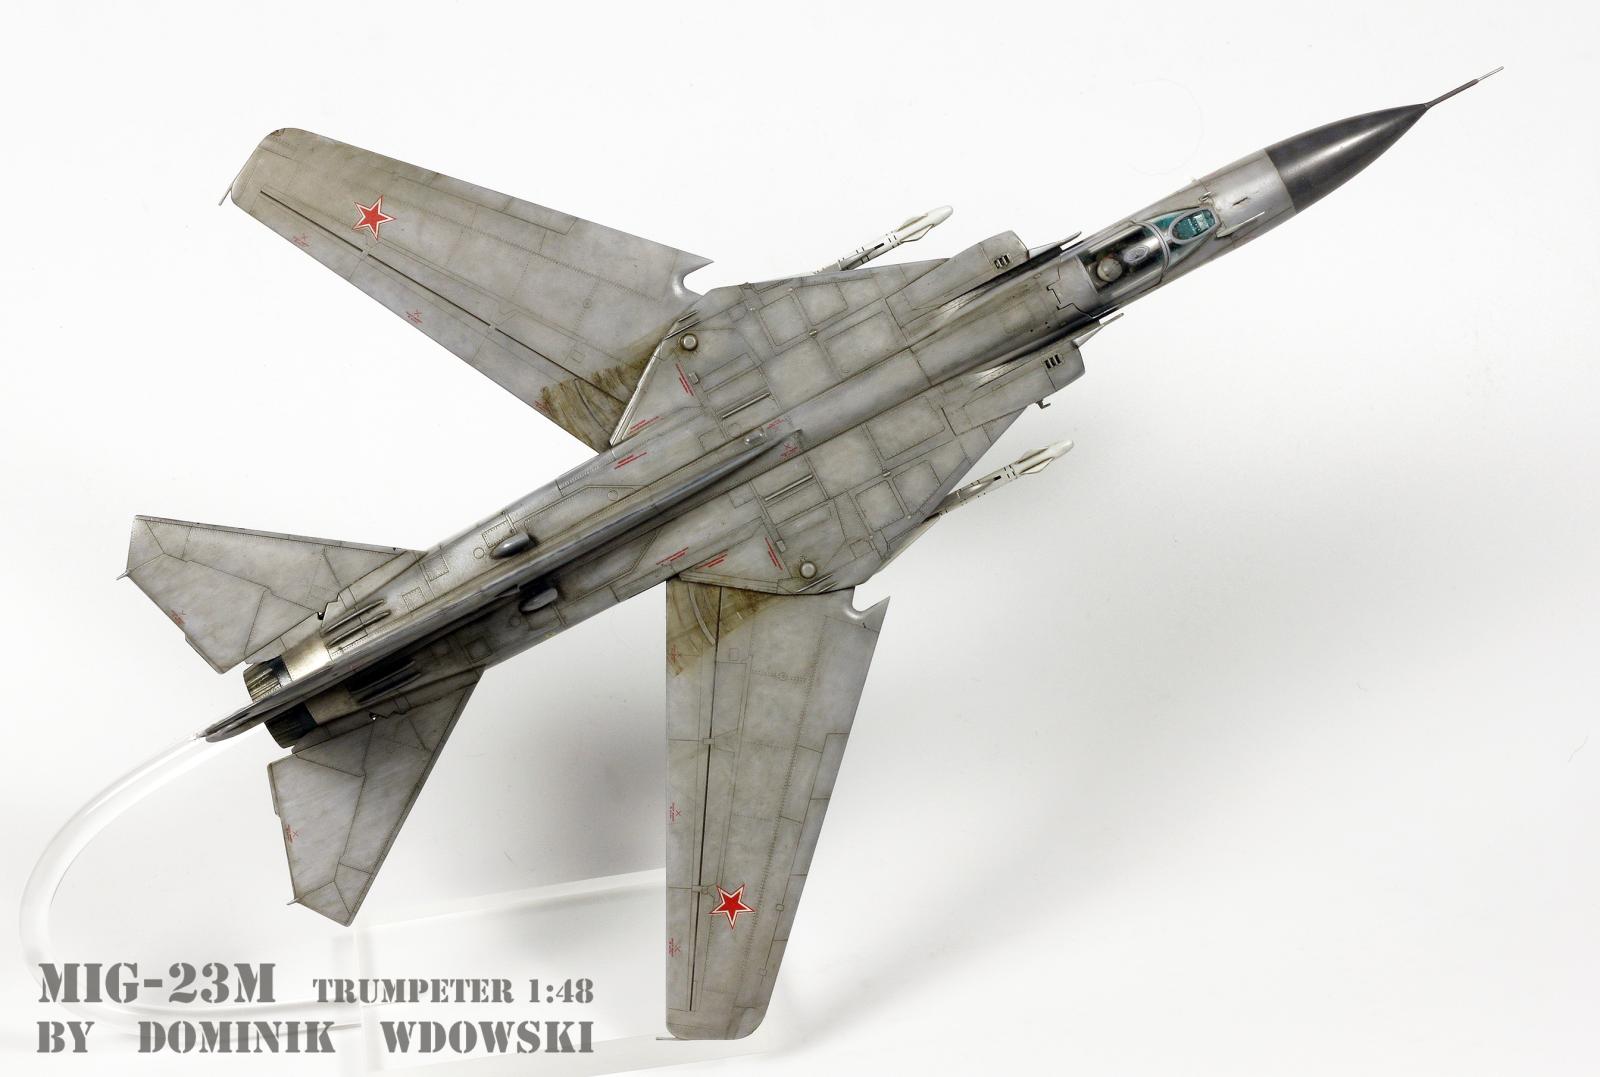
Very standard techniques were used while painting, Tamiya and Gunze paints, Set and Sol for decals, oil paints for weathering and washes. Who knows, maybe I'll buy it again some day and paint in in Polish markings so I could keep it ;).
I hope you like it, as always constructive critique appreciated! Salut! D.

Love it
Thanks!
Im not a fan of Migs, but I do like the Flogger in part for the same reason you mentioned (the prominent vertical fin) and in general for how it looks flying, as your images have captured. Great looking build. 👌
Thank You !
That's a very nice build.
Thanks!
A beautiful Flogger, Dominik @dominikw79
Very nicely weathered, especialy on the location where the wings enter the fuselage when moving.
Thank you, John! Yep, the accuracy of recreating this part was crucial to me, since I have seen models where it was not properly done, and it always looked unnatural ...
Excellent Flogger, Dominik!
Thank you, Spiros!
Great Mig, Dominik. I like the weathering on top of the wings. Great representation of swing mechanism grime.
Thanks! Yes, I put some effort into this feature 😉
The Flogger is one of my favorite MiGs, and that paintwork is incredible - nicely weathered. Love it!
Thank you!
The in-flight configuration is perfect for the MiG-23, excellent idea. And the rendition is perfect. Bravo!
May I ask how did you make the plexi pedestal?
Thank you! You need a plexi rod abot 60 cm long and 8 to 10 mm in diameter (for most 1/48 jets), and at leas 2mm thicker plate for base. The safest way to bend the rod is to put it into a boiling water (you need a big pot) or a good quality heatgun, one with regulation of temperature. slowly build up the temperature and start bending. Try to bend holding two ennds of the rod - using teplates may damage the surface. When you are satified with the curve cut spare ends. Drill a hole in base (plexi needs a special, sharpened drill bit) and you are done. Oh! One more thing, you need to prepare the nozzle. I pour some acrylic resin inside than drill a hole - of coure you cover all inside details this way, but you know... I hope this helps! 😉
Thanks! 😎
This looks amazing Dominik (@dominikw79). Well done mate 😀
Thank You!