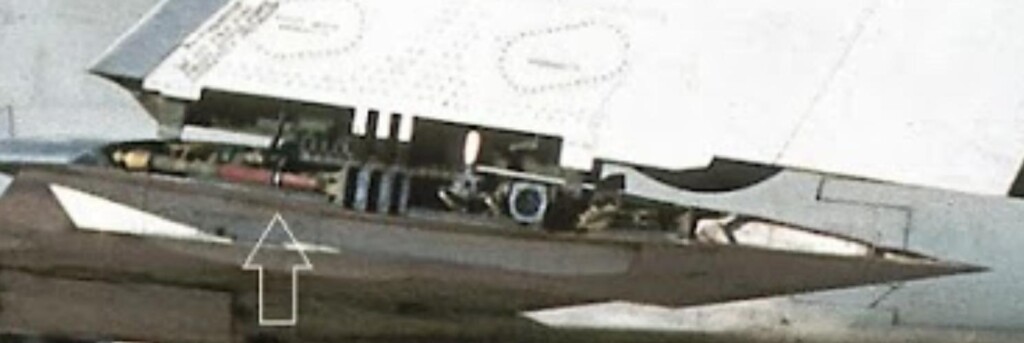
Well this will be fun. Since I am doing the wings folded up and because Hobby Boss only gives you wishful thinking for wingfold detail, I am going to have to "wing it" 🙂 and create my own interpretation. I have some references, here's one as an example.
-

1. Locking teeth
2. Locking teeth
3. Hinge ??
Here's what I have to work with on the HB wing after cutting the outer wing off.
-

1. Thick kit plastic needs to be thinned way down for more scale appearance
2. It looks like this is the hinge area in the real wing photo
There are a few things to notice here. First, the aileron on the Fury is exposed on the outboard end when the wings are up. And because I wanted to reposition them slightly, I had to cut them out of the wing. Hence the part at the trailing edge which looks sort of tulip shaped. This is where the aileron will go when I mount it. What is not apparent in this or the other photos is that the wing line is not straight from front to back, but rather more like a crooked dog's leg.
Also if you look at the real thing, it appears that the wing is hinged in the middle along the top edge and uses the three "tongues" to lock the wing when down. The other detail, I am unsure of at the moment. The arrow in the real photo is from the photo and is pointing out the color of that pipe.
Finally, notice how the real wing is thin at the edges (the sheetmetal making up the skin) while the kit looks like something made for the Flintstones.
So my first task is to try and thin down these edges while leaving an area for the hinge point. It would have been easier to do this before gluing the wings together, but alas, my gluing hand was faster than my thinking brain that evening. So I am having to do this after the fact. It still looks pretty rough in this photo, but hopefully with some detailing and a bit more clean up, it will look the part. Then I have to repeat this for the other wing. And then repeat it again for the outer wing halves. I don't have any good photos of the outer wings detail so I will have to use what I do have to interpret it as best as I can.
-

1. This looks pretty rough in this photo, but the edges will be thinner except where the hinge will mount.