A-4B Skyhawk – Fuerza Aerea Argentina, Falklands War – 1/48 scale

Started by Colin Gomez · 94 · 1 year ago
  • Profile Photo
    Colin Gomez said 3 years, 1 month ago:

    To get this rolling, here is my first submission to the Falklands War Group Build. I will do this one completely OOB. There are very nice decals included in a really fine kit. Unusually for Hasegawa, there is even a set of resin pieces in the kit for the unique radome on this aircraft. I had a great time building my Blue Tail Flies A-4C, so I hope this one will go along equally well. I will be doing the FAA Grupo 4 aircraft, which I think was involved with the sinking of some merchant vessels in the UK's task force. It is also the aircraft featured on the box art. I am just reviewing the history now. More to follow.

  • Profile Photo
    Tom Cleaver said 3 years, 1 month ago:

    Yeah, you cannot go wrong with a Hasegawa Skyhawk.

    Great idea on this group, @coling!

  • Profile Photo
    Spiros Pendedekas said 3 years, 1 month ago:

    Great entry, @coling!
    This Hasegawa Skyhawk looks great, and I love the Argentinean camo!
    Looking forward to it!

  • Profile Photo
    Erik Gjørup said 3 years, 1 month ago:

    On top of the good looks the very concept of the Skyhawk is a great one. Will have to come up with something for this GB, but it may take a bit before I jump in. . . .(got something to check first)

  • Profile Photo
    John Healy said 3 years, 1 month ago:

    Nice to see an Argentine Skyhawk!

  • Profile Photo
    Colin Gomez said 3 years, 1 month ago:

    Thank you, gentlemen for your support. Once again, welcome to the Group. For all the attention that the Super Etendard and Exocet got in the conflict, the old A4s did a lot of damage with simpler weapons. They also suffered some terrible losses. Almost unbelievable how desperate and brave the fighting was on both sides, particularly by pilots on near suicide missions far from home. I hope to do this one justice. It is indeed a uniquely interesting camouflage, somewhat compromised by the big panels of blue. I think there were some other a-4s that had yellow panels. I will have to have a look at this. Oh yeah, OOB - must resist temptation to modify! 🙂

  • Profile Photo
    Spiros Pendedekas said 3 years, 1 month ago:

    Well, this kit is more than sufficient to qualify for a beautiful OOB build!
    Will you resist the temptation to modify it, my friend @coling? 🙂

  • Profile Photo
    Colin Gomez said 3 years, 1 month ago:

    Thanks, Tom, Spiros, Erik and John for your kind regards. I have been working on the model a bit but more intensively on research. What I turned up suggests there are quite a few issues with doing the box art A-4C. First of all, Hasegawa's color suggestions are almost certainly wrong and the box art is quite misleading. The instructions call for a topside camo of "Sandy Yellow" and "Dark Earth". A very thorough and well-illustrated article by Jorge Figari on Hyperscale makes a strong case that main color is actually "Off White" and the camo shade an olive or khaki green. The latter looks much greener in repainted museum examples but shades towards brown in many photos from the period of the war or earlier. Here is a link to the article:
    http://www.clubhyper.com/reference/a4cargentineskyhawkjf_1.htm
    The camo green is a tricky shade but I began to feel it was similar to the color I came up with for my Shiden Kai cockpit (Tamiya JA Green + Khaki). So, I went all over the net beyond Figaris article to find every photo I could of how A-4Cs of Grupo 4 were actually painted during the conflict, including how the paint scheme was modified with either turquoise or yellow ID panels. I looked at built-up models as well to see how others had interpreted the Grupo 4 scheme.

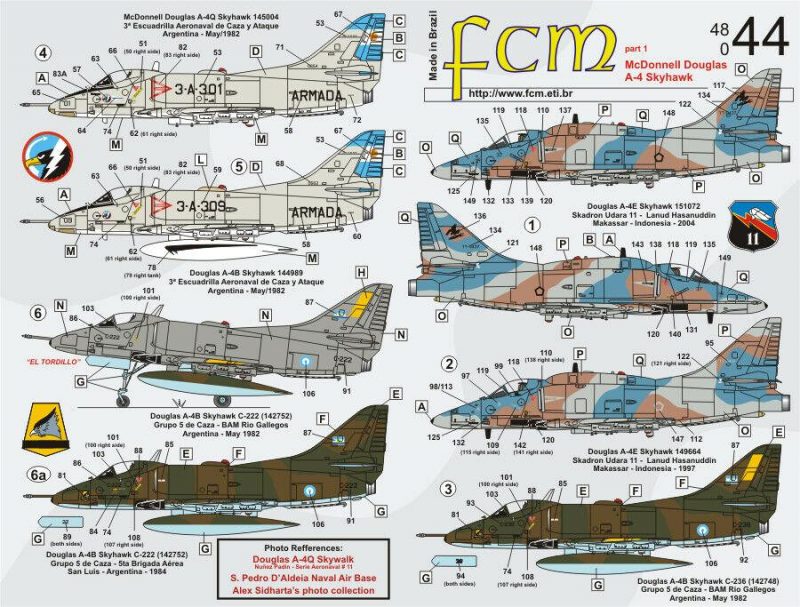
    To make a long story short, I decided not to go with the Grupo 4 A-4C for a couple of reasons. First, getting accurate color matches for both the camo and ID panels looked too difficult. Second, I began to feel that the combination of the camo color with turquoise or yellow panels plus the red of the leading edge slats would just not look good to me. Sounds dumb maybe but I once binned a whole 1/48 MiG-21bis because I could not get good Egyptian sand and green colors and stripped/repainted the model one too many times. Live and learn. Anyway, as I did more research on Argentine Skyhawks, I was increasingly drawn to the earth and green scheme of the FAA's A-4Bs. I also did not have an A-4B in my collection, (the Blue Tail Fly US Navy version I did was an A-4C). I finally ordered decals from FCM to do an A-4B instead from this sheet.

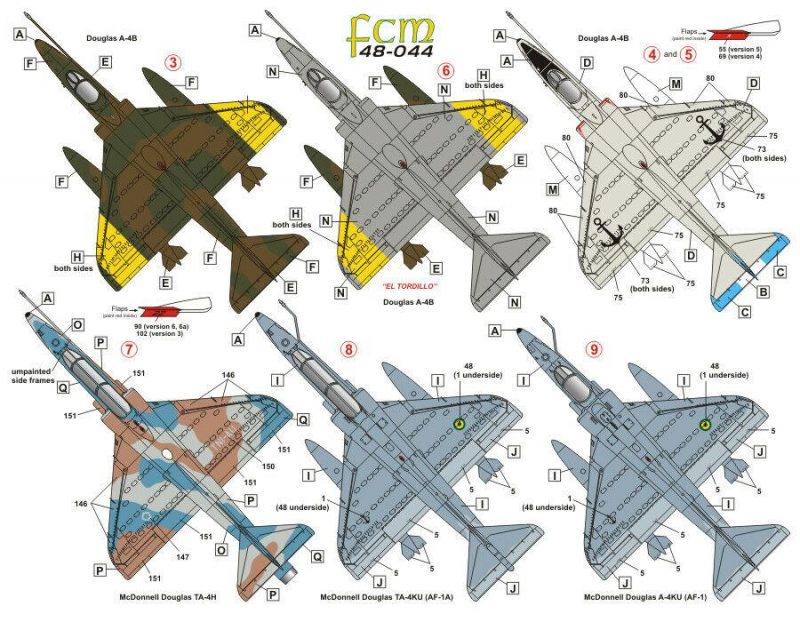
    When I saw these on eBay, I just couldn't resist the temptation to go for good aftermarket decals as opposed to using the thicker Hasegawa kit supplied ones. So an A-4B in green and brown with blue undersides it will be. Very nice rich colors and clearly documented. They also harmonize with the red flap details well. I hope this doesn't conflict with other subjects on the Group Build - namely with John Healy's Hobbycraft A-4Q. I didn't originally intend to step on your toes here, John but I hope its OK if we get some of overlap of aircraft and color schemes. The kits will be a contrast in design and look, I think.

    Anyway, there is not a lot of build to report just yet, I am only making plans and following routines, some of which will be a departure for me.
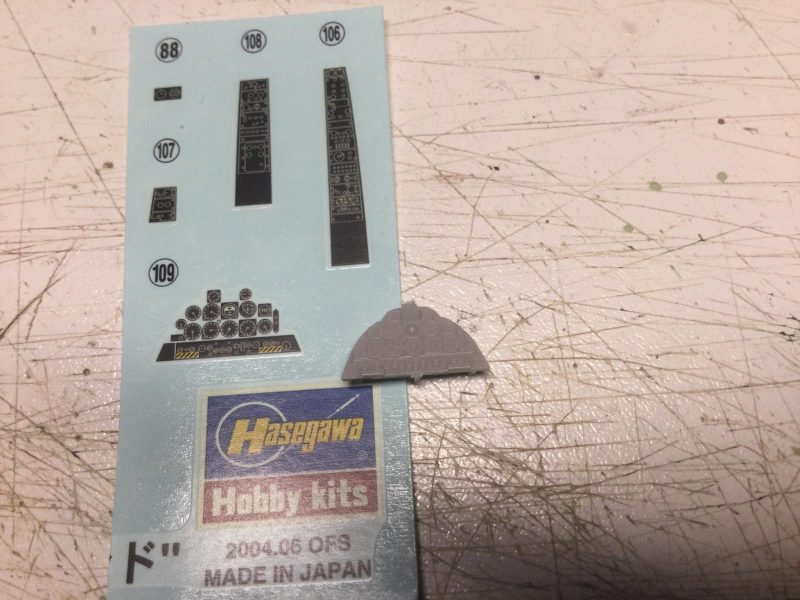
    For once in this scale, I will be NOT be doing the cockpit with Eduard pre-painted cockpit details as none are currently available. I plan to use a mix of paintwork and kit decals to do both the consoles and control panel. I will snip and punch out details rather then lay down the whole decal over the molded panel elements.

    I want to get on with this build and don't want to wait for photo-etch. In any case, I have found that the real A-4B pit is quite chunky and it is more authentic to keep the raised details of these panels as molded, rather than replacing them with flat photo-etch that only simulates depth. 
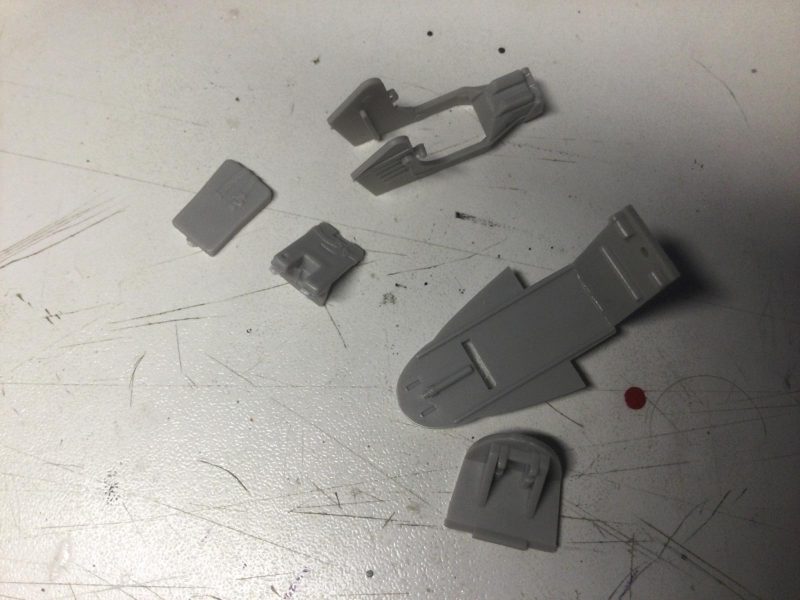
For other cockpit elements like the seat, I have glued some bits together to plan on how to add my own belts, levers and cables to the kit structure as I paint and assemble them. On a larger scale, I have gone ahead with attaching the A-4B nose to each fuselage half. Nice to see it taking shape. I then began gluing together the ordinance, starting with the kit drop tanks. I have a Hasegawa weapons set for the various bombs I will need (nothing but drop tanks in the kit). I plan to do large elements of the build while I work slowly on details. I am following Spiros in getting right into the bigger elements of assembly right away (where possible), instead of trying only to work on details first. Thanks for the inspiration, my friend. It's a good way to keep momentum up for getting projects done.
    Anyway, that's it for tonight. Its more or less to let you know I haven't forgotten about this one. Thanks for watching this space.

  • Profile Photo
    Spiros Pendedekas said 3 years, 1 month ago:

    Wow, my friend @coling!

    What a nice posting! I enjoyed reading the hyperscale article about the como tones: yep, reality sometimes is (was) different than initially thought. This was very true in trying to determine my 1/32 Su-27 actual color shades, as it stood in Poland in 1992. As in your Skyhawk case, a "correction" applied at the pics yields devastating differences.

    I am lucky enough to be near actual fightes for my whole life, so I kind of understand the sometimes difficult task of replicating an actual camo shade. Not only weathering comes to play, but also other factors interfere. Like getting paints from different manufacturers almost always results in different shades, they rarely are totally same! Or seeing the same paint form the same batch yielding defferent results, depending on the surface applied (applied over primer or over lightlysanded old color...). I could go on and on, only to conclude that having a good knowledge of the specific bird at the specific time is the "go to" process. Just look at our friend's @tcinla Pucara!

    Regarding the IP, I think that the decal applied and melted over the raised panel will look great, maybe with a couple of (red? yellow? white?) "knobbing" with a 10/0 brush. I have done this many times with Hasegawa decals applied on IP panels and look good!

    I love your second chosen scheme, cannot wait to see another Colin Gomez masterpiece emerging!

    In the meantime, my Victor's coarse/fine sanding and filling are going well, hoping to post something tonight, Mr Admin!

  • Profile Photo
    Greg Kittinger said 3 years ago:

    I've selected the same bird/scheme in 1/72 - an Airfix kit. I'll be following along, especially as you get to paint colors (come on, you have to provide me a nice cheat sheet to use!).

  • Profile Photo
    Eric Berg said 3 years ago:

    Colin - your second chosen camo scheme looks like a winner. Was this camo applied in the field or on the mainland?

    And those decal dials from Hasegawa look too good to pass up. I suppose if you didn't want to use the whole decal like Spiros suggested, you could always go through the hassle of cutting each gauge apart and applying each one separately.

  • Profile Photo
    Colin Gomez said 3 years ago:

    Thank you, gentlemen for your comments.

    Spiros, I am grateful for your suggestions on cockpit painting/detailing techniques. I took a similar approach to the one you suggested, with a few variations yo may find interesting. I hope your experience around real fighters will help me to judge if my experimental approach worked. I have included on pic of an A-4B pit to show the worn look I was going for.

    Greg, I'll be looking forward to your 1/72 version of the FAA A-Quatro. Feel free to borrow any techniques as the build unfolds. Some 1/72 detail challenges are pretty close to 1/48.

    Eric, I think the camo will be really eye-catching and harmonious, if I can get it right.. I believe it was done in a factory or hanger setting, quite carefully. It seems to have weathered well. I think the Argentines did it themselves though, rather than having the Skyhawks delivered painted by the Americans. The other camo A-4C of off-white and green was definitely painted to match the terrain around their highland base (when it was decided where they would be based - according to the article). As to you other point, you will see that I chose the option of punching out each dial with my handy Waldron punch and die set - time consuming but worth it, I think.

  • Profile Photo
    Colin Gomez said 3 years ago:

    Here is the latest progress on the A-4B. I decided to work on the IP and consoles first to get them near photo-etch standard, or at least to a level of detail that would satisfy me. It is often said that nothing we can do with traditional modeling techniques can come close to printed color photo-etch. I didn't have any options here because I wasn't able to locate any affordable etch for the A-4B. My approach was to go for a more 3D appearance to the consoles than etch provides. I also went for a dull, weathered look, as opposed to the shininess of printed etch. Here is a real a-4B cockpit - pretty dull and worn-looking but busy.

    To get finer detail in some segments than I could not achieve with a paintbrush, I used segments of decal melted down over the raised detail (there was a good match-up). For the other switches and dials not covered by decal (most of them), I painted first with the cockpit Dark Sea Grey then covered the panel area with MMAcryl Semi-Gloss Black. Since I had recently learned on the Buffalo build that the SG Black was fragile, I made use of that fact by scraping the black off each switch and dial with a toothpick. So most of the detail was created by this extractive technique rather than by painting over top. I did some painting in the end to highlight larger details with light grey, red and yellow. I wanted to get a worn look which highlighted panel segments when white or light grey ran around and between these sub panels. I had noticed that MM Acryl Flat Clear tends to sink into crevices and turn whitish when laid on heavily. In this case, that was exactly what I wanted, so I used it in successive layers to highlight detail around switches and between panels. Where this got excessive or where a decal did not look convincing enough, I painted it over with flat black. You only see that finished look in the last two pics below.

    The IP is straight from the kit, with each dial punched out individually for the single IP decal and laid in the appropriate place. The bottom half of the panel is a single decal melted down over the raised detail.

    This worked very well as the printed switches and raised details matched up perfectly. I was also happy to preserve the warning striped areas intact over their raised panels.

    As for the fuselage sidewalls, I highlighted the fabric insulation detail Hasegawa provides, as well as a few protrusions by spraying Dark Sea Grey downward over a flat black pre-shade to deepen shadows.

    Finally, I worked on the ESCAPAC ejection seat. It is not quite finished , but I did it with color etch from an unused A-7 Corsair II - which I could cheaply replace. The A-7 has a near identical seat. I had to augment the harness with masking tape to make it more authentically layered and I also added strap detail to the back cushion with painted decal strips. The warning stripe on the seat side ejector handle is made from Airscale decal segment. It adds business to the pit and compliments the console detail well.

    That's it for now. More details tomorrow, when I may be able to close up the fuselage. You will be able to compare this approach to color etch when I upload the work I have been doing on the Super Etendard. That's a whole different modeling experience.

    Comments welcome

  • Profile Photo
    Spiros Pendedekas said 3 years ago:

    Your cockpit looks amazing, @coling! You made good use of many techniques, the result looking totally convincing.
    I liked that you used the MM clear "whiteness", as it dried, to your benefit.
    Looking forward to your progress!

  • Profile Photo
    Tom Cleaver said 3 years ago:

    @coling - if you're doing the A-4B in brown/green, C-239 or 207 are the ones you want - the successful ship-killers. According to my friend Pablo Calcaterra, who is the guy I know most knowledgeable about Argentinian aircraft in the Falklands War, they both used the centerline MER with three Mk. 82 bombs, rather than the single 1,000-pounder, since the three bombs gave a better kill probability. I'm going to do one of these with the Hobbycraft kit.