Messerschmitt Bf109 F-4 V-12, Royal Hungarian Air Force, eduard 1/48

Started by Erik Gjørup · 30 · 4 years ago · 1/48, Bf109, Eduard, hungary
  • Profile Photo
    Erik Gjørup said 5 years, 7 months ago:

    People – I have a confession…..

    I have a few 109’s in the works. All the ones in progress are eduard kits. This topic will be about a 109F-4 that is quite a bit along the assembly line, but I will be starting it up from the beginning, and then at some point the postings will catch up with reality – hope you will forgive me for taking that approach. It has been posted on my ello.co profile ello.co/airbum – however you have to be logged in to follow it there, so to spare you creating an account there, here we go;

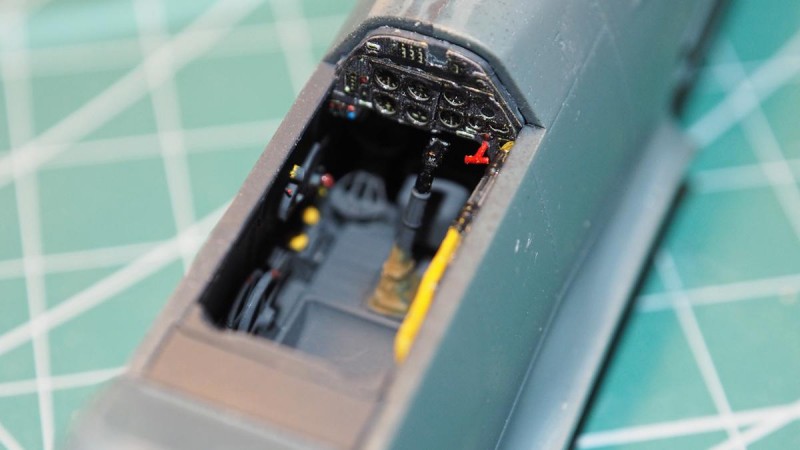
    The cockpit had some detail added. The throttle was remade as eduard has cast it to the wall, and pushrods and the tailwheel lock mechanism had to be made too.

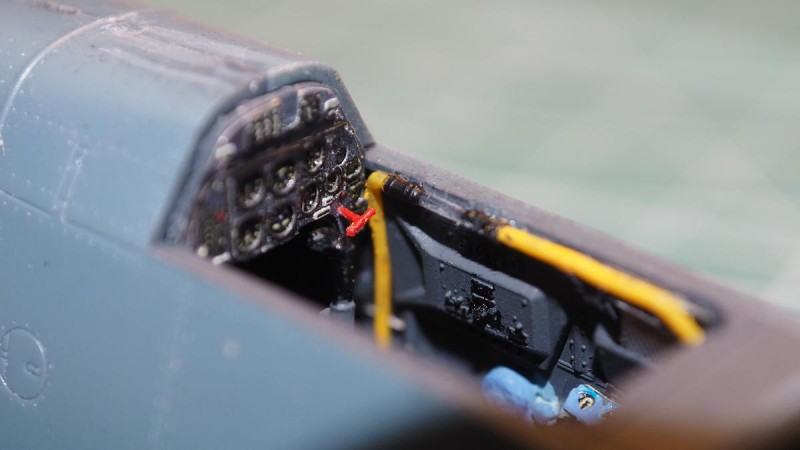
    On the right wall the chartholder was thinned, wiring and boxes placed, and a handle fashioned from stretched sprue.

  • Profile Photo
    Louis Gardner said 5 years, 7 months ago:

    I like it !

    Nothing wrong with assembly line model building ... 😉

  • Profile Photo
    George R Blair Jr said 5 years, 7 months ago:

    Looks good. I am looking forward to seeing a paint scheme that isn't normally used.

  • Profile Photo
    Morne Meyer said 5 years, 7 months ago:

    AWESOME! Will follow this build.

  • Profile Photo
    Csaba said 5 years, 7 months ago:

    Great build, I will follow it!
    You might find these photos useful. I built the V -07 recently in 1:72 scale, and found a few good photos of the Hungarian F-4s during my research. One of these is a rare original color photo of V -12.

    2 attached images. Click to enlarge.

  • Profile Photo
    Erik Gjørup said 5 years, 7 months ago:

    Thanx guys!
    Louis - right you are, the more the merrier…
    George, Morne and Csaba - hope that the finished work wont let you down - still has a "L" on my airbrush 🙂
    Csaba - thank you for the pictures - good inspiration!

  • Profile Photo
    Erik Gjørup said 5 years, 6 months ago:

    The office

    It has been a while since my last posting. Sadly there has been far to few hours spent at the bench, but at least (as I said earlier) I have quite a backlog of pictures, and so this evening will be spent at the PC.
    Now – here we have the assembled office

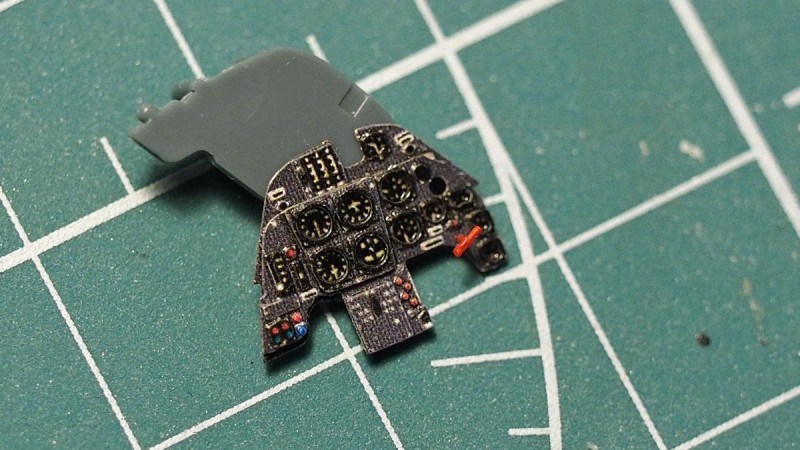
    The small red handle was sacrified to the carpetmonster at an early stage, so I tried my hand on a new one of stretched sprue. Came out a bit too large I think!

    The instrumentpanel is – apart from the handle – standard Eduard photoetch with the addition of Tamiya clear glasses

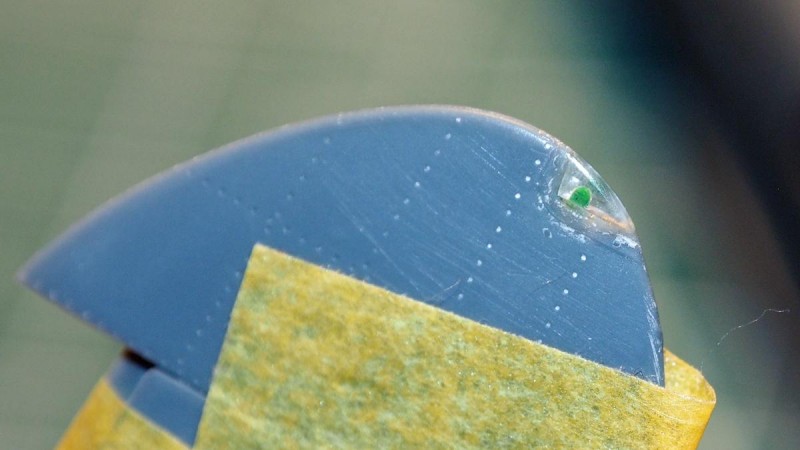
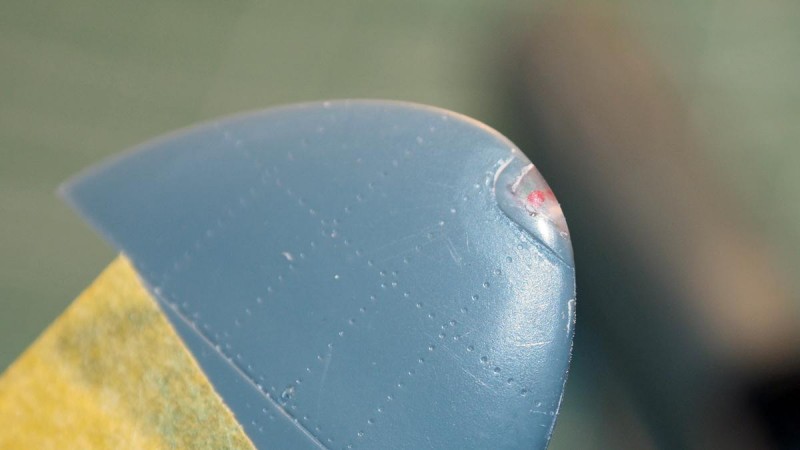
    Speaking of glass – the by now usual navigation lights were fashioned from clear sprue, here we have the green/right/starboard one


    And the redlight district is at port, as every sailor knows

    next up will be assembled wing and some fuselage details

  • Profile Photo
    Louis Gardner said 5 years, 6 months ago:

    It looks as if you have been very productive, even without too much spare time at the work bench. This looks fantastic Erik. Thanks for the update. I'll be looking forward to your next one.

    How do you change the font style of letters in your postings ? I like that too... 🙂

  • Profile Photo
    Erik Gjørup said 5 years, 6 months ago:

    Thank you Louis - the font style and lettering is explained further on iModeler - it is down under tutorials at the bottom of the page. When you get it it is actually rather easy! For the headlines you just write heading in a "square" (alt gr+( and alt gr+) on my keypad) and after the larger text you do the same, only preceed "heading" with a "/". For italics just replace "heading" with "i". Have fun! (check the page on BBCode here on iModeler)

  • Profile Photo
    Erik Gjørup said 5 years, 6 months ago:

    Wings on, keep cool!


    Having assembled the wing, it was glued to the fuselage and left to dry (for a full month actually!)

    After a month of setting, water and oil coolers were detailed with eduard photoetch and copper wire and added to the wing and fuselage.

    Some cleaning and adjustment needed.

    And thus the sun sets on this chapter.

    next up more detailing on the cockpit and fuselage

  • Profile Photo
    Erik Gjørup said 5 years, 5 months ago:

    Windscreen and fuselage


    Windscreen added – the Revi had received new glass from acetate – the kit version having a nasty line down the middle.


    Revi seen from behind – and the panel with its “tamiya clear glass”


    The left front part of the “F” can be opened, the illusion being imprived by some etch-details

    109’s have a hole in the aft fuselage to put a broomstick or whatever into to add handling. The hole is actually a tube, and one has been fashioned here by a stretched handle from a swob

    next up more detailing and guns – comments welcome

  • Profile Photo
    david leigh-smith said 5 years, 5 months ago:

    Excellent work, Erik. Those Eduard 48 scale 109’s are a joy to build. I really like all the nice touches such as the broom handle ‘hole’.
    Thanks for sharing the build, really enjoying it.

  • Profile Photo
    Greg Kittinger said 5 years, 5 months ago:

    A broom handle hole? Who knew! I just received a Tamiya G-6 from a friend (1/72), and having not built a 109 in a 'coons age, I thought I might get to it soon. You're details are amazing - using you for inspiration (thought not near so much detail at my scale...).

  • Profile Photo
    Erik Gjørup said 5 years, 5 months ago:

    Broomhandles - just as essential for aviation as coffee! (remember "the right stuff" - famed for the broomhandle to close the hatch - perhaps an idea for imodeler at the movies?)

    @dirtylittlefokker - all to kind! But yes, the Eduard kit really helps a lot in the process.

    @gkittinger looking forward to your 109-build 🙂 (I guess I'm too old for 109's in 1/72)

  • Profile Photo
    Erik Gjørup said 5 years, 5 months ago:

    The business end

    a look at the cowlguns and some other details

    The gun throughs were as usual sanded down to be a bit more flush with the cowling.


    With the wings in place, ailerons came into play


    And finally for this installment the rudder was glued into position too


    next up more detailing and guns – comments welcome