Tamiya P-47D Thunderbolt, 1/48. Razorback and Bubbletop, Europe and Asia.

Started by Harvey R. · 84 · 2 years ago
  • Profile Photo
    Harvey R. said 2 years, 2 months ago:

    Finishing the Cockpits

    With the bubbletop's mostly done, time to work on the razorback. Same method completely, and the parts are largely the same though a different gunsight and instrument panel are the two biggest noticeable differences.

    Interestingly, another difference is with that right-hand wall. Tamiya released the P-47D Razorback in 2002, the Bubbletop in 2003, and then the P-47M in 2005, you can see that the detail is very slightly more refined on the bubbletop's cockpit particularly in those levers which aren't quite as oversized.

    Regardless, with the two canopies assembled the thing I've been waiting for was the instrument panel. The decals would not settle, which isn't something I particularly have an issue with normally even with Tamiya's thick decals. I think part of this is not giving enough of a gloss coat to the bumpy IP, I also am starting to doubt how useful this 'stronger' Mr.Mark Setter is compared to Micro-Set and whether its worth using it as it leaves a weird white gunk on the plastic. Unfortunately, my Micro-Set ended up evacuating the pot it was in a few months ago. Regardless after literally drowning the decals with lots of application of Mr.Mark Softener, and dunking it fully in Micro-Sol, and then finally dabbing on some Tamiya Extra Thin, the decals were down enough to warrant gluing the IP in place. Finally I gave it all a clear matt coat.

    Joining the Fuselage

    And with that done, the cockpit could be glued in, the wing spars could be added, the turbocharger exhaust could be put on, and the whole thing could go together, engine exhausts were also placed in from the inside. Interestingly I found the razorback to fit together noticeably better than the Bubbletop, the Bubbletop wasn't bad but just the worse of the two. And with the fuselage tougher and glued for a bit, the back of the Bubbletop can be placed on.

    Now to go over the seams with extra-thin, and leave it 'til tomorrow before we consider filler.

    Not pictured, but I also changed those engine cowlings. The turbocharger intake is neutral grey. I feel bare-metal is more suitable for a factory made bare-metal aircraft, the photos of the Razorbacks all seem to be grey and its hard to tell with the RAF ones but I've seen at least one coloured photo of it being grey. Luckily the join for these parts was very weak due to it being mostly glue-to-paint so I was able to take them apart without damage and respray it rather than have to do some masking attempt. I'll glue to Bubbletop's engine on but I'll leave the Razorback off until the checkerboard is painted.

  • Profile Photo
    John vd Biggelaar said 2 years, 2 months ago:

    Interiors look amazing as always, Harvey @scalerambush
    Maybe you should display one on your shelve without encapsulating it within the fuselage.
    Great progress.

  • Profile Photo
    Spiros Pendedekas said 2 years, 2 months ago:

    Amazing cockpits, my friend @scalerambush!
    Good thinking on the turbocharger intake color.

  • Profile Photo
    Harvey R. said 2 years, 2 months ago:

    Time for another update!


    Preparing for Primer

    Since the fuselages were put together the next logical step was on the wings. These went together without too much issue, though the insert gun panels never seem to work perfectly on any model. Regardless, the wings were added to the fuselage without too much hassle. A small gap could be seen in some areas but overall it was a very solid fit, the biggest issue was on the underside of the wheels up Thunderbolt, in hindsight it would have been better to put the wheel cover that is closest to the fuselage in once the wings were together to try and balance out the gaps evenly, but with some putty things have been mostly sorted for now.


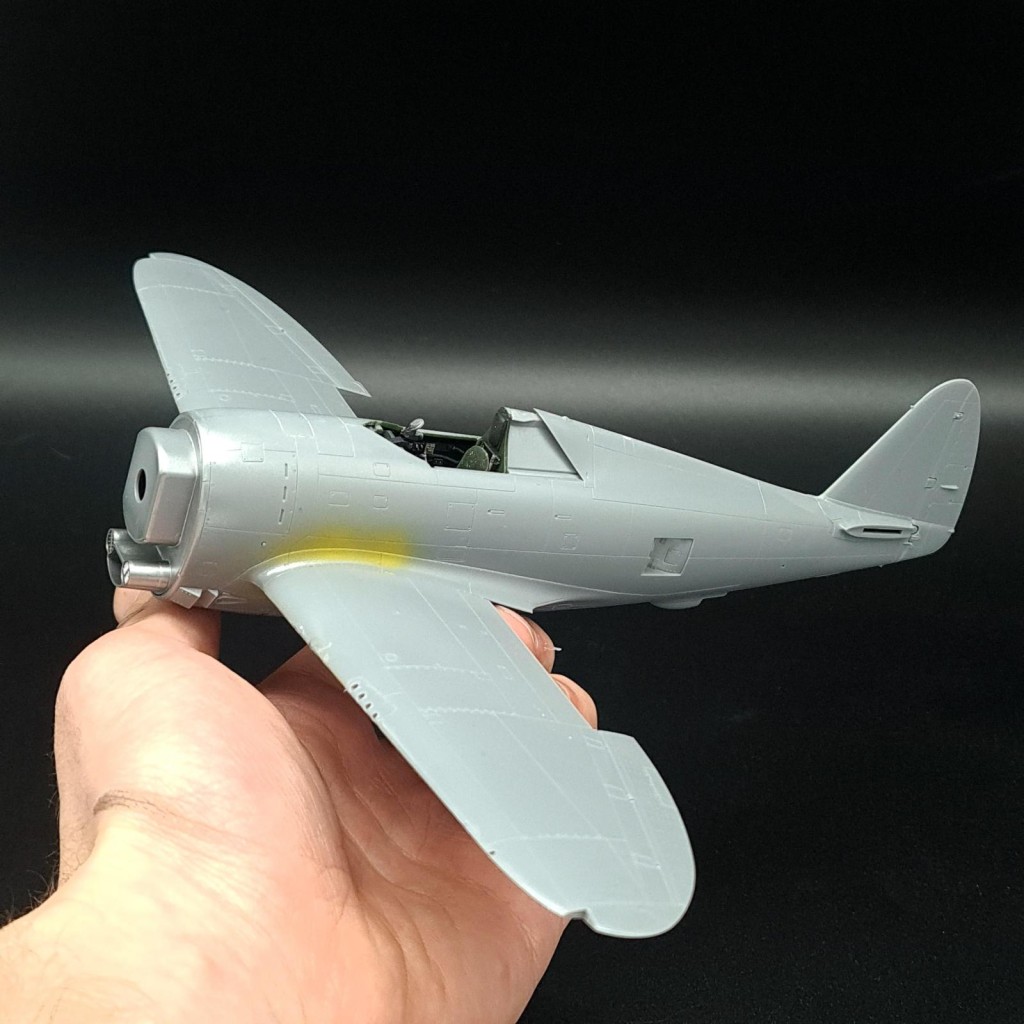
    Flaps on the flaps up bubbletop have also been added, I found the fit of these to be questionable. I must state that I mean questionable in terms of Tamiya, which still means a good fit compared to most kits, either way I can't help but feel they just don't quite want to go in. I also added the turbocharger outlet doors on the in flight one, the US markings were painted both inside the door and outside so you'd always see a full star which naturally isn't an issue for an RAF aircraft so I just stuck them on in the open position, I will likely put them in the open position on the razorback too as it seems most photos of P-47s on the ground have them open.

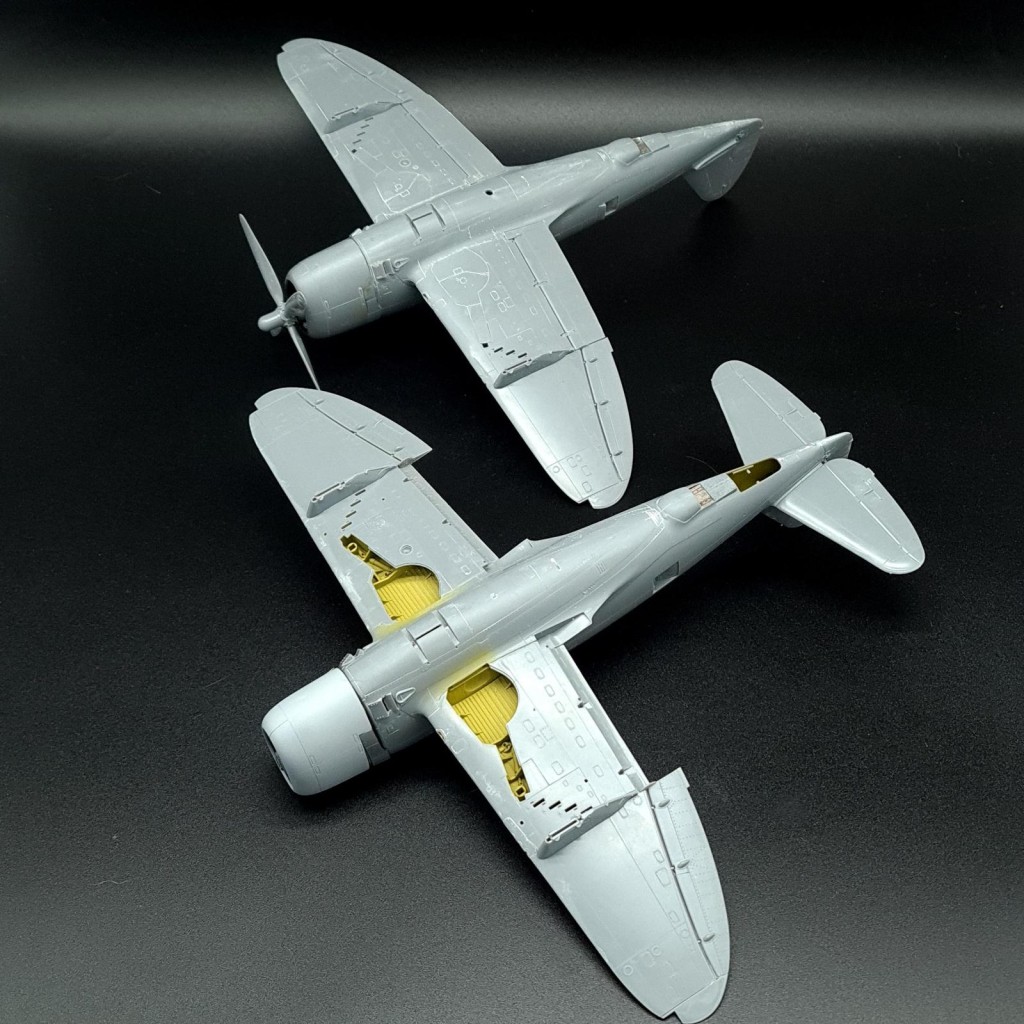
    On the subject of weaponry, I opened up the holes and added the wing racks that could hold either bombs or drop tanks. These would be painted in the underside colour so I added them here now, I also opened up holes for the M8 114mm rockets on the Razorback. I will give the RAF Thunderbolt a pair of bombs, I was considering a centreline drop tank or bomb but I haven't actually been able to find a photo with this, the USAAF Razorback will likely get the M8 Bazookas and a 500lb bomb on each wing, with a 108gal fuel tank on the underside as this squadron was unsurprisingly very active in the ground attack role after D-Day.

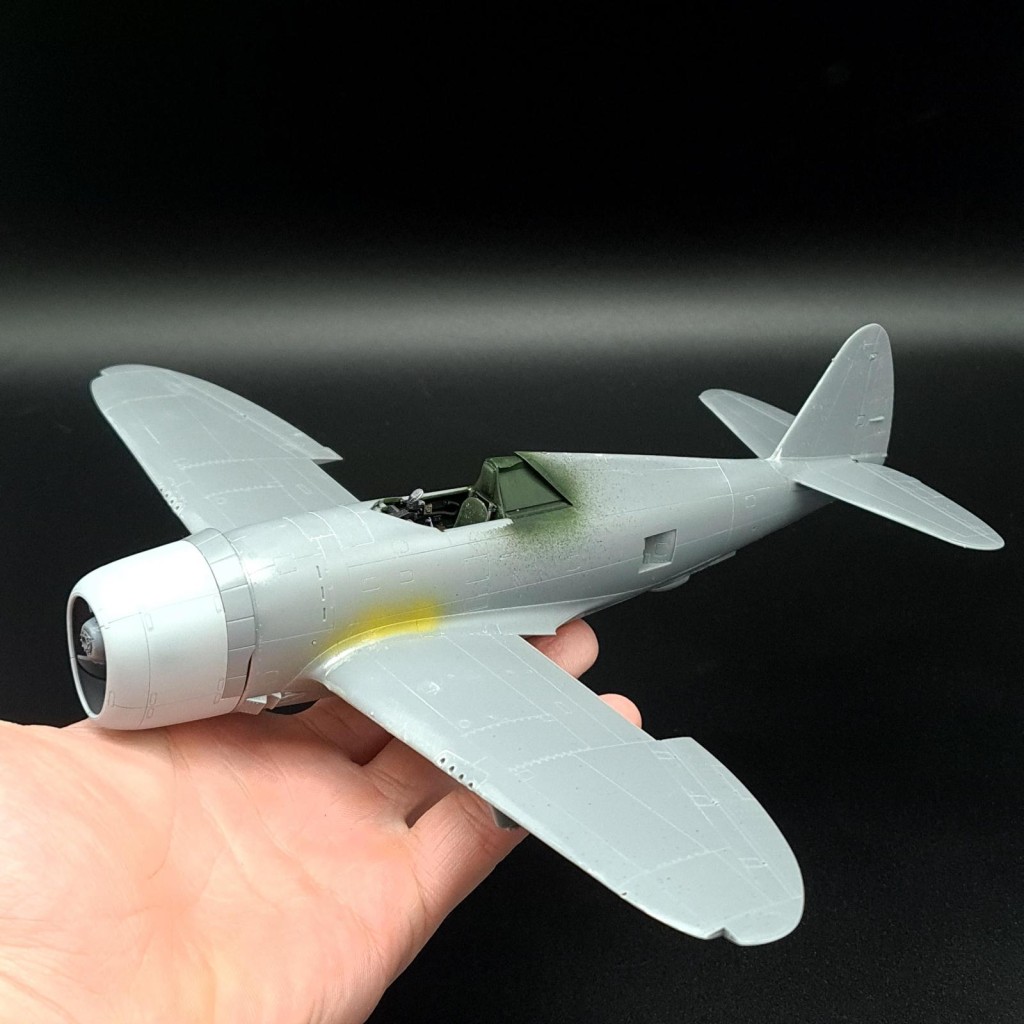
    To make life plenty more easier, I'll add the canopies prior to painting. For the bubbletop this means painting up our resin pilot who is now feeling grey with primer, for both of them the clear parts have been dunked in some pledge floor polish to give them some shine and are currently drying. This is a step I haven't bothered to do in a while but the last few kits have all had issues with some sort of 'ghosting' on the inside of the canopy and I'm hoping returning to this method may solve this. The razorback will be painted with an open canopy, but the fit of the canopy seems quite good so a very minimal amount of PVA should keep it in place whilst I paint and can allow the canopy to be simply removed with the tiniest amount of force when it's all done.

    I also got round to building the propellers, for those unaware the choice of propellers in these kits is approximately 4 different options. The P-47 went through many different propellers, and many were changed as the years went on, but I think I chose the correct propellers for the job based on the photo of 'Jungle Queen' and a photo of 'Snafu', a P-47 from the same squadron and time.

    At the moment the elevators are just pushed in for the photos, it'll be easier to paint the models without them in and the fit is good enough that they can just be glued on after painting. The engine on the bubbletop has been glued on, but the razorback has not. I will try to paint the checkerboard on hence why it's the only bit primed at the moment, but if that fails the bubbletop kit luckily includes a marking option from the same Duxford squadron which means I do have checkerboard decals to fall back on if it doesn't turn out fantastic.

    Finally, here's some photos of the P-47 with flaps up and down, and the 3 join tabs which are changed to let you choose.


    2 additional images. Click to enlarge.

  • Profile Photo
    Spiros Pendedekas said 2 years, 2 months ago:

    Nice update, my friend @scalerambush!

  • Profile Photo
    John vd Biggelaar said 2 years, 2 months ago:

    Great progress, Harvey @scalerambush
    Nice option they added for the joint position on the flaps.

  • Profile Photo
    Harvey R. said 2 years, 2 months ago:

    Thank you! And yes, much appreciated to have the option!

    A minor update: The primed cowling was painted white. Plan A for the checkerboard design was to use the pre-cut masks in the Montex set. These are absolutely awful, they're clearly made by someone on a computer not by someone actually measuring the kit, compared to the Tamiya decals they're way too big and don't curve in the right ways.

    So, time for Plan B, which is the long way of using Tamiya tape and doing it myself. If this turns out poorly I can always strip the paint and use those decals for Plan C.

  • Profile Photo
    Tom Cleaver said 2 years, 2 months ago:

    A couple points on "Eileen" when you get to painting the model, Harvey (I wrote a book on the 78th and Frank Oiler was one of the guys I focused on). This airplane was "well-used" by the time new-guy Oiler had it passed down to him in July 1944. It's early enough in production that it was likely still painted in "green base" Olive Drab. That's a color that is the same as RAF Dark Green - they were both created using the specifications for WW1 PC.10. Another thought is that ETO airplanes were mostly "sun-faded" at altitude, over the clouds covering their bases. Thus, there is a strong UV element in the result. I did that by adding a bit of Violet to the RAF Dark Green (I was using Tamiya paints). There's another argument in favor of this camo color: Oiler took the panel that the bee and name were painted on, and had it transferred to the "bubble top" P-47D he received in late August. All those airplanes were painted in RAF Dark Green uppers and Sky lowers (according to Dick Hewitt, who was in charge of that). When you look at photos of the second "Eileen," there is no difference in the background color to the bee's panel, which there would be if the old P-47 had been painted in "brown base" OD.

    YMMV

  • Profile Photo
    Harvey R. said 2 years, 2 months ago:

    Thank you for that great information, I'll definitely keep it in mind! Great timing on it too, as these two are about ready for primer. Should provide some interesting weathering opportunities with the sun fading.

    The RAF Officer


    Before I can get to priming, I have a few loose ends to tie up starting with the elan13miniatures pilot. This was super fun to paint up, and has the perfect amount of exaggeration in the facial features to allow some nice brush work.


    I think this guy is the best pilot I've done yet, and thankfully the Bubbletop allows him to be clearly seen after this is all done. Unfortunately he did suffer some reconstructive knee surgery to fit in, he's supposed to fit a Tamiya Spitfire not a Thunderbolt.

    With him out of the way I glued the glass on with Krystal Klear. The canopy of the Razorback is glued on with a few tiny dots so it can be removed easy enough later on.

    After this the internal colour was painted, black for bubbletop and green for razorback.

    Next up is to mask off some key areas and then it can get primed.

  • Profile Photo
    Spiros Pendedekas said 2 years, 2 months ago:

    Nice progress, my friend @scalerambush!
    The Officer looks great!

  • Profile Photo
    John vd Biggelaar said 2 years, 2 months ago:

    Nice steps, Harvey @scalerambush
    Indeed a great looking officer nice paintwork.

  • Profile Photo
    Eric Berg said 2 years, 2 months ago:

    I like how your “happy chaps” are turning out. Those jug photos you posted are valuable weathering references Harvey@scalerambush.

  • Profile Photo
    Harvey R. said 2 years, 2 months ago:

    Prime Day

    I got some primer on the Thunderbolts a few hours ago, it showed a few issues predominantly where the sprue gates were as well as me seemingly to forget to remove any of the filler added to the razorbacks leading edge.

    I also realised I managed to forget to add a door to the bubbletop, so I'll cut some styrene to size to plug the gap. This tiny door is moulded onto another door which was sanded down for the wheels up.

    All in all though, pretty standard. I'll fix these up and hopefully spray another coat tonight.

    Primer used was Mr.Surfacer 1500, it isn't the cheapest stuff so I keep an empty tamiya pot where I pour unused mixed primer into it. So this is a combination of excess primer from the last few models and from a mix of white, grey and black hence it's colour. Waste not want not!

  • Profile Photo
    Spiros Pendedekas said 2 years, 2 months ago:

    Nice steps, my friend @scalerambush!
    A really smooth finish already!

  • Profile Photo
    John vd Biggelaar said 2 years, 2 months ago:

    Nice progress, Harvey @scalerambush
    Great idea to save the unused primer. Always useful for later projects.