USN Douglas A-1H Skyraider Tamiya 1/48th

Started by Chuck A. Villanueva · 96 · 3 years ago
  • Profile Photo
    Chuck A. Villanueva said 3 years, 11 months ago:

    Moving on the assembling the engine, cowl and scoop on the front part of the fuselage.

    The cowl is molded in 1 piece and in past reviews from other modelers is the correct length. Despite being an excellent kit, the only flaw in the Monogram kit is the cowl is short. Which is not that far off so it is not a deal breaker.

    I won't do much with the engine as I will configure this with the cowl intake flaps closed. Black based with steel lightly airbrushed over the black to highlight the cooling fins. Then the center flange is attached to the cooling flaps in the closed position.

    Next the polycap is inserted into the back of the cooling flaps and then the assembly attached to the engine crankcase.

    Next the engine assy is inserted into the cowl, all the way until the cooling flaps meet the inner edge of the cowl with no gaps around the ring.

    The rear cowl ring filler is then placed in back of the engine cowl.

    The forward nose section has a bit of Lt Gull Grey painted around the areas where it will be difficult to reach once the cowl assembly is in place.

    The exhaust ring and pipes are painted Burnt Iron.

    Step 4. is to install the exhaust ring and pipes, intake scoop and cowl.

    The exhaust ring and the lower intake scoop is place under the nose just ahead of the wing attachment point.

    The cowl flaps are attached to each side of the cowl. Then the cowl is attached to the air frame.

    Now with the cowl installed with the engine. More detail work to follow as we start adding some feathers.

    More to follow.

  • Profile Photo
    Spiros Pendedekas said 3 years, 11 months ago:

    Great progress, Chuck @uscusn! I will repeat myself, but cannot help it: your presentation/pic coverage is equally amazing. Thanks for sharing!

  • Profile Photo
    George R Blair Jr said 3 years, 11 months ago:

    Looking good, Chuck. In the photos it looks like you have several more builds in line.

  • Profile Photo
    Andrew H said 3 years, 11 months ago:

    It's very strange that I have this same kit, but it looks as though Tamiya has revised the exhaust between your kit and mine, as well as the front of the fuselage... Instead of one hub with all pipes that attaches to a boss on the fuselage, there are port and starboard pieces that fit around locating tabs. I wouldn't think it would be common practice for a company to change mold and instructions... and I'm curious now [not that it's of any consequence to your build] why they would have done it.

    1 attached image. Click to enlarge.

  • Profile Photo
    Jeff Bailey said 3 years, 11 months ago:

    Great piece, Chuck! @uscusn Although I went Army, thanks to my Dad, I like to echo something YOU say: "Fly Navy." And the Skyraider is one of my favorite aircraft of all time. I like to think of them as B-17s with only one engine, and fewer guns! The max load for this aircraft is pretty amazing (at least to me!) for a single-engine machine.

    I'll be watching this one closely!

  • Profile Photo
    Stellan Schroeder Englund said 3 years, 11 months ago:

    Yes, they did change the exhaust bits along the production. Not sure why as either works alright.

  • Profile Photo
    Chuck A. Villanueva said 3 years, 11 months ago:

    Thanks Spiros, though an older kit now, (time is such a blur these day, my ride in the Tomcat feel like it was yesterday, yet it was 30 years ago). But some have not built this kit as yet like me and sharing the joy of building it is part of that joy.

    Yes George I have the factory producing full tilt. in 48th and 72nd scale projects along with some armor, with 4 more coming online soon.

    Andrew that is a very interesting point, as not only are the exhaust stacks mounted differently but even the forward section of fuselage is different as well. My kit is one that was bought in the late 90's. Out of curiosity now aroused I will check the Tam Air force Sandy and see how the exhaust system is assembled in that kit. Since that kit was produced a bit after the Navy version.

  • Profile Photo
    Andrew H said 3 years, 11 months ago:

    Not only that Chuck, but they added a pin to the lower "6 o'clock" cowling, and added a hole to part B2. I bought my kit just last year. Again, nothing of importance, just.. interesting.

    Ill bet it has something to do with this...
    https://www.scalemates.com/kits/tamiya-61505-douglas-a-1h-skyraider-us-navy--133972

    I'd bet they modified the plastic to be common for the powered and non-powered kit, which necessitated a big hole in the front of the fuselage.

  • Profile Photo
    Chuck A. Villanueva said 3 years, 11 months ago:

    Andrew that makes sense. Keeping the updated molding to accommodate the powered kit that is now sold. That will explain the change.

  • Profile Photo
    Chuck A. Villanueva said 3 years, 11 months ago:

    This session will have the wings assembled. As well as the gear bays.

    The lower wing is nipped off the sprue, the wheel bay areas are pre painted Tamiya Gloss White. Also Tamiya also allows an option to have the flaps lowered.

    First installing the landing gear bay internal walls and gear doors. Everyone mentions the great idea on the P-38 with the doors attached to the side interior walls on that kit. Well Tamiya has been using this particular method for awhile now on a few their previous kits. Which really helps set the correct angle in how the doors hang open when they are down.

    All 4 pieces fit very in place on the locating tabs that are in the lower wing. Setting square once in place.

    One the the main wheel bay well side walls set, next was to attach the upper wing panels. Normally at this point I would place the lower wing to the fuselage and then add attach each upper wing panel, but after a test fit, there is no need the fit is excellent.

    A brown wash is applied over the details on the upper wing panels before they are attached to the lower wing.

    Next is to attach the upper wing panels to the lower wing.

    8 additional images. Click to enlarge.

  • Profile Photo
    George R Blair Jr said 3 years, 11 months ago:

    Tamiya must have some of the best-designed kits on earth. Looking forward to the paint and decals.

  • Profile Photo
    Spiros Pendedekas said 3 years, 11 months ago:

    Me too looking forward to your painting, Chuck.
    Your work is amazing.

  • Profile Photo
    Chuck A. Villanueva said 3 years, 11 months ago:

    Thanks George and Spiros, the right amount of detail and parts count to build a great replica of the subject. A great base to enhance with AM parts if you wish or just convert it to a different variant.

    With the wing installed, time to work on the horizontal tail.

    These are molded in a neutral position so some modification will be needed if you want to pose them drooped down. Detail is excellent.

    Each stab once assembled slip neatly into the slot in the tail. Nice firm fit, insuring perfect alignment and level.

    Tamiya does give you several options to display the dive brakes open, and drop the flaps. I will leave the brakes close but will drop the flaps on this build. Give it a bit of character.

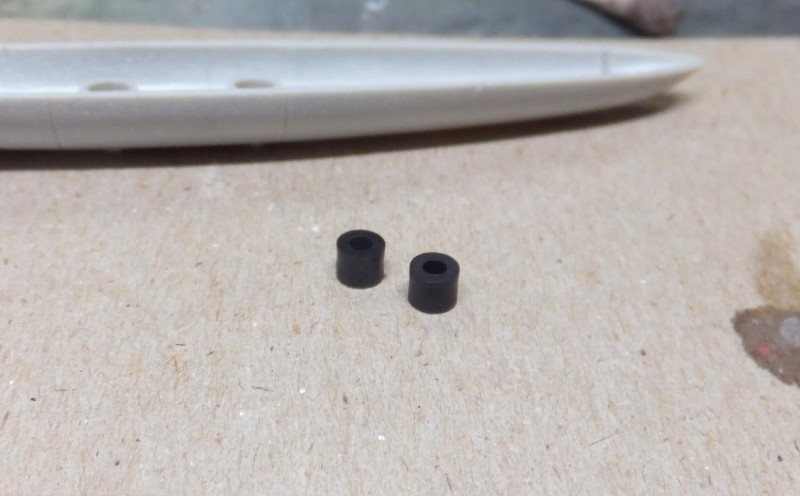
    The flaps are in 2 pieces for a total of 4 to build a pair. Then 2 actuators are also supplied to display in the full down position.

    Each are assembled before the arms are attached.

    First I place the flap into the wing for a test fit, then attach each arm to set the correct angle.

    The fit is good but careful in handling as this is all whats holding the flap in place. So careful handling through the end of the build process will need to be taken.

    Next the rear steps will be installed at this point. Most of the time I usually save this step towards the final detail bits added after painting and decals. Usually the point when installing the landing gear step. But these are sturdy and will just go ahead and put them on.

    While killing time I decided to build the center drop tank. Now this is the first time that Tamiya used a unique and great idea to give you the option to insert the polycaps into not only the drop tanks but also the 1000ilbs as well so you can just push them in and pull them off.

  • Profile Photo
    Spiros Pendedekas said 3 years, 11 months ago:

    Great progress, Chuck.
    Loved the dropped flaps. They indeed add character to your model.
    Loooking forward to your next installment.

  • Profile Photo
    Erik Gjørup said 3 years, 11 months ago:

    Those flaps look great. And nice job on the gearbays too! (I know, I'm a few posts behind, but then there were more to see)