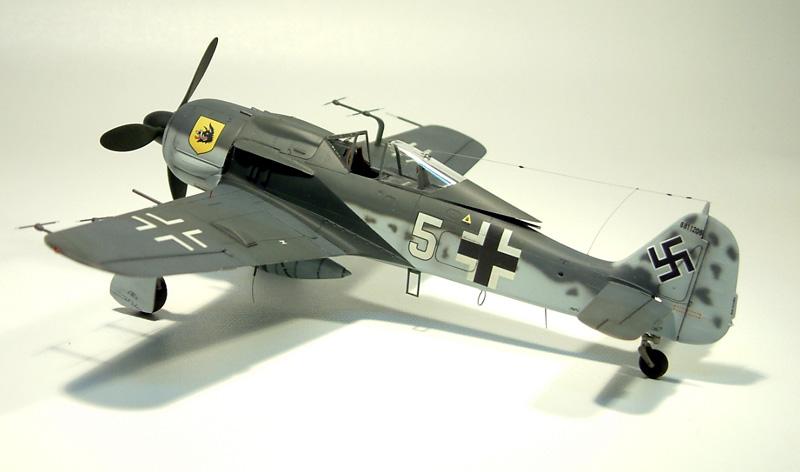
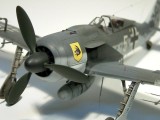
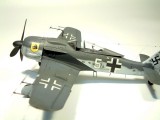
FOCKE WULF 190A-8/R11 "Wilde Sau" Nachtjager
DRAGON 1/48 SCALE INJECTED PLASTIC KIT
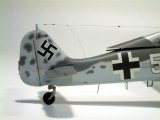
Construction was straight-forward and without event. For painting I used Tamiya Acrylics mixed to the correct colour. I mixed the RLM76 first and applied it to the lower airframe, the fuselage sides and other appropriate areas. When that was dry, I mixed the 74 and 75 according to the Tamiya mixing ratios and applied them appropriately. At this point in the project I decided to make an anonymous aircraft rather than Gunther Migge's "White 9". With that settled, I allowed myself a little artistic license and I applied some simple mottling on the fuselage sides as well as on the fin and rudder.
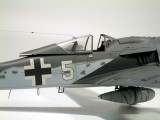
Once the camouflage had cured completely, I masked and sprayed the black markings on the forward fuselage and once again set it aside to dry. Very little touch up was required and I let the model dry again for a couple of days in preparation for the gloss coat.
The kit supplied decals were of typical Dragon quality, well printed but a little on the thick side. The kit sheet comes with fuselage codes of 0 through 9 and with enough Werk Number decals to be able to make any number. I used Mr. Mark Decal Softener as my decal solution and used it to good effect on these.
With the decaling complete, I applied a wash to the control surfaces and access panels only, and then sealed it all up with another coat of the gloss. Before applying the flat coat, I used some very heavily thinned light gray applied to the center of the panels and other high wear areas to break up the monotone quality to the paint finish and add interest to the model. When I was happy with all that, I sealed it all up with a couple of coats of Pollyscale Flat.
Adding the bits and pieces is always the most nerve wracking part of a project for me. In this case, it was even worse as the details included the radar antenna array. I made myself work slowly and carefully I began with the previously painted and weathered undercarriage. Once I had the model on its wheels, I added the small antennas on the underside rear fuselage, the fuel tank and the pilot access step.
With the underside complete, I worked on completing the canopy and windshield parts and then added the radar antenna array. I applied a little more Pollyscale Flat to ensure there were no shiny spots from the CA glue I used to attach most of the parts at this stage.
Once I saw the very nearly complete model, I must admit I didn't want to weather it at all - so I really didn't.
Last, I drilled through the canopy and threaded some invisible thread through and attached it to the framing under the solid part at the rear of the canopy. With that glued and strong, I placed the canopy in the open position on the fuselage and then attached the other end to the post on the fin. With that done and nicely taught, the model was finished.


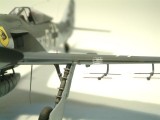
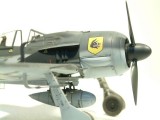
Stellar workmanship, sir...an outstanding job indeed.
Looks Factory Fresh and ready to go……nice build.
Very pretty, Mark. Nice work.
Excellent finish, Mark, I agree with you about the weathering, it looks really good as it is. Interesting read about your build and painting, too.
Thanks George, I actually intended to heavily weather it, even painting the entire model with floquil old silver under the camo paint with the intention of putting a lot of chipping and wear on it later. Changed my mind.
Yeah ain't it hard to know how far to go with weathering? They look good at a certain point and you don't want to mess with it anymore, I hear ya. That looks real good right as is.
Thanks guys!
Mark, Beautiful clean build of a killer AC. Actung! Wilde Sau indeed!
Mark,
Very,very, nicely done. I like the clean look for a change.
I agree. I sometimes wince at models dirtied-up as more a modelling fetish than a reflection of theatre-of-war conditions. What self-respecting ground crew would allow their charge to get into such a condition?!
Very clean build that looks every bit like a Wurger. Welcome onboard, Mark!
Hello Mark. Very good work and a pleasure to look at. Setting a high goal for me to aim at.
fine job on a kit that can get a little testy
Thanks again for the kind comments!