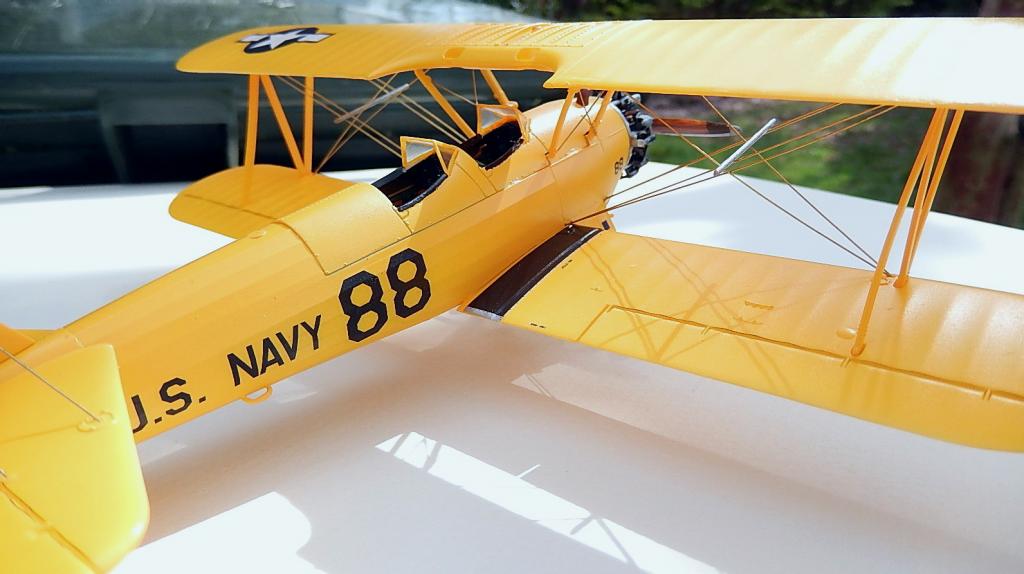
New Revell 1/48 Stearman completed
Hello all: First of all, many thanks to Jim Sullivan for enhancing the photos you see here.
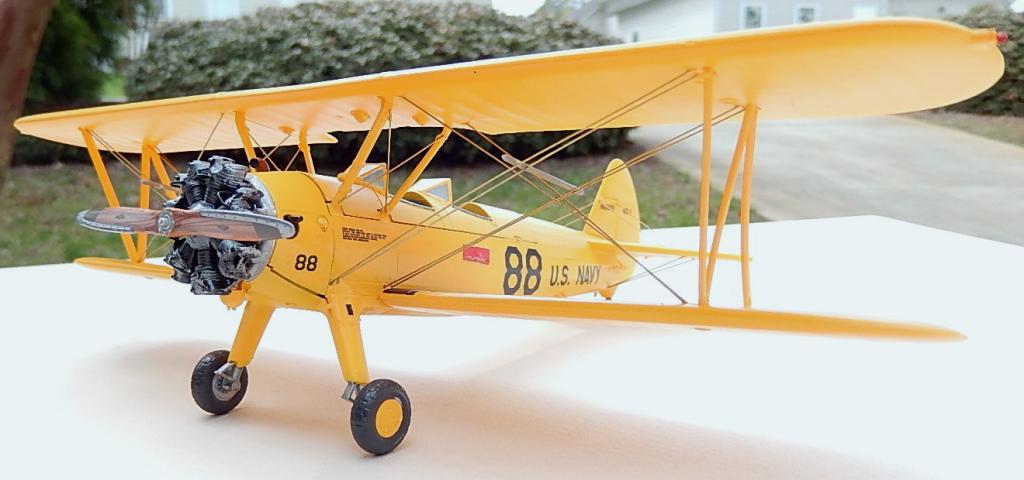
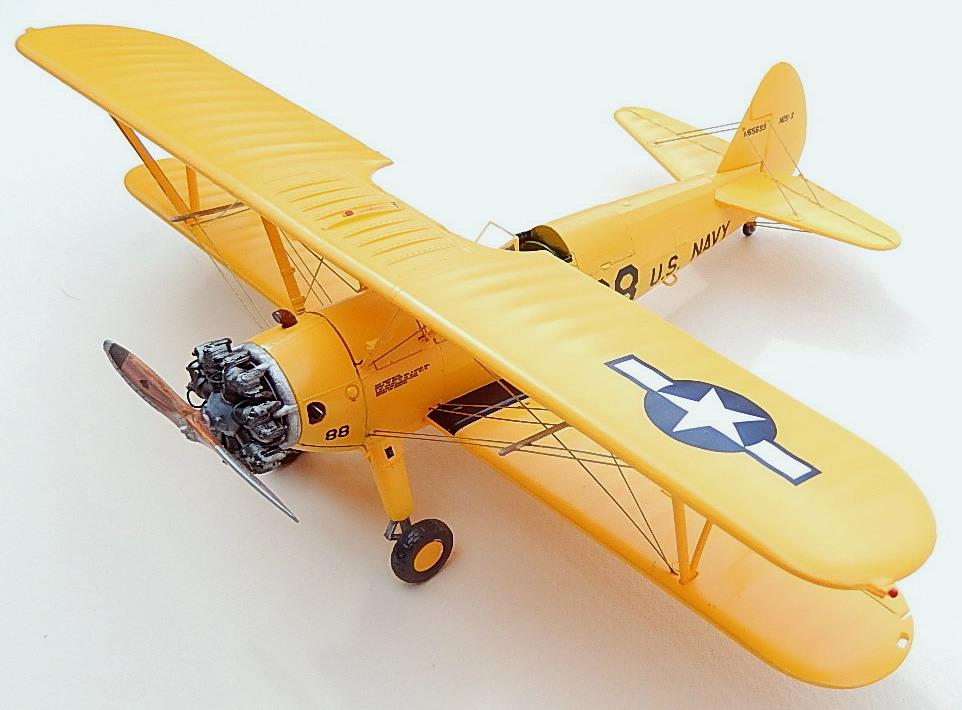
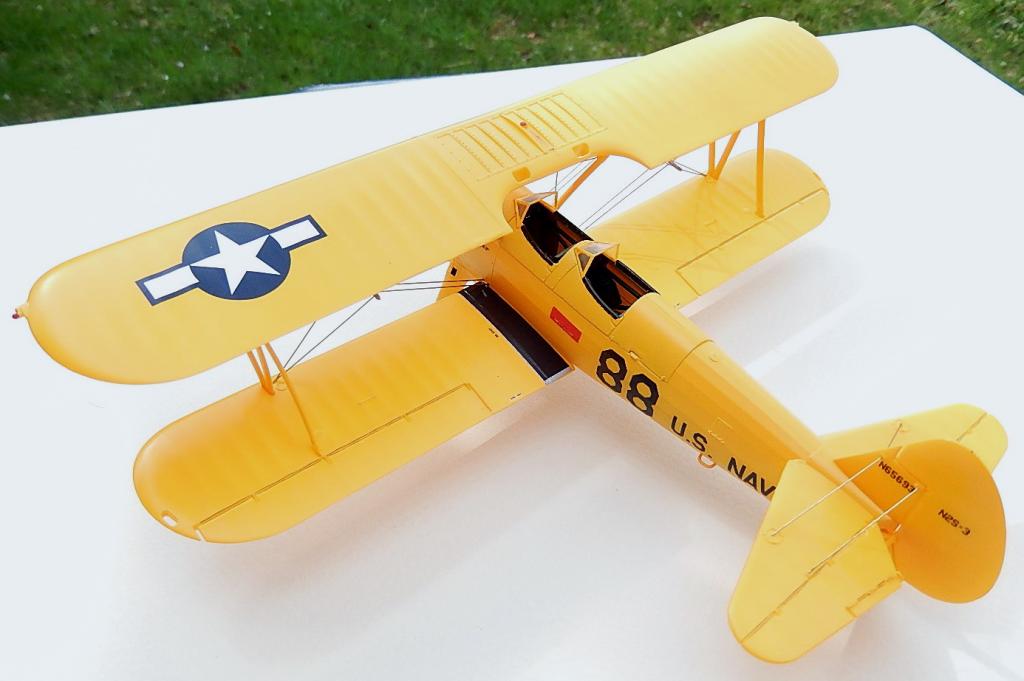
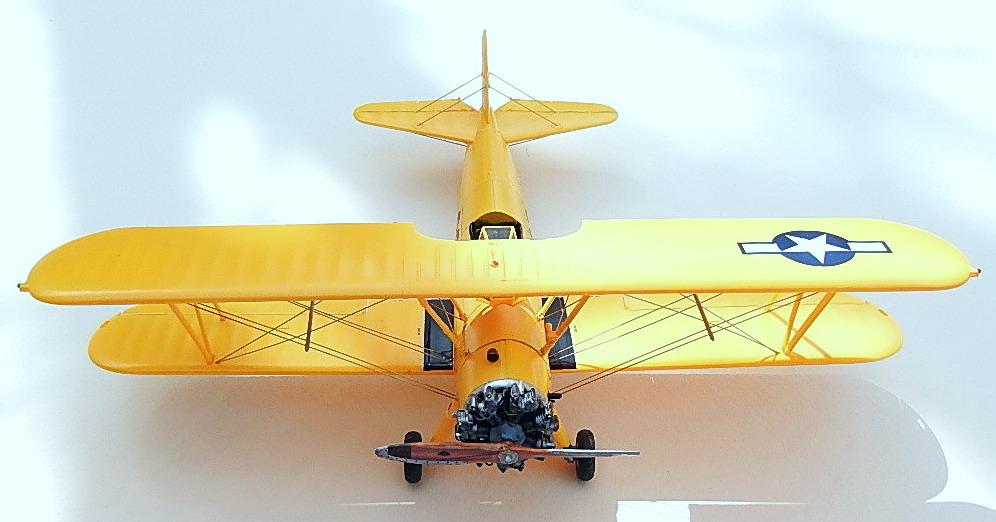
I just completed this build. What a beautiful model. I wrapped it up in less than 2 weeks. I added lap belts from Eduard. The model is rigged using Detail Master scale 1/2" brass wire which looked good to my eye. It was first painted with flat yellow form the Testor's small bottle, then given an overcoat of Future prior to decals, and a final coat using my last bottle of Polly Scale satin finish. I used kit decals for the Navy version, including the instrument panel and prop markings. The prop need a bit of touch up painting but sure came out well.
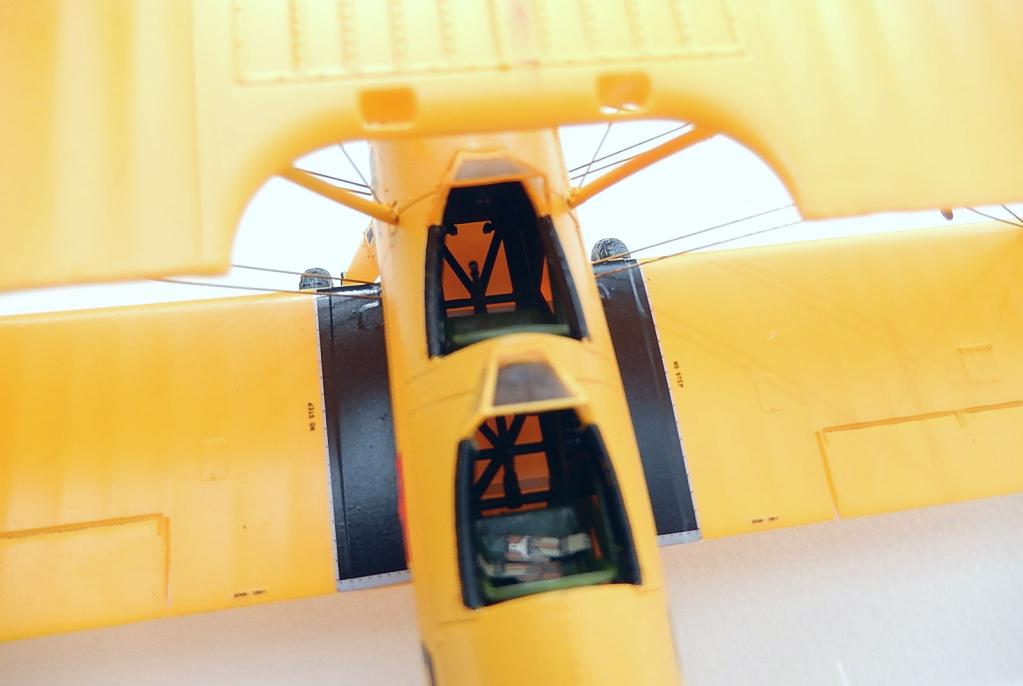
The interior was painted with a linen pale white then I highlighted the longerons with a colored pencil in the proper interior green shade. The framework is interior green. I removed the molded on kit harnesses from the seats prior to installing the Eduard color etch parts. I also wired the engine and represented the spark plug boots with painted sprue.
I used the Internet and the Martin Bowman Stearman book for reference.
My goal was to portray this model as one that had just come out of the refurb shop. I even allowed for a bit of overspray behind the seats.
Cautions: The plastic is soft and the tail wheel will break off before you complete the build.
I have another one in the stash and will build another Navy version, this time in the doped silver scheme. But first, a 1/48 Hobbyboss F8F-1 Bearcat is calling my name.
Comments much appreciated. Clark


man...that's beautiful
Thanks very much Bob. I appreciate your comment. Clark
Spectacular build, Clark...and that prop DID turn out nice-lookin'.
Thanks Craig. The decal is 4 parts: 2 front and 2 rear. They are smaller than the prop itself but touching up with some Testor's mixed to match worked well. Clark
Outstanding. That prop looks like a labor of love. Makes me want to drop everything & get to work on mine.
Thanks Al. Just goes to show that Monogram and Revell can still produce economical killer kits. Clark
Hello Clark...I certainly agree that the new Revell Stearman kit is quite nice and you did an excellent job on your model. That color looks spot-on to me. Like Al Hoffman said, it makes one want to push a current build aside and get to work on the Stearman. Congratulations on a fine build and I look forward to seeing your next build, the F8F Bearcat.
Thanks pal-much appreciated. May have some time this morning to get started on the Bearcat. Clark
The paint work on the prop with the wood grain along with the metal reinforced tips really stand out and are a high point in this build . Also, the engine work is stands out too. Definitely a must have.
Two thumbs up on this build.
Thank you Stephen. As I noted above, a lot of that prop is kit decals but in the end it turned out great. You have an option of two props in the kit but the wooden model stood out. Clark
Great to see a newly released kit done so quickly and done so well. This icon of aviation is well represented in your model. Nice work here Clark.
Thank you Jack. I'm sure there is a real Stearman close by-I would sure like to get some in person photos. Clark
Outstanding build, Eugene! Now I have to get my hands on one of these kits!
Thank you Drew. Best to you today. Clark
Lovely build Clark, Some great pics to.
Well done sir.
Thanks Simon-much appreciated. Clark
Very nice.
Thank you Nikola. Clark
Just a note. I made the rigging spreader bars from styrene stock. On the real plane, the rigging wires run through the spreader. Mine are just super glued at the intersection points-but ended up looking good.
Actually, the rigging took about 3-4 hours all together, not bad.
Well built, well painted, beautiful pictures I'd say you had a winner here Clark.
Make you want to grab your goggles and scarf and head to the to the flight line...;-)
Thanks Rick-it is a good day to do just that!
Well done, Clark. Thanks to you, I'll have to have one !
Thanks Joe.
The only thing more marvelous than this build is the kit itself. Revell even included the engine mounts which can be seen if one chose to leave some of the fuselage panels off. I would have liked to have had more than just two decal options though. I hope Revell will release more trainers in 1/48 with such quality, especially a Tigermoth.
Agreed Seamus. I'm sure there will be some aftermarket decals sheets on the market soon. Just a heads up, if you choose to use the engine mount, it is just a bit too long. I ended up leaving it out since I was modeling a closed cowl.
Clark,
When I saw this advertised I ordered two. I was well pleased at the kit and now seeing yours completed I only hope I can do as good a job as you have done here. Outstanding model and very skillfully done. Yours will be my I inspiration when I do mine.
Hi and thanks very much Frank. Best to you today. Clark
It looks beautiful, Clark, it's so nice to see a plane it such tip top condition.
Thanks George. I sure plan on building another one or two.
simply amazing Clark I cant say enough, I need to get this kit now, that prop is absolutely perfect great work
Thanks for your comments Steven. Clark
Looks great! How did the guide for cutting the rigging length in the instructions work? Pretty close?
Hi Josh. The kit "line lengths" were good enough to start with. I cut a bit long then shortened as necessary. They key is to have precise holes drilled to locate the wires. No problem drilling as the plastic is so soft. I used a #75 micro bit. Clark
Thanks. I just got this kit thinking it was a re-pop of an old mold, but it looks all new! I'm looking forward to starting it.
Eugene the only thing I can say is perfection !
Thanks for you kind words Gary.
Just beautiful! Thanks for posting & also for your tips on rigging. Biplanes have always put me off because of this perceived difficulty. I'll have to bite the bullet & have another go.
Yep Tony...rigging was a challenge as the last model I wired up was one of the old Otaki Japanese trainers back in the 80s. This project went well and the learning curve came back quickly. Clark
That's beautiful Clark. I'm building one of these myself and found your model through a Google search, and I'm glad I did. However I found the plastic quite hard, in fact I've broken five #80 drill bits making the holes for the rigging wires!
Mike