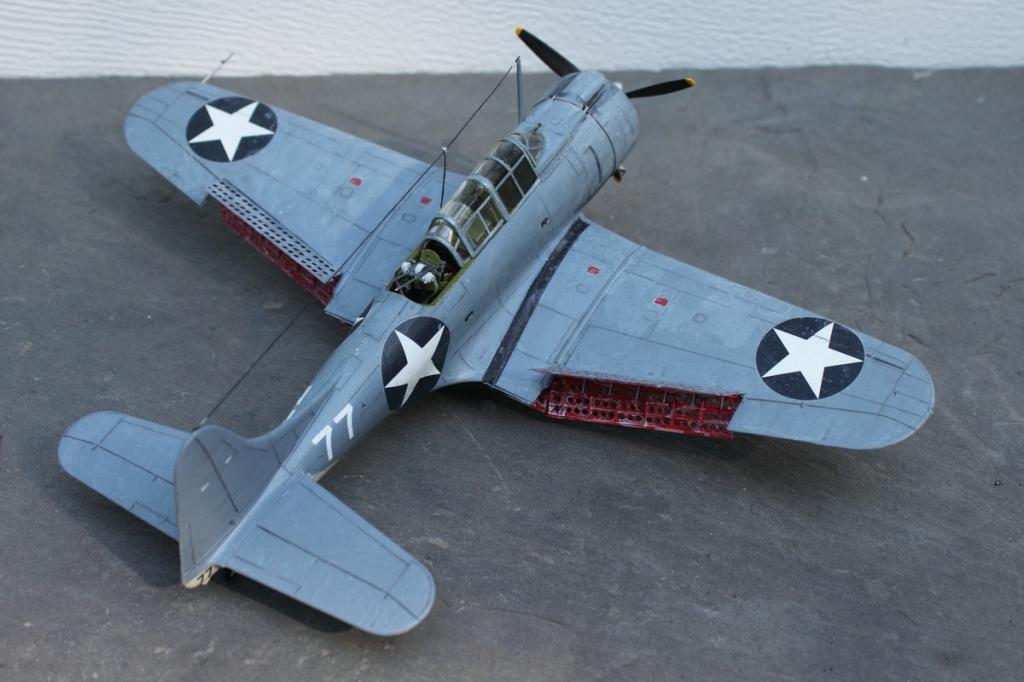
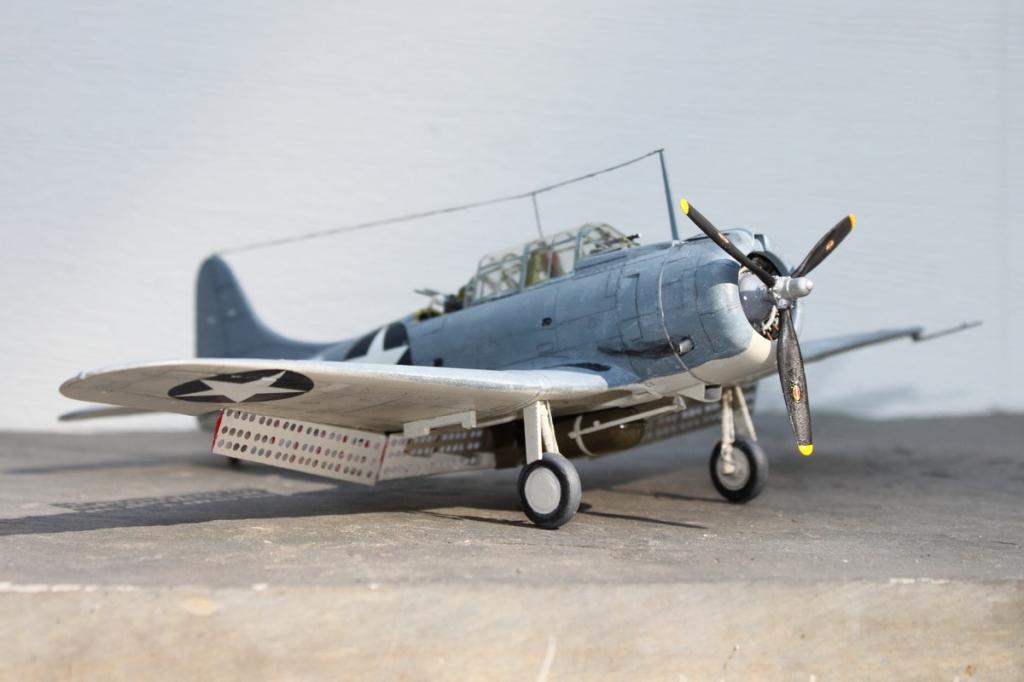
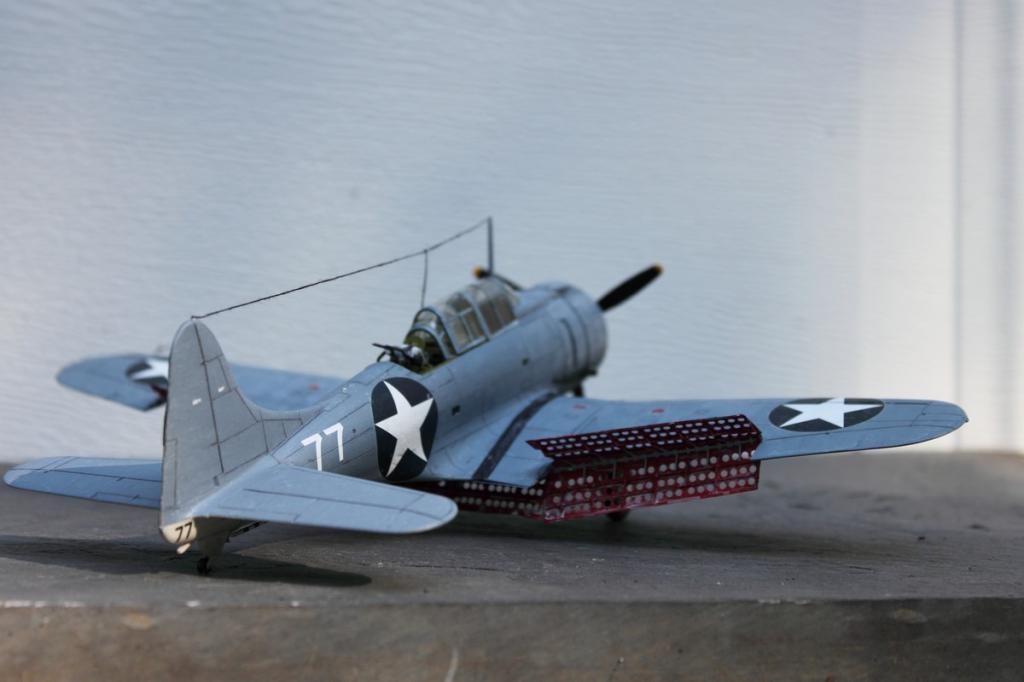
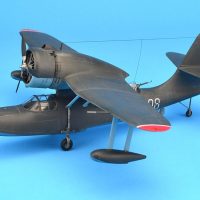
Dauntless, Done… SBD-4, 1/48, Hasegawa
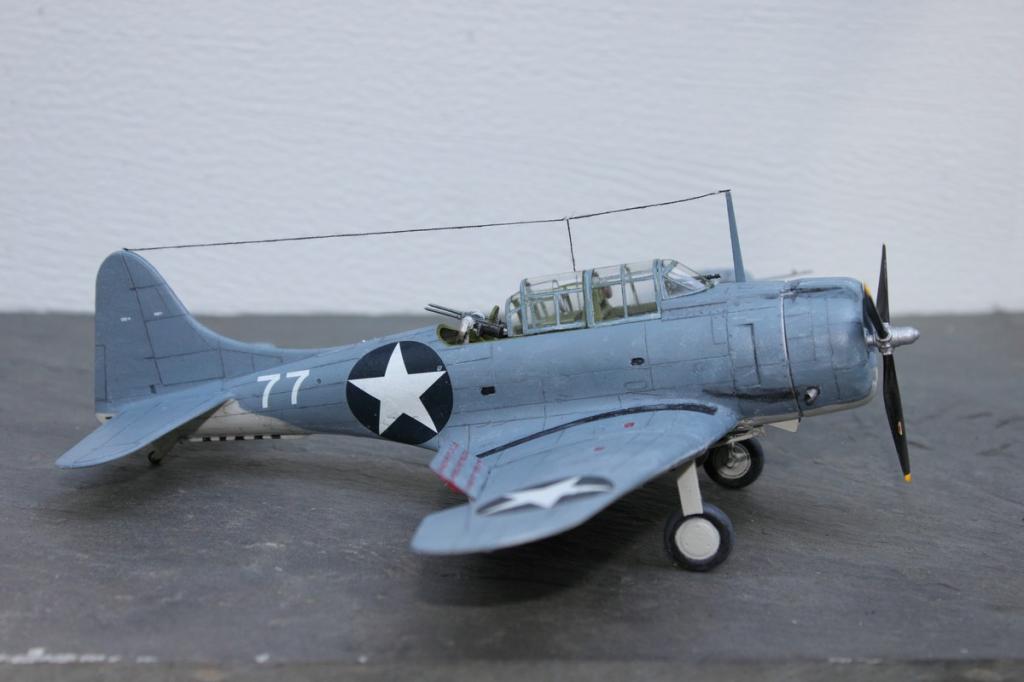
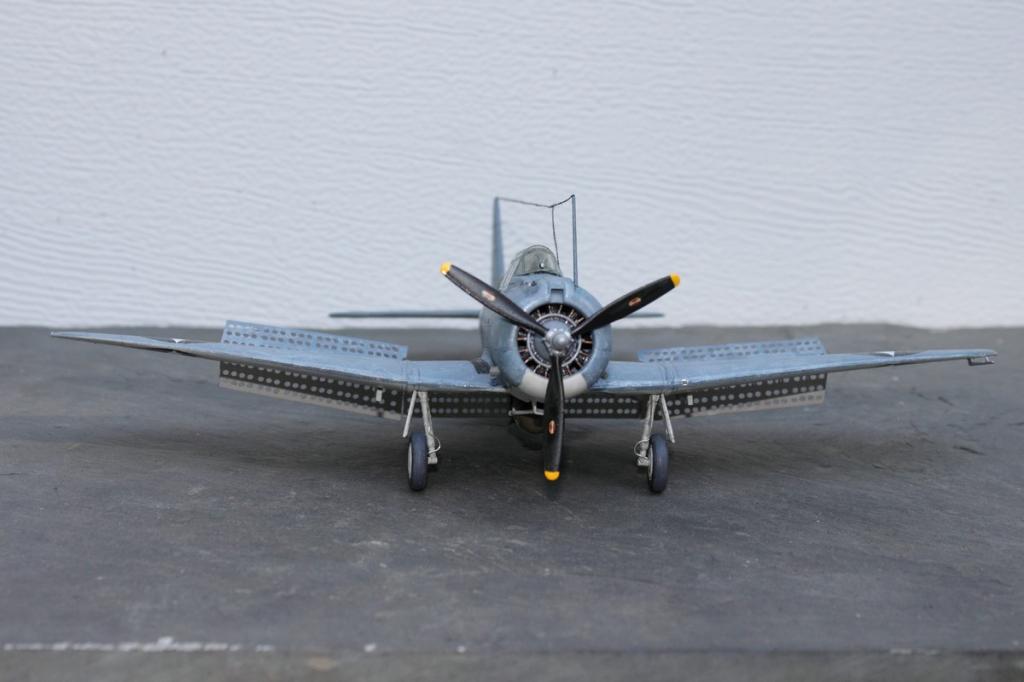
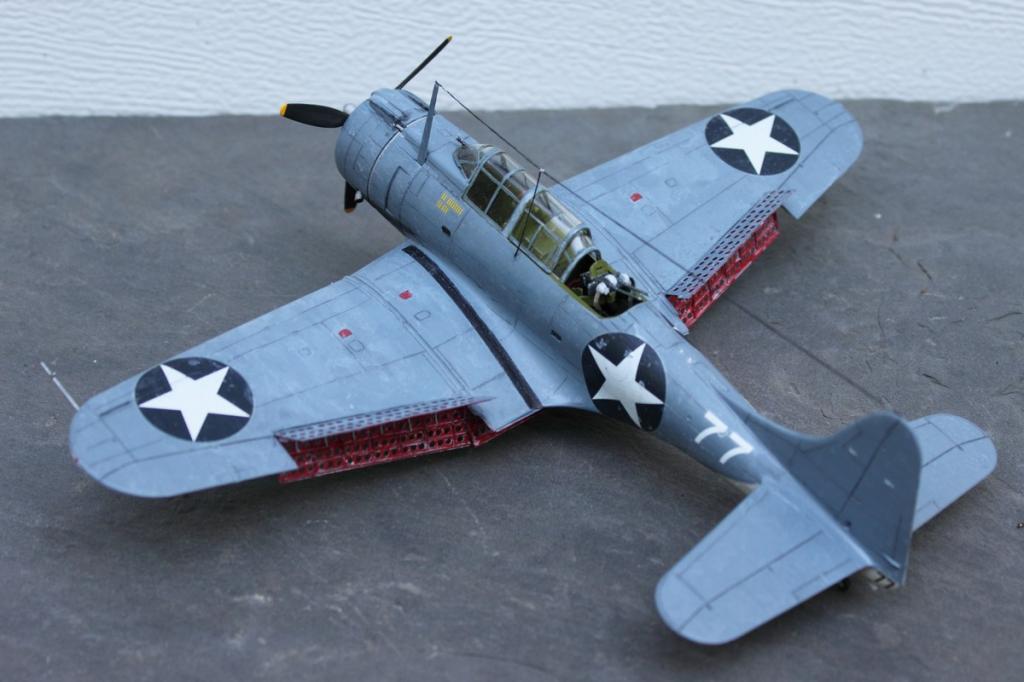
After much ado and diligent effort over the past two and and a half weeks, I am calling my SBD-4 Dauntless 'done'...for a fairly unskilled builder like me it has been a challenge but I am pleased overall with the result which I humbly offer in photo form here.
It is a Hasegawa 1/48 scale kit which included photo etched ammunition belts and dive brake assemblies. Those dive brakes were tedious and aside from the ammo belts, my first try ever at using any photo-etch material.
One big problem with the kit is that the wings, consisting of left and right upper halves and a one-piece bottom section, once assembled, would not fit onto the fuselage. They fit in front, but in the rear, even after cutting off the closed dive brakes to replace later with PE ones, the lower closed section of the fuselage obstructed them from being pushed all the way up to match at the wing root, by what I would consider very large amount at this scale, 1/8th inch or so, way to much for putty to cover! I finally sawed out a section of the lower fuselage box, which gets covered by the lower wing center section anyway, to make them fit. It just doesn't seem like I should have had to do that. Generally speaking the kit fit together real well, so I don't know what was going on there, the instructions offer no clue.
I chose the VMSB-233 no. 77 decals, which according to the kit literature is U.S. Marine Corps, Guadalcanal, spring 1943.
So much of building a model like this is objective, like the wing issue described above, either it fits or it doesn't. I wanted to weather this model and that where it gets subjective... it is so easy to overdo any part of that – I think I am right on the edge of too much, maybe, maybe not. I weathered it with a mix of water and ground chalk pastel for panel lines, thin white acrylic wash overall to de-blue it some since I used “intermediate Blue' spray can, not being able to find the 'blue gray' the kit called for. Then after the pastel and wash, some Testors Dullcoat...then some future stuff...too much...more Dullcoat, a little...THERE! STOP WHILE YOU”RE AHEAD. Then raided my wife's sewing box for some black thread and rigged the wire last night...another challenge to be sure.
I wish the photos I am posting would have come out better, but the real weather wasn't cooperating on that...
Thanks again for the helpful tips I get from posters here, feedback on my group posts and ideas I get from those who share images and stories of your truly beautiful models – I continue to be inspired by what I find here on Imodeler!

Turned out pretty doggone good Ralph. Don't think you overdid it on the weathering.
Good effort & I look forward to more.
Nice job on the Dauntless. I think the color looks great. Nice fading.
Ralph, you're selling your skills short, you've done a fine job on you "Speedy D". I think your paint work really captured a hard working aircraft in the Solomon's.
Look forward to seeing you next "humble" effort..;-)
I agree with the other guys, a good job all round. I enjoyed watching you battle the PE in wip thread, its given me a bit of confidence to have a go at it soon. The weathering looks good to me. Well done Ralph.
Thank you gentlemen -
That's a well done SBD. Nice work.
a really fine job
Great job there Ralph.
Well done sir.
Hello Ralph...Nice job on the Dauntless and I think your weathering came out really well. Just a suggestion, but one thing you might want to consider for future rigging jobs is the use of a fine mono-filament line. Thanks for sharing your well done SBD build.
yes you are right Jim, that last minute addition did not get the attention to detail it should have and as with the brake lines to the wheels, I was improvising.
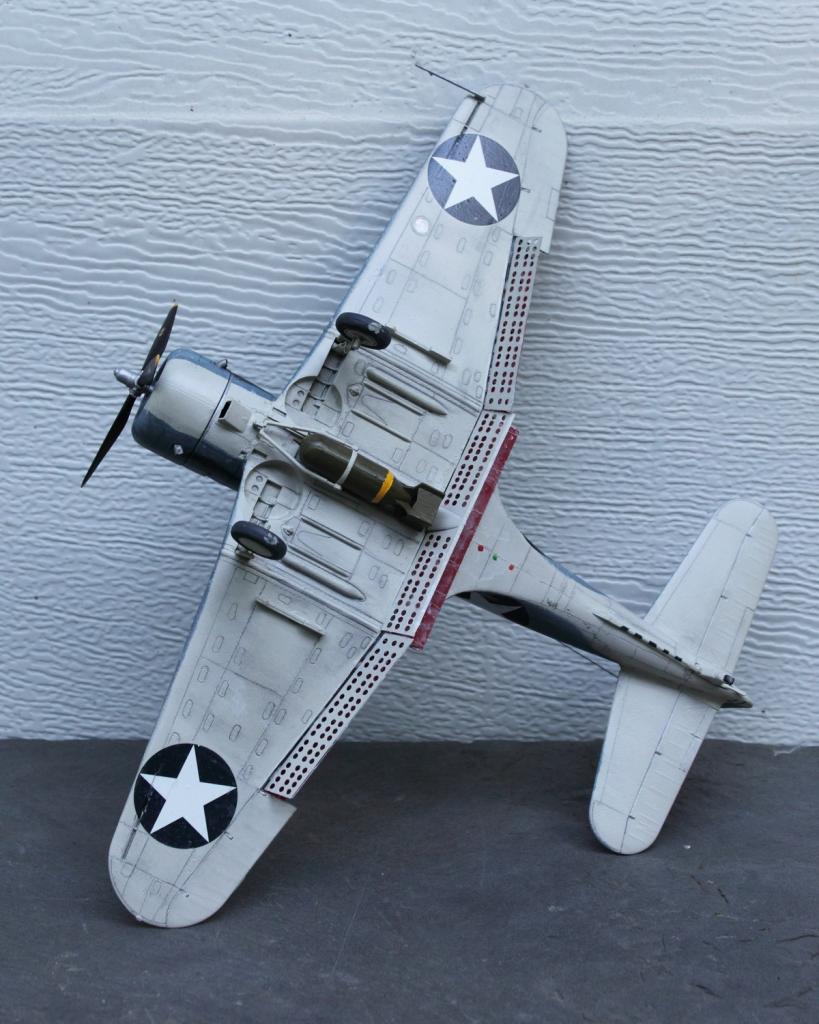
I like your Dauntless, not eassy built with wings and flaps. Good weathering too. Maybe bomb need some dirt and dust. I one book I seen the 100 lb bombs wrapped with cal.50 ammo belt that was used by Marines in Salomones. They would fit your model if you wish.
It turned out fine, Ralph, I, too, enjoyed reading your works in progress, and I'm sure you must be very pleased with the end result. Looking forward to seeing your next build.
Looks good Ralph. The colours look well weathered. I concur with Jim about the antenna line, thin Ezi line is good as well. I see you managed to shoe horn the rear gunner's canopy into position. I botched mine so badly I ended up leaving it off!
Regards,
Kent
Thanks all - I fiddled with the canopy a great deal. It's 5 pieces in all and I am still bummed I could only make 4 work, and the rear most one had to be cut down a lot. My think on weathering the bomb was, it wasn't flying back and forth a lot, only got used once, a one way trip...so I intentionally didn't weather it and in fact shined it up!
I appreciate all the compliments and tips!
I have started a new one, but have not made enough progress to report much, but it is a different direction that the Pacific theater planes I have done so, its a Mosquito.
Ralph,
It looks great to me. Me thinks you beat yourself up too much. If you know where your goofs or troubles are you needn't point them out. If you know where they are and are not quite happy with them then that is a learning process and you will only improve on everything else you do. I don't think you have to take a back seat with this one. Great job.