Tamiya 1/48 FM-2 conversion
Hi all,
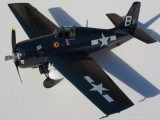
I have finally finished my conversion of a Tamiya 1/48 F4F-4 into an FM2. I used the Vector conversion set. While intended for the HobbyBoss Wildcat kits, I had a pile of Tamiya kits I had already put aside before the HB kit came out, and wasn't planning to spend even more money for the more expensive Hobby Boss kits that are in need of corrective parts anyway!
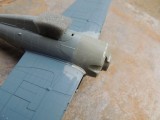
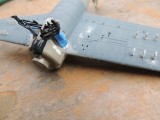
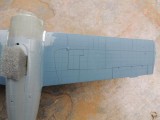
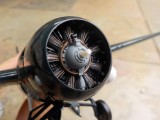
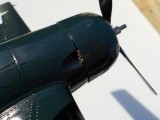
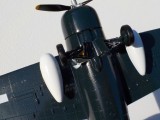
So, on to the conversion. I had to shape the Vector front fuselage part a bit to fit the Tamiya cross-section, as well as leave a section of the Tamiya wheel well, to act as an insert into the Vector part- you can see those details in the images provided. The difference between the Tamiya and Hobby Boss kits when using the Vector conversion, is that the Hobby Boss wheel wells are further forward than in the Tamiya kit (placement of the wheel well is one thing HB got right) which also means that you need to cut the Tamiya kit a little bit ahead of the panel line that you would use on the HB kit. The engine is truly a work of art as other Vector products are!
For this conversion you need to remove the extra gun details on the wing, and fill in the fairings under the wings near the wing roots. The fuselage cockpit windows need to be painted over as there were metal panels placed over the window openings on the "standard" Wildcat fuselage for FM2 production. You also need to replace the rudder and add a little to the top of the Tamiya kit F4F-4 tail to match the length of the FM2 replacement rudder.
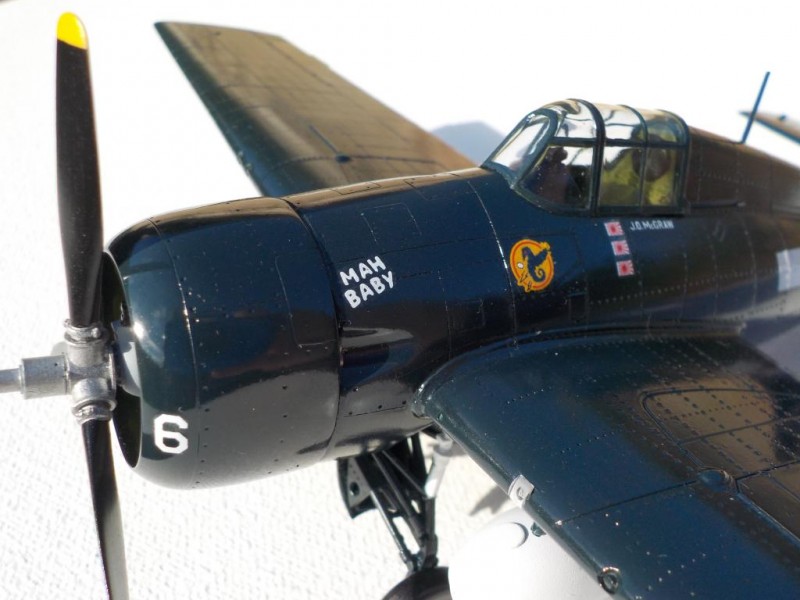
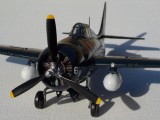
I was going to add rocket stubs as you can see from the photos, but fortunately, just before paint, I realized that the airframe I wanted to model was from the early production run that did not provide those. I wanted to do a kit of "Mah Baby" ever since I saw its profile in the Opsrey Wildcat aces book, so took them off. I decided that I would do another FM2 with them, and have since found great pictures of FM2's toting HVARs! I have another Tamiya kit and Vector set ready for another build with beautiful Vector late model Wildcat wheels as well.
Lastly, I used Aeromaster Decals, Modelmaster enamel, Layers of future floor finish to prep for decals and later to seal them in. Hand painted canopy frames. I am planning a little airbrush work for exhaust staining in future, but for now I have a number of other kits I really want to finally finish this summer!
I am really happy I followed through on the conversion as it is proof you can use the Vector conversion on the Tamiya kit. I hope you enjoyed it.
Turned out well...nice work.
Thanks Craig, you do a lot to encourage people.
Looks good to me Dan and lot's of conversion work there. A good choice of a subject for sure. So, what's next on the building schedule?
Thanks. The building schedule is a fluid situation! Right now the aim is to finish off almost finished kits- I have too many of those!
F9F-5 panther is the next one to finish, followed by an A-7E- both in 1/48.
Beautiful "Hot Rod" Wildcat Dan. Excellent job removing the outboard gun doors,
Thanks Rick!
The paint looks wonderful! It has a nice scale gloss to it!
Thanks Josh, I know its a bit of a showroom finish when you consider what the airframe would have been through by this point in its life. I will be doing a little exhaust staining eventually. I am just so glad the blending of the parts turned out well that I wanted to call it done! I get that gloss by floating multiple thin layers of Future floor polish with a good quality broad brush.
Actually, the "all blue" FM-2s on Gambier Bay were only taken into the squadron when they were at Seeadler Harbor two weeks before the Philippines invasion, and those airplanes had only arrived in SoPac in mid-September. Also Gambier Bay only participated in flight ops for the Philippines. She was mostly involved transporting aircraft before that during her six month existence in the Pacific. So having the airplane look new is right, since it was.
Whoops, managed to forget the Gambier Bay also provided air support for the Marianas invasion. But the point about the GSB FM-2s being new still stands. If you wanted to do a weathered one, you could do one of the tri-color airplanes she still had from earlier in the deployment.
Nice work on the modelm BTW. Easier than the FM-2 conversion I did back about 15 years ago.
The re-supply was also at Manus, not Seeadler, done the week of October 12 (consulting my research material).
Hi Tom, forgot to mention that the next gsb FM2 I will be doing will be a mid 1945 vc70 aircraft. I found lots of good wartime pics by accident online!
Hi Tom,
Not sure how I missed your posts before, but I really appreciate the info! From what I had read here and there, I was thinking the all blue FM2's were "new" in theater, so should have been fairly fresh looking, but I would like to do some restrained exhaust staining and weather the tanks a bit as they were most likely long in the tooth after being used by the tricolor aircraft before the GSB ones got there. I really appreciate your input as I printed out your conversion a while back, and it is still in my Wildcat reference/inspiration binder! Thanks!
that is a pretty build.
Thanks!
A lot of hard work paid off for you Dan. Engine looks great.
Well done.
Thanks! Vector's engine component is designed so well and cast so well it really makes the modeler's job easier. I am really getting more enthused about doing the second one!
Beautiful in all respects, I'd say.
Hand painted canopy frame? You da man Dan.
Thanks Ralph!
Dan,
I like the mirror like paint finish. Especially, the header photo showing the cowling. Lots of modelers would kill for a finish like that.
Two thumbs up.
To read that means a lot to me- THANKS!
Indeed a mirror like finish... in the header cowling you can see the hand holding a light blue camera!
Awesome paint job and awesome job in total.
Thanks Ulrich! I have to say I am really proud of the blend between the Vector parts and the Tamiya kit- the main reason for the photo at that angle- but also, when the post is at the top of the headlines page, it looks better in that long rectangle image template.
Nice Wildcat, Dan!
Much appreciated!
Terrific work, Dan!
Thanks for your comment. I hope to post a few more today or tomorrow.
Like the others have said, beautiful finish on this, Dan, and, obviously, lots of hard work.
Thanks very much for the post- I've been busy with some other things lately, but hope to post some other recent completions soon.
Dan,
This is excellent. Your hard work has paid off in spades.
Awesome build, Dan. Looking really nice. The FM-2 is not so often seen.
Well done.